Go down to local Pep Boys and buys some Evaporust, consider checking website for 25% off order and pickup locally. Do a search on how to use evaporust on bike frames if you are looking to remove the rust globally.
In my experience, your long point lugs suggest Italian. Someone (like me) is not too far from you (you're in Lakewood California?) and a quick trip by someone with a Campagnolo crank puller tool will reveal the bottom bracket threading.
If you take a thin rag with a little solvent or even just WD40, you can clean the interspace between the bottom bracket cups and the inner crank surface. Then with a decent smartphone camera, a lot of light or sunlight, and using the smartphone camera's auto focusing (or tapping the displayed part on the screen) you'll get a nice almost magnified look into the interspace. The optical or digital zoom feature on modern smartphones makes for easy looks into tight places. Here's one of my shots to see a BB threading markings:
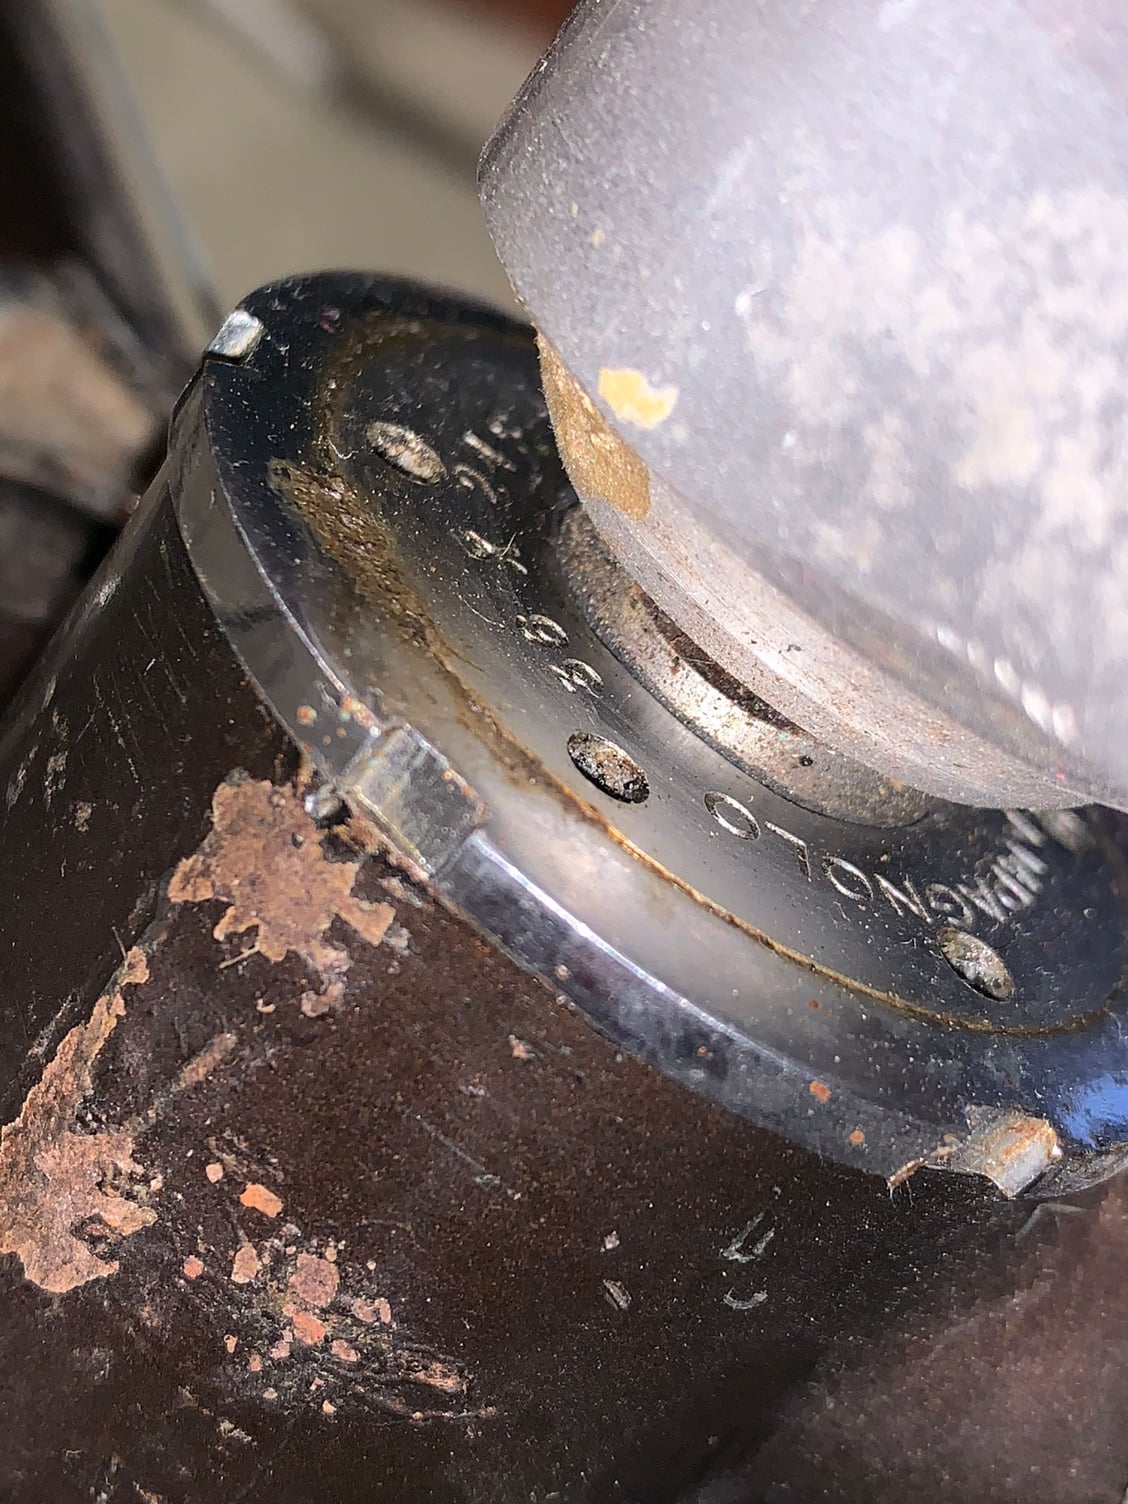
Another to show seat lug details:
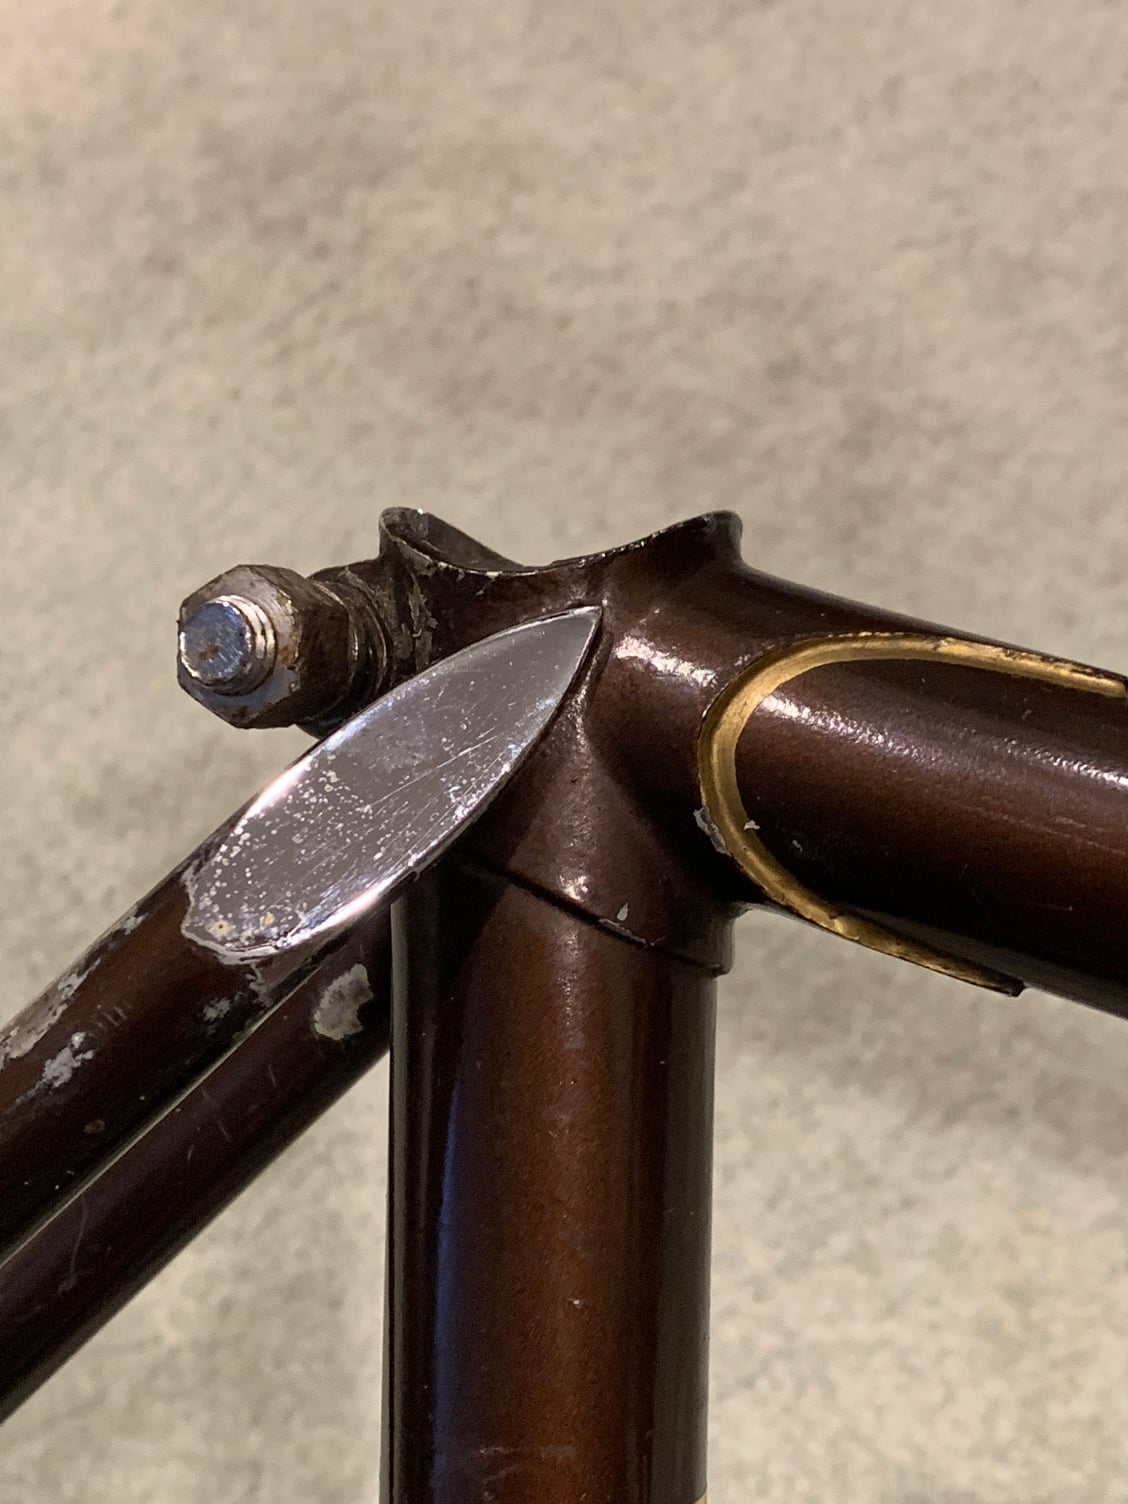
This photo and my photo contributions to this thread:
https://www.bikeforums.net/classic-v...-frame-id.html
were all shot using my iPhone XS in my loft using overhead 3000-3300K LED lighting, and occasionally the smartphone flash. I usually used the normal 1X setting and composed or framed the shot to give me a closeup view of the frame section I'm trying to show. Occasionally I would switch to 2X optical zoom or more to get details like lug lining. The key is to have as much light as possible to show detail. On my iPhone, there is the ability to also change the brightness of the picture and choose from about 10-15 darker to lighter versions of the same shot, very helpful in trying to get the visual representation of detail just right for use or study. Of course, a steady hand, good optics and vision of your own eyes, and a sharp large smartphone display to see and judge the pictures you've taken is very important. If you can't see that your picture is already blurred or less than detailed, the only way you can tell is then to transfer to your computer (email) and see it on a large monitor. Then the pic's quality becomes very apparent. It takes a bit of trial and error but your photographic skills will improve quickly, unlike my typing skills which have had about 15 misspellings or mis-typings while I've written this paragraph at 5 am!!
Part of the issue here is the format of the serial number. The placement on the top right side of the seat tube is not common, nor is the good imprinting of the numbers. I'm inclined to say this looks a bit like a Torpado product but they usually used flat crowns on their mid level products. You might look into this thread for some comparisons to Italian frames:
https://www.bikeforums.net/classic-v...i-talians.html
https://www.bikeforums.net/classic-v...r-torpado.html