Originally Posted by
pinholecam
...
Can I check with you what is the torque required to secure the couplings on your bike?
TIA
Seatpost clamps are like any other seatpost clamps, I have no idea what the number is, I just get them tight. My Break Away frame and clamps are steel, not titanium. My titanium bike, the seatpost clamp is an external clamp, the threads are steel, not titanium. I have no clue if you have any threads in titanium metal or not.
When I previously made my comment on torque, at that time you said it was a Break Away frame, which I assumed was from Ritchey. But, your frame is a copy of the Ritchey design and your coupler on the downtube could be different, so it depends on how close that copy is, if the manufacturer made it to a different design, that could change things. Ritchey instructions say to NOT use any grease on the frame and coupler interface, and their e-mail to me said Torque Max is 4nm. But I think you should ask the frame manufacturer for the torque settings on all bolts including the coupler on the downtube.
I bought a later version of the torque wrench described here. It is cheap and you can use it for different torque settings. If you get this one, make sure that it reads zero before you use it, good idea to check that every time you use it.
https://www.bikeradar.com/reviews/ma...wrench-review/
I almost never use a torque wrench, so I had to buy one for the coupler. My only other torque wrench is a half inch drive one that is too huge for the small fittings on a bike.
***
Different topic, I previously mentioned the photo of all the parts in the correct order of my headset, but I also keep on my phone a series of about eight photos on exactly how I pack my S&S bike from beginning to end. Once you have your bike in the case so everything fits well, take lots of photos as you unpack it, so you have a photographic record of exactly how it all goes together in the case. When I took my S&S bike to Iceland, I forgot to put my photos on my phone, that cost me an extra hour trying to get my bike packed up again when I came home, as it is a tight fit and I had missed one key aspect to my packing.
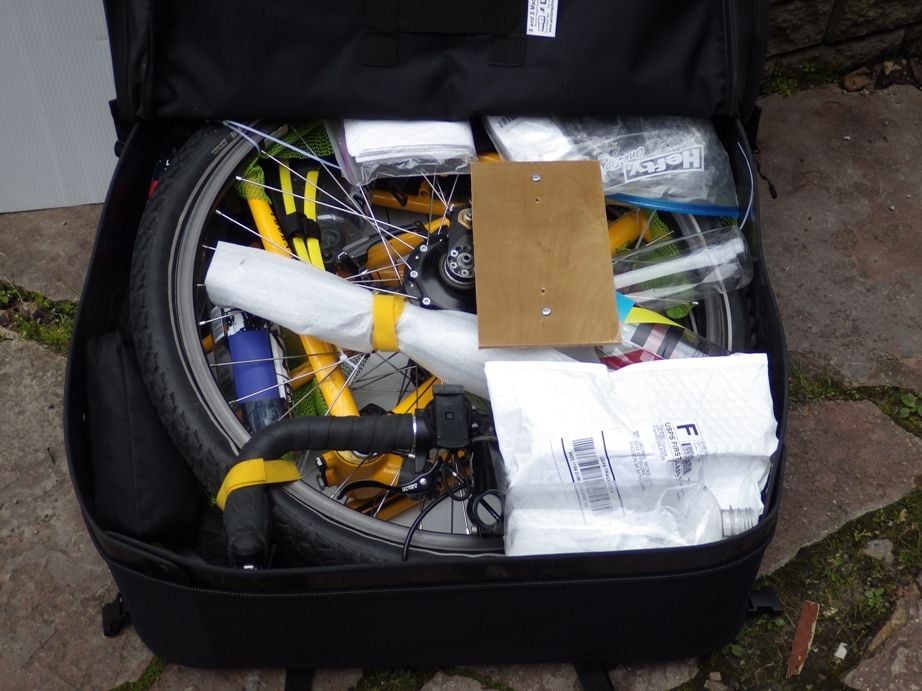
One more thing, I made a DIY center support for my S&S backpack case, you can see in the photo a small piece of thin plywood on top of the bike and two metal screws in that plywood. Under the bike there is another small piece of plywood, maybe 3/16 inch thick, and vertically there are two wooden dowels to provide support. Dowels fit through the spokes, if I was to do it again instead of dowels that are a soft wood I would use a thinner piece of Oak or some other hard wood, thinner so it would fit through the spokes and other parts better.
The bike in the photo above is my expedition bike, I can't fit fenders in the case with it, racks go in my other luggage too.