


How to wrench like a pro - tell us what you know!
 05-15-23, 10:24 AM
#26

Senior Member
Join Date: Oct 2013
Location: Mich
Posts: 7,633
Bikes: RSO E-tire dropper fixie brifter
Mentioned: 0 Post(s)
Tagged: 0 Thread(s)
Quoted: 6 Post(s)
Liked 3,160 Times
in
2,006 Posts
I'd rather have a Hex with the center of the head having a torx or allen provision, but I'm sure "cost" is why most don't do it.
__________________
-Oh Hey!
-Oh Hey!
 05-15-23, 10:38 AM
#28
Senior Member
Join Date: Sep 2017
Posts: 8,157
Mentioned: 42 Post(s)
Tagged: 0 Thread(s)
Quoted: 7158 Post(s)
Liked 11,355 Times
in
4,851 Posts
If you start a thread and then provide most of the replies, perhaps you actually need a blog.
Likes For Koyote:
05-15-23, 10:38 AM
#29
Senior Member
Join Date: Dec 2020
Location: Wake Forest, NC
Posts: 6,019
Bikes: 1989 Cinelli Supercorsa
Mentioned: 12 Post(s)
Tagged: 0 Thread(s)
Quoted: 3646 Post(s)
Liked 3,087 Times
in
1,860 Posts
I think the only hex head nuts on my bike are for the second pivot on my dual pivot brakes. The third faceted nut on my bike is octagonal--the headset nut.
05-15-23, 10:46 AM
#30
Senior Member
Join Date: Oct 2013
Location: Mich
Posts: 7,633
Bikes: RSO E-tire dropper fixie brifter
Mentioned: 0 Post(s)
Tagged: 0 Thread(s)
Quoted: 6 Post(s)
Liked 3,160 Times
in
2,006 Posts
hydr brake fittings are "hex", pedal axle contains a "hex" & allen. Even the spoke nips are not hex. Those squares designed them to be, squares.
__________________
-Oh Hey!
-Oh Hey!
05-15-23, 11:45 AM
#32
Habitual User

Join Date: Jan 2020
Location: Altadena, CA
Posts: 8,254
Bikes: 2023 Niner RLT 9 RDO, 2018 Trek Procaliber 9.9 RSL, 2018 Storck Fascenario.3 Platinum, 2003 Time VX Special Pro, 2001 Colnago VIP, 1999 Trek 9900 singlespeed, 1977 Nishiki ONP
Mentioned: 5 Post(s)
Tagged: 0 Thread(s)
Quoted: 5111 Post(s)
Liked 8,440 Times
in
3,984 Posts
An interesting observation. The problem with Allen and Torx instead of a hex nut is that they can't be freed by careful grinding. Sure, the heads can be ground off, and the rest drilled out ... but I would never attempt that. To me, that's a task for a skilled engineer in a machine shop with specialized machines and toolings.
A hex nut can be removed by brute force if necessary - grinding, chiselling, hammer and punch. All quite primitive. For someone with a bike loaded with Allen and Torx bolts, the only way is to have top quality tools. It's a good idea to attend to such bolts periodically. Turn back the bolt a tad, and retighten, to avoid its getting stuck in there.
I stick to old bikes, because I only occasionally see an Allen bolt head, most often on the handlebar stem. I've never had a problem with those.
Cheers!
I would never let the type of fasteners determine what type of bike I have, especially since my preference is for newer bikes. I'm also not opposed to having an excuse to buy a new tool.

__________________
"Swedish fish. They're protein shaped." - livedarklions
"Swedish fish. They're protein shaped." - livedarklions
05-15-23, 12:20 PM
#34
Habitual User
Join Date: Jan 2020
Location: Altadena, CA
Posts: 8,254
Bikes: 2023 Niner RLT 9 RDO, 2018 Trek Procaliber 9.9 RSL, 2018 Storck Fascenario.3 Platinum, 2003 Time VX Special Pro, 2001 Colnago VIP, 1999 Trek 9900 singlespeed, 1977 Nishiki ONP
Mentioned: 5 Post(s)
Tagged: 0 Thread(s)
Quoted: 5111 Post(s)
Liked 8,440 Times
in
3,984 Posts
I reckon you could instead have ground the head so it had two flats that a wrench would fit. Congrats on your success, and thanks for sharing it with us. It's what this thread is about. I've been wrenching for sixty years, and I learn something every time I tackle a bicycle. A couple of days ago, I serviced a bike for a good friend. When I'd finished, I gave it a visual check, especially the frame and its lugs. I'd been working from one side of the bike. When I looked at the other side during my final visual inspection, I saw that the seat tube was catastrophically broken just above the bottom bracket.
What did I learn?
ALWAYS inspect the frame FIRST, before starting work.
Yep! It ain't rocket science, but it's close .
.
Cheers!
What did I learn?
ALWAYS inspect the frame FIRST, before starting work.
Yep! It ain't rocket science, but it's close
.Cheers!
__________________
"Swedish fish. They're protein shaped." - livedarklions
"Swedish fish. They're protein shaped." - livedarklions
05-15-23, 12:38 PM
#36
Senior Member
Join Date: Dec 2020
Location: Wake Forest, NC
Posts: 6,019
Bikes: 1989 Cinelli Supercorsa
Mentioned: 12 Post(s)
Tagged: 0 Thread(s)
Quoted: 3646 Post(s)
Liked 3,087 Times
in
1,860 Posts
Beng1 is a member of this site who posts a variety of oddball threads. He prefers bikes he's found and "refurbished," dislikes handlebar tape, and has disdain for anyone who enjoys high-quality bikes and components. Search here and you'll see.
Likes For smd4:
05-15-23, 03:10 PM
#37
Senior Member

Join Date: Mar 2016
Location: North Carolina
Posts: 1,786
Bikes: '87-ish Pinarello Montello; '89 Nishiki Ariel; '85 Raleigh Wyoming, '16 Wabi Special, '16 Wabi Classic, '14 Kona Cinder Cone, 2023 Surly Disk Trucker
Mentioned: 6 Post(s)
Tagged: 0 Thread(s)
Quoted: 708 Post(s)
Liked 415 Times
in
260 Posts
Cyccomute,
Yep!! That extra 5 minutes up front saves a lot of labor on the back end for the shop over the course of a year. Little things like that add up over time and are real money for the shop owner. A good mechanic knows this and will make every effort to do it right the first time so they don't get a return.
Although derailer and brake cables are “pre-stretched”, there is still some construction stretch left in the cable. It’s around 0.5 to 1% . That may not seem like much but on a 2300mm cable, that can be 10 to 20mm of stretch. When I install derailer cables, I shift gears several times without moving the derailer then I reachor the cable and do it again as many times as necessary to get the cable so that it doesn’t stretch anymore.
05-15-23, 06:24 PM
#38
Expired Member

Join Date: Jun 2007
Location: TN
Posts: 11,914
Mentioned: 41 Post(s)
Tagged: 0 Thread(s)
Quoted: 3806 Post(s)
Liked 5,810 Times
in
2,936 Posts
After so many years of turning nuts, I have a good success rate. How so? I remember the early days, when a rusted nut would beat me, and bring the work to a halt.
I'll start with this:
I still don't understand how this works, I just know that it does. Sometimes, a nut can be removed with fingers once the torque is released. But it's commonplace to have to use a wrench all the way if rust and gunge need to be overcome.
So ... half a turn backwards (release), a full turn forwards (tightening). Half a turn back, a full turn forwards, until the nut is off. Instead of powering on in one direction (release).
 It sure is a mystery how that works for you.
")
Likes For shelbyfv:
05-15-23, 07:23 PM
#39
Senior Member
Join Date: Oct 2013
Location: Mich
Posts: 7,633
Bikes: RSO E-tire dropper fixie brifter
Mentioned: 0 Post(s)
Tagged: 0 Thread(s)
Quoted: 6 Post(s)
Liked 3,160 Times
in
2,006 Posts
I don't understand how this works either. I've been pondering it awhile and finally fetched a nut and bolt to see for myself. I followed your instructions, turned the nut half turn back/release then full turn forward/tight, repeat.... Instead of coming loose, the nut worked itself down the bolt until it bottomed out. It sure is a mystery how that works for you.
It sure is a mystery how that works for you.what they might've meant was back 1/2 turn forward 1 turn, back 1 1/2 turns forward 1 turn, back 1 1/2 turns etc
it's that other half that always gets ya.
__________________
-Oh Hey!
-Oh Hey!
Likes For Troul:
05-15-23, 08:00 PM
#40
aged to perfection

Join Date: Jun 2009
Location: PacNW
Posts: 1,882
Bikes: Dinucci Allez 2.0, Richard Sachs, Alex Singer, Serotta, Masi GC, Raleigh Pro Mk.1, Hetchins, etc
Mentioned: 24 Post(s)
Tagged: 0 Thread(s)
Quoted: 867 Post(s)
Liked 1,308 Times
in
691 Posts
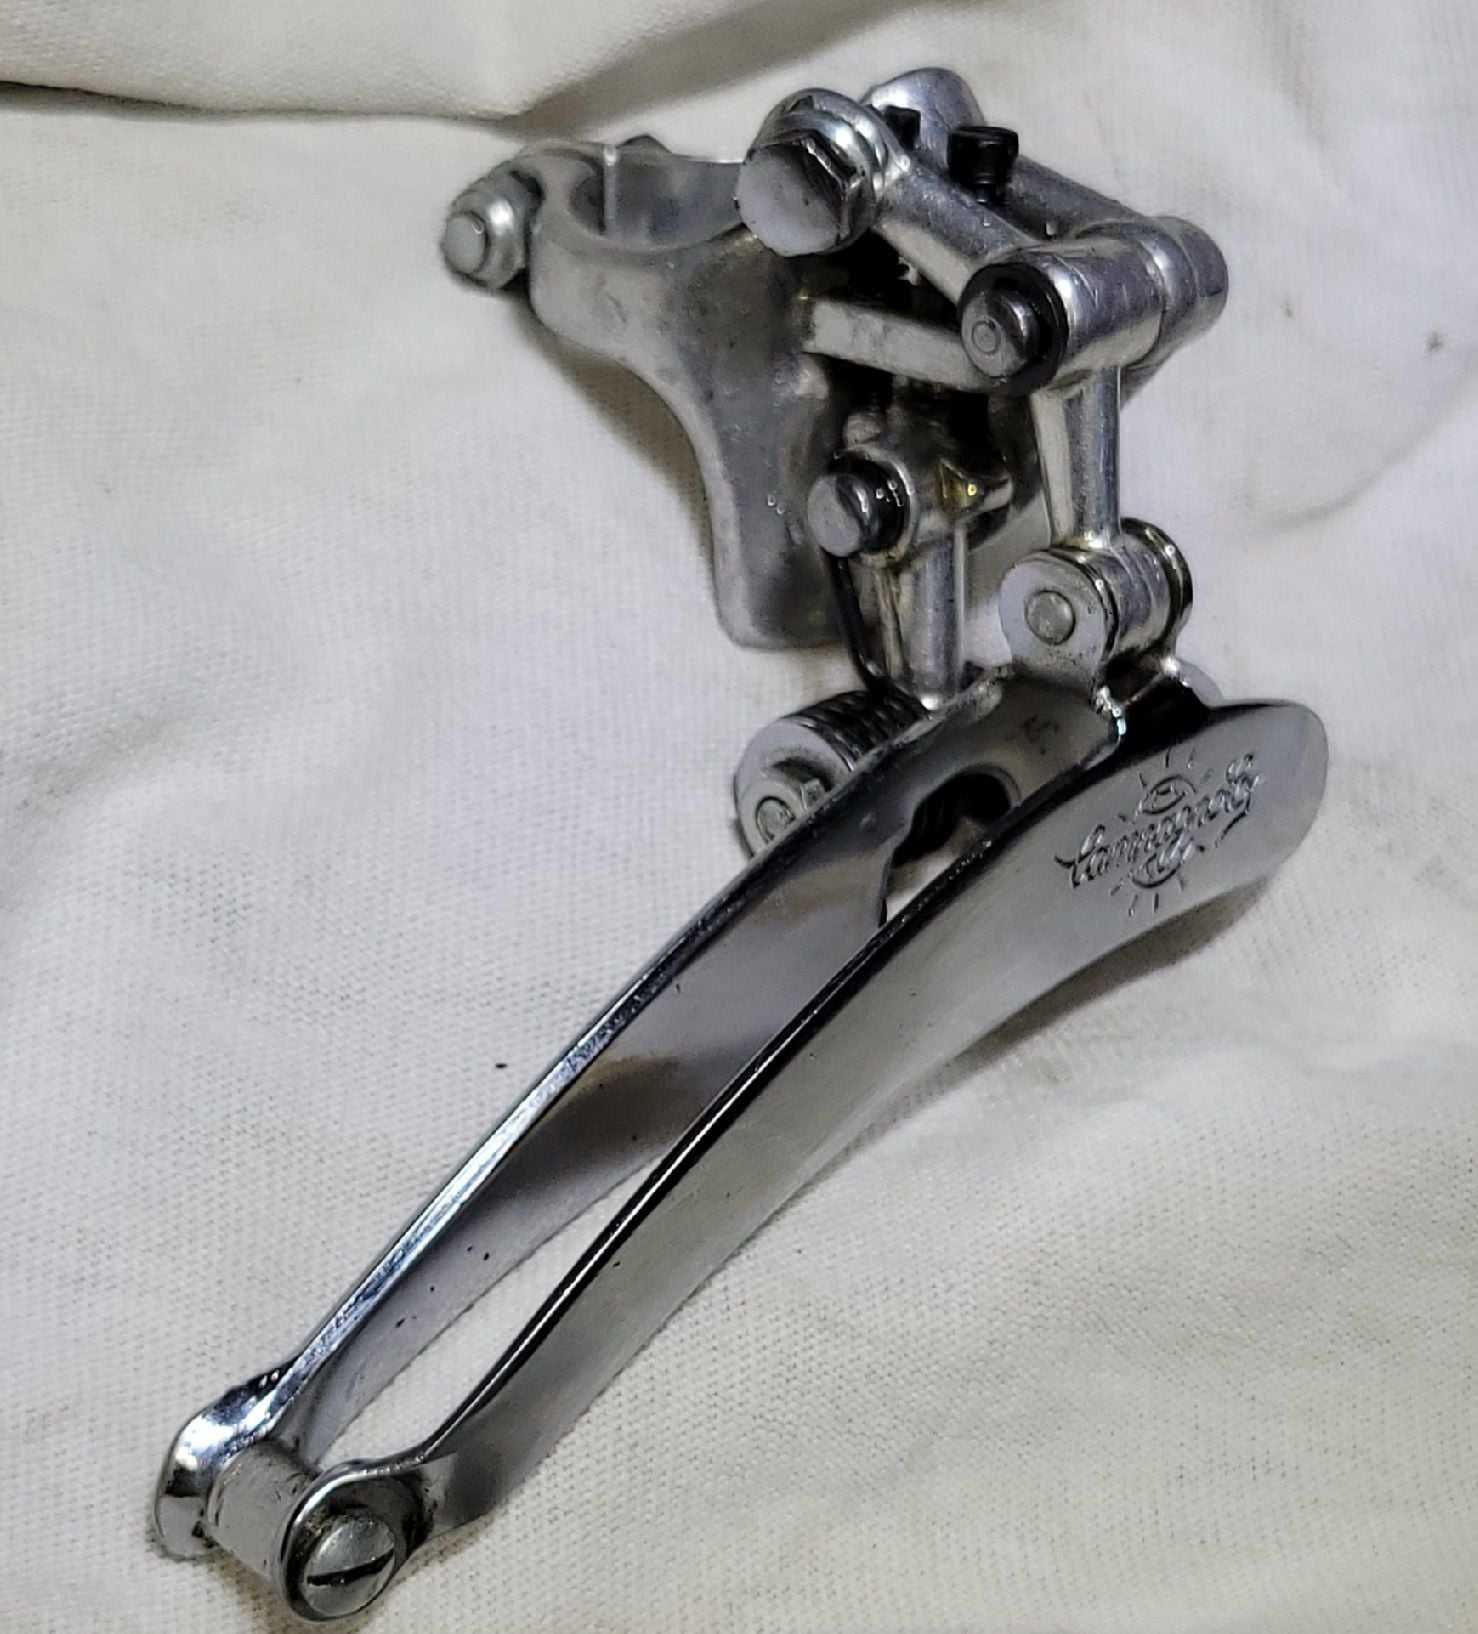
A favorite of mine is to remove the outer arm from a Campagnolo front derailleur 1032
and clearance drill and heli-coil the cable bolt threads
I use a titanium Torx bolt. This combo will never strip out.
great component good for another 50 years
/markp
and clearance drill and heli-coil the cable bolt threads
I use a titanium Torx bolt. This combo will never strip out.
great component good for another 50 years
/markp
Likes For robalong:
05-16-23, 04:53 AM
#43
Banned
Thread Starter
Nuts and bolts ... how to make sure they're doing the job right
uijedsoikeujsd
Last edited by robalong; 05-16-23 at 11:46 AM. Reason: added info
05-16-23, 07:05 AM
#45
Junior Member
It includes how to decide whether to turn the nut or the bolt in various applications. Stuff about the role of washers. Again, a technical article that I found quite readable:
https://www.boltscience.com/pages/nu...tightening.htm
https://www.boltscience.com/pages/nu...tightening.htm
In theory, if one assumes the bolt under tension is less likely to vibrate loose than its nut (ceteris paribus), then, one holds the nut immobile, and tightens the bolt. This way, the surface between nut/washer/part is not smoothed during the turning process, consequently impairing friction.
But, it's probably such a minor difference that it's not worth worrying about.
05-16-23, 07:08 AM
#46
Expired Member
Join Date: Jun 2007
Location: TN
Posts: 11,914
Mentioned: 41 Post(s)
Tagged: 0 Thread(s)
Quoted: 3806 Post(s)
Liked 5,810 Times
in
2,936 Posts
BF has a well established sticky thread.Hints and Tricks Maybe someone could ask the mods to incorporate this thread so OP's pro tips won't be lost to posterity.
05-16-23, 07:22 AM
#48
aged to perfection
Join Date: Jun 2009
Location: PacNW
Posts: 1,882
Bikes: Dinucci Allez 2.0, Richard Sachs, Alex Singer, Serotta, Masi GC, Raleigh Pro Mk.1, Hetchins, etc
Mentioned: 24 Post(s)
Tagged: 0 Thread(s)
Quoted: 867 Post(s)
Liked 1,308 Times
in
691 Posts
On the Campy 1032 FD, the cable fixing bolt is threaded into aluminum, so after 40 years or so, the threads do strip out, whether from wear or over tightening.
this mod results in a very solid thread for the bolt. It will last another 50 years. Great component.
Modern Campy FDs are in fact helicoiled from the factory in this location.
A nut is (generally) steel so the threads are much more solid
/markp
this mod results in a very solid thread for the bolt. It will last another 50 years. Great component.
Modern Campy FDs are in fact helicoiled from the factory in this location.
A nut is (generally) steel so the threads are much more solid
/markp