


What have you been wrenching on lately?

Likes For EJM73:
 07-21-23, 11:37 AM
#6577
Senior Member

Join Date: May 2021
Location: London
Posts: 564
Bikes: Motobecane C41, Matsu$hita Nashonaru
Mentioned: 7 Post(s)
Tagged: 0 Thread(s)
Quoted: 215 Post(s)
Liked 439 Times
in
255 Posts
Many things happened in 1982. China's population reached 1 billion. THe Falkland War started and ended. E.T. was first screened in the cinemas across the globe. And this humble hub below left the assembly line at Maillard factory. Today I have opened it probably the first time since then. I did give the hub shell a bit of a polish before, but since then it was sitting in a box with other random hubs.
Old grease turned into a dry paste. But thankfully, it seems it wasn't used much. Races, cones and bearing balls were all in a very good condition. I was actually surprised, because the manufacturing quality is pretty good. I've thoroughly cleaned and de-greased everything, packed it with fresh XHP222 and put it back together. It will still need some polishing when I have more time, but for now it will do. Looks like I might need a new set of hub spanners, mine are a bit too thick to adjust the cones properly. I mean it spins nicely and with no play, but I'd rather tighten the locknuts a bit more.
And, since I have the same model, but later (1990, with a slight difference to the flange profile) and with solid axle I could give myself another reason for using solid axle on hubs. QR version weighs 207g. Track nut and solid axle one weighs 161g. If there is similar difference with the rear one, that's an easy way to save 100g. Not much? Sure, but it's a very cheap 100g to save with any hub. Not mentioning it makes stealing the wheels slightly more difficult (or more involved than simply taking the QR skewer off and walking away with the wheel) and offers more clamping force.

Taken apart over 40 years after manufacturing
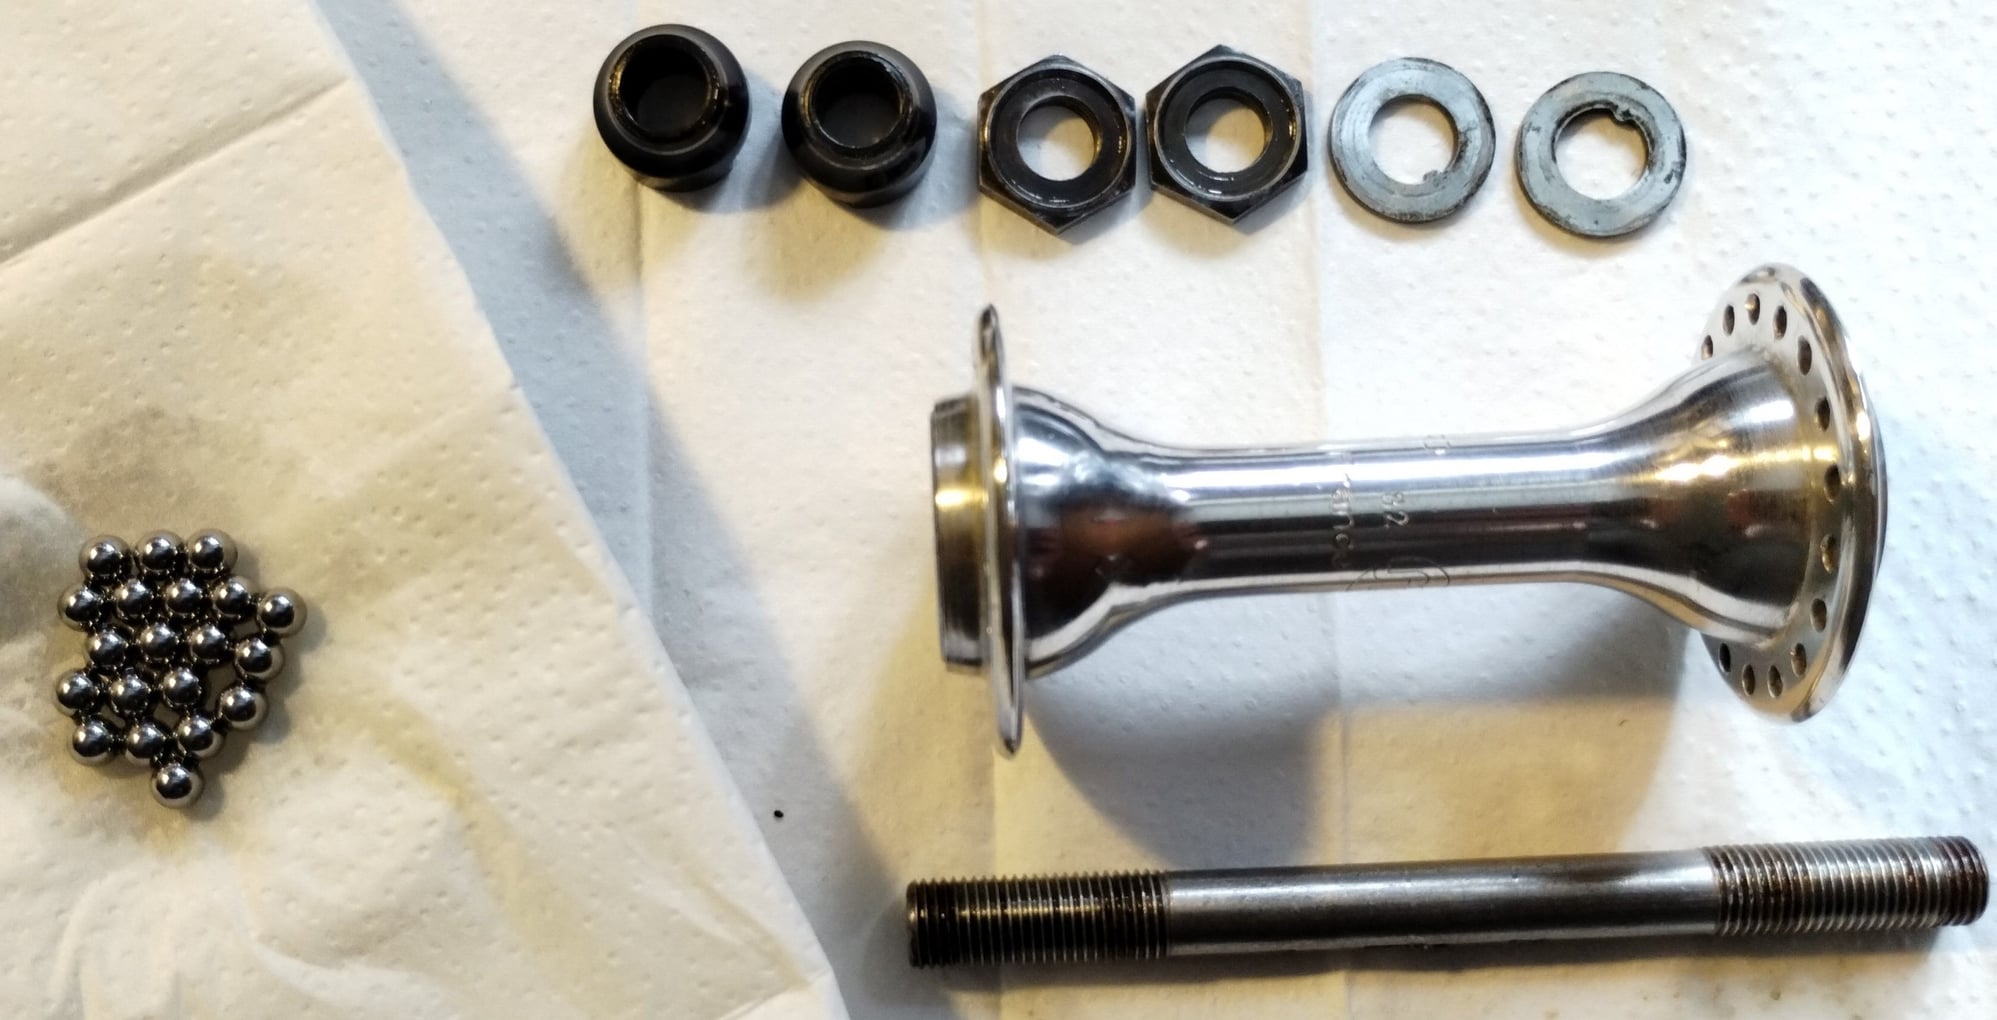
Nice and clean for re-assembly

Ready to be used
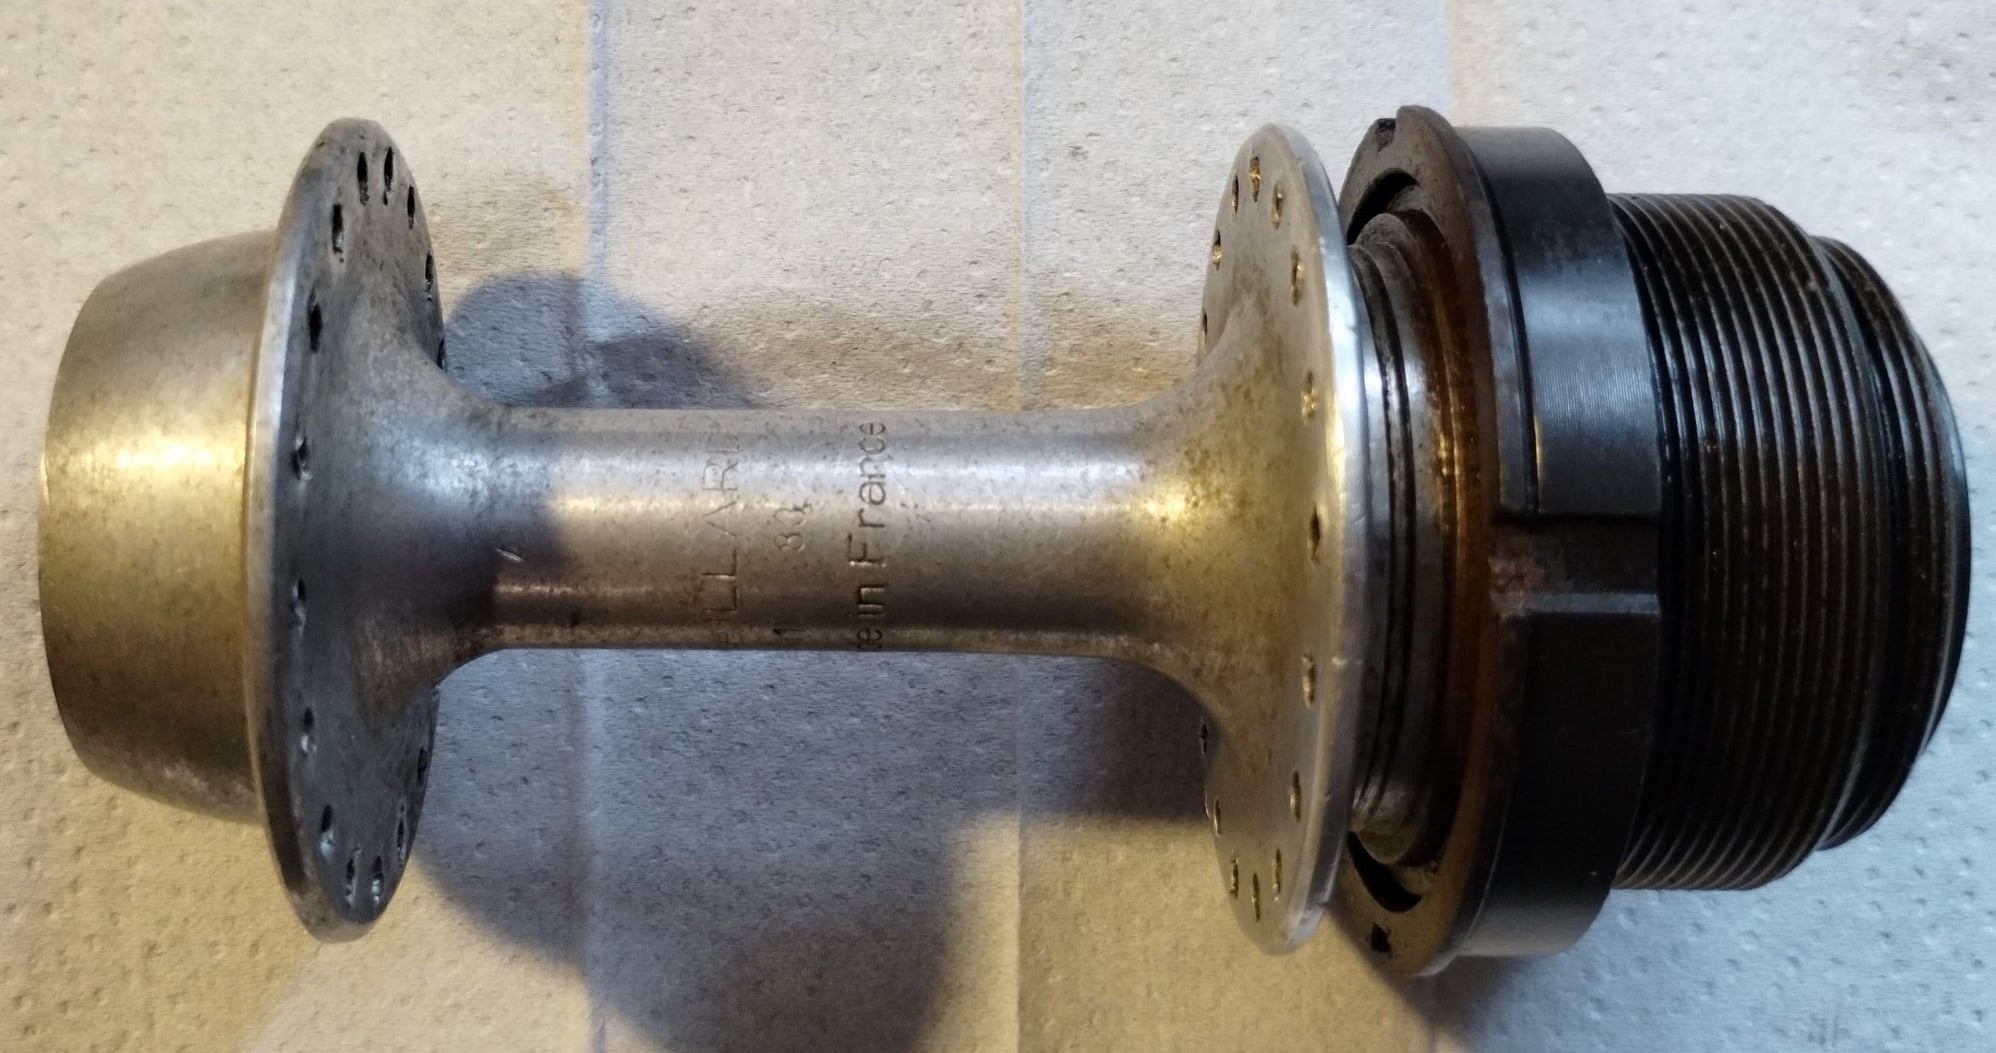
The next task is going to be more tricky. With the rear hub, I couldn't make the freewheel budge at all back when I got it. Didn't know how to make it come off back then. So I got it off the rim by cutting the spokes. Now I actually care about saving this hub and definitely care about getting the freewheel off as it's a Suntour NWN which happens to be in a pretty darn good condition. The plan is to first disassemble the freewheel body and remove its shell. Then I can soak it in penetrating oil for a bit, lace the hub shell into a wheel and then remove the rest of the freewheel body finally. Fingers crossed
Puzzle for the day
Old grease turned into a dry paste. But thankfully, it seems it wasn't used much. Races, cones and bearing balls were all in a very good condition. I was actually surprised, because the manufacturing quality is pretty good. I've thoroughly cleaned and de-greased everything, packed it with fresh XHP222 and put it back together. It will still need some polishing when I have more time, but for now it will do. Looks like I might need a new set of hub spanners, mine are a bit too thick to adjust the cones properly. I mean it spins nicely and with no play, but I'd rather tighten the locknuts a bit more.
And, since I have the same model, but later (1990, with a slight difference to the flange profile) and with solid axle I could give myself another reason for using solid axle on hubs. QR version weighs 207g. Track nut and solid axle one weighs 161g. If there is similar difference with the rear one, that's an easy way to save 100g. Not much? Sure, but it's a very cheap 100g to save with any hub. Not mentioning it makes stealing the wheels slightly more difficult (or more involved than simply taking the QR skewer off and walking away with the wheel) and offers more clamping force.
Taken apart over 40 years after manufacturing
Nice and clean for re-assembly
Ready to be used
The next task is going to be more tricky. With the rear hub, I couldn't make the freewheel budge at all back when I got it. Didn't know how to make it come off back then. So I got it off the rim by cutting the spokes. Now I actually care about saving this hub and definitely care about getting the freewheel off as it's a Suntour NWN which happens to be in a pretty darn good condition. The plan is to first disassemble the freewheel body and remove its shell. Then I can soak it in penetrating oil for a bit, lace the hub shell into a wheel and then remove the rest of the freewheel body finally. Fingers crossed
Puzzle for the day
Likes For VintageSteelEU:
07-21-23, 12:00 PM
#6578

Cantilever believer

Join Date: Nov 2021
Location: Phoenix, AZ
Posts: 1,659
Mentioned: 6 Post(s)
Tagged: 0 Thread(s)
Quoted: 567 Post(s)
Liked 1,961 Times
in
882 Posts
Early this morning, I wasn't wrenching on the bikes, but our home AC unit - it stopped working around 2 AM local time, and it just might hit 119 F again later today. Got it working again after going through a couple big capacitors, a contactor, and a few blown fuses. If I can get some rest and have a real AC person check it, maybe I'll try to get some bike miles in after sunset...
__________________
Richard C. Moeur, PE - Phoenix AZ, USA
https://www.richardcmoeur.com/bikestuf.html
Richard C. Moeur, PE - Phoenix AZ, USA
https://www.richardcmoeur.com/bikestuf.html
07-21-23, 01:08 PM
#6579
Senior Member
Join Date: Oct 2015
Location: PDX
Posts: 13,240
Bikes: Merz x 5 + Specialized Merz Allez x 2, Strawberry/Newlands/DiNucci/Ti x3, Gordon, Fuso/Moulton x2, Bornstein, Paisley,1958-74 Paramounts x3, 3rensho, 74 Moto TC, 73-78 Raleigh Pro's x5, Marinoni x2, 1960 Cinelli SC, 1980 Bianchi SC, PX-10 X 2
Mentioned: 271 Post(s)
Tagged: 0 Thread(s)
Quoted: 4568 Post(s)
Liked 6,553 Times
in
3,761 Posts
Early this morning, I wasn't wrenching on the bikes, but our home AC unit - it stopped working around 2 AM local time, and it just might hit 119 F again later today. Got it working again after going through a couple big capacitors, a contactor, and a few blown fuses. If I can get some rest and have a real AC person check it, maybe I'll try to get some bike miles in after sunset...
Can't imagine how much fun that was, my brother is an expert heating, A/C senior tech currently stationed at Boeing here in PDX.
Also have a step brother in Phoenix, plenty of horror stories between the two, good luck, hang in and take care.
07-21-23, 01:24 PM
#6580
Cantilever believer
Join Date: Nov 2021
Location: Phoenix, AZ
Posts: 1,659
Mentioned: 6 Post(s)
Tagged: 0 Thread(s)
Quoted: 567 Post(s)
Liked 1,961 Times
in
882 Posts
But now the temps are in the high hunnert teens, the lows in the upper 90s, and the dew points are in the 60s, and our "character building" weather is in full force. But we drink heavily, try to stay out of direct sun, ride really early or at night, and endure until about two weeks after Labor Day, when the dew point drops and the nights cool off again. A drenching thunderstorm or two (or more) would be nice, but that's a bonus. And you don't have to shovel or scrape this kind of brutal weather.
In mid-October we should be back to our riding (and outdoor wrenching) season weather that lasts until May. The cycle has its benefits along with its punishments.
__________________
Richard C. Moeur, PE - Phoenix AZ, USA
https://www.richardcmoeur.com/bikestuf.html
Richard C. Moeur, PE - Phoenix AZ, USA
https://www.richardcmoeur.com/bikestuf.html
Likes For RCMoeur:
07-21-23, 01:36 PM
#6581
Senior Member
Join Date: Oct 2015
Location: PDX
Posts: 13,240
Bikes: Merz x 5 + Specialized Merz Allez x 2, Strawberry/Newlands/DiNucci/Ti x3, Gordon, Fuso/Moulton x2, Bornstein, Paisley,1958-74 Paramounts x3, 3rensho, 74 Moto TC, 73-78 Raleigh Pro's x5, Marinoni x2, 1960 Cinelli SC, 1980 Bianchi SC, PX-10 X 2
Mentioned: 271 Post(s)
Tagged: 0 Thread(s)
Quoted: 4568 Post(s)
Liked 6,553 Times
in
3,761 Posts
After the amazingly nice and cool (by our standards) spring and early summer we had, I'm not really complaining. A whole month or more that usually sees 105-115 was mostly in the 90s, and with low dew points.
But now the temps are in the high hunnert teens, the lows in the upper 90s, and the dew points are in the 60s, and our "character building" weather is in full force. But we drink heavily, try to stay out of direct sun, ride really early or at night, and endure until about two weeks after Labor Day, when the dew point drops and the nights cool off again. A drenching thunderstorm or two (or more) would be nice, but that's a bonus. And you don't have to shovel or scrape this kind of brutal weather.
In mid-October we should be back to our riding (and outdoor wrenching) season weather that lasts until May. The cycle has its benefits along with its punishments.
We of course as kids rode sun up to well past sun down every day, all day long and can still ride in some heat for now.
 07-21-23, 02:48 PM
#6582
Senior Member
Join Date: May 2021
Location: London
Posts: 564
Bikes: Motobecane C41, Matsu$hita Nashonaru
Mentioned: 7 Post(s)
Tagged: 0 Thread(s)
Quoted: 215 Post(s)
Liked 439 Times
in
255 Posts
Early this morning, I wasn't wrenching on the bikes, but our home AC unit - it stopped working around 2 AM local time, and it just might hit 119 F again later today. Got it working again after going through a couple big capacitors, a contactor, and a few blown fuses. If I can get some rest and have a real AC person check it, maybe I'll try to get some bike miles in after sunset...
 07-21-23, 02:57 PM
#6583
Cantilever believer
Join Date: Nov 2021
Location: Phoenix, AZ
Posts: 1,659
Mentioned: 6 Post(s)
Tagged: 0 Thread(s)
Quoted: 567 Post(s)
Liked 1,961 Times
in
882 Posts
We just shut off the big ol' evaporative cooler a couple weeks ago, after the dew points jumped from the 30s to the 60s. That contraption saves us a lot of money as compared to running AC all summer, plus it brings in a lot of fresh air and the outgoing air helps cool the bike-repair zone on the back porch. But using it now would just be a miserable mess.
__________________
Richard C. Moeur, PE - Phoenix AZ, USA
https://www.richardcmoeur.com/bikestuf.html
Richard C. Moeur, PE - Phoenix AZ, USA
https://www.richardcmoeur.com/bikestuf.html
Last edited by RCMoeur; 07-21-23 at 04:59 PM.
Likes For RCMoeur:
Likes For EJM73:
07-21-23, 07:27 PM
#6585
se�or miembro

Join Date: Dec 2018
Location: Pac NW
Posts: 6,704
Bikes: '70s - '80s Campagnolo
Mentioned: 93 Post(s)
Tagged: 0 Thread(s)
Quoted: 3943 Post(s)
Liked 6,635 Times
in
3,282 Posts
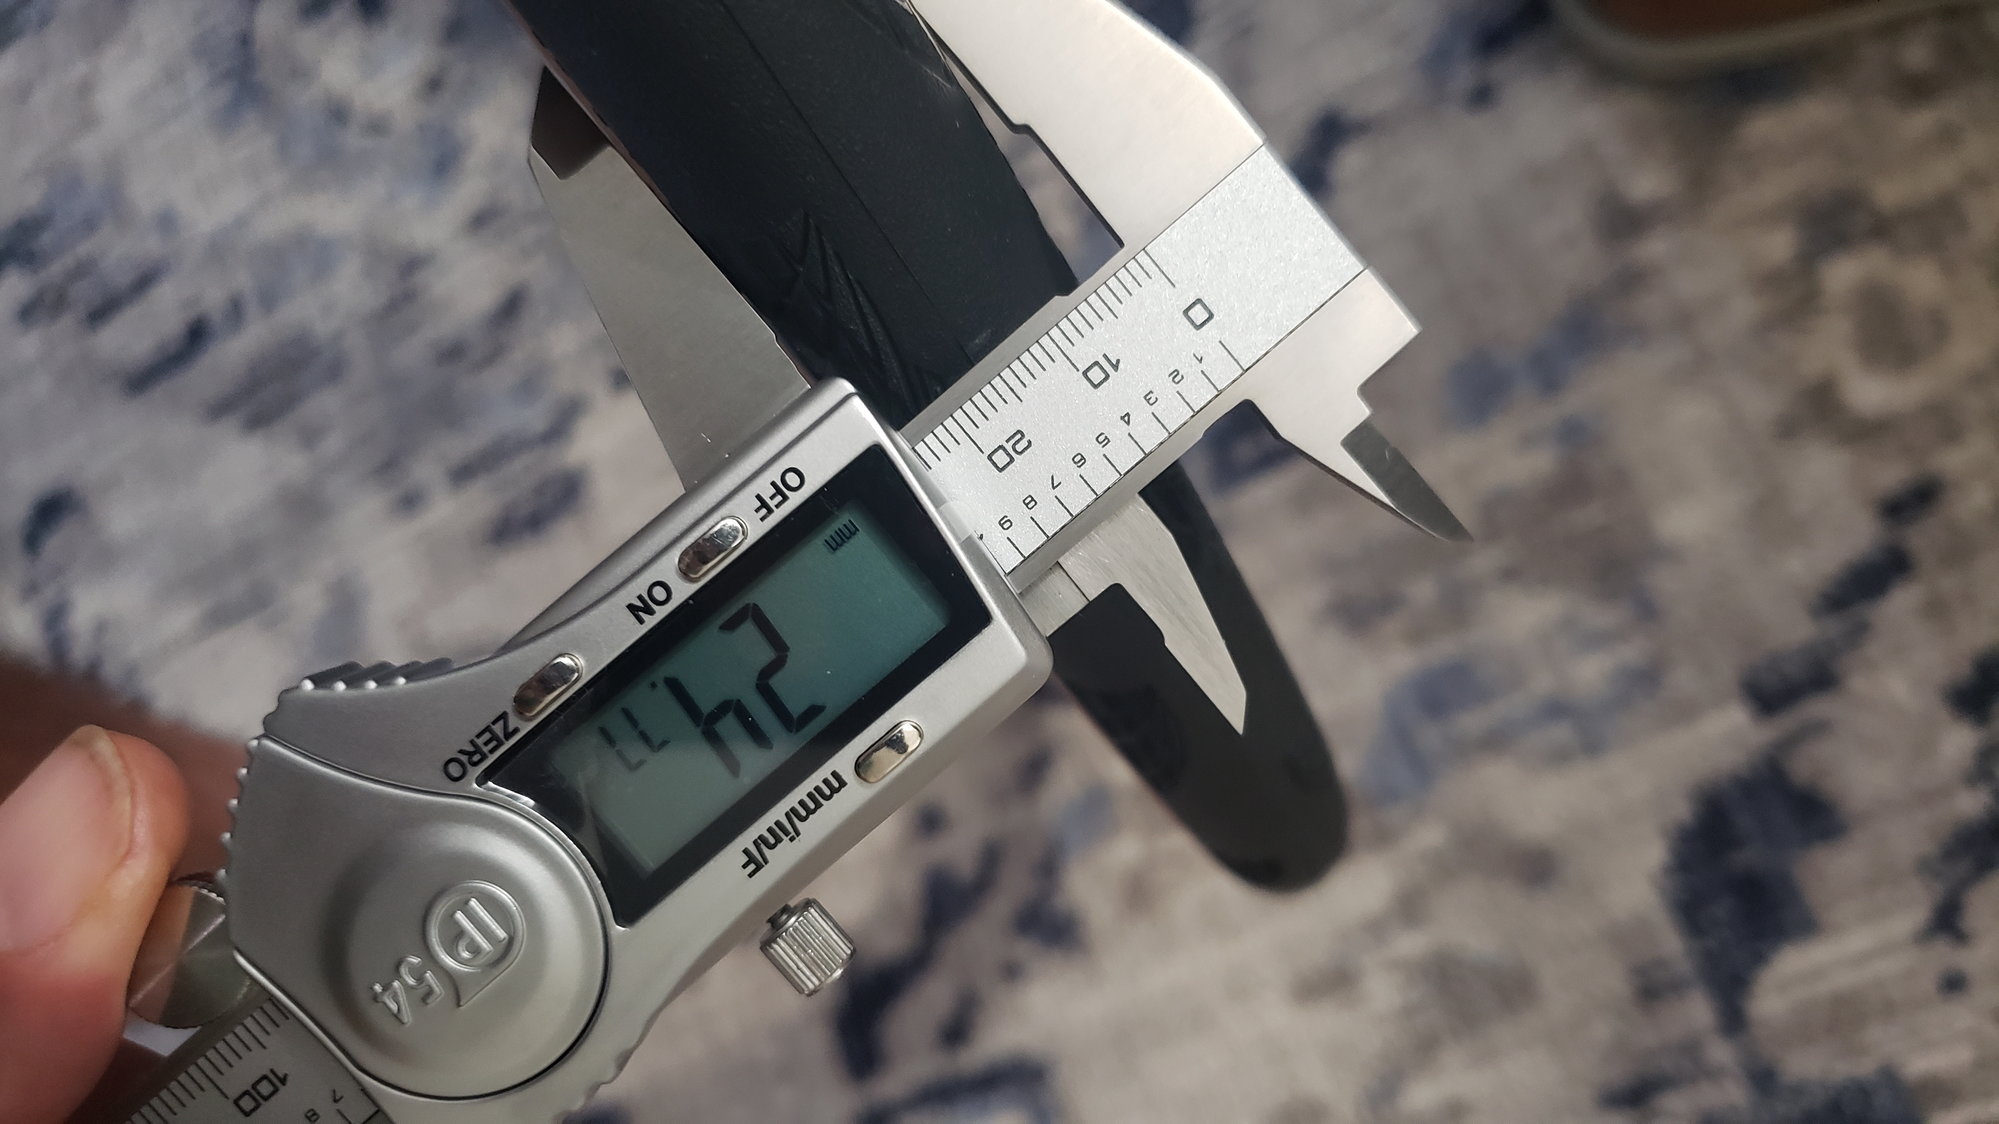
^ 24.77? Wow, that's far more "true" than my 23.5mm GP5000s (on m13ii rims). 
07-21-23, 09:27 PM
#6586
Henderson, NV

Join Date: Jan 2022
Location: Henderson/Las Vegas NV
Posts: 567
Bikes: Trek Alpha 3700, GT STS DH, Raleigh Grand Prix, Fisher Montare, Fisher CR-7, Fisher Aquila, Diamondback Sorrento, The Bike Beat Revolution, KHS XC 504R
Mentioned: 1 Post(s)
Tagged: 0 Thread(s)
Quoted: 360 Post(s)
Liked 639 Times
in
312 Posts
Newest project.
Initial inspection: replace inner tubes F/R, re-cover or replace the seat.


Initial inspection: replace inner tubes F/R, re-cover or replace the seat.
Likes For Desert Ryder:
07-21-23, 11:54 PM
#6587
Senior Member

Join Date: Aug 2015
Location: Murrieta Ca.
Posts: 537
Bikes: Teledyne Titan, Bob Jackson Audax Club, Bob Jackson World Tour, AlAn Record Ergal, 3Rensho Katana.
Mentioned: 9 Post(s)
Tagged: 0 Thread(s)
Quoted: 215 Post(s)
Liked 623 Times
in
245 Posts
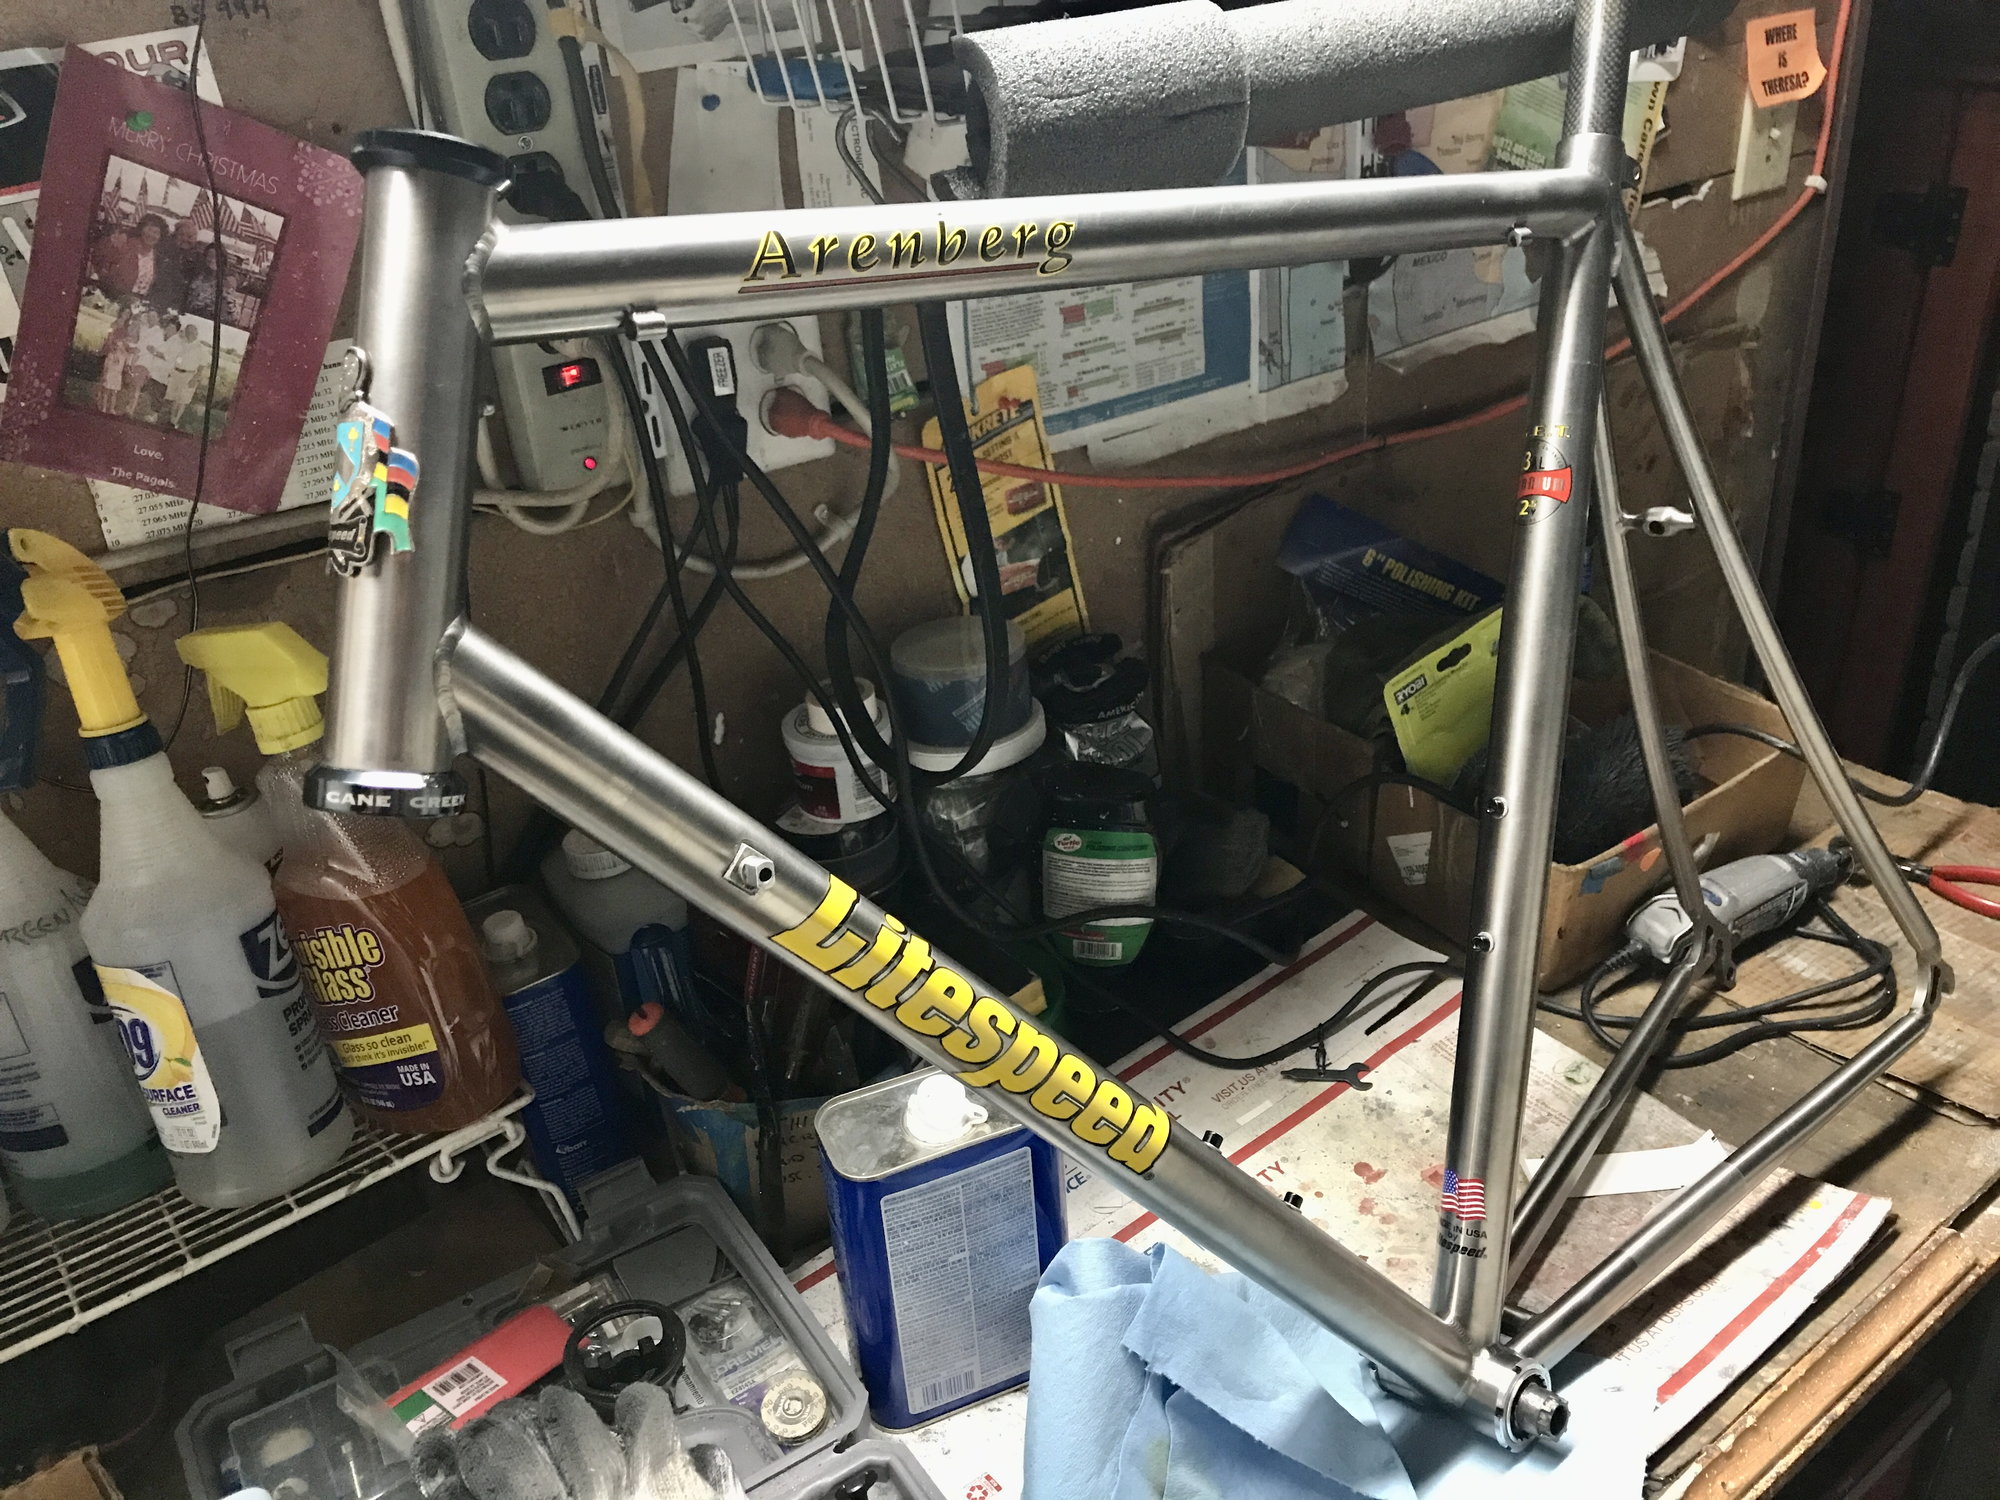
Progress on the Serotta, The head tube was trimmed .110" to eliminate a extra headset washer that I was really beginning to hate after looking at it a few days, the headset is greased, adjusted and done. I als have been working corrosion control on the tubes that needed it (the OCD is strong with me, I boroscoped the inside of the frame), in the morning I plan to coat the inside of the frame with Boeshield let it sit in the sun for a few hours to flash off the VOC's and install the bottom bracket. Now for a few photos..
Seat tube after cleaning...
 Untitled by nemosengineer, on Flickr
Tools used for cleaning... (not shown is a 18 inch drill extension)
 Untitled by nemosengineer, on Flickr
The drill is over 100 years old, fairly high tech in 1915, two speed and top of the line.
 Untitled by nemosengineer, on Flickr
 Untitled by nemosengineer, on Flickr
 Untitled by nemosengineer, on Flickr
: Mike
Seat tube after cleaning...
Untitled by nemosengineer, on FlickrTools used for cleaning... (not shown is a 18 inch drill extension)
Untitled by nemosengineer, on FlickrThe drill is over 100 years old, fairly high tech in 1915, two speed and top of the line.
Untitled by nemosengineer, on FlickrUntitled by nemosengineer, on FlickrUntitled by nemosengineer, on Flickr: Mike
__________________
Booyah Hubba-Hubba!!!
Booyah Hubba-Hubba!!!
07-22-23, 04:51 PM
#6588
Senior Member
Join Date: May 2021
Location: London
Posts: 564
Bikes: Motobecane C41, Matsu$hita Nashonaru
Mentioned: 7 Post(s)
Tagged: 0 Thread(s)
Quoted: 215 Post(s)
Liked 439 Times
in
255 Posts
The weather's been rubbish all day, so since I've been overhauling the hubs, grabbed two more loose front hubs lying about and thought I'll prepare them for whatever. Campagnolo Xenon (weight 150g, in case anyone was ever looking for this information) and Shimano Exage HB-RM50 (weight 140g). The latter was actually never used and I repacked it before, so just polished it up a bit. Both are quite alright for what they are. I'd say Campagnolo is a bit more smooth, perhaps because it's been used before. Difficult to quantify that really, just feels a bit softer. Shimano probably has nicer finish. Next thing to do at some spare moment will be cleaning up some Weinmann centrepull brakes.
And then I should get two MA40 rims, hopefully in decent enough condition. The idea is to use them on my commuting bicycle. They are coming with two Athena hubs. The rear one is incomplete, but if I manage to fix it, I'm planning to build a wheelset for someone who was adamant to ride on exotic wheels with fancy spoke patterns and not enough spokes (20 front radial and 27 rear in 9 groups of 3). On the London roads with potholes. With a weight of 180lbs. On a heavy alu-framed bicycle... With predictable results. So fingers crossed, perhaps I'll be able to put that one on the road again with sensibe 36/36 laced in 3 cross, like nature intended.
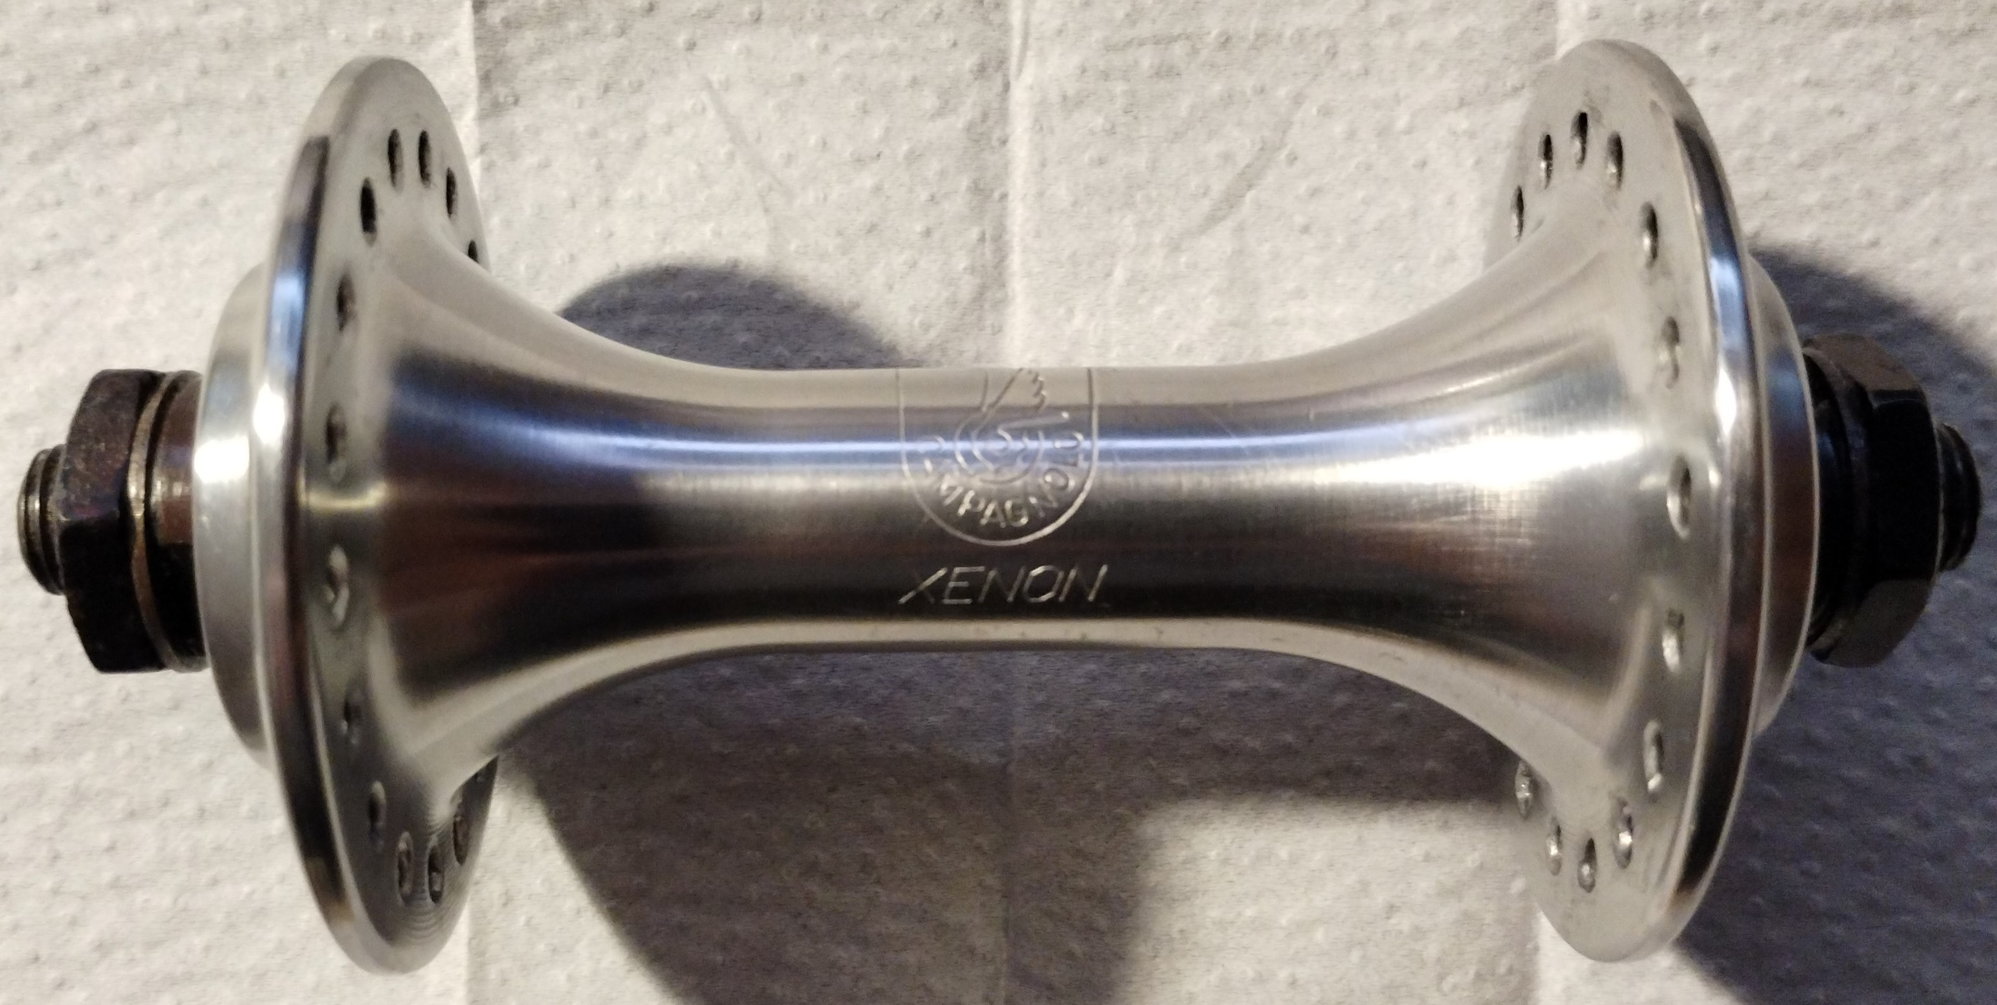
Campagnolo Xenon - 150g

Shimano HB-RM50 - 140g
And then I should get two MA40 rims, hopefully in decent enough condition. The idea is to use them on my commuting bicycle. They are coming with two Athena hubs. The rear one is incomplete, but if I manage to fix it, I'm planning to build a wheelset for someone who was adamant to ride on exotic wheels with fancy spoke patterns and not enough spokes (20 front radial and 27 rear in 9 groups of 3). On the London roads with potholes. With a weight of 180lbs. On a heavy alu-framed bicycle... With predictable results. So fingers crossed, perhaps I'll be able to put that one on the road again with sensibe 36/36 laced in 3 cross, like nature intended.
Campagnolo Xenon - 150g
Shimano HB-RM50 - 140g
Likes For VintageSteelEU:
07-22-23, 11:40 PM
#6589
Senior Member
Join Date: Aug 2015
Location: Murrieta Ca.
Posts: 537
Bikes: Teledyne Titan, Bob Jackson Audax Club, Bob Jackson World Tour, AlAn Record Ergal, 3Rensho Katana.
Mentioned: 9 Post(s)
Tagged: 0 Thread(s)
Quoted: 215 Post(s)
Liked 623 Times
in
245 Posts
A very strange day, started out normal enough. I hauled the frame outside blew the dust out of it plugged the openings ang poured a pint of Boeshield in it, sloshed it around and drained it, sat it in the sun for for a few hours (100 degree day), dry and ready for assembly.
So... I tried to fit the Dura-Ace bottom bracket for hours, multiple attempts were made, every trick in the book was applied, FAIL left and right hand side would not catch the first thread. So I grabbed the Campagnolo bottom bracket and it threaded in like butter... I took this as a sign from the gods at Cinelli who made the bottom bracket , torqued everything up and installed the Shimpagnolo triple crank. This set off a chain of events resulting in a more Italian cockpit to try to restore balance to the universe.
Shimpagnolo Record triple crank
 Untitled by nemosengineer, on Flickr
Super Record seatpost and 3TTT Record 84 100mm stem, somewhat period correct.
 Untitled by nemosengineer, on Flickr
: Mike
So... I tried to fit the Dura-Ace bottom bracket for hours, multiple attempts were made, every trick in the book was applied, FAIL left and right hand side would not catch the first thread. So I grabbed the Campagnolo bottom bracket and it threaded in like butter... I took this as a sign from the gods at Cinelli who made the bottom bracket , torqued everything up and installed the Shimpagnolo triple crank. This set off a chain of events resulting in a more Italian cockpit to try to restore balance to the universe.
Shimpagnolo Record triple crank
Untitled by nemosengineer, on FlickrSuper Record seatpost and 3TTT Record 84 100mm stem, somewhat period correct.
Untitled by nemosengineer, on Flickr: Mike
__________________
Booyah Hubba-Hubba!!!
Booyah Hubba-Hubba!!!
Likes For Nemosengineer:
07-23-23, 01:07 PM
#6590
Senior Member
Join Date: May 2013
Location: Greenwood SC USA
Posts: 2,264
Bikes: 2002 Mercian Vincitore, 1982 Mercian Colorado, 1976 Puch Royal X, 1973 Raleigh Competition, 1971 Gitane Tour de France and others
Mentioned: 56 Post(s)
Tagged: 0 Thread(s)
Quoted: 824 Post(s)
Liked 1,445 Times
in
701 Posts
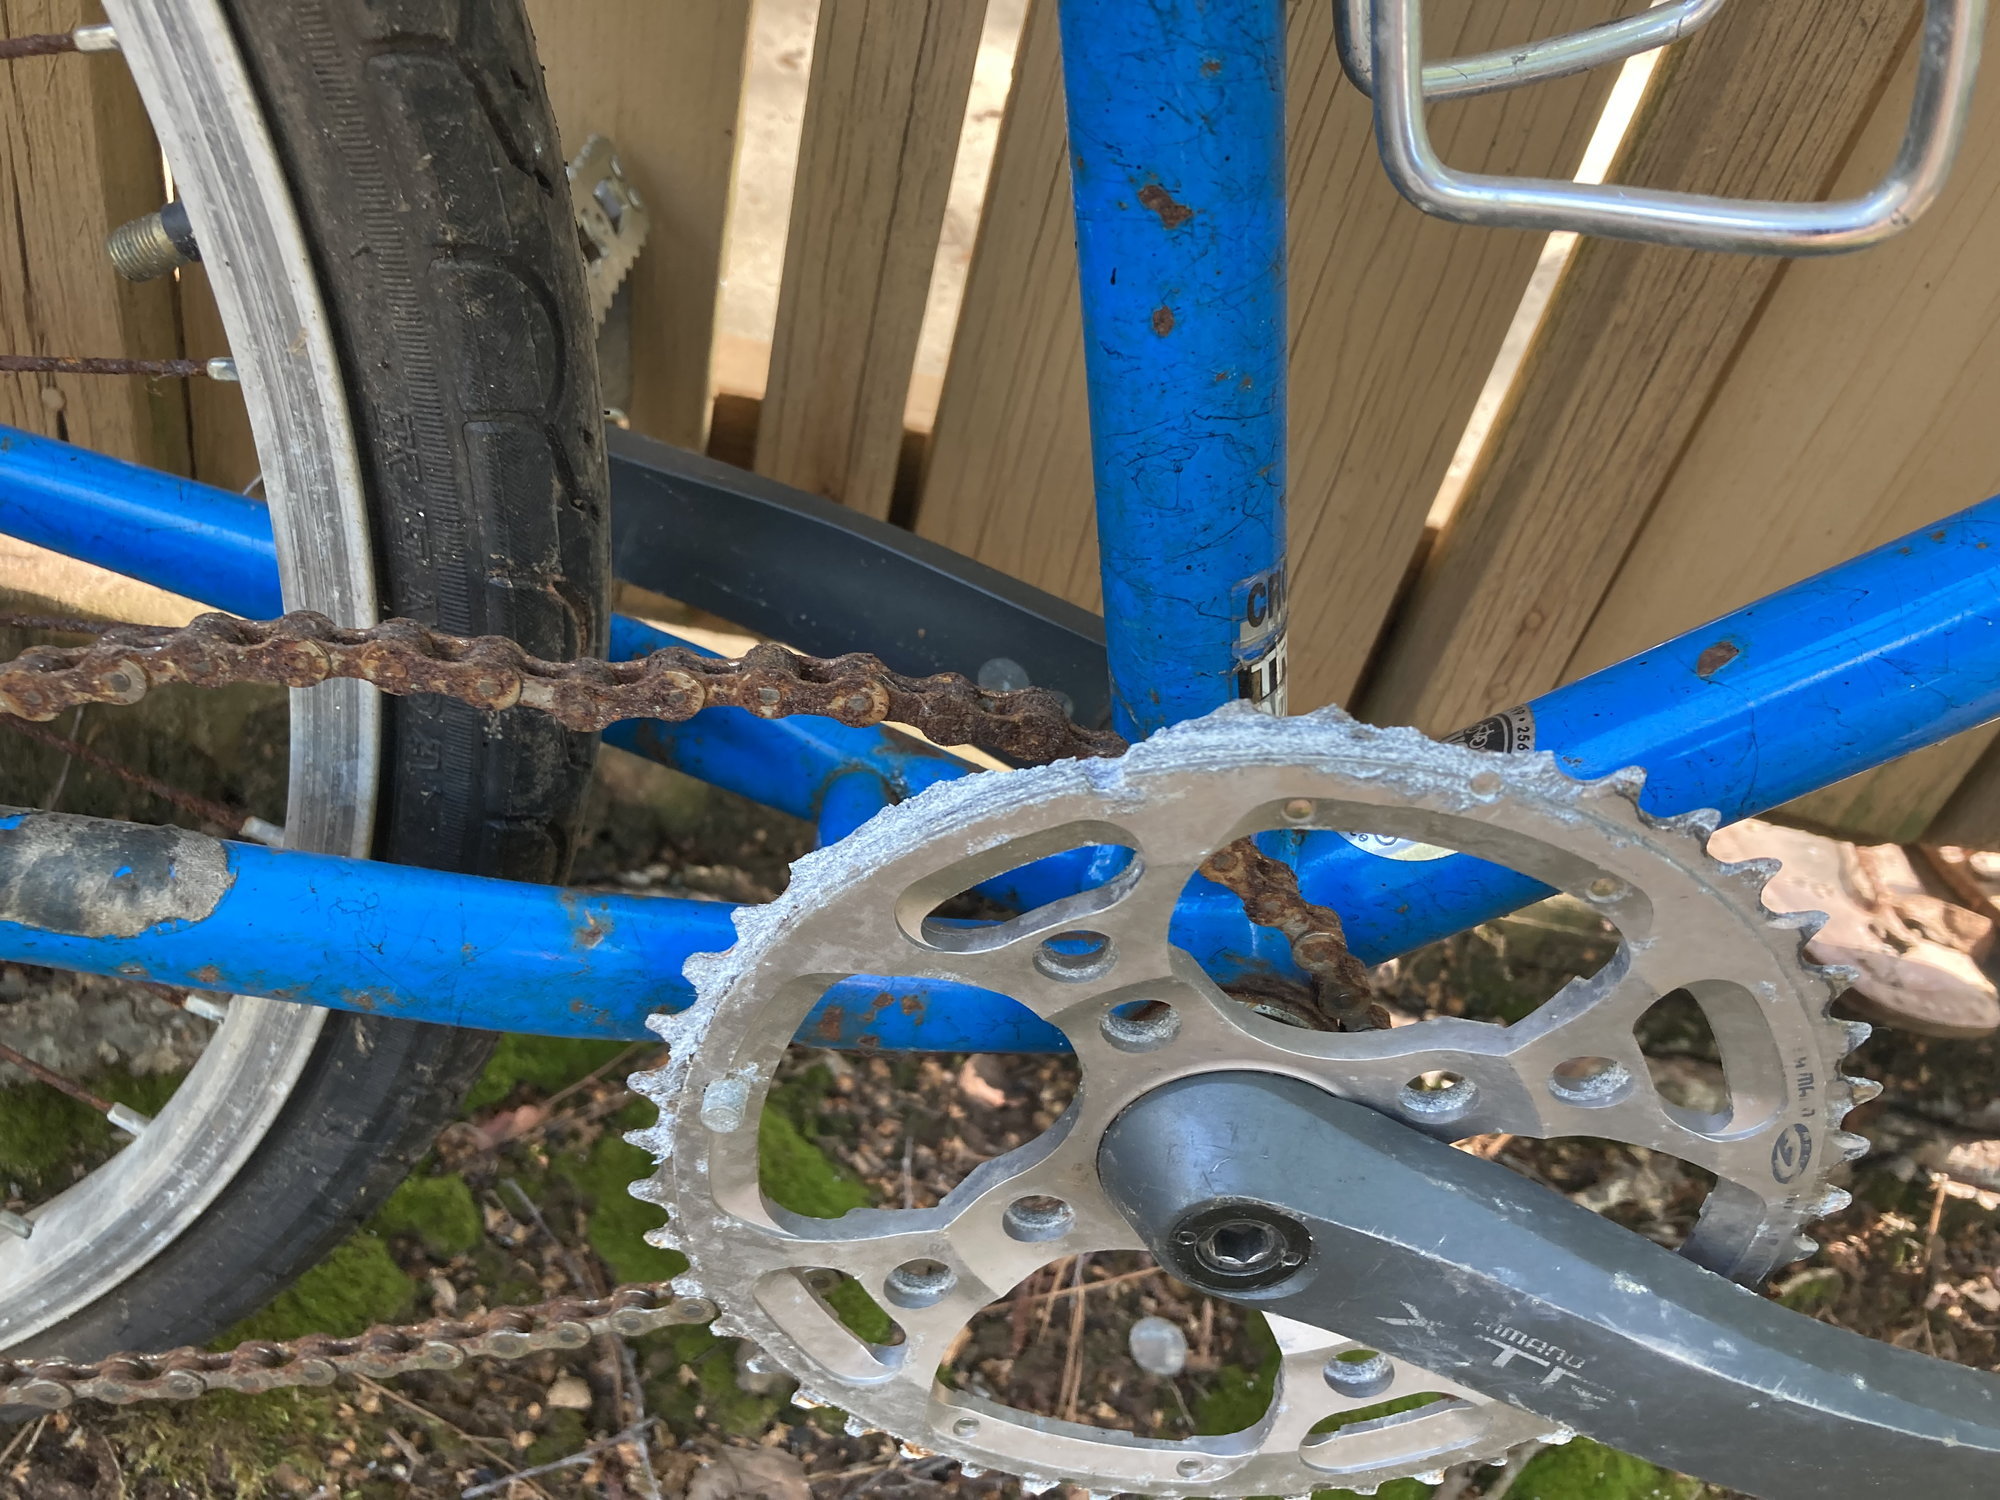
Last year I was hanging out at the now-defunct LBS, Bikes and Boards. I spotted this �92 Trek 820 that someone had fitted with a bad single speed conversion and bull horns. Coleman the owner said it had come in for drivetrain and brake parts, and when he gave the customer a quote, the customer said �keep it.�
�It�s yours if you want it, otherwise I�ll scrap it,� Coleman said, so into the truck it went.

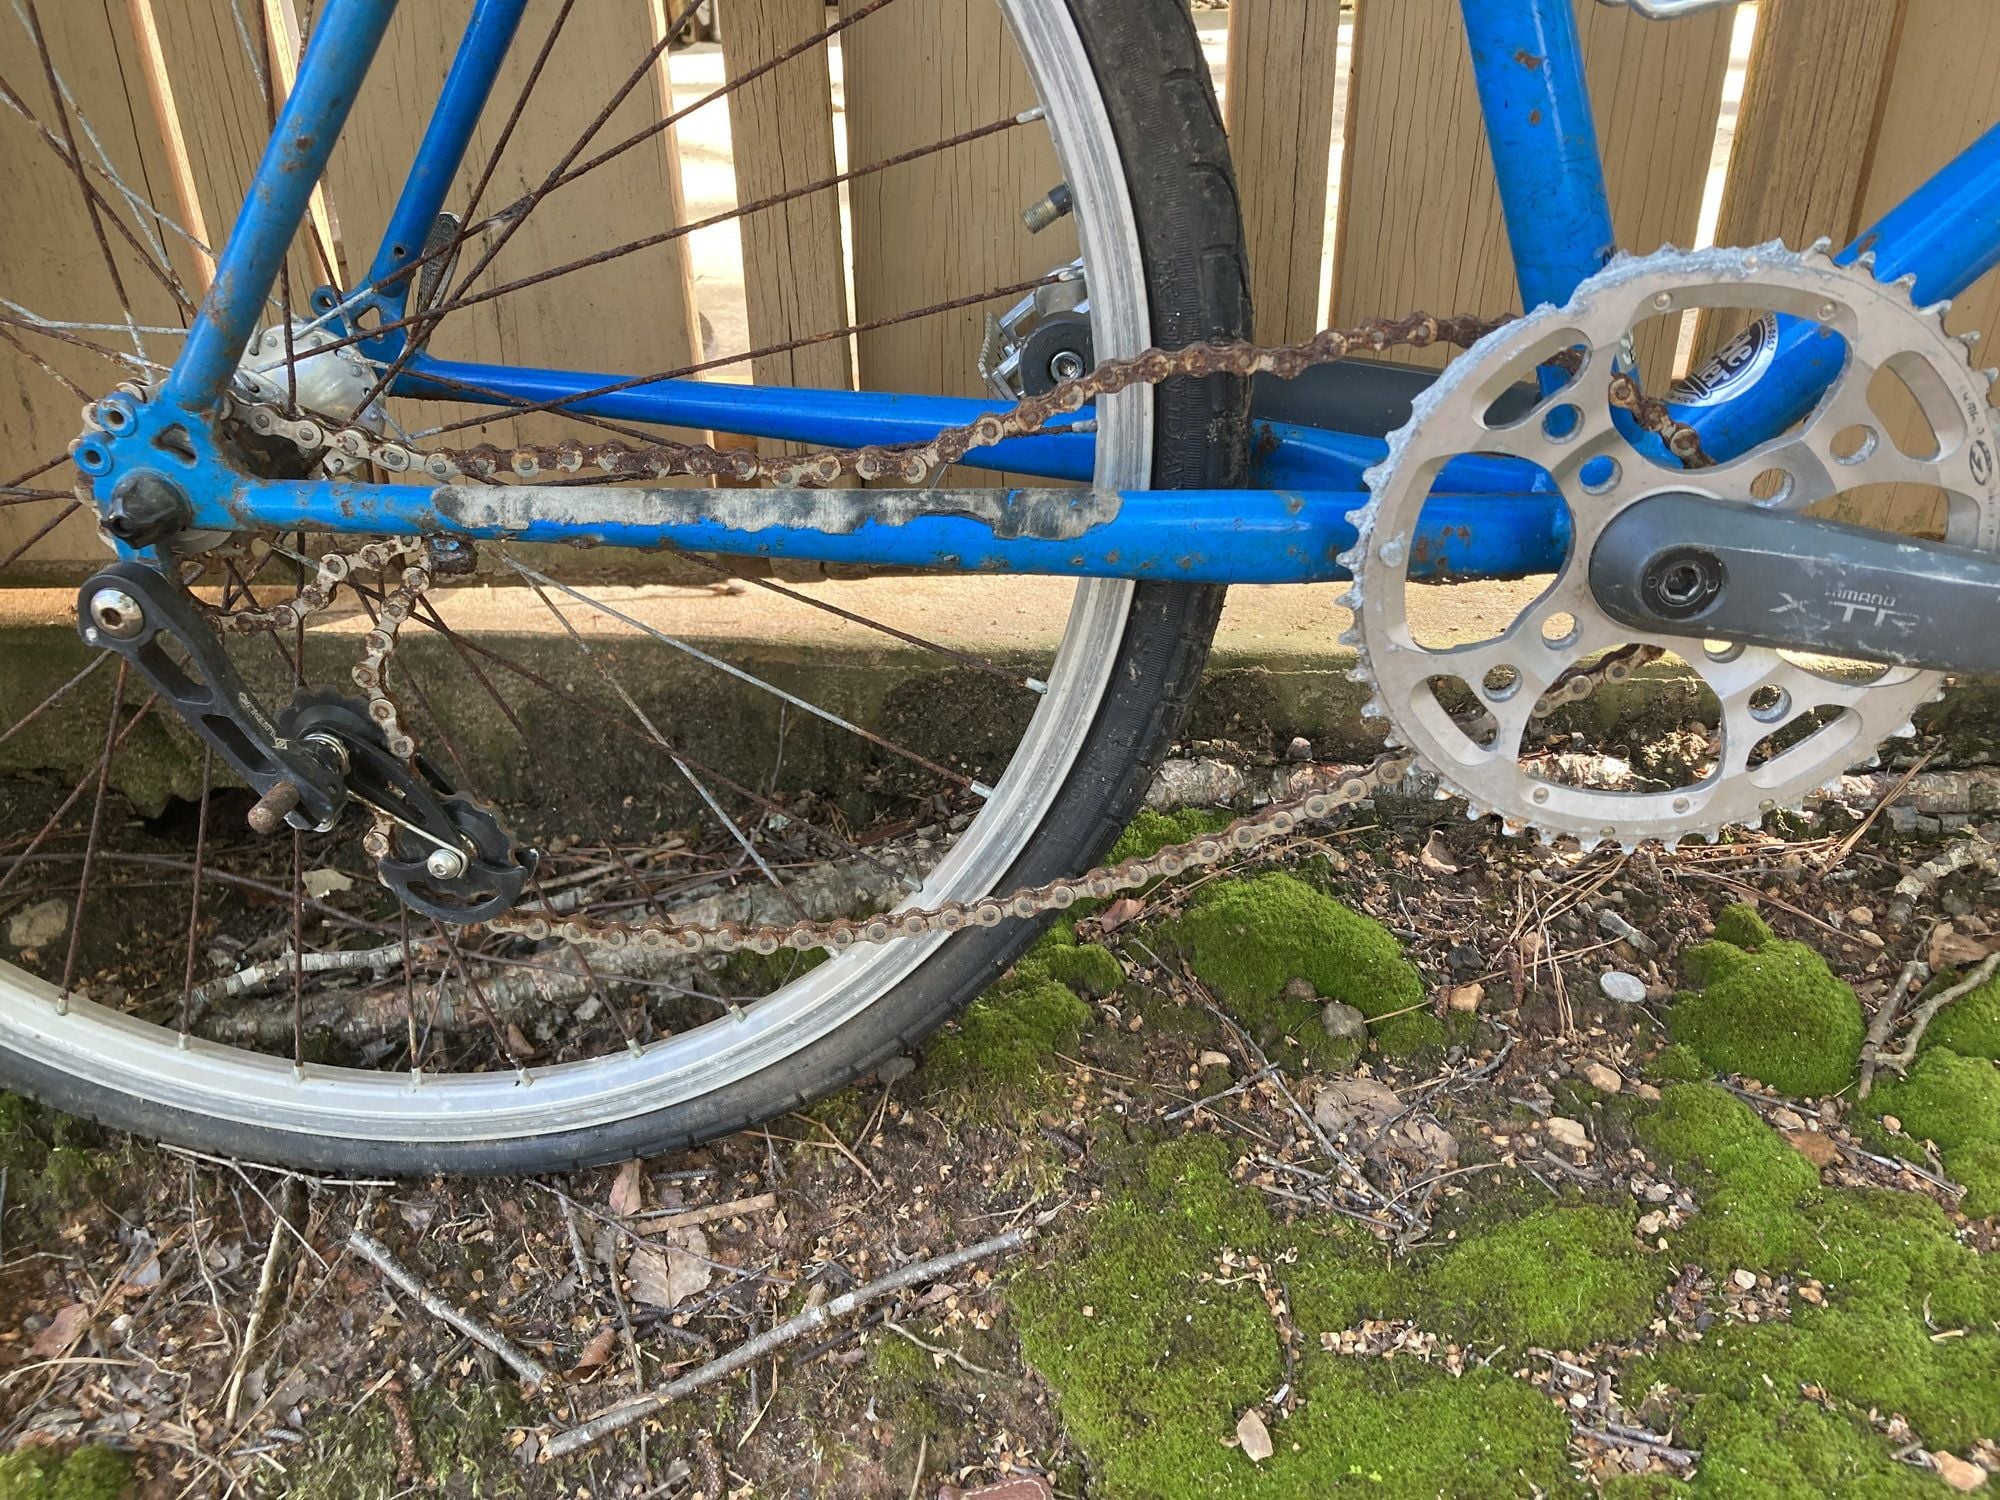
I puttered with it and then set it aside aside for more than a year, but yesterday while clearing out projects I looked it over again and decided it was time to create the ultimate Edisto Beach bike, capable of also doing some single track.
It helps that this 820 has chro-moly main tubes and forks and possibly even stays - generic plain gauge, but better than gaspipe! Being a more casual sport model, it also has a shorter top tube - and the reach from saddle to bars is about identical to that of my road bikes.
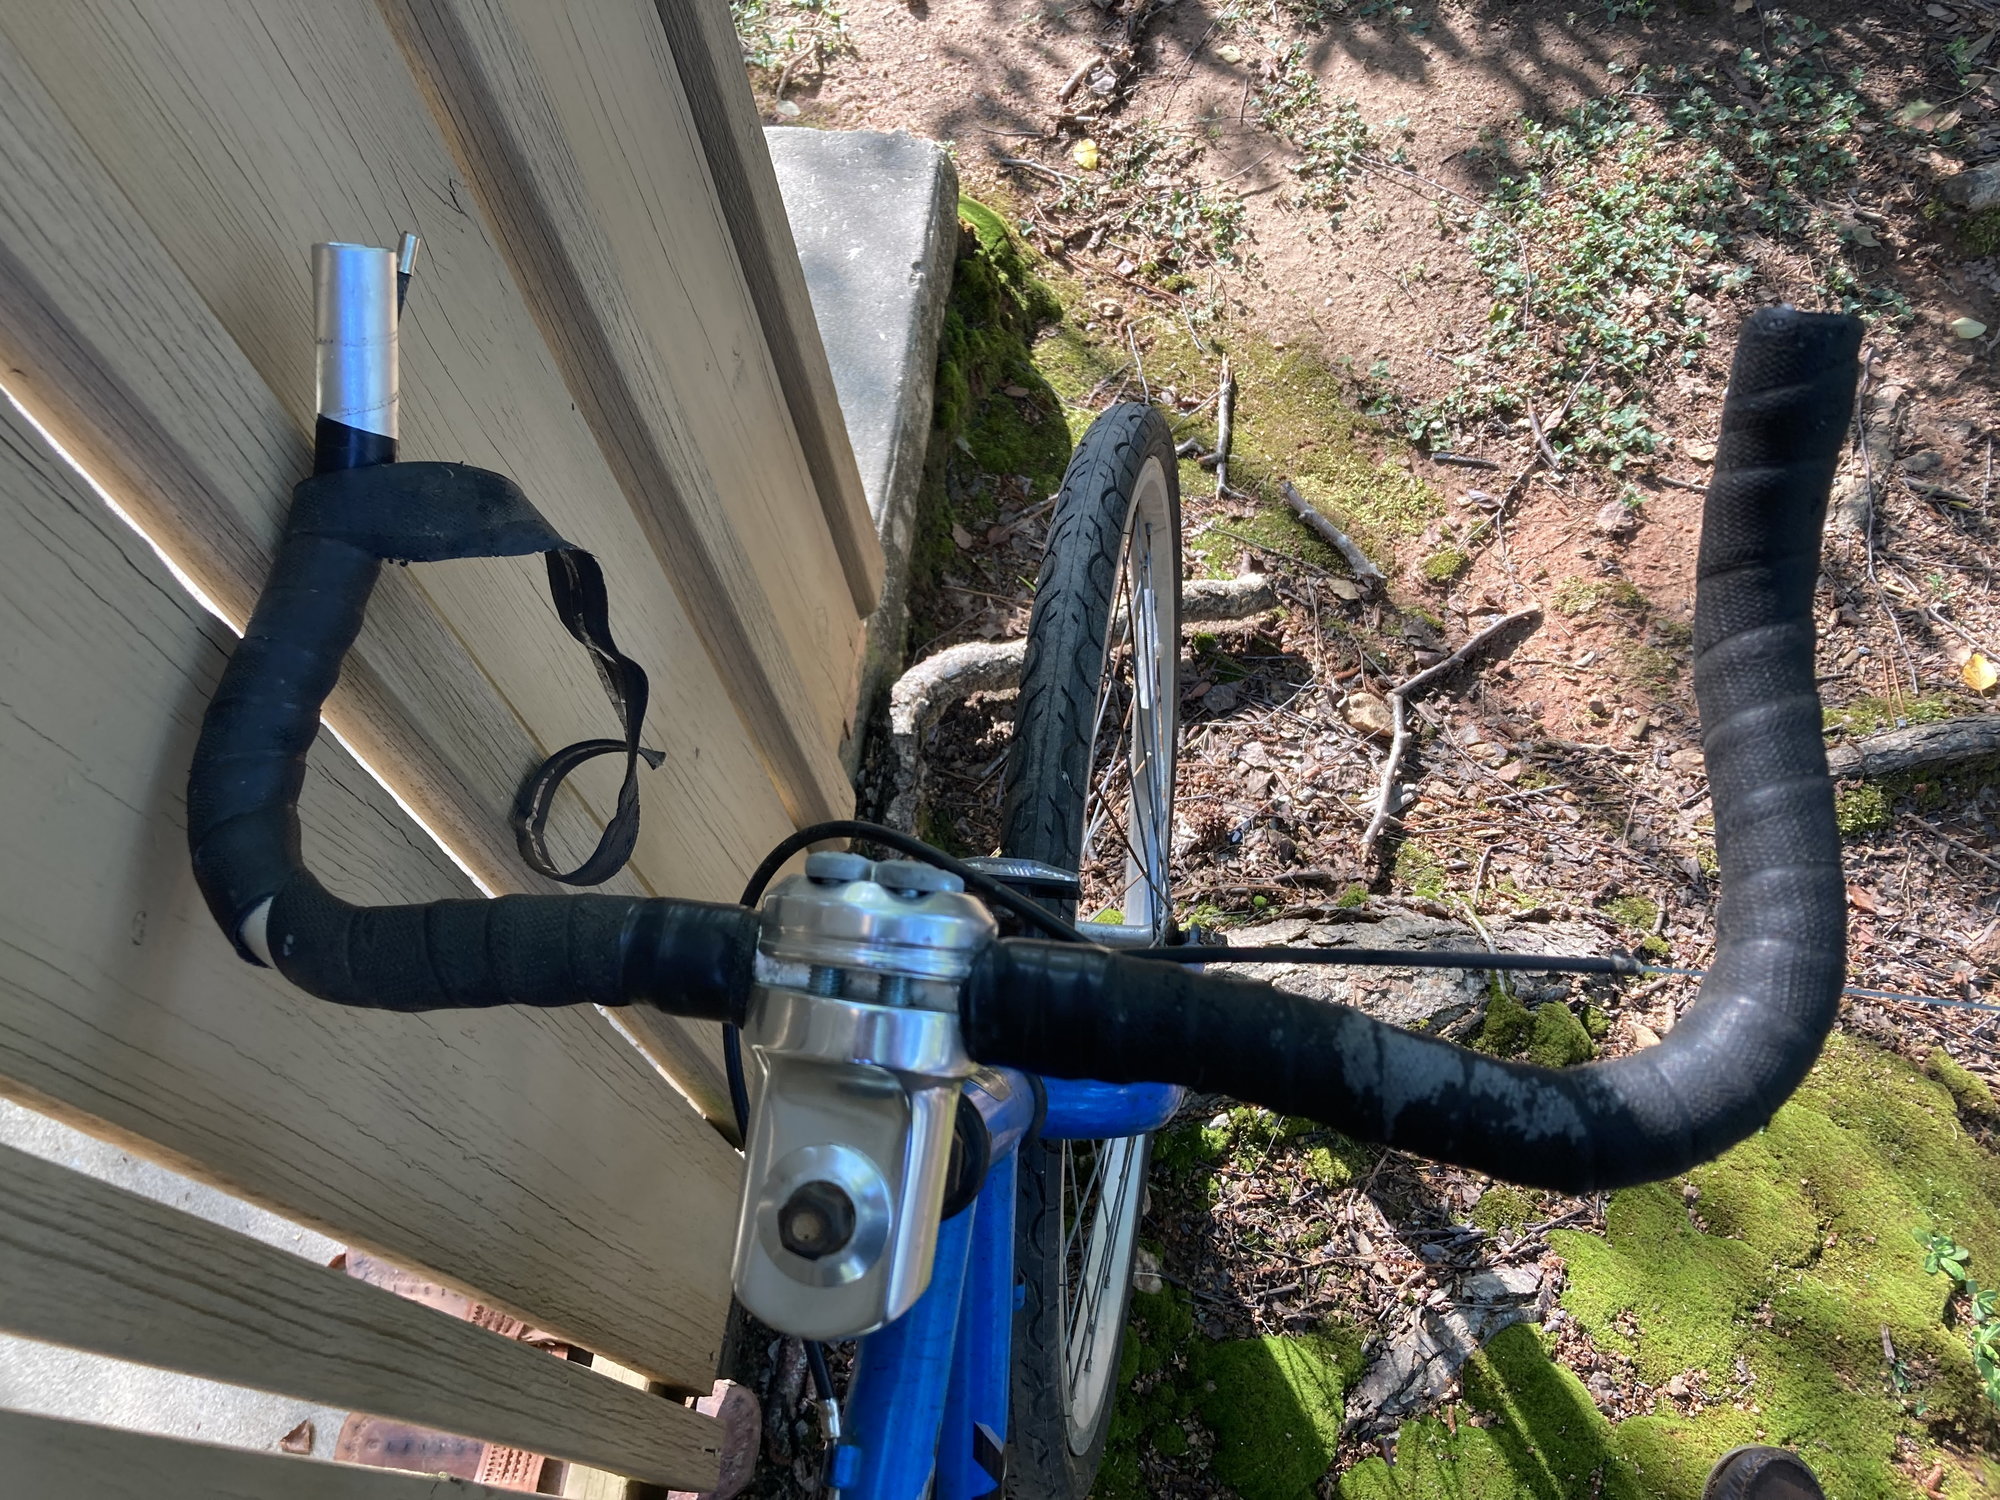
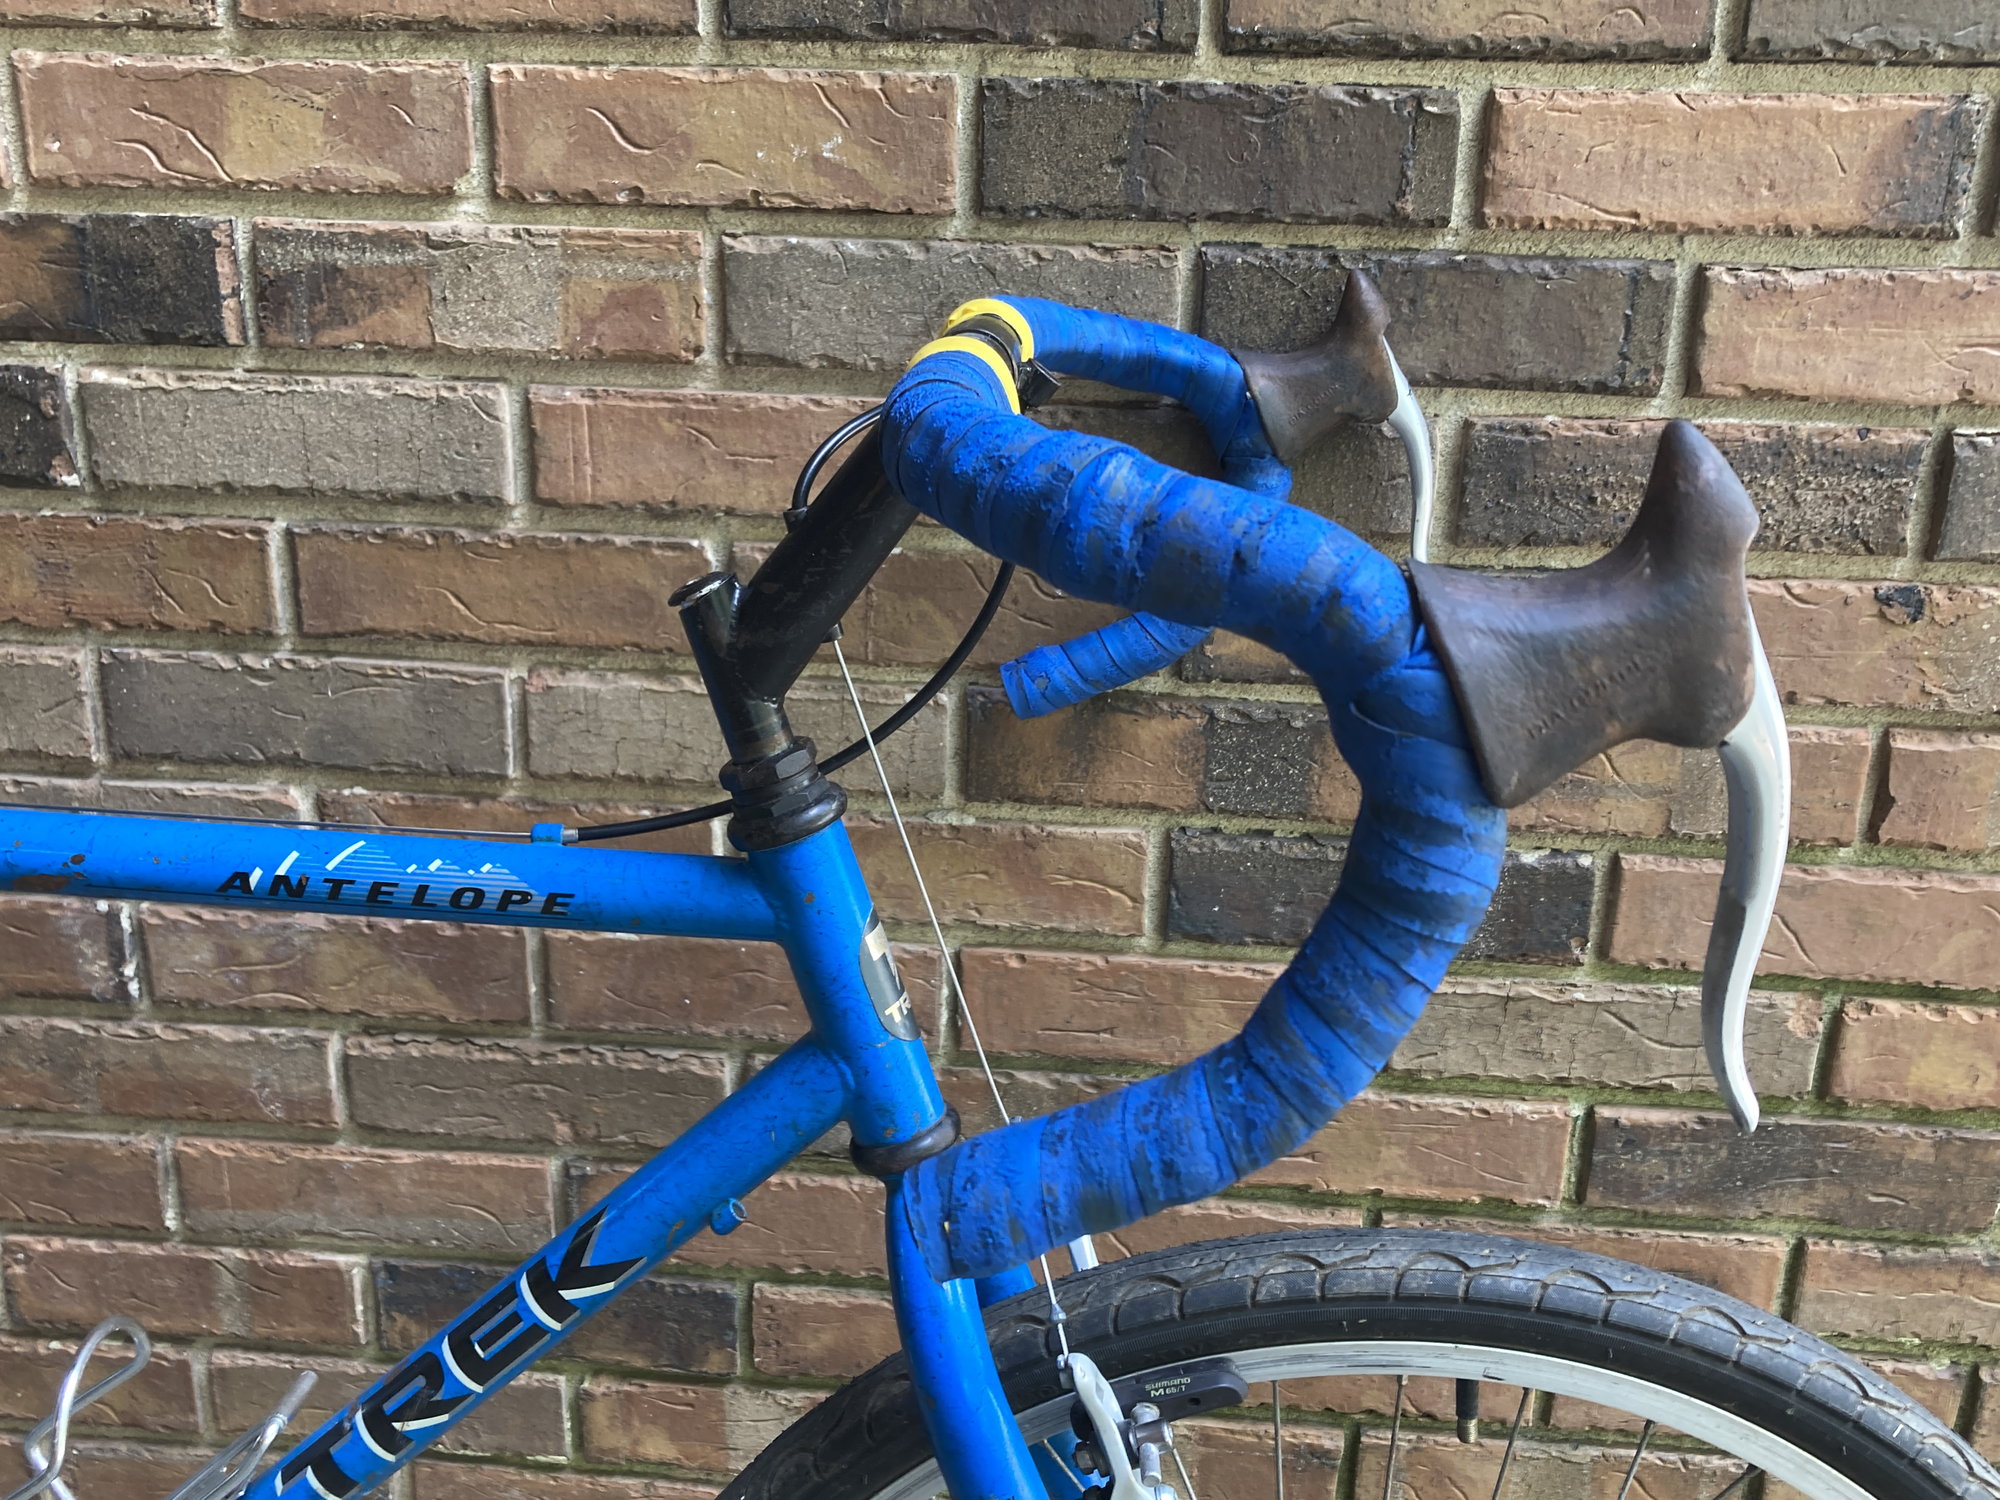
I had a set of anatomic bend dropped bars from a long ago part-out, a set of aero brake levers that have been on who knows how many bikes through the years, and some SR 110 bcd 170 mm cranks. Into the stash pile I went for the 34T Sugino chainring, and I used the 40T for a placeholder/spacer until I can get a 36T. The cranks are pretty far inboard, which meant I needed to rearrange the spacers for the 17T cog. It all went together with less hassle than it could have �.
The current 34x17 makes for a slack chain, but after consulting the FixMeUp site I feel confident that I can run 34x18 in magic gear mode - which leads me to suspect 36x16 will also work, so I could go with a near-60-in gear for meandering around in pavement and have a 49-in for singletrack with different tires.
The best part? So far, ZERO cash expenditures! The bike was free, bars, crankset, brakes, bar tape, cables, housings, ferrules, saddle, pedals and cage were all recycled bits from the parts stash, and the cartridge BB was a gift from a generous BFer!
So, now to get a 36T ring and 16 and 18T cogs - and a half-link for insurance. Guess I�ll have to spend some money, unless someone has those bits and wants to trade �

�It�s yours if you want it, otherwise I�ll scrap it,� Coleman said, so into the truck it went.
I puttered with it and then set it aside aside for more than a year, but yesterday while clearing out projects I looked it over again and decided it was time to create the ultimate Edisto Beach bike, capable of also doing some single track.
It helps that this 820 has chro-moly main tubes and forks and possibly even stays - generic plain gauge, but better than gaspipe! Being a more casual sport model, it also has a shorter top tube - and the reach from saddle to bars is about identical to that of my road bikes.
I had a set of anatomic bend dropped bars from a long ago part-out, a set of aero brake levers that have been on who knows how many bikes through the years, and some SR 110 bcd 170 mm cranks. Into the stash pile I went for the 34T Sugino chainring, and I used the 40T for a placeholder/spacer until I can get a 36T. The cranks are pretty far inboard, which meant I needed to rearrange the spacers for the 17T cog. It all went together with less hassle than it could have �.
The current 34x17 makes for a slack chain, but after consulting the FixMeUp site I feel confident that I can run 34x18 in magic gear mode - which leads me to suspect 36x16 will also work, so I could go with a near-60-in gear for meandering around in pavement and have a 49-in for singletrack with different tires.
The best part? So far, ZERO cash expenditures! The bike was free, bars, crankset, brakes, bar tape, cables, housings, ferrules, saddle, pedals and cage were all recycled bits from the parts stash, and the cartridge BB was a gift from a generous BFer!
So, now to get a 36T ring and 16 and 18T cogs - and a half-link for insurance. Guess I�ll have to spend some money, unless someone has those bits and wants to trade �
07-23-23, 01:33 PM
#6591
aka Tom Reingold
Thread Starter

Join Date: Jan 2009
Location: New York, NY, and High Falls, NY, USA
Posts: 40,608
Bikes: 1962 Rudge Sports, 1971 Raleigh Super Course, 1971 Raleigh Pro Track, 1974 Raleigh International, 1975 Viscount Fixie, 1982 McLean, 1996 Lemond (Ti), 2002 Burley Zydeco tandem
Mentioned: 513 Post(s)
Tagged: 0 Thread(s)
Quoted: 7400 Post(s)
Liked 2,580 Times
in
1,505 Posts
@VintageSteelEU, I truly don’t know how you will get the freewheel body off the hub, now that you removed the rim and spokes. I’ll watch your progress eagerly.
__________________
Tom Reingold, tom@noglider.com
New York City and High Falls, NY
Blogs: The Experienced Cyclist; noglider's ride blog
�When man invented the bicycle he reached the peak of his attainments.� � Elizabeth West, US author
Please email me rather than PM'ing me. Thanks.
Tom Reingold, tom@noglider.com
New York City and High Falls, NY
Blogs: The Experienced Cyclist; noglider's ride blog
�When man invented the bicycle he reached the peak of his attainments.� � Elizabeth West, US author
Please email me rather than PM'ing me. Thanks.
07-23-23, 01:45 PM
#6592

Senior Member

Join Date: Jan 2005
Location: Baltimore, MD
Posts: 5,645
Mentioned: 18 Post(s)
Tagged: 0 Thread(s)
Quoted: 2638 Post(s)
Liked 3,188 Times
in
1,817 Posts
Even with the cheater pipe, it was touch and go both times. But that just made the eventual success all the sweeter.
07-23-23, 02:03 PM
#6593
blahblahblah chrome moly

Join Date: Apr 2009
Location: Seattle
Posts: 2,088
Mentioned: 94 Post(s)
Tagged: 0 Thread(s)
Quoted: 1224 Post(s)
Liked 2,729 Times
in
1,136 Posts
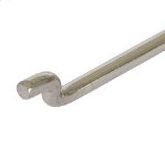
One fix is to make some Z-bend spokes, which don't have heads on them, so they can be inserted into the flange. They can be made by snipping just the top cap off the J-bends, then adding another bend near the existing bend, with narrow-nose pliers. The space between the two bends should be set to match the flange thickness of the hub, but it doesn't need to be precise.
You can make, say 8 spokes in the time it took me to type this.
The exact length of the spokes also doesn't matter. I said 8, which is based on one-fourth of a 32-hole rim, but the exact number doesn't matter either.
Once you have the spokes made, lace a wheel only to the right flange and only pulling spokes, no crosses. Thread the nipples on to full engagement, and proceed to removing the freewheel the normal way. Once your 8 (or however many) spokes are pulled tight by the freewheel removal action, you'll have almost the same removing power as a fully built wheel, no crossing spokes needed.
It is possible to damage a rim by this method so you might want to choose a junk one or at least a heavy/strong one. You can't hurt the spokes though, you aren't strong enough.
Remember to hold the freewheel remover tightly to the freewheel with a QR skewer. Back off the tension on the skewer after the freewheel breaks loose. (Standard advice for almost any FW removal.)
If we charged a customer what this job should cost in normal labor rates, most people would opt to throw the hub and freewheel away. That's always an option; used vintage hubs and freewheels aren't expensive, like on ebay, leboncoin or swap meets for example. Extra karma points for keeping these out of the recycle bin though. Good luck!
Likes For bulgie:
07-23-23, 02:54 PM
#6594
Senior Member
Join Date: May 2021
Location: London
Posts: 564
Bikes: Motobecane C41, Matsu$hita Nashonaru
Mentioned: 7 Post(s)
Tagged: 0 Thread(s)
Quoted: 215 Post(s)
Liked 439 Times
in
255 Posts
@VintageSteelEU, I truly don�t know how you will get the freewheel body off the hub, now that you removed the rim and spokes. I�ll watch your progress eagerly.
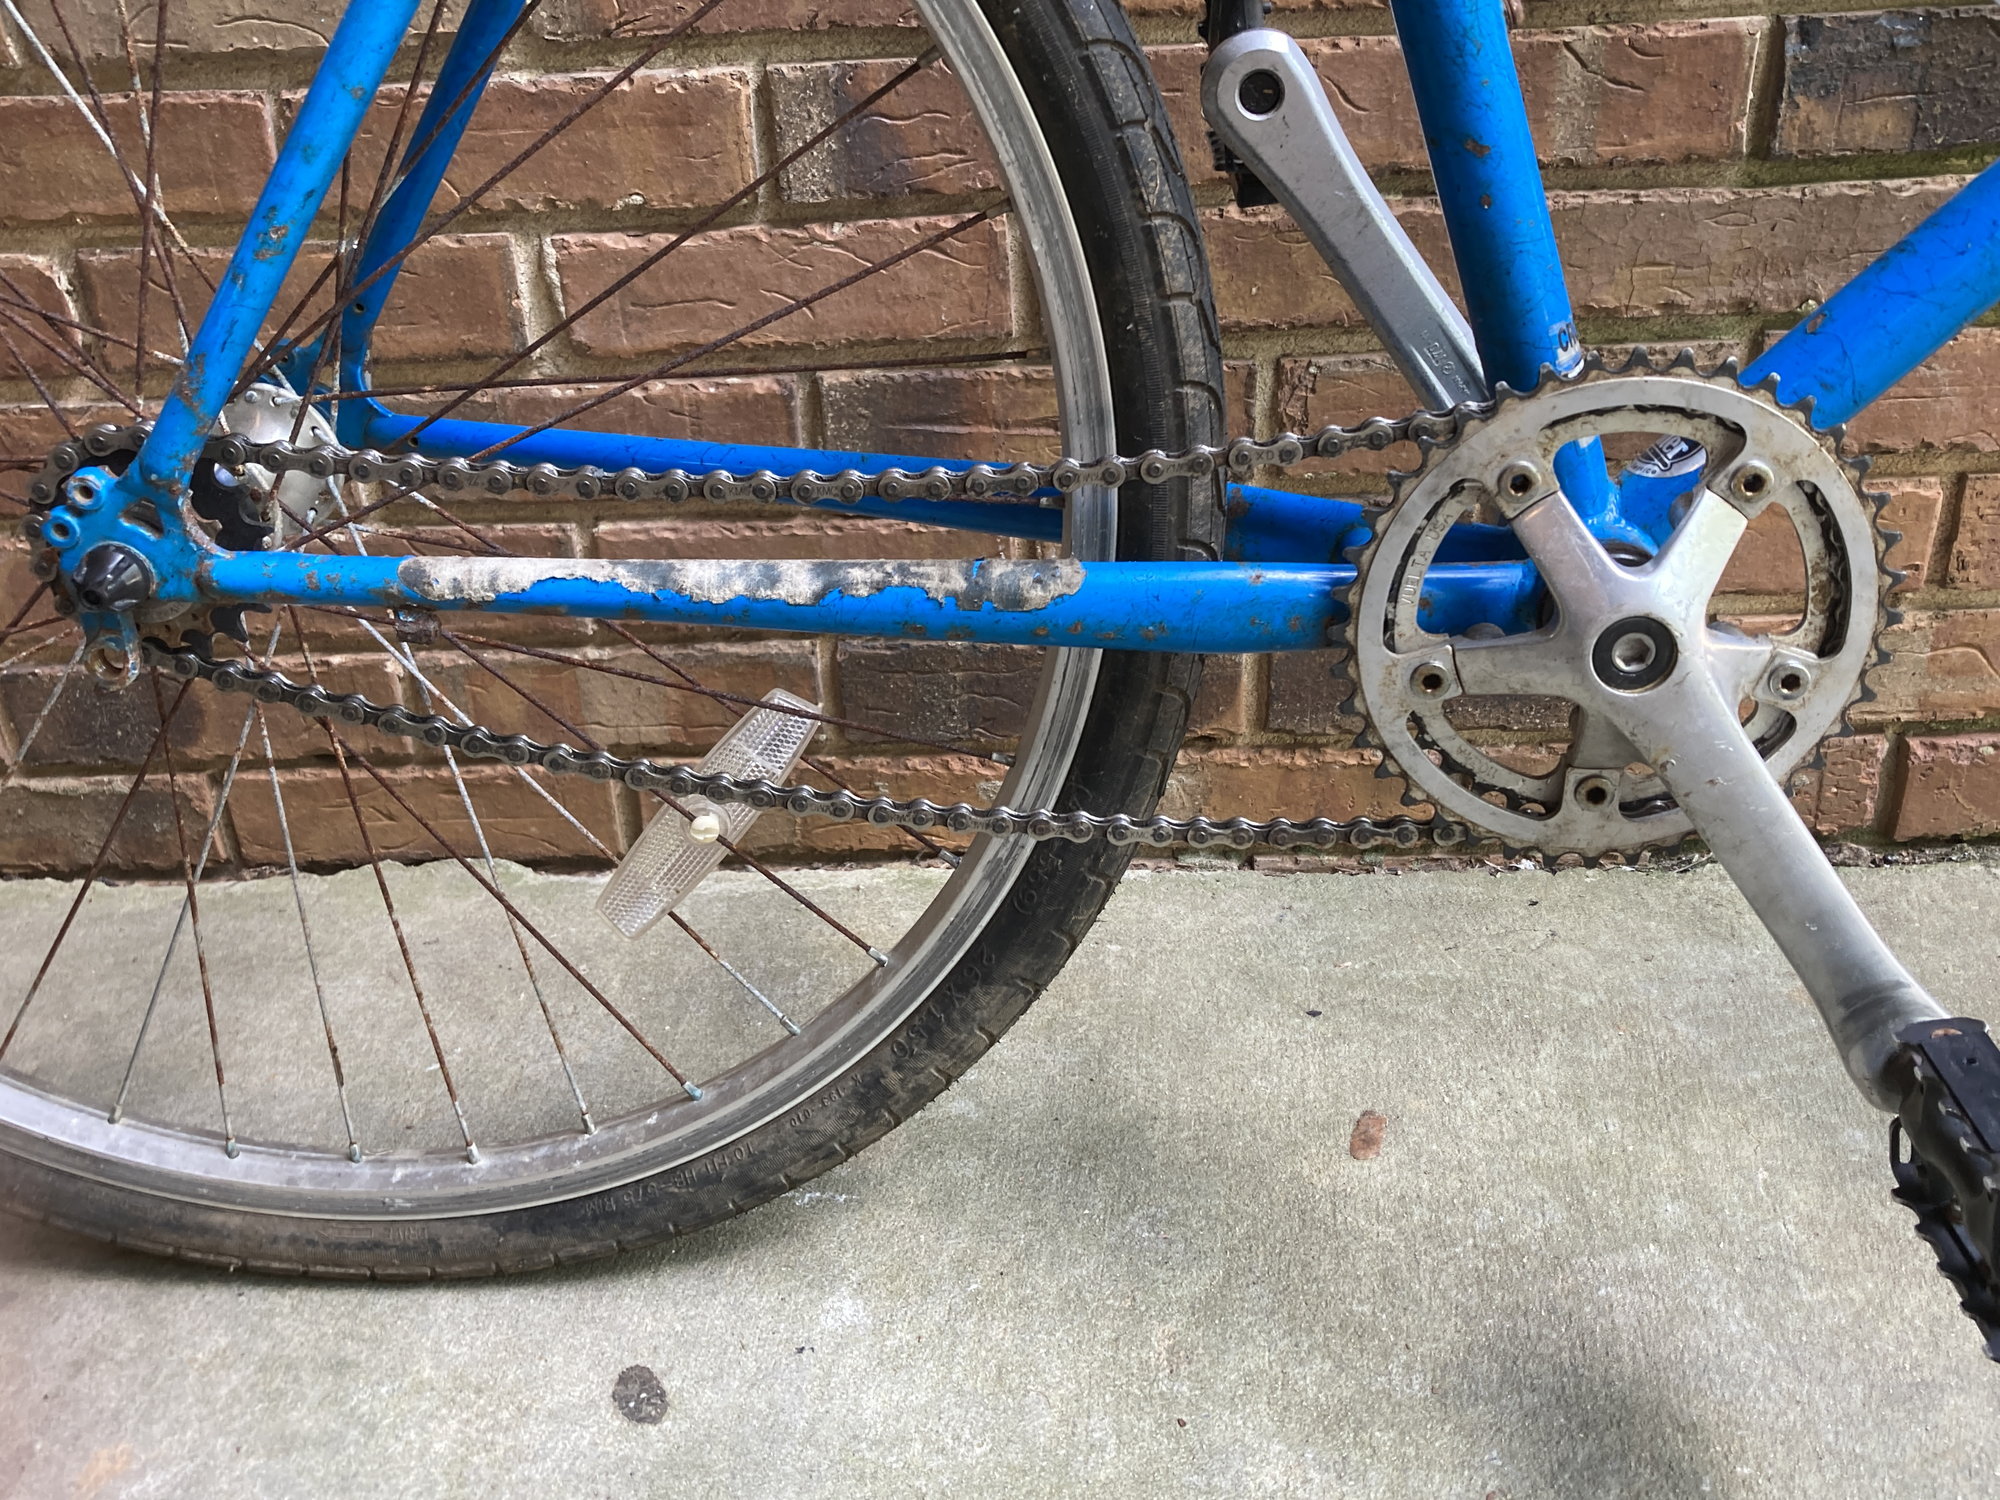
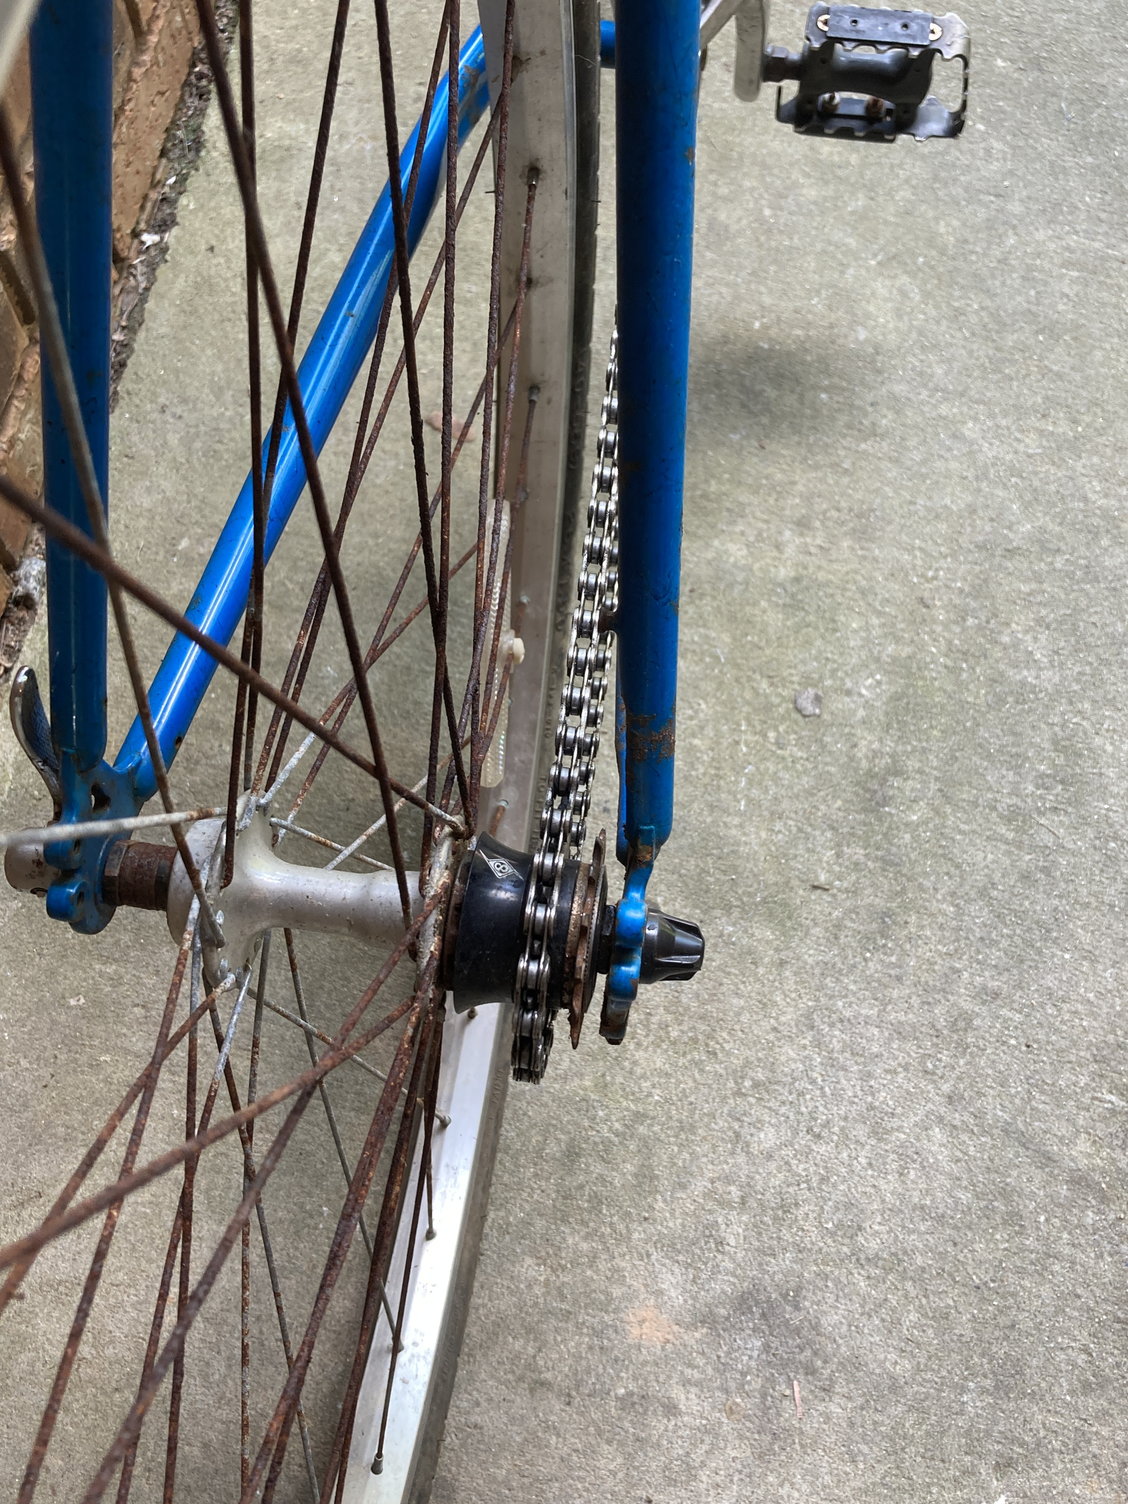
Obviously, if I got that wheel now, I wouldn't have made the same mistake. I didn't care much about the hub or the freewheel back then. I did want the rim (which was concave Weinmann, still have both of them) which I didn't use in the end. Now I still don't care that much about the hub shell (I'll do my best to save it though), but since all my current bicycles have freewheels, I do somewhat care about that freewheel body. So I hope I will manage to get it off.
The plan A for it is as follows:
1. Put the axle, bearing balls and cones back in (done)
2. Remove the outer shell of the freewheel by disassembling it. That didn't want to budge just yet (would be too easy, I expected it won't)
3. If the lockring doesn't budge, blast the thing with penetrating oil and let it soak (which is what has been happening for the past few days and I will still blast it a few times more and give it time)
4. Try again
5. If it doesn't go, use some heat and try again
I hope eventually I will be able to loosen that lockring and take the freewheel body apart. I'm lucky I actually have the correct tool but it won't be easy anyway. If I manage to get the outer shell of the freewheel body off, I'm hoping I will have enough clearance there to put the spokes in, lace the hub into some rim, put a tyre and inner tube on it and remove the rest of the freewheel body. I did that recently with a Shimano FH-6207 I got for postage because it had a freewheel body still on. That was actually easy-peasy and quick (no truing of the wheel, just tightening the spokes enough so the hub sits firm in the wheel). In case of this hub here, I'm not entirely sure whether I will have enough clearance for the spokes, but we'll see. Fingers crossed
If I don't have enough clearance, I still have the spokes from the front wheel and I'm not going to use them in any build. The idea is to chop off the spoke heads, bend the remaining bit of the J-bend a bit more into little hooks and see if I can lace it this way. Considering the wheel won't be subjected to forces anywhere near what it has to withstand whilst being ridden, this might do the trick and allow me to tighten the spokes just enough. I might try it even if I won't get the outer shell of the freewheel body off.
If it doesn't... Well, that will be end of the road for the hub shell. I will get the axle, bearing balls and cups out again. Try to save NDS cup in case it was ever useful for anything. If I get access to some bench vise, I might give it another go with the freewheel remover. If I don't, the hub shell will get sawn off just behind the DS flange, freewheel will get masked off where possible and filled with wax on the inside and the hub shell will get gradually submerged in caustic soda and resolved. Not the most elegant way out, but since the freewheel shell is made of steel, it should work. But let's hope it won't come to this.
This is the 6207 with similar problem (though without the outer freewheel shell already):

Likes For VintageSteelEU:
07-23-23, 03:15 PM
#6595
Senior Member

Join Date: Sep 2013
Location: Chicago
Posts: 1,086
Bikes: '72 Peugeot PX-10 '78 Motobecane Le Champion '83 Motobecane Grand Jubile '85 Trek 830 '88 Merckx Team ADR Corsa Extra
Mentioned: 5 Post(s)
Tagged: 0 Thread(s)
Quoted: 472 Post(s)
Liked 1,218 Times
in
655 Posts
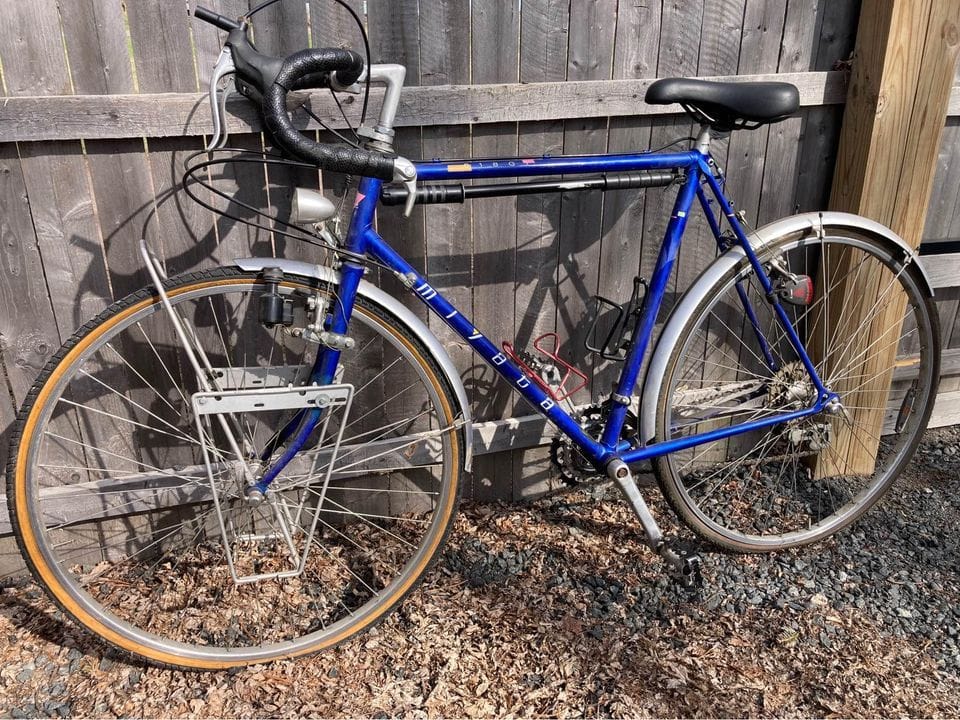
Just picked up this one for my partner. She loves Miyatas and I'm happy to help her scratch that itch. It's a late 80's 618GT and got it from the original owner's family. Been sitting in the basement for a couple decades, so it's going to need a complete overhaul. Looks to be in good condition. Seatpost ain't stuck, so that's a good start. Nice to have the lights and pump too. Looking forward to getting into it. These are the seller's photos.


__________________

Likes For Sedgemop:
07-23-23, 03:18 PM
#6596
Senior Member
Join Date: May 2021
Location: London
Posts: 564
Bikes: Motobecane C41, Matsu$hita Nashonaru
Mentioned: 7 Post(s)
Tagged: 0 Thread(s)
Quoted: 215 Post(s)
Liked 439 Times
in
255 Posts
Classic! When I worked in bike shops, people would ever so often bring in a rear hub with freewheel still attached. It was sad having to explain to them what they'd done.
One fix is to make some Z-bend spokes, which don't have heads on them, so they can be inserted into the flange. They can be made by snipping just the top cap off the J-bends, then adding another bend near the existing bend, with narrow-nose pliers. The space between the two bends should be set to match the flange thickness of the hub, but it doesn't need to be precise.
You can make, say 8 spokes in the time it took me to type this.
The exact length of the spokes also doesn't matter. I said 8, which is based on one-fourth of a 32-hole rim, but the exact number doesn't matter either.
Once you have the spokes made, lace a wheel only to the right flange and only pulling spokes, no crosses. Thread the nipples on to full engagement, and proceed to removing the freewheel the normal way. Once your 8 (or however many) spokes are pulled tight by the freewheel removal action, you'll have almost the same removing power as a fully built wheel, no crossing spokes needed.
It is possible to damage a rim by this method so you might want to choose a junk one or at least a heavy/strong one. You can't hurt the spokes though, you aren't strong enough.
Remember to hold the freewheel remover tightly to the freewheel with a QR skewer. Back off the tension on the skewer after the freewheel breaks loose. (Standard advice for almost any FW removal.)
If we charged a customer what this job should cost in normal labor rates, most people would opt to throw the hub and freewheel away. That's always an option; used vintage hubs and freewheels aren't expensive, like on ebay, leboncoin or swap meets for example. Extra karma points for keeping these out of the recycle bin though. Good luck!
07-23-23, 04:58 PM
#6597
Senior Member
Join Date: Mar 2007
Location: SF Bay Area, East bay
Posts: 7,770
Bikes: Miyata 618 GT, Marinoni, Kestral 200 2002 Trek 5200, KHS Flite, Koga Miyata, Schwinn Spitfire 5, Mondia Special, Univega Alpina, Miyata team Ti, Santa Cruz Highball
Mentioned: 54 Post(s)
Tagged: 0 Thread(s)
Quoted: 1639 Post(s)
Liked 2,744 Times
in
1,275 Posts
Just picked up this one for my partner. She loves Miyatas and I'm happy to help her scratch that itch. It's a late 80's 618GT and got it from the original owner's family. Been sitting in the basement for a couple decades, so it's going to need a complete overhaul. Looks to be in good condition. Seatpost ain't stuck, so that's a good start. Nice to have the lights and pump too. Looking forward to getting into it. These are the seller's photos.
 07-23-23, 06:24 PM
#6598
Senior Member
Join Date: Aug 2015
Location: Murrieta Ca.
Posts: 537
Bikes: Teledyne Titan, Bob Jackson Audax Club, Bob Jackson World Tour, AlAn Record Ergal, 3Rensho Katana.
Mentioned: 9 Post(s)
Tagged: 0 Thread(s)
Quoted: 215 Post(s)
Liked 623 Times
in
245 Posts
Just photos, it's been a good weekend.
 Untitled by nemosengineer, on Flickr
 Untitled by nemosengineer, on Flickr
 Untitled by nemosengineer, on Flickr
: Mike
Untitled by nemosengineer, on FlickrUntitled by nemosengineer, on FlickrUntitled by nemosengineer, on Flickr: Mike
__________________
Booyah Hubba-Hubba!!!
Booyah Hubba-Hubba!!!
Likes For Nemosengineer:
07-23-23, 07:00 PM
#6599
Senior Member
Join Date: Sep 2013
Location: Chicago
Posts: 1,086
Bikes: '72 Peugeot PX-10 '78 Motobecane Le Champion '83 Motobecane Grand Jubile '85 Trek 830 '88 Merckx Team ADR Corsa Extra
Mentioned: 5 Post(s)
Tagged: 0 Thread(s)
Quoted: 472 Post(s)
Liked 1,218 Times
in
655 Posts
Likes For Sedgemop:
Likes For jim dandy: