


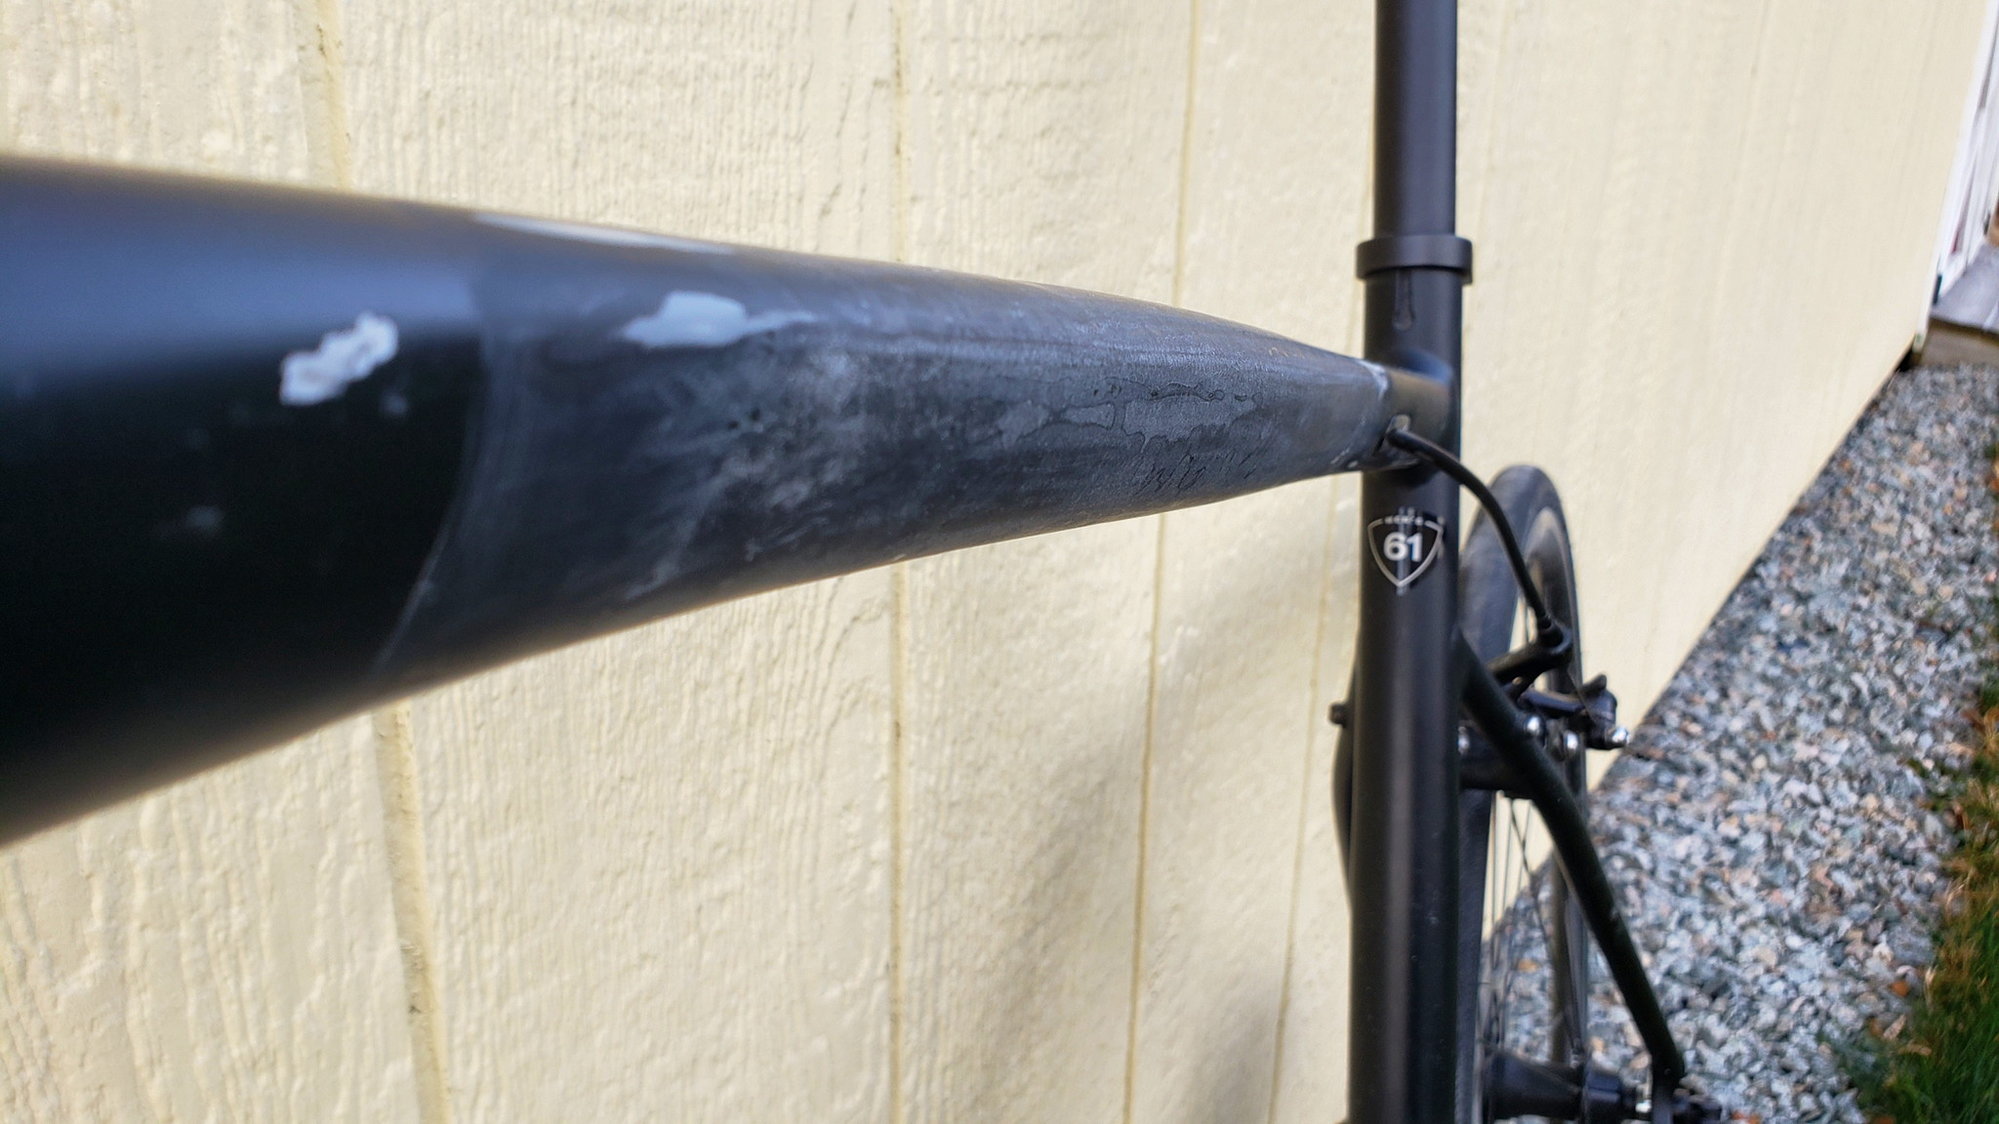
Big hole in top tube of new bike (Pics attached) aluminum repair with carbon fiber
 11-22-20, 08:02 AM
#51
Not a newbie to cycling
Join Date: Oct 2020
Posts: 911
Bikes: Omnium Cargo Ti with Rohloff, Bullitt Milk Plus, Dahon Smooth Hound
Mentioned: 2 Post(s)
Tagged: 0 Thread(s)
Quoted: 356 Post(s)
Liked 323 Times
in
199 Posts
Wow, that's pretty wild! I didn't realize even the z shaped part was carbon fiber also. Makes sense though, I guess anyone with a prosthetic leg would not want a solid metal foot to pull around. I'm assuming where you are on a bike forum that the prosthetic leg still allows you to cycle? If so that's awesome, good for you.
As far as heating the alloy frame, fortunately I wasn't sure about the level when I put it on the bike frame so I kept it pretty tame. Partly because the bike has internal cable routing through the top tube and I did not want to melt the plastic casing of the cable so I'm sure I did not get the frame heated to the point of damaging the aluminum but I'm glad you told me for future reference. The heat was largly because the repair was curing overnight in a pretty chilly garage (around 50 degrees or so) and I knew I did not want to leave it that cold. Basically it was at such a temperature that I could grab the top tube with my hand and it felt very warm but not hot.
Do you think a fully fiberglass repair would have been more appropriate here given the nature of compression on the top tube?
As for the leg and cycling. I could cycle with the leg before I could properly walk on it (it's about 5.5 years ago I was amputated). I can even play football (soccer) with it, climb a tree with my daughter, and so on. There is not much I can't do. Compared to my "bum" foot before that in the end had me in lots of pain everyday, had me take an hour every morning before I could fully put my weight on the leg, and had me walking with a cane and I still could only walk about 100 metres (300 ft) at a time before I needed a break due to foot pain, the amputation was the right choice and has given me increased mobility and a much better quality of life in general.
Yes, both the cow's foot and the stump holster is CF.
 11-22-20, 08:48 AM
#52

Senior Member
Join Date: Dec 2010
Location: St Cloud Fl.
Posts: 1,945
Bikes: Only my riders left...
Mentioned: 6 Post(s)
Tagged: 0 Thread(s)
Quoted: 350 Post(s)
Liked 782 Times
in
389 Posts
Little late...I might’ve somehow insinuated a rod or a stick or some longer than the damaged area object into the damaged area to halt the collapsing of that area...
11-22-20, 09:31 AM
#53
Go Ride!
Join Date: May 2019
Location: Minnesota�55346
Posts: 268
Bikes: Klein Quantum Pro, Klein Attitude, Azuki SS, Merckx AXM, Klein Quantum Race, Klein Quantum
Mentioned: 2 Post(s)
Tagged: 0 Thread(s)
Quoted: 109 Post(s)
Liked 155 Times
in
87 Posts
....not to drag this out, more of an exercise in mental engineering...but really there will be almost zero compression on that repair CF and fiberglass. The CF does not extend to the lugs/tube joints so the only compression would be from the surface bong to the aluminum and that will not occur to any great degree because (1) CF bonded with resin (and its really the resin here when you�re talking compression) will compress under a load to a greater degree than aluminum (aluminum is far more �brittle� under compression) so compression strain would be on the aluminum in this case and (2) if any compression did occur on the CF/resin vs the aluminum tube it is wrapped around, the bond is the �weakest link� and would shear well before any significant compression force was transferred from the aluminum tube to the CF wrap. No?
11-22-20, 09:33 AM
#54
Go Ride!
Join Date: May 2019
Location: Minnesota�55346
Posts: 268
Bikes: Klein Quantum Pro, Klein Attitude, Azuki SS, Merckx AXM, Klein Quantum Race, Klein Quantum
Mentioned: 2 Post(s)
Tagged: 0 Thread(s)
Quoted: 109 Post(s)
Liked 155 Times
in
87 Posts
Love the prosthetic carbon example, LOL, carbon fiber is such a game changer for so many things! I was waiting for you to say you had SPD clips epoxied into the base of the prosthetic 
Likes For Sonofamechanic:
11-22-20, 09:37 AM
#55
Not a newbie to cycling
Join Date: Oct 2020
Posts: 911
Bikes: Omnium Cargo Ti with Rohloff, Bullitt Milk Plus, Dahon Smooth Hound
Mentioned: 2 Post(s)
Tagged: 0 Thread(s)
Quoted: 356 Post(s)
Liked 323 Times
in
199 Posts
I don't know why you think the metal (alu, steel, titanium etc.) is poor under compression. Such materials are used and are good especially under compression.
But as you mention, I don't want to drag this out anymore either. I have shared my thoughts on the repair and the various production methods of CF (and how to make it strong enough for compression) with Yellowlab. I think I've said and shared enough for this topic.
But as you mention, I don't want to drag this out anymore either. I have shared my thoughts on the repair and the various production methods of CF (and how to make it strong enough for compression) with Yellowlab. I think I've said and shared enough for this topic.
11-22-20, 09:39 AM
#56
Not a newbie to cycling
Join Date: Oct 2020
Posts: 911
Bikes: Omnium Cargo Ti with Rohloff, Bullitt Milk Plus, Dahon Smooth Hound
Mentioned: 2 Post(s)
Tagged: 0 Thread(s)
Quoted: 356 Post(s)
Liked 323 Times
in
199 Posts
Nah, I prefer pinned platform pedals, as it allows me to wear footwear that is also good for walking with the prosthetic foot. If I raced or otherwise cycled where walking wasn't a thing, I would probably have glued a spd cleat onto the foot.
11-22-20, 10:37 AM
#57
With a mighty wind
Join Date: May 2015
Posts: 2,594
Mentioned: 13 Post(s)
Tagged: 0 Thread(s)
Quoted: 1088 Post(s)
Liked 862 Times
in
490 Posts
I like it.
Since it's only for a training bike, I probably would have gone nuts, like using the frame as lugs to replace the front triangle with bamboo. But I don't do anything until I do it over the top.
Since it's only for a training bike, I probably would have gone nuts, like using the frame as lugs to replace the front triangle with bamboo. But I don't do anything until I do it over the top.

Likes For rosefarts:
11-22-20, 03:05 PM
#58
Member
Thread Starter
For what it's worth, our LBS is open on Sundays so I just took the bike there to have it inspected. The owner and his mechanic both came out to look at it. I'd call them aquaintences at this point, they've done some work for me in the past. I showed them the pics and walked them through the process of fixing it. I told them I was going to paint the top tube with a clear coat to keep an eye on it and they said don't bother, just go ahead and paint it black. They said they didn't see any way that repair was going to let go and that the top tube is much stronger now than when it was new. They said aside from catastrophe they didn't see any way that I would be able to break it by just riding it. They both knew of companies that repair frames and apparently used to have an employee that repaired frames for them and they said they felt this repair was pretty solid. Anecdotal for everyone reading this but for me personally, especially after the diversity and range of opinions here, it was nice to have someone look at it in person that has some experience with this type of thing and give a thumbs up. Anyway, I just wanted to share that with you all. Thanks again to everyone that took the time to contribute with constructive opinions / criticism, ideas, etc. I learned a lot and it is greatly appreciated!
Last edited by Yellowlab; 11-22-20 at 04:41 PM.
Likes For Yellowlab:
11-22-20, 05:53 PM
#59
Senior Member
Join Date: Jul 2019
Location: In the south but from North
Posts: 700
Bikes: Turner 5-Spot Burner converted; IBIS Ripley, Specialized Crave, Tommasini Sintesi, Cinelli Superstar, Tommasini X-Fire Gravel
Mentioned: 0 Post(s)
Tagged: 0 Thread(s)
Quoted: 406 Post(s)
Liked 389 Times
in
219 Posts
Part 2
Step nine: Sand first carbon treatment to desired look. I tried to keep as much of the original shape as possible without sanding off enough to compromise the structural integrity of the carbon fiber.
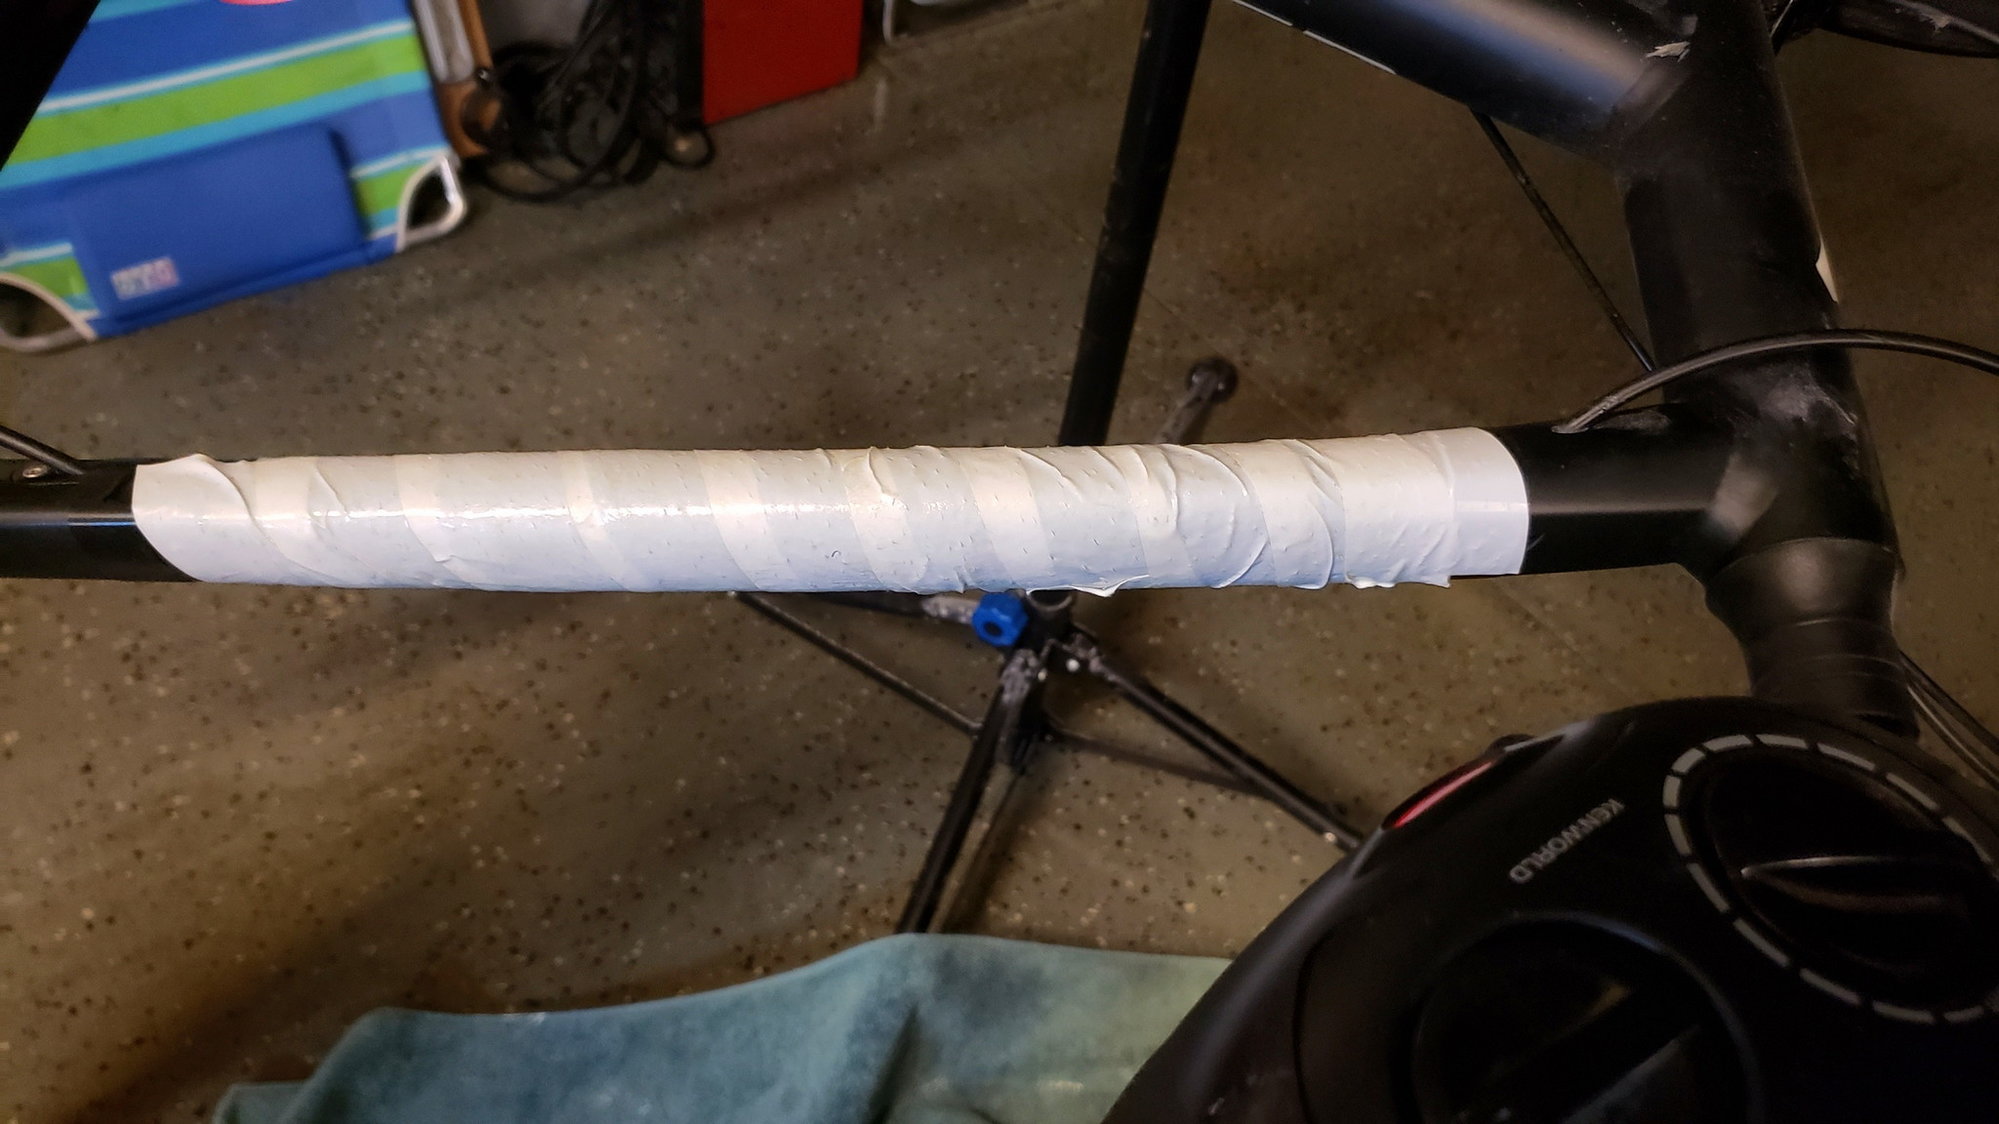
Step ten: Wash, rinse, repeat steps seven through nine for second carbon fiber wrap. The first wrap was about 6 inches wide, this second one was about 11 inches wide, again with thinner edges and getting thicker towards the middle to maintain a tapered look. The first 6 inch wrap was 4 layers of carbon. The second wrap was three layers as I ran out of fiber but there are a total of seven layers directly over the damaged section which should be plenty.
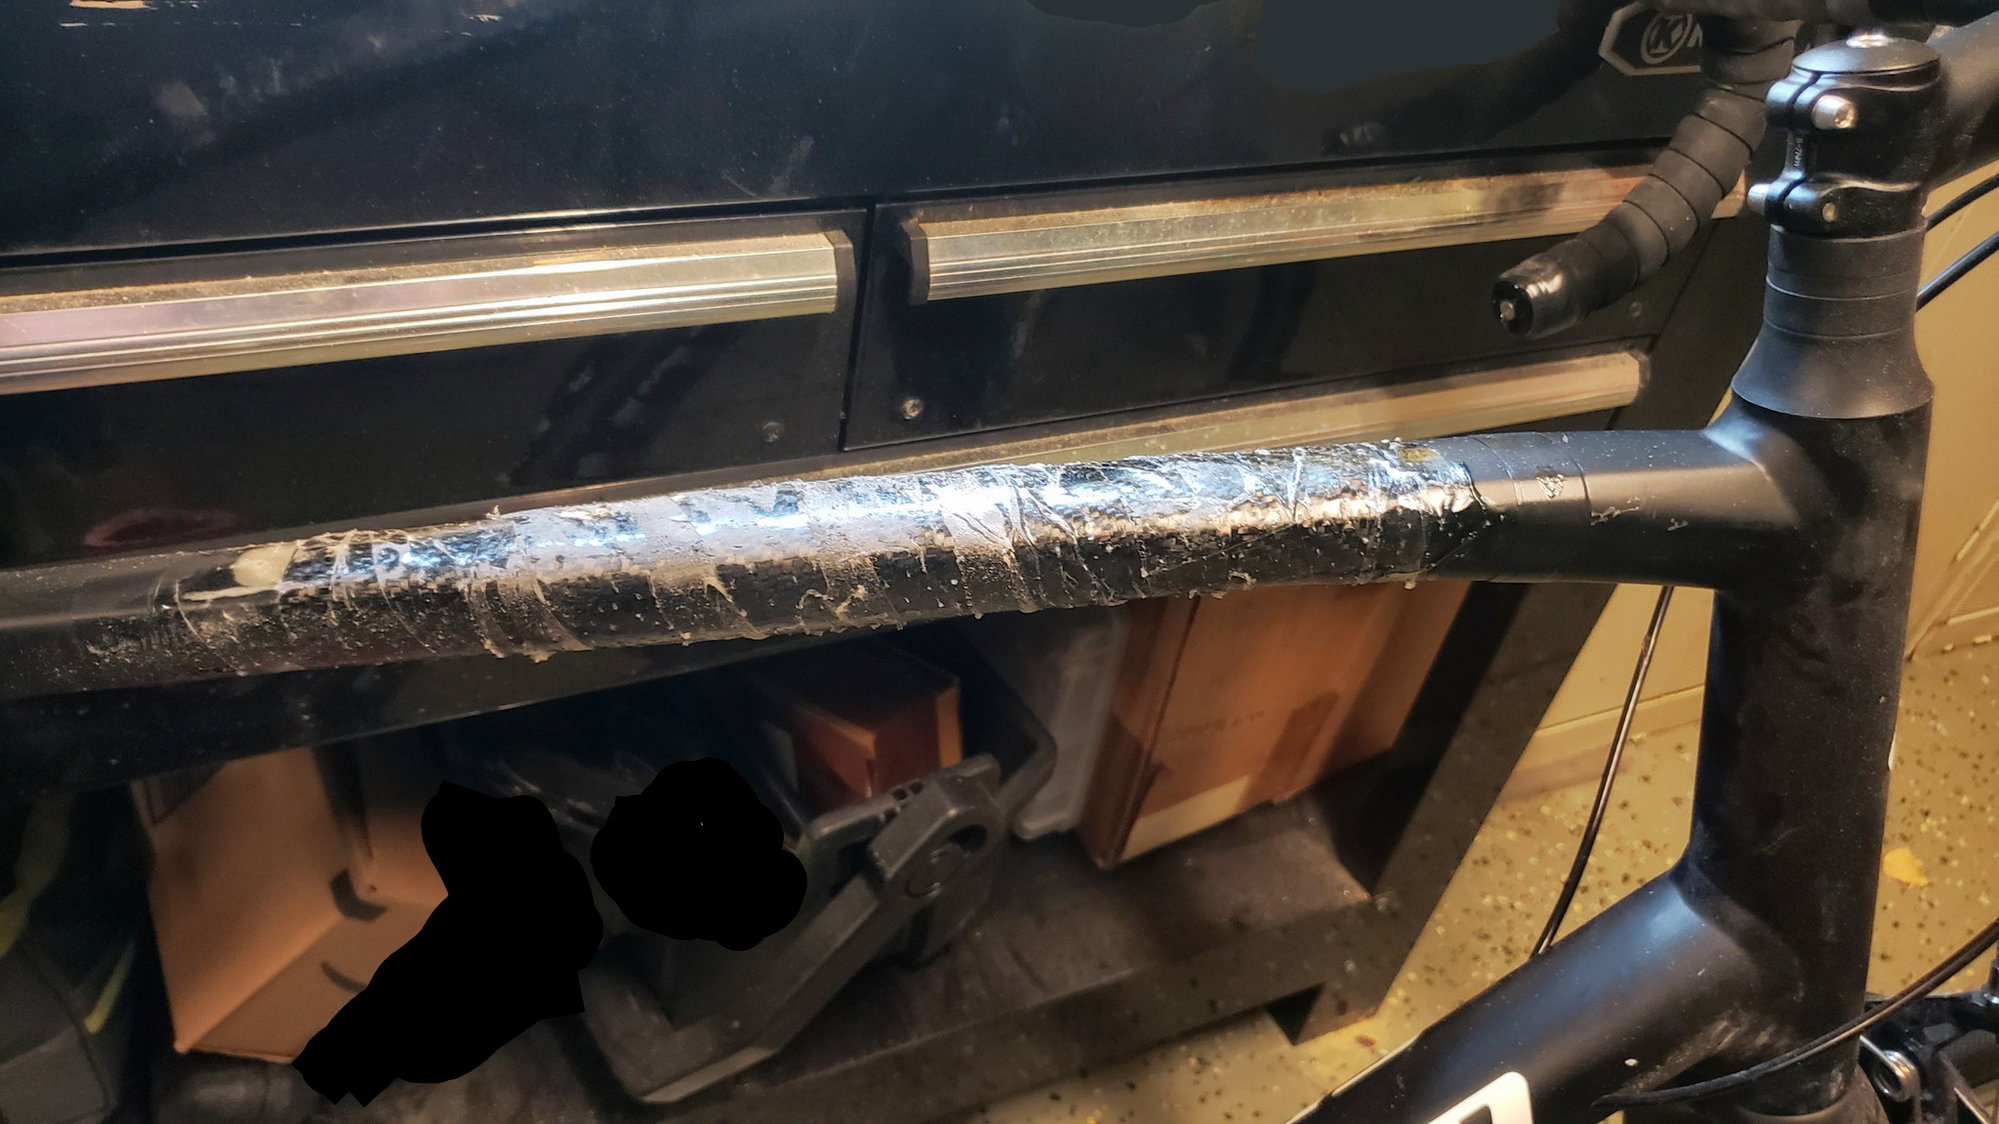
Step eleven: Again, wait a full day and remove tape to sand to desired shape. At this point once I had the basic shape, there was still a couple of "pits" here and there and I wanted a nicer finish so I took the time to apply two more coats of just epoxy during the next two days, over the final sanded layer of carbon fiber.
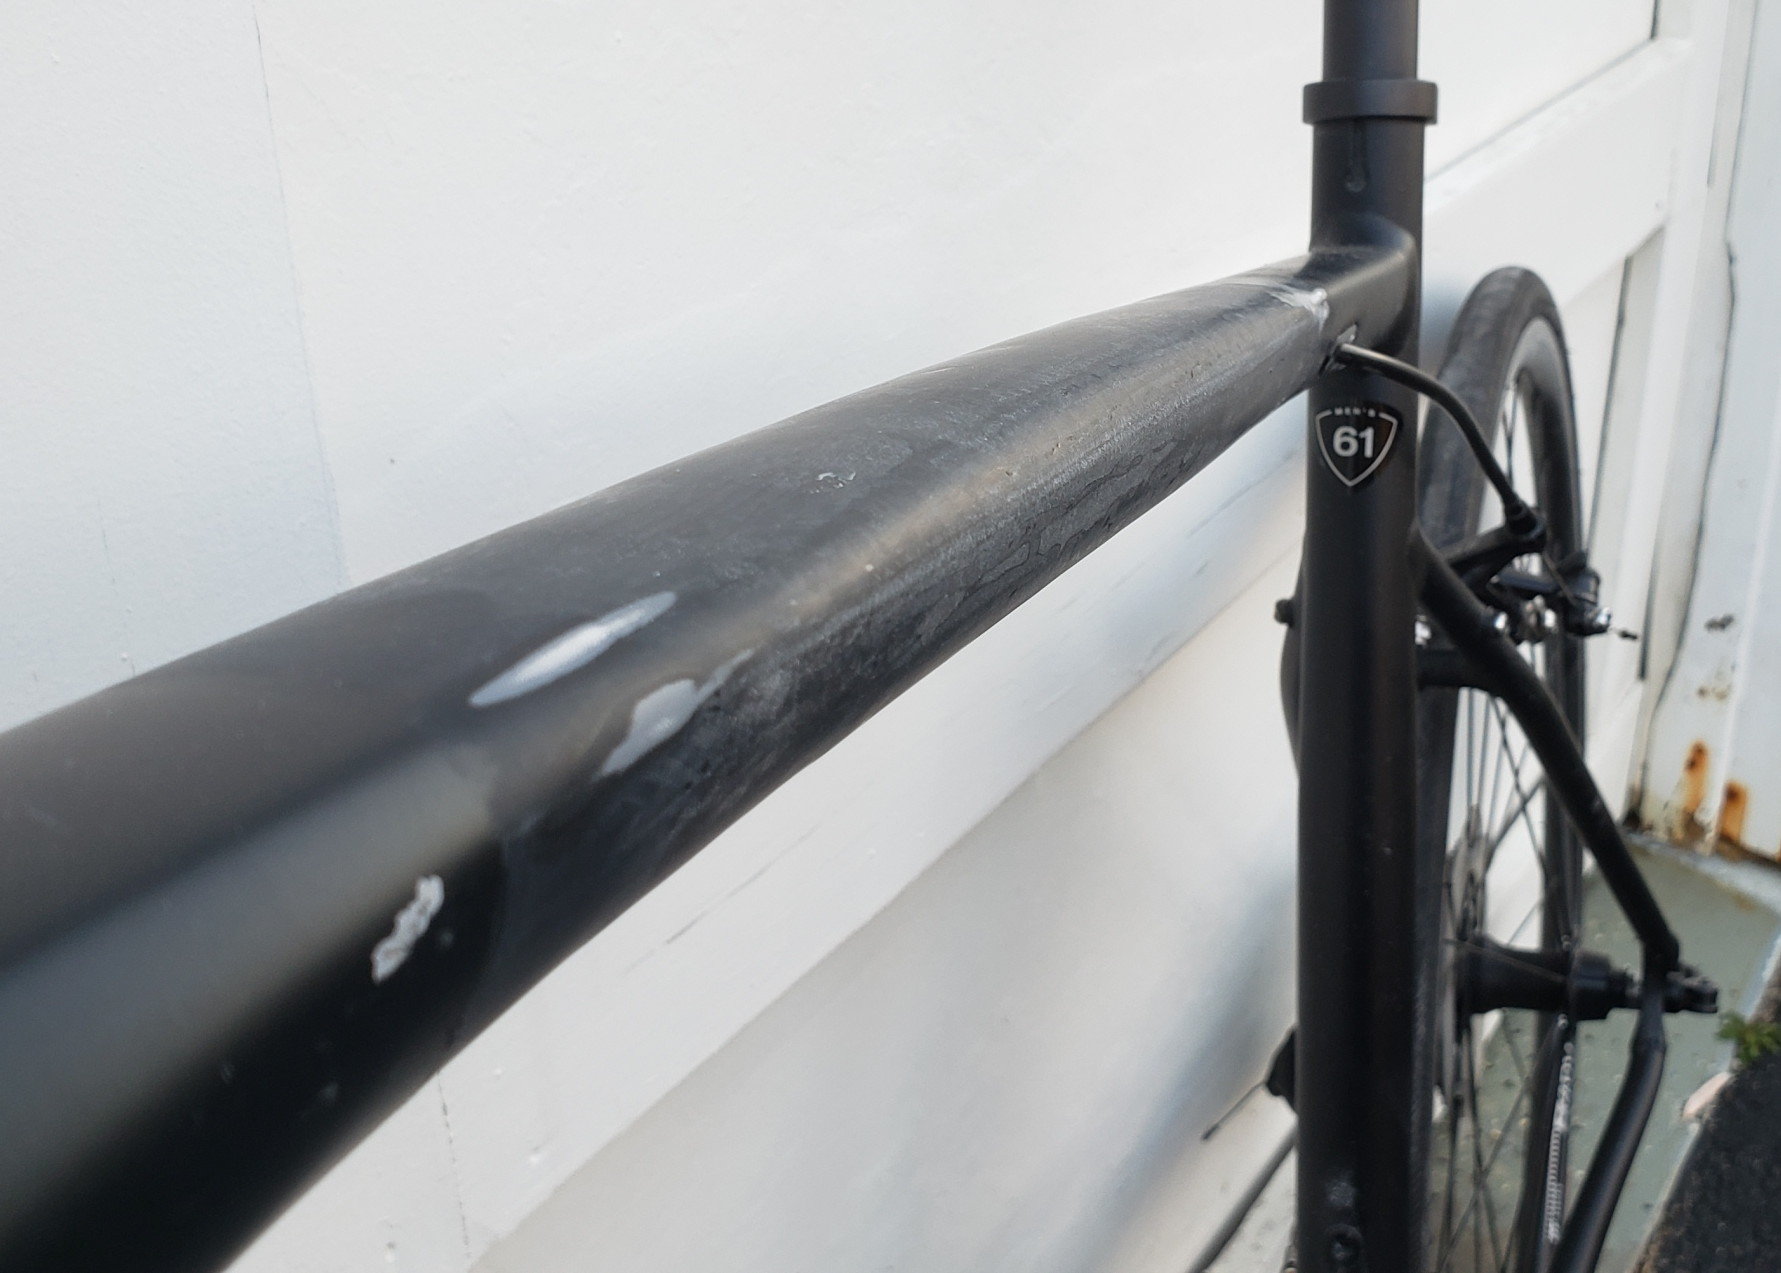
Once the final two layers of epoxy cured I sanded the final product down 400 grit sandpaper. If I was going for an actual carbon fiber look I'd probably get down to wet sanding with 800 grit but I'm just going to paint it clear so I can continue to have a visual on the repair and see if there are any potential issues popping up with it in the future.
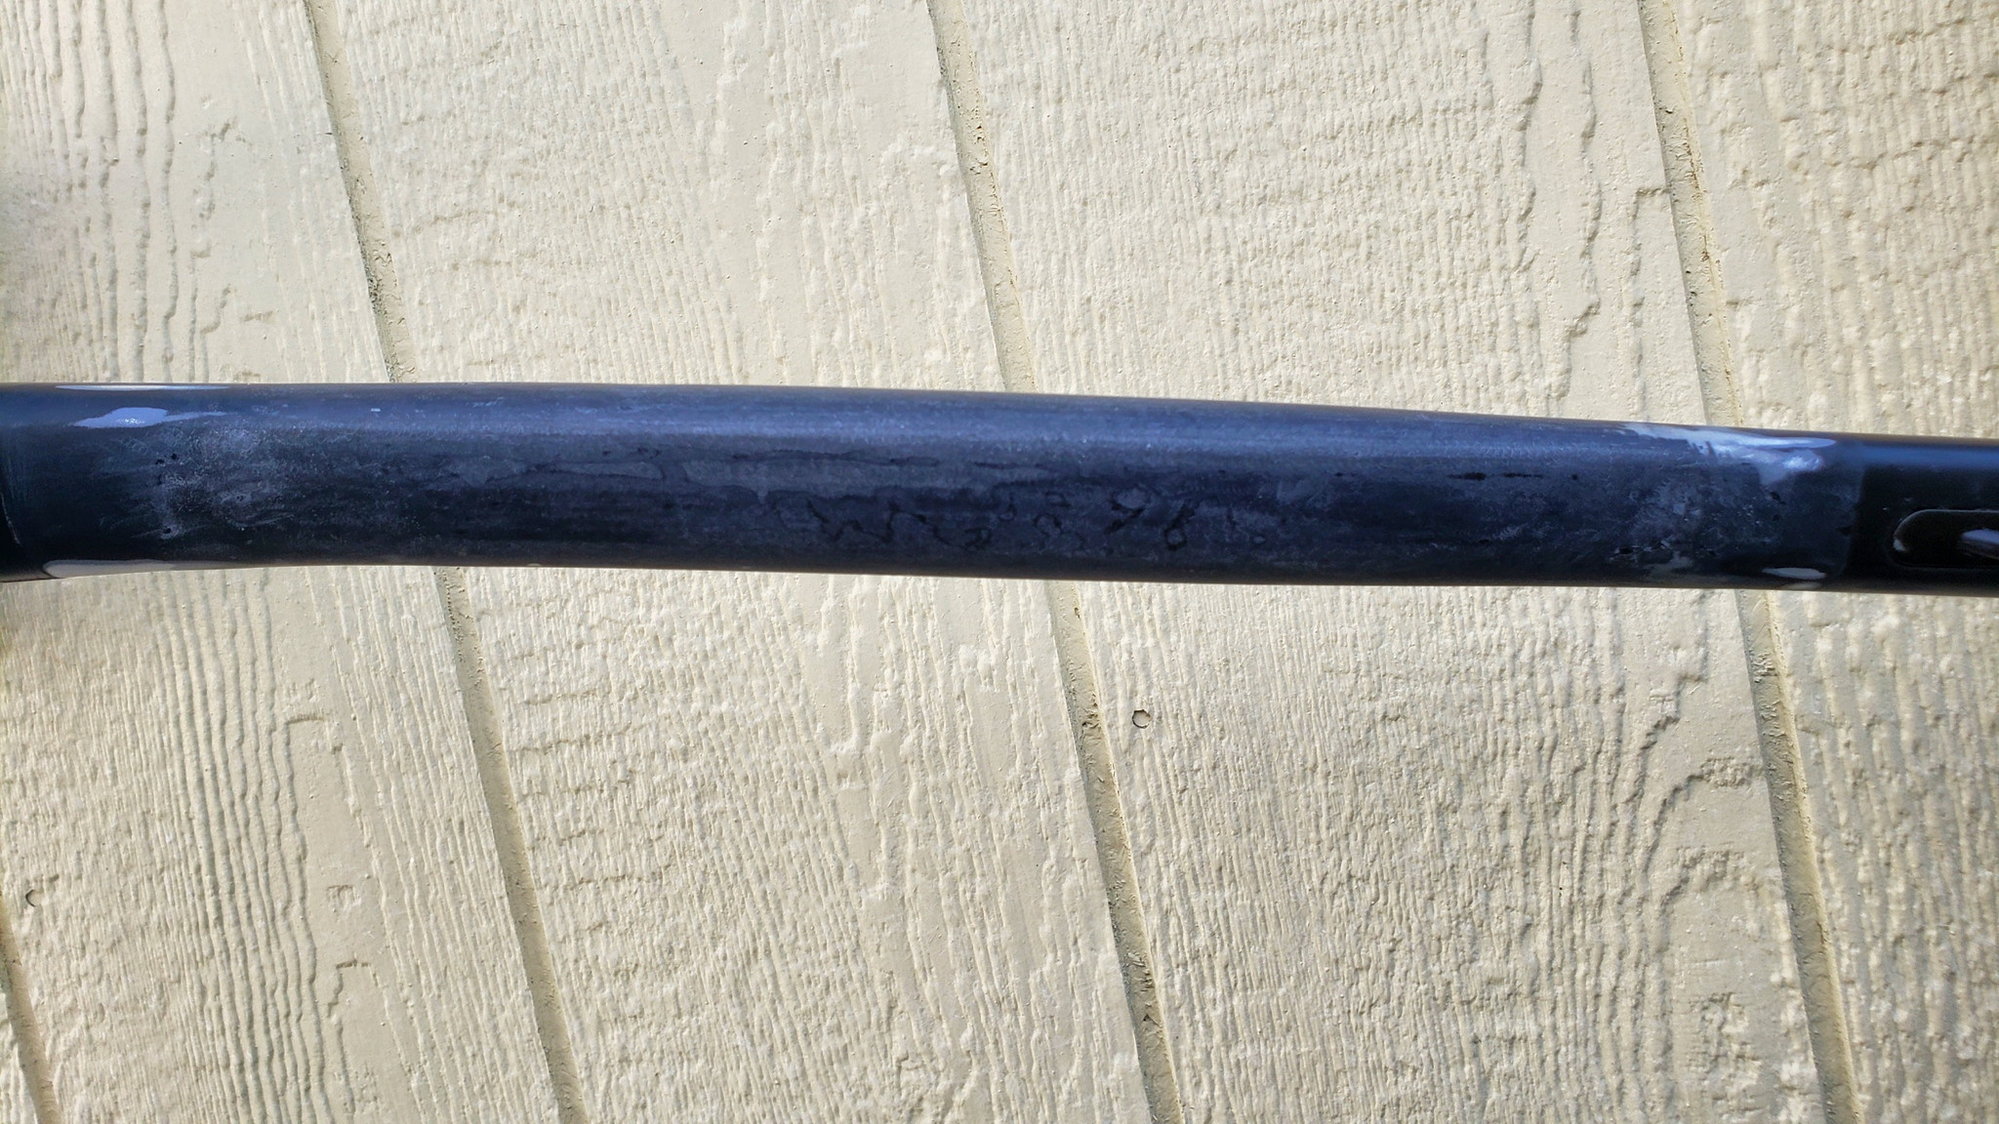
Nothing can be done to prevent the fact that seven layers of carbon fiber and a layer of fiberglass will inevitably add a visible bulge to the fixed area that can be noticed upon closer inspection.
So that's it. The total cost of materials for the fix was about $70. It's mostly just a lot of time and elbow grease but I think it was worth it to not scrap the frame. There are still a couple of tiny pits that aren't perfect. I may or may not fill these with some bondo before painting. I wasn't originally going for a perfect aesthetic looks so much as I wanted to ensure a competent structural fix that will keep the bike safe to ride for years to come.
Let me know what you think or if anyone here has any experience with this type of fix and did it hold up.
Thank you!
Cliff
Step nine: Sand first carbon treatment to desired look. I tried to keep as much of the original shape as possible without sanding off enough to compromise the structural integrity of the carbon fiber.
Step ten: Wash, rinse, repeat steps seven through nine for second carbon fiber wrap. The first wrap was about 6 inches wide, this second one was about 11 inches wide, again with thinner edges and getting thicker towards the middle to maintain a tapered look. The first 6 inch wrap was 4 layers of carbon. The second wrap was three layers as I ran out of fiber but there are a total of seven layers directly over the damaged section which should be plenty.
Step eleven: Again, wait a full day and remove tape to sand to desired shape. At this point once I had the basic shape, there was still a couple of "pits" here and there and I wanted a nicer finish so I took the time to apply two more coats of just epoxy during the next two days, over the final sanded layer of carbon fiber.
Once the final two layers of epoxy cured I sanded the final product down 400 grit sandpaper. If I was going for an actual carbon fiber look I'd probably get down to wet sanding with 800 grit but I'm just going to paint it clear so I can continue to have a visual on the repair and see if there are any potential issues popping up with it in the future.
Nothing can be done to prevent the fact that seven layers of carbon fiber and a layer of fiberglass will inevitably add a visible bulge to the fixed area that can be noticed upon closer inspection.
So that's it. The total cost of materials for the fix was about $70. It's mostly just a lot of time and elbow grease but I think it was worth it to not scrap the frame. There are still a couple of tiny pits that aren't perfect. I may or may not fill these with some bondo before painting. I wasn't originally going for a perfect aesthetic looks so much as I wanted to ensure a competent structural fix that will keep the bike safe to ride for years to come.
Let me know what you think or if anyone here has any experience with this type of fix and did it hold up.
Thank you!
Cliff
Likes For vespasianus:
11-23-20, 12:42 PM
#60
Junior Member
"Sad day, backing tractor into shed and bucket swung out just enough to do this. "
You certainly did an impressive repair.
Did you file an insurance claim for this accident? It would seem that your homeowners/renter insurance would have covered this accident although you would have to have pay for your deductible.
You certainly did an impressive repair.
Did you file an insurance claim for this accident? It would seem that your homeowners/renter insurance would have covered this accident although you would have to have pay for your deductible.
11-23-20, 12:54 PM
#61
Senior Member

Join Date: Mar 2011
Posts: 3,095
Mentioned: 7 Post(s)
Tagged: 0 Thread(s)
Quoted: 1034 Post(s)
Liked 1,292 Times
in
744 Posts
I took the bike on a 30 mile ride today with a buddy and absolutely hammered on it. I kept a watchful eye on the repaired top tube but I wasn't gentle. I'm not entirely positive what exactly would translate to the most stress on the top tube but I put all I had into uphill bursts, hilly, winding, undulating roads with some pretty quick downhill slopes. Some rougher patches with larger cracks, potholes, etc. We even did some gravel. (We're in New England, so.....) The repaired top tube took everything I could throw at it. The bike felt great, even confidence inspiring. During and after the ride, while inspecting the repair, there were no visible signs of separation or peeling or cracking or anything. I know this was just a small, first initial test and the real test will be what shape it is in after 1000 miles but for now I feel pretty good that it's going to safely hold for some time to come.
Also, as an added safety precaution I decided that rather than paint the top tube black, I'm just going to spray it clear for now. That will enable me to still be able to visually inspect it as time goes by so I can see any early signs of failure. The clear will also still protect it from the elements so win-win. Thanks again to everyone for sharing your opinions and thanks also to those of you with experience working with these materials taking a minute to give me some confidence in the integrity of the repair. I really appreciate the feedback I got!
Thank you!
Cliff
 11-23-20, 02:06 PM
#62
Senior Member
Gives me a NDI (non-destructive inspection) nightmare. Stress tested for some roads that will put ten years worth of wear vibrations and violent hard hits in a mile? Down hill at 45+mph? Unseen catastrophic total stress failure continues building? Frames are designed and built for specific stress loads.
11-23-20, 06:31 PM
#63
Member
Thread Starter
"Sad day, backing tractor into shed and bucket swung out just enough to do this. "
You certainly did an impressive repair.
Did you file an insurance claim for this accident? It would seem that your homeowners/renter insurance would have covered this accident although you would have to have pay for your deductible.
You certainly did an impressive repair.
Did you file an insurance claim for this accident? It would seem that your homeowners/renter insurance would have covered this accident although you would have to have pay for your deductible.
11-23-20, 06:36 PM
#64
Member
Thread Starter
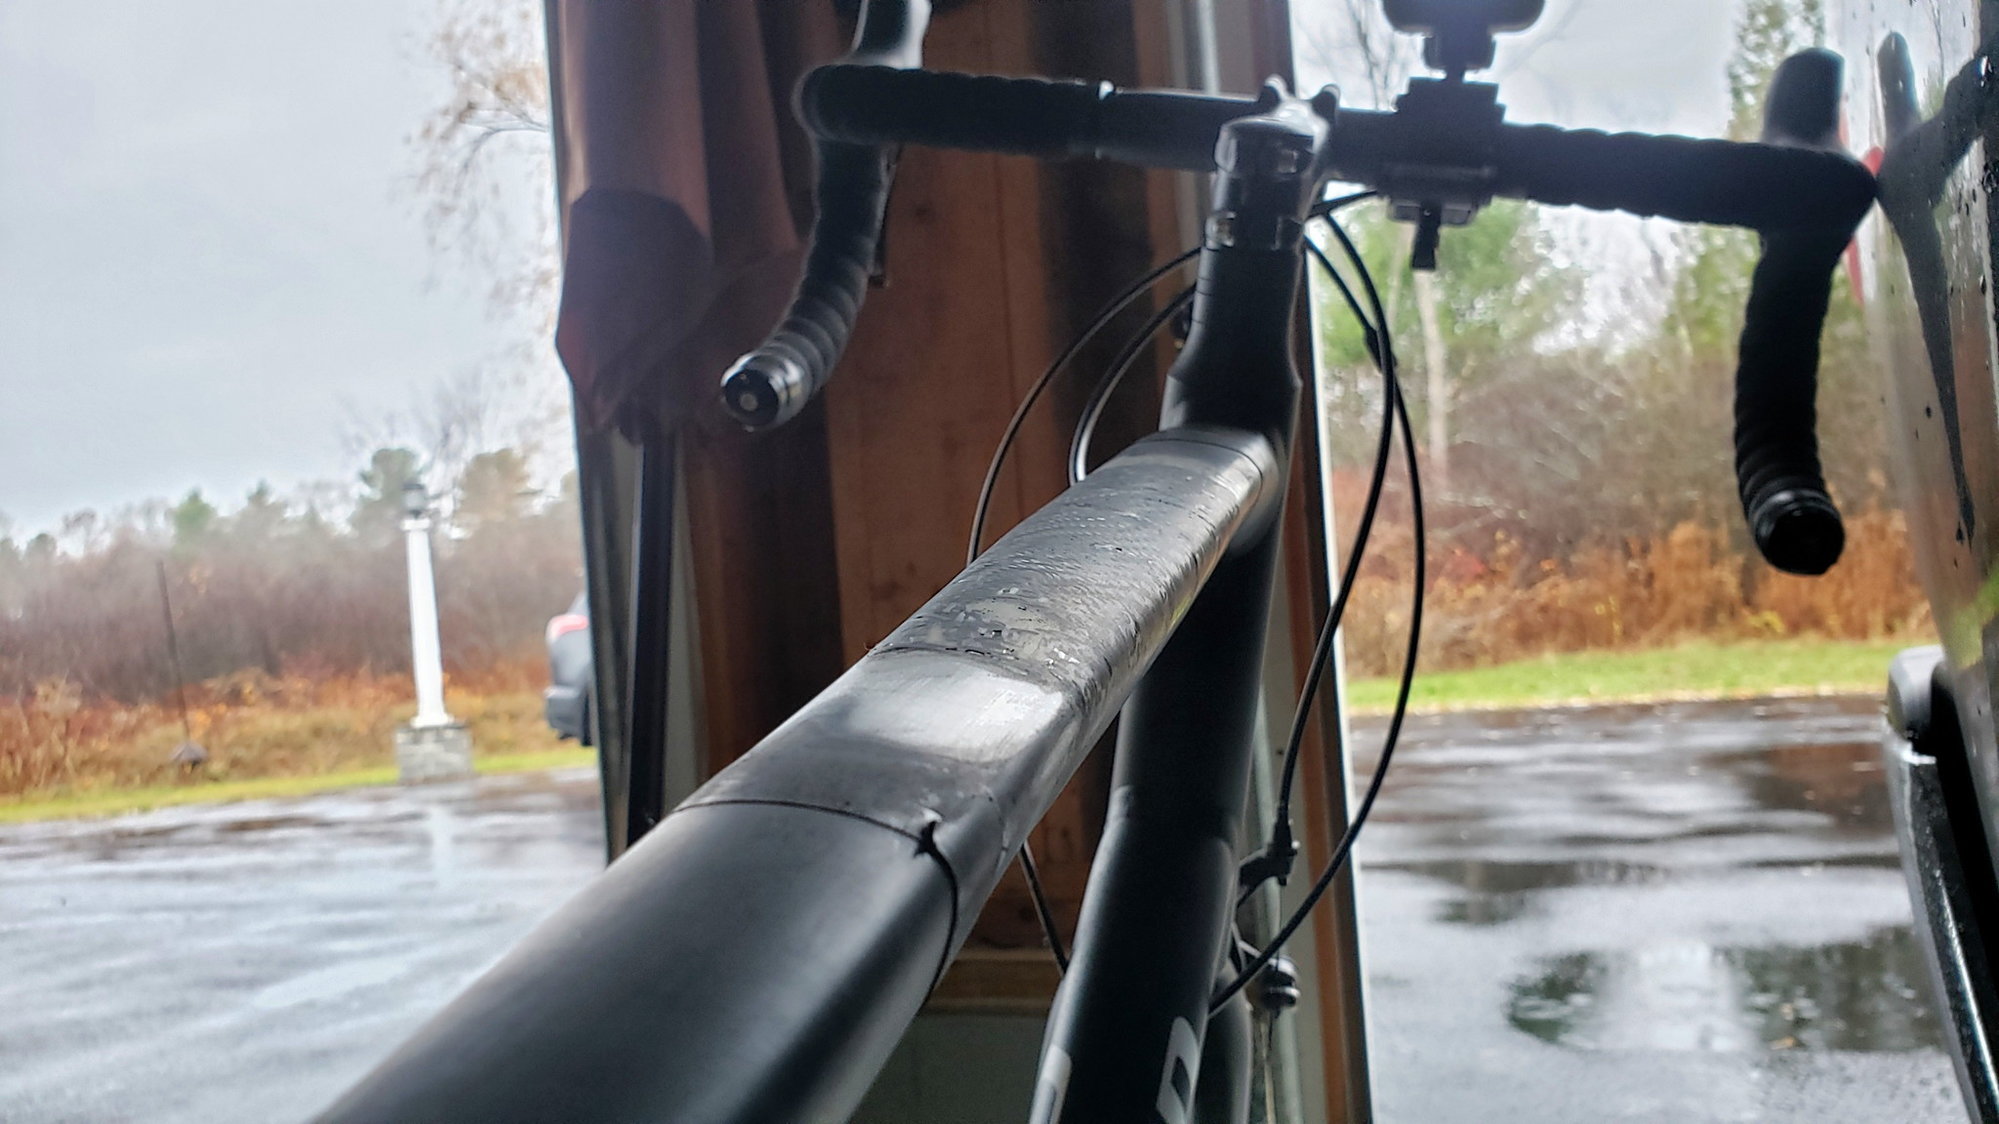
 The bike is normally on a rack up on the wall in the shed where we keep the tractor. That day, I had not put it up on the rack and it was leaned up against the wall. I was backing the tractor in and looking behind me and I cut the wheel a little to adjust and the bucket which sits way out front swung wide just enough, and was at the exact perfect level to punch that hole.
Likes For Yellowlab:
11-23-20, 06:44 PM
#65
Member
Thread Starter
Gives me a NDI (non-destructive inspection) nightmare. Stress tested for some roads that will put ten years worth of wear vibrations and violent hard hits in a mile? Down hill at 45+mph? Unseen catastrophic total stress failure continues building? Frames are designed and built for specific stress loads.
Likes For Yellowlab:
11-23-20, 07:09 PM
#66
With a mighty wind
Join Date: May 2015
Posts: 2,594
Mentioned: 13 Post(s)
Tagged: 0 Thread(s)
Quoted: 1088 Post(s)
Liked 862 Times
in
490 Posts
Gives me a NDI (non-destructive inspection) nightmare. Stress tested for some roads that will put ten years worth of wear vibrations and violent hard hits in a mile? Down hill at 45+mph? Unseen catastrophic total stress failure continues building? Frames are designed and built for specific stress loads.
The biggest concern is mental. How does he feel about his repair at speed?
I have a welded extension on a fork of mine, it's great but I got a speed wobble my first day after the welding. Maybe because of the huge descents and high winds that day. Not sure. It's in my mind though and eating at me.
Same with the OP. He needs to decide whether he wants to fly into a switchback at 50mph on that. It can probably take it but does he want to? From his posts though, I don't think that's in the future of this bike.
Likes For rosefarts:
11-23-20, 08:07 PM
#67
Member
Thread Starter
We like to think that there's a calculation for everything on the bike. Really though, it's nowhere nearly as precise as that. It's not a space shuttle.
The biggest concern is mental. How does he feel about his repair at speed?
I have a welded extension on a fork of mine, it's great but I got a speed wobble my first day after the welding. Maybe because of the huge descents and high winds that day. Not sure. It's in my mind though and eating at me.
Same with the OP. He needs to decide whether he wants to fly into a switchback at 50mph on that. It can probably take it but does he want to? From his posts though, I don't think that's in the future of this bike.
So while my skill set isn't such that I would be able to fly into a switchback at 50mph, (not even close
) I am now very much interested in putting some miles on it to give it the old litmus test so to speak. It wion't see much more riding this season though as it's getting pretty chilly here so it will be going on the trainer very soon until next spring. I'm hoping to come back in a year and give an update after at least 1000 miles or so. As far as the mental aspect, I have about 50 miles on it since being repaired and between the reassurance I got from the bike shop and how it feels on the road I feel pretty confident. I've had it up to 40 mps for what that's worth but the bike felt great so I had no anxiety or apprehension about it. Looking forward to more time in the saddle with it.
I think I like the bike better now that I have so much time invested into it. I'm kind of proud of the repair in a way.
11-23-20, 11:06 PM
#68
Senior Member
Join Date: Mar 2011
Posts: 3,095
Mentioned: 7 Post(s)
Tagged: 0 Thread(s)
Quoted: 1034 Post(s)
Liked 1,292 Times
in
744 Posts
Yeah, it's a good one The bike is normally on a rack up on the wall in the shed where we keep the tractor. That day, I had not put it up on the rack and it was leaned up against the wall. I was backing the tractor in and looking behind me and I cut the wheel a little to adjust and the bucket which sits way out front swung wide just enough, and was at the exact perfect level to punch that hole.
The bike is normally on a rack up on the wall in the shed where we keep the tractor. That day, I had not put it up on the rack and it was leaned up against the wall. I was backing the tractor in and looking behind me and I cut the wheel a little to adjust and the bucket which sits way out front swung wide just enough, and was at the exact perfect level to punch that hole.  Ugh. Well, glad you were able to fix it.
Likes For phughes:
Likes For Thomas15:
11-24-20, 11:04 AM
#70
Stevoo
I will pass on making comments on the repair as I think that has been covered well enough.
However, it is Impressive that after sustaining that kind of damage the frame is still straight and rides well?
Not sure if the OP performed any frame alignment checks but I don't recall reading in the thread that they noticed any changes in ride or handling. Amazing.
I once hit a bike top tube w a car and it was bent and not rideable.
Likes For stevoo:
11-24-20, 05:12 PM
#71
Member
Thread Starter
I will pass on making comments on the repair as I think that has been covered well enough.
However, it is Impressive that after sustaining that kind of damage the frame is still straight and rides well?
Not sure if the OP performed any frame alignment checks but I don't recall reading in the thread that they noticed any changes in ride or handling. Amazing.
I once hit a bike top tube w a car and it was bent and not rideable.
However, it is Impressive that after sustaining that kind of damage the frame is still straight and rides well?
Not sure if the OP performed any frame alignment checks but I don't recall reading in the thread that they noticed any changes in ride or handling. Amazing.
I once hit a bike top tube w a car and it was bent and not rideable.
Great point though, thanks for brining it up.
11-24-20, 06:19 PM
#72
Senior Member
OP: That is quite a severe injury to the top tube. If it is at all buckled in terms of straightness, you're done. However assuming the far side of the tube is still straight, the repair you did looks very sound. Concerns:
- The repair area has to be good in both tension, and compression. Compression forces will buckle a thin section (wall thickness). But I think using the number of layers you did, and also filling the hole first with a rigid compound and carefully leveling, I think will hold up.
- Adhesion of the carbon fiber is critical. But I think you may have done a good prep on the base surface.
- Stress concentrations at the end of the repair are critical. But I think your tapering of the repair will mitigate that.
- Ideally, the layers of carbon fiber will alternate in weave direction by 45 degree intervals: first layer, threads going 12/6 and 3/9 o'clock to the long axis of the tube, next layer 1:30/7:30 and 4:30/10:30, then third layer back to the first orientation, if that makes sense. Fibers lined up with the tube long axis give you primary bending strength. Fibers oriented at 45 degrees to the long axis give you torsional strength. If you didn't do this, under torsion, the fibers will try to slip with respect to each other, but if the resin and bond have good strength to resist that, it may be OK. Just keep an eye on it.
EDIT: Don't ever sell, give away, or even junk the bike without getting an acknowledgement in writing from whoever gets the bike that they are aware of the repair and accept full liability for themselves and anyone else. Covering with paint will conceal the repair and you can run into liability because under reasonable expectations and even an professional inspection, the repair will not be detectable. Junk the frame when you are done with it by cutting it up, and let anyone know that if you die, that is what to do with the frame. Perhaps even placard the repair area.
Last edited by Duragrouch; 11-24-20 at 06:25 PM.
11-24-20, 06:36 PM
#73
Member
Thread Starter
OP: That is quite a severe injury to the top tube. If it is at all buckled in terms of straightness, you're done. However assuming the far side of the tube is still straight, the repair you did looks very sound. Concerns:
- The repair area has to be good in both tension, and compression. Compression forces will buckle a thin section (wall thickness). But I think using the number of layers you did, and also filling the hole first with a rigid compound and carefully leveling, I think will hold up.
- Adhesion of the carbon fiber is critical. But I think you may have done a good prep on the base surface.
- Stress concentrations at the end of the repair are critical. But I think your tapering of the repair will mitigate that.
- Ideally, the layers of carbon fiber will alternate in weave direction by 45 degree intervals: first layer, threads going 12/6 and 3/9 o'clock to the long axis of the tube, next layer 1:30/7:30 and 4:30/10:30, then third layer back to the first orientation, if that makes sense. Fibers lined up with the tube long axis give you primary bending strength. Fibers oriented at 45 degrees to the long axis give you torsional strength. If you didn't do this, under torsion, the fibers will try to slip with respect to each other, but if the resin and bond have good strength to resist that, it may be OK. Just keep an eye on it.
EDIT: Don't ever sell, give away, or even junk the bike without getting an acknowledgement in writing from whoever gets the bike that they are aware of the repair and accept full liability for themselves and anyone else. Covering with paint will conceal the repair and you can run into liability because under reasonable expectations and even an professional inspection, the repair will not be detectable. Junk the frame when you are done with it by cutting it up, and let anyone know that if you die, that is what to do with the frame. Perhaps even placard the repair area.
- The repair area has to be good in both tension, and compression. Compression forces will buckle a thin section (wall thickness). But I think using the number of layers you did, and also filling the hole first with a rigid compound and carefully leveling, I think will hold up.
- Adhesion of the carbon fiber is critical. But I think you may have done a good prep on the base surface.
- Stress concentrations at the end of the repair are critical. But I think your tapering of the repair will mitigate that.
- Ideally, the layers of carbon fiber will alternate in weave direction by 45 degree intervals: first layer, threads going 12/6 and 3/9 o'clock to the long axis of the tube, next layer 1:30/7:30 and 4:30/10:30, then third layer back to the first orientation, if that makes sense. Fibers lined up with the tube long axis give you primary bending strength. Fibers oriented at 45 degrees to the long axis give you torsional strength. If you didn't do this, under torsion, the fibers will try to slip with respect to each other, but if the resin and bond have good strength to resist that, it may be OK. Just keep an eye on it.
EDIT: Don't ever sell, give away, or even junk the bike without getting an acknowledgement in writing from whoever gets the bike that they are aware of the repair and accept full liability for themselves and anyone else. Covering with paint will conceal the repair and you can run into liability because under reasonable expectations and even an professional inspection, the repair will not be detectable. Junk the frame when you are done with it by cutting it up, and let anyone know that if you die, that is what to do with the frame. Perhaps even placard the repair area.
I hate that we live in a world where people are generally so sketchy that you aren't the first person in this thread that has felt compelled to leave a disclaimer that the frame should not be passed on. You did it in a humorous way and clearly have the best of intentions and I can appreciate it, but still.....that there are enough dicks out there that it is something that even has to be mentioned is disheartening. The frame shall go to the grave with me.
11-24-20, 07:11 PM
#74
Senior Member
Duragrouch, thank you, I think you are right, the number of layers alone wiill likely be of sufficient strenght to overcome most any aspects of the repair that would not be considered optimal.
I hate that we live in a world where people are generally so sketchy that you aren't the first person in this thread that has felt compelled to leave a disclaimer that the frame should not be passed on. You did it in a humorous way and clearly have the best of intentions and I can appreciate it, but still.....that there are enough dicks out there that it is something that even has to be mentioned is disheartening. The frame shall go to the grave with me.
I hate that we live in a world where people are generally so sketchy that you aren't the first person in this thread that has felt compelled to leave a disclaimer that the frame should not be passed on. You did it in a humorous way and clearly have the best of intentions and I can appreciate it, but still.....that there are enough dicks out there that it is something that even has to be mentioned is disheartening. The frame shall go to the grave with me.
11-24-20, 08:11 PM
#75
Member
Thread Starter
I usually endeavor to be clever and witty, but in this case, not. If you suddenly die, most everything you own will get yard or estate sold, and the buyer will be none the wiser. Example: I once removed one safety feature of something I owned that interfered with function and the item had multiple redundant safety features and the others did not interfere so were left intact. I always had a warning placard attached to the item. When I later sold the item to a buyer that understood and appreciated this, I explained this carefully, and had the buyer sign a document acknowledging this and assuming all liability going forward, and had it notarized.

Likes For Yellowlab: