


Paramount build
 05-19-21, 04:47 PM
#26

Senior Member
Thread Starter
Join Date: May 2019
Location: Bloomington, IN
Posts: 2,951
Bikes: Paramount, Faggin, Ochsner, Ciocc, Basso
Mentioned: 117 Post(s)
Tagged: 0 Thread(s)
Quoted: 1304 Post(s)
Liked 1,912 Times
in
1,142 Posts
Ok Merziac, here goes with the wheel build process I use...
There are a few preliminary steps needed before the build can start. I use the UBI (United Bicycle Institute) spoke length calculator. If you do a search for spoke length calculator it should be one of the first three to show up. It asks for a few measurements and they are pretty easy to get. Here are some pics to get past this part of the build process.
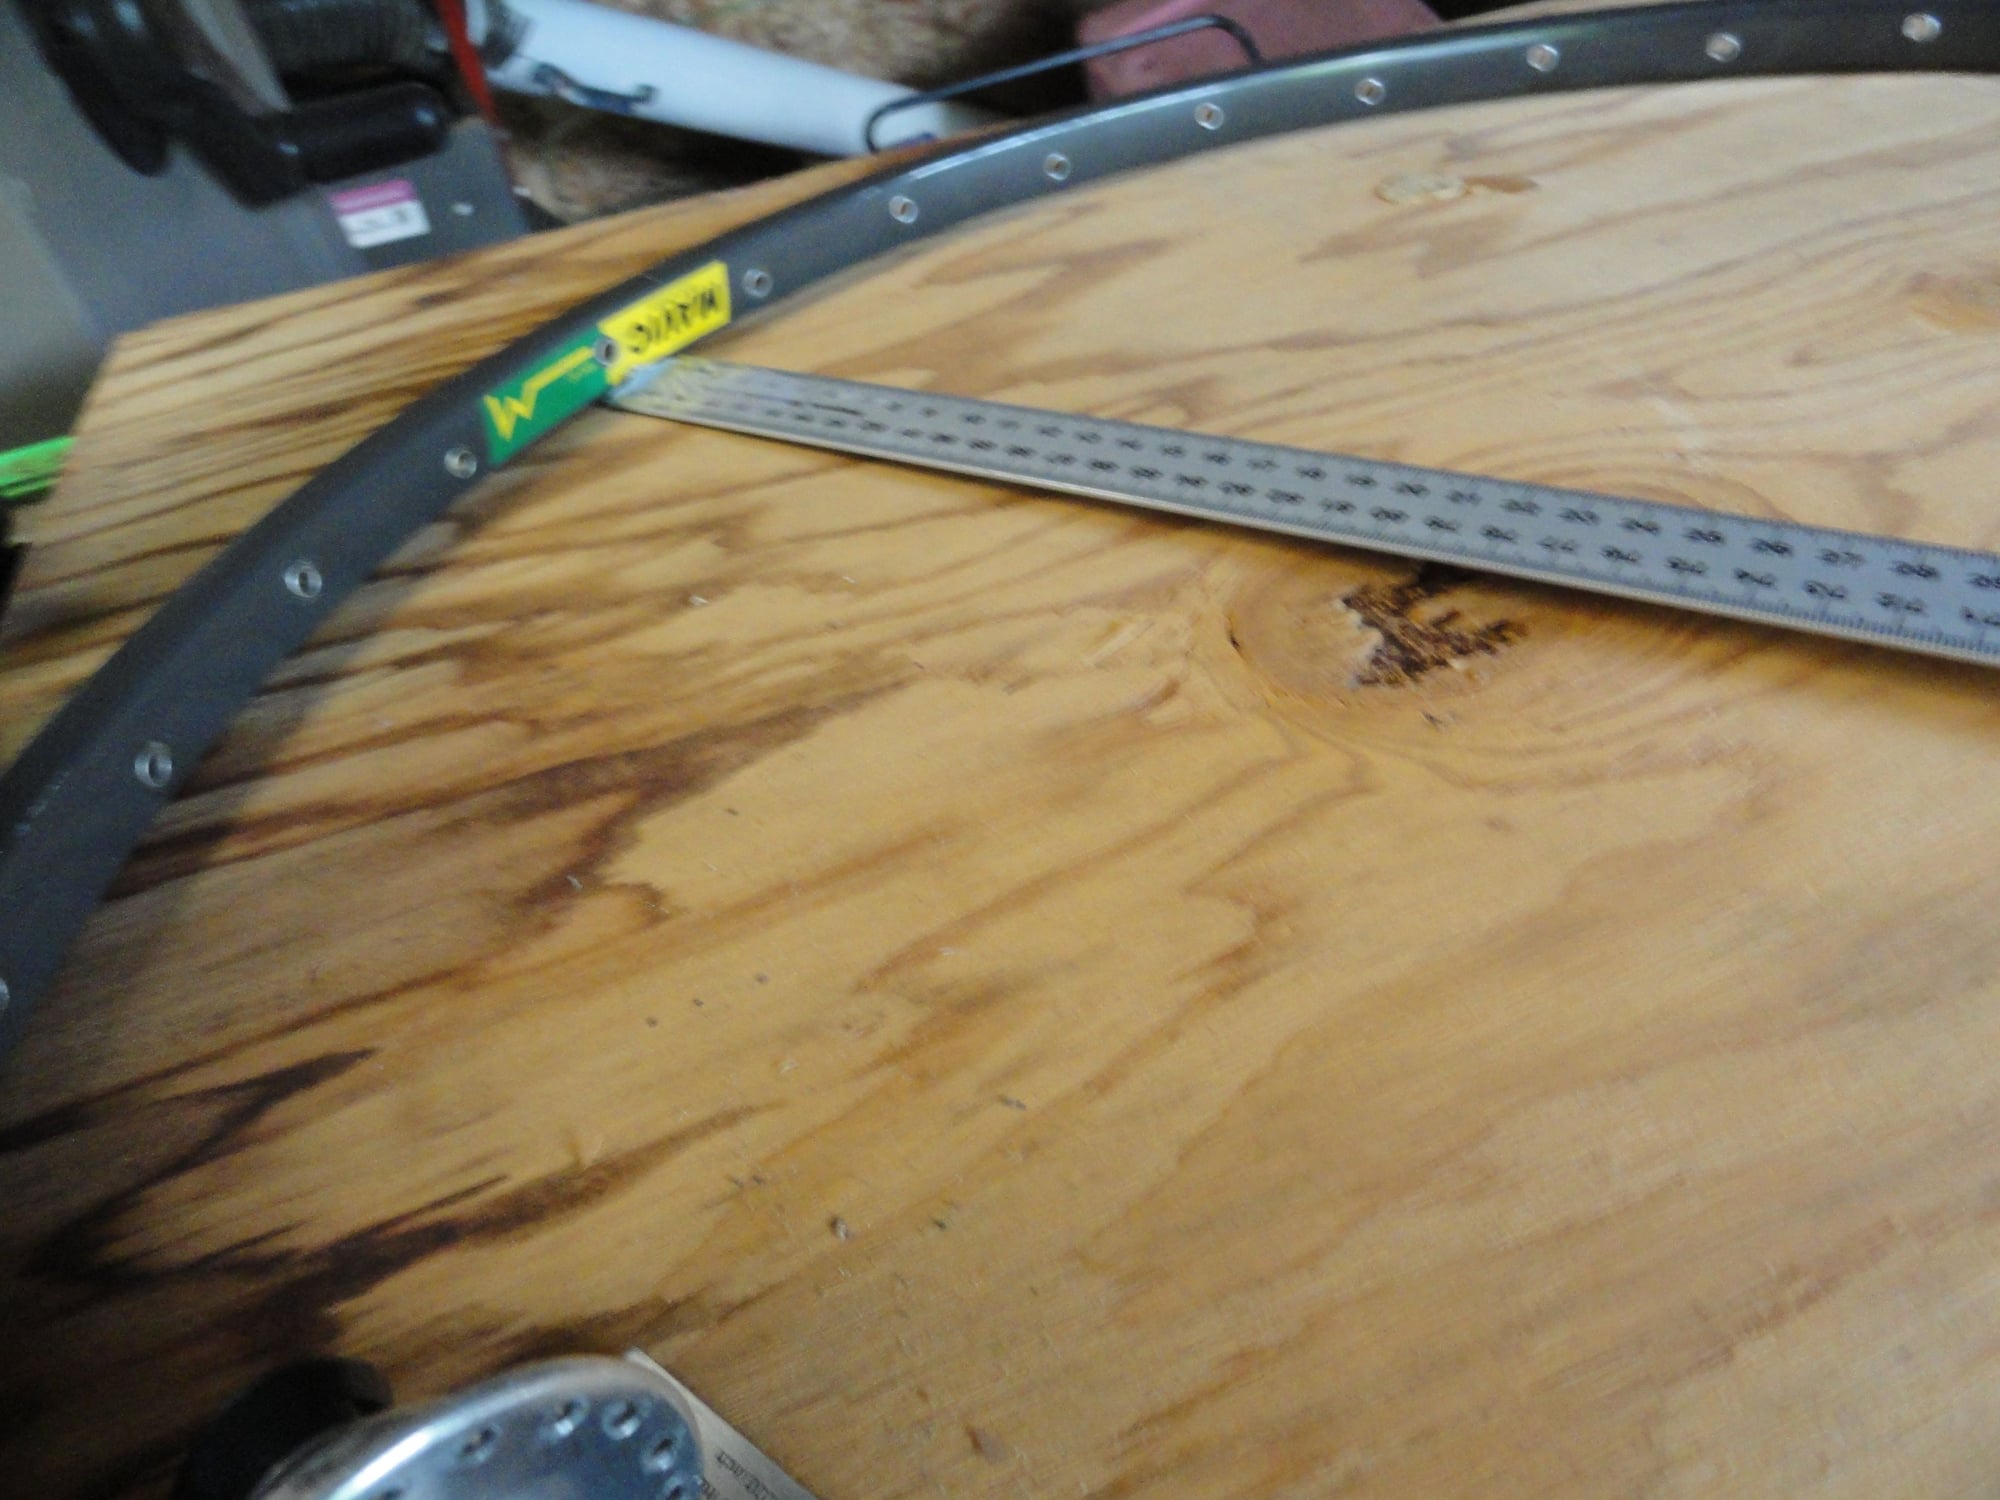
I use a metal ruler that measures in cm/mm.
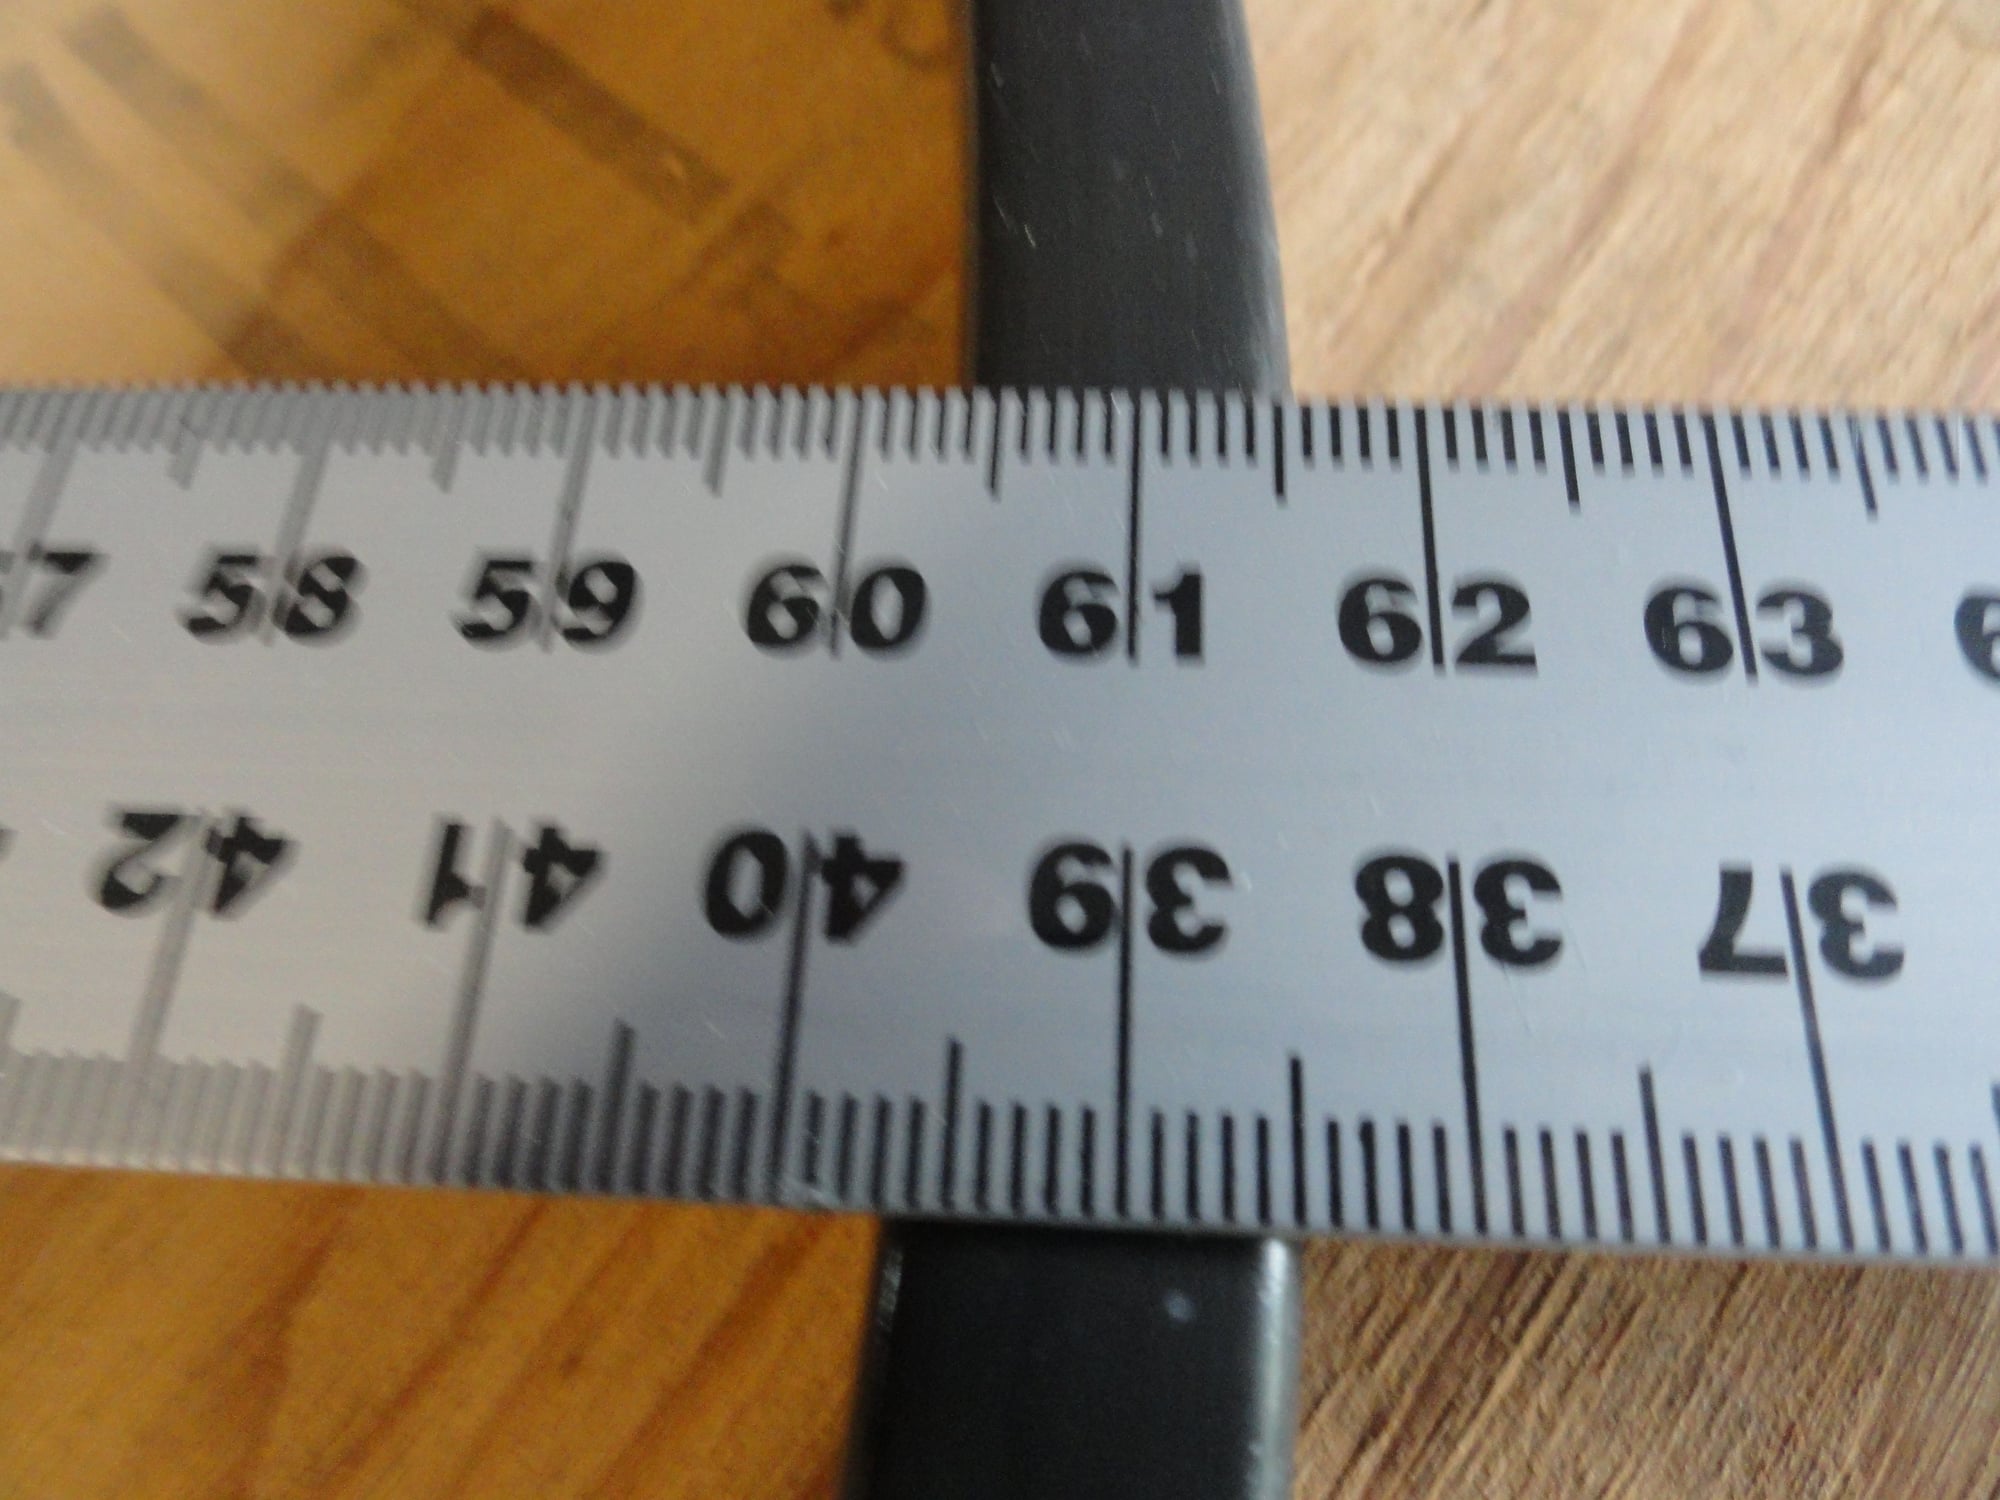
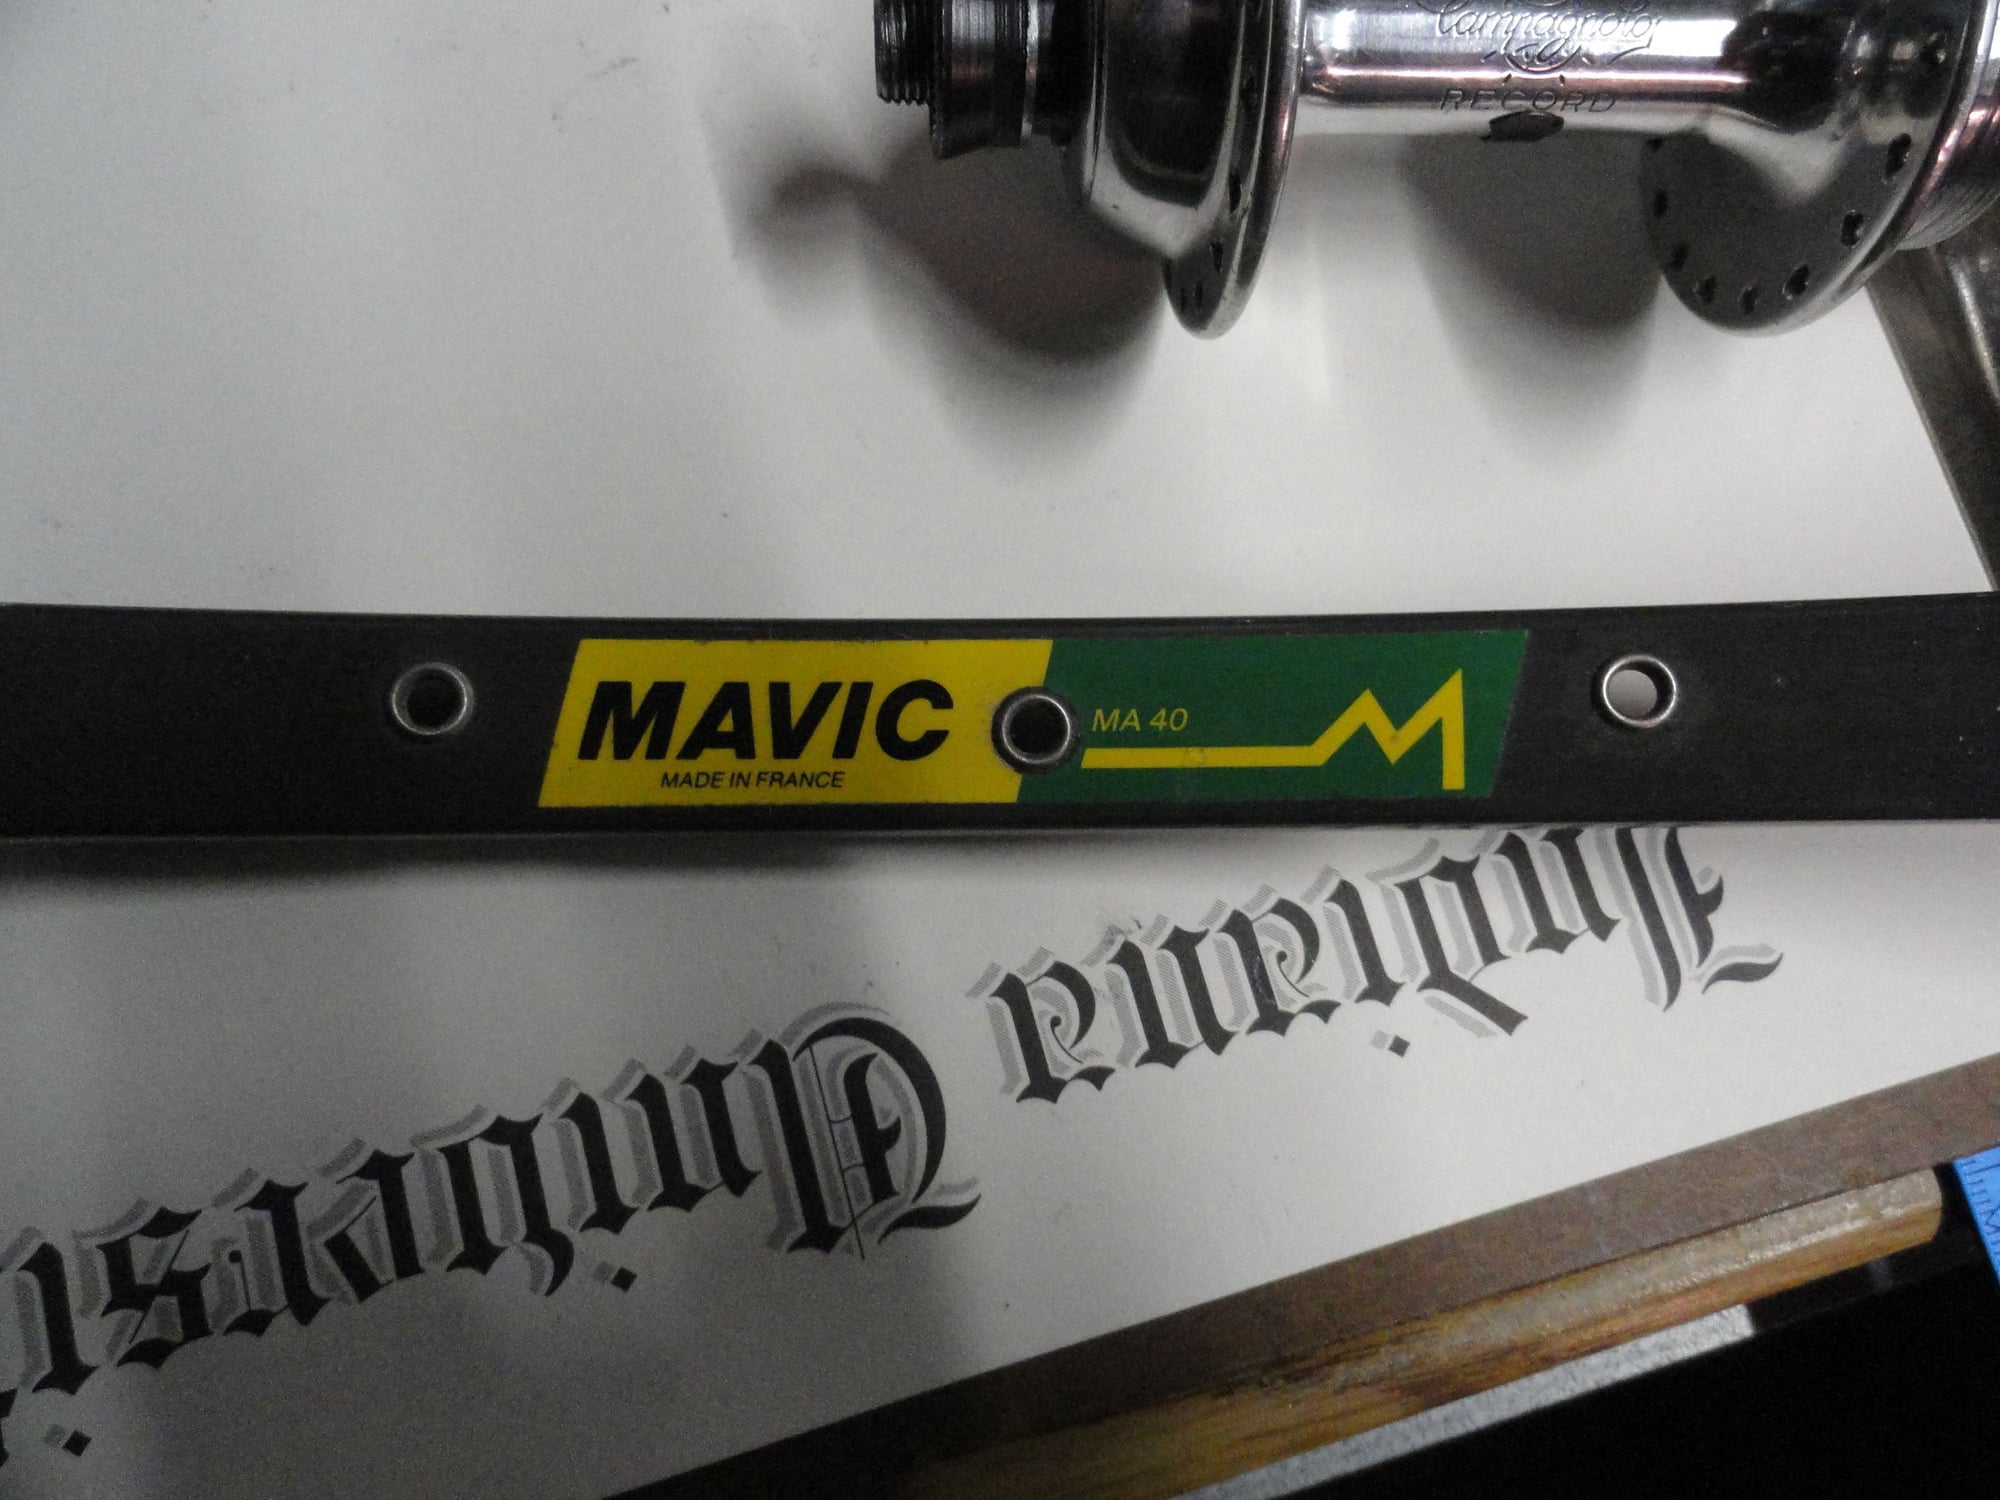
I read 604 for the inner rim diameter but I have to add two mm to account for the spokes seated in the SS inserts in the rim. Thus ERD is 606.
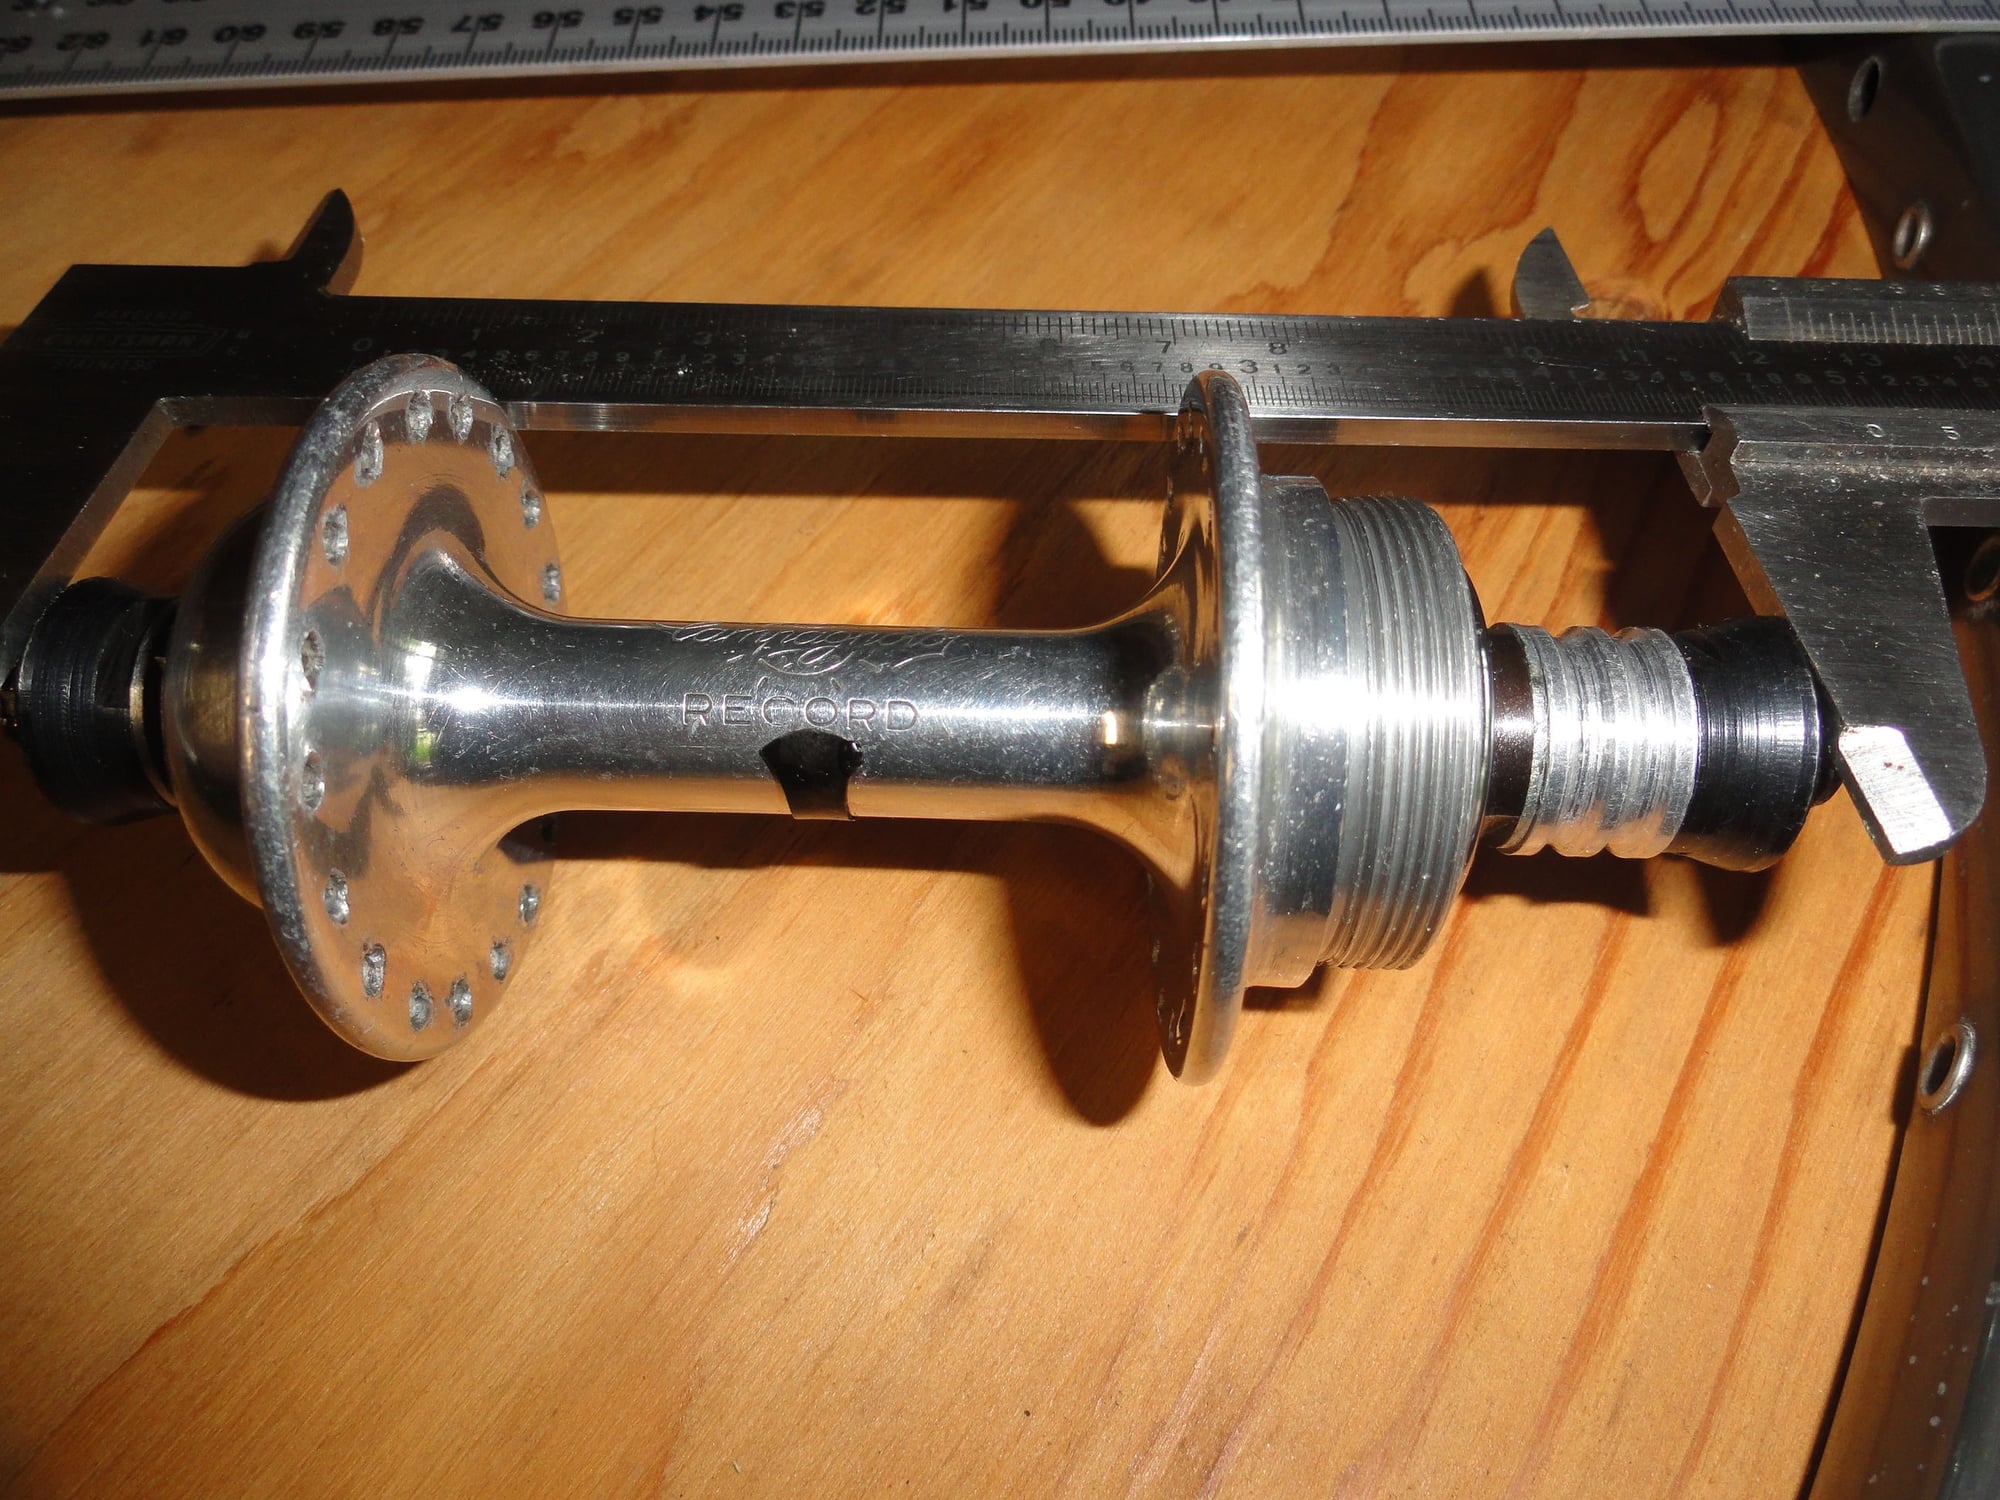
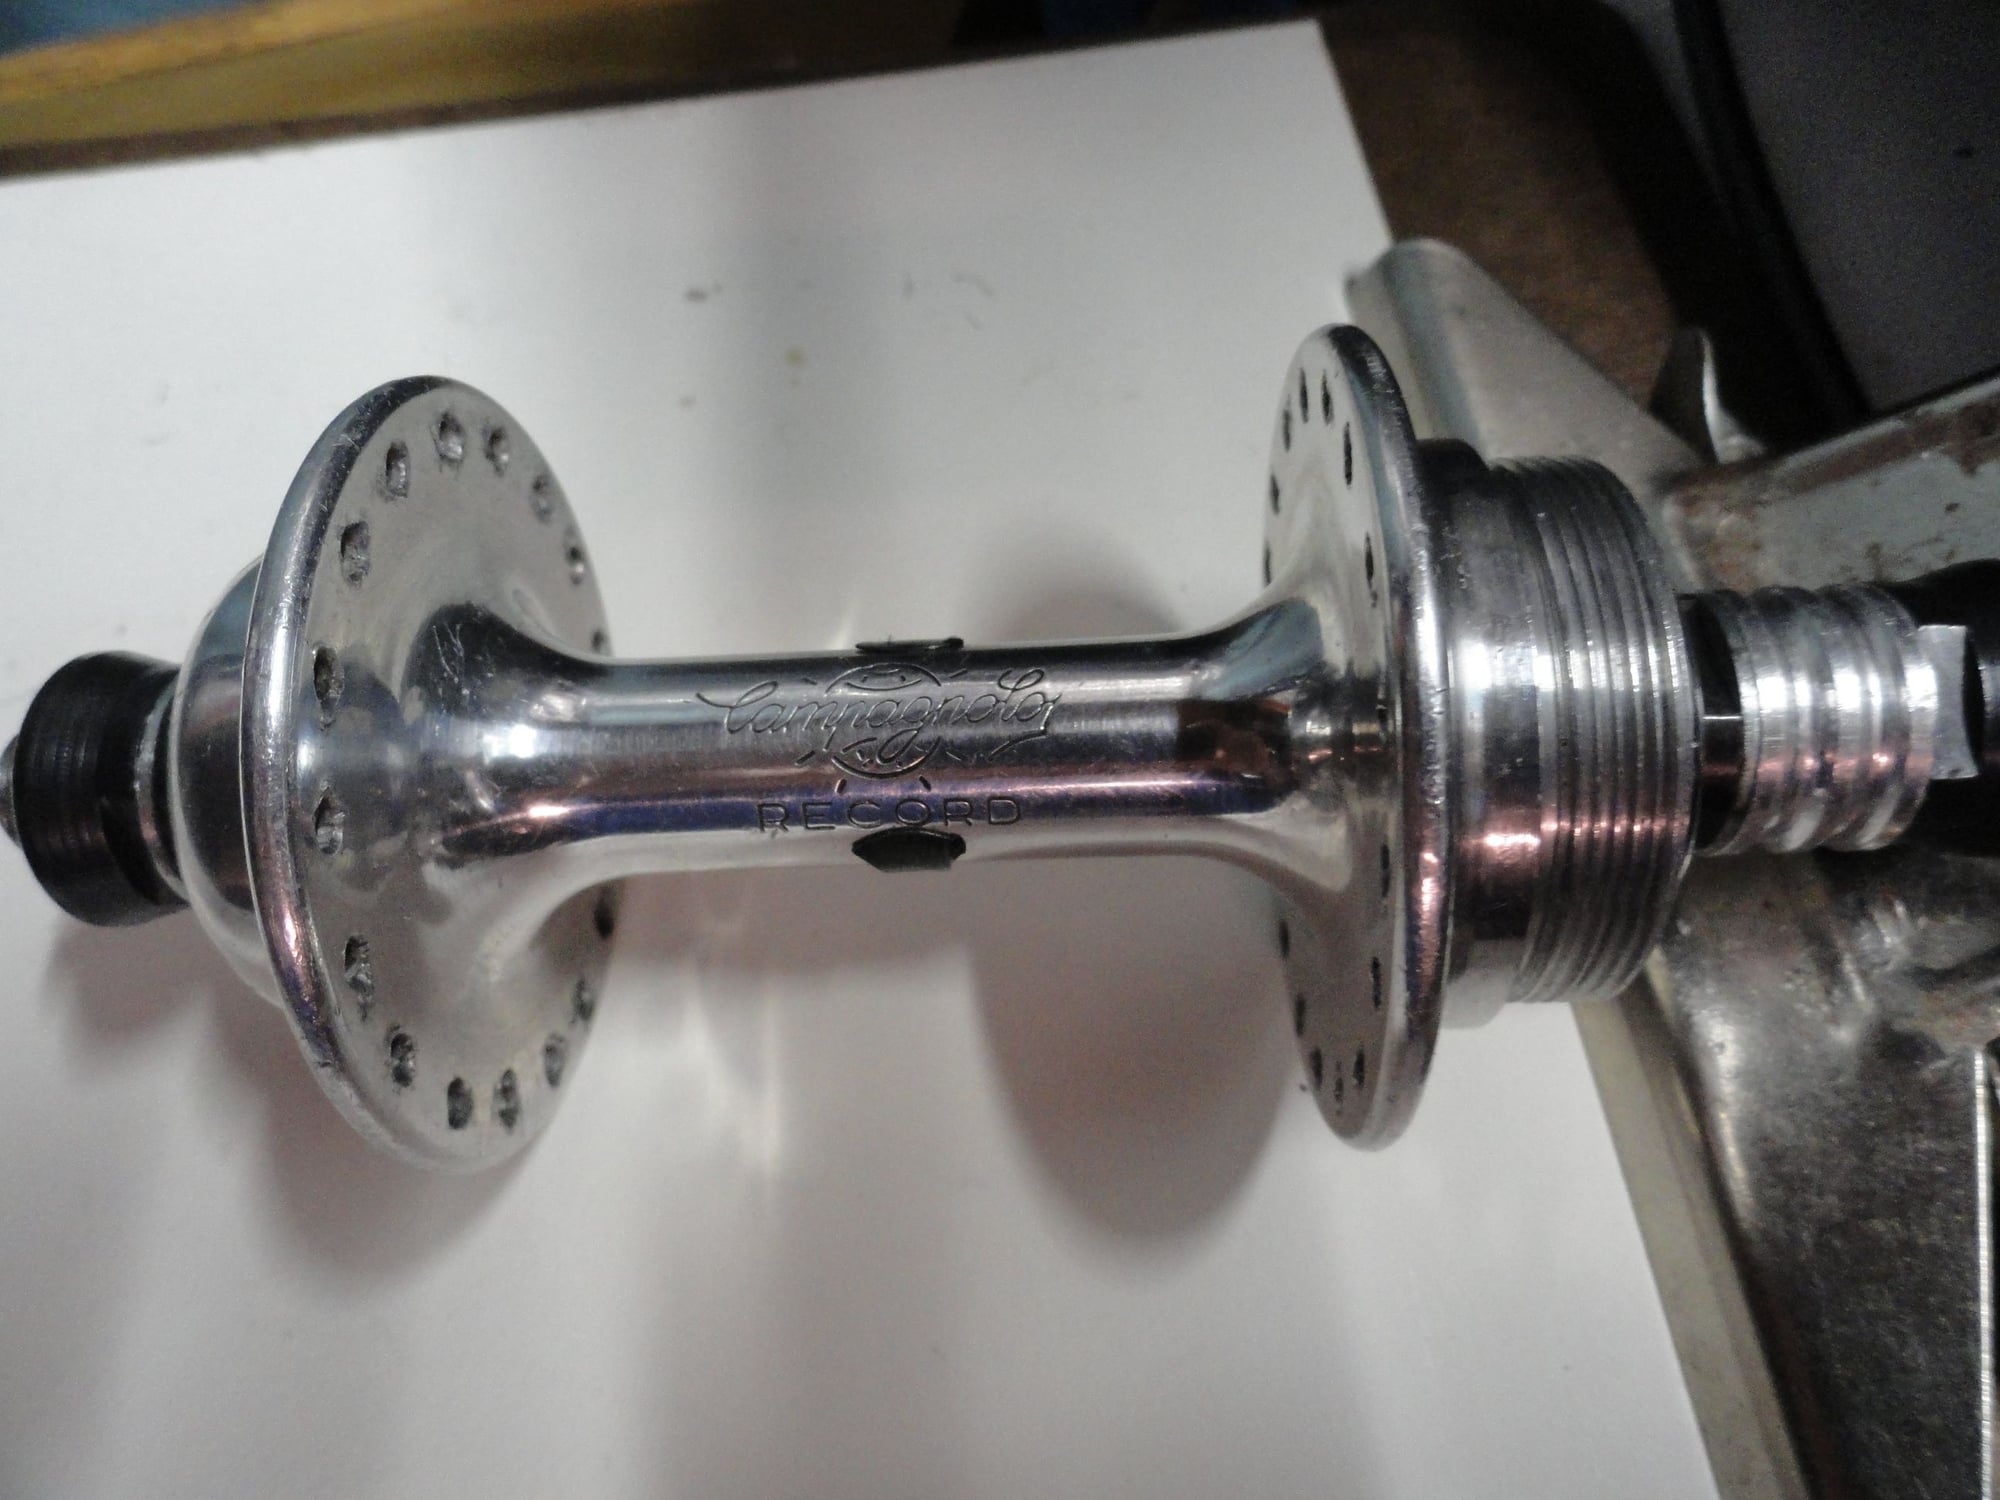
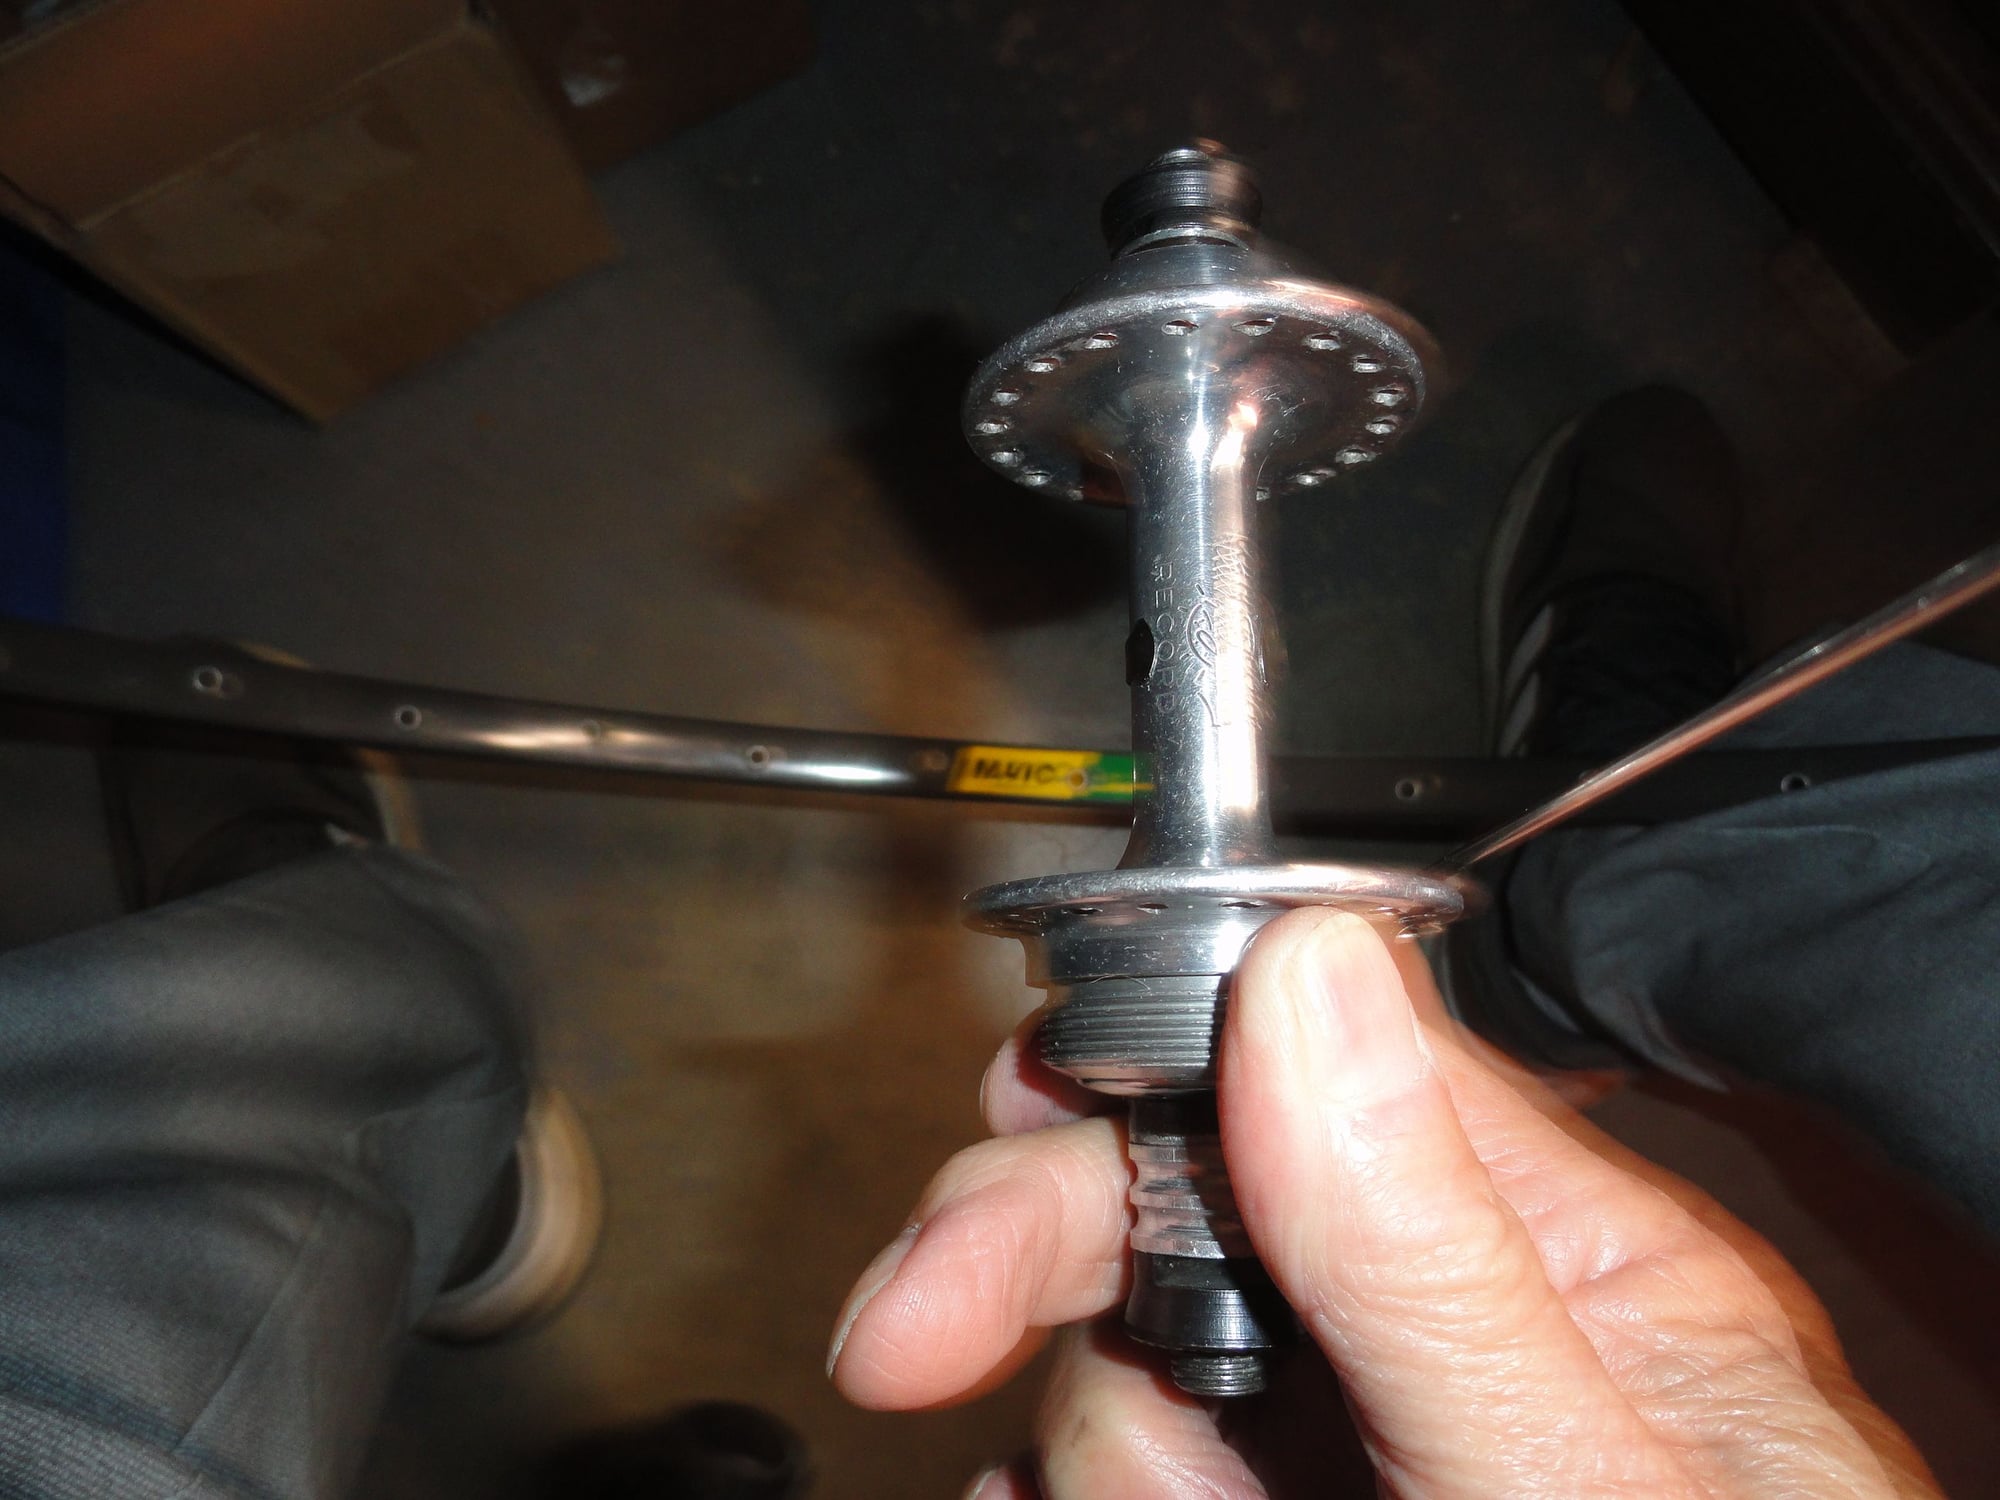
The calculator needs to know the center of the hub so I measure the over lock nut spacing and divide by 2. Here it is 126mm so center of hub is 63mm. This part of the calculations done later.
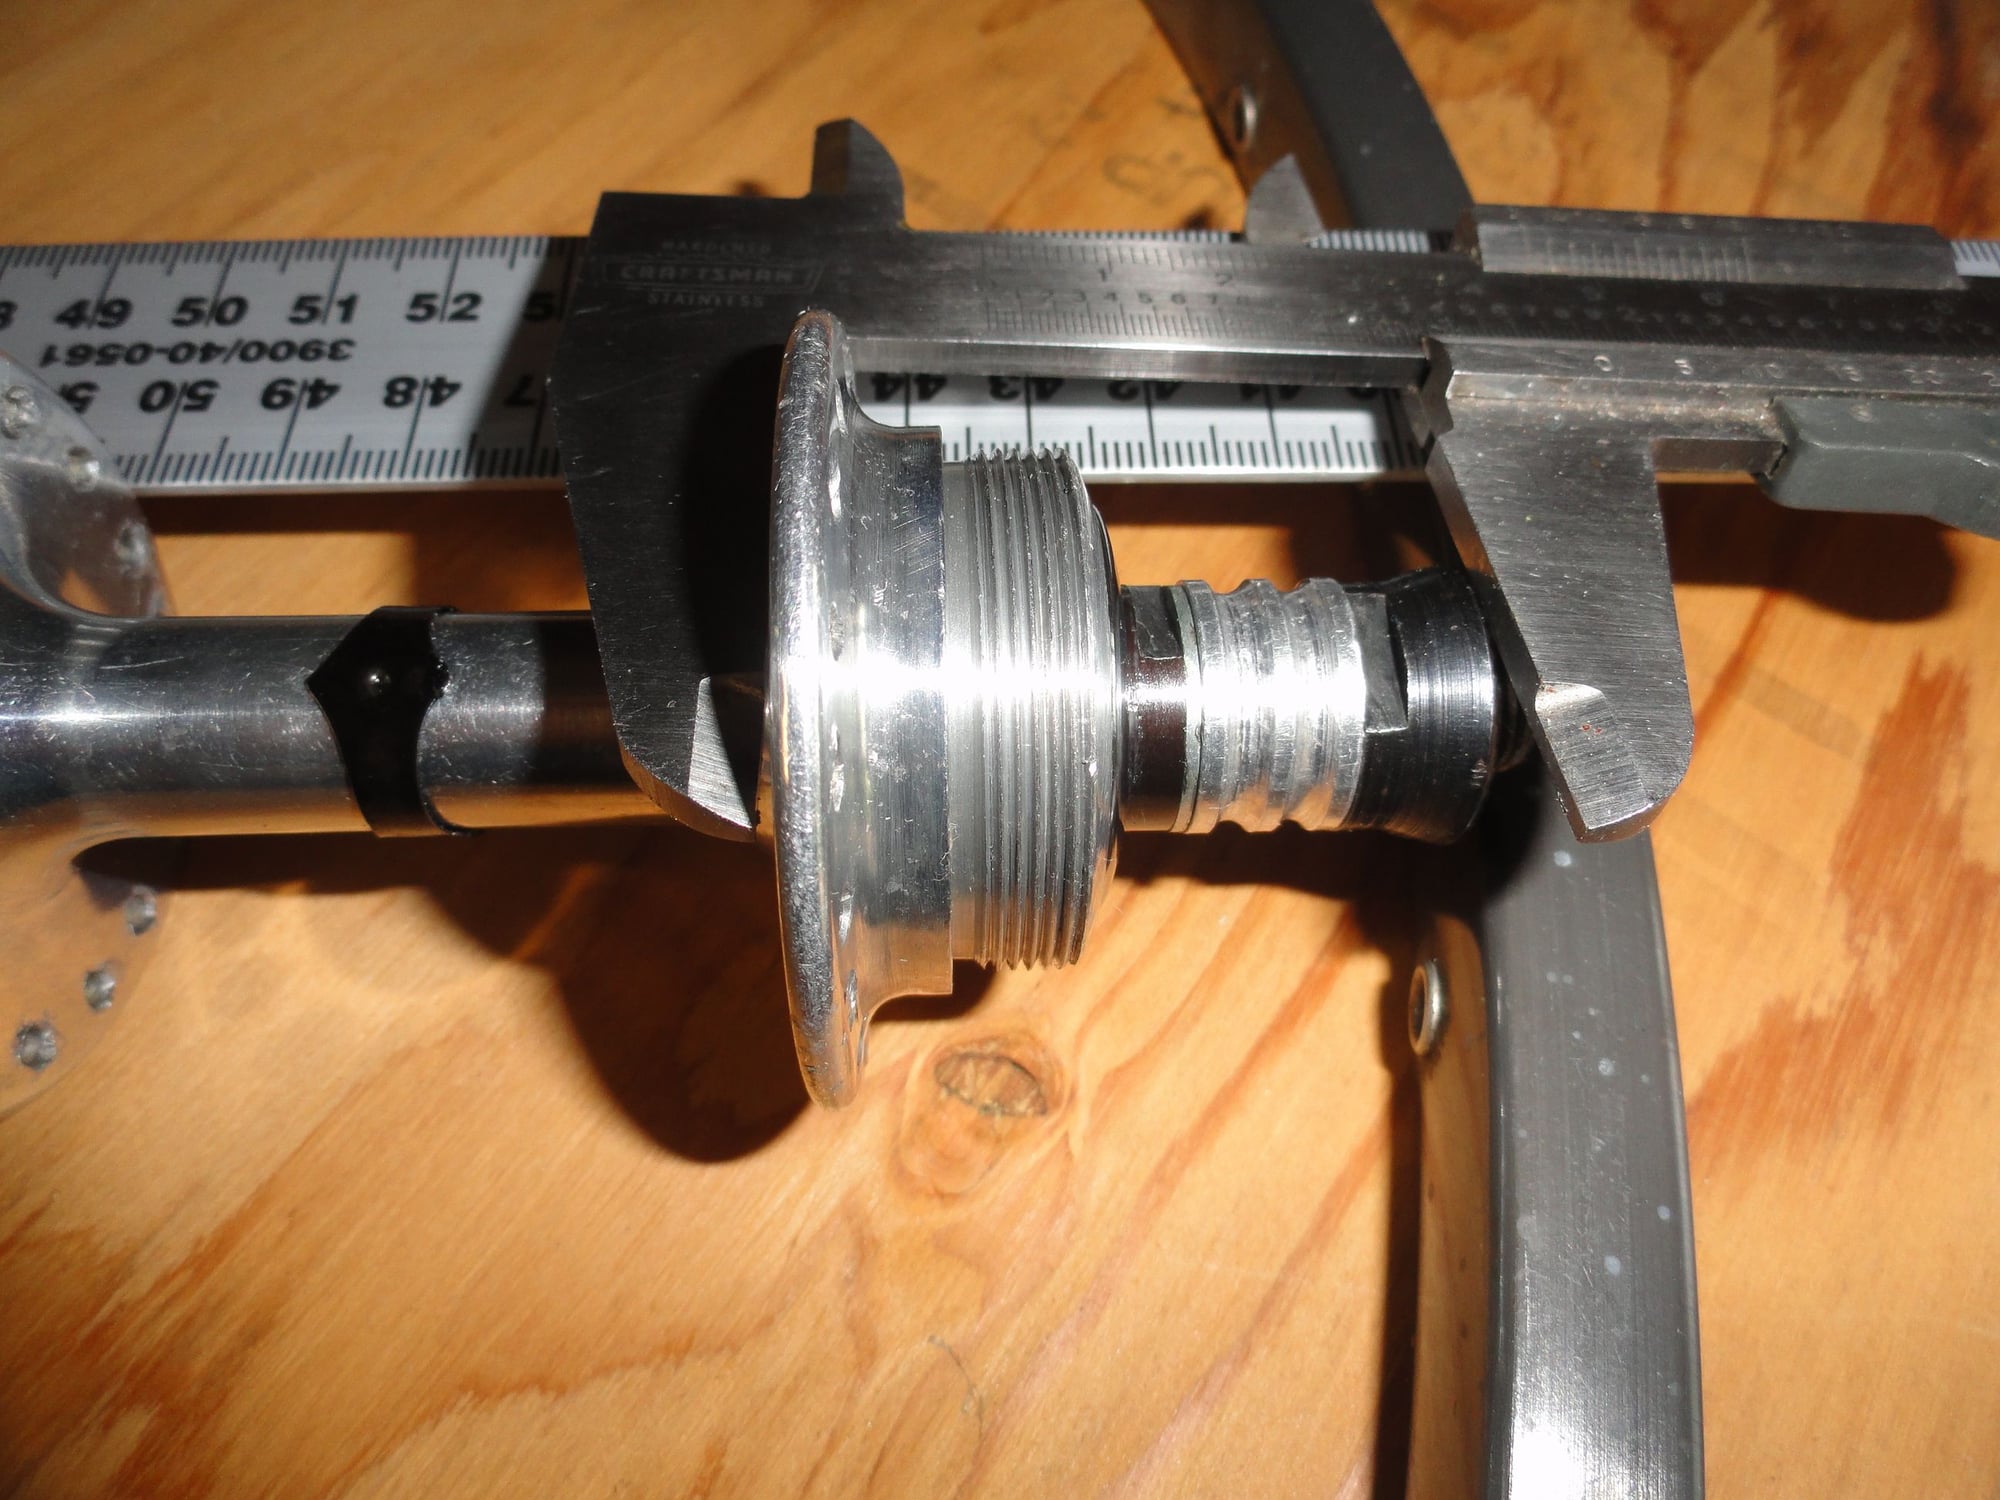
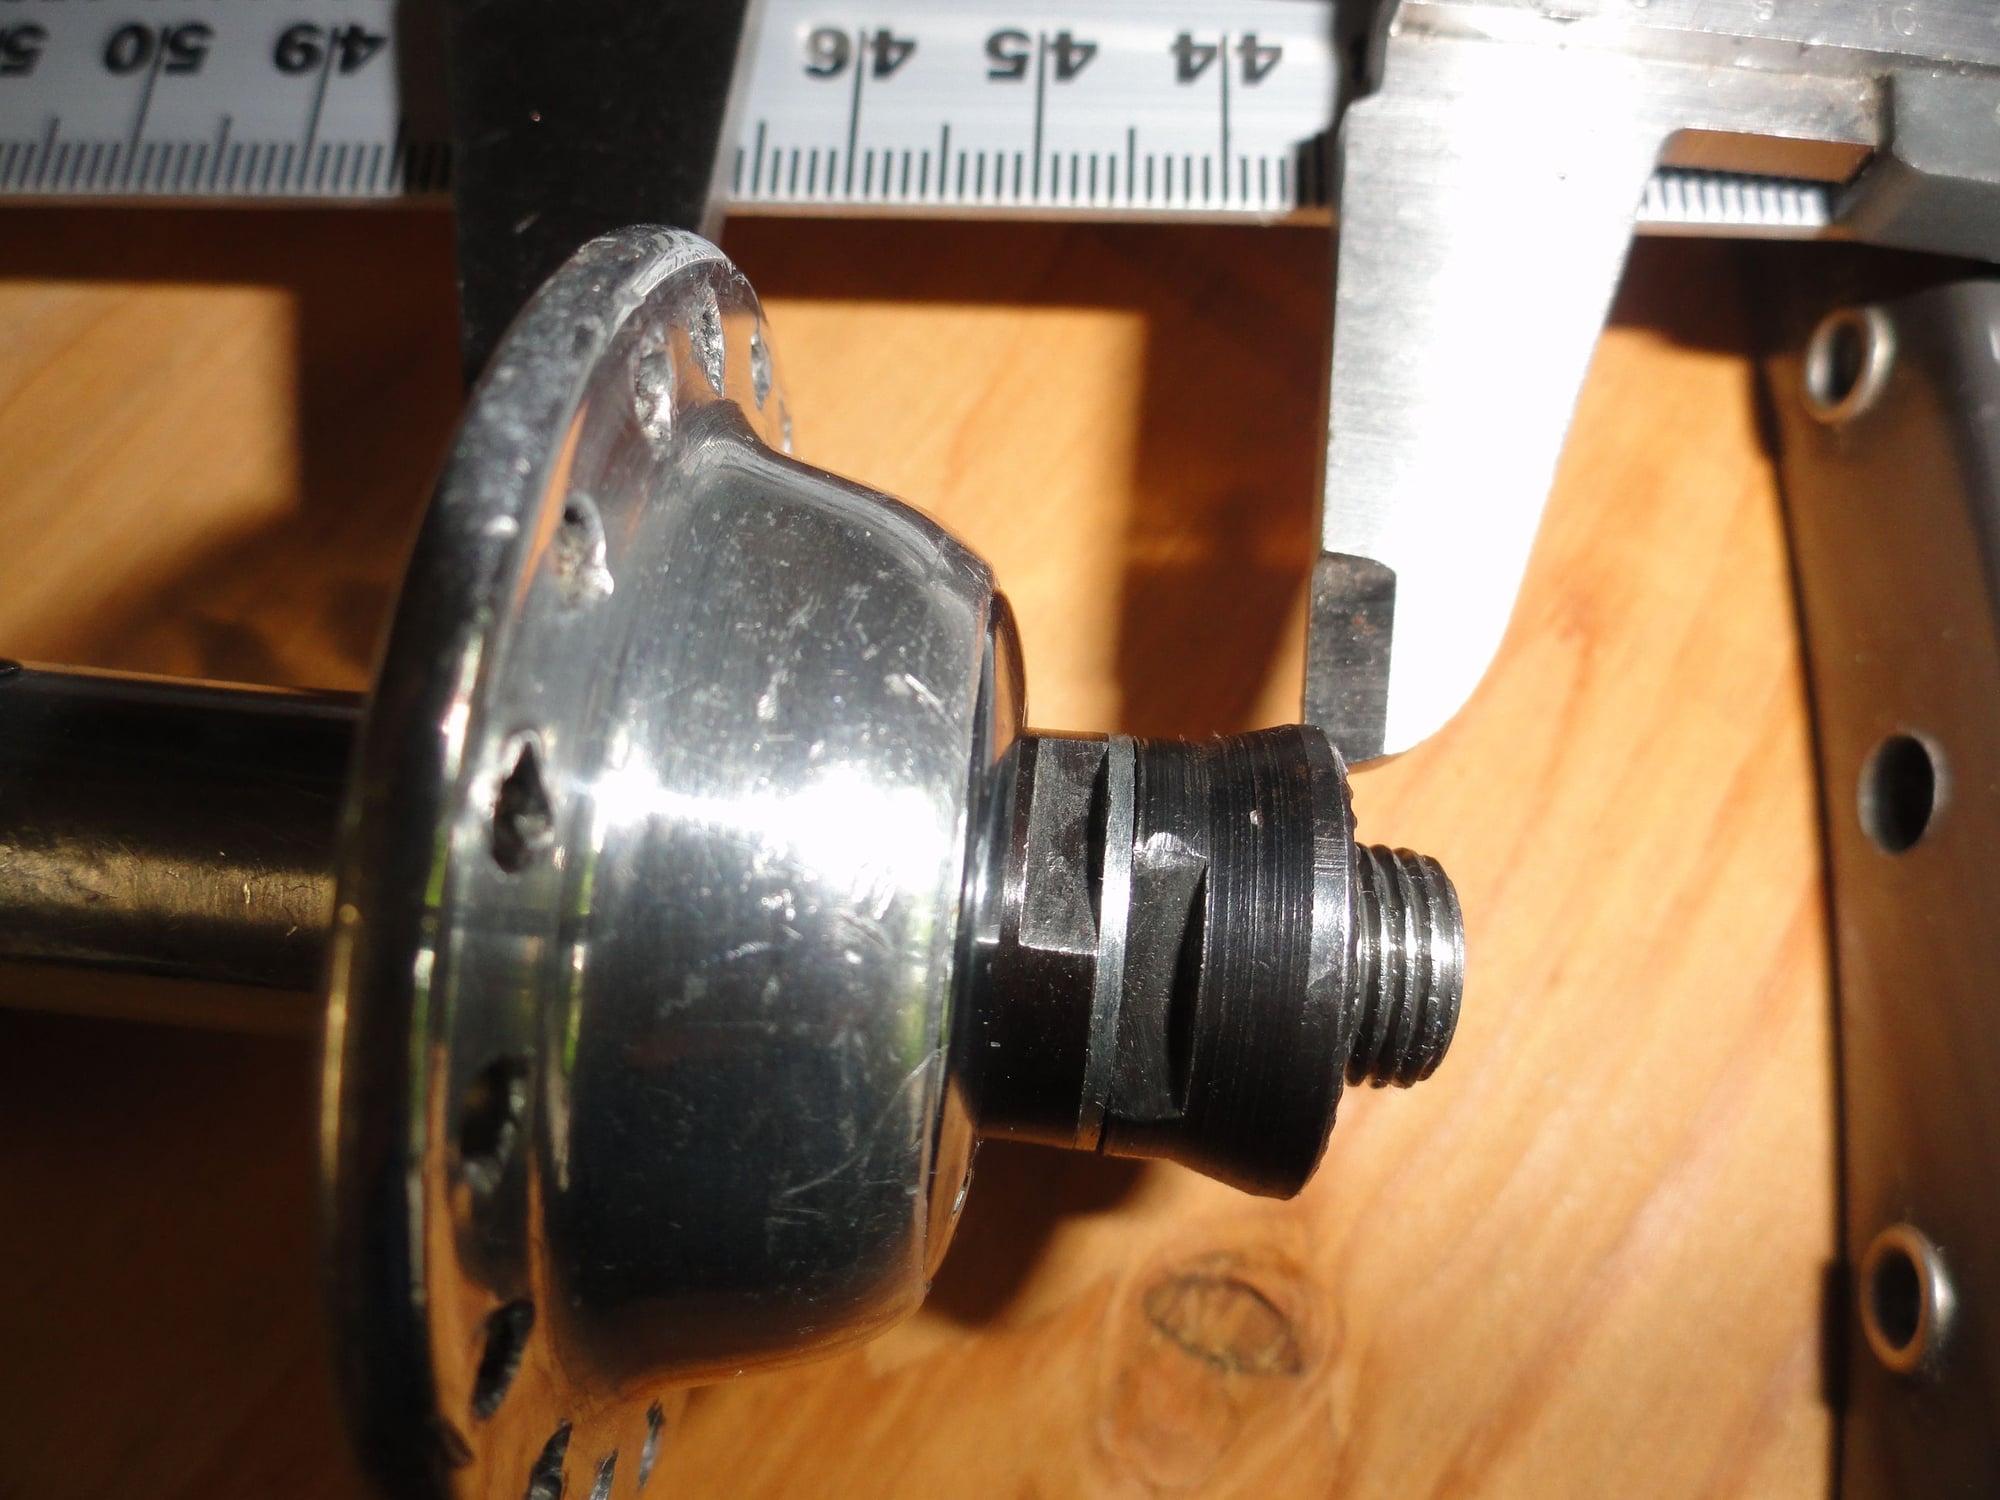
The The drive side flange to over-nut measurement.
The non-drive side flange to over-nut measurement
Ok so I have taken all of the measurements and now I can start ciphering to get the numbers to put into the spoke calculator.
I know I am building with a 36 hole hub and rim so I enter that into the calculator.
The hub over-nut spacing is 126mm I need to divide that by 2 to get the center of hub spacing. In this case it is 63mm.
The drive side flange to over-nut distance is 44mm. Subtract the 44mm form the 63mm and you get the center of hub to flange measurement the calculator needs. here it is 19mm.
From this point you put in the cross pattern and hit the calculate length button. I am building to 3X so I enter that. The calculator tells me I need 292 mm spokes for the drive side.
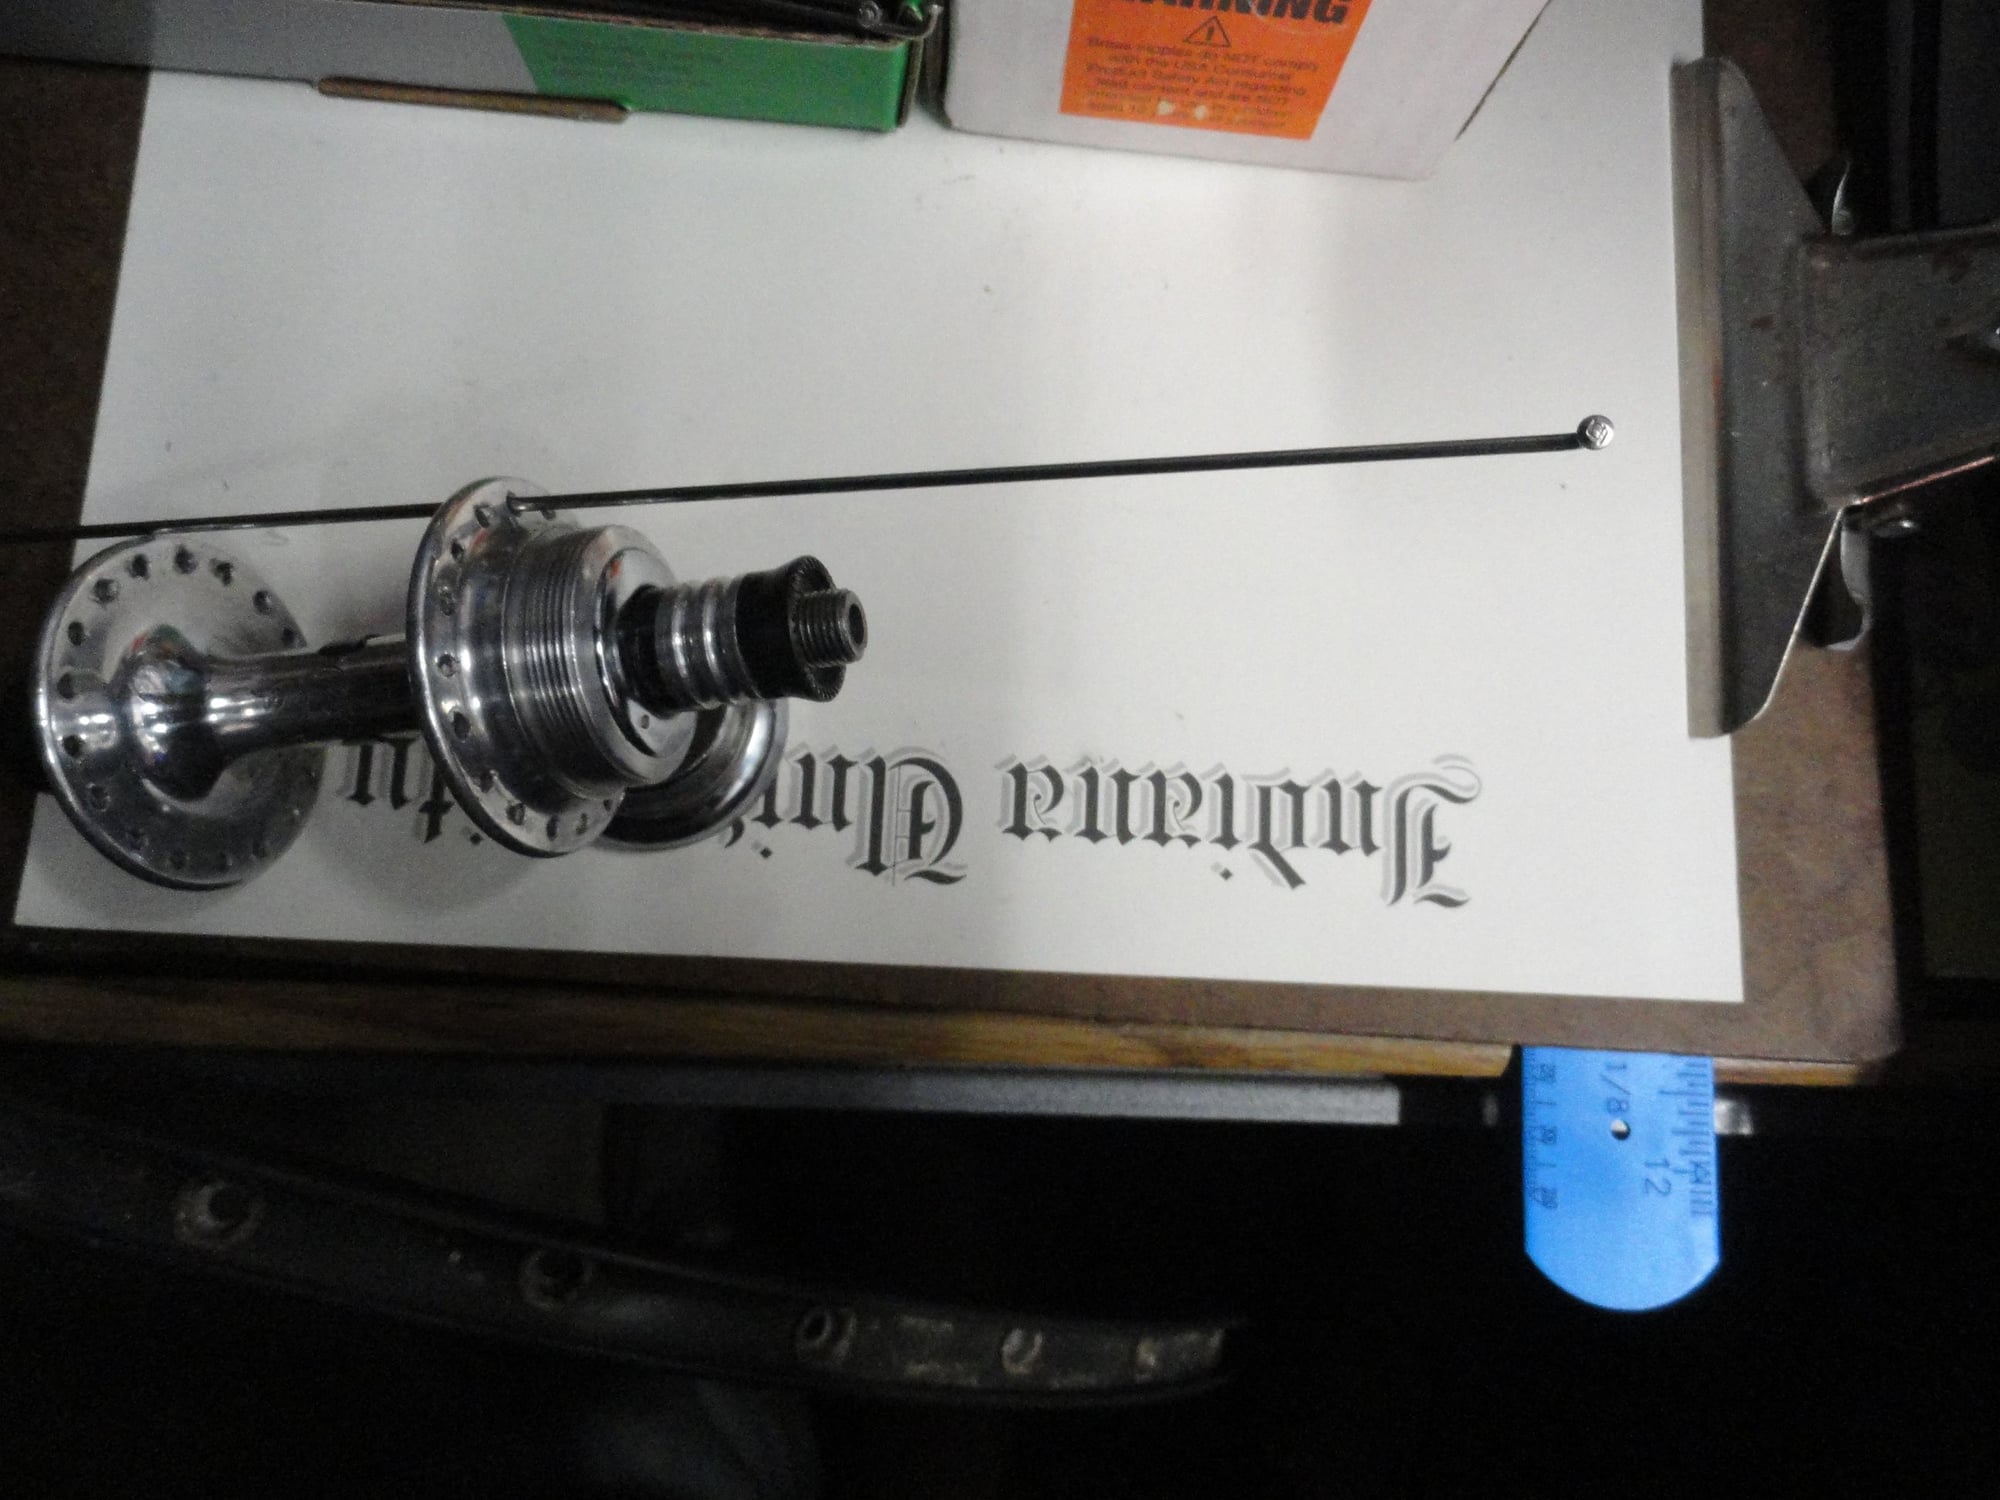
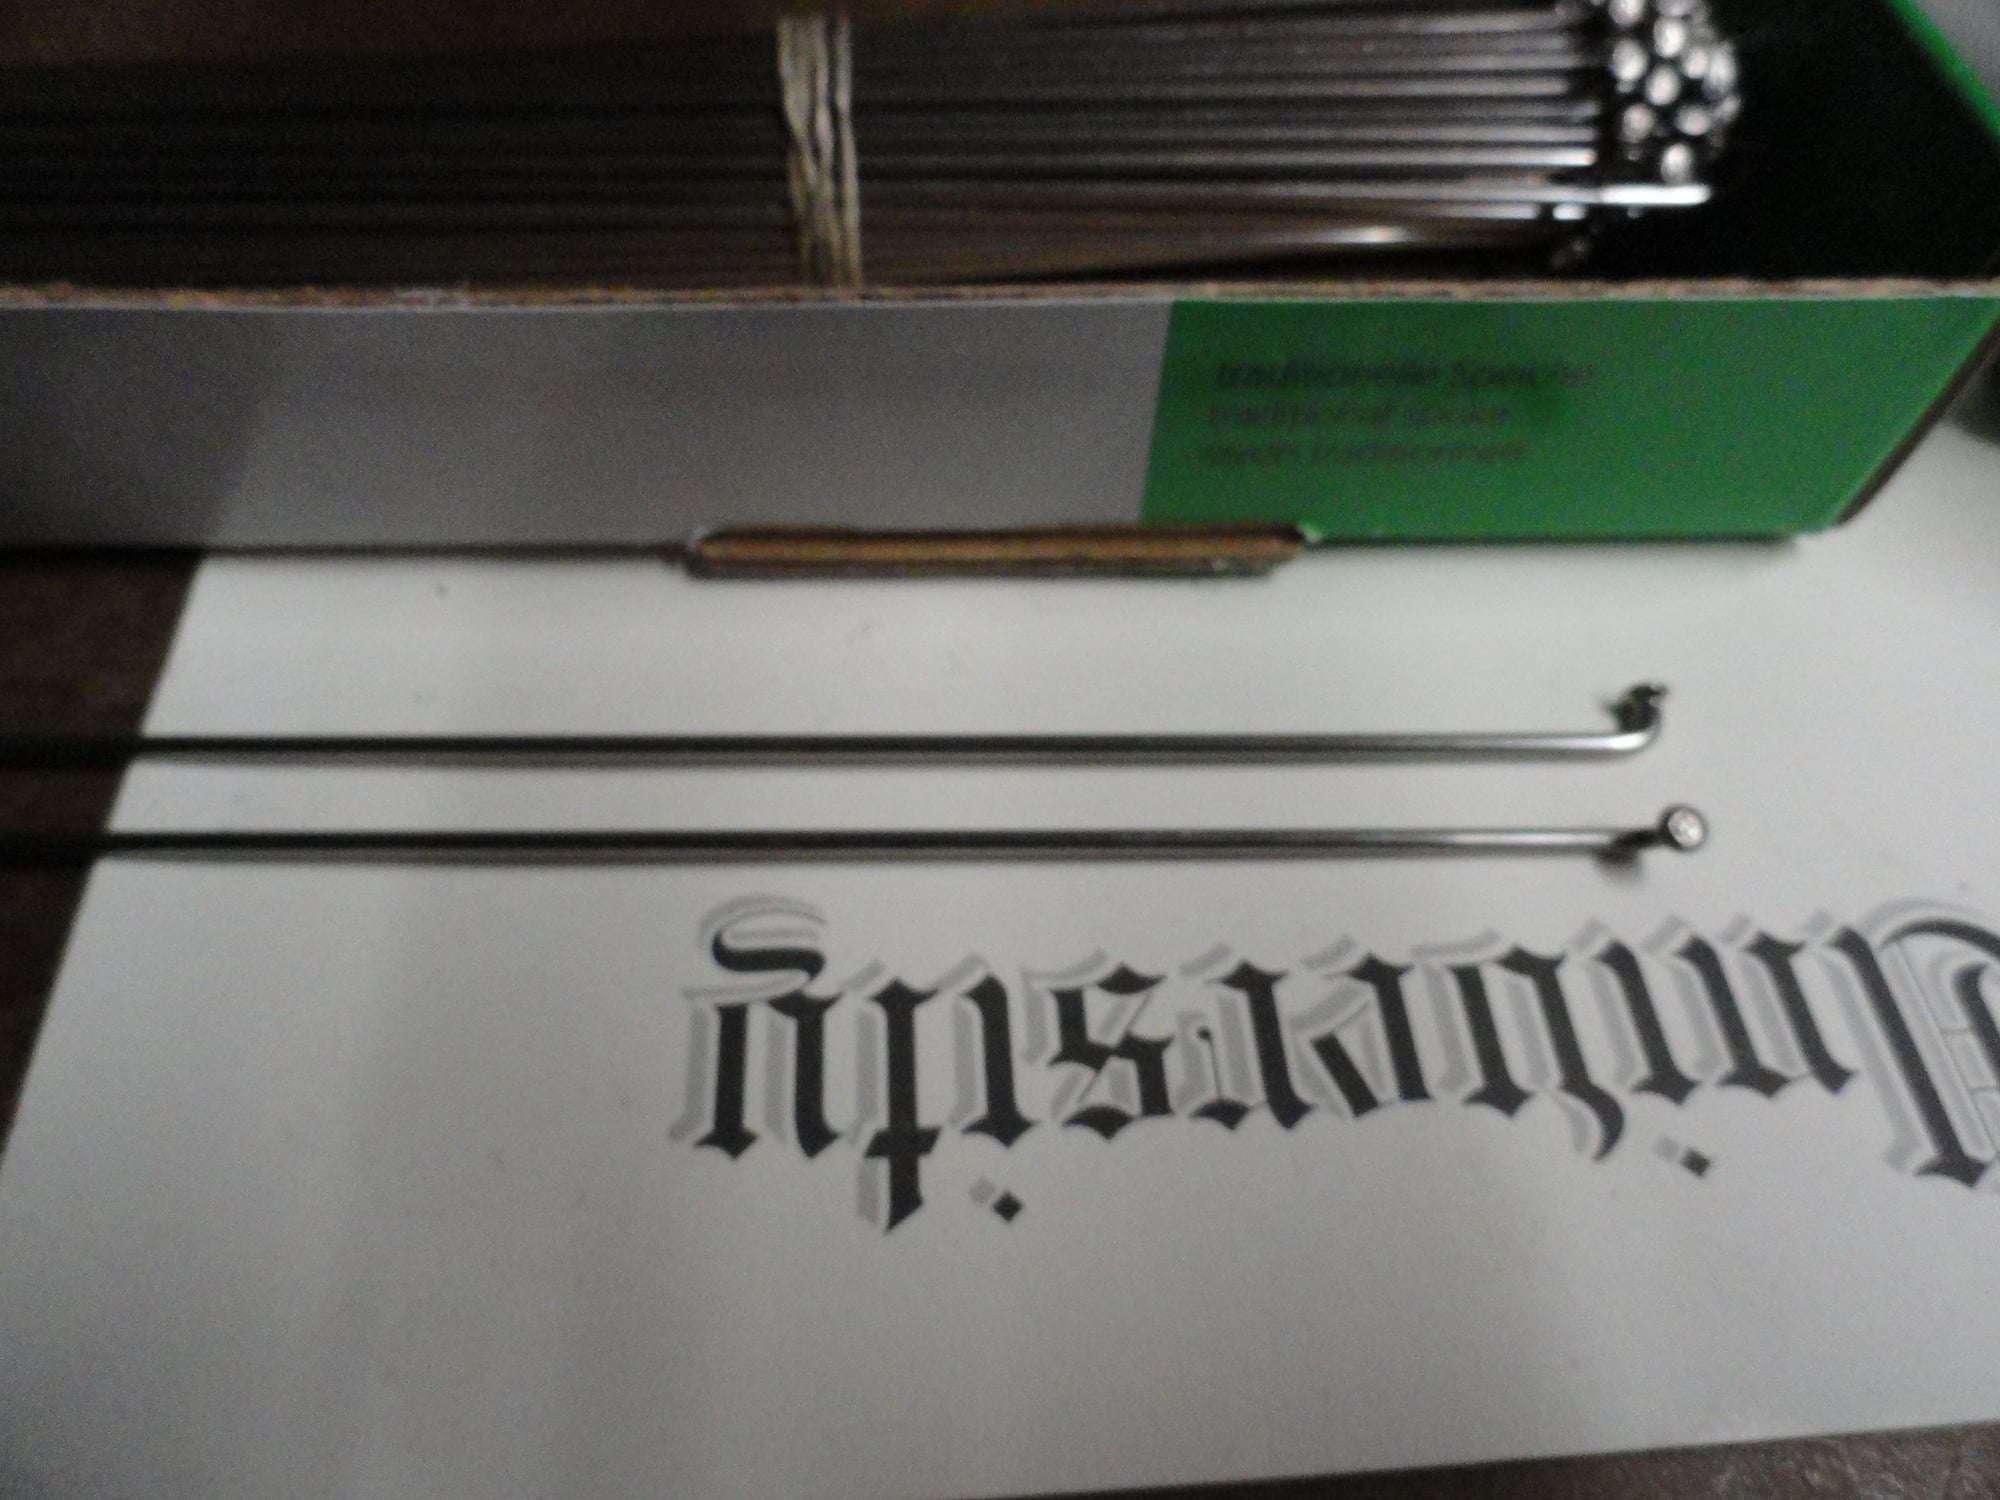
I change the input for the non-drive side center of hub to flange. In this case it is 63mm minus 29mm so I enter 34mm and the calculator tells me I need 293.8mm spokes. I round up to 294mm and I am ready to start the build with the correct length spokes. I had to order the spokes but they are here and now I can start to demonstrate the lacing process.
There are a few preliminary steps needed before the build can start. I use the UBI (United Bicycle Institute) spoke length calculator. If you do a search for spoke length calculator it should be one of the first three to show up. It asks for a few measurements and they are pretty easy to get. Here are some pics to get past this part of the build process.
I use a metal ruler that measures in cm/mm.
I read 604 for the inner rim diameter but I have to add two mm to account for the spokes seated in the SS inserts in the rim. Thus ERD is 606.
The calculator needs to know the center of the hub so I measure the over lock nut spacing and divide by 2. Here it is 126mm so center of hub is 63mm. This part of the calculations done later.
The The drive side flange to over-nut measurement.
The non-drive side flange to over-nut measurement
Ok so I have taken all of the measurements and now I can start ciphering to get the numbers to put into the spoke calculator.
I know I am building with a 36 hole hub and rim so I enter that into the calculator.
The hub over-nut spacing is 126mm I need to divide that by 2 to get the center of hub spacing. In this case it is 63mm.
The drive side flange to over-nut distance is 44mm. Subtract the 44mm form the 63mm and you get the center of hub to flange measurement the calculator needs. here it is 19mm.
From this point you put in the cross pattern and hit the calculate length button. I am building to 3X so I enter that. The calculator tells me I need 292 mm spokes for the drive side.
I change the input for the non-drive side center of hub to flange. In this case it is 63mm minus 29mm so I enter 34mm and the calculator tells me I need 293.8mm spokes. I round up to 294mm and I am ready to start the build with the correct length spokes. I had to order the spokes but they are here and now I can start to demonstrate the lacing process.

Likes For Mad Honk:
05-19-21, 05:50 PM
#27
Senior Member
Thread Starter
Join Date: May 2019
Location: Bloomington, IN
Posts: 2,951
Bikes: Paramount, Faggin, Ochsner, Ciocc, Basso
Mentioned: 117 Post(s)
Tagged: 0 Thread(s)
Quoted: 1304 Post(s)
Liked 1,912 Times
in
1,142 Posts
Folks... round two of Honk vs his computer for the wheel build,
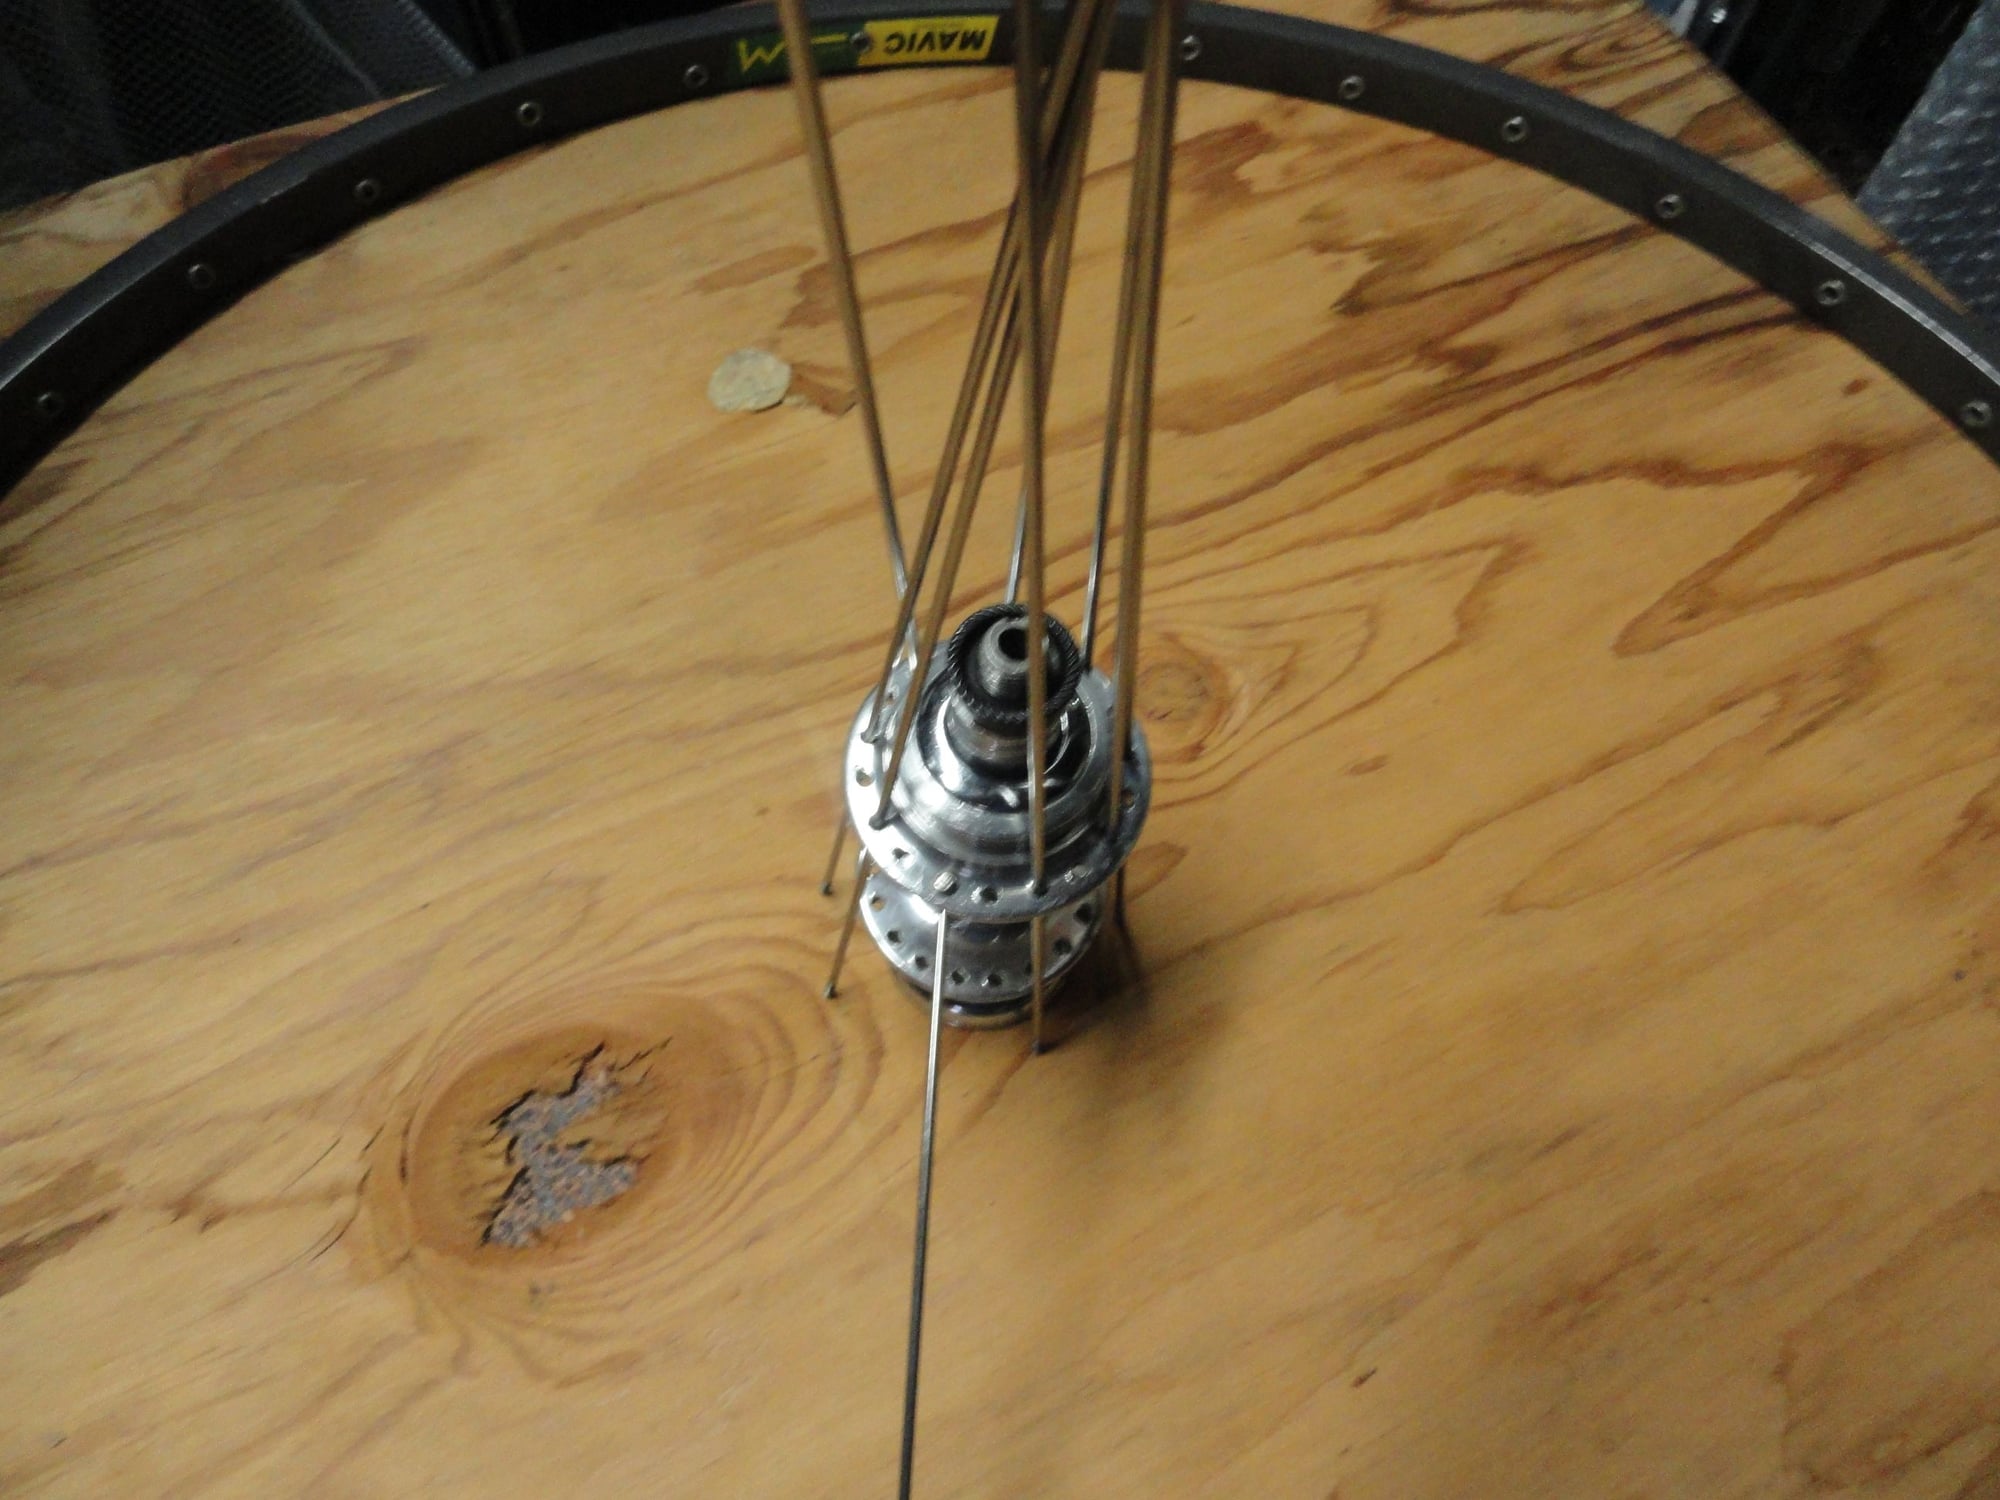
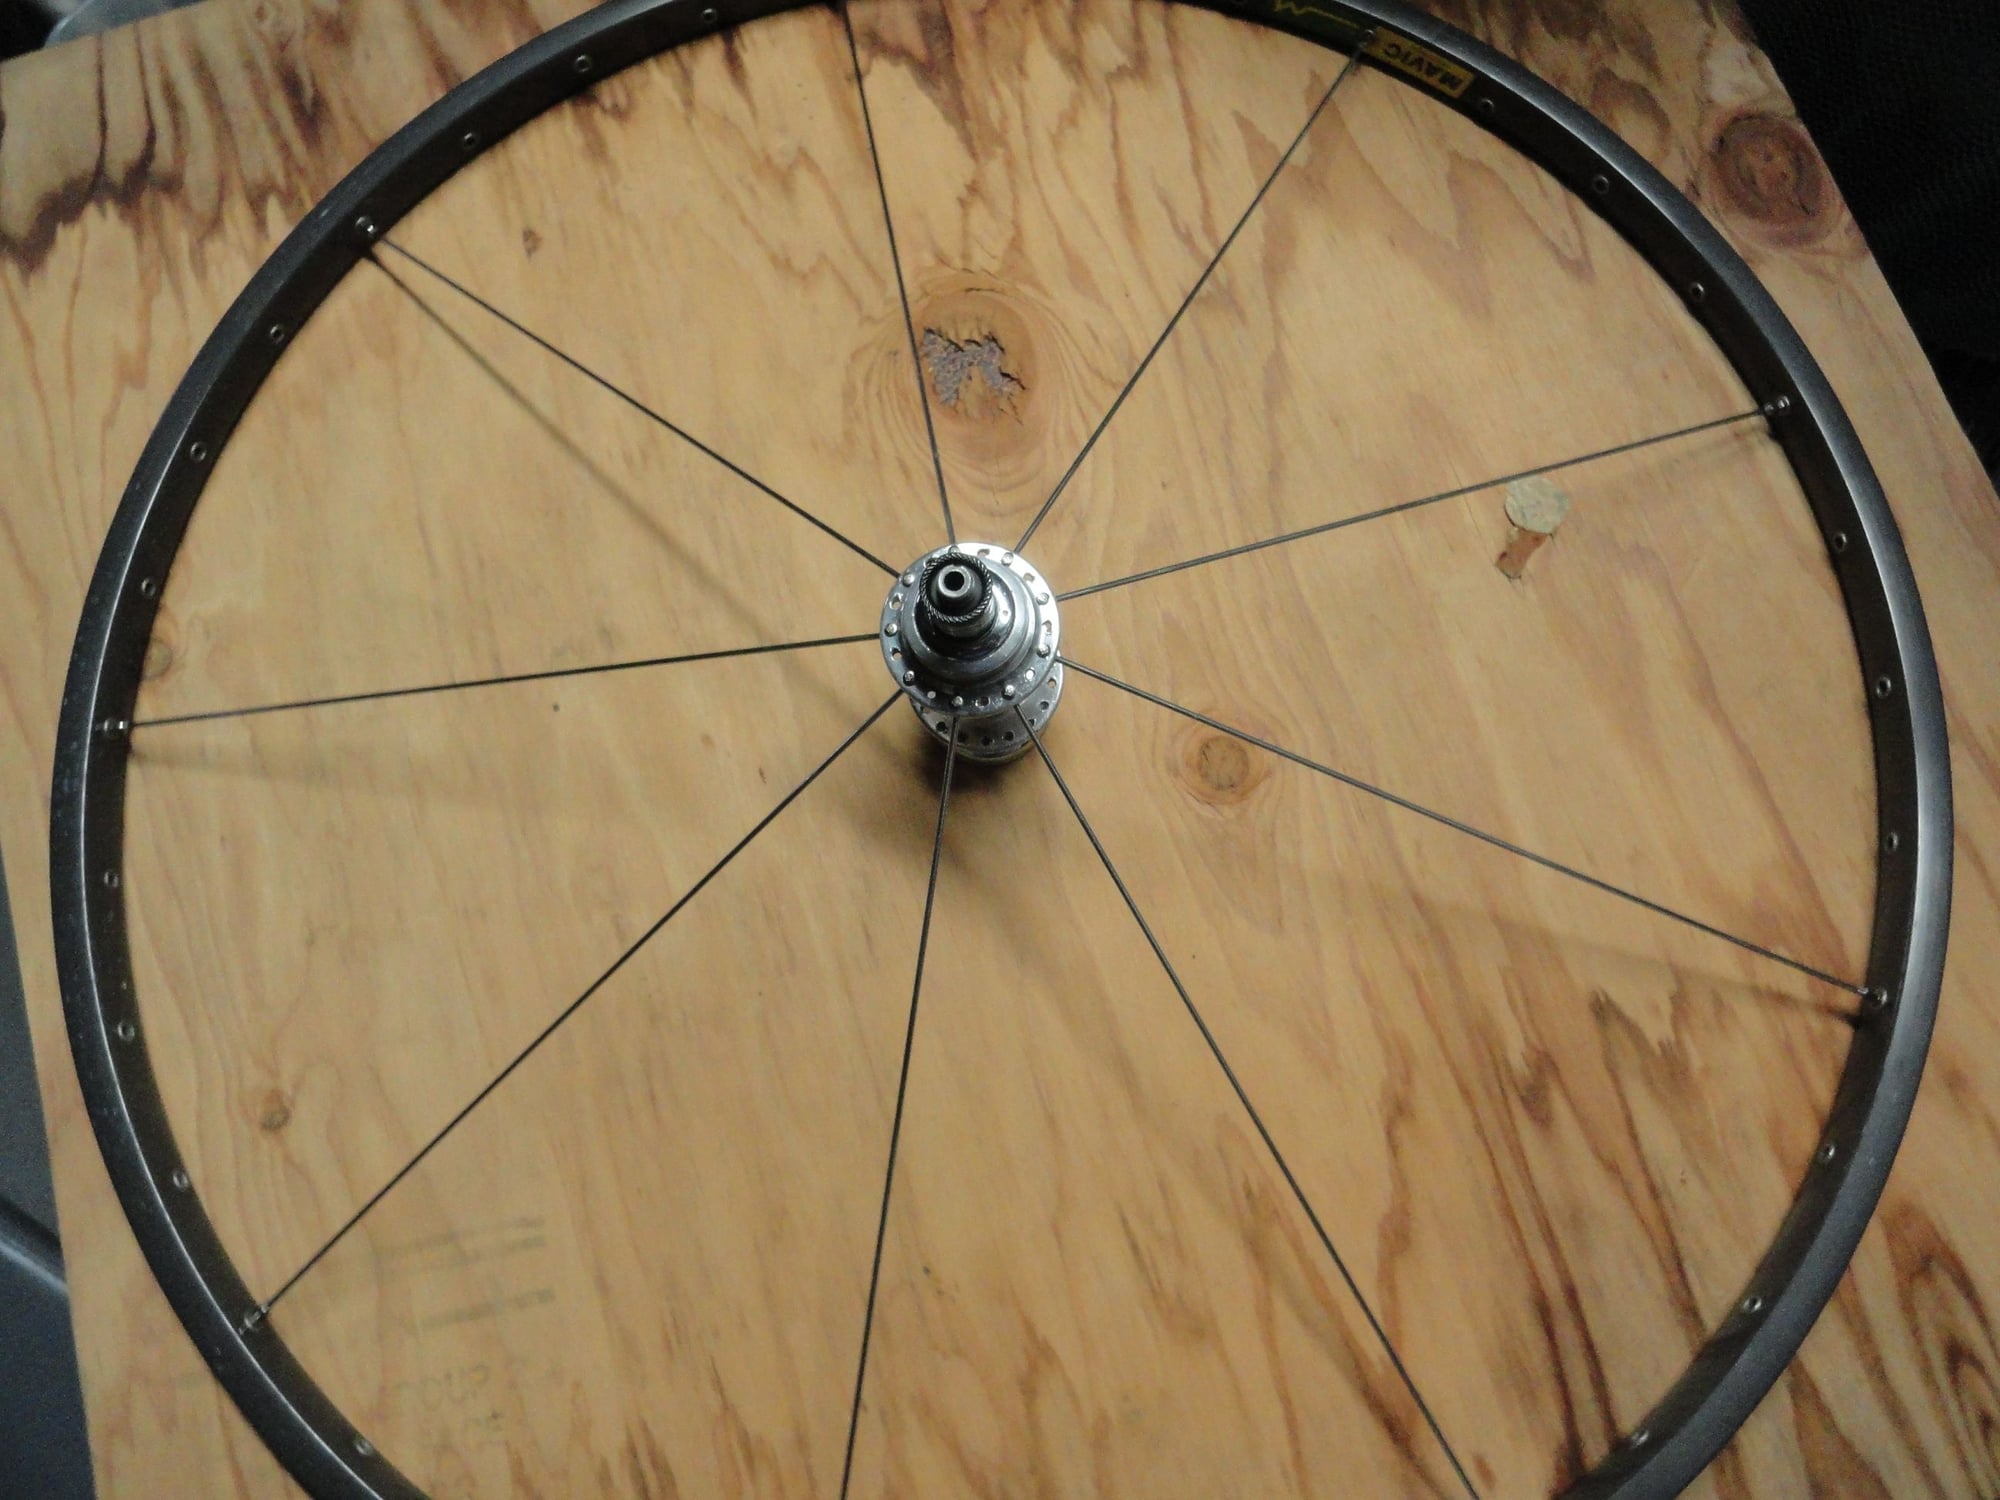
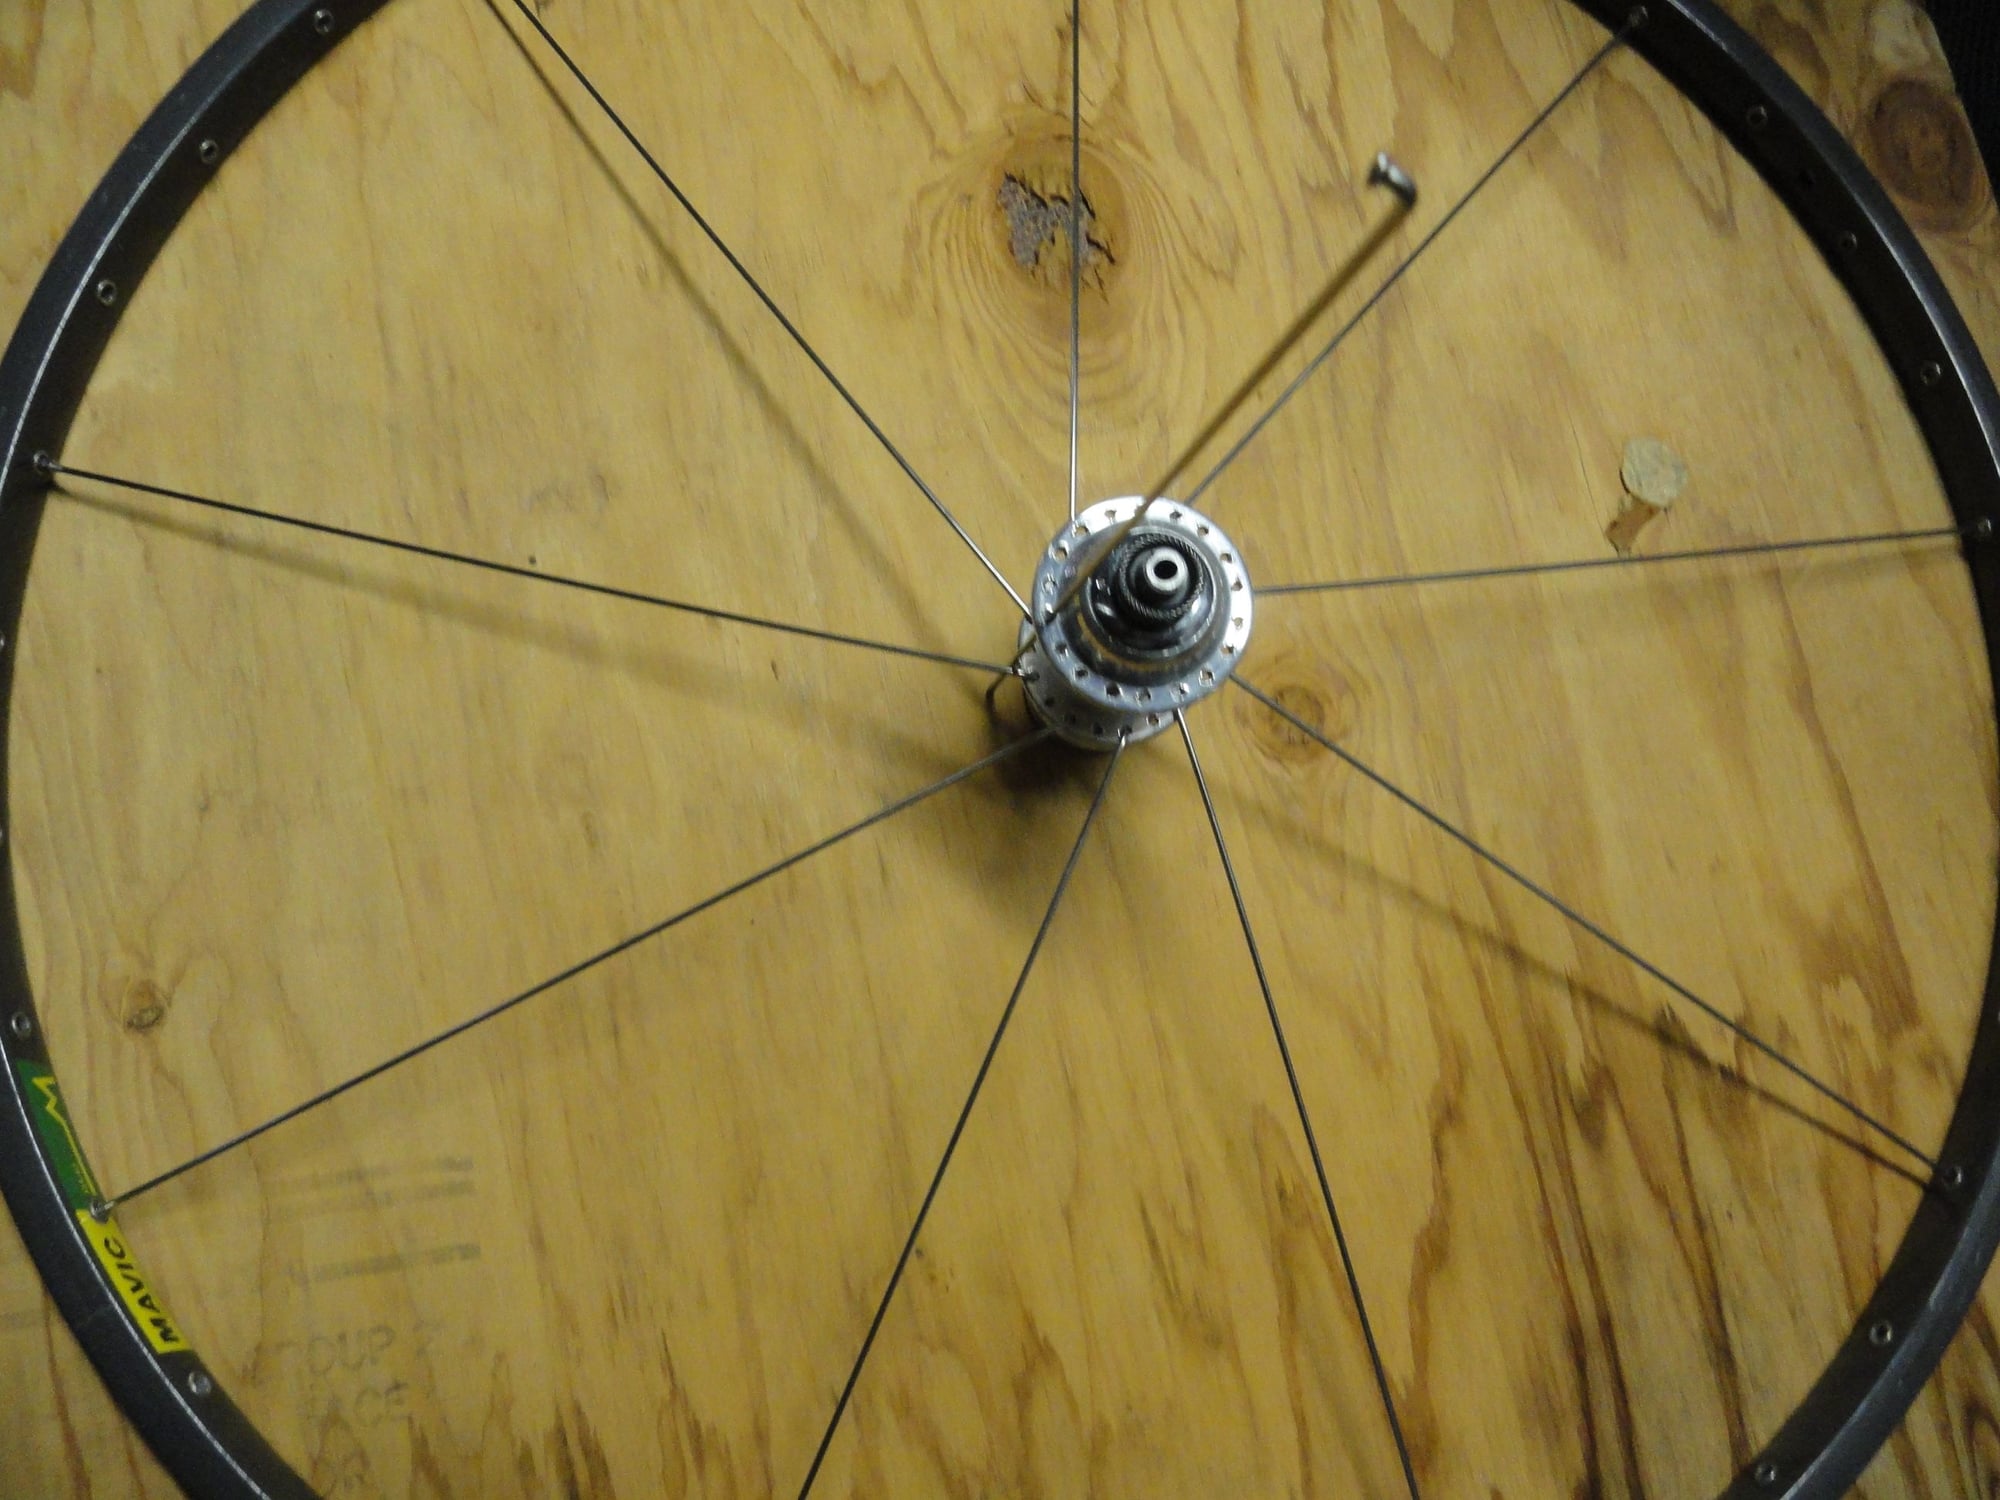
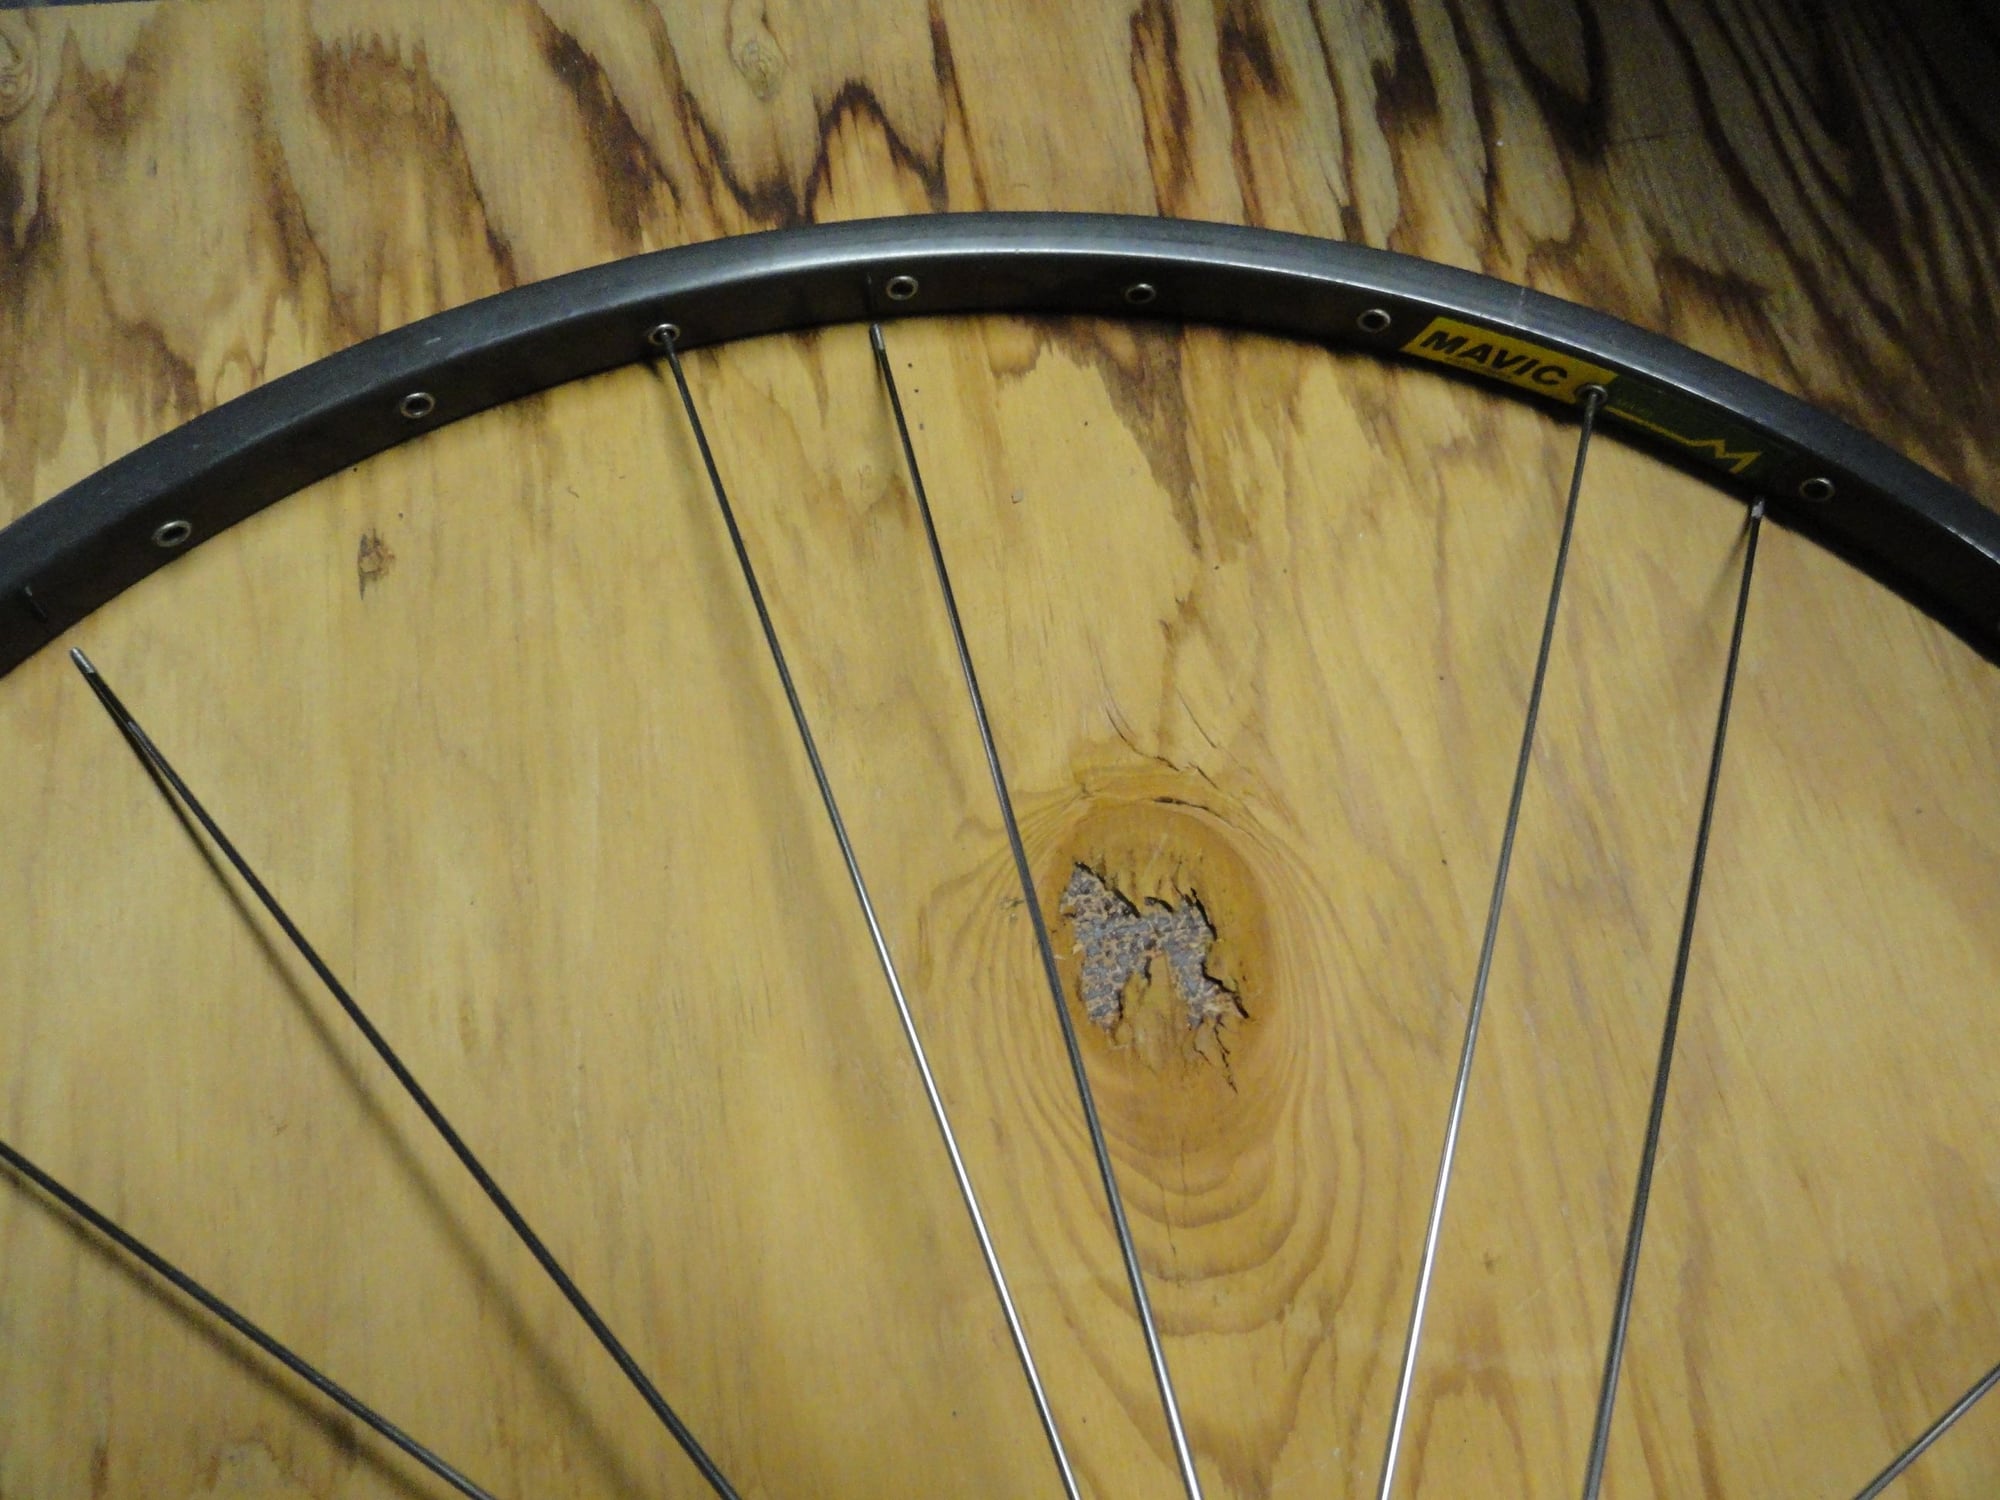
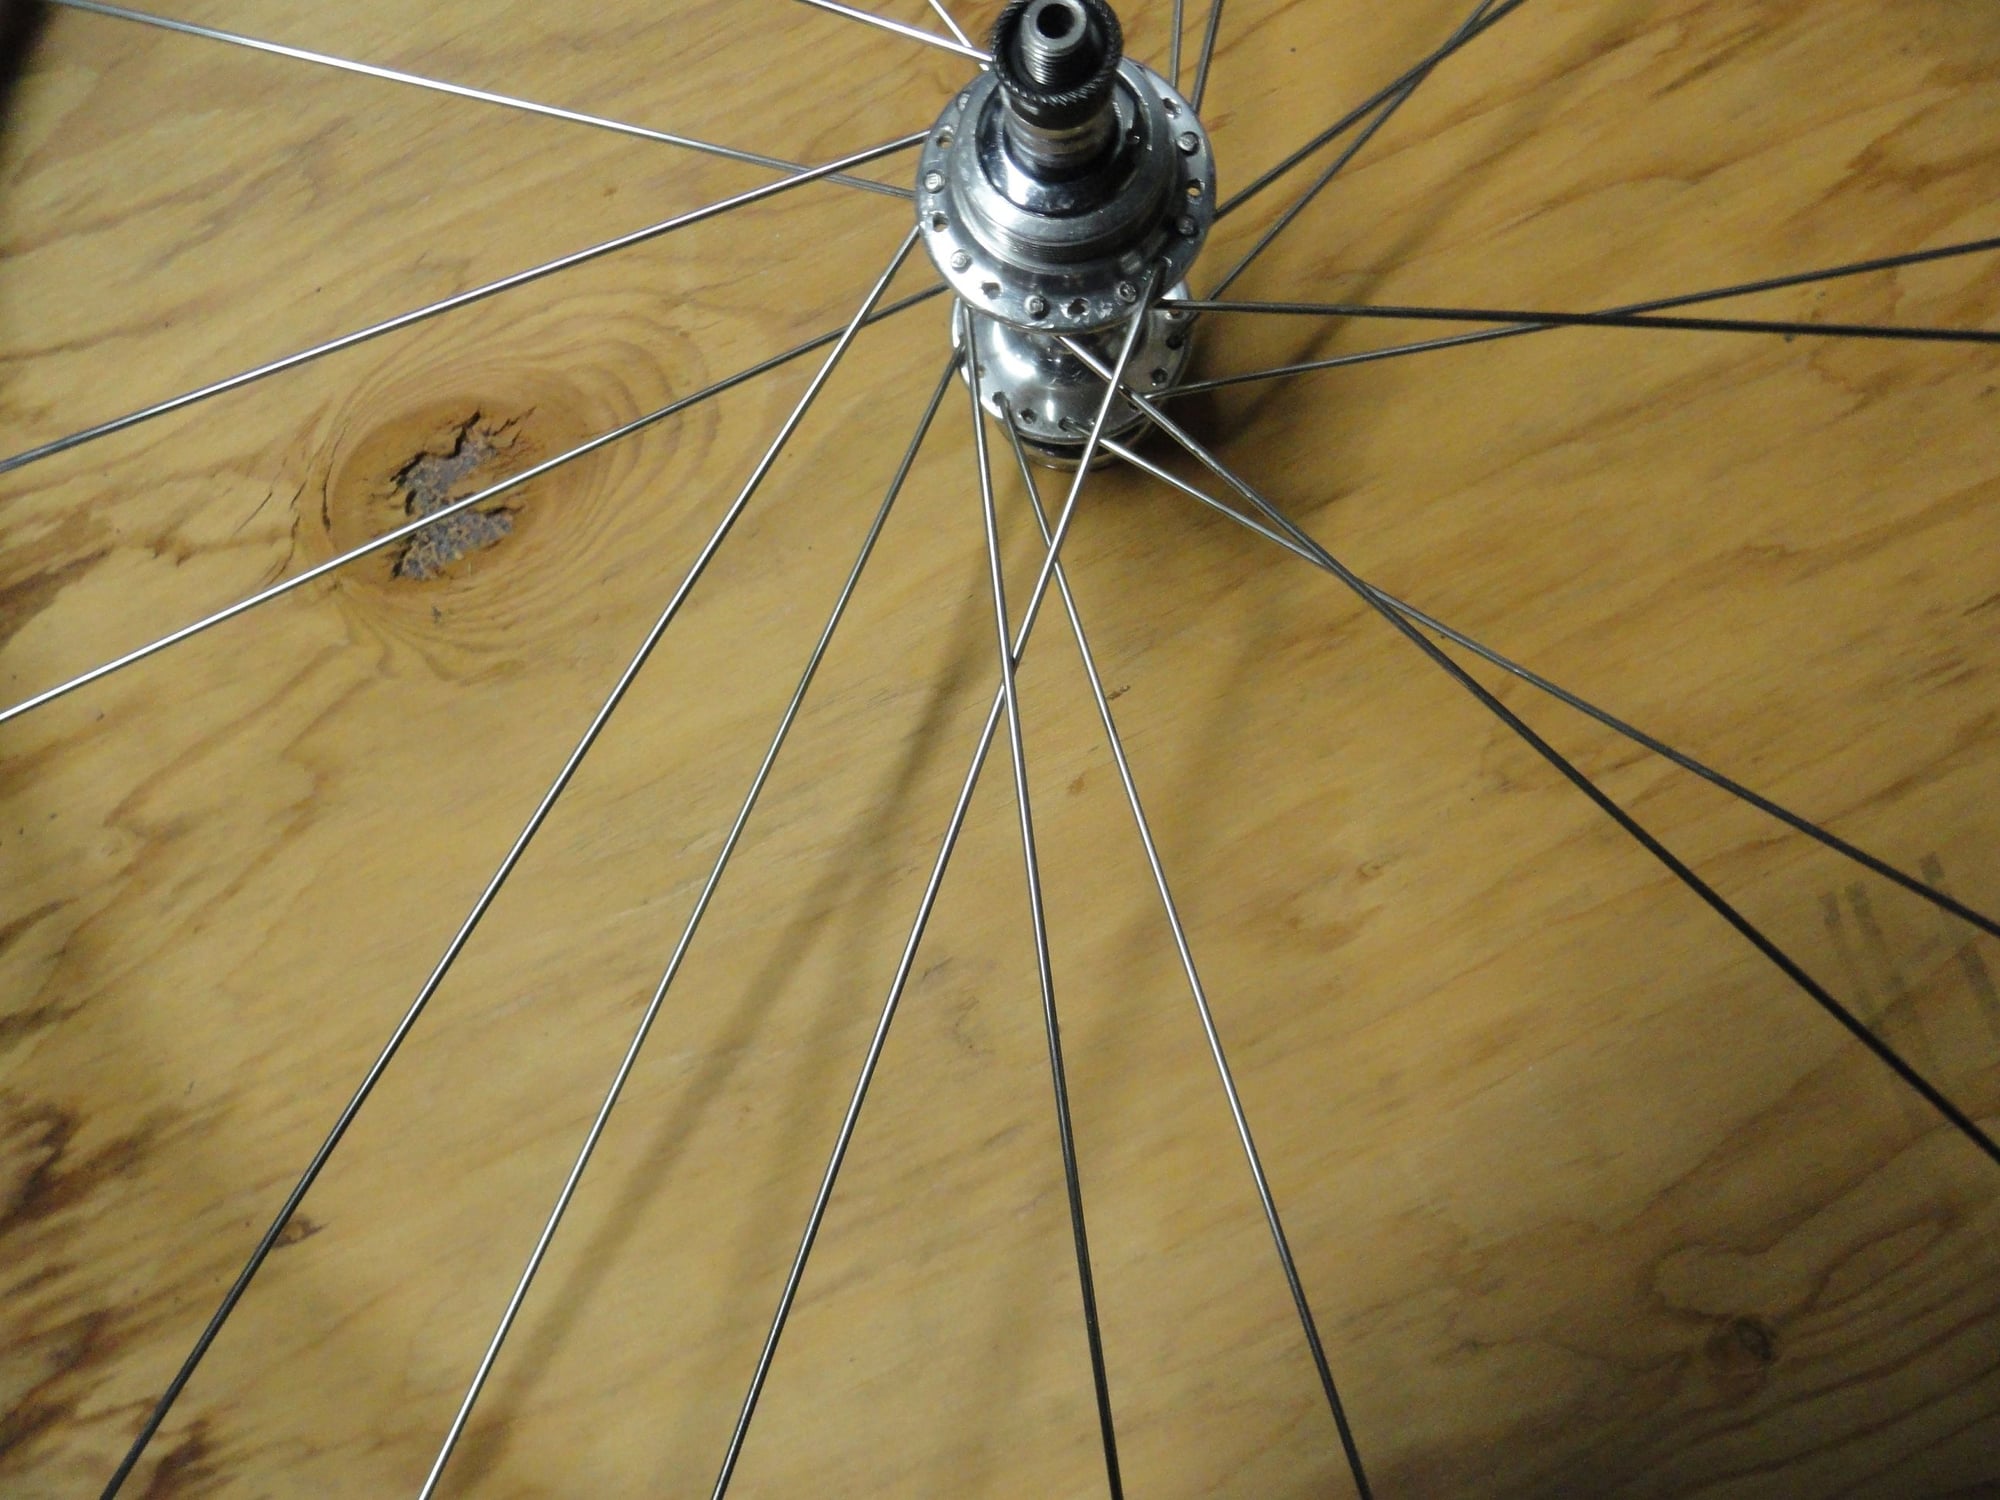
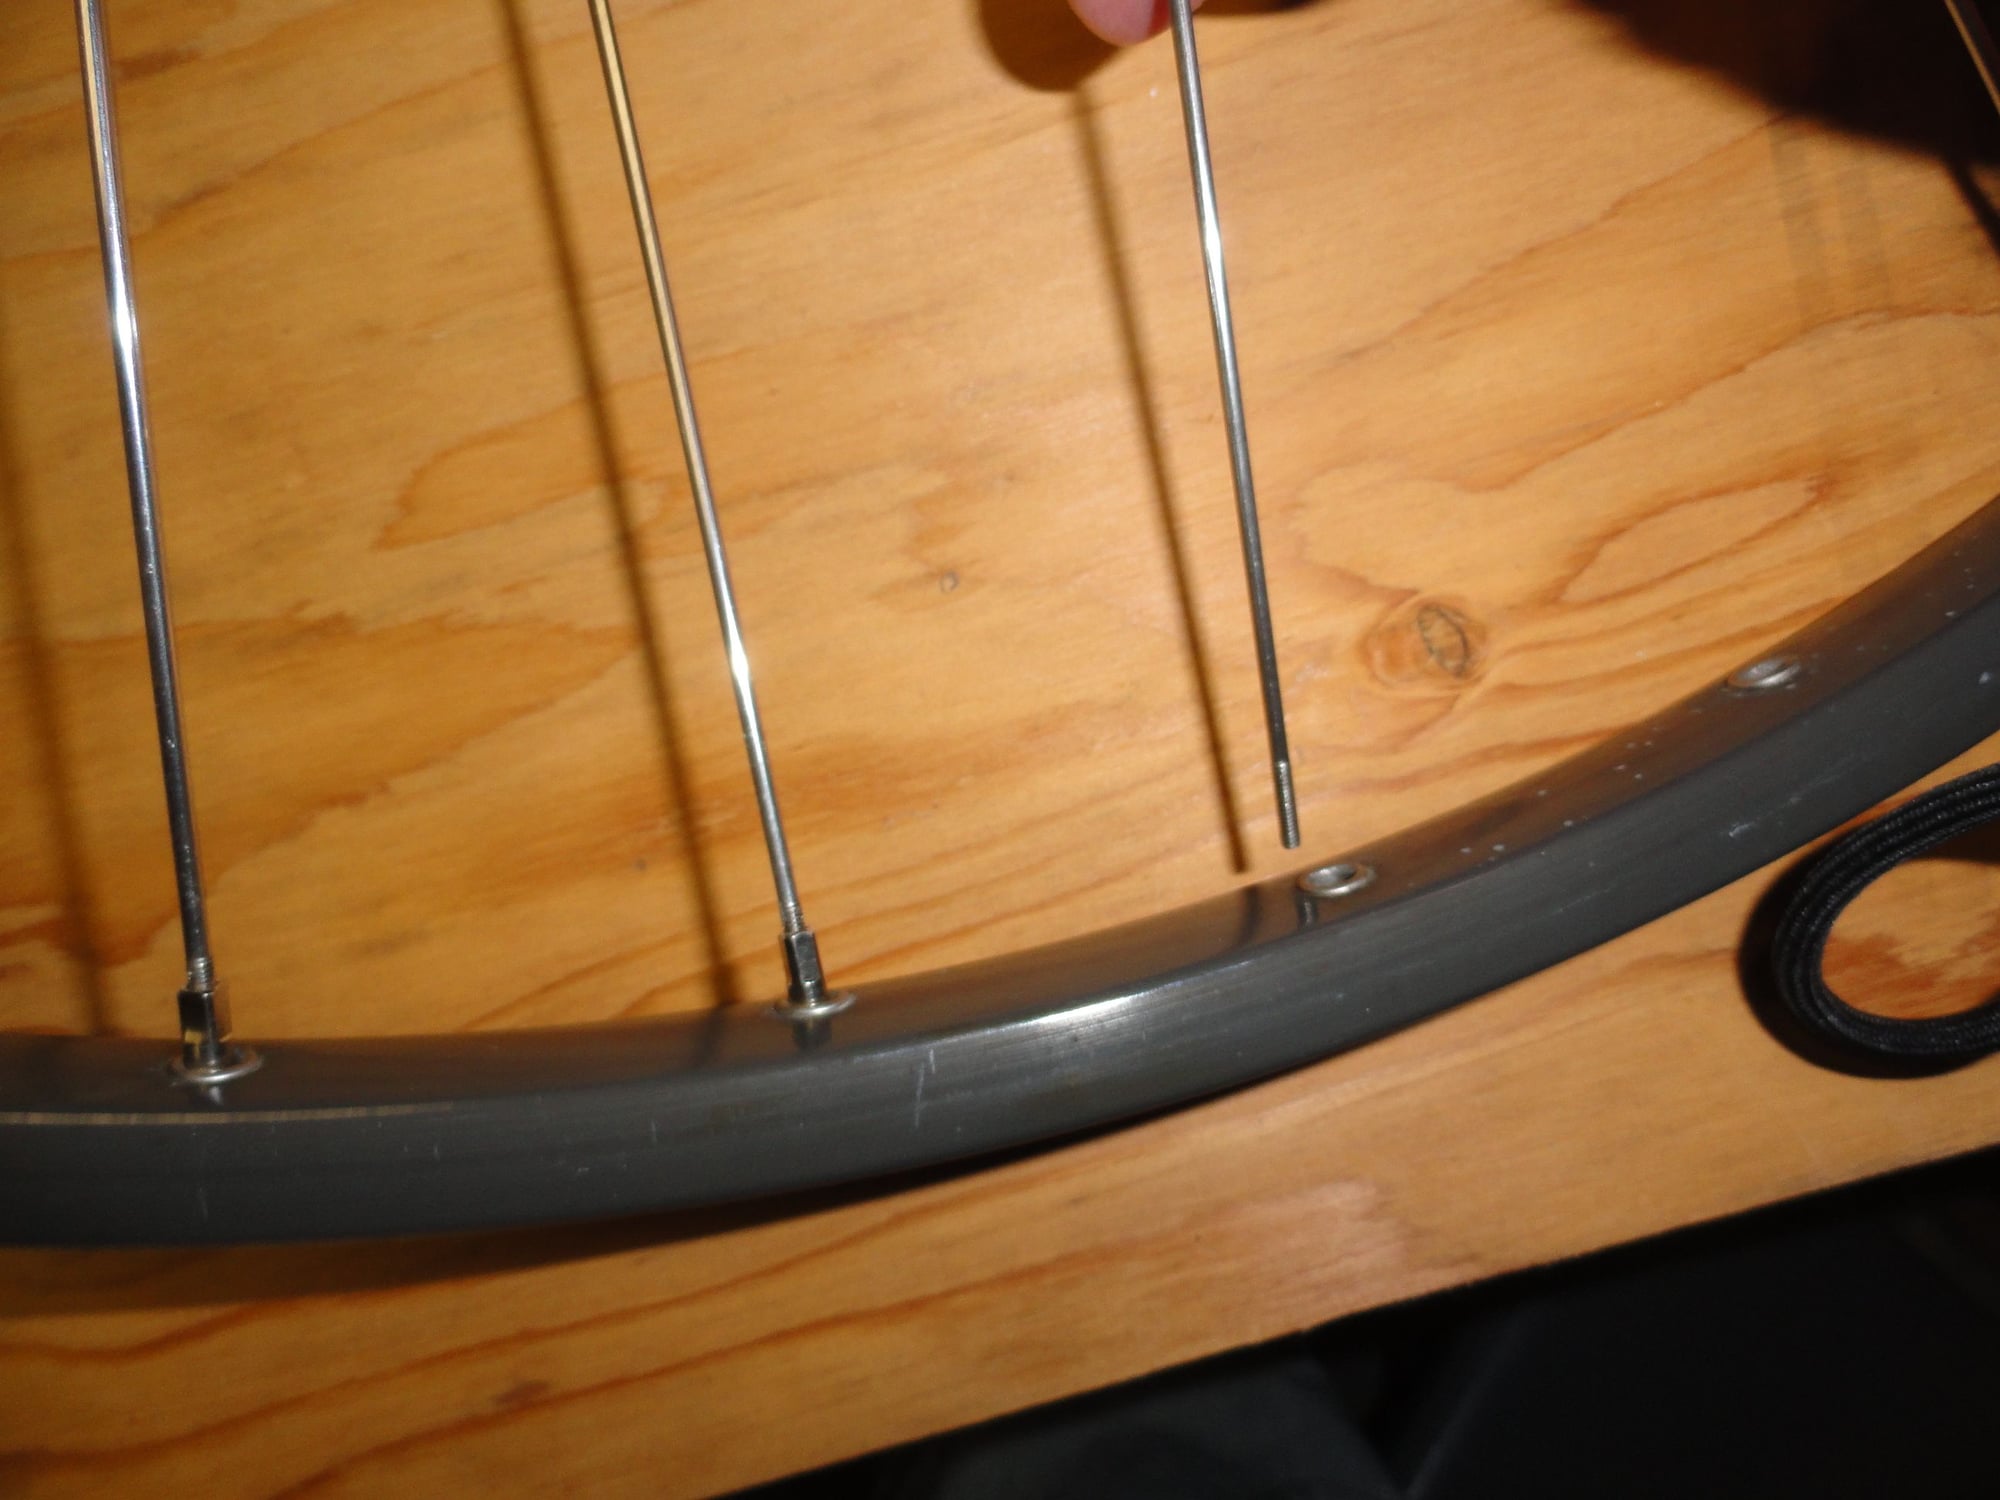
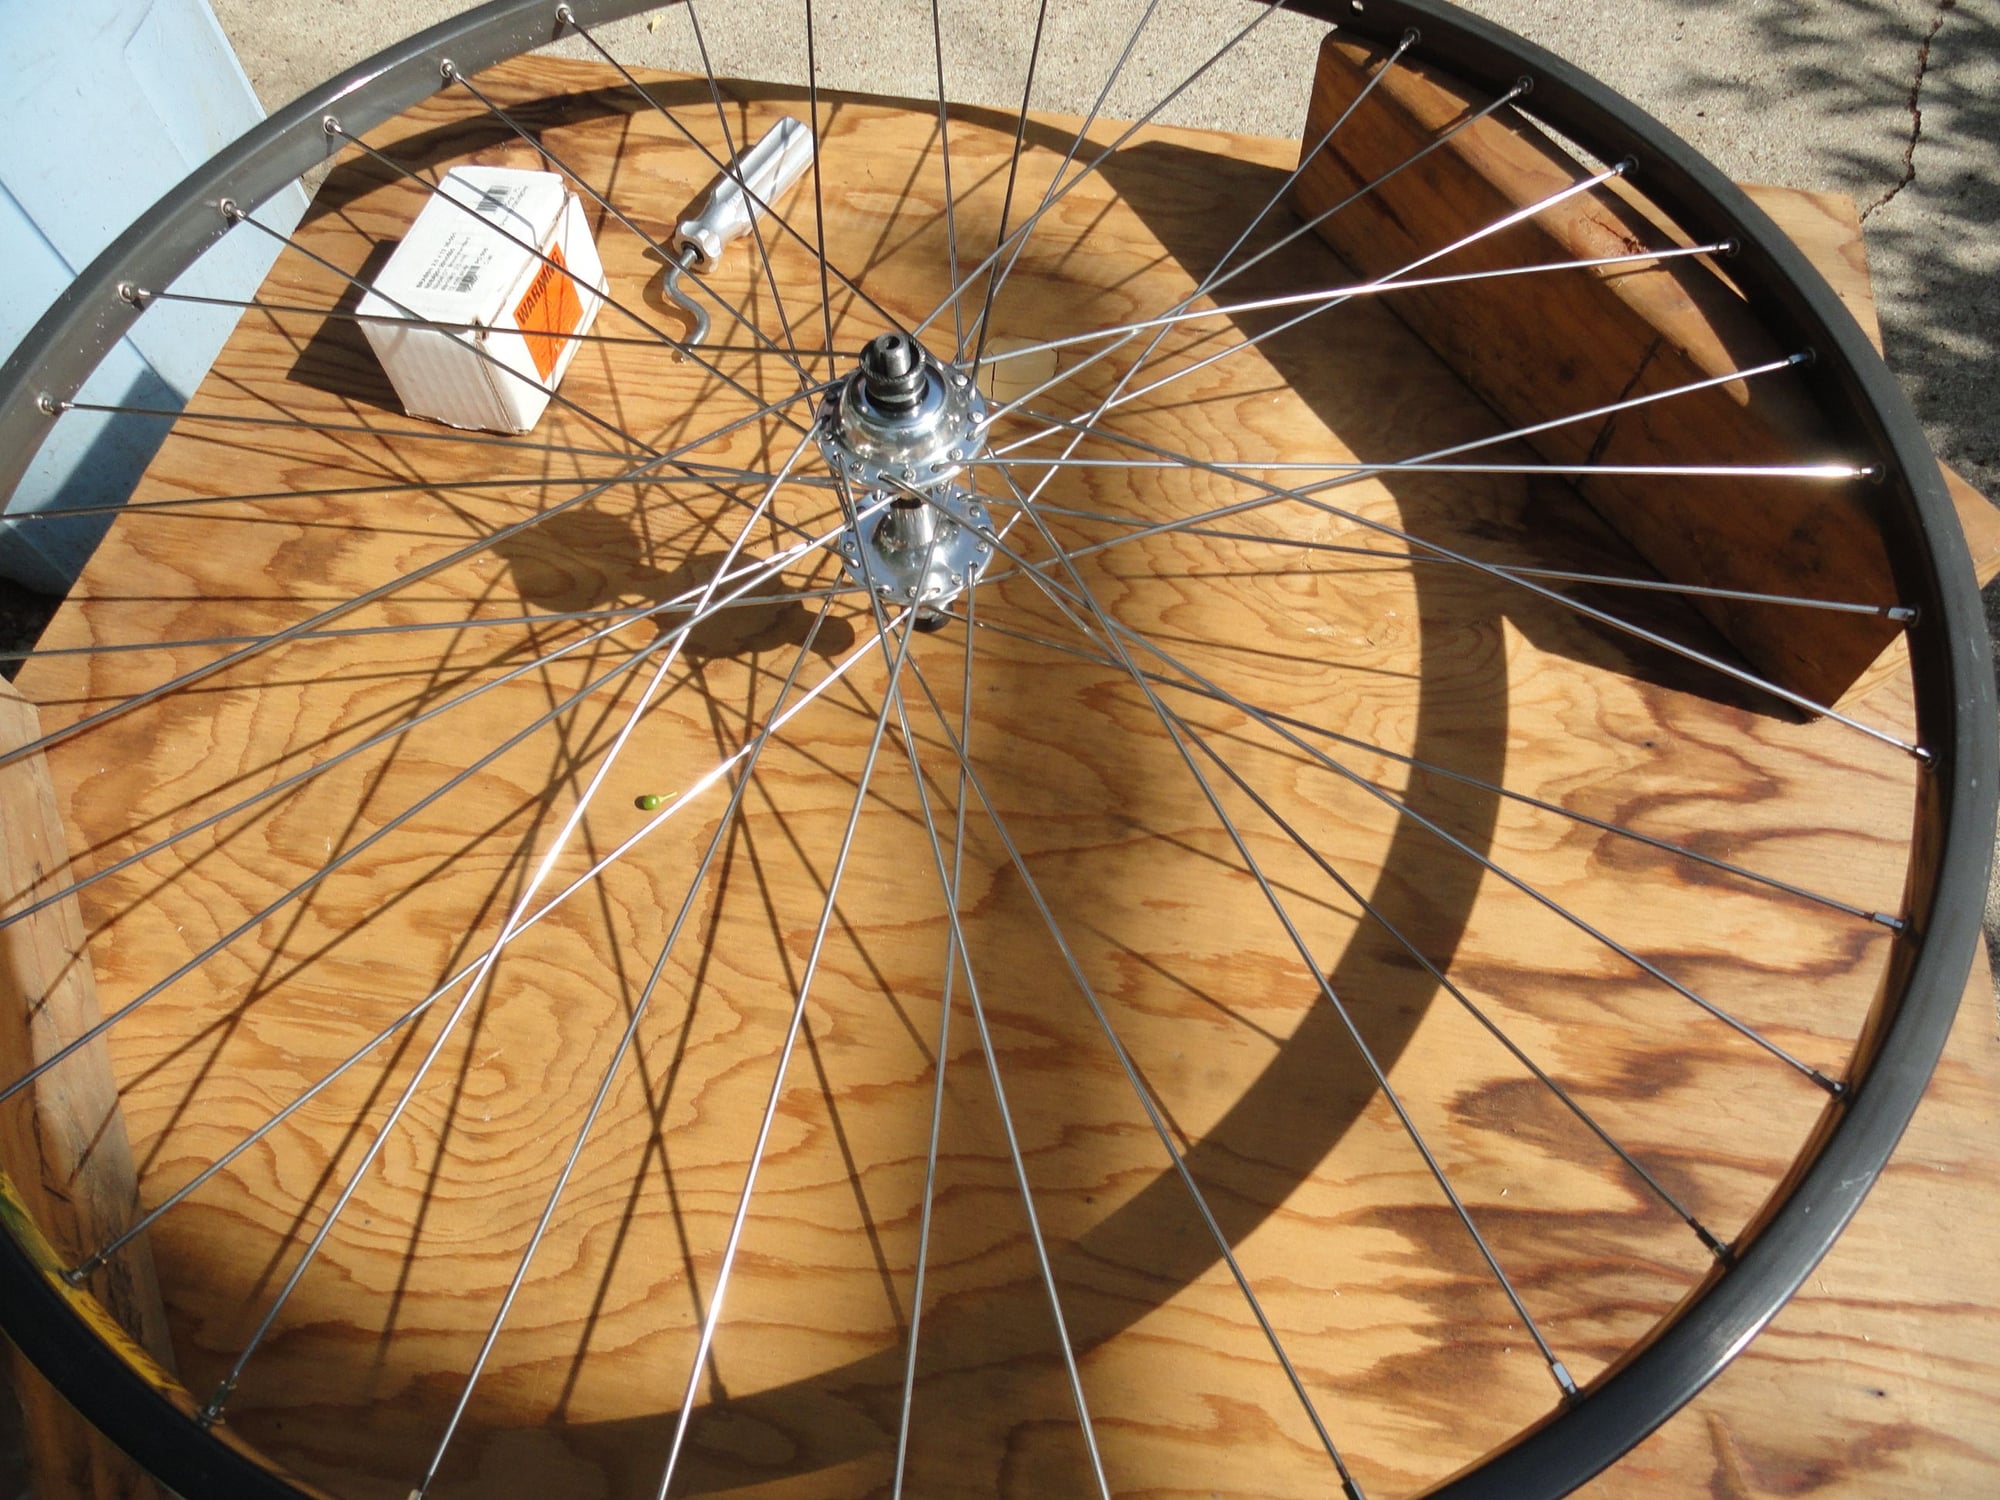
I have determined the spoke lengths and I am going to lace in the first set of drive side spokes. I want to have a cosmetically "correct" looking wheel so I will build with the hub logo just above the rim logo when looking down from the top. To do this I start with one spoke and put it in the hub from outside to in. I do this because I want the drive side pulling spokes to work from the area closest to the centerline of the finished wheel. In this case the spoke is in the fifth hole from the top hole when the hub logo is centered above the rim logo. The spoke goes to the second spoke hole on the right side of valve opening in the rim. This is the first part of the step. The process is to then put 8 more spokes into the hub from the outside of the flange toward the inside of the hub in every second spoke hole on the flange. The spokes should be placed into the rim radially in every fourth spoke hole on the rim. This is the end of the first step in my build process.
Hub with logo up
Rim with log up
first spoke into the hub toward the center of the hub
note the placement of logos on top of each other
added eight other drive side spokes. I will post extra pics in a later addition
05-19-21, 07:18 PM
#28
Senior Member
Thread Starter
Join Date: May 2019
Location: Bloomington, IN
Posts: 2,951
Bikes: Paramount, Faggin, Ochsner, Ciocc, Basso
Mentioned: 117 Post(s)
Tagged: 0 Thread(s)
Quoted: 1304 Post(s)
Liked 1,912 Times
in
1,142 Posts
Ok a break to take more pics
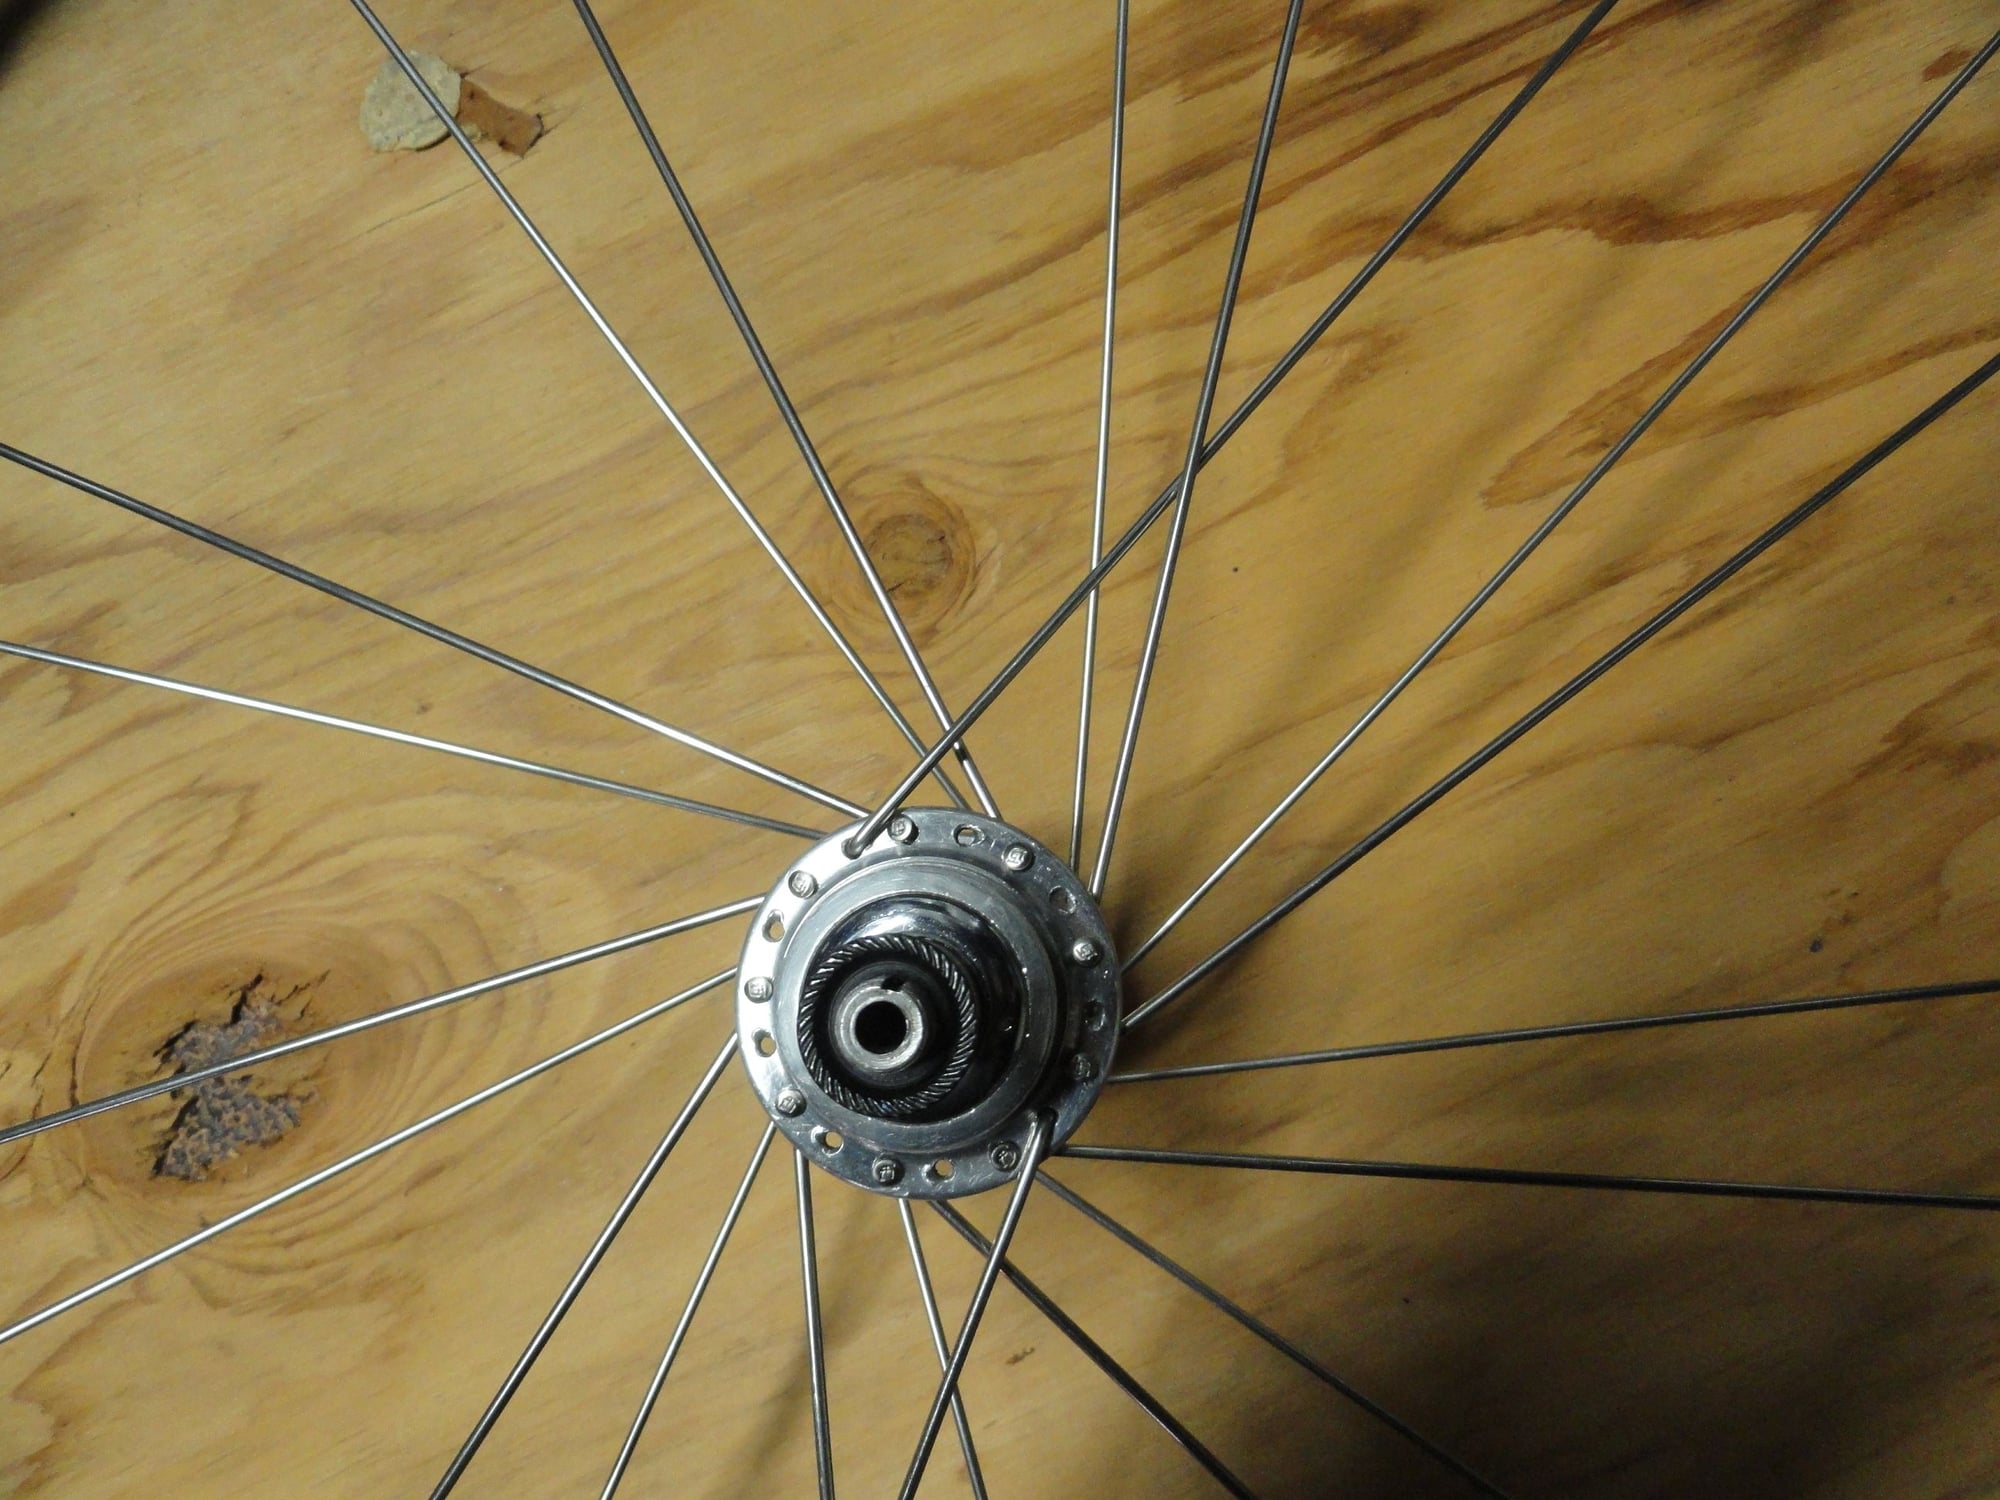
I showed in the last session how the wheel looked at finish. Now for the tips and tricks part of the build. At this point the spokes are not well seated into the hub so It is going to make the build easier if they are/ The process I use is to hold the hub stable and bend the spokes slightly upward to get the spokes to seat in the hub shell. I am going to show the process after explaining the second step of the build.
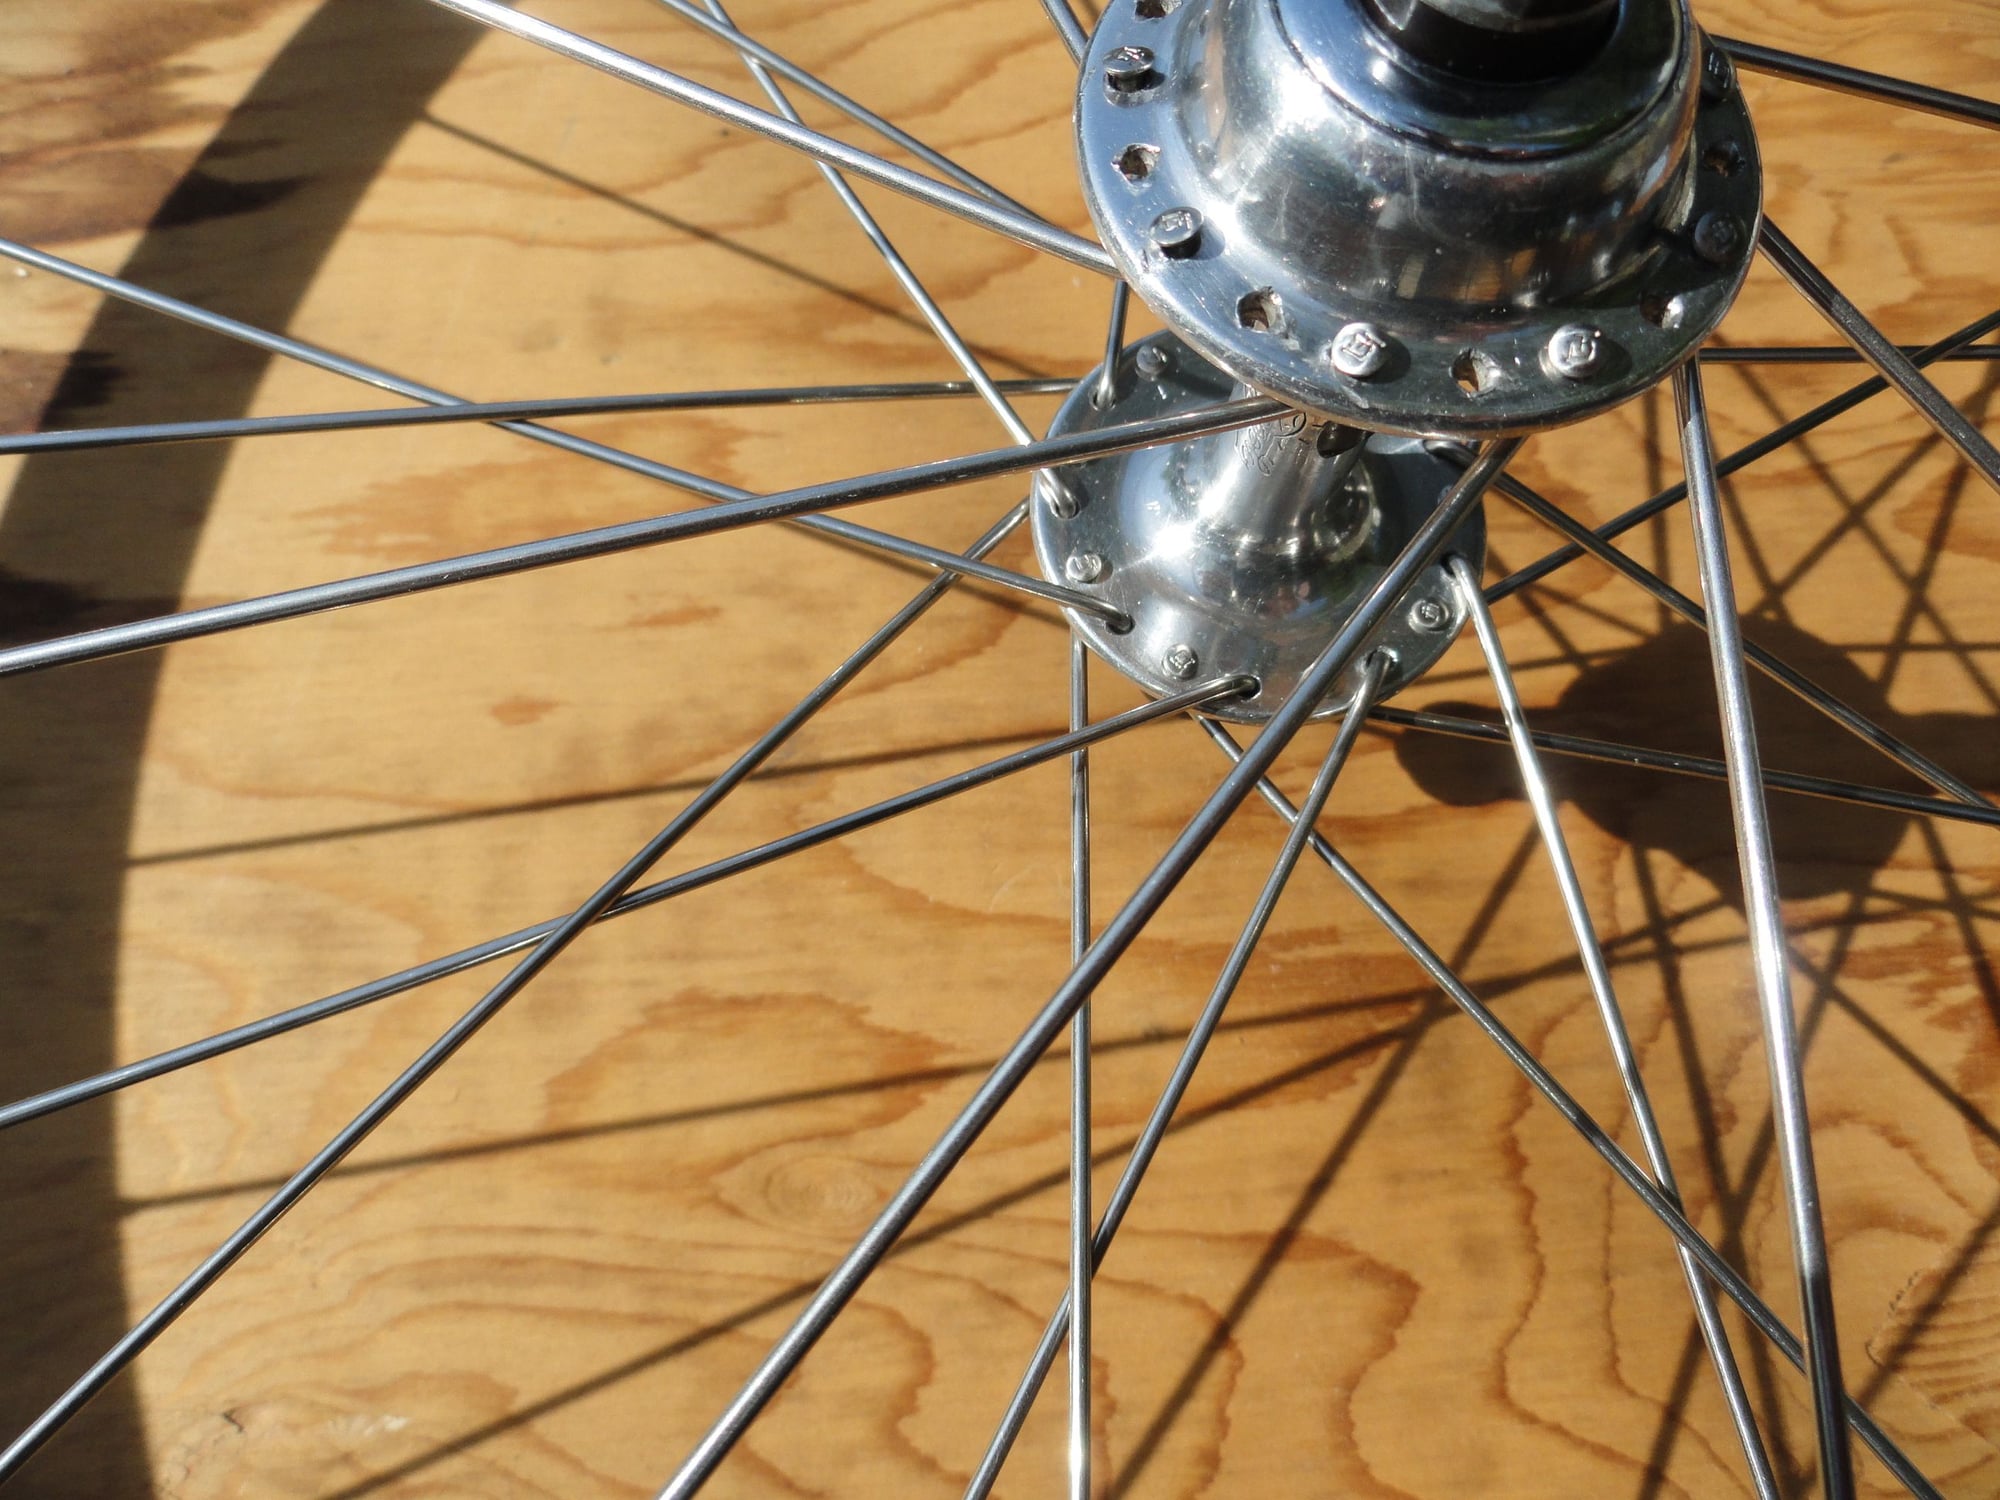
At this point the drive side spokes are set, and it is time to load the off drive-side spokes so they pull in the proper sequence to drive the wheel. The spokes on this side will pull just behind the first spokes we installed. So we need to find the hole in the off drive-side that immediately follows the drive spoke the nine spokes go into the h form the outside to the inside every second hole in the hub. These spokes then radiate to the rim just behind the first set of spokes we placed. The pictures should make it clear as to how they go into the rim. When the nipples are installed the spokes should be seated down just like on the drive side.
the radial pattern from step one
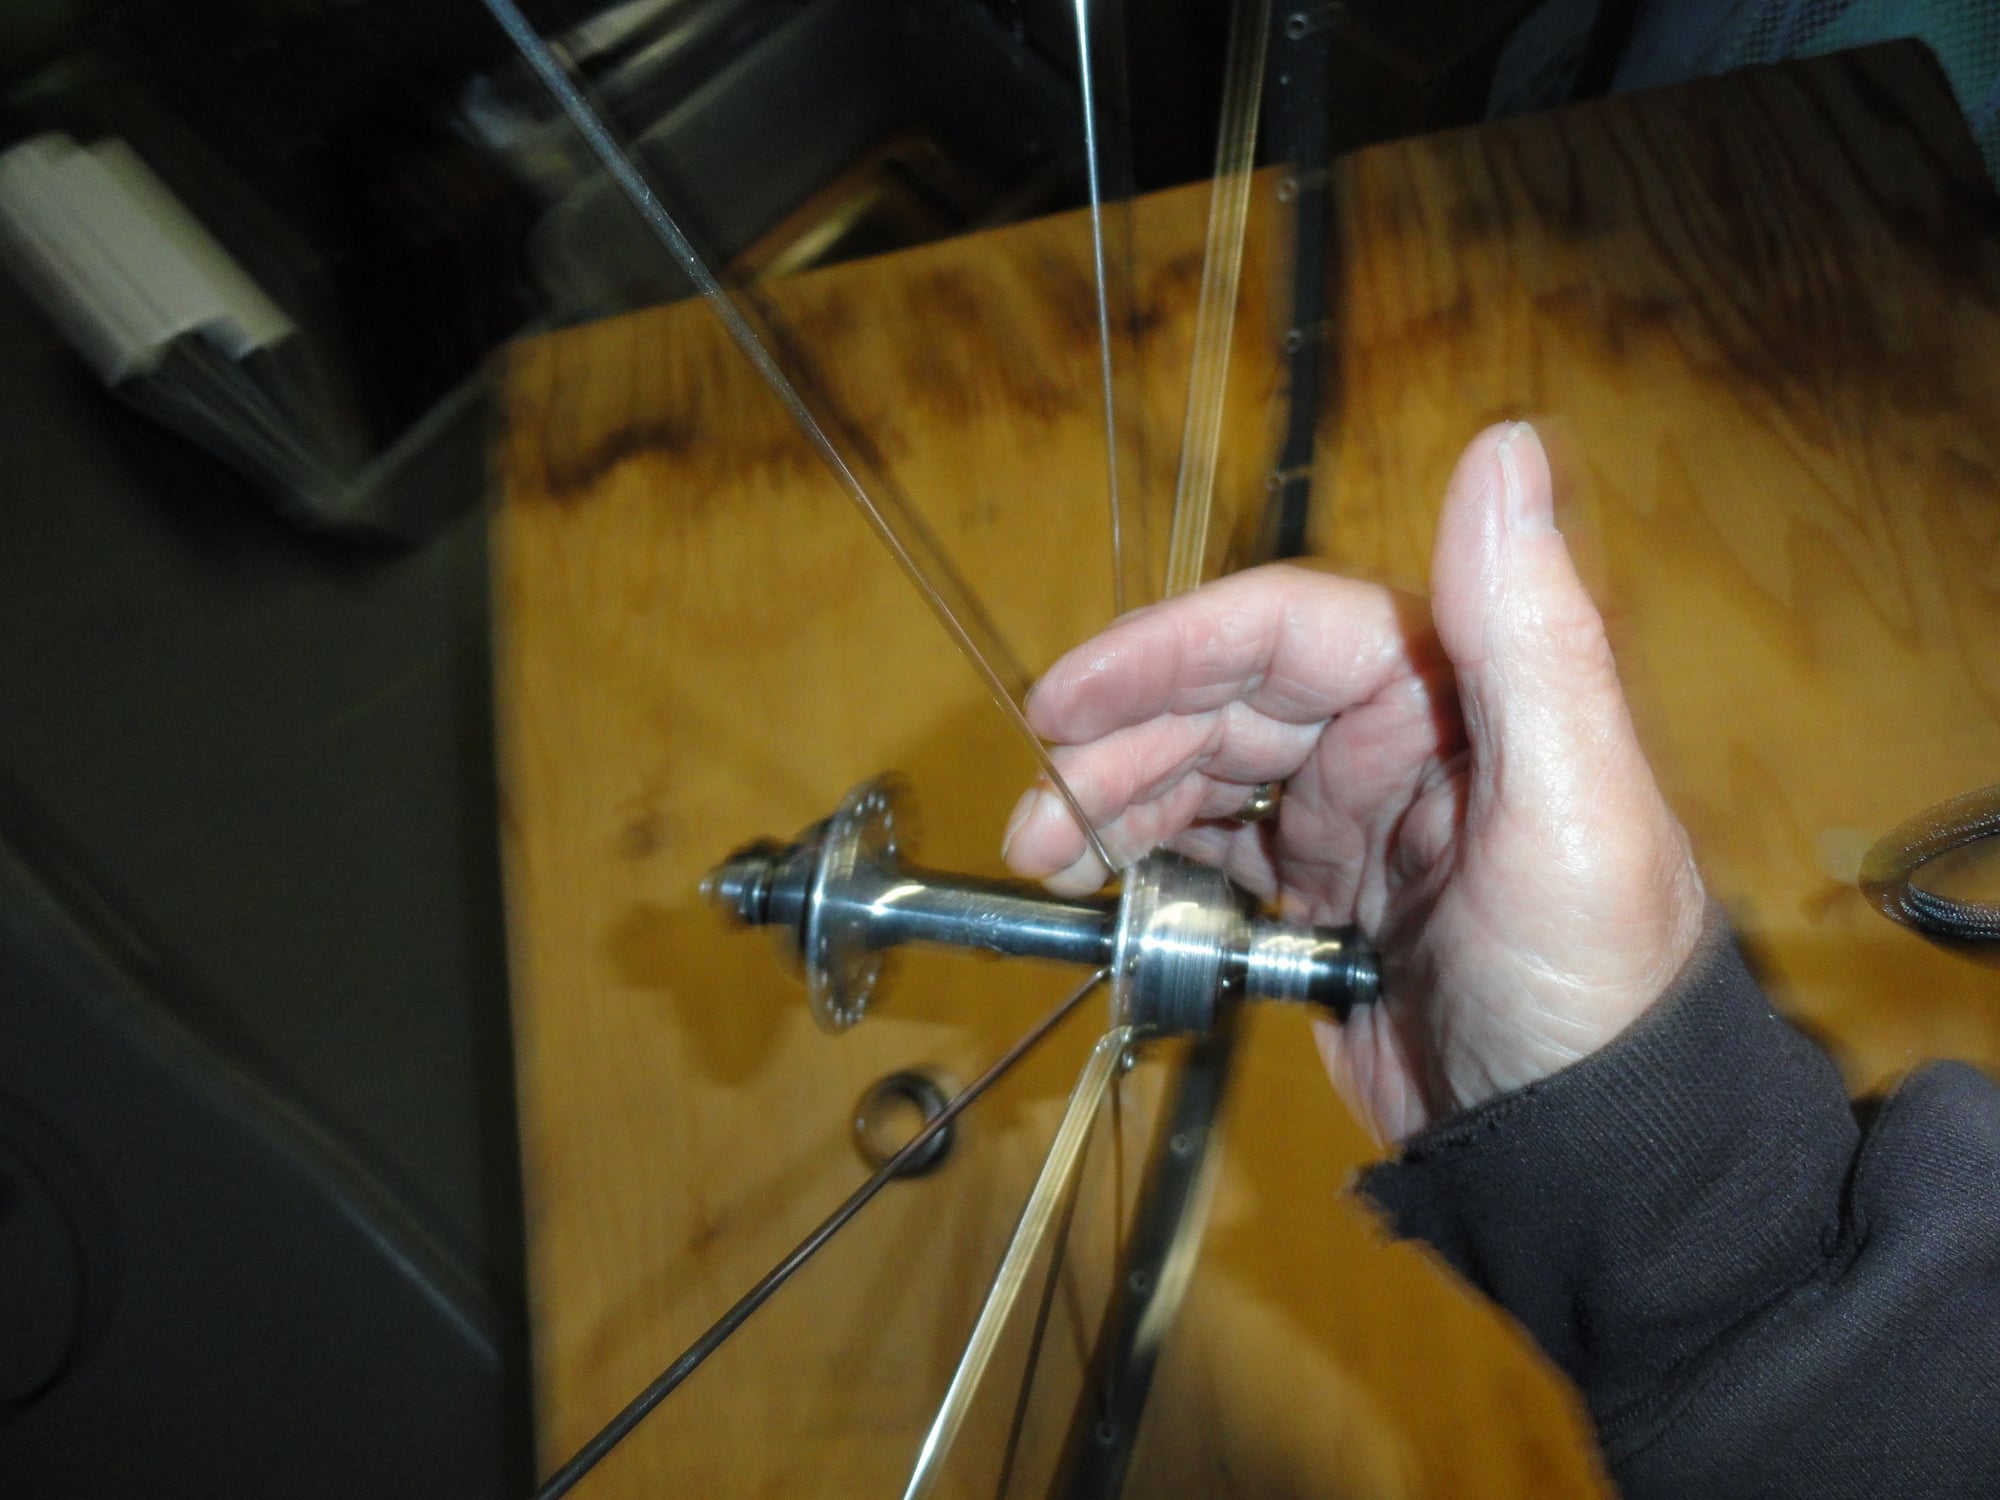
bending the spokes to seat into the hub-shell
position of the non drive side spokes in the hub
The non-drive side spoke closest in the pic and drive side spoke leading the non-drive side spoke
The way the wheel will look after lacing the non-drive spokes.
The non-drive side spokes will need to be seated in as were the first stage spokes. Next segment will show the way and reasons for the methods I use
I showed in the last session how the wheel looked at finish. Now for the tips and tricks part of the build. At this point the spokes are not well seated into the hub so It is going to make the build easier if they are/ The process I use is to hold the hub stable and bend the spokes slightly upward to get the spokes to seat in the hub shell. I am going to show the process after explaining the second step of the build.
At this point the drive side spokes are set, and it is time to load the off drive-side spokes so they pull in the proper sequence to drive the wheel. The spokes on this side will pull just behind the first spokes we installed. So we need to find the hole in the off drive-side that immediately follows the drive spoke the nine spokes go into the h form the outside to the inside every second hole in the hub. These spokes then radiate to the rim just behind the first set of spokes we placed. The pictures should make it clear as to how they go into the rim. When the nipples are installed the spokes should be seated down just like on the drive side.
the radial pattern from step one
bending the spokes to seat into the hub-shell
position of the non drive side spokes in the hub
The non-drive side spoke closest in the pic and drive side spoke leading the non-drive side spoke
The way the wheel will look after lacing the non-drive spokes.
The non-drive side spokes will need to be seated in as were the first stage spokes. Next segment will show the way and reasons for the methods I use
05-19-21, 08:00 PM
#29
Senior Member
Thread Starter
Join Date: May 2019
Location: Bloomington, IN
Posts: 2,951
Bikes: Paramount, Faggin, Ochsner, Ciocc, Basso
Mentioned: 117 Post(s)
Tagged: 0 Thread(s)
Quoted: 1304 Post(s)
Liked 1,912 Times
in
1,142 Posts
Now comes the final steps of the wheel lacing. I place one spoke on the drive side and another opposite it through the wheel and because there are now nothing in my way to do the lacing from outside of the wheel. The lacing pattern is set and all that is left to do is place the seven additional drive side spokes in the hub and then place all nine of the NDS spokes through the wheel so the work can be done from the outside of the wheel. It makes the work go smoothly and the spokes all are set in place and lace up easily. Aside from doing this work with the stops to take pictures and tell the story, I think it has take about 40 minutes to do this part of the build. The final stage is going to be done on the truing stand and I will explain he process there as I get to it. I'm done for tonight but I think there is plenty here to digest and I think I will have to answer a few questions. Smiles, MH
These tow spokes will set the wheel for it's finsh
The spokes are placed into the hub from the inside to the outside. And then laced over two and under one spoke for it's final position. The way it looks in place
both spokes in place and laced holding the wheel into position for the rest of the lacing work
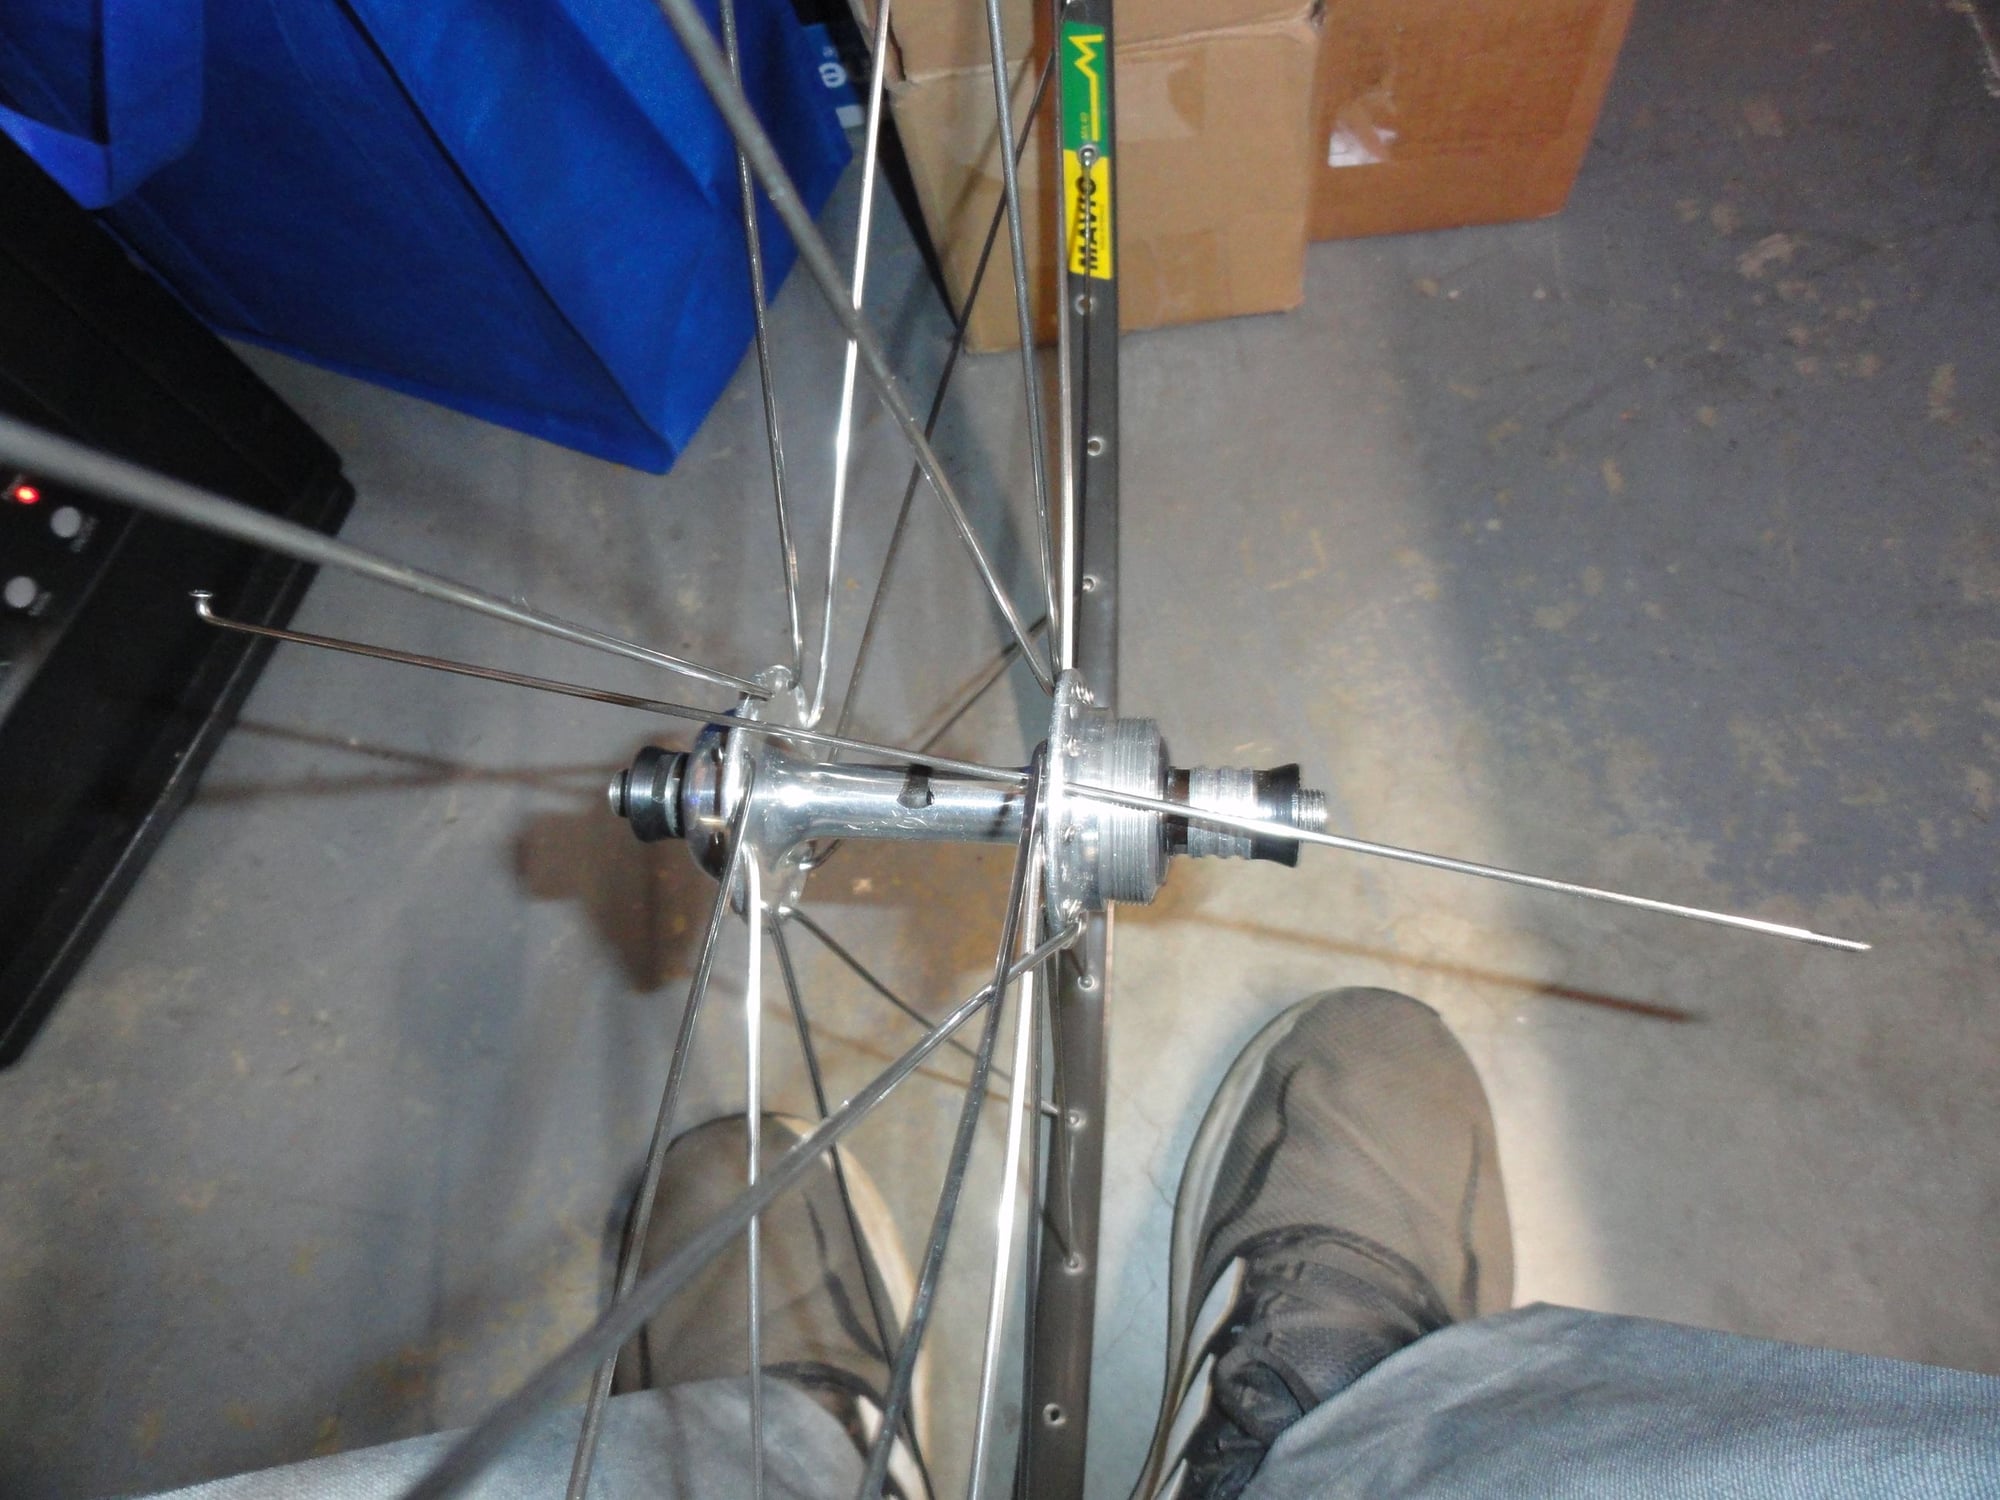
When the spokes are put from the inside out there are no impediments to the lacing
Same here easy-peasy lacing
All spokes after will fall right into place for ease in the build process.
These tow spokes will set the wheel for it's finsh
The spokes are placed into the hub from the inside to the outside. And then laced over two and under one spoke for it's final position. The way it looks in place
both spokes in place and laced holding the wheel into position for the rest of the lacing work
When the spokes are put from the inside out there are no impediments to the lacing
Same here easy-peasy lacing
All spokes after will fall right into place for ease in the build process.
05-19-21, 08:02 PM
#30
Senior Member
Thread Starter
Join Date: May 2019
Location: Bloomington, IN
Posts: 2,951
Bikes: Paramount, Faggin, Ochsner, Ciocc, Basso
Mentioned: 117 Post(s)
Tagged: 0 Thread(s)
Quoted: 1304 Post(s)
Liked 1,912 Times
in
1,142 Posts
Oops! It is looking like my camera did the Blair Witch thing again ! Smiles, MH
05-20-21, 08:44 AM
#31
Senior Member
Thread Starter
Join Date: May 2019
Location: Bloomington, IN
Posts: 2,951
Bikes: Paramount, Faggin, Ochsner, Ciocc, Basso
Mentioned: 117 Post(s)
Tagged: 0 Thread(s)
Quoted: 1304 Post(s)
Liked 1,912 Times
in
1,142 Posts
It is now the next morning and the build continues.
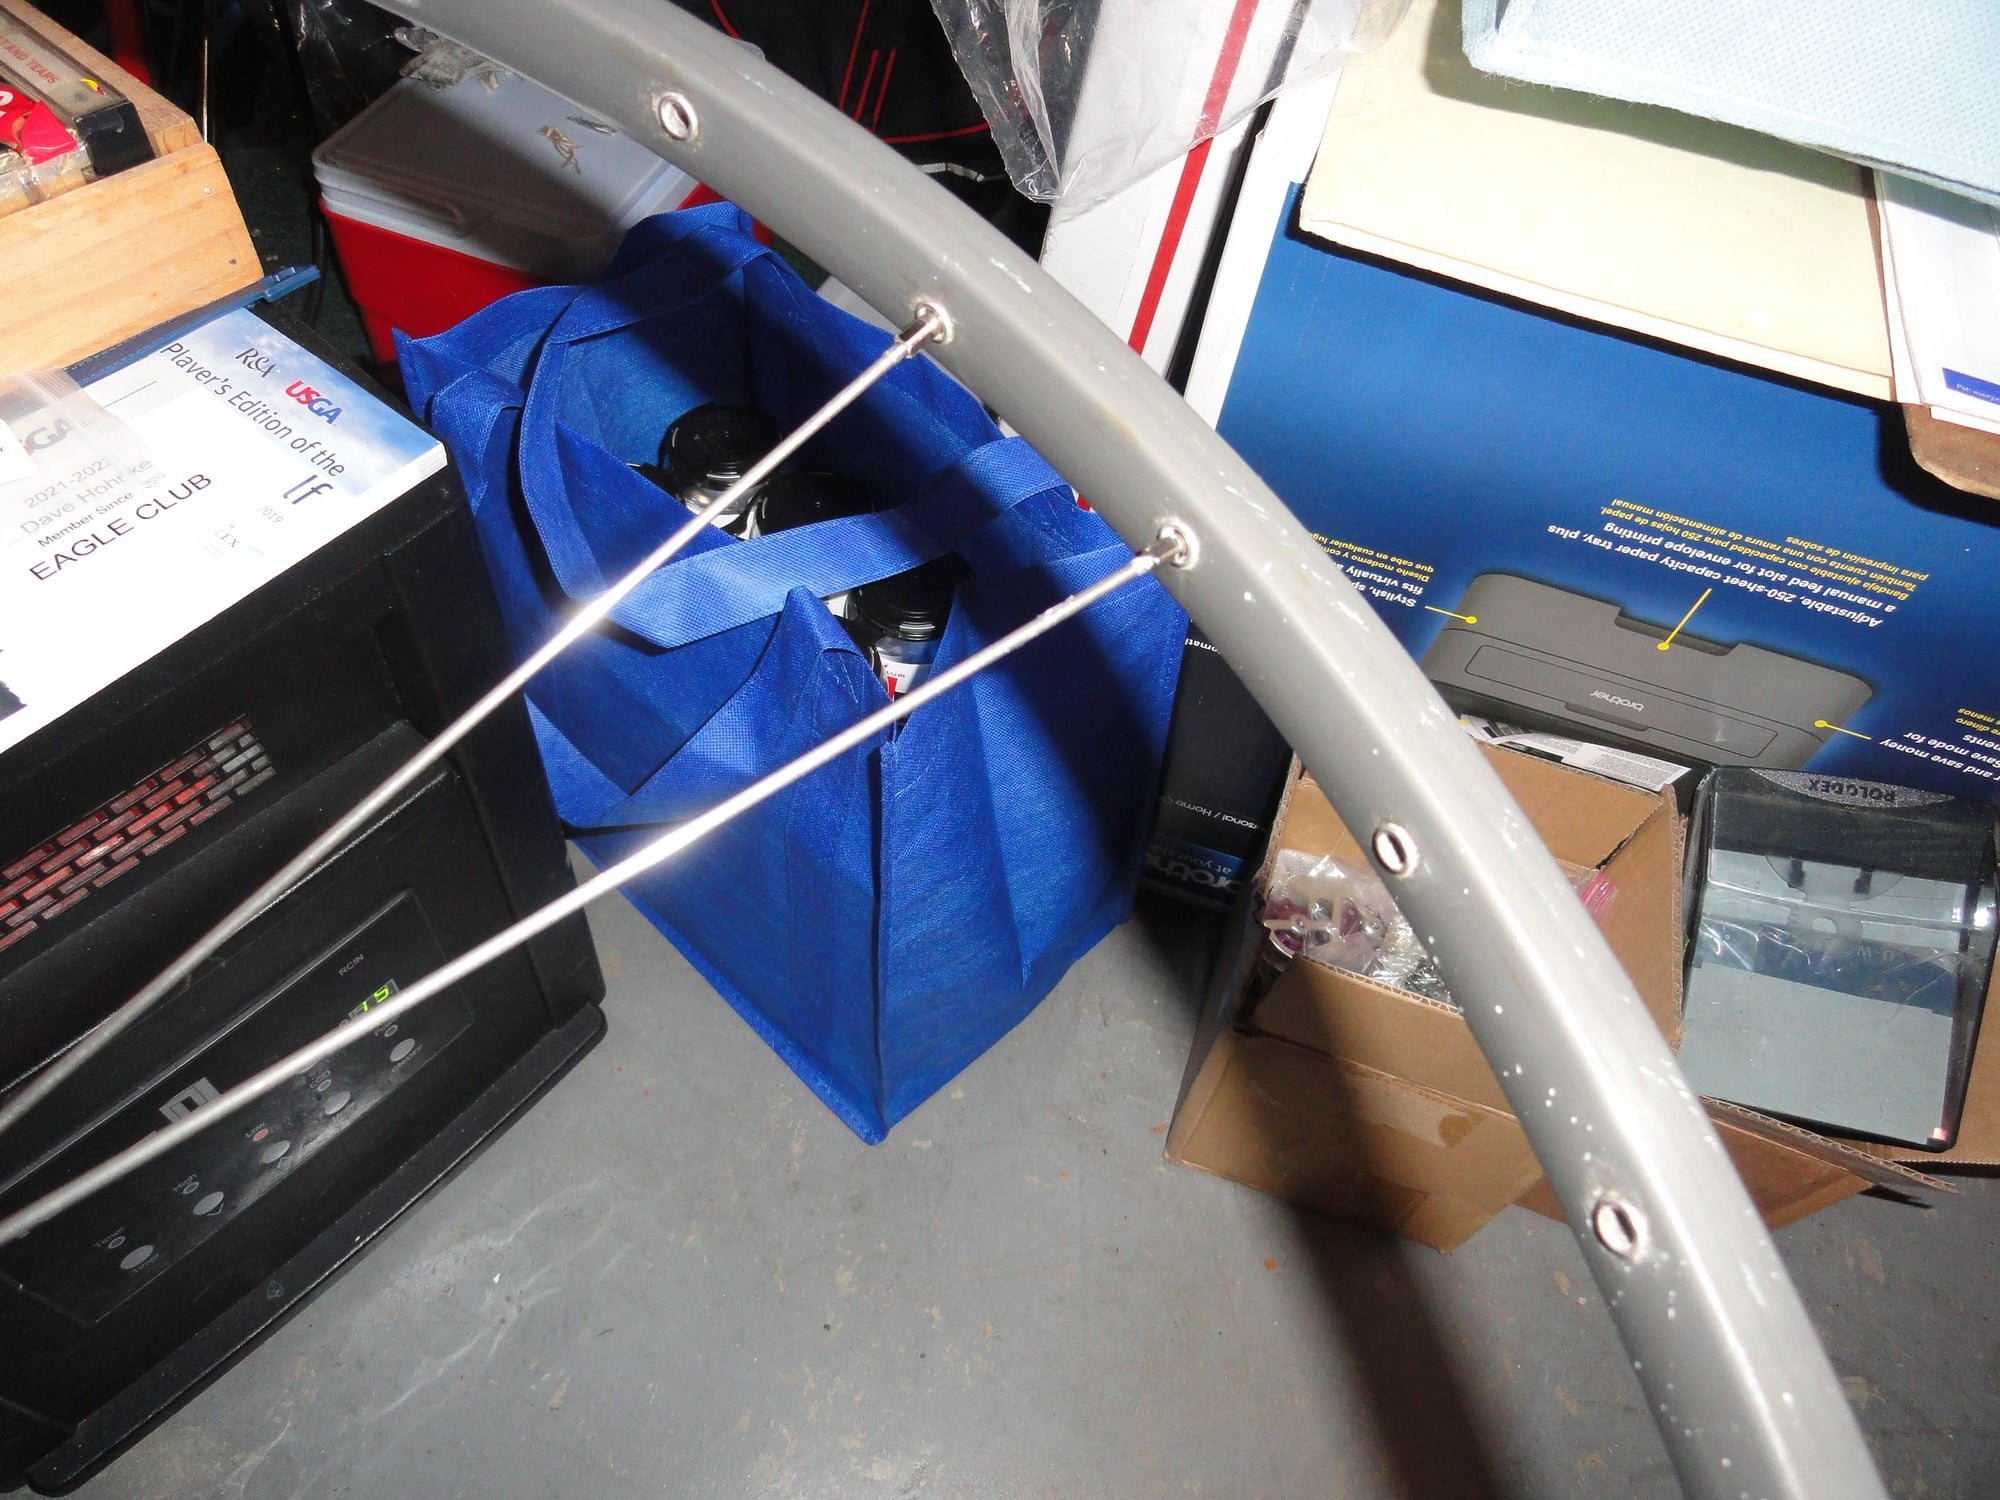
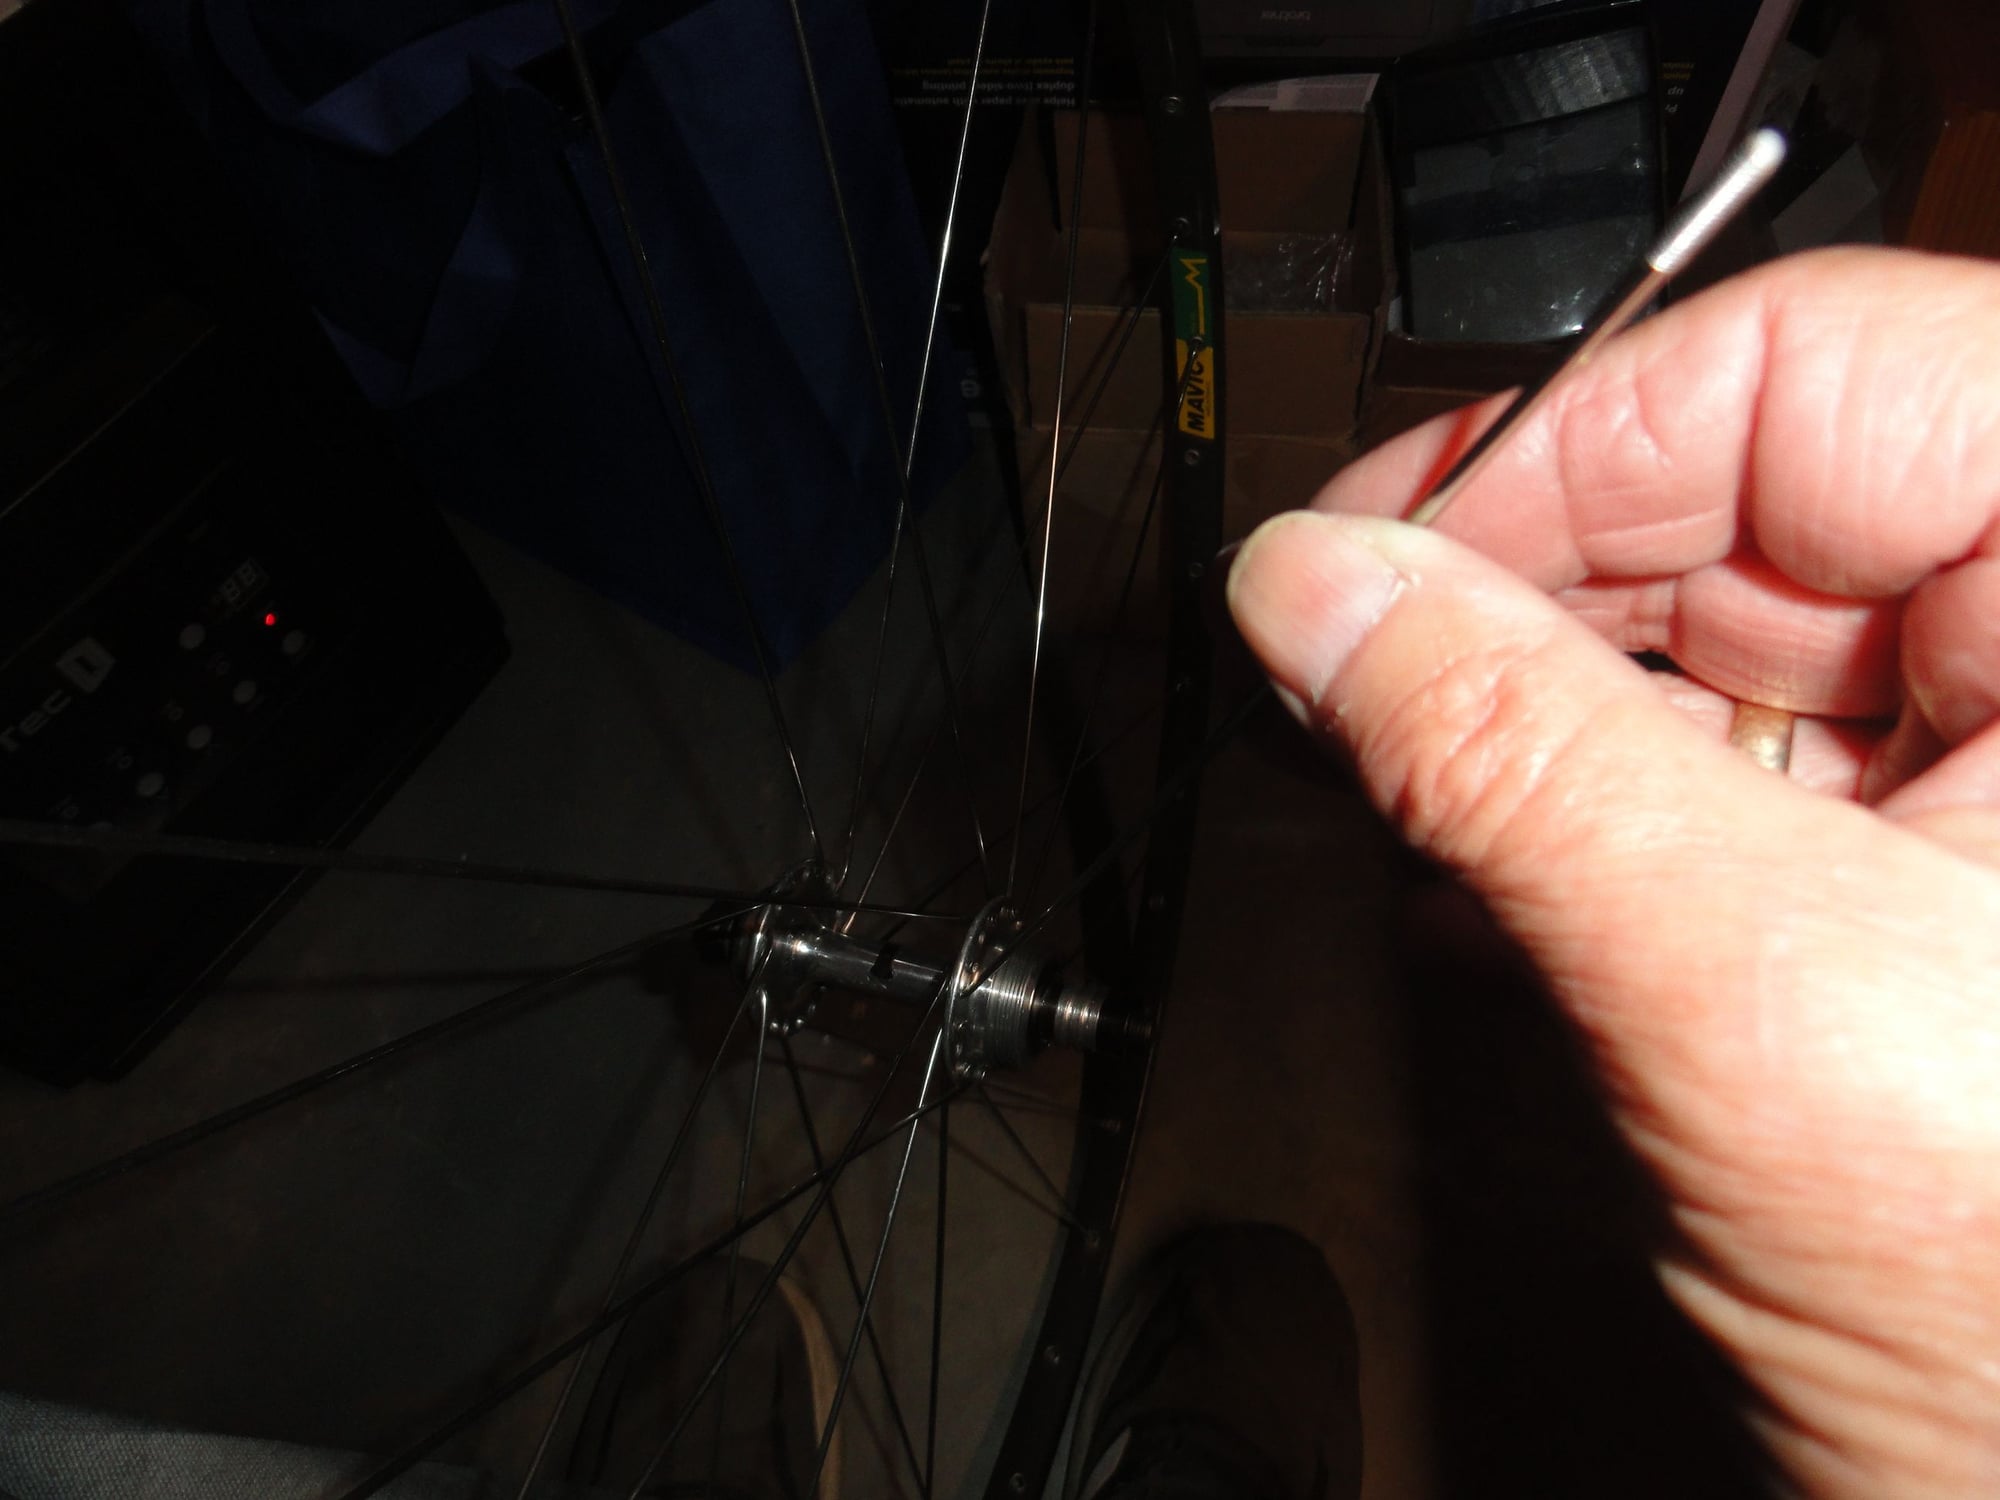
I have finished the drive side spoke lacing and require only to lace in the other nine spokes on the non-drive side. These spokes do not do any pulling of the rim from the hub but are there to stabilize the pulling spokes that were the initial two sets of spokes I installed. I will start by putting the spokes though the wheel from the drive side and the spokes then come out on the outside of the wheel. This allows for free movement of the spokes when lacing and doesn't risk scuffing up the rim by trying to lace from the inside of the spoke pattern. Here are today's pictures:
The non-drive side of the rim and the current installed spokes.
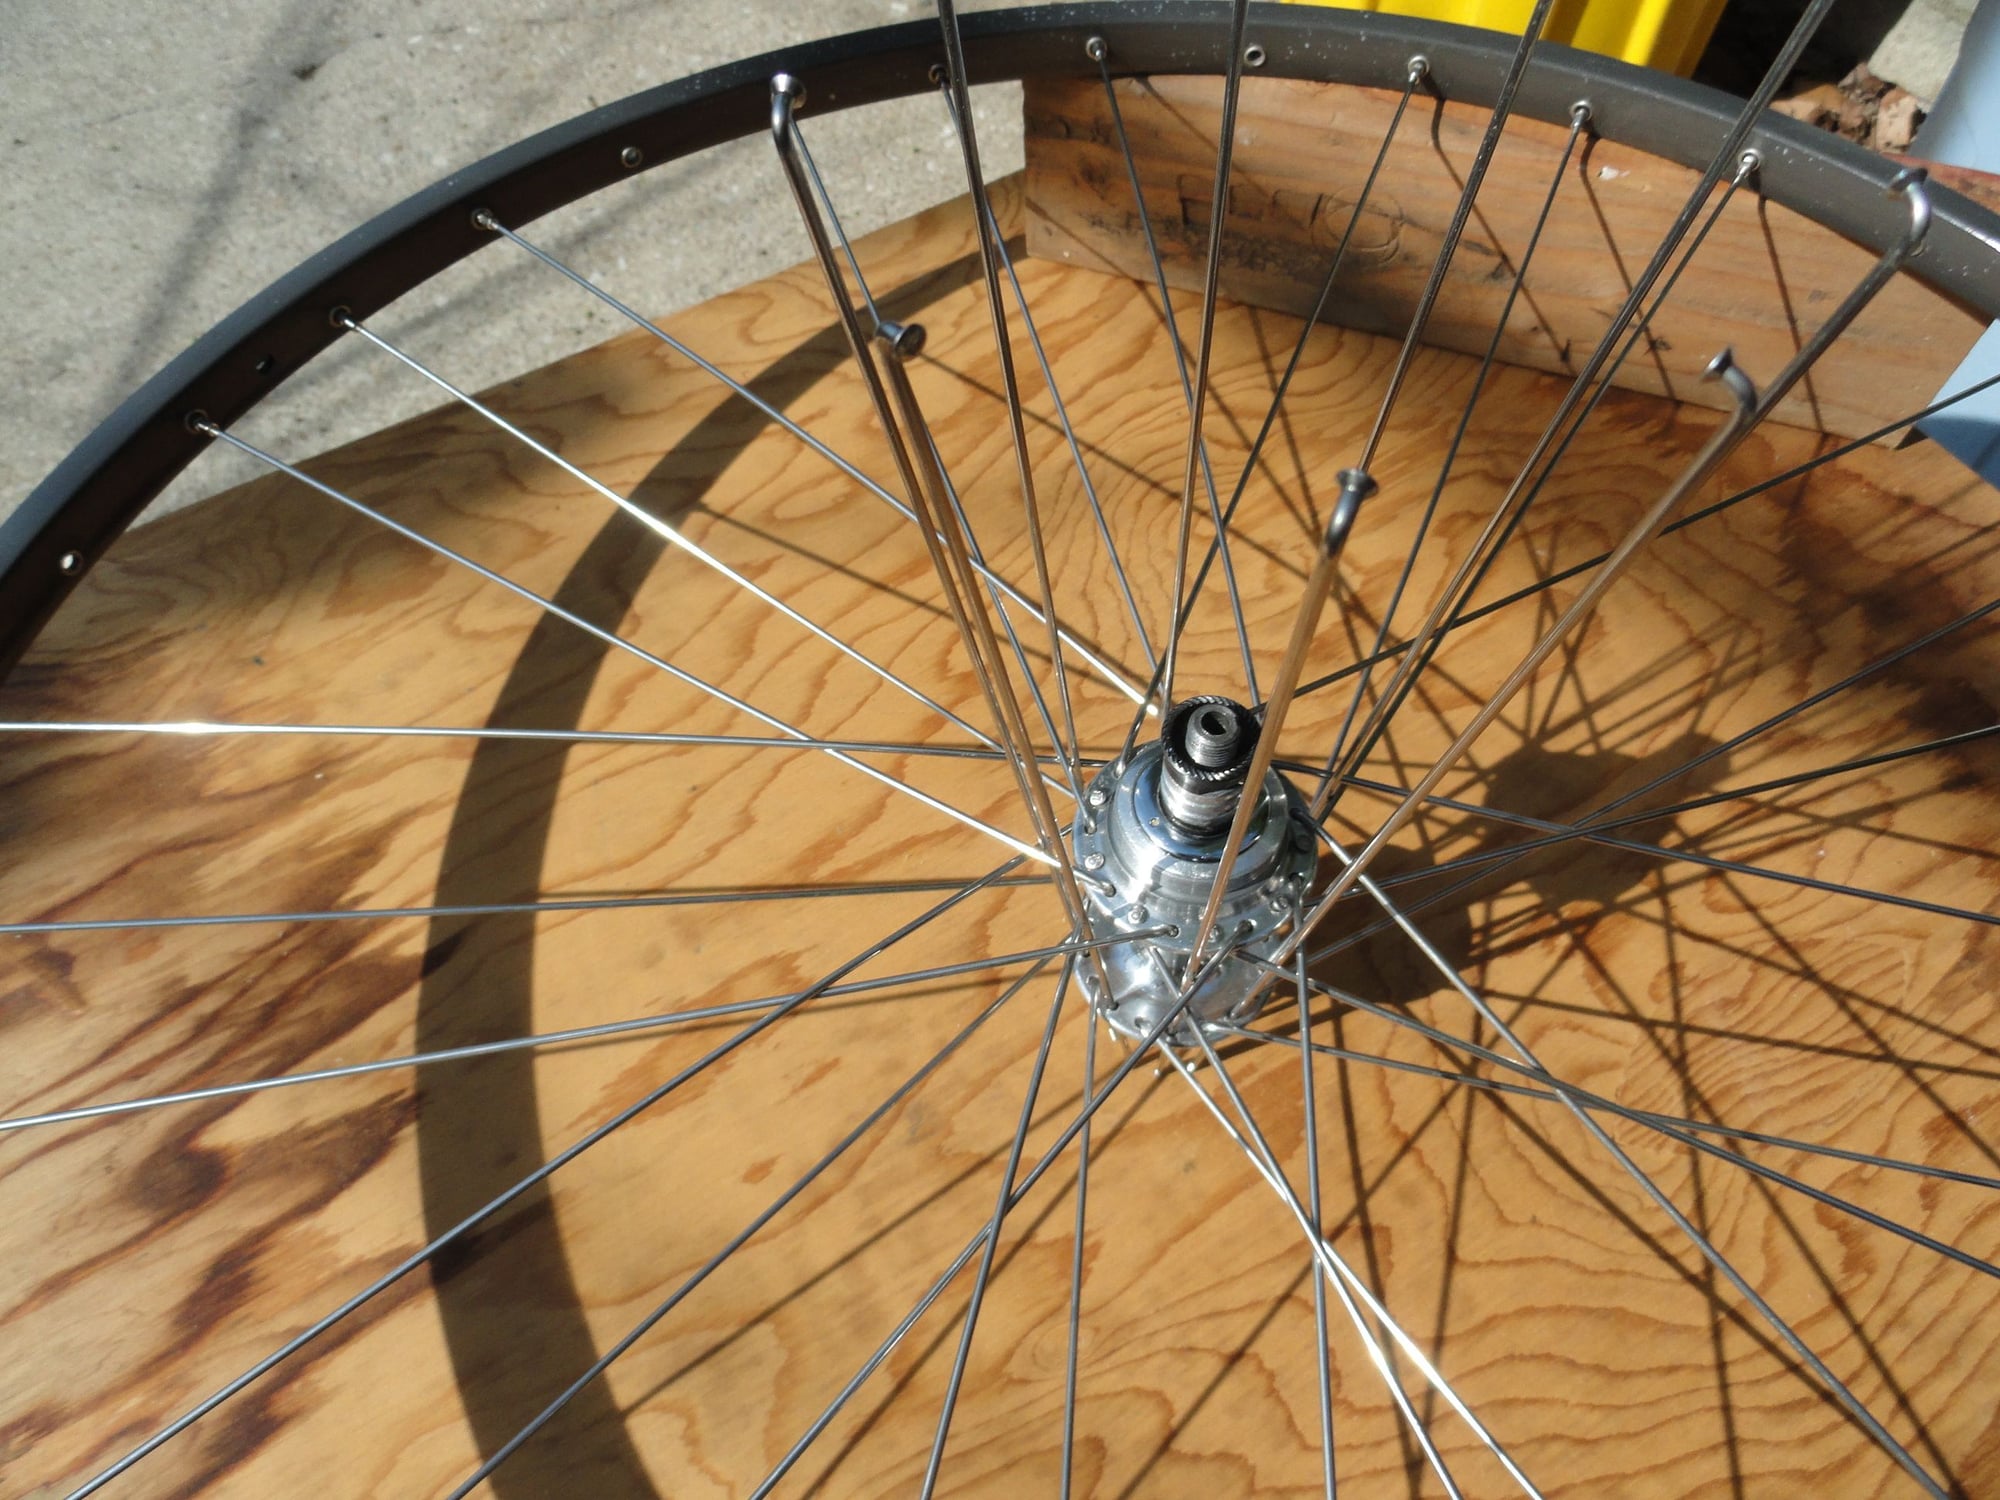
The last nine spokes being added from the drive side of the wheel.

By placing the spokes through the star pattern closest to the hub flange they will drop through a bit easier.
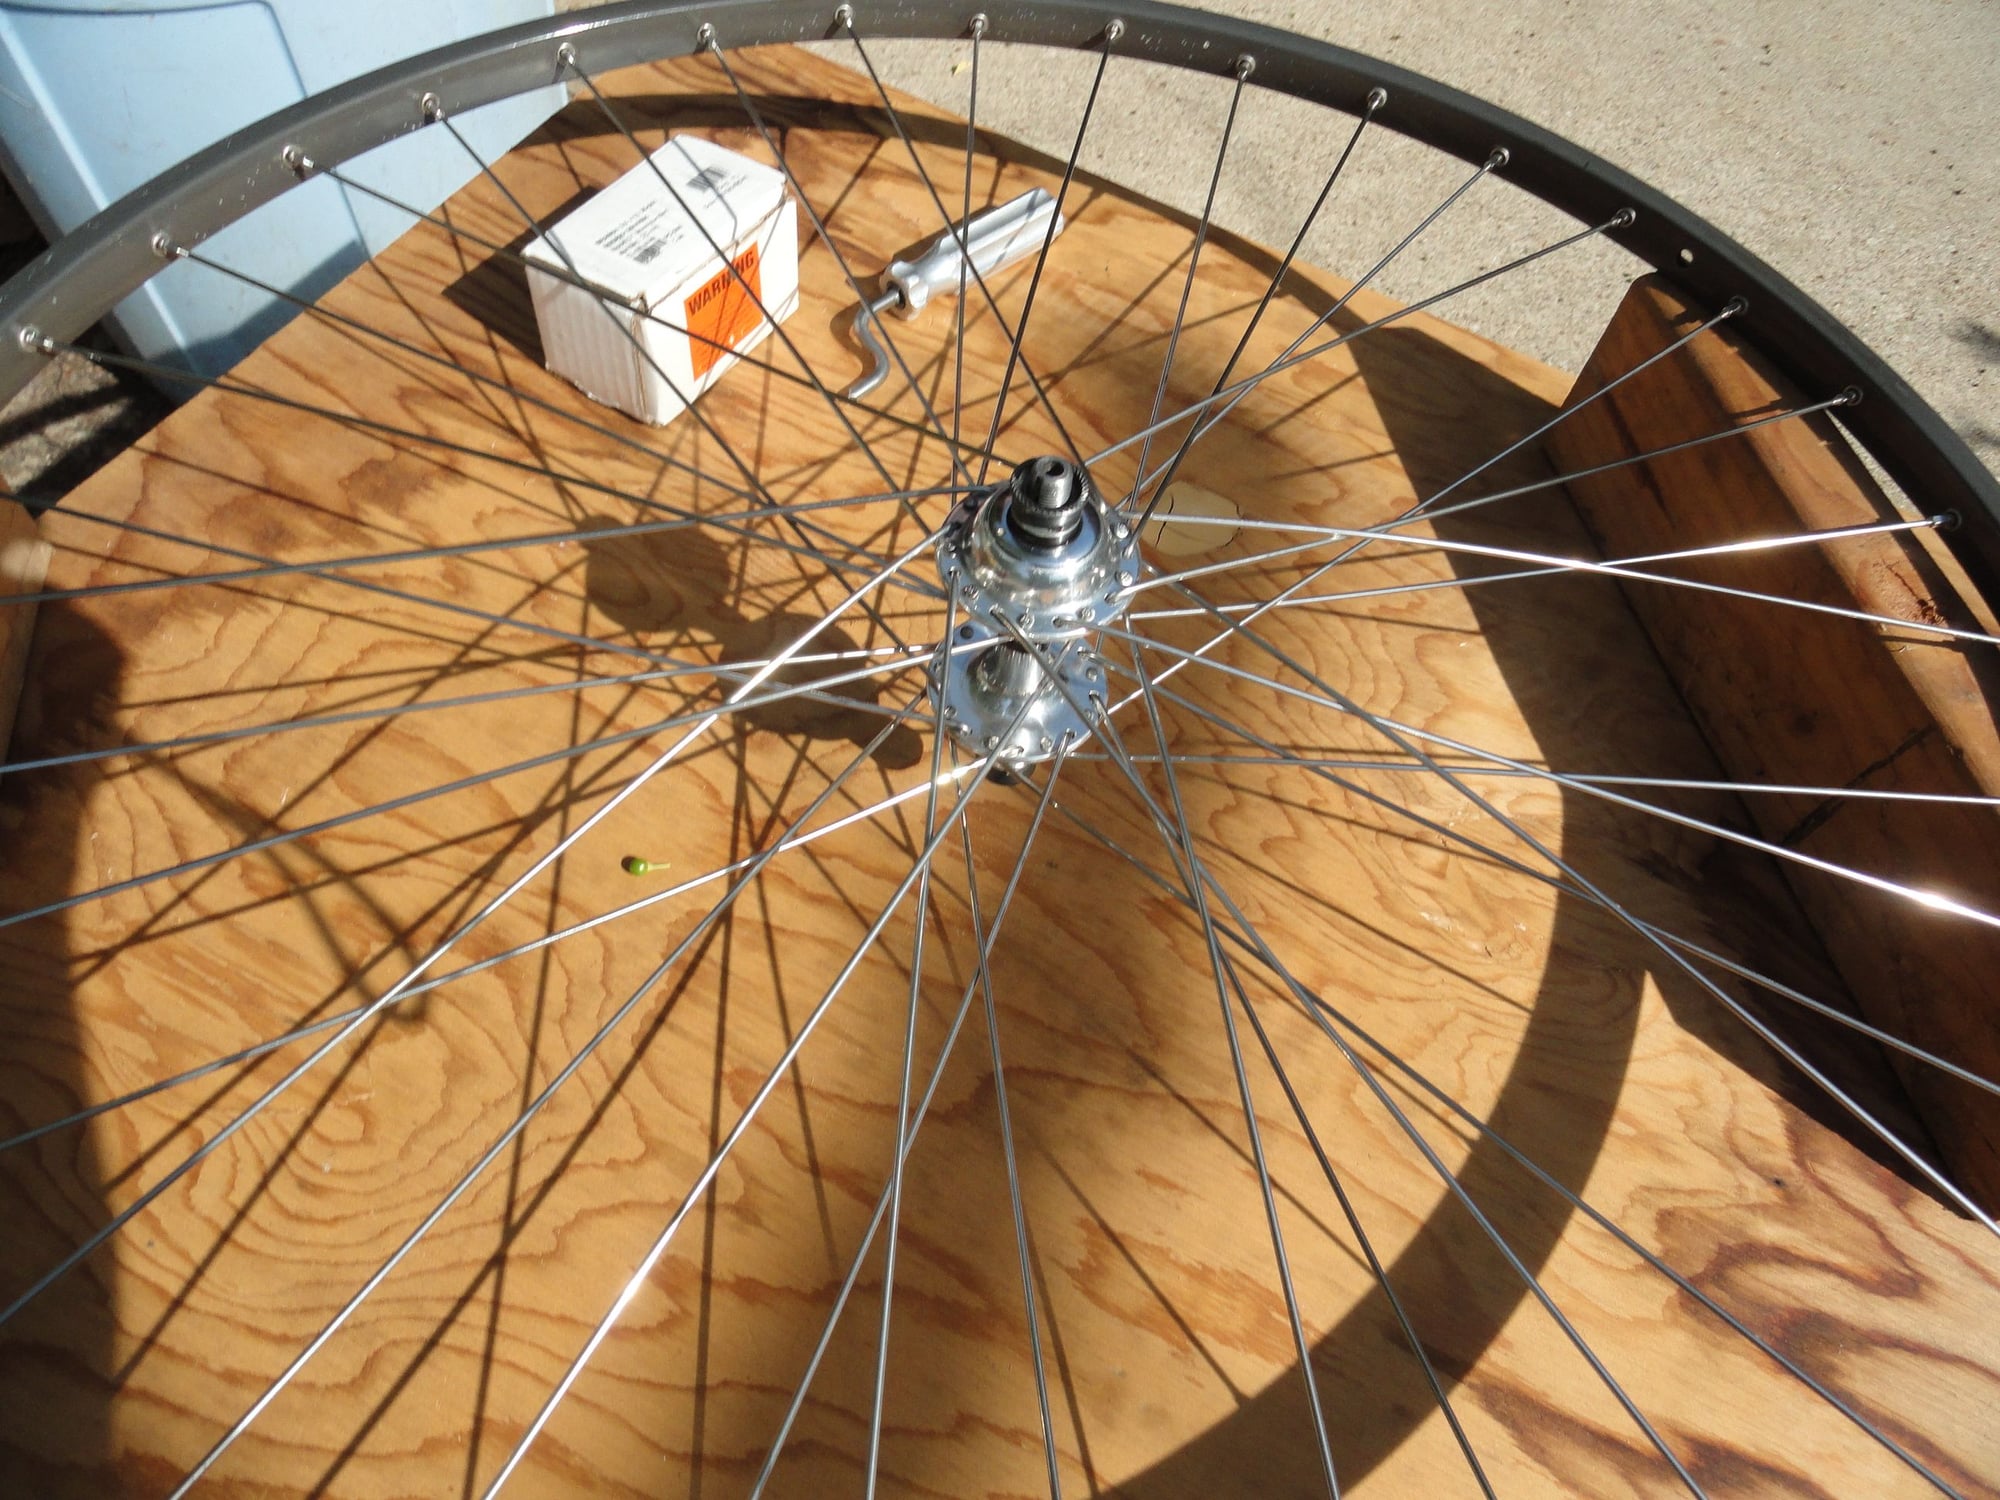
The non-drive side spokes installed. Note that the star patterns for both sides are identical.
Finished lacing and the wheel is ready to go to the truing stand. Total build time this morning with pictures was fifteen minutes.
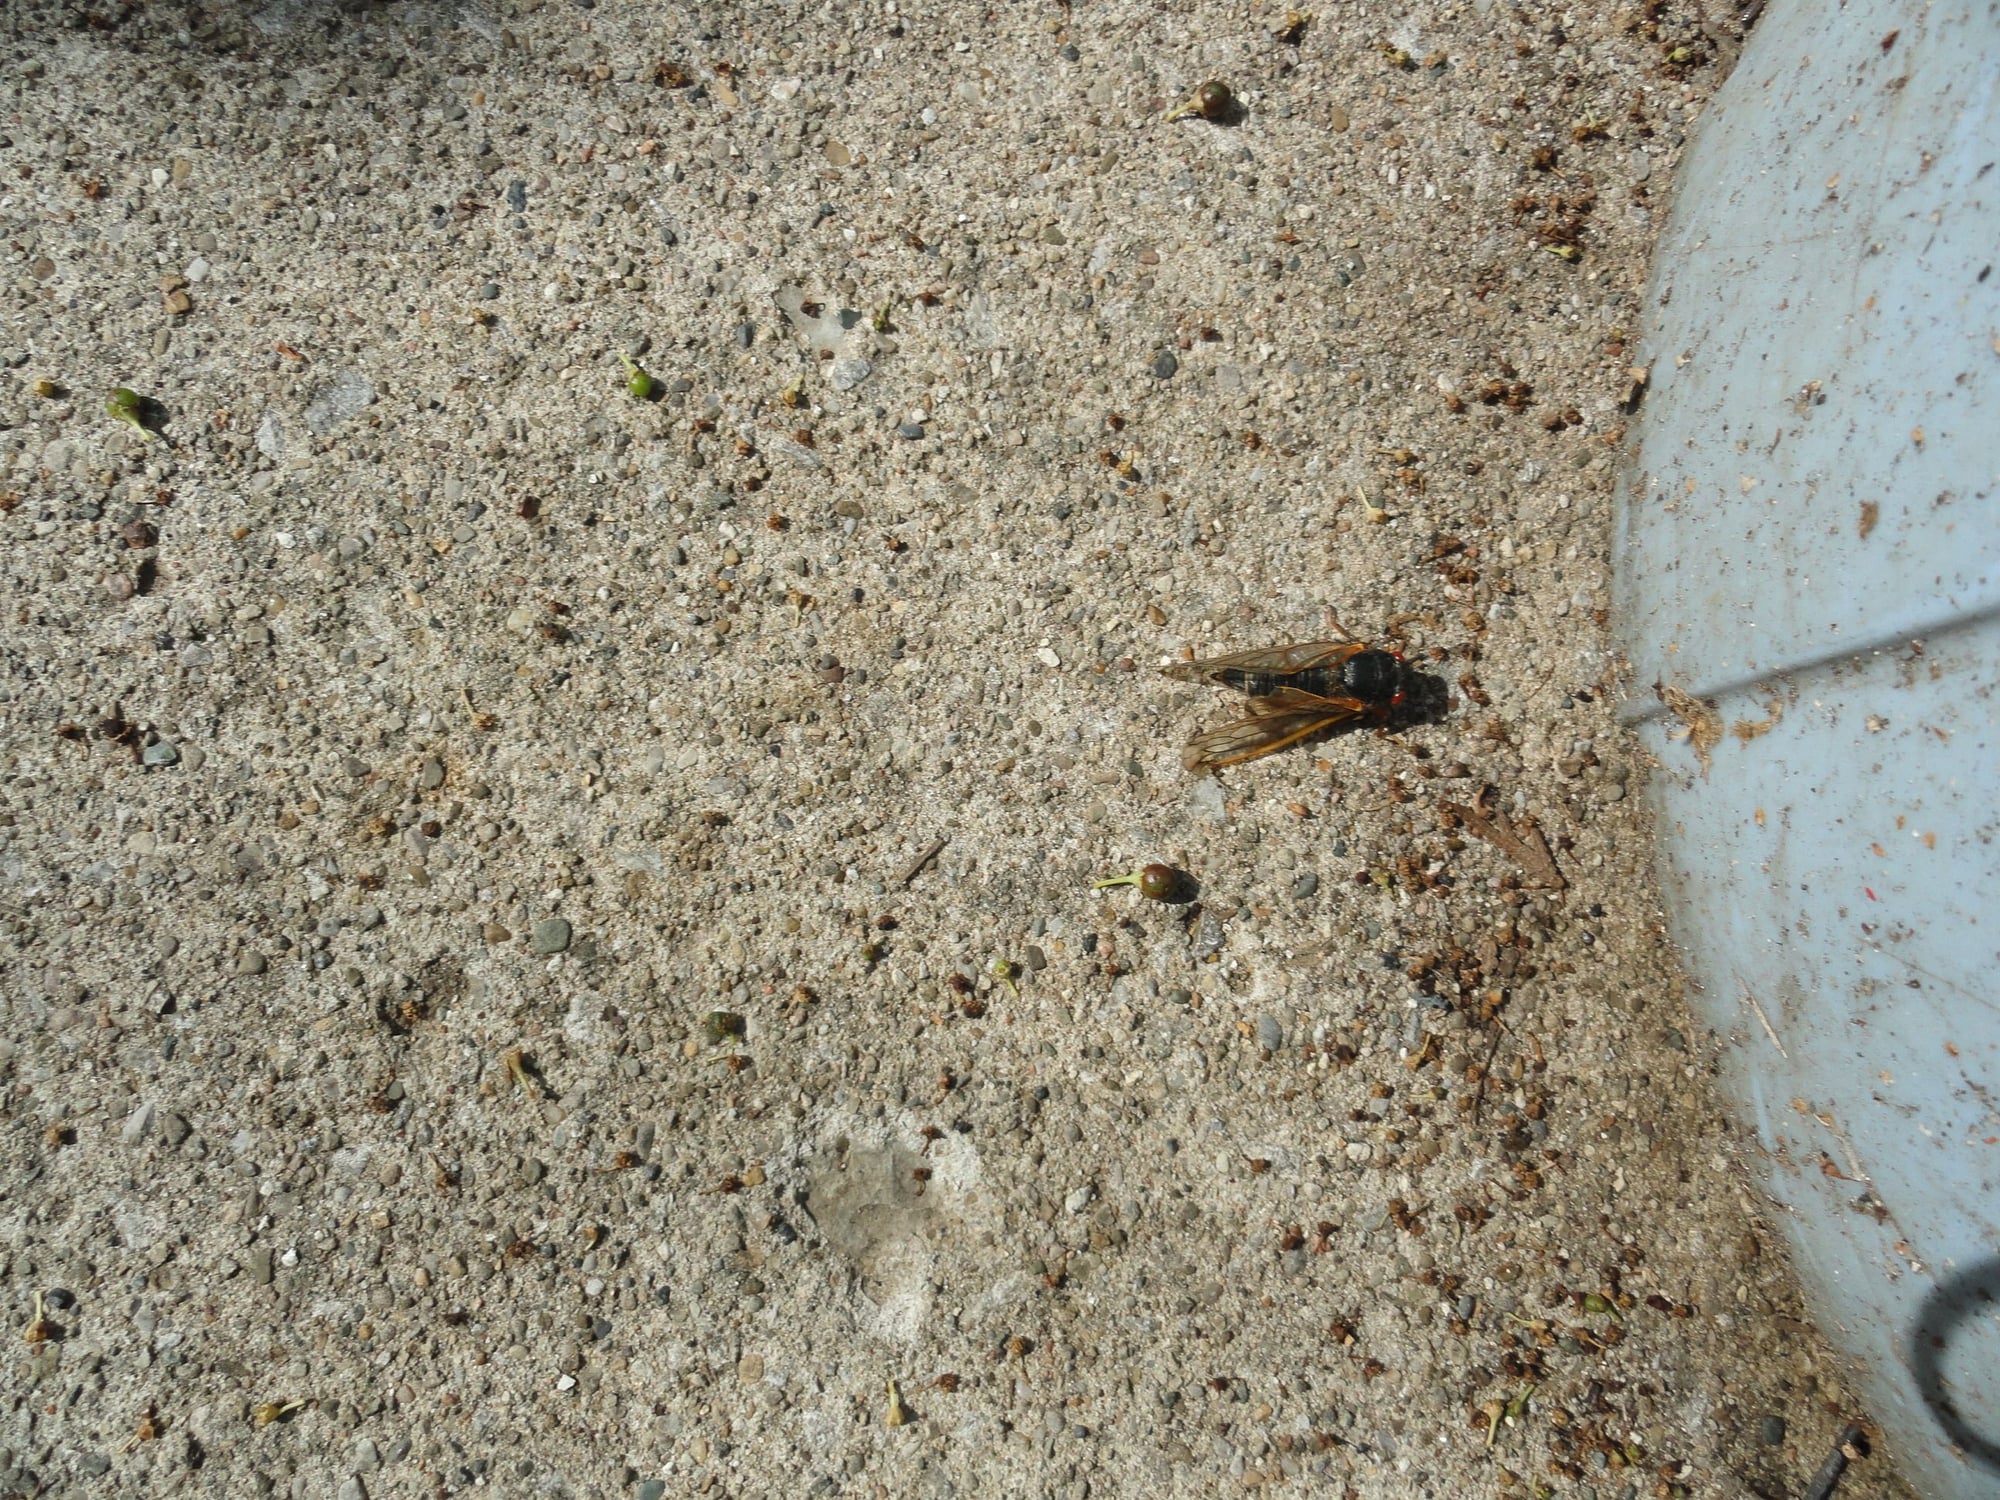
This little feller stopped in to observe/supervise my work. He is one of the early hatchlings of Brood X cicadas. Soon he will be joined by a few billion of his siblings and the noise will be incessant from early morning to night fall. They have been in larvae state for the past 17 years and they are like every other teenager, all they want to do is have sex!
I have finished the drive side spoke lacing and require only to lace in the other nine spokes on the non-drive side. These spokes do not do any pulling of the rim from the hub but are there to stabilize the pulling spokes that were the initial two sets of spokes I installed. I will start by putting the spokes though the wheel from the drive side and the spokes then come out on the outside of the wheel. This allows for free movement of the spokes when lacing and doesn't risk scuffing up the rim by trying to lace from the inside of the spoke pattern. Here are today's pictures:
The non-drive side of the rim and the current installed spokes.
The last nine spokes being added from the drive side of the wheel.
By placing the spokes through the star pattern closest to the hub flange they will drop through a bit easier.
The non-drive side spokes installed. Note that the star patterns for both sides are identical.
Finished lacing and the wheel is ready to go to the truing stand. Total build time this morning with pictures was fifteen minutes.
This little feller stopped in to observe/supervise my work. He is one of the early hatchlings of Brood X cicadas. Soon he will be joined by a few billion of his siblings and the noise will be incessant from early morning to night fall. They have been in larvae state for the past 17 years and they are like every other teenager, all they want to do is have sex!
Last edited by Mad Honk; 05-20-21 at 12:09 PM.
05-20-21, 06:43 PM
#33
Senior Member
Thread Starter
Join Date: May 2019
Location: Bloomington, IN
Posts: 2,951
Bikes: Paramount, Faggin, Ochsner, Ciocc, Basso
Mentioned: 117 Post(s)
Tagged: 0 Thread(s)
Quoted: 1304 Post(s)
Liked 1,912 Times
in
1,142 Posts
Ok Merziac,
Here are the last set of pics and description of the wheel build process! My little seventeen year old buddie flew off and didn't stay to help supervise the final work. But here goes:
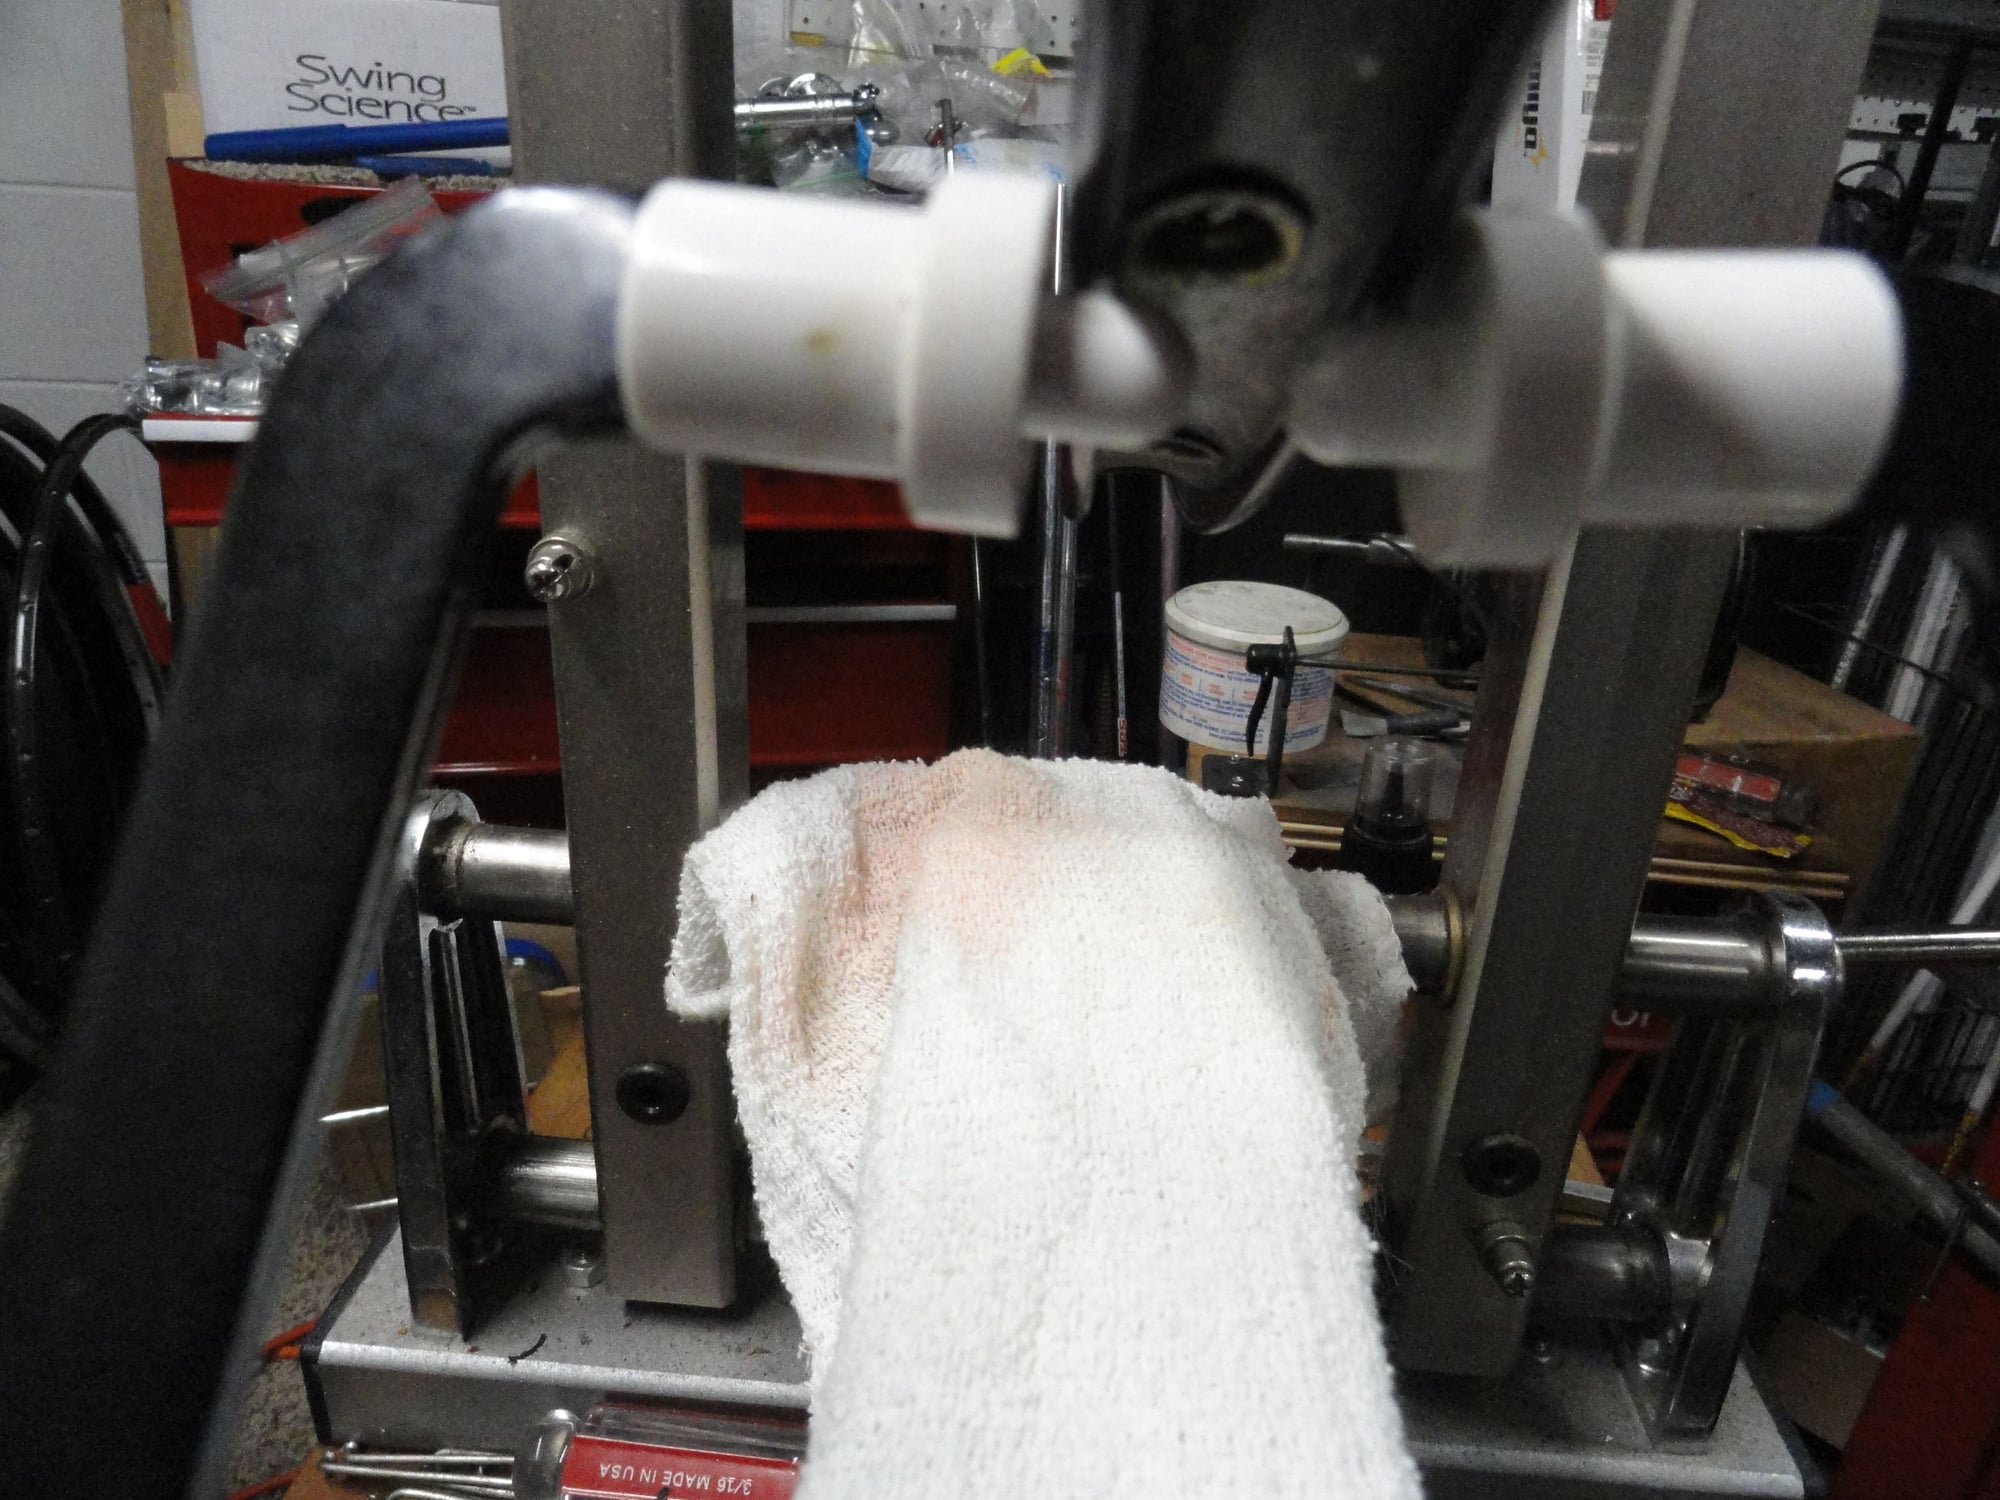
The wheel went to my truing stand this afternoon and it got a treatment of oil to to the spoke nipples to help lubricate them when I start to really crank down on them. After oiling every nipple I went around the drive side spokes to have just two threads of the spoke showing above the end of the nipple. To be sure I am working with the whole wheel I use the valve hole as a reference point. Then I go over to the NDS and do the same thing. This assures radial roll-out is correct. Then I move back to the drive side and turn the nipples down until there are no threads left showing above the end of the nipple. At this point I check radial roundness once again and begin to correct for variations in both roundness and lateral true. At this time the wheel dish is toward the drive side and the adjustments are being made from the NDS. Final adjustments are made for roll out and lateral true. I flex the spokes by hand by squeezing them in pairs opposite each other to be sure they are seated and check both measurements again. As a last step I check the dish with a dish tool to be sure my truing stand is not in need of adjustment. The wheel is now ready for tape and tires.
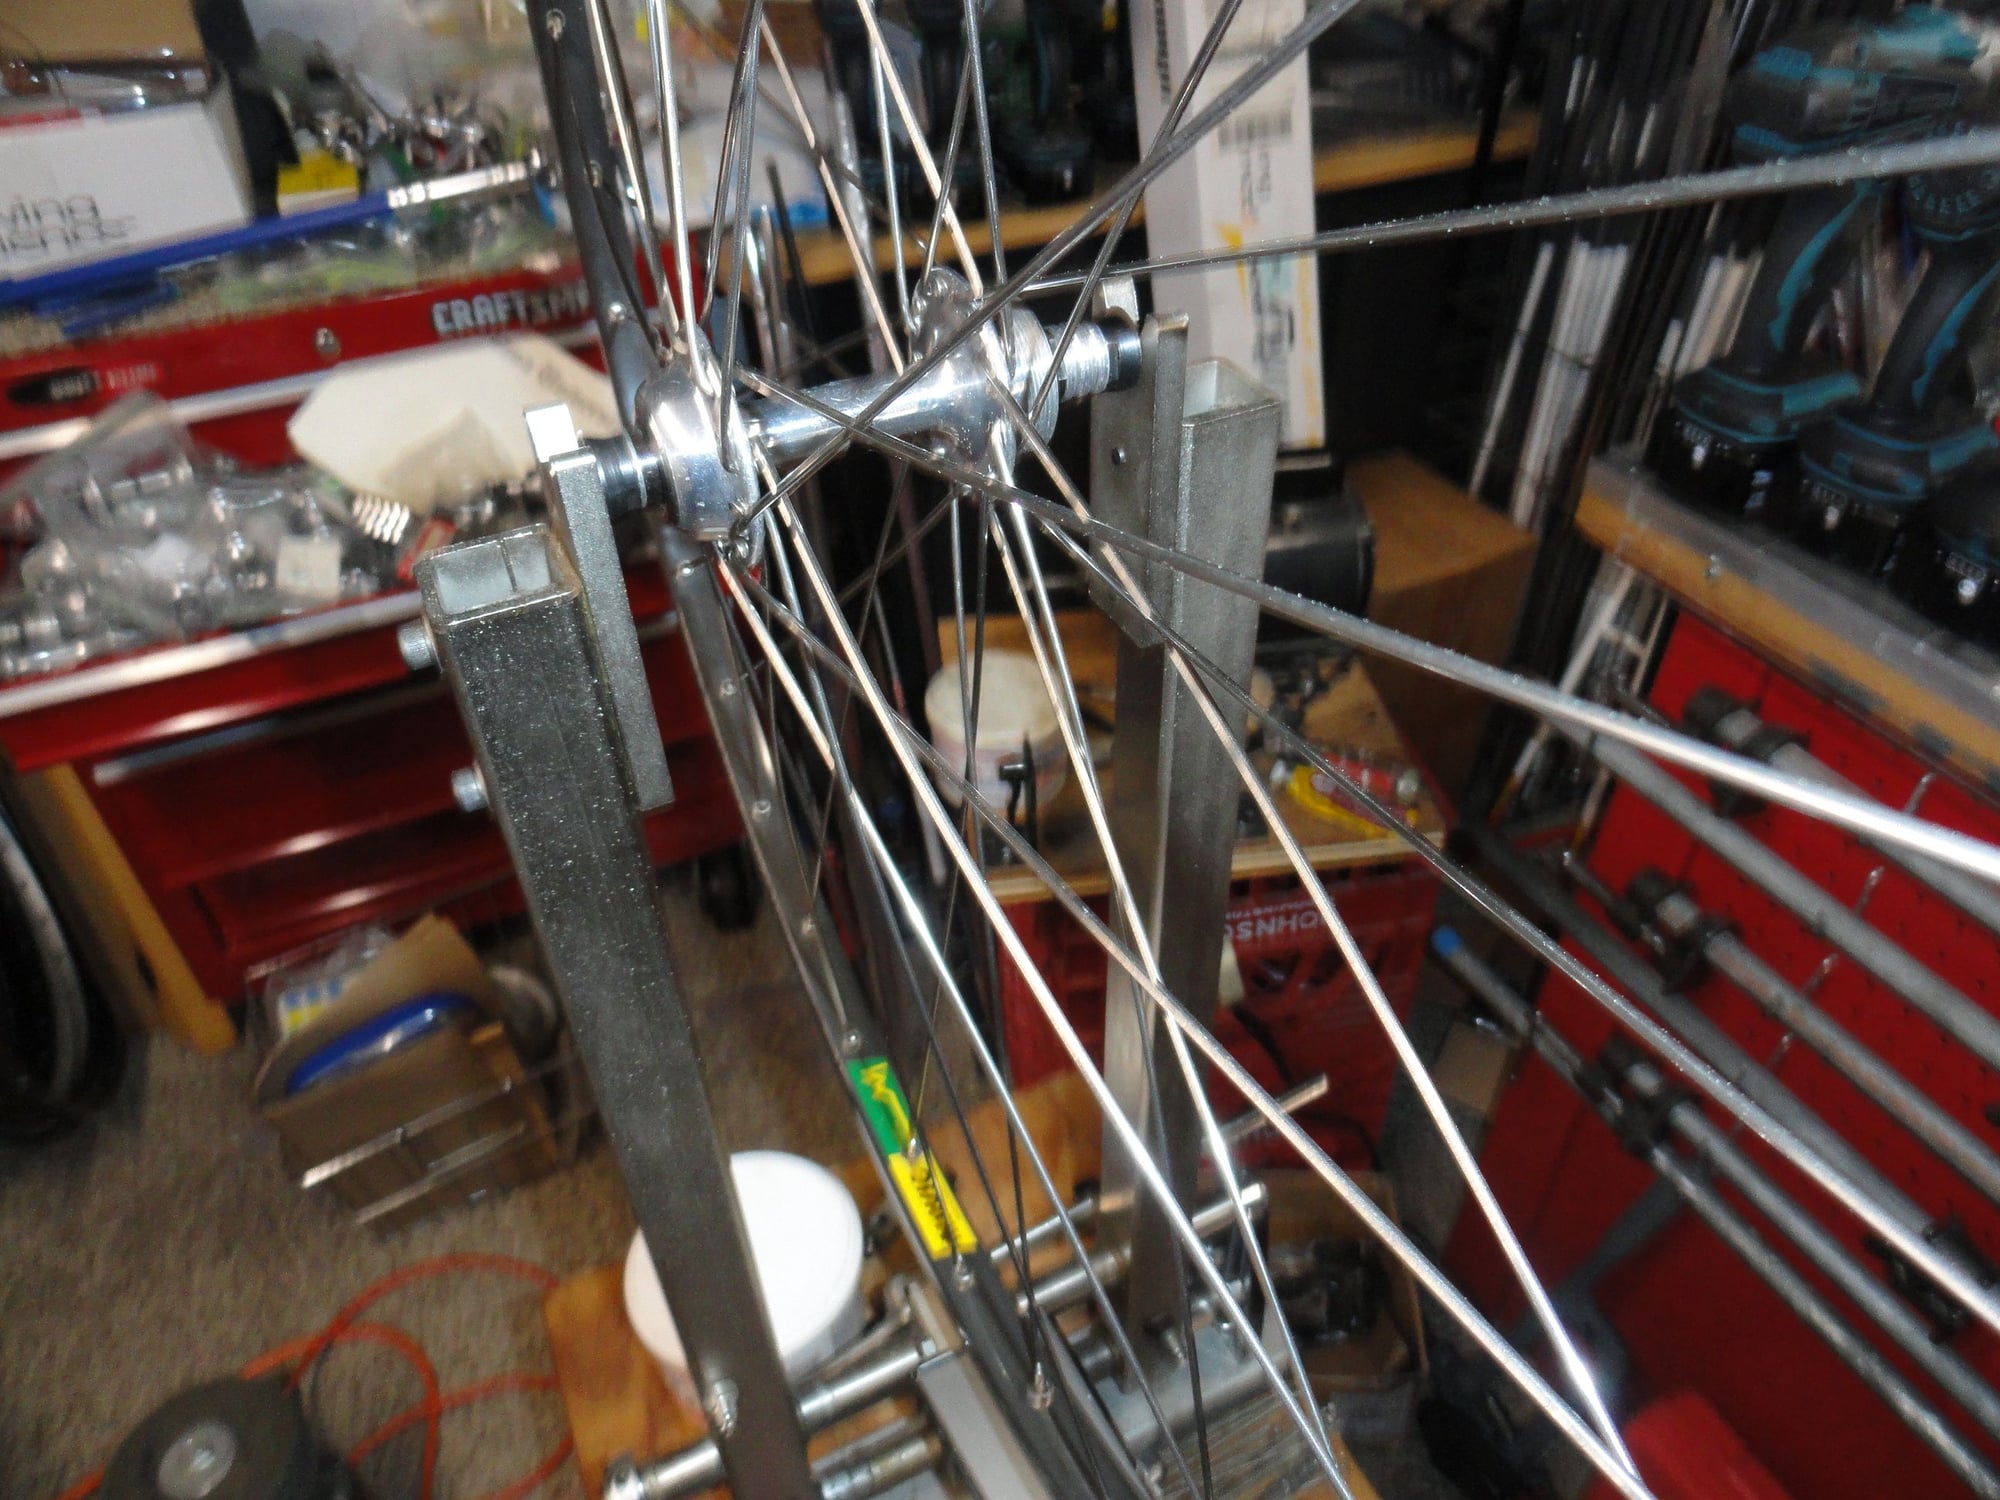
The wheel goes into the truing stand.
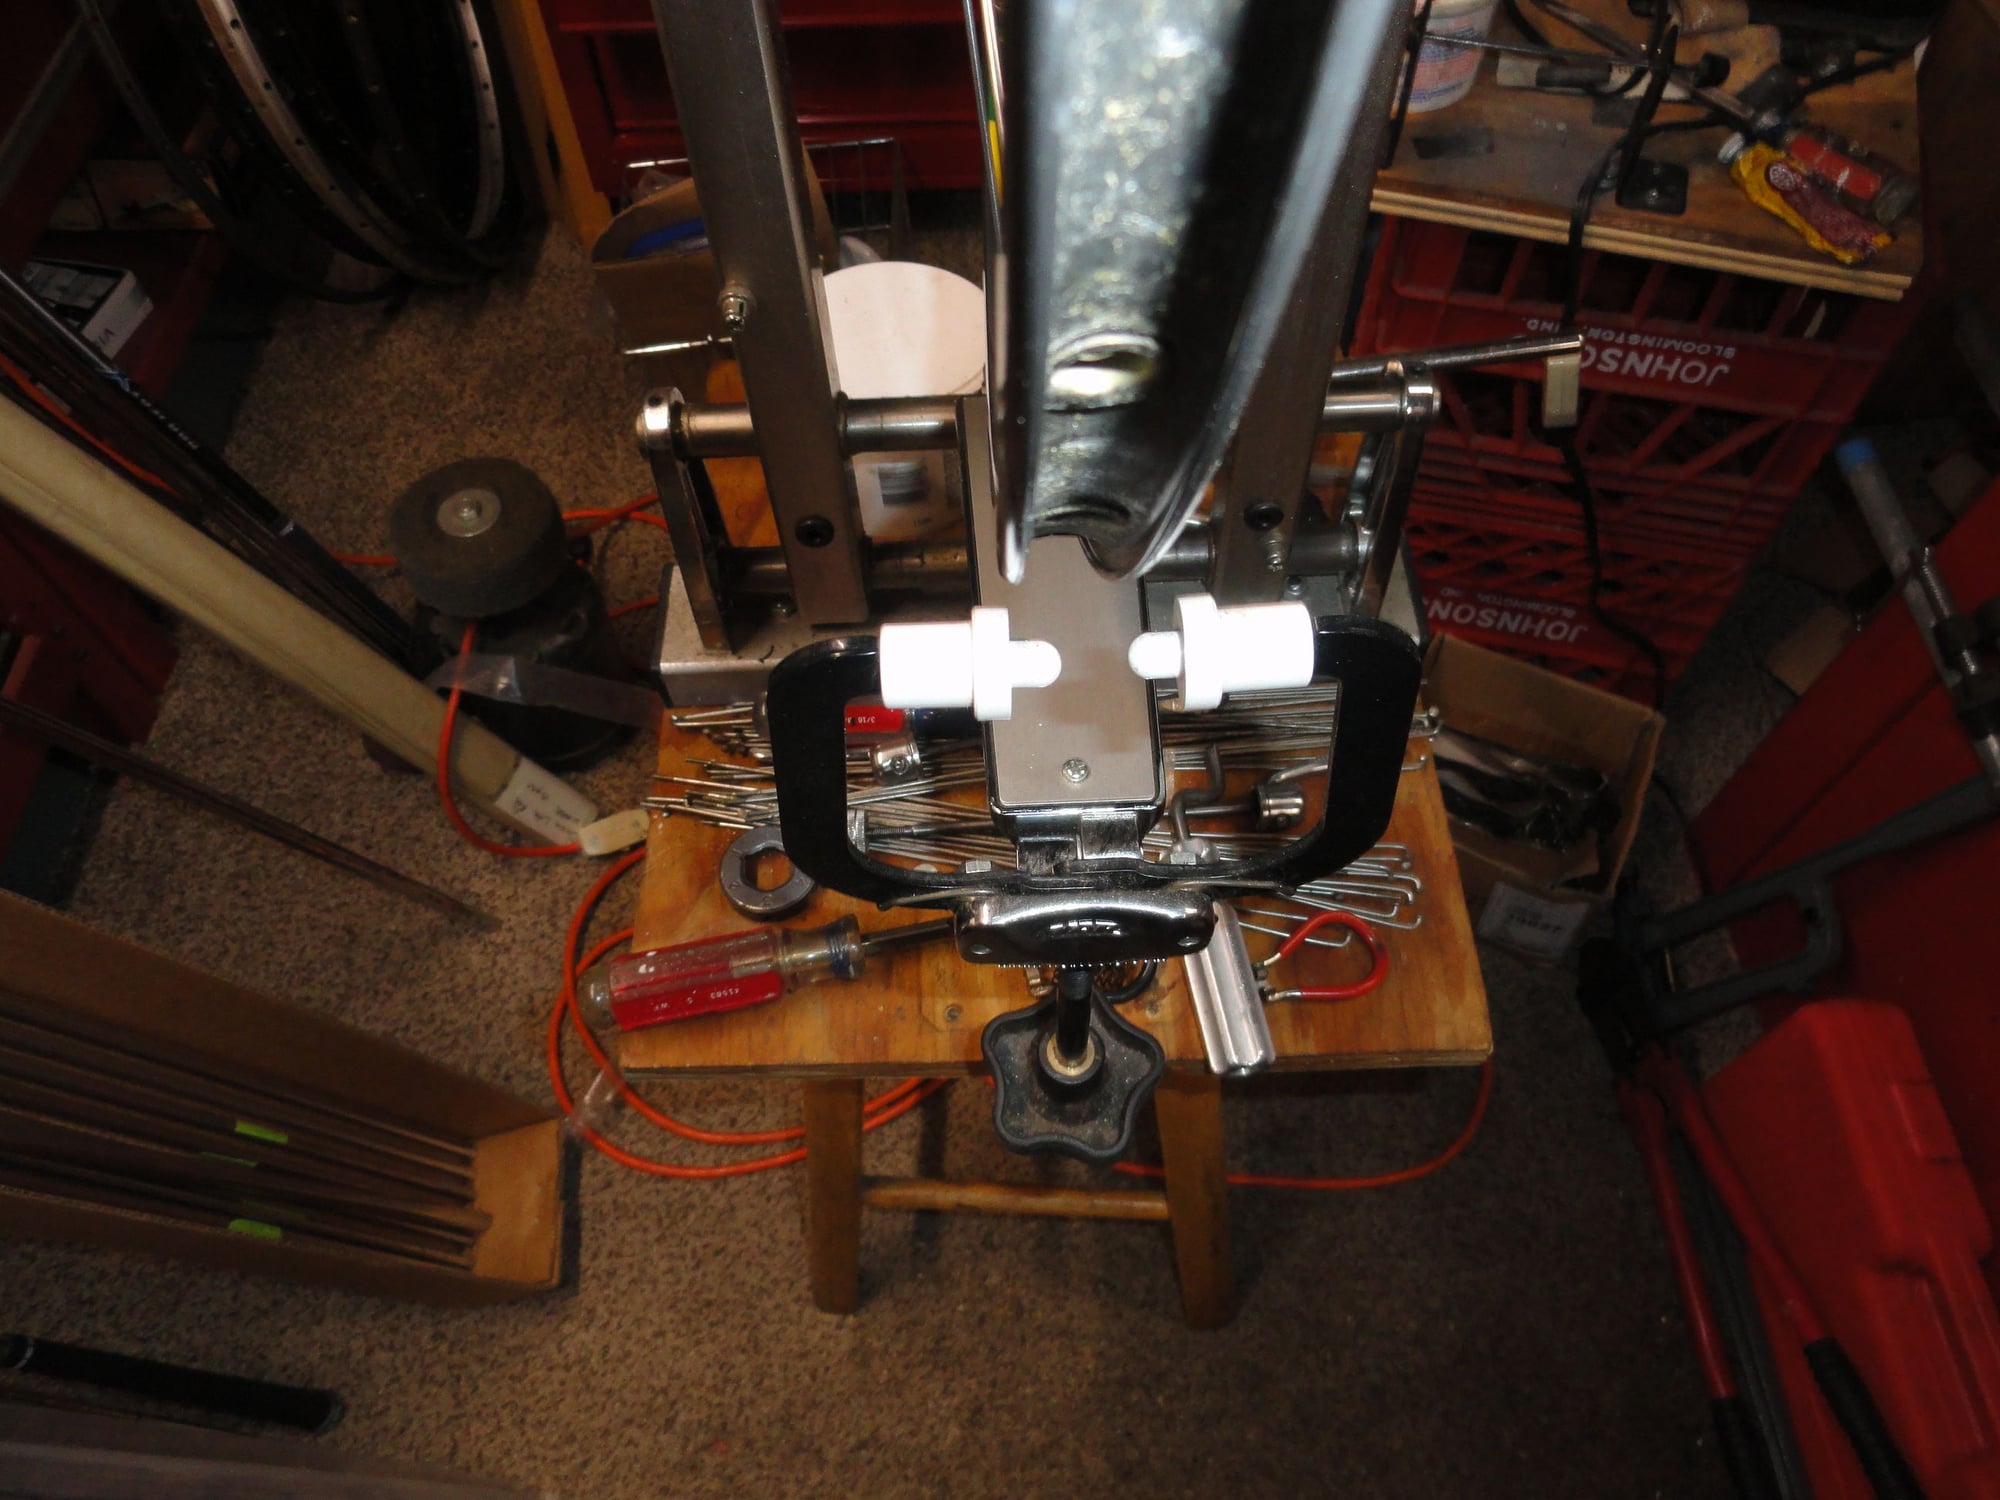
The tools I use for this step: screwdriver, bicycle research driver, and a handful of spoke wrenches.
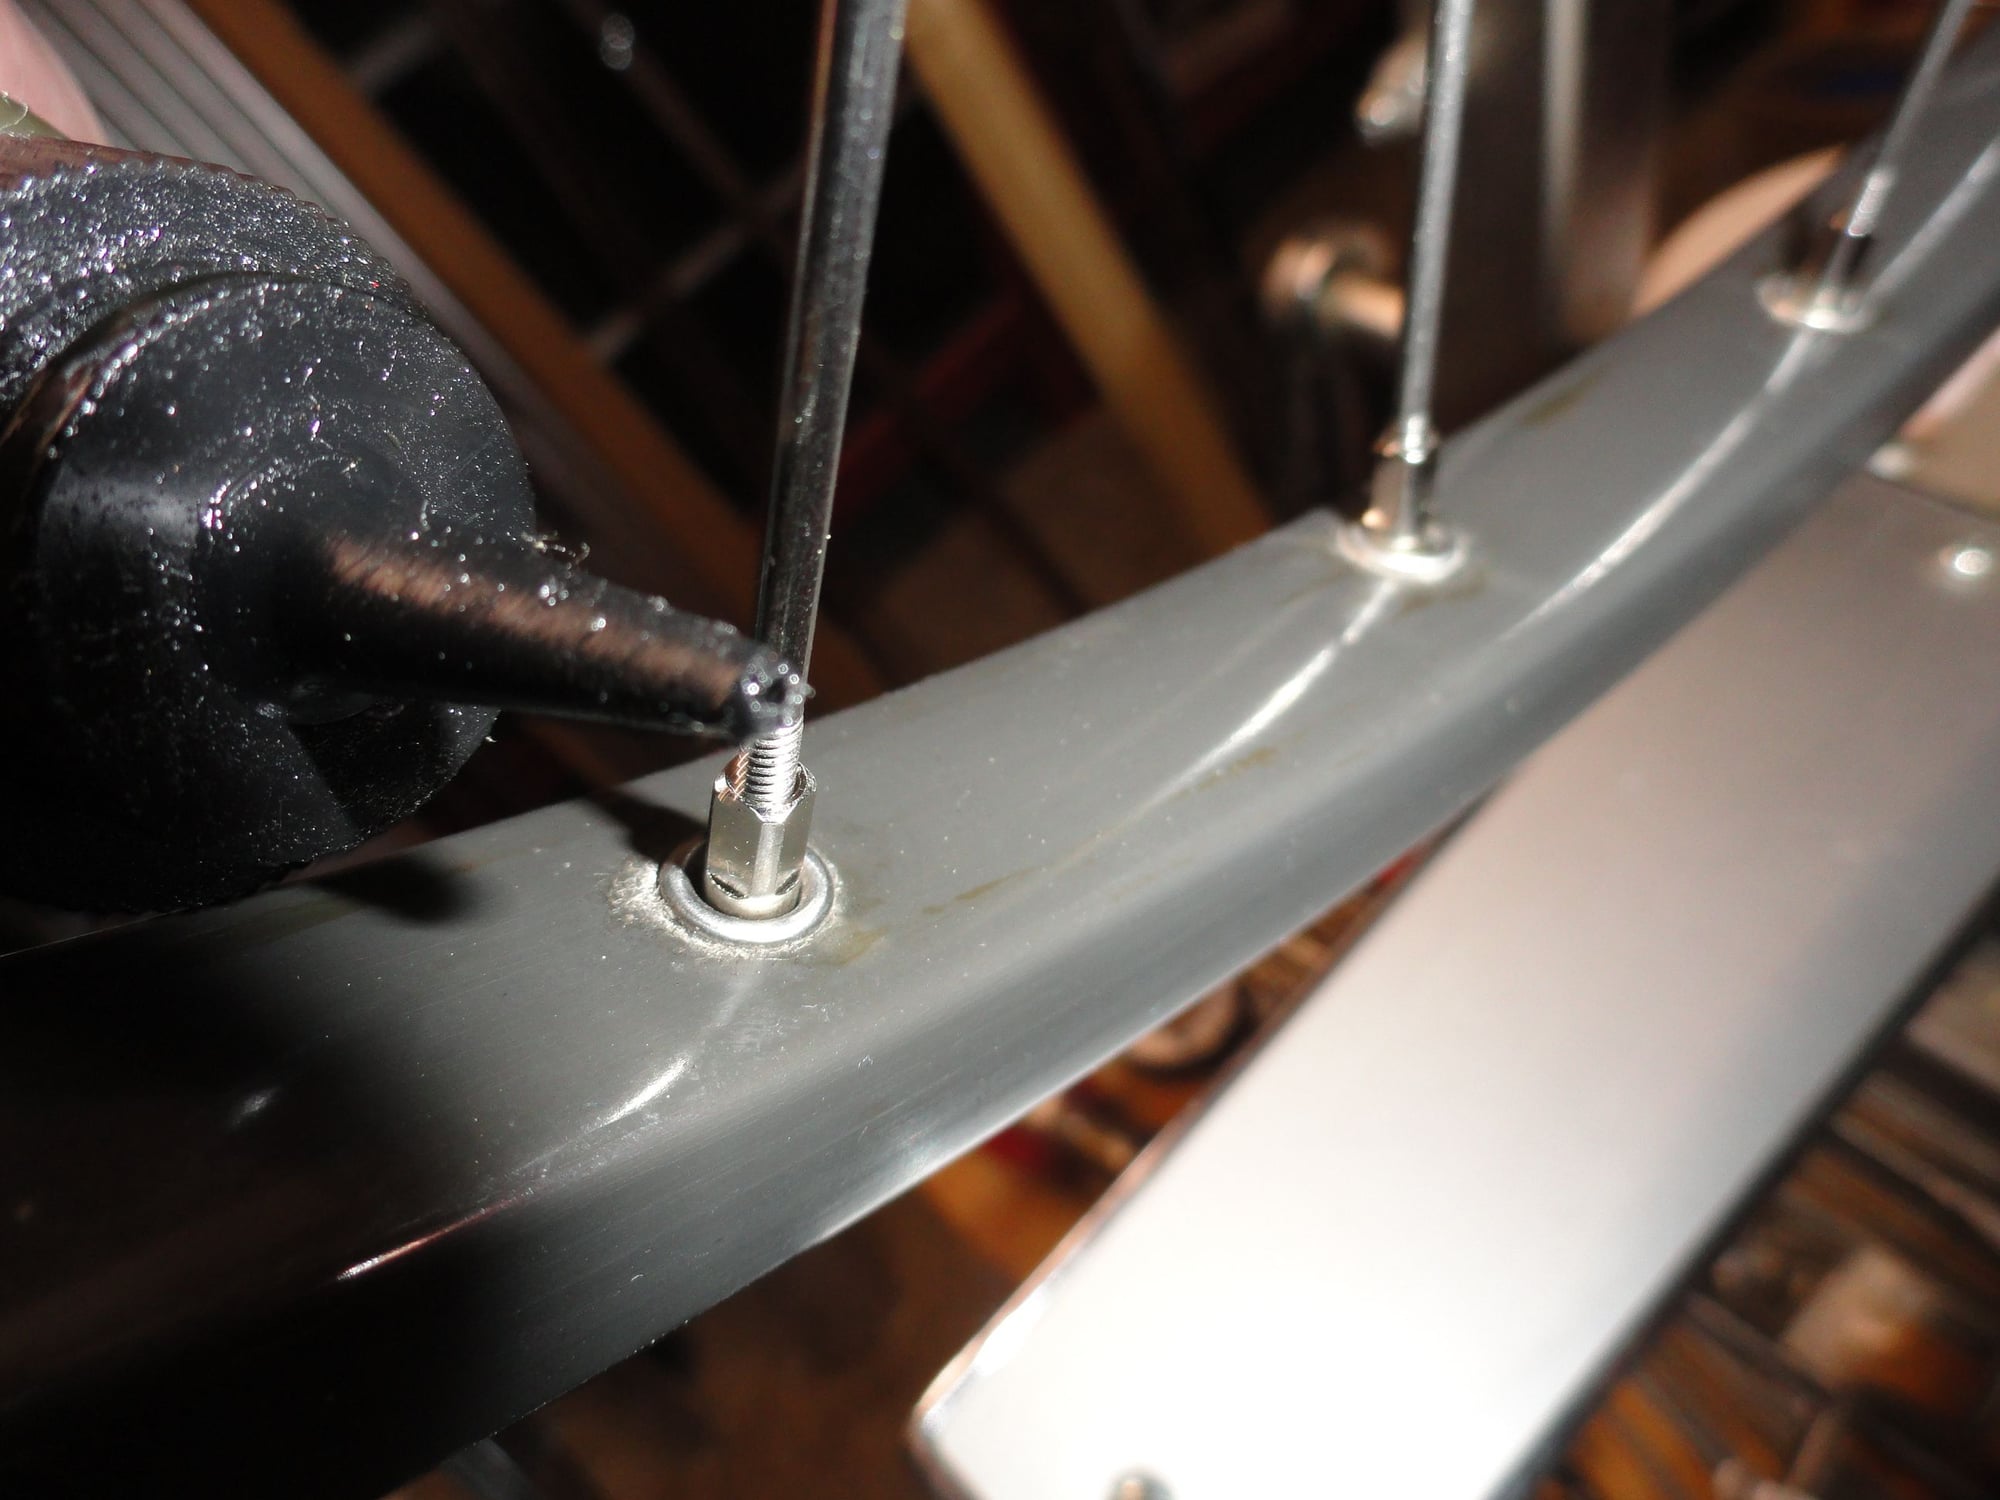
Oiling the spoke nipples to make tightening easier.

Truing for radial roundness
Final true and the lateral true clearance of about half a mm. Note spacing on the left arm.
I suspect that this truing stand looks a bit different than what most here are used to. This is the newest iteration of the VAR stand. It holds tolerances quite well, and rarely goes off center. This wheel came out of the stand and checked perfectly with a dish tool. It cost a bit more but the reliability is what sold me on buying it. No cranks other than the lateral jaws and all else is fast and easy.
This concludes the segment on wheel building and I hope it was helpful for those who have followed through my antics of a wheel build. I am going to build the front next and move on to the bike completion. Smiles, MH
Here are the last set of pics and description of the wheel build process! My little seventeen year old buddie flew off and didn't stay to help supervise the final work. But here goes:
The wheel went to my truing stand this afternoon and it got a treatment of oil to to the spoke nipples to help lubricate them when I start to really crank down on them. After oiling every nipple I went around the drive side spokes to have just two threads of the spoke showing above the end of the nipple. To be sure I am working with the whole wheel I use the valve hole as a reference point. Then I go over to the NDS and do the same thing. This assures radial roll-out is correct. Then I move back to the drive side and turn the nipples down until there are no threads left showing above the end of the nipple. At this point I check radial roundness once again and begin to correct for variations in both roundness and lateral true. At this time the wheel dish is toward the drive side and the adjustments are being made from the NDS. Final adjustments are made for roll out and lateral true. I flex the spokes by hand by squeezing them in pairs opposite each other to be sure they are seated and check both measurements again. As a last step I check the dish with a dish tool to be sure my truing stand is not in need of adjustment. The wheel is now ready for tape and tires.
The wheel goes into the truing stand.
The tools I use for this step: screwdriver, bicycle research driver, and a handful of spoke wrenches.
Oiling the spoke nipples to make tightening easier.
Truing for radial roundness
Final true and the lateral true clearance of about half a mm. Note spacing on the left arm.
I suspect that this truing stand looks a bit different than what most here are used to. This is the newest iteration of the VAR stand. It holds tolerances quite well, and rarely goes off center. This wheel came out of the stand and checked perfectly with a dish tool. It cost a bit more but the reliability is what sold me on buying it. No cranks other than the lateral jaws and all else is fast and easy.
This concludes the segment on wheel building and I hope it was helpful for those who have followed through my antics of a wheel build. I am going to build the front next and move on to the bike completion. Smiles, MH
Last edited by Mad Honk; 05-23-21 at 06:23 PM.
Likes For Mad Honk:
05-20-21, 06:50 PM
#34
Senior Member
Thread Starter
Join Date: May 2019
Location: Bloomington, IN
Posts: 2,951
Bikes: Paramount, Faggin, Ochsner, Ciocc, Basso
Mentioned: 117 Post(s)
Tagged: 0 Thread(s)
Quoted: 1304 Post(s)
Liked 1,912 Times
in
1,142 Posts
Oops! I forgot to mention that after the wheel is done it will need a wash to remove the oil that went into the spoke nipple and rim holes. I trust this was helpful for others who have troubles with wheel building. And now as Rod Serling would say: we now return you to your regular television programing. Smiles, MH
Likes For Mad Honk:
05-23-21, 06:34 PM
#35
Senior Member
Thread Starter
Join Date: May 2019
Location: Bloomington, IN
Posts: 2,951
Bikes: Paramount, Faggin, Ochsner, Ciocc, Basso
Mentioned: 117 Post(s)
Tagged: 0 Thread(s)
Quoted: 1304 Post(s)
Liked 1,912 Times
in
1,142 Posts
I have had some time to work on the build and here are the pics:
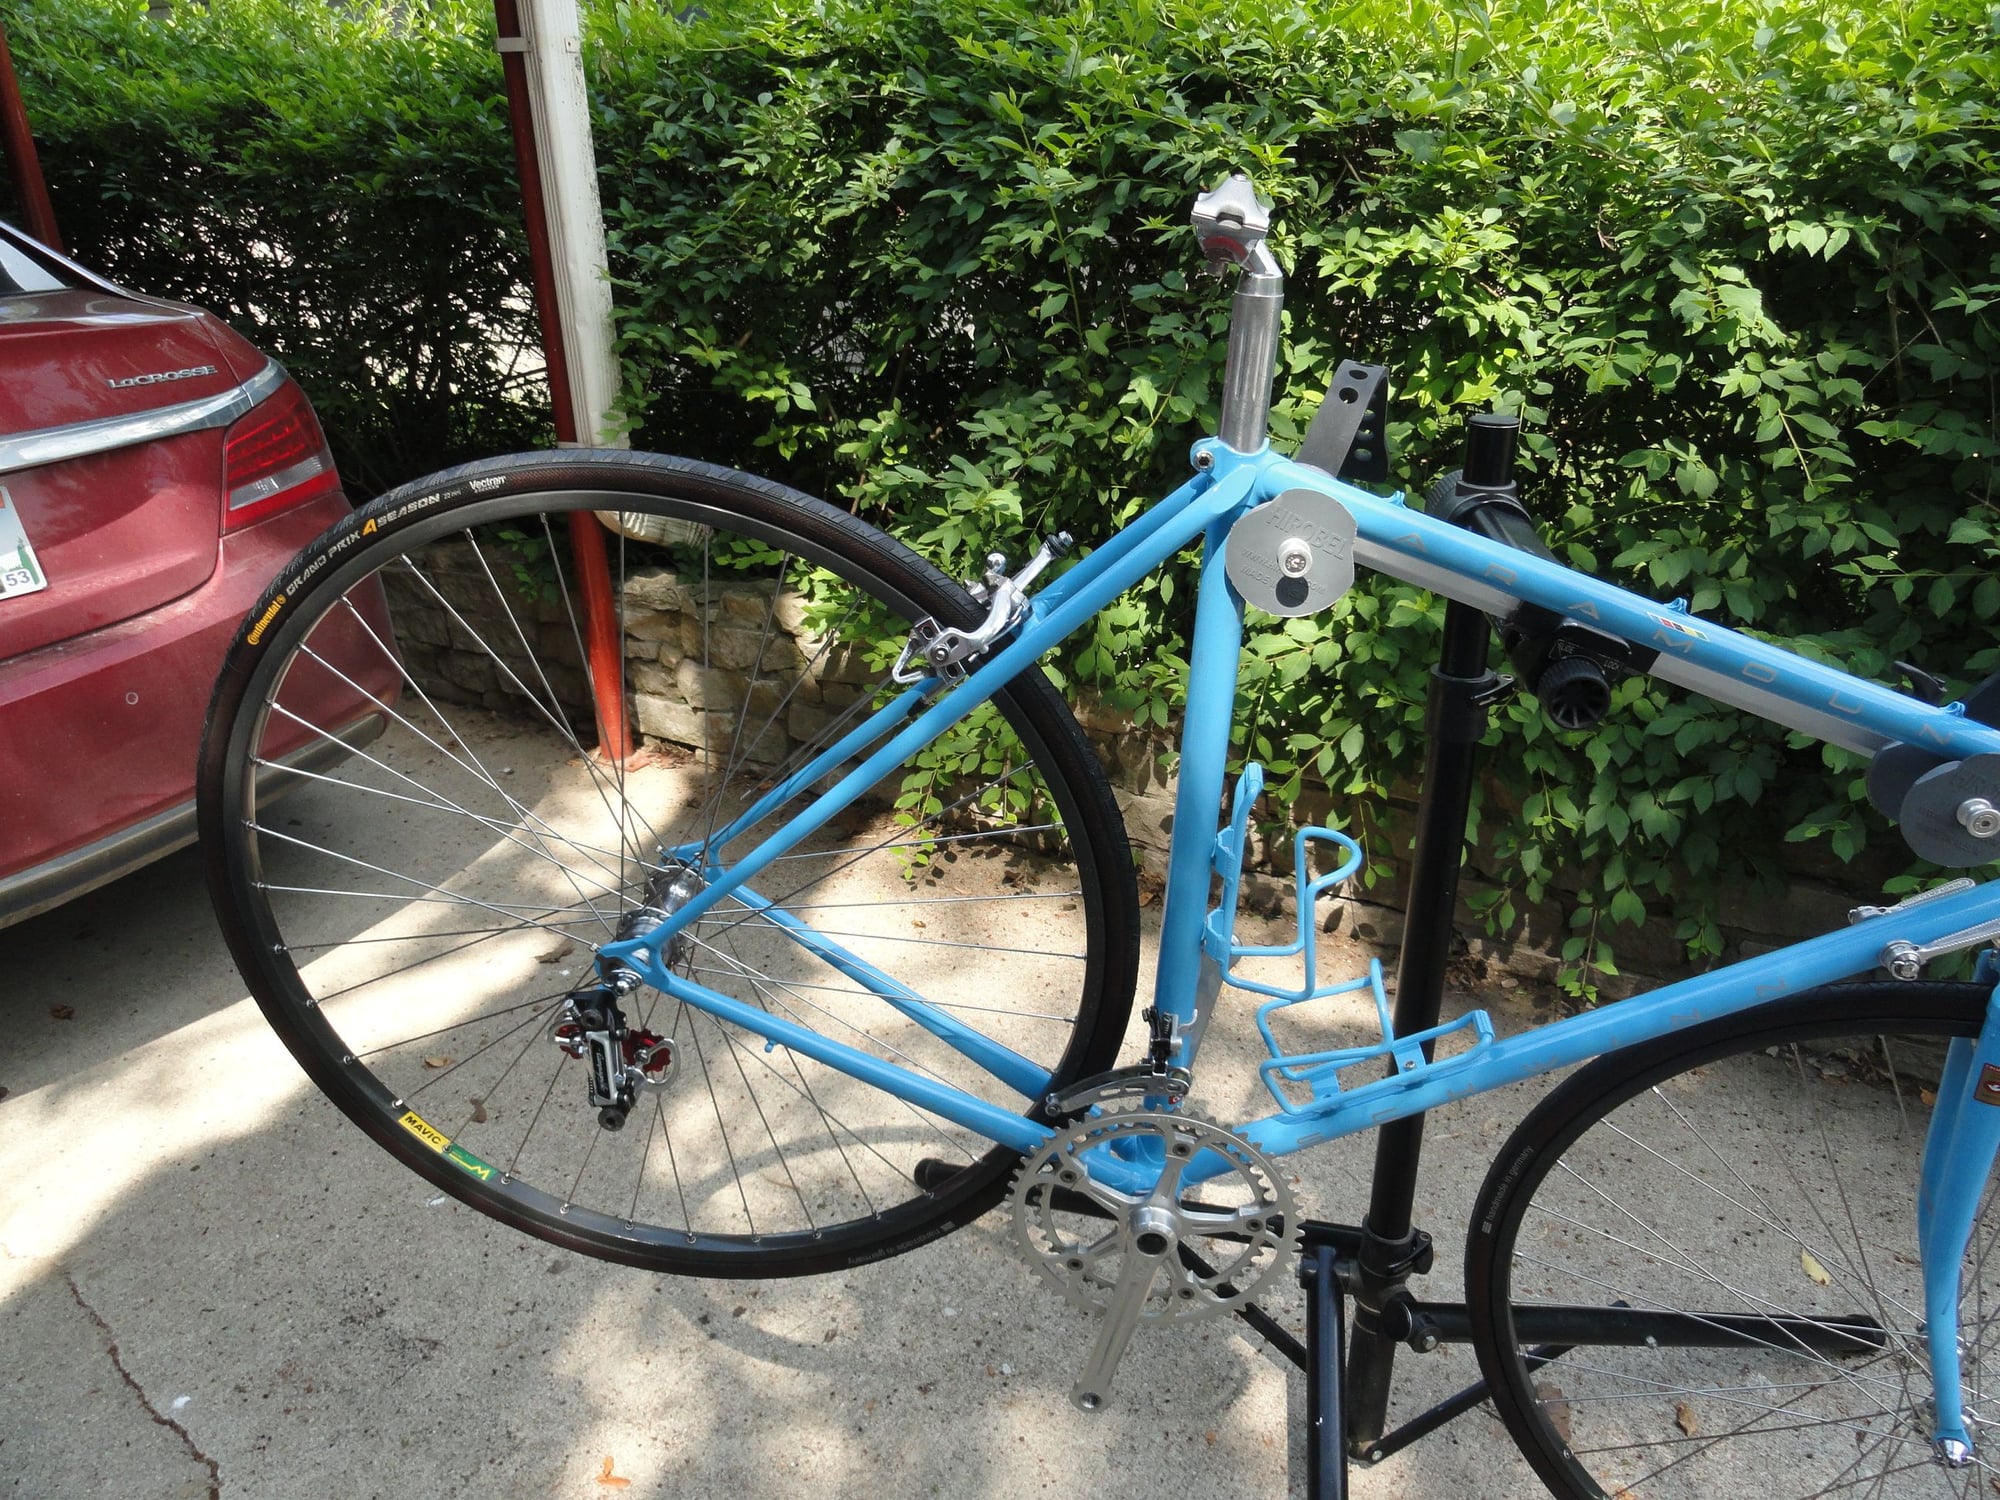
Added brake set and bottle cages, along with seat post.
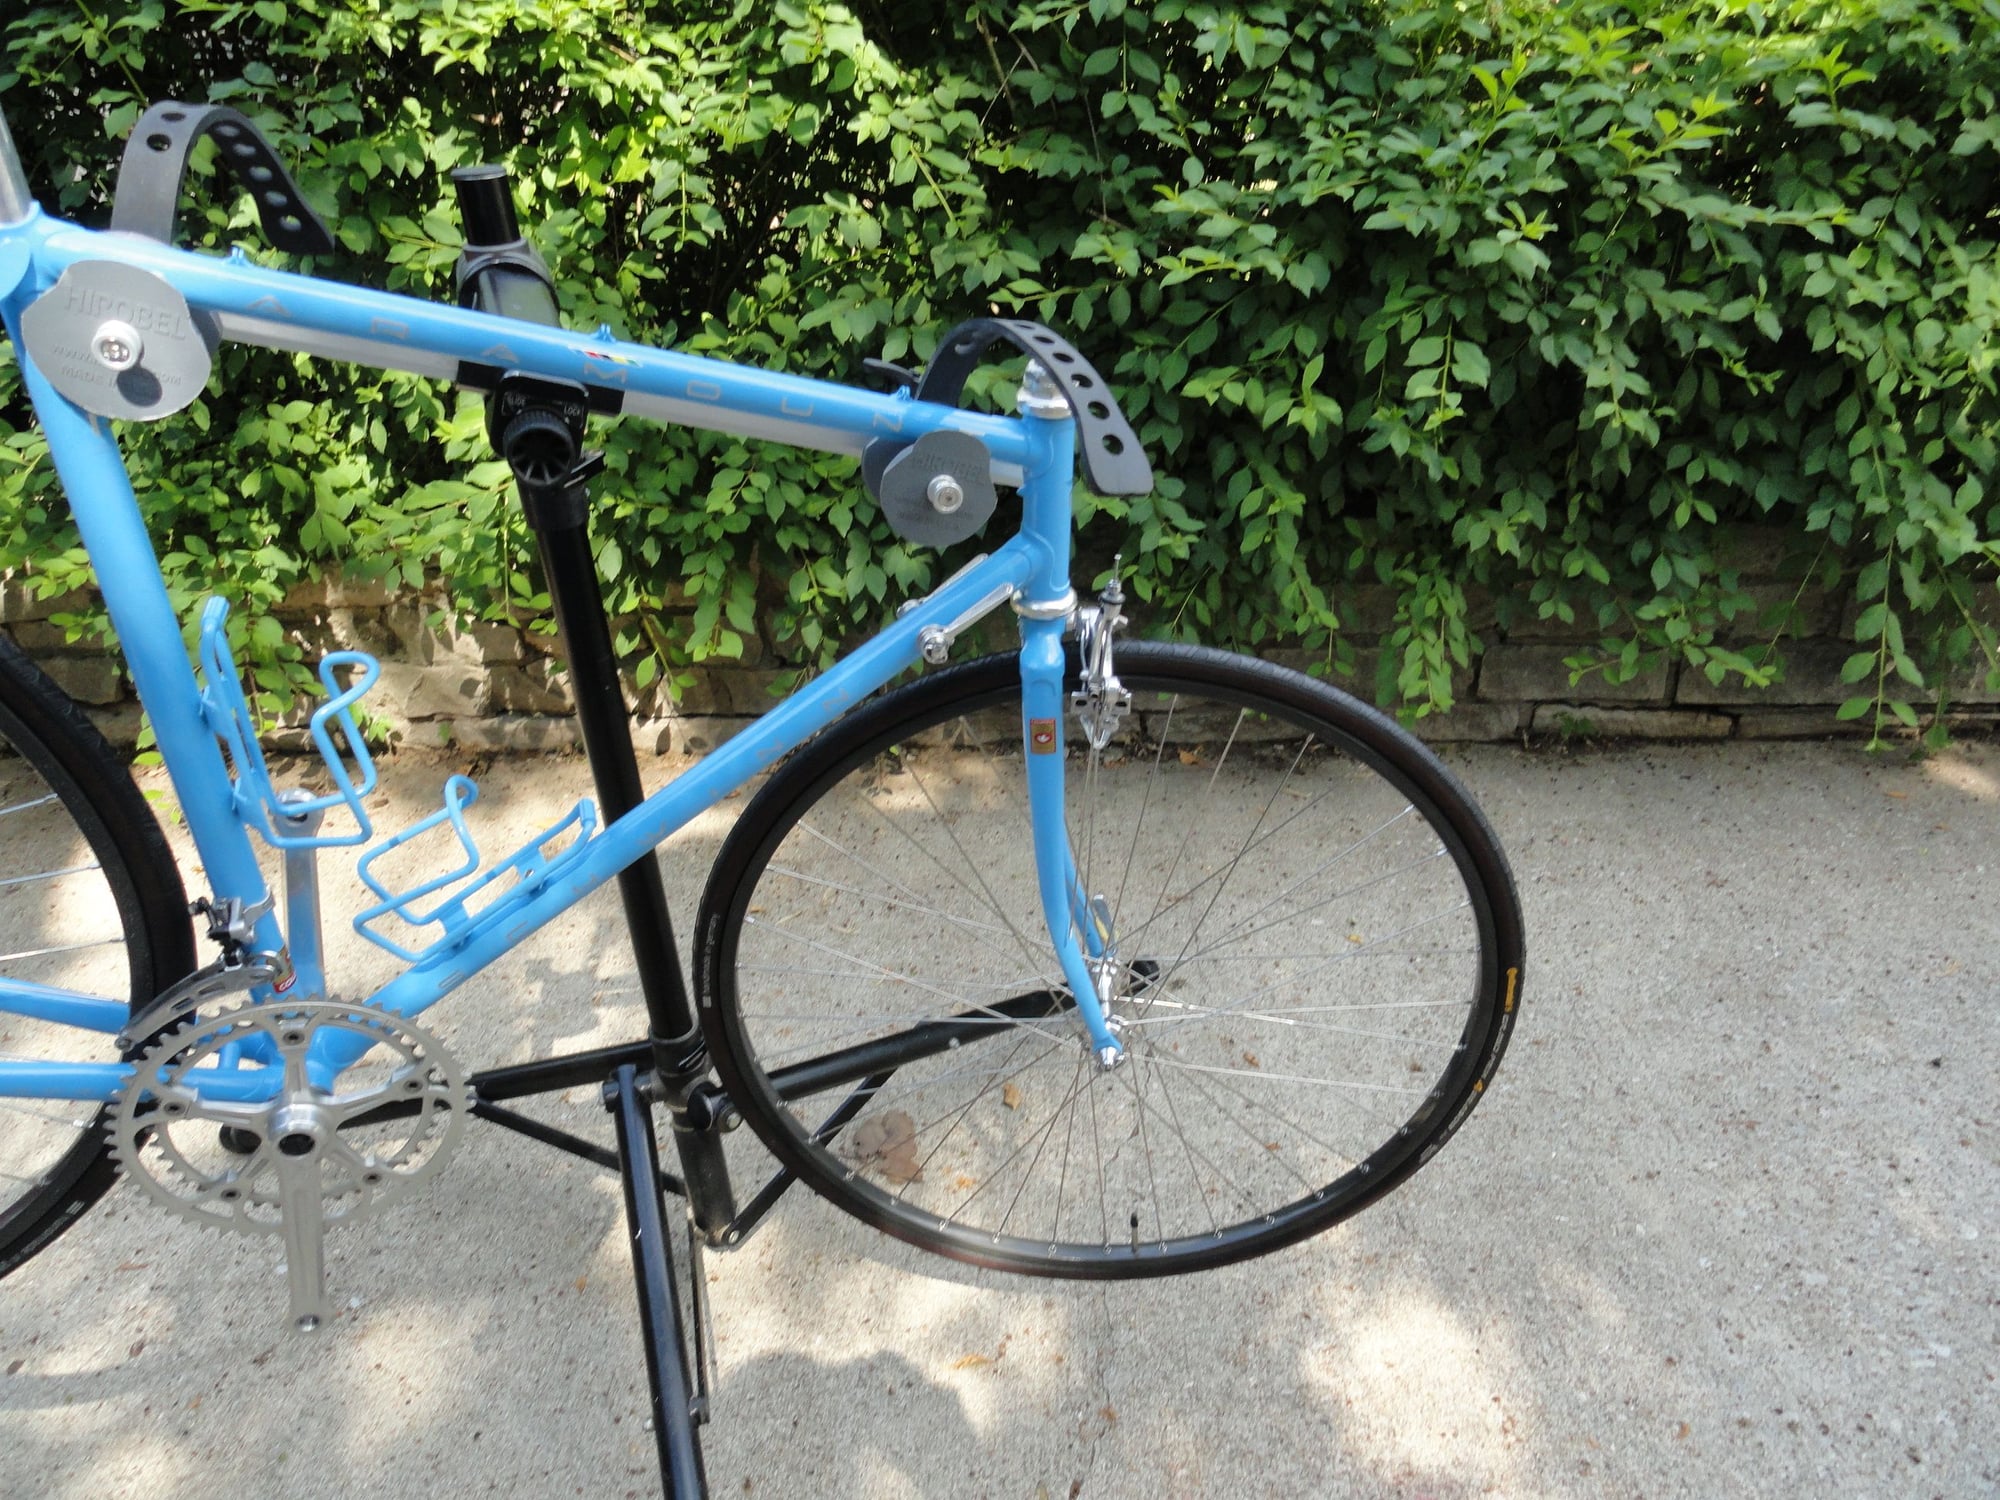
Front wheel installed and checked for clearances.
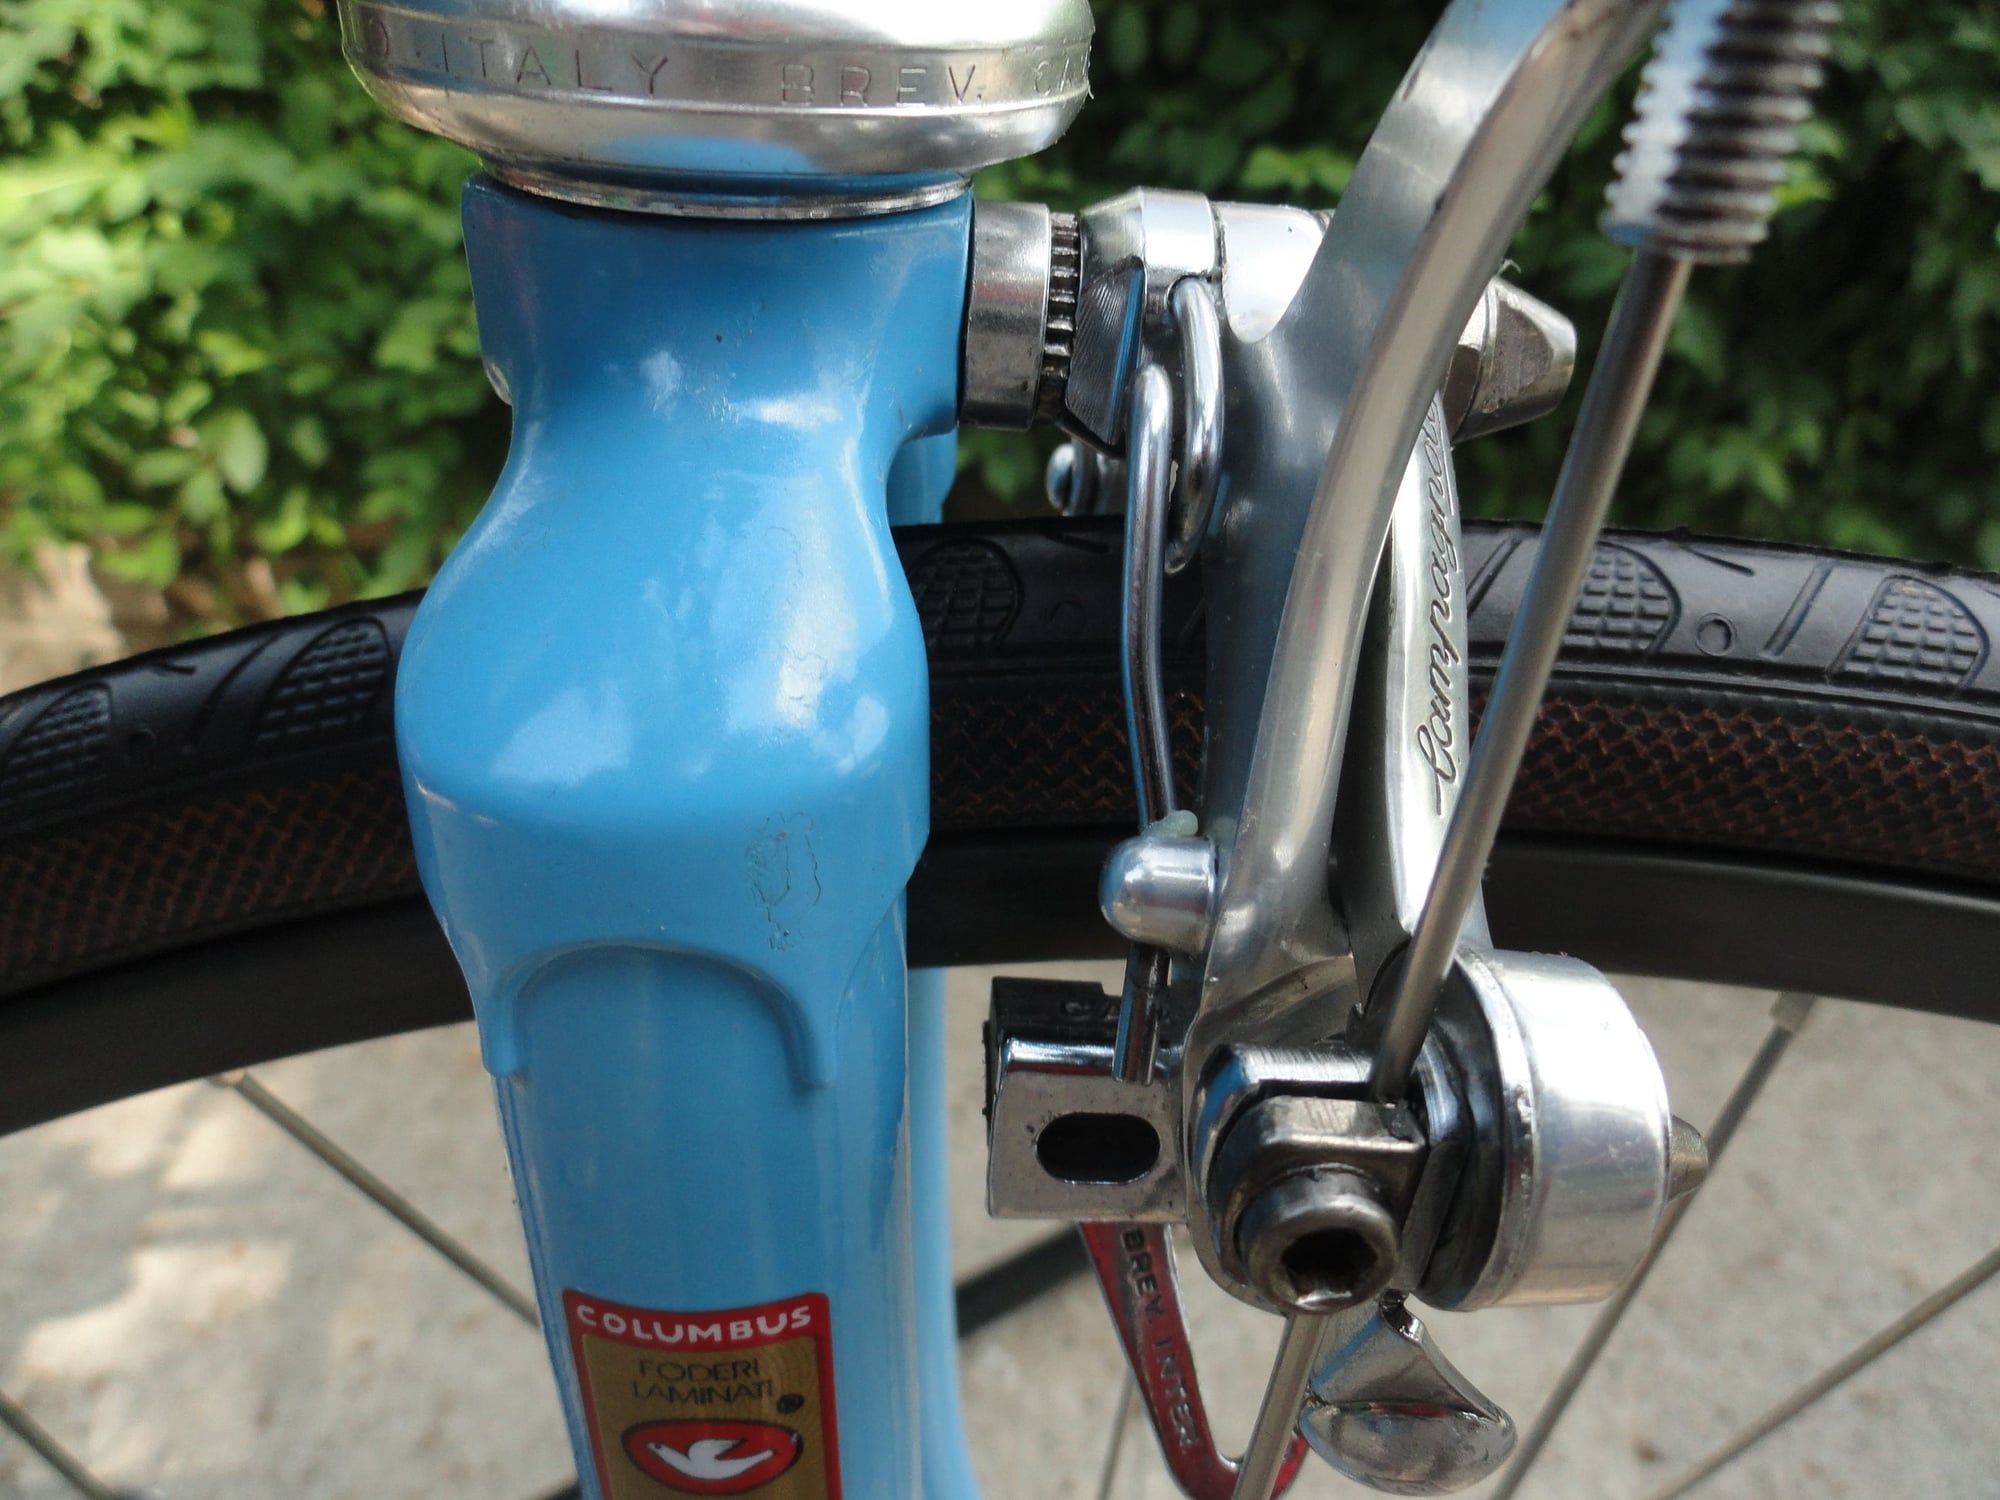
I had to change the brake securing nut and add a spacer to get the right spacing to hold the brake set secure.
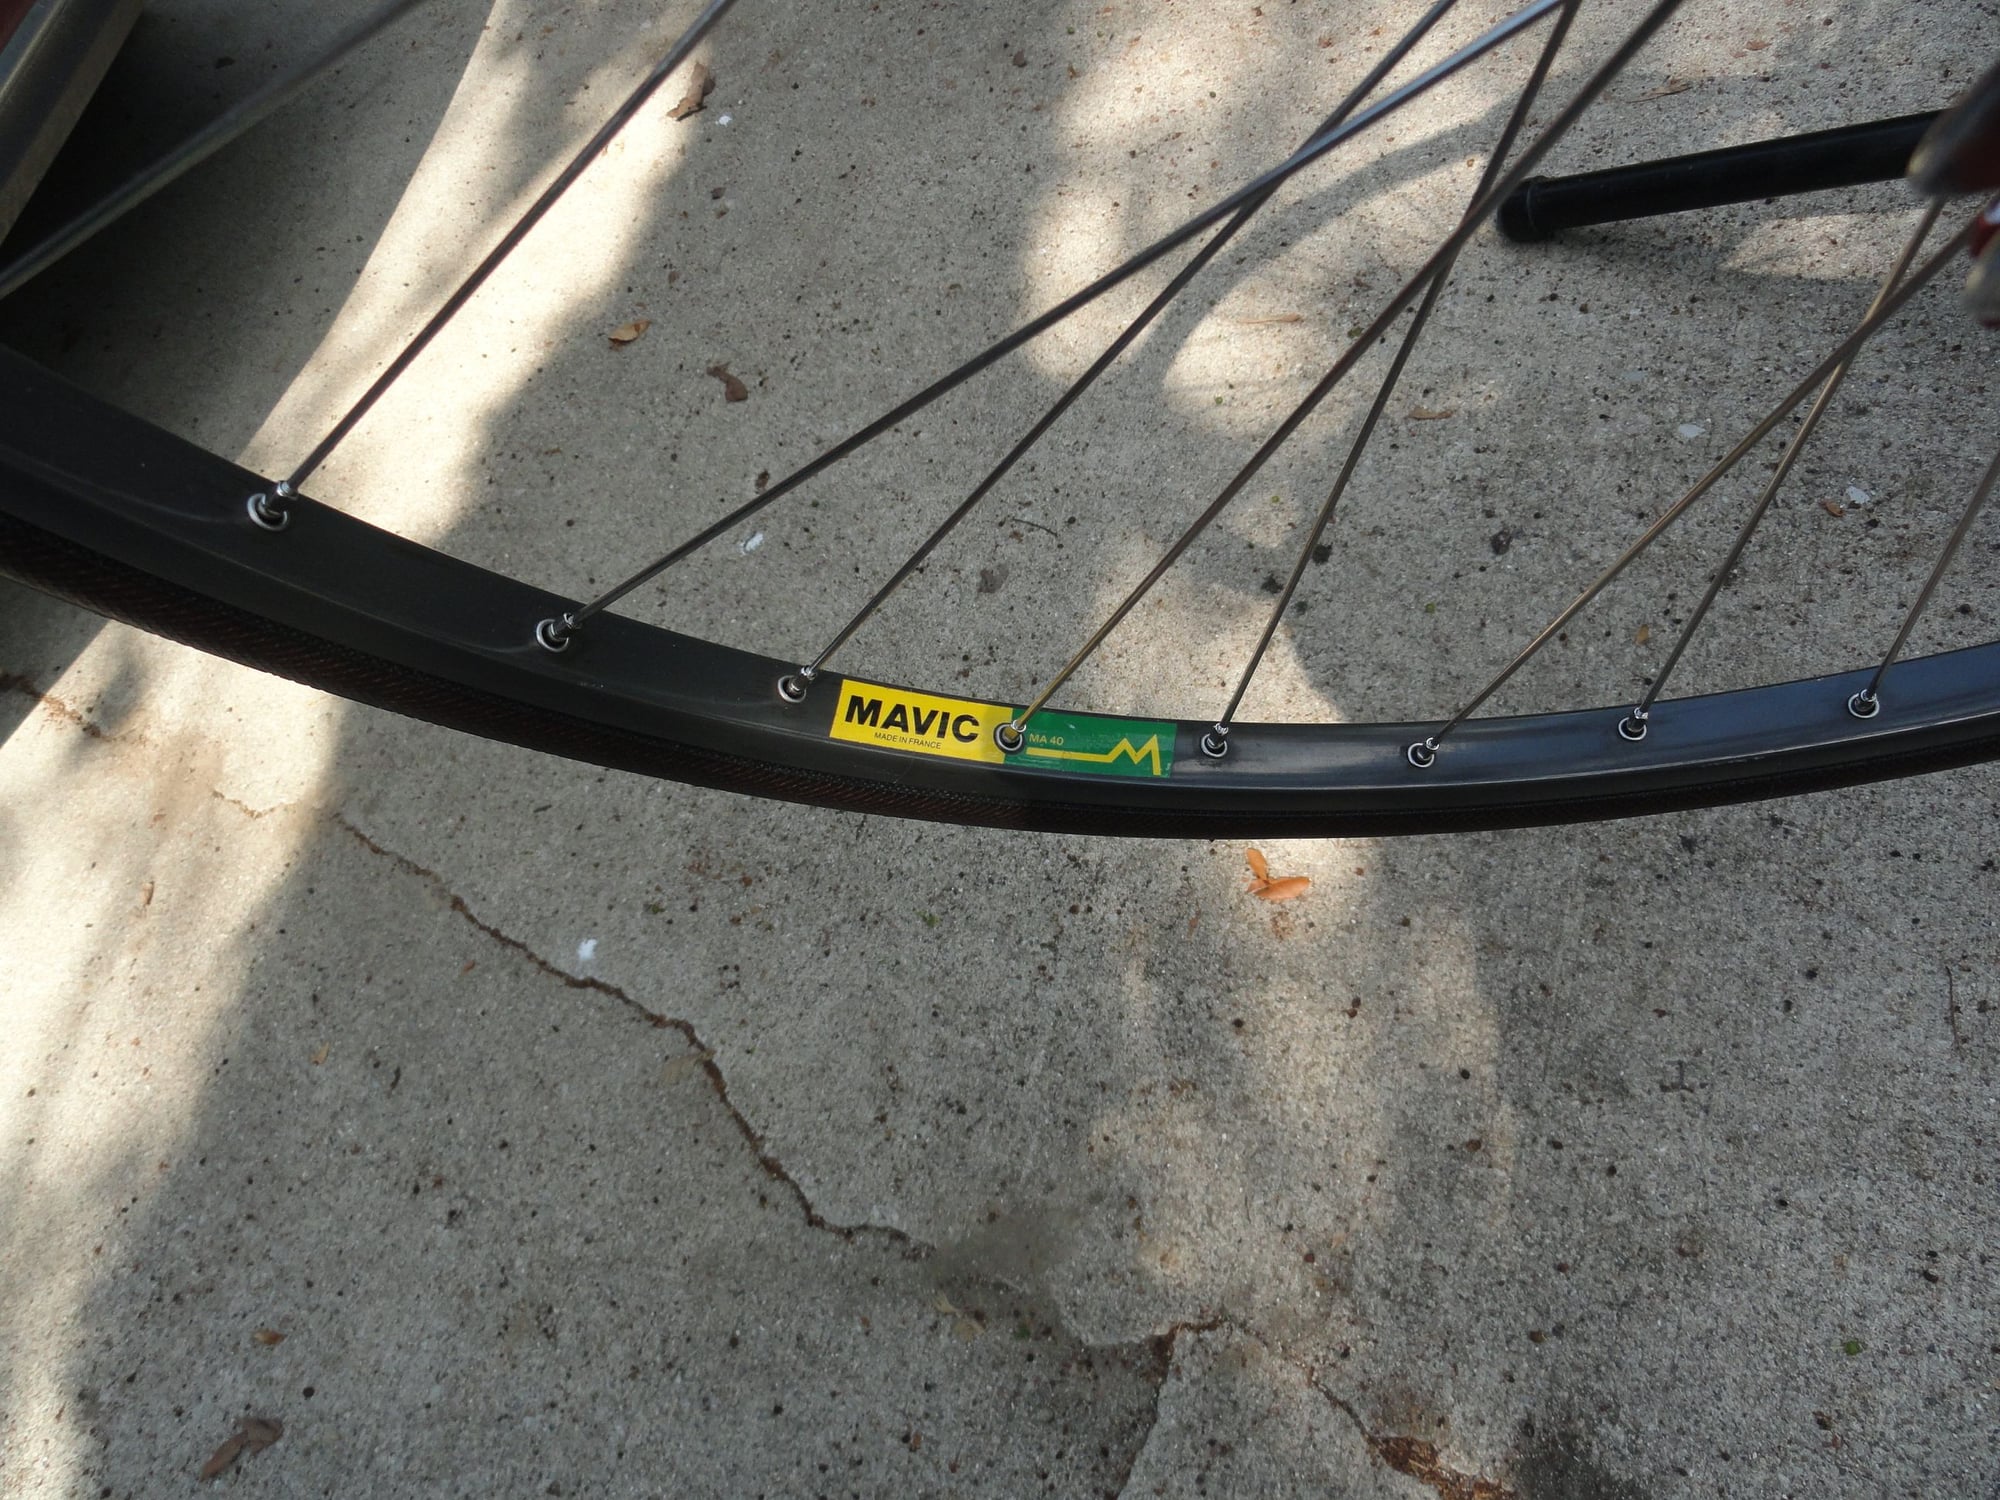
Rear wheel after install.

Tires at 25c which is a bit more than I expected but clearance is OK and it should ride a bit softer than an 18c.
Added brake set and bottle cages, along with seat post.
Front wheel installed and checked for clearances.
I had to change the brake securing nut and add a spacer to get the right spacing to hold the brake set secure.
Rear wheel after install.
Tires at 25c which is a bit more than I expected but clearance is OK and it should ride a bit softer than an 18c.
05-23-21, 07:13 PM
#36
Senior Member
Join Date: Oct 2015
Location: PDX
Posts: 13,053
Bikes: Merz x 5 + Specialized Merz Allez x 2, Strawberry/Newlands/DiNucci/Ti x3, Gordon, Fuso/Moulton x2, Bornstein, Paisley,1958-74 Paramounts x3, 3rensho, 74 Moto TC, 73-78 Raleigh Pro's x5, Marinoni x2, 1960 Cinelli SC, 1980 Bianchi SC, PX-10 X 2
Mentioned: 267 Post(s)
Tagged: 0 Thread(s)
Quoted: 4513 Post(s)
Liked 6,389 Times
in
3,674 Posts
Oops! I forgot to mention that after the wheel is done it will need a wash to remove the oil that went into the spoke nipple and rim holes. I trust this was helpful for others who have troubles with wheel building. And now as Rod Serling would say: we now return you to your regular television programing. Smiles, MH
Your tutorial confirmed my trepidation on this where it requires skill, patience and far more understanding than I have for this.

I have a rim replacement that needs to happen and I may try to see if the new rim will allow just swapping the rim, I suspect not and will see if I can suss it out. I have a wheel builder that will backstop me and take it over if necessary or actually when.

Oh and
 on the tire choice, love these as many here don't, think they really look the part and ride very well for me. I also get great service out of regular Gatorskins as well and find both for great deals regularly.
Last edited by merziac; 05-23-21 at 07:17 PM.
05-23-21, 07:20 PM
#37
Senior Member
Join Date: Oct 2015
Location: PDX
Posts: 13,053
Bikes: Merz x 5 + Specialized Merz Allez x 2, Strawberry/Newlands/DiNucci/Ti x3, Gordon, Fuso/Moulton x2, Bornstein, Paisley,1958-74 Paramounts x3, 3rensho, 74 Moto TC, 73-78 Raleigh Pro's x5, Marinoni x2, 1960 Cinelli SC, 1980 Bianchi SC, PX-10 X 2
Mentioned: 267 Post(s)
Tagged: 0 Thread(s)
Quoted: 4513 Post(s)
Liked 6,389 Times
in
3,674 Posts
05-23-21, 07:41 PM
#38
Senior Member
Thread Starter
Join Date: May 2019
Location: Bloomington, IN
Posts: 2,951
Bikes: Paramount, Faggin, Ochsner, Ciocc, Basso
Mentioned: 117 Post(s)
Tagged: 0 Thread(s)
Quoted: 1304 Post(s)
Liked 1,912 Times
in
1,142 Posts
Merziac,
You ever build a race tire and and find it didn't have the same diameter as you needed? It happens quite often in dirt track racing where we have to adjust the tire pressure to keep the wheel within specs for the inspection before the race.
Now about that wheel build thing. It really is just a few steps. Drive spokes on the inside of the drive flange, non drive side pulling the same way, and then putting in the supporting spokes on both sides from the outside of the wheel. Smiles, MH
05-23-21, 11:30 PM
#39
Senior Member
Join Date: Oct 2015
Location: PDX
Posts: 13,053
Bikes: Merz x 5 + Specialized Merz Allez x 2, Strawberry/Newlands/DiNucci/Ti x3, Gordon, Fuso/Moulton x2, Bornstein, Paisley,1958-74 Paramounts x3, 3rensho, 74 Moto TC, 73-78 Raleigh Pro's x5, Marinoni x2, 1960 Cinelli SC, 1980 Bianchi SC, PX-10 X 2
Mentioned: 267 Post(s)
Tagged: 0 Thread(s)
Quoted: 4513 Post(s)
Liked 6,389 Times
in
3,674 Posts
Merziac,
You ever build a race tire and and find it didn't have the same diameter as you needed? It happens quite often in dirt track racing where we have to adjust the tire pressure to keep the wheel within specs for the inspection before the race.
Now about that wheel build thing. It really is just a few steps. Drive spokes on the inside of the drive flange, non drive side pulling the same way, and then putting in the supporting spokes on both sides from the outside of the wheel. Smiles, MH
You ever build a race tire and and find it didn't have the same diameter as you needed? It happens quite often in dirt track racing where we have to adjust the tire pressure to keep the wheel within specs for the inspection before the race.
Now about that wheel build thing. It really is just a few steps. Drive spokes on the inside of the drive flange, non drive side pulling the same way, and then putting in the supporting spokes on both sides from the outside of the wheel. Smiles, MH
I'm running 32's and 27x1.25 on everything now days as I take many a path and dirt road when I can and find them, way more sure footed and compliant when it matters.
And I get the wheel building thing, been there but haven't done that, just one of those things I can't visualize and didn't completely force myself down that road yet.
Too many other things I can see through to a good outcome in a reasonable amount of time, maybe if I ever get to retire.
05-24-21, 07:00 AM
#40
Hoards Thumbshifters

Join Date: Jul 2010
Location: Signal Mountain, TN
Posts: 1,157
Bikes: '23 Black Mtn MC, '87 Bruce Gordon Chinook, '08 Jamis Aurora, '86 Trek 560, '97 Mongoose Rockadile, & '91 Trek 750
Mentioned: 11 Post(s)
Tagged: 0 Thread(s)
Quoted: 246 Post(s)
Liked 338 Times
in
193 Posts
Ok Merziac, here goes with the wheel build process I use...
There are a few preliminary steps needed before the build can start. I use the UBI (United Bicycle Institute) spoke length calculator. If you do a search for spoke length calculator it should be one of the first three to show up. It asks for a few measurements and they are pretty easy to get. Here are some pics to get past this part of the build process.
I use a metal ruler that measures in cm/mm.
I read 604 for the inner rim diameter but I have to add two mm to account for the spokes seated in the SS inserts in the rim. Thus ERD is 606.
The calculator needs to know the center of the hub so I measure the over lock nut spacing and divide by 2. Here it is 126mm so center of hub is 63mm. This part of the calculations done later.
The The drive side flange to over-nut measurement.
The non-drive side flange to over-nut measurement
Ok so I have taken all of the measurements and now I can start ciphering to get the numbers to put into the spoke calculator.
I know I am building with a 36 hole hub and rim so I enter that into the calculator.
The hub over-nut spacing is 126mm I need to divide that by 2 to get the center of hub spacing. In this case it is 63mm.
The drive side flange to over-nut distance is 44mm. Subtract the 44mm form the 63mm and you get the center of hub to flange measurement the calculator needs. here it is 19mm.
From this point you put in the cross pattern and hit the calculate length button. I am building to 3X so I enter that. The calculator tells me I need 292 mm spokes for the drive side.
I change the input for the non-drive side center of hub to flange. In this case it is 63mm minus 29mm so I enter 34mm and the calculator tells me I need 293.8mm spokes. I round up to 294mm and I am ready to start the build with the correct length spokes. I had to order the spokes but they are here and now I can start to demonstrate the lacing process.
Anyway, I have 6 wheel sets ready to build minus spokes and I have been hesitating to start and this is just the perfect push to get these done this summer. Thanks
05-24-21, 07:29 AM
#41
Senior Member

Join Date: Sep 2017
Location: Hotel CA / DFW
Posts: 1,734
Bikes: 83 Colnago Super, 87 50th Daccordi, 79 & 87 Guerciotti's, 90s DB/GT Mtn Bikes, 90s Colnago Master and Titanio, 96 Serotta Colorado TG, 95/05 Colnago C40/C50, 06 DbyLS TI, 08 Lemond Filmore FG SS, 12 Cervelo R3, 20/15 Surly Stragler & Steamroller
Mentioned: 10 Post(s)
Tagged: 0 Thread(s)
Quoted: 601 Post(s)
Liked 781 Times
in
498 Posts
Pastor Bob,
It is a 51st anniversary model (1989), but the only decal set was for the 50th and it was the same set for both years. And Kurt doesn't like it enough to trade me that front clip for it! So I got to work on it tonight after the day job. I sourced the Stainless bolts for the drop outs and installed them. I use a waterproof grease for the threads to keep the screws working correctly. a couple of pics:
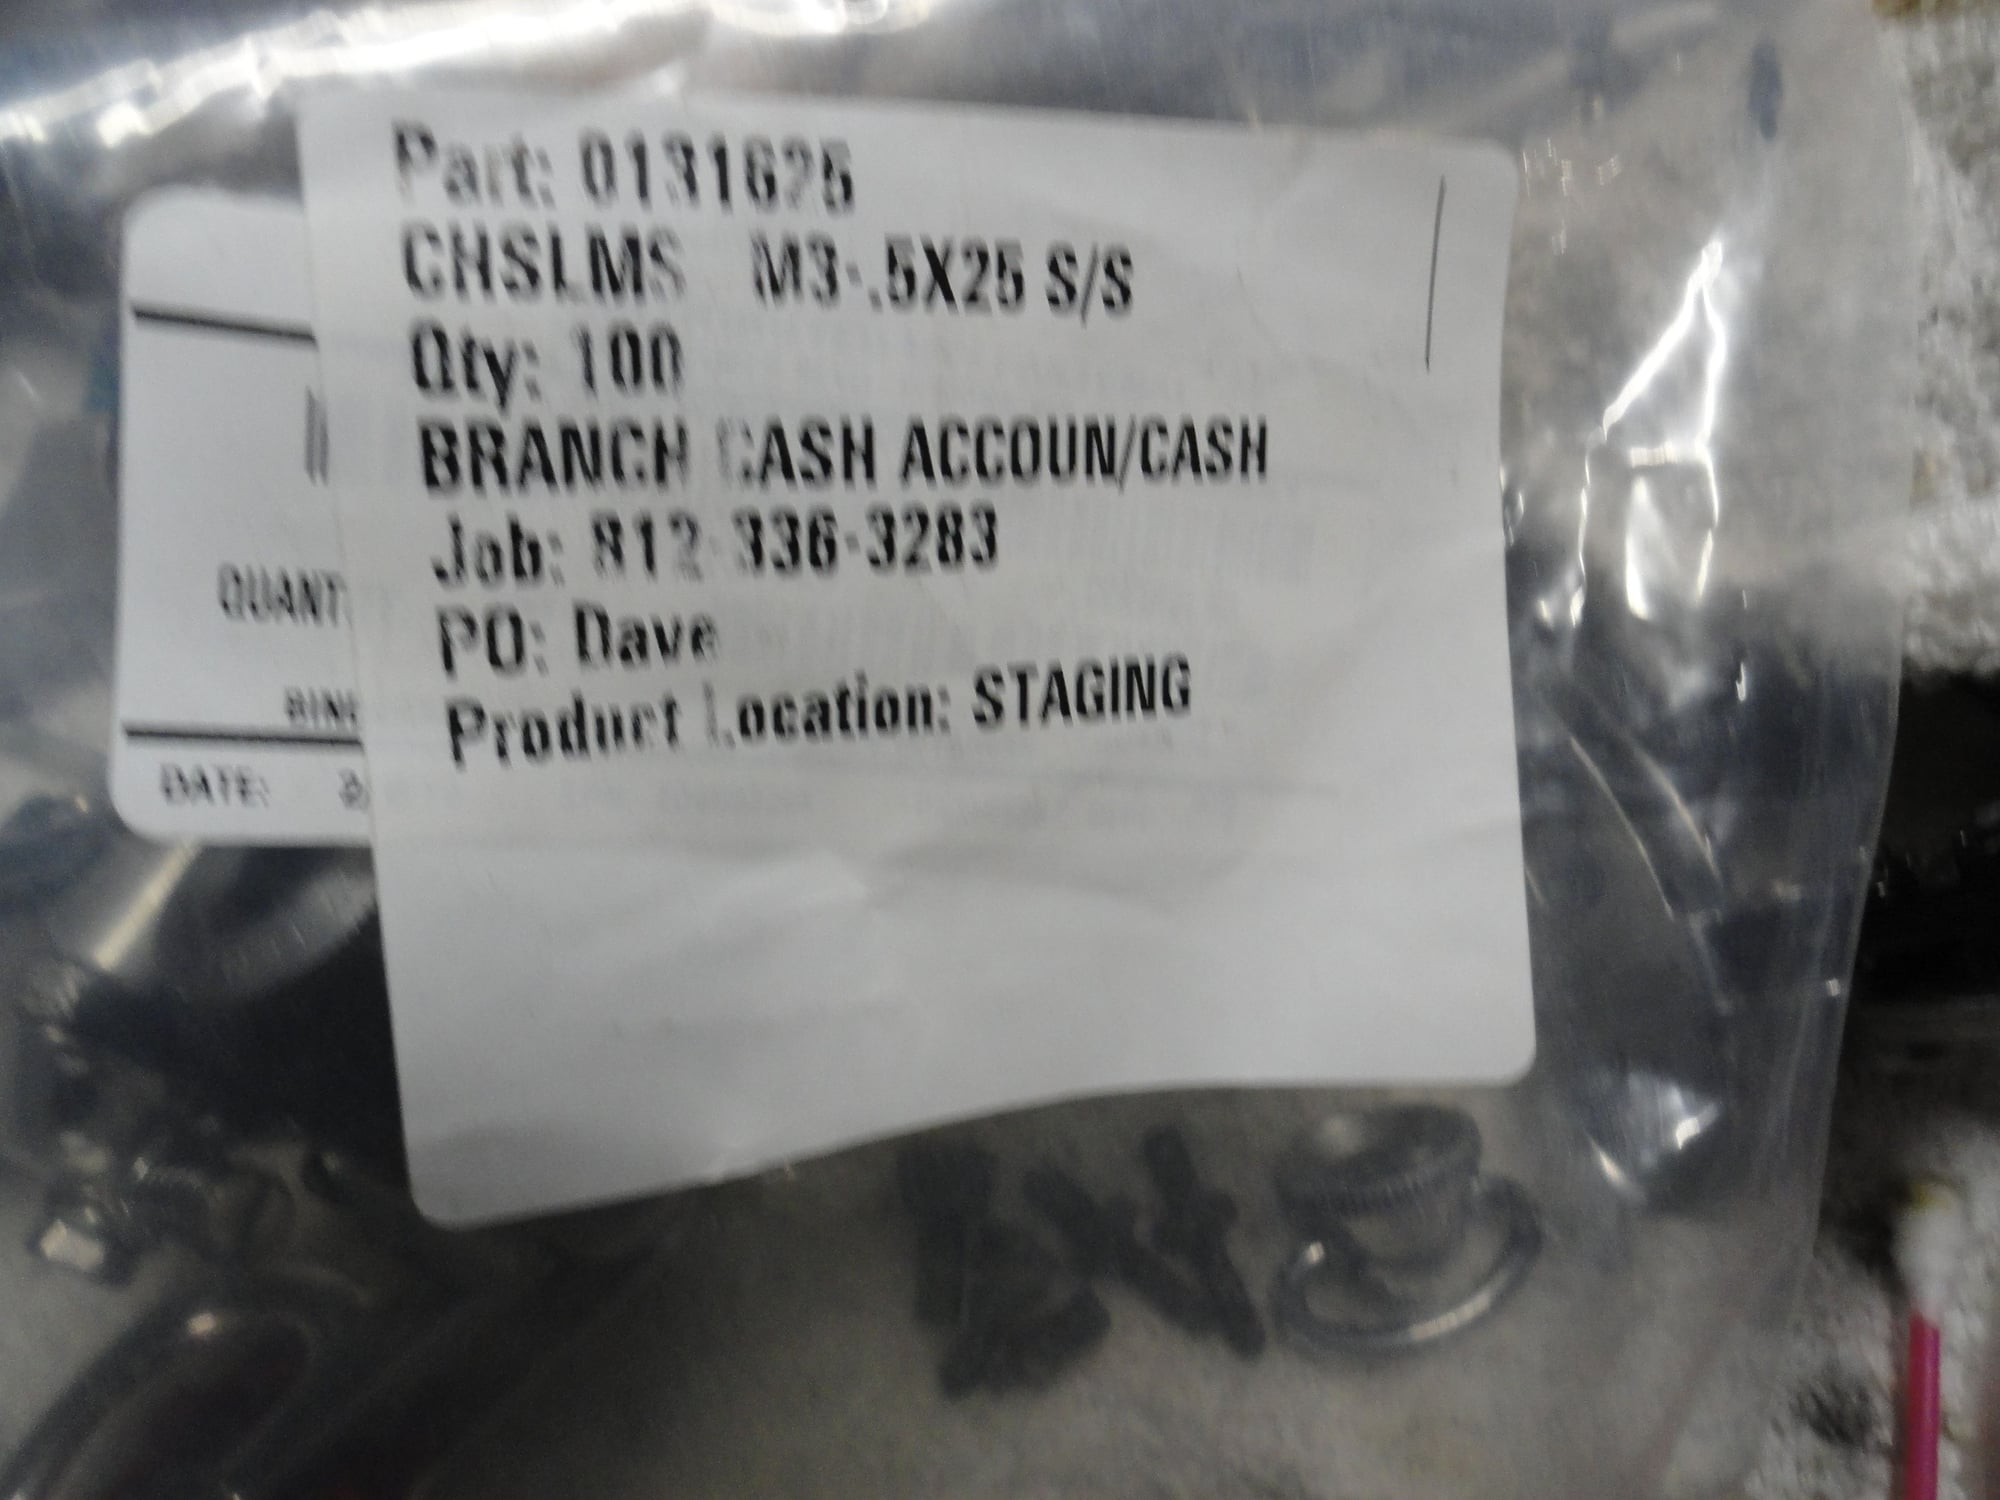
I source these bolts from Fastenal by the bag of 100. Using two per bike they don't really last that long, but if someone needs a couple they need to PM me.
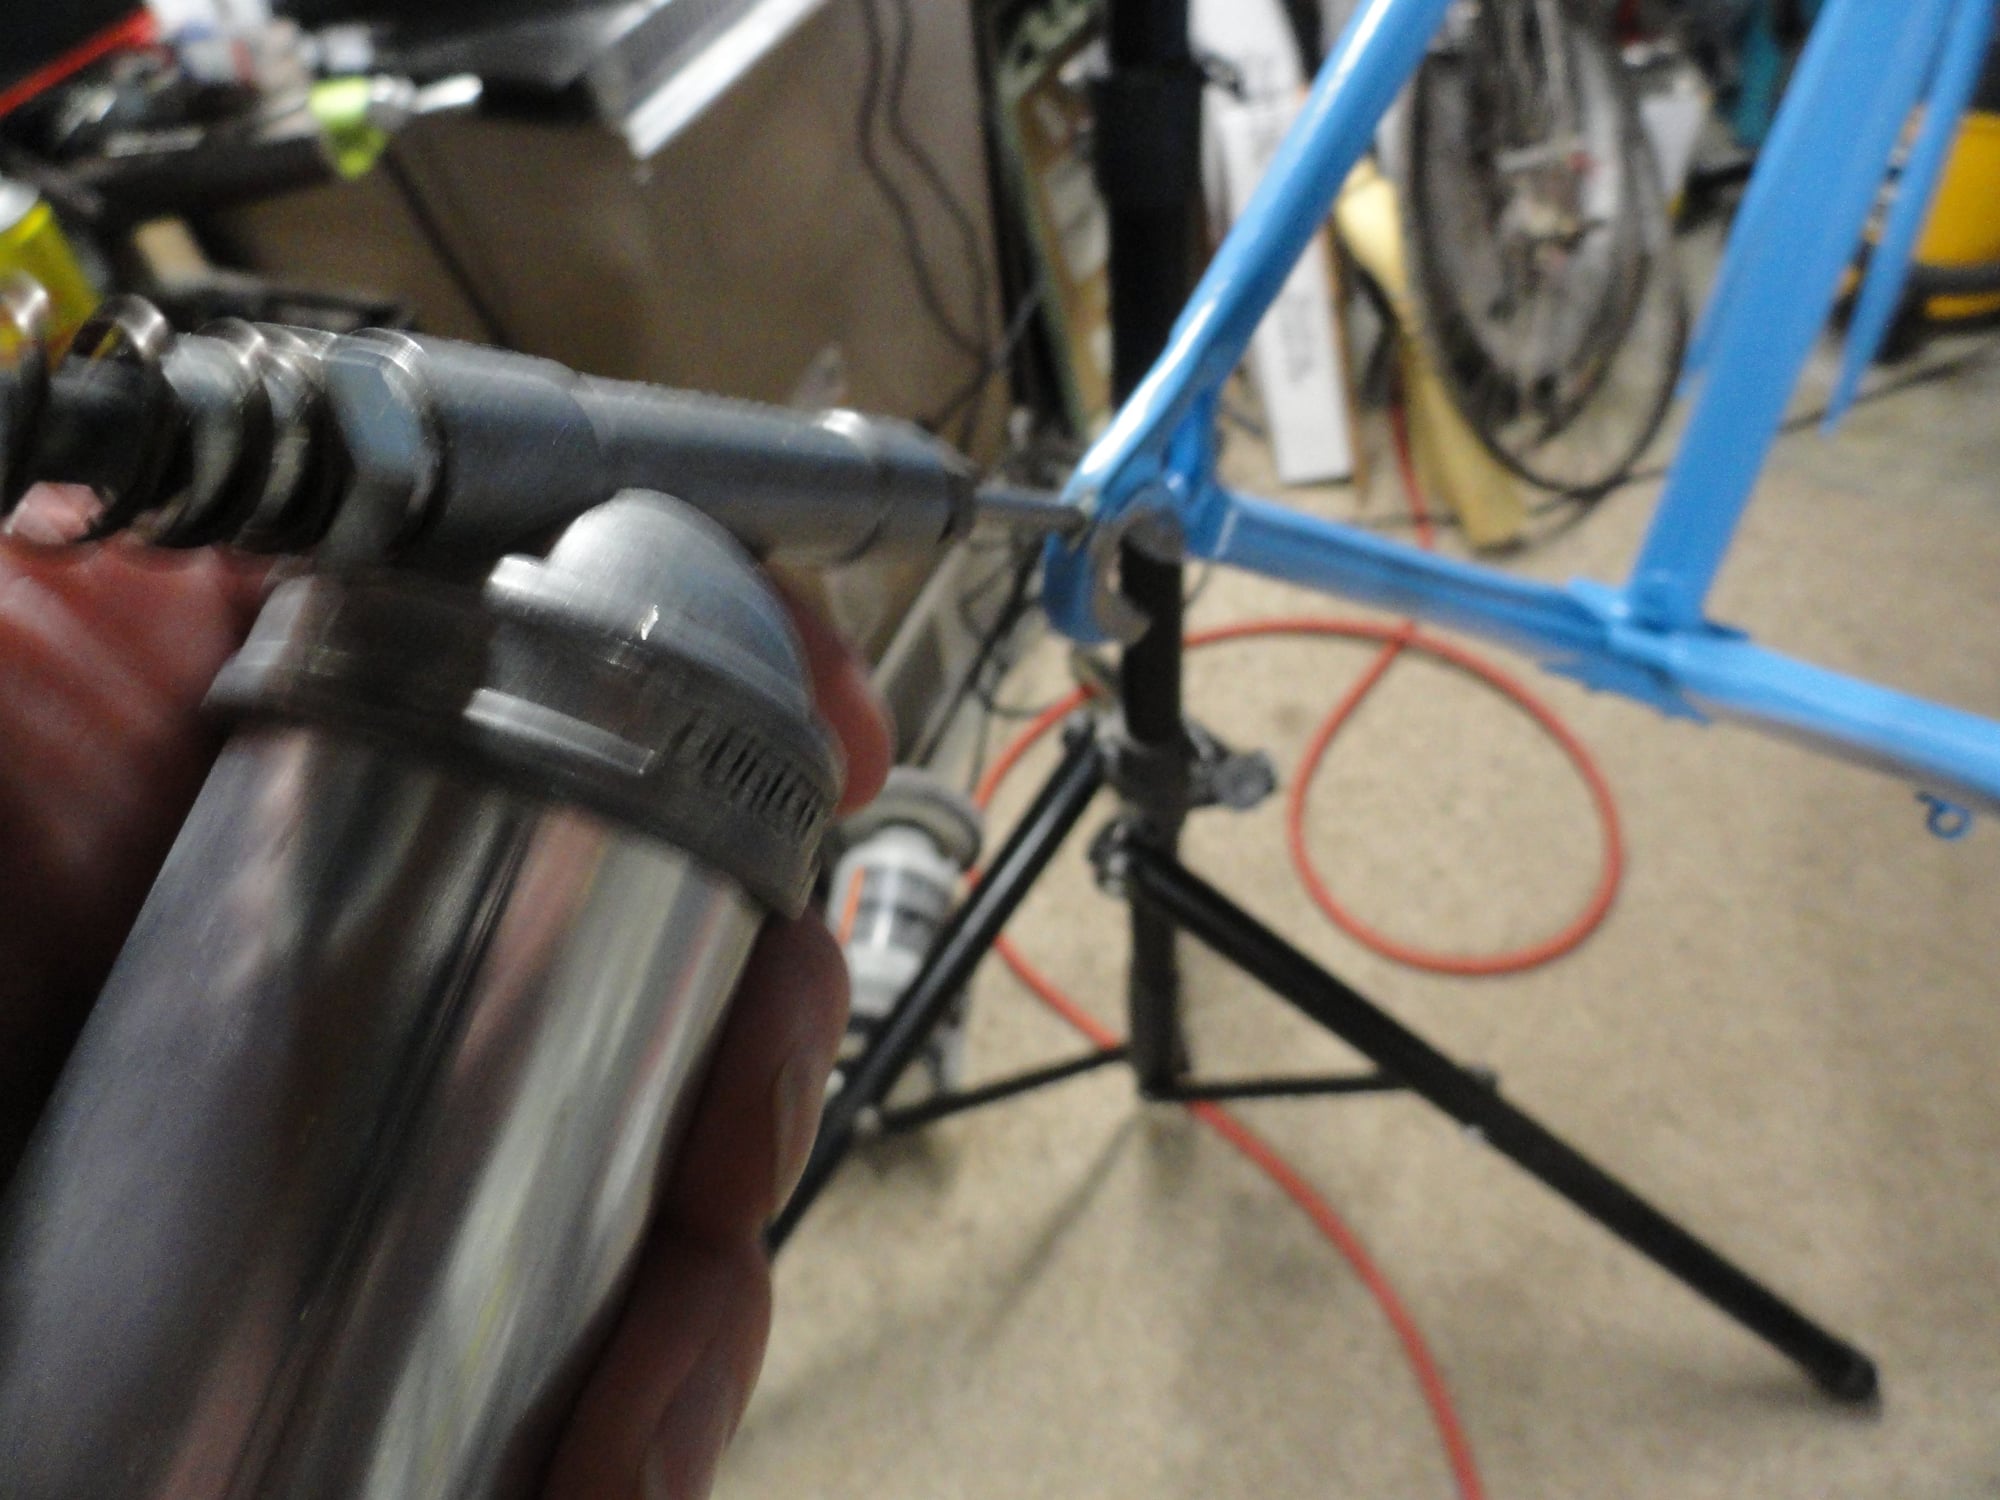
I use the Dualco grease guns for a lot of this as the needle tips makes applying the grease really effective. Grease is waterproof.
It is a 51st anniversary model (1989), but the only decal set was for the 50th and it was the same set for both years. And Kurt doesn't like it enough to trade me that front clip for it! So I got to work on it tonight after the day job. I sourced the Stainless bolts for the drop outs and installed them. I use a waterproof grease for the threads to keep the screws working correctly. a couple of pics:
I source these bolts from Fastenal by the bag of 100. Using two per bike they don't really last that long, but if someone needs a couple they need to PM me.
I use the Dualco grease guns for a lot of this as the needle tips makes applying the grease really effective. Grease is waterproof.
Maybe just a one off paint job for marketing and endorsement purposes ?
Would love for one of the BF collectors to win, glad its too small for me.
Last edited by joesch; 05-24-21 at 07:47 PM.
