


Chinese/Taiwanese carbon frame DIY builders #2
 07-14-16, 08:01 AM
#26
Senior Member
Join Date: Aug 2009
Location: Jersey
Posts: 153
Bikes: Workswell WCB-R-066 Ultegra 6800, LOOK 675 Light Ultegra Di2
Mentioned: 1 Post(s)
Tagged: 0 Thread(s)
Quoted: 1 Post(s)
Likes: 0
Liked 0 Times
in
0 Posts
looks just like mine except for the orange bar tape. I even have similar looking H+ Son hoops.
Congrats!
Congrats!
Here is a progress shot of my Workswell R-066. Just waiting for the BB to arrive and it'll be done the same day. Hopefully it will come today. So far I have been very impressed with the quality of the frame. It was packaged well and there was no damage at all. No imperfections that I can see on the frame and when looking inside the various tubes, the carbon looks to be on par with my Focus Cayo.
The only minor gripe was that they seemed to have but a "bulkhead" at the back of the BB shell and made running the rear mech cable challenging. I had to drill a small hole in order to eliminate the unnecessary bends that would have been there. In speaking with a couple other 066 owners, neither had this bulkhead. My frame also had come with additional Di2 frame plugs in the event that I ever go Di2. Not sure it what is the reasoning behind the mysterious bulkhead.
Other than that it's been great. Running the cables has been mush easier than my Focus was. Can't wait to ride it.

 07-14-16, 08:11 AM
#27
Senior Member

Join Date: Aug 2013
Location: Alexander City, Alabama
Posts: 806
Mentioned: 0 Post(s)
Tagged: 0 Thread(s)
Quoted: 52 Post(s)
Likes: 0
Liked 0 Times
in
0 Posts
The drive side hole in the frame wasn't as tight as the non-drive side so I felt like using the Loctite was necessary.
Sure it may have voided the warranty but I don't think that will ever be an issue. After looking over the aluminium cups they look bullet proof. This particular bottom bracket, BBRIGHT-OUT-1, doesn't have the rubber gasket like some of their other BB shells. The only thing I can see happening to this bottom bracket is the bearings going out some day and the bearings aren't warranted. They are a simple replacement.
The Ultegra crank slid right in and works perfectly. So I was able to install the chain and get the derailleurs fine tuned. It's a real bike now!
I'm going to take it for a spin this afternoon if the weather cooperates.
07-14-16, 08:32 AM
#28

Senior Member

Join Date: Dec 2009
Location: Houston, TX
Posts: 28,682
Bikes: 1990 Romic Reynolds 531 custom build, Merlin Works CR Ti custom build, super light Workswell 066 custom build
Mentioned: 109 Post(s)
Tagged: 1 Thread(s)
Quoted: 6556 Post(s)
Likes: 0
Liked 58 Times
in
36 Posts
So I decided to use a small amount of Loctite 609. As I pressed the drive side cup in I stopped at about .125" of space left. I dripped a small amount of Loctite on the cup then pressed all the way in. On the non drive side I put some grease on the cup threads and screwed it in till there was .125" of space left. Did the same thing as the drive side then finished turning the cup in till it was tight.
The drive side hole in the frame wasn't as tight as the non-drive side so I felt like using the Loctite was necessary.
Sure it may have voided the warranty but I don't think that will ever be an issue. After looking over the aluminium cups they look bullet proof. This particular bottom bracket, BBRIGHT-OUT-1, doesn't have the rubber gasket like some of their other BB shells. The only thing I can see happening to this bottom bracket is the bearings going out some day and the bearings aren't warranted. They are a simple replacement.
The Ultegra crank slid right in and works perfectly. So I was able to install the chain and get the derailleurs fine tuned. It's a real bike now!
I'm going to take it for a spin this afternoon if the weather cooperates.
The warranty issue is simply unimportant. One reason is the low cost of the parts you are working with and another is the low probability of anything going wrong except with the unwarranted bearings. Most folks who have had creaking with press-fit bottom brackets would (I believe) gladly sacrifice $100 for a guaranteed fix, which is what the properly used Loctite primer/609 system is. Fortunately it should never come to that. The Loctite won't harm your adapter and can be easily removed from it if you ever needed to submit the part for warranty remediation.
Did you weight the OEM adapter against the one you used. It would be interesting to know the actual weight difference.
07-14-16, 09:07 AM
#29
Senior Member
Join Date: Aug 2013
Location: Alexander City, Alabama
Posts: 806
Mentioned: 0 Post(s)
Tagged: 0 Thread(s)
Quoted: 52 Post(s)
Likes: 0
Liked 0 Times
in
0 Posts
No I didn't weight the OEM adapter but I'll try to do that this evening.
BTW I did use the 7649 primer, I just didn't mention it in the post. Now that I have installed a press fit BB I'll know what to expect in the future. If it starts to creak I'll pull the cups out and use a liberal amount of Loctite before reinstalling.
BTW I did use the 7649 primer, I just didn't mention it in the post. Now that I have installed a press fit BB I'll know what to expect in the future. If it starts to creak I'll pull the cups out and use a liberal amount of Loctite before reinstalling.
07-14-16, 11:59 AM
#30
Senior Member

Join Date: Oct 2015
Posts: 15,481
Bikes: 2015 Workswell 066, 2017 Workswell 093, 2014 Dawes Sheila, 1983 Cannondale 500, 1984 Raleigh Olympian, 2007 Cannondale Rize 4, 2017 Fuji Sportif 1 LE
Mentioned: 144 Post(s)
Tagged: 0 Thread(s)
Quoted: 7649 Post(s)
Liked 3,465 Times
in
1,831 Posts
07-14-16, 04:16 PM
#31
Senior Member
Thread Starter
To the Pen Man, thank you for the push to have me move forward and order the frame. I still need a fitting (or a recommendation from one of you fine gentleman)
I'm also looking from anyone of you a recommended press fit tool or kit to use. The only bb tool I have is a Lezyne External Bottom Bracket And Cassette Lockring Tool.
Did I mention you guys are AWESOME?!
Last edited by clubber; 07-14-16 at 04:34 PM. Reason: Givin the boys their props
07-14-16, 04:29 PM
#32
Senior Member
Join Date: Oct 2015
Posts: 15,481
Bikes: 2015 Workswell 066, 2017 Workswell 093, 2014 Dawes Sheila, 1983 Cannondale 500, 1984 Raleigh Olympian, 2007 Cannondale Rize 4, 2017 Fuji Sportif 1 LE
Mentioned: 144 Post(s)
Tagged: 0 Thread(s)
Quoted: 7649 Post(s)
Liked 3,465 Times
in
1,831 Posts
I bought the Wheels kit based on recommendations form people here and in the Weightweenies thread ad being the lightest solid set of adapters/shims for Ultegra to BBRight. I also spent $35 on the Wheels Mfg press-fit press, because I knew I could make my own ,... but I also knew I could make a mess. I definitely cannot tolerate creaking and squeaking, and particularly not from the bottom bracket. I might not ever be able to afford another bike, but if I can it will probably be an 085 with 105, so I can use the press again.
07-14-16, 04:29 PM
#33
Senior Member

You see this is EXACTLY what I was looking for when I started this thread. Detailed info regarding what some may consider to be assumed but to us it is invaluable. I'm curious to know why you all are going with the Wheelsmfg BBRight-out-1. Is it that is is known to work well with the Ultegra cranks? (which I will also be using)
To the Pen Man, thank you for the push to have me move forward and order the frame. I still need a fitting (or a recommendation from one of you fine gentleman)
I'm also looking from anyone of you a recommended press fit tool or kit to use. The only bb tool I have is a Lezyne External Bottom Bracket And Cassette Lockring Tool.
07-14-16, 05:11 PM
#34
Senior Member
Join Date: Dec 2009
Location: Houston, TX
Posts: 28,682
Bikes: 1990 Romic Reynolds 531 custom build, Merlin Works CR Ti custom build, super light Workswell 066 custom build
Mentioned: 109 Post(s)
Tagged: 1 Thread(s)
Quoted: 6556 Post(s)
Likes: 0
Liked 58 Times
in
36 Posts
What you say is right, but the press bushings that fit the ID of the bearings are an invaluable part of the press tool kit. And sometimes you can get the press device as well as the dies for the same price as the dies alone. See ebay and search for "bottom bracket press". Many to choose from.
Last edited by rpenmanparker; 07-14-16 at 05:15 PM.
07-14-16, 05:34 PM
#35
Senior Member
Thread Starter
I bought the Wheels kit based on recommendations form people here and in the Weightweenies thread ad being the lightest solid set of adapters/shims for Ultegra to BBRight. I also spent $35 on the Wheels Mfg press-fit press, because I knew I could make my own ,... but I also knew I could make a mess. I definitely cannot tolerate creaking and squeaking, and particularly not from the bottom bracket. I might not ever be able to afford another bike, but if I can it will probably be an 085 with 105, so I can use the press again.
Any opinions on the different Ultegra components?
Ill look for the Wheels Mfg press-fit press on their site. I'm a serious tool junkie so $35 is right in my wheel-house

I too am driven NUTZ by any kind of rubbing or creaking or squeaking (thats what happened with the BB on my cheapo mtb that I sent to the grave after putting over 2000 miles on it) I literally rode it into the ground. tossed it off and embankment and walked home. That was a FINE day. Being FORCED into buying a new bike.

The primary reason I got into road biking and buying my current ride off CL. I was also looking at the 085 frame months ago as an option. Possibly a build for next spring.
07-14-16, 05:36 PM
#36
Senior Member
Thread Starter
What you say is right, but the press bushings that fit the ID of the bearings are an invaluable part of the press tool kit. And sometimes you can get the press device as well as the dies for the same price as the dies alone. See ebay and search for "bottom bracket press". Many to choose from.
What is your opinion of this one https://www.ebay.com/itm/Bike-Headset...AAOSwUdlWeAGv? Or perhaps there is a specific one you could recommend? Maybe one with a hand-crank?
Last edited by clubber; 07-14-16 at 05:44 PM.
07-14-16, 05:41 PM
#37
Senior Member
Join Date: Jun 2016
Posts: 625
Mentioned: 5 Post(s)
Tagged: 0 Thread(s)
Quoted: 252 Post(s)
Likes: 0
Liked 0 Times
in
0 Posts
The only reason to buy the medium cage GS is if you want to run 11-32, at which point I'd rather run a triple. SS works with every other cassette option. GS is optimized to only work with 11-28 and 11-32, although I'm sure it will still shift other cassettes.
07-14-16, 05:46 PM
#38
Senior Member
Thread Starter
Not sure what you mean by SS, GS. As I mentioned I have not really gotten into researching it yet. I do appreciate your input though
07-14-16, 05:48 PM
#39
Senior Member
Join Date: Jun 2016
Posts: 625
Mentioned: 5 Post(s)
Tagged: 0 Thread(s)
Quoted: 252 Post(s)
Likes: 0
Liked 0 Times
in
0 Posts
GS is the medium cage version of the rear derailer. SS is the short cage version of the rear derailer.
GS is heavier, usually costs more, and will probably shift worse on any cassette smaller than 11-28. The only, singular advantage it has is the ability to run 11-32.
GS is heavier, usually costs more, and will probably shift worse on any cassette smaller than 11-28. The only, singular advantage it has is the ability to run 11-32.
07-14-16, 07:13 PM
#40
Senior Member
Join Date: Aug 2013
Location: Alexander City, Alabama
Posts: 806
Mentioned: 0 Post(s)
Tagged: 0 Thread(s)
Quoted: 52 Post(s)
Likes: 0
Liked 0 Times
in
0 Posts
Okay for those of you contemplating using a homemade press, threaded rod and nuts, I'd think twice. If this is your first time pressing a BB into a frame I suggest you get the Wheels Mfg. press or one equal to it from ebay. I tried the homemade route myself and I destroyed the OEM (Workswell) BB that came with the frame. I even CNC'd custom drifts for the bearings and still ruined them.
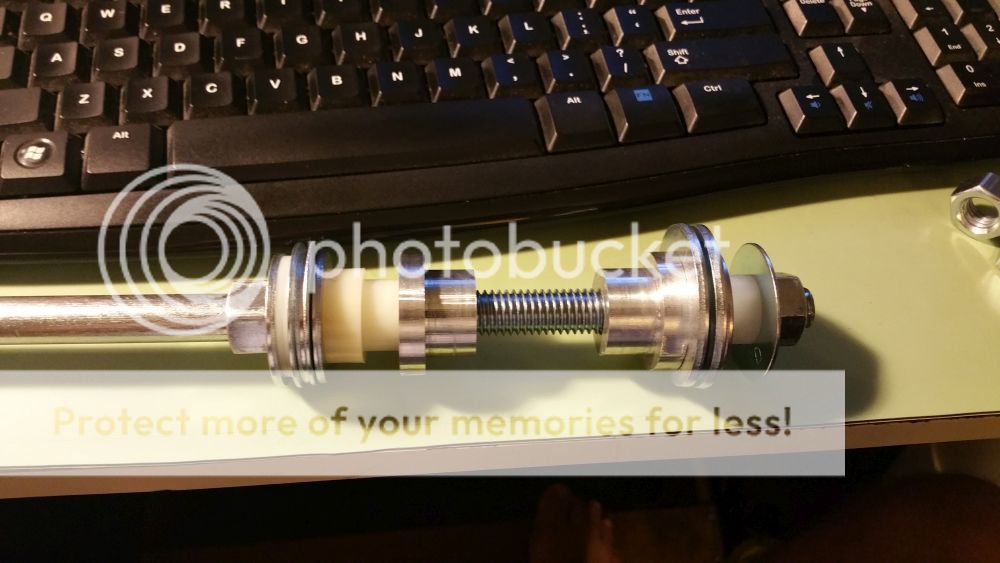
You may not have the same result as I did with a homemade press but you'll never regret getting the right tool for the right job.

You may not have the same result as I did with a homemade press but you'll never regret getting the right tool for the right job.
07-14-16, 07:35 PM
#42
Senior Member
Join Date: Aug 2013
Location: Alexander City, Alabama
Posts: 806
Mentioned: 0 Post(s)
Tagged: 0 Thread(s)
Quoted: 52 Post(s)
Likes: 0
Liked 0 Times
in
0 Posts
Ride report:
I went out on a short ride today to test ride the new bike and everything was great except the bottom bracket. I had creaking from the start. I know for a fact it wasn't any other component of the bike because every nut and bolt was tightened to spec and I just repacked the pedals. Apparently using a little bit or Loctite isn't the answer. As rpenmanparker suggested before, use a liberal amount of Loctite along with the specified primer, if you are going to go that route.
I will be pulling the cups back out to reinstall them properly, when I have time. As for now I'm going to have to put the bike on the back burner for a week or so because I am backed up at work and I am going to California next week.
I have to say, besides the creaking from the bottom bracket I was very happy with everything else. I can't give a realistic report of the ride because I was so pumped and I forgot to inflate the tires to the correct amount. My ride was cut short because we are getting some major afternoon lightning/thunder boomers right now.
07-14-16, 07:50 PM
#43
Senior Member
Join Date: Aug 2013
Location: Alexander City, Alabama
Posts: 806
Mentioned: 0 Post(s)
Tagged: 0 Thread(s)
Quoted: 52 Post(s)
Likes: 0
Liked 0 Times
in
0 Posts
Honestly, I don't know what was happening. I put even pressure on the bearings from the start and as I started to apply torque the BB cup would get crooked. I tried it more than once and I went very slow each time. It still went wrong each time. The last time it went in wrong I wrecked the bearings getting the BB back out.
The thing that gets me is the Wheels Mfg. BB cup slid in so easy. The drive side was easy but the non-drive side was tight as ****.
The thing that gets me is the Wheels Mfg. BB cup slid in so easy. The drive side was easy but the non-drive side was tight as ****.
07-14-16, 08:06 PM
#44
Senior Member
Join Date: Jun 2016
Posts: 625
Mentioned: 5 Post(s)
Tagged: 0 Thread(s)
Quoted: 252 Post(s)
Likes: 0
Liked 0 Times
in
0 Posts
Some of the Chinese BBs don't have a very good taper so they don't do a very good job at self centering and staying flat at the start. If you get the job started with a mallet just tapping it in lightly and somewhat straight, but getting the entire circumference started, it can make the job easier.
07-14-16, 09:48 PM
#45
Senior Member
Thread Starter
Honestly, I don't know what was happening. I put even pressure on the bearings from the start and as I started to apply torque the BB cup would get crooked. I tried it more than once and I went very slow each time. It still went wrong each time. The last time it went in wrong I wrecked the bearings getting the BB back out.
The thing that gets me is the Wheels Mfg. BB cup slid in so easy. The drive side was easy but the non-drive side was tight as ****.
The thing that gets me is the Wheels Mfg. BB cup slid in so easy. The drive side was easy but the non-drive side was tight as ****.
I would be curious to know (if you have a digital caliper) the measurements of both the inside diameter of the BB shell outside diameter of the BB cup. If the non-drive side is particularly tight than it seems to me that one or the other has to be off or out of round.
The fact that you have to leave and come back to it in week or however long you'll be gone will give you a fresh perspective and hopefully it will be something you simply overlooked.
07-15-16, 07:51 AM
#46
Senior Member
Join Date: Aug 2013
Location: Alexander City, Alabama
Posts: 806
Mentioned: 0 Post(s)
Tagged: 0 Thread(s)
Quoted: 52 Post(s)
Likes: 0
Liked 0 Times
in
0 Posts
Well aside from the problems with the BB you have to feel good about (nearly) finishing your build.
I would be curious to know (if you have a digital caliper) the measurements of both the inside diameter of the BB shell outside diameter of the BB cup. If the non-drive side is particularly tight than it seems to me that one or the other has to be off or out of round.
The fact that you have to leave and come back to it in week or however long you'll be gone will give you a fresh perspective and hopefully it will be something you simply overlooked.
I have a set of digital calipers so I'll give it a look when I pull the Wheels Mfg BB out. I'll also measure the OEM one to see if it's consistent. I don't doubt that the hole in the frame may be out of round. That's good reason alone to use a lot of Loctite during installation. I wonder if they ream the BB hole out by hand or in a jig?
I do need a fresh perspective. There is a lot going on here. We are trying to get a big job out at work and I am putting in extra work to make sure I'm covered while I'm out of town next week. Up until yesterday my living room looked like a junk yard with bike parts, tools and packaging all over the place.
I think a nice long bike ride along the Pacific coast might be just what I need.
 07-15-16, 08:39 AM
#47
Senior Member
Join Date: Dec 2009
Location: Houston, TX
Posts: 28,682
Bikes: 1990 Romic Reynolds 531 custom build, Merlin Works CR Ti custom build, super light Workswell 066 custom build
Mentioned: 109 Post(s)
Tagged: 1 Thread(s)
Quoted: 6556 Post(s)
Likes: 0
Liked 58 Times
in
36 Posts
Honestly, I don't know what was happening. I put even pressure on the bearings from the start and as I started to apply torque the BB cup would get crooked. I tried it more than once and I went very slow each time. It still went wrong each time. The last time it went in wrong I wrecked the bearings getting the BB back out.
The thing that gets me is the Wheels Mfg. BB cup slid in so easy. The drive side was easy but the non-drive side was tight as ****.
The thing that gets me is the Wheels Mfg. BB cup slid in so easy. The drive side was easy but the non-drive side was tight as ****.
07-15-16, 10:08 AM
#48
Senior Member
What you say is right, but the press bushings that fit the ID of the bearings are an invaluable part of the press tool kit. And sometimes you can get the press device as well as the dies for the same price as the dies alone. See ebay and search for "bottom bracket press". Many to choose from.
07-15-16, 02:20 PM
#49
Senior Member
Join Date: Aug 2013
Location: Alexander City, Alabama
Posts: 806
Mentioned: 0 Post(s)
Tagged: 0 Thread(s)
Quoted: 52 Post(s)
Likes: 0
Liked 0 Times
in
0 Posts
Correct me if I am wrong, but it sounds like your first try with the negative result differed by two variables from the successful installation that followed. Different tool AND different BB adapter. Considering how similar the purchased tool is to the homemade one, I would blame the failure on the Workswell BB adapter, not the homemade tool. Despite the fancier look of the purchased one, it is basically the same as the homemade one, just a threaded rod, some nuts and the drifts. How could the problem have been the fault of the tool if the drifts were right?
Last edited by aubiecat; 07-16-16 at 04:56 PM.
07-16-16, 04:53 PM
#50
Senior Member
Join Date: Aug 2013
Location: Alexander City, Alabama
Posts: 806
Mentioned: 0 Post(s)
Tagged: 0 Thread(s)
Quoted: 52 Post(s)
Likes: 0
Liked 0 Times
in
0 Posts
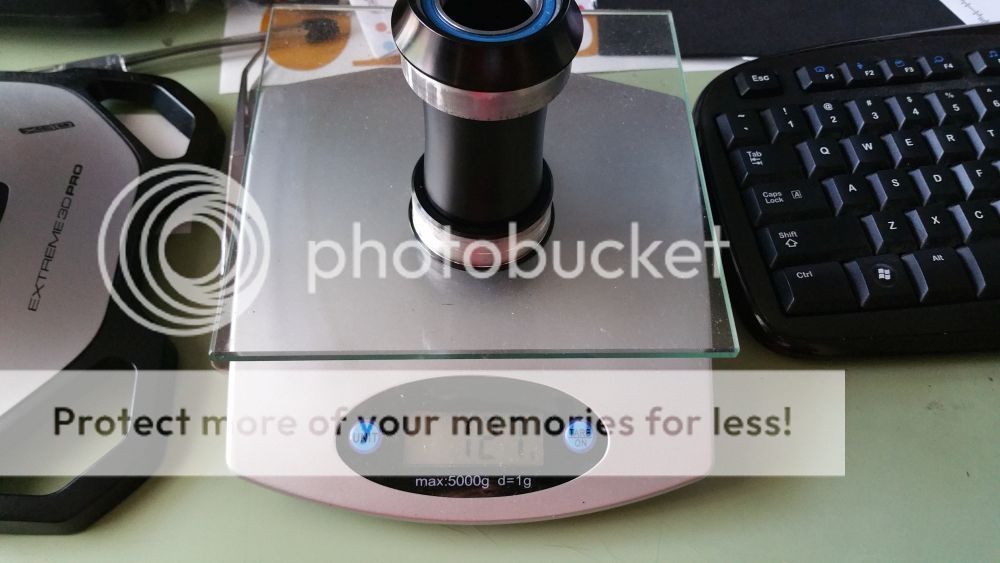
I weighed the OEM bottom bracket, it came out to 128 grams. (The photo shows 127 but I left the seal off which weights one gram)
The Wheels Mfg. bottom bracket weighs 164 grams.
A weight penalty of 36.
The Wheels Mfg. bottom bracket weighs 164 grams.
A weight penalty of 36.