


Your Most Recent Cycling-related Repair
 10-23-17, 06:32 PM
#51
vespertine member

Join Date: Jul 2013
Location: Land of Angora, Turkey
Posts: 2,476
Bikes: Yes
Liked 220 Times
in
163 Posts
I replaced my rear derailleur cable last week. It broke while I was going up a rather steep hill...leading to a brief walk of shame followed by another 15 miles in 50x11.
I've also now learned the trick for keeping the derailleur in a more reasonable gear, should I ever snap the cable again.
I've also now learned the trick for keeping the derailleur in a more reasonable gear, should I ever snap the cable again.
 10-23-17, 07:43 PM
#52
Senior Member
Thread Starter

Join Date: Nov 2007
Location: Yamaguchi City, Japan
Posts: 1,109
Bikes: Trek Madone 5.2 SL 2007, Look KG386, R022 Re-framed Azzurri Primo, Felt Z5, Trek F7.3 FX
Liked 85 Times
in
73 Posts
https://www.artscyclery.com/learning...rcablefix.html
I have been thinking about bar tape. I don't even need it any more. I feel my handle grip covers to be greatly superior, cheaper, easier to fit, and less bother to remove and replace when replacing cables than bar tape. This makes me wonder why road bikes have bar tape at all? What is bar tape's raison d'etre? Could it be that it is because bar tape is a nice little earner for lBS rather than actually being useful?!?
10-23-17, 08:22 PM
#53
Farmer tan

I replaced my rear derailleur cable last week. It broke while I was going up a rather steep hill...leading to a brief walk of shame followed by another 15 miles in 50x11.
I've also now learned the trick for keeping the derailleur in a more reasonable gear, should I ever snap the cable again.
I've also now learned the trick for keeping the derailleur in a more reasonable gear, should I ever snap the cable again.
10-24-17, 07:38 AM
#55
Senior Member

I'm not a big bike wrencher, but I'm proud of my accomplishments this past weekend. After my last ride on my road bike I noticed the crank was wobbling. I ordered the appropriate Park tool to remove the bottom bracket. Then I found a Youtube video describing the process. This past weekend I successfully removed the bottom bracket, greased the parts and reassembled. It is all tight now. While on the stand I took out the rear brake cable and retouched some of the paint. I just need to return the cable and adjust the back brakes.
10-24-17, 02:29 PM
#56
Senior Member
Join Date: Sep 2014
Location: Northeastern MA, USA
Posts: 1,686
Bikes: Garmin/Tacx Bike Smart
Liked 296 Times
in
193 Posts
Front brake and pads on my Roubaix were replaced. The original had an oil leak that quickly contaminated the pads causing loss of effectiveness and tons of noise. Shimano paid for the replacement.
10-24-17, 03:13 PM
#59
Senior Member
Join Date: Sep 2014
Location: Northeastern MA, USA
Posts: 1,686
Bikes: Garmin/Tacx Bike Smart
Liked 296 Times
in
193 Posts
I'm a creature of habit, I guess. I broke down the tires and installed Velox. I've used it for decades without any issues. Someone mentioned Stan's No Tubes rim tape, and if I had thought of it I might have given that a try. It's designed for tubeless, but no doubt would work well with tubes.
11-21-17, 02:24 AM
#60
Senior Member
Thread Starter
Join Date: Nov 2007
Location: Yamaguchi City, Japan
Posts: 1,109
Bikes: Trek Madone 5.2 SL 2007, Look KG386, R022 Re-framed Azzurri Primo, Felt Z5, Trek F7.3 FX
Liked 85 Times
in
73 Posts
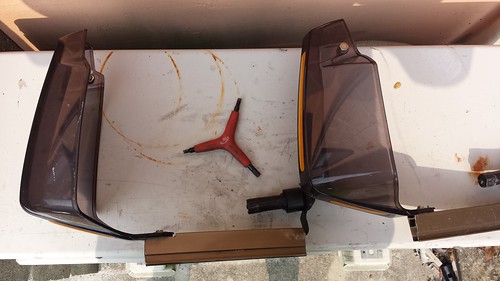
The handle bar fairings are on and I will try them out soon.
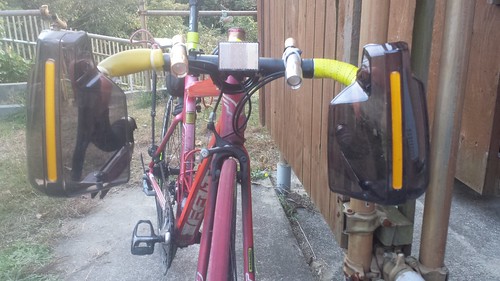 Bar Fairings by Timothy Takemoto, on Flickr
I have put reflective tape on my downtube and top tube - red in the picture above, yellow on my other bike for carbon protection and visibility at night. It is reasonably priced.
https://www.aliexpress.com/item/http...808845586.html
Bar Fairings by Timothy Takemoto, on FlickrI have put reflective tape on my downtube and top tube - red in the picture above, yellow on my other bike for carbon protection and visibility at night. It is reasonably priced.
https://www.aliexpress.com/item/http...808845586.html
11-21-17, 03:05 AM
#61

Senior Member
Tonight I pulled a latex tube out of my rear wheel that had developed a slow leak over the weekend, and then was leaking somewhat quicker during this morning's ride so that I had to refill it during the ride to make it back home.
It appears that I micro-pinched it a little with a tire iron while swapping the stock tire that came on my new bike for this new Compass 32mm tire. Kind of wierd that it took a week to really turn into something. I patched it and put it back in. The tire had stretched out enough after a week of riding that I was able to get it on, albeit with difficulty, using just my hands.
It appears that I micro-pinched it a little with a tire iron while swapping the stock tire that came on my new bike for this new Compass 32mm tire. Kind of wierd that it took a week to really turn into something. I patched it and put it back in. The tire had stretched out enough after a week of riding that I was able to get it on, albeit with difficulty, using just my hands.
11-25-17, 10:44 AM
#63
Senior Member
Thread Starter
Join Date: Nov 2007
Location: Yamaguchi City, Japan
Posts: 1,109
Bikes: Trek Madone 5.2 SL 2007, Look KG386, R022 Re-framed Azzurri Primo, Felt Z5, Trek F7.3 FX
Liked 85 Times
in
73 Posts
The motor cycle handlebar fairings rattled but they are warm so I persevered. Today I drilled a 6mm hole through the front top of both of my hoods and screwed an M6 stainless steel bolt into the hard plastic of the hood through the fairings which tapped a thread for itself in the plastic of the hood and now makes them rock solid.
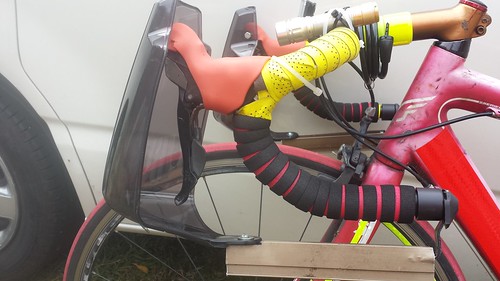
Bolted to Hoods by Timothy Takemoto, on Flickr
I feel like I am riding a motorcycle, or a Rolls Royce.
Bolted to Hoods by Timothy Takemoto, on Flickr
I feel like I am riding a motorcycle, or a Rolls Royce.
11-25-17, 06:46 PM
#65
Super WW
Join Date: Jul 2008
Location: NY (state)
Posts: 670
Bikes: A really light one and a really heavy one.
Likes: 0
Liked 43 Times
in
15 Posts
5:17 am commuting to work (on my road bike). 28 degrees, dark and the rear tire gets really squishy (flat) halfway in. Find the cut, boot the tire and change out the tube in 7 minutes (with gloves on) and get to work only 5 minutes later than usual.
Likes For cyclebycle13:
12-18-17, 07:58 PM
#66
Senior Member
Thread Starter
Join Date: Nov 2007
Location: Yamaguchi City, Japan
Posts: 1,109
Bikes: Trek Madone 5.2 SL 2007, Look KG386, R022 Re-framed Azzurri Primo, Felt Z5, Trek F7.3 FX
Liked 85 Times
in
73 Posts
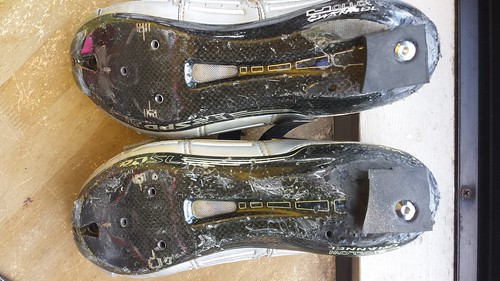
Another pair of Shimano Carbon soled shoes SIDI-fied with heel pads. I got them for 20USD when looking for a cheaper way to purchase cleats (on second hand shoes - sometimes they are cheaper than the cleats on the) for 20USD including postage. I now have 4 pairs of Shimano pro-level hollow carbon soled shoes! The previous owner had shoe gooed the heel (a cosmetic repair) but I did not bother to carbon patch them because the base of the heel is not critical, but a heel pad is, lest you wear all the carbon away.
The process of SIDI-fying (adding a replacable rubber heel) to a pair of carbon sole shoes is
1) Purchase some M5 claw nuts for a bout 1USD
https://www.aliexpress.com/item/10pc...833008717.html
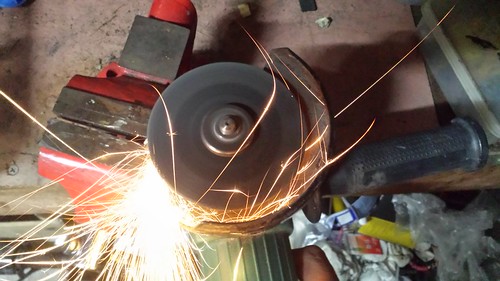
2) Put a M5 bolt into your vice, protruding about 4mm, and screw the claw nut down onto it and then use your angle grinder to grind away 4-5mm of nut to about the height of the claws, and the bolt protruding from your vice.
 Grinding Down a Claw Nut by Timothy Takemoto, on Flickr
You have to use the grinder upside down I think so that the nut is not twisted off the bolt. This means that sparks come in your own direction so old clothes are a good idea.
 Grinding Down a Claw Nut by Timothy Takemoto, on Flickr
The shorter claw nuts can be used to repair cleat nuts too.
3) Drill a 7mm hole in the heel of your shoes. Do NOT drill the hole as shown in the picture below from the inside because the heel lining can get caught in the chuck and pulled off your shoes! Drill from the outside in, at about the place where there is a Shimano non-replaceable heel pad rivet.
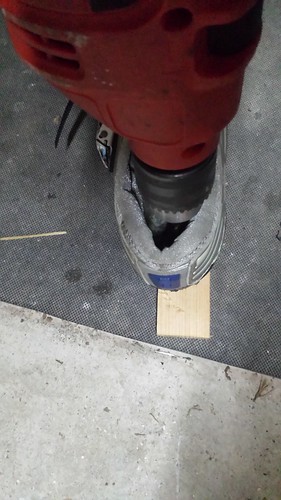 Don't do this by Timothy Takemoto, on Flickr
4) Bed the nut in the inside of the sole in a two/three stage process (this is the only bit that is not obvious) by first bolting down using a cleat nut on the outside. Then, when the cleat bolt starts to turn the claw nut on the interior of the shoe (this can twist the claws cutting a circle in your sole) use a hammer and steel rod to bash the nuts claws into the carbon. Tighten with a cleat bolt again to embed the nut into the interior of the shoe so that you can't feel it when you replace the insole.
5) Bolt a piece of rubber onto your heel with a cleat bolt (I drill a 6mm hole through, and 12mm partial hole first) or purchase a SIDI replacement heel if you want it to look nice.
 Adicted to SIDIfying by Timothy Takemoto, on Flickr
Replace the rubber, and the cleat bolt periodically. The super-stiff Shimano shoes, which were ready to go in the dustbin, are good for another decade.
The process of SIDI-fying (adding a replacable rubber heel) to a pair of carbon sole shoes is
1) Purchase some M5 claw nuts for a bout 1USD
https://www.aliexpress.com/item/10pc...833008717.html
2) Put a M5 bolt into your vice, protruding about 4mm, and screw the claw nut down onto it and then use your angle grinder to grind away 4-5mm of nut to about the height of the claws, and the bolt protruding from your vice.
Grinding Down a Claw Nut by Timothy Takemoto, on FlickrYou have to use the grinder upside down I think so that the nut is not twisted off the bolt. This means that sparks come in your own direction so old clothes are a good idea.
Grinding Down a Claw Nut by Timothy Takemoto, on FlickrThe shorter claw nuts can be used to repair cleat nuts too.
3) Drill a 7mm hole in the heel of your shoes. Do NOT drill the hole as shown in the picture below from the inside because the heel lining can get caught in the chuck and pulled off your shoes! Drill from the outside in, at about the place where there is a Shimano non-replaceable heel pad rivet.
Don't do this by Timothy Takemoto, on Flickr4) Bed the nut in the inside of the sole in a two/three stage process (this is the only bit that is not obvious) by first bolting down using a cleat nut on the outside. Then, when the cleat bolt starts to turn the claw nut on the interior of the shoe (this can twist the claws cutting a circle in your sole) use a hammer and steel rod to bash the nuts claws into the carbon. Tighten with a cleat bolt again to embed the nut into the interior of the shoe so that you can't feel it when you replace the insole.
5) Bolt a piece of rubber onto your heel with a cleat bolt (I drill a 6mm hole through, and 12mm partial hole first) or purchase a SIDI replacement heel if you want it to look nice.
Adicted to SIDIfying by Timothy Takemoto, on FlickrReplace the rubber, and the cleat bolt periodically. The super-stiff Shimano shoes, which were ready to go in the dustbin, are good for another decade.
Likes For timtak:
12-19-17, 12:17 AM
#67
Senior Member
Dang timtak, that's hard core!
12-24-17, 12:26 AM
#71
Senior Member
How many layers? I'm just curious because when I've run tubes over two layers of Stans tape and then looked at the tape over the spoke holes, I just get a very little indenting downward, and nothing that could conceivably pop a tube.
12-24-17, 12:03 PM
#72
Senior Member
Join Date: Sep 2014
Location: Northeastern MA, USA
Posts: 1,686
Bikes: Garmin/Tacx Bike Smart
Liked 296 Times
in
193 Posts
Just one layer, but the tube popped because the rim strip moved. When I pulled the wheel and tire the strip exposed a spoke hole, and well...
12-24-17, 02:35 PM
#73
Senior Member
Ah, that sucks. I have experienced Stans tape getting wrinkled a bit on the very edge where a tire bead that was squished between it and the bead hook was pulled out. Ended up having to pull the tape, clean up the rim, and lay down some new tape. I'm not sure if that's a Stans thing or more like any tape would have suffered similarly under similar circumstances.
01-05-18, 07:35 PM
#74
Senior Member
Join Date: Sep 2014
Location: Northeastern MA, USA
Posts: 1,686
Bikes: Garmin/Tacx Bike Smart
Liked 296 Times
in
193 Posts
Ah, that sucks. I have experienced Stans tape getting wrinkled a bit on the very edge where a tire bead that was squished between it and the bead hook was pulled out. Ended up having to pull the tape, clean up the rim, and lay down some new tape. I'm not sure if that's a Stans thing or more like any tape would have suffered similarly under similar circumstances.
03-26-18, 07:36 PM
#75
Senior Member
Thread Starter
Join Date: Nov 2007
Location: Yamaguchi City, Japan
Posts: 1,109
Bikes: Trek Madone 5.2 SL 2007, Look KG386, R022 Re-framed Azzurri Primo, Felt Z5, Trek F7.3 FX
Liked 85 Times
in
73 Posts
I removed the handlebar covers from my bike after a great winter of riding with warm hands.
Winter is over by Timothy Takemoto, on Flickr
I also replaced my brake pads with Discobrake red pads (at about 24USD for 4 pairs) but I will be replacing them with Kingstop reds at about 10USD for for pairs, since I can't tell the difference. I sewed my gloves up again, and replaced a Sidi-like pad that I had attached to my shoes.

Replacement Replacement Heel by Timothy Takemoto, on Flickr
It is important to use a flat wood drill bit
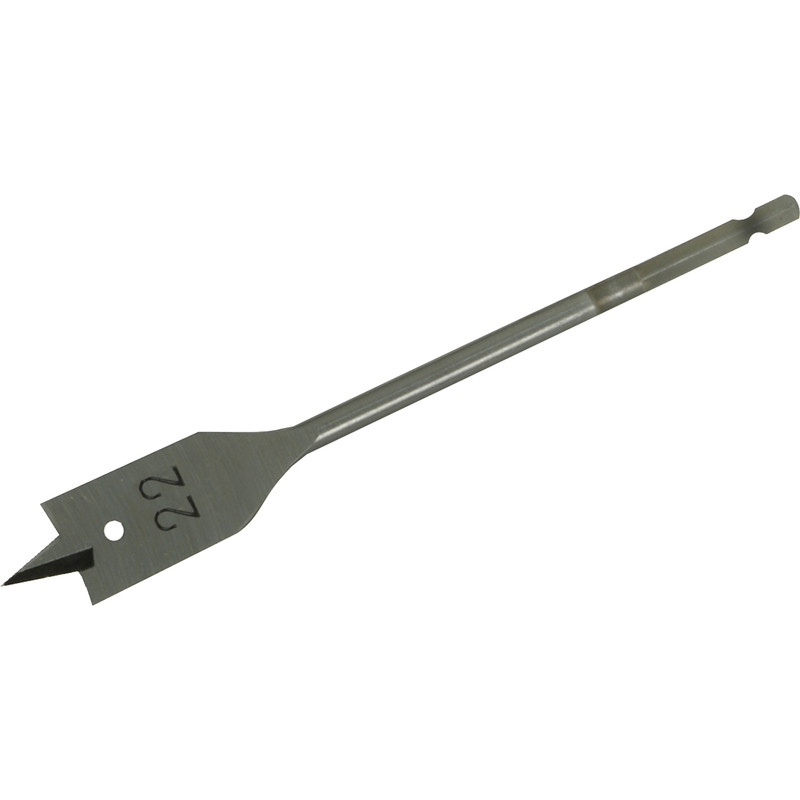
to cut the recess for the head of the (cleat) bolt use to attach the pad to the sole. If you use a normal steel twist drill then it cuts a conical hole, weakening the rubber pad. I use a 11 or 12 mm drill not 22mm as shown.
Winter is over by Timothy Takemoto, on Flickr
I also replaced my brake pads with Discobrake red pads (at about 24USD for 4 pairs) but I will be replacing them with Kingstop reds at about 10USD for for pairs, since I can't tell the difference. I sewed my gloves up again, and replaced a Sidi-like pad that I had attached to my shoes.
Replacement Replacement Heel by Timothy Takemoto, on Flickr
It is important to use a flat wood drill bit
to cut the recess for the head of the (cleat) bolt use to attach the pad to the sole. If you use a normal steel twist drill then it cuts a conical hole, weakening the rubber pad. I use a 11 or 12 mm drill not 22mm as shown.
Last edited by timtak; 03-26-18 at 10:00 PM.