


Painting tips for restoration
 09-09-23, 06:24 PM
#1
Newbie
Thread Starter
Painting tips for restoration
Hi all, I'm finishing up a thorough restoration project of a 1981 miyata 912. I've flipped bikes in the past by just throwing new consumables on and cleaning them up, but this is my first foray into painting. I did not do it right! I spot-sanded rust spots, masked off the decals, then painted over with acrylic using sponge brushes, then enamel clear coat (hoped the enamel coat would protect the less durable acrylic). It doesn't look awful, but it's not right. I can see the spots I sanded to remove rust. Decals don't look right with the new paint even though its the same color as the old paint.
I decided I want to learn to do this right (or as close to right as I can get). New plan is to strip all paint with industrial paint stripper, buy an aerosol paint can handle and give it several light coats of paint, then add decals, then clear coat. Hoping the forums can give me info on the following:
1. Is it always necessary to strip ALL paint down to bare metal before repainting?
2. Should I use a primer?
3. What type of paint is best? Enamel? Epoxy?
4. What finish? Matte? High gloss?
5. Is there a noticeable difference between aerosol/rattle can spray paint and a professional sprayer? I'm not going to drop lots of money on a pro sprayer, but might be open to a budget one if there's a real benefit (I love doing resto stuff and am ready to drop a little money if needed to take this next step)
6. Do I really need a paint booth? Why? They're available on amazon for cheap but would just like the opinion of the forums before buying
7. I want to try printing my own decals with inkjet printer and sticker paper. Anyone have any files/images for 1981 Miyata 912 (silver), 1983 Univega specialissima (black), or 1981 Miyata 610 (gold) to share? Or have wisdom to share in generating my own from pictures of the old labels? Not real sure where to start with this part but I think it would be a lot of fun to try.
Money is not the motivator here. This is a hobby. I'm fine with putting more time/money into a bike than will be reflected in resale price. I just enjoy the process.
Thanks all, appreciate you.
 09-09-23, 07:02 PM
#2


Se�or Member

Join Date: Oct 2004
Location: Hardy, VA
Posts: 17,925
Bikes: Mostly English - predominantly Raleighs
Mentioned: 70 Post(s)
Tagged: 0 Thread(s)
Quoted: 1492 Post(s)
Liked 1,095 Times
in
641 Posts
Welcome to Bike Forums and C&V
I have repainted a few bikes but I've never attempted an actual "restoration". I definitely do not consider myself an expert and I know there are several - if not dozens here who have more experience and are better at it than I am. I'll happily give you my -fwiw thoughts on this, but I am certain you will hear other opinions. I've only dealt with steel, and I see from the three frames you've listed, they are steel, so there's one bit of consistency.
1. If you want an enduring finish and aren't simply doing touch-ups, I think you are better off stripping down to bare metal.
2. I've seen paint that has come out nicely with primer and without primer. I've also seen paint without primer that didn't come out well. I think the answer here is, "it depends", with the biggest factors being preparation and the paint that's being used.
3. I'm not sure. I've only used rattle can. I have had some frames painted for me that were done with compressors/sprayers by a professional and by a more talented than me amateur. I think enamel was used, though not sure.
4. I think the vast majority of bikes are painted with gloss. It might be looks. It might also help to keep moisture from collecting
5. The bikes I've had sprayed professionally did come out better than those I have painted myself. This said, I rattle-canned one that came out rather acceptably well. Rattle can can turn out nicely, but I think you still need good conditions, technique, patience and good surface prep - as well as allowing the typically longer curing time that most rattle-can requires. Patience and curing also can affect between coat sanding.
6. I don't have a paint booth... yet. I do have three frames in my queue that I want to do a nice job on - including a candy colorshift. I'd hate to have done everything else right and have a couple gnats decide they want to end their lives on the top tube.
7. Haven't attempted decals.
__________________
In search of what to search for.
In search of what to search for.
Likes For USAZorro:
09-09-23, 07:09 PM
#3
Senior Member
Best finish goes to bare metal, primer, then new decals. The primer is what gives you the perfect surface and the chance to spot fix whatever imperfections you may have; prime, sand, prime some more, sand, and when the surface is perfect, then paint.
09-09-23, 07:12 PM
#4
Senior Member

Join Date: Jan 2008
Location: Beaverton, OR
Posts: 14,744
Bikes: Yes
Mentioned: 525 Post(s)
Tagged: 0 Thread(s)
Quoted: 3230 Post(s)
Liked 3,868 Times
in
1,439 Posts
I just did this with spray paint, with the idea of seeing just how good I could get the results. It turned out great, but I'm not sure how durable it will be. I had a few tiny chips after just one ride. Here's the thread for my recent project:
https://www.bikeforums.net/classic-v...t-nothing.html
1. Is it always necessary to strip ALL paint down to bare metal before repainting?
2. Should I use a primer?
Read the directions on your paint carefully. You generally need to apply the color over the primer within a couple of hours or after at least 48 hours. The 48 hour time is a drying time estimate. It's probably not long enough. I waited two weeks because I wasn't in a hurry. It depends on your local conditions.
When applying multiple coats, don't put them on too thick or too close together (in time). If each coat doesn't have time to release solvents before you cover it, you end up with an inner coat that will never properly dry.
3. What type of paint is best? Enamel? Epoxy?
4. What finish? Matte? High gloss?
5. Is there a noticeable difference between aerosol/rattle can spray paint and a professional sprayer?
6. Do I really need a paint booth? Why?
One thing you should be thinking about at this point is ventilation and protecting your lungs and eyes. Get a proper respirator. If you try this with just a dust mask you'll find that the mask ends up the color of your paint, and you'll probably have inhaled a lot of chemicals you shouldn't. A proper respirator will have directions telling you it won't work as intended if you have a beard. I didn't notice that until after I was done.
__________________
My Bikes
My Bikes
Likes For Andy_K:
09-09-23, 08:22 PM
#5
Friendship is Magic

Join Date: Nov 2010
Location: Sacramento, CA
Posts: 22,984
Bikes: old ones
Mentioned: 304 Post(s)
Tagged: 0 Thread(s)
Quoted: 26425 Post(s)
Liked 10,381 Times
in
7,209 Posts
1. Is it always necessary to strip ALL paint down to bare metal before repainting?
If you care enough to go through all this trouble, you should probably strip to bare metal and sand smooth...fewer unpleasant surprises.
2. Should I use a primer?
3. What type of paint is best? Enamel? Epoxy?
Color coat paint is another thing entirely, and there's a wide variety of color coats available. Enamels work for this. Probably stay away from laquers and acrylics.
4. What finish? Matte? High gloss?
5. Is there a noticeable difference between aerosol/rattle can spray paint and a professional sprayer? I'm not going to drop lots of money on a pro sprayer, but might be open to a budget one if there's a real benefit (I love doing resto stuff and am ready to drop a little money if needed to take this next step)
6. Do I really need a paint booth? Why? They're available on amazon for cheap but would just like the opinion of the forums before buying
7. I want to try printing my own decals with inkjet printer and sticker paper. Anyone have any files/images for 1981 Miyata 912 (silver), 1983 Univega specialissima (black), or 1981 Miyata 610 (gold) to share? Or have wisdom to share in generating my own from pictures of the old labels? Not real sure where to start with this part but I think it would be a lot of fun to try.

There are a whole bunch of other things you need to learn about, like recoat windows, and methods for getting your stickers placed on the color coat, so they're on there straight. Without marring that same color coat. The Urethane goes on last, one or two coats, over everything, including the stickers (or decals). Read stuff, or look at some videos from the guys who paint cars. The same techniques apply.
If you are hoping to recreate the finish you are removing, pay attention to how many coats (and their colors) were applied by the guys who did it originally, as you strip the paint off.
__________________
Likes For 3alarmer:
09-09-23, 09:58 PM
#6
Newbie
Thread Starter
Thanks everyone for all the information! That's all very, very helpful! Appreciate you all
[QUOTE=3alarmer;23010836]
... I'm no help on this. I buy stickers from the bike sticker professionals. On a couple of frames when they were unavailable, I went over and designed my own at this place.
/QUOTE]
3alarmer, I would love to just buy the decals online but unfortunately I'm having an extremely hard time finding them for sale, so I had resigned myself to making my own. If you (or anyone else reading this!!) has any leads on where to get decals for an '81 Miyata 912, please let me know! I've started working with Adobe illustrator any it is not my idea of fun
09-09-23, 11:51 PM
#7
se�or miembro

Join Date: Dec 2018
Location: Pac NW
Posts: 6,625
Bikes: '70s - '80s Campagnolo
Mentioned: 92 Post(s)
Tagged: 0 Thread(s)
Quoted: 3889 Post(s)
Liked 6,488 Times
in
3,211 Posts
Painting tips for restoration
09-10-23, 12:01 AM
#8
Senior Member
Preparing a frame for paint is difficult if you do it by hand.
Getting repairs to look good even after the paint is applied is difficult.
Painting a frame is difficult because the surfaces are so convoluted.
Getting decals to go down straight and without bubbles is difficult.
Outlining the lugs is difficult if you want uniformity.
Having said all that, painting a frame is very rewarding.
JUST DO IT!
Likes For Bad Lag:
09-10-23, 02:32 PM
#9
Newbie
Thread Starter
SurferRosa, that takes all the fun out of it!! (We may have different ideas of fun...)
Just placed a large Amazon order for lots of painting equipment. I'm going to use an industrial strength spray on paint stripper I found recommended online. After that, I'll sand, do primer, then enamel, then epoxy clear coat as recommended. I decided to buy a cheap paint booth/tent, and bought a real-deal respirator. I also spent some time using Adobe Illustrator last night making the new decals using pics of the old ones. It's tedious but not all that hard once you get used to the tools. I'm thinking that I will shop around for someone who prints things like this professionally and see if I can get them to custom print the decals for me.
Excited to get started. Will post results!!
09-10-23, 02:54 PM
#10
small ring

Join Date: Jul 2012
Location: PNW
Posts: 1,025
Mentioned: 24 Post(s)
Tagged: 0 Thread(s)
Quoted: 438 Post(s)
Liked 925 Times
in
370 Posts

__________________
59 Allegro Special -- 72 Bob Jackson -- 74 Motobecane Grand Jubile -- 74 Sekine SHS 271 -- 80 Nishiki International
85 Shogun 800 -- 86 Tommasini Super Prestige -- 92 Specialized Rockhopper -- 17 Colnago Arabesque
59 Allegro Special -- 72 Bob Jackson -- 74 Motobecane Grand Jubile -- 74 Sekine SHS 271 -- 80 Nishiki International
85 Shogun 800 -- 86 Tommasini Super Prestige -- 92 Specialized Rockhopper -- 17 Colnago Arabesque
Likes For droppedandlost:
09-10-23, 04:02 PM
#11
Senior Member
Join Date: Jan 2008
Location: Beaverton, OR
Posts: 14,744
Bikes: Yes
Mentioned: 525 Post(s)
Tagged: 0 Thread(s)
Quoted: 3230 Post(s)
Liked 3,868 Times
in
1,439 Posts

__________________
My Bikes
My Bikes
09-10-23, 04:14 PM
#12
Senior Member
Join Date: Jan 2008
Location: Beaverton, OR
Posts: 14,744
Bikes: Yes
Mentioned: 525 Post(s)
Tagged: 0 Thread(s)
Quoted: 3230 Post(s)
Liked 3,868 Times
in
1,439 Posts
I would love to just buy the decals online but unfortunately I'm having an extremely hard time finding them for sale, so I had resigned myself to making my own. If you (or anyone else reading this!!) has any leads on where to get decals for an '81 Miyata 912, please let me know!

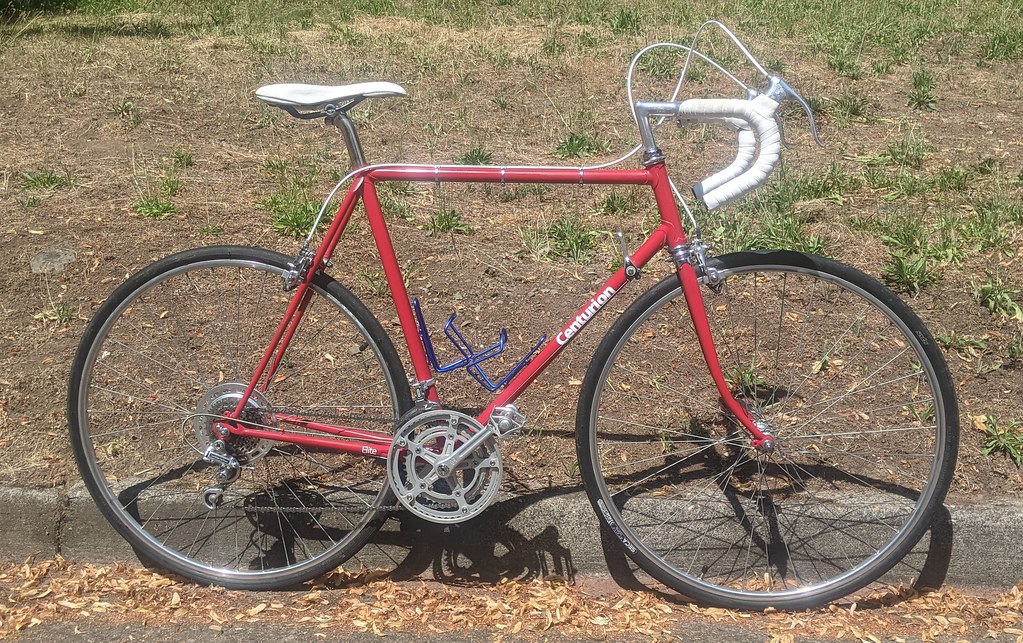
The key thing here is that hardly anyone knows what the fonts on these decals looked like from memory, so if you get it in the neighborhood, it will look good to most people -- probably yourself included after a few weeks. (I put the downtube decal too low on the Centurion -- it should be a little above the center of the tube to look right, and I centered it.)
If you want something closer and/or you need graphics, talk to the guy at Cyclomondo. He's in Australia, but a lot of people in the U.S. have reported good experiences working with him. I don't see the models you want in his current listing, but I hear he'll make custom reproductions on request. I believe SSS Ink does this too.
__________________
My Bikes
My Bikes
09-10-23, 04:18 PM
#13
Newbie
Thread Starter
Extremely helpful, thank you!
Regarding the first solution you offered, the lettering in the pictures looks great. Case in point that no one remembers the exact script from memory, I guess. The Centurion looks perfect aside from being too low as you mentioned. I am less familiar with Takara.
I will likely contact the people you mentioned, as the Miyata lettering is pretty unique, and I own several of them so I would have a constant reminder that it's not right .
.
Regarding the first solution you offered, the lettering in the pictures looks great. Case in point that no one remembers the exact script from memory, I guess. The Centurion looks perfect aside from being too low as you mentioned. I am less familiar with Takara.
I will likely contact the people you mentioned, as the Miyata lettering is pretty unique, and I own several of them so I would have a constant reminder that it's not right
.
09-10-23, 04:21 PM
#14
Newbie
Thread Starter
09-10-23, 04:29 PM
#15
Full Member
Join Date: Feb 2014
Location: Arvada, Colorado
Posts: 344
Bikes: 1975 Motobecane LeChampion (silver lilac), 1974 Motobecane Grand Jubile (red/black); 1975 Motobecane Team Champion (orange); 1982 Pinarello Professional (Exorcist Green); 1974 Raleigh Professional MkIV mink blue, 1974 Motobecane Grand Record blk/red
Mentioned: 12 Post(s)
Tagged: 0 Thread(s)
Quoted: 103 Post(s)
Liked 750 Times
in
172 Posts
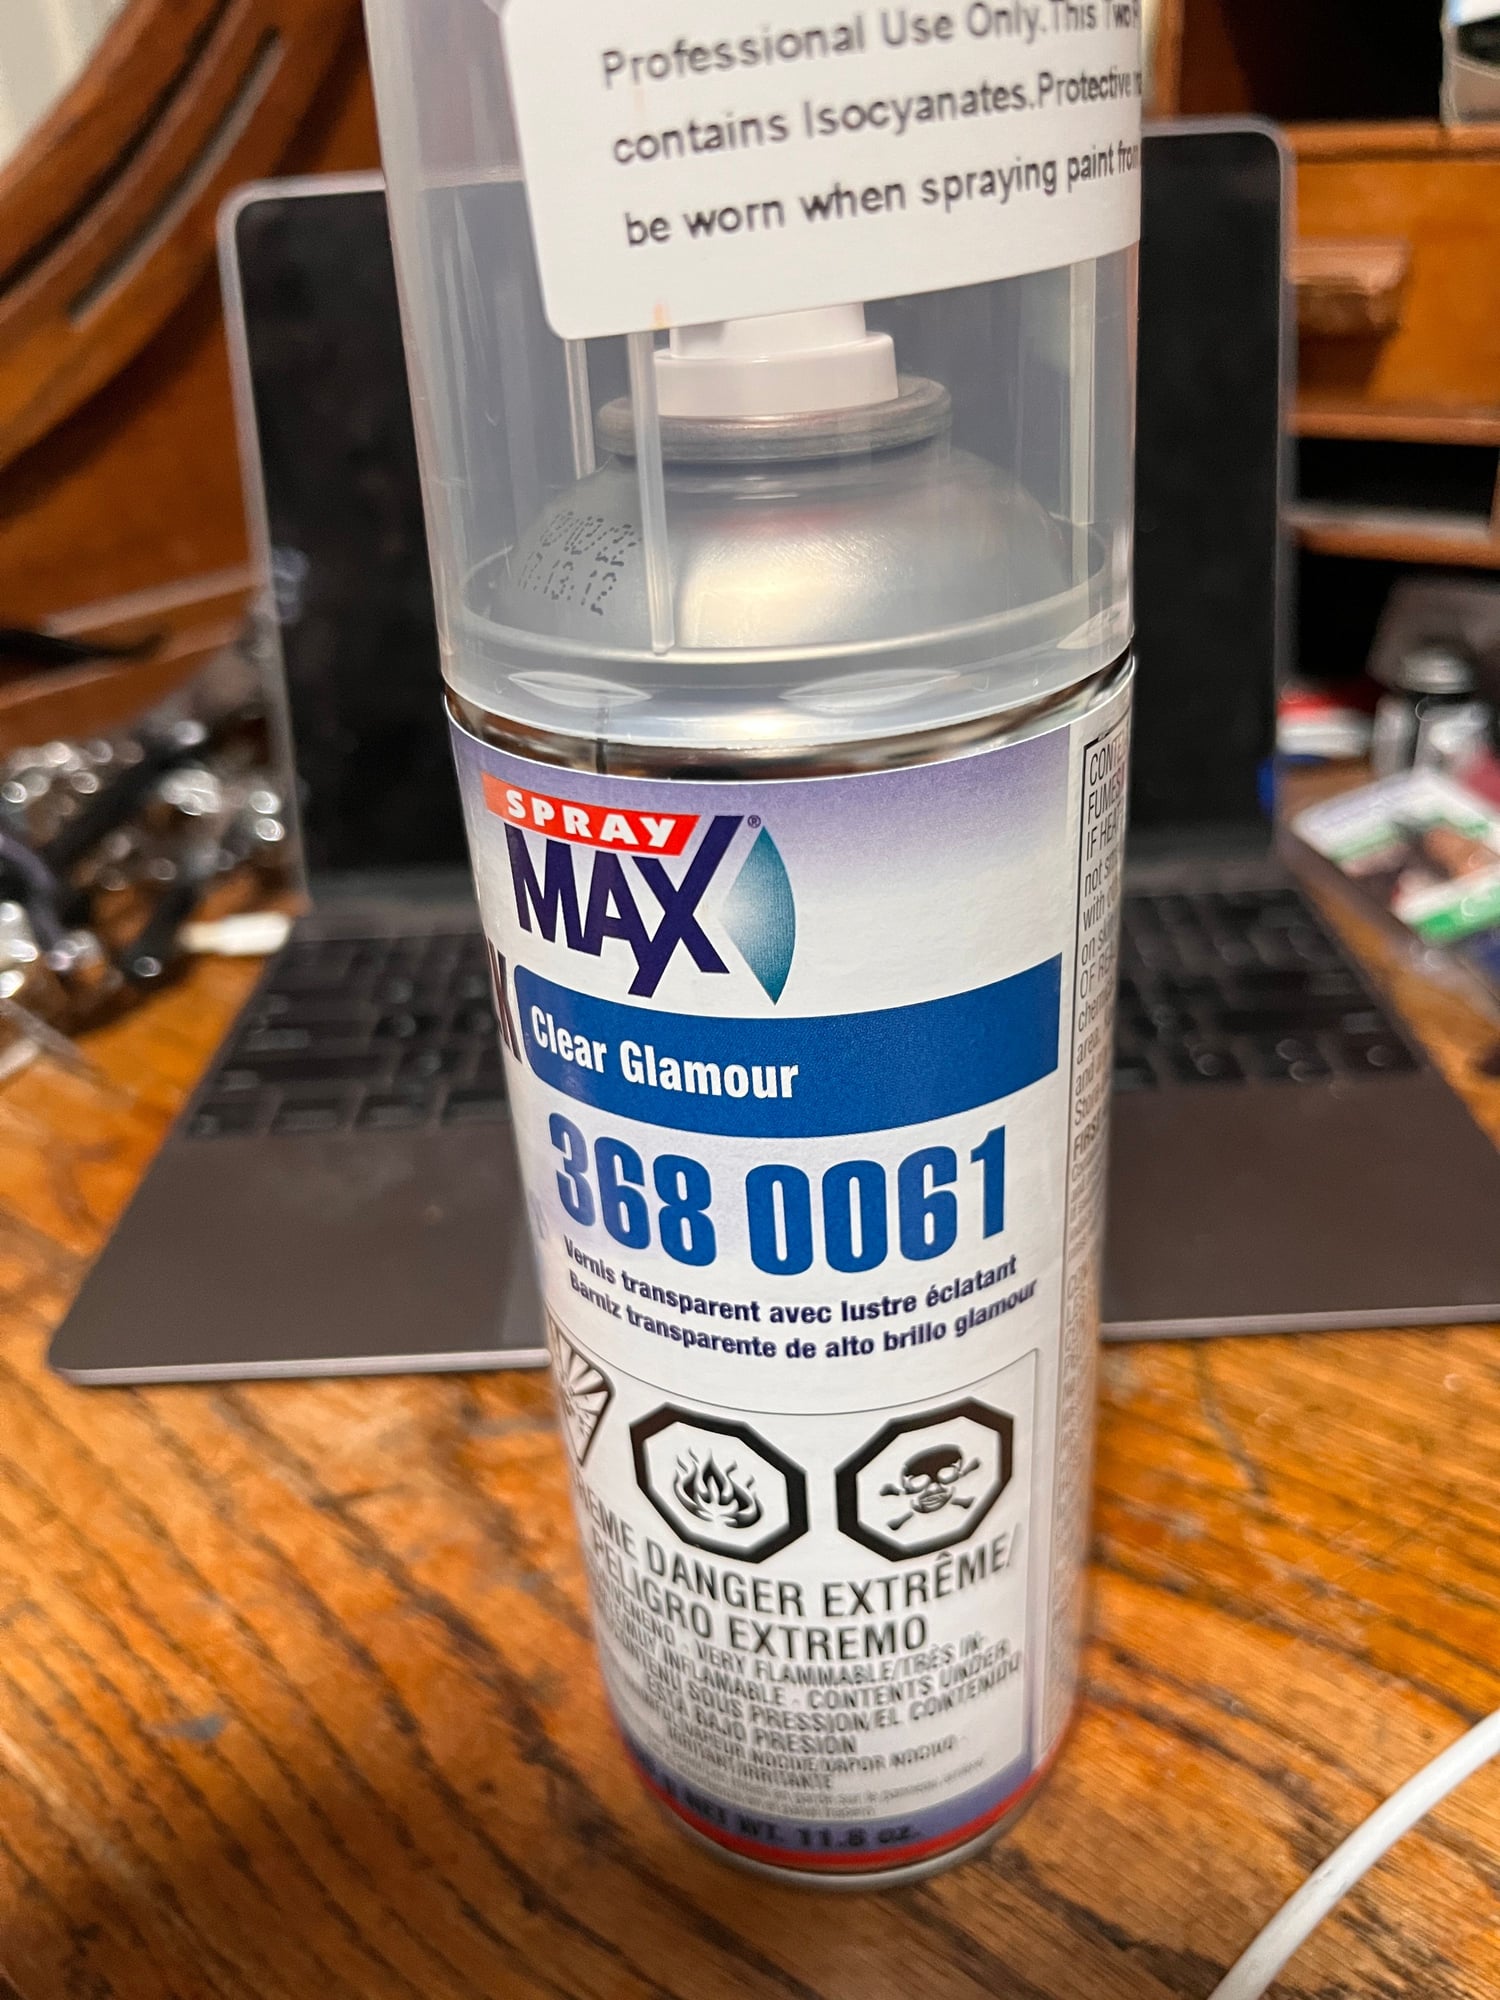
I have never done a color job, but second the endorsement above for Spraymax 2K which I have successfully used for spraying clear over decals. It wetsands really well, and after a few days is super hard and durable.... I have not seen anything that comes close to this out of a spray can. Just follow the directions for shaking up the hardener....
Likes For 75lechamp:
09-10-23, 04:30 PM
#16
Senior Member
Join Date: Jan 2008
Location: Beaverton, OR
Posts: 14,744
Bikes: Yes
Mentioned: 525 Post(s)
Tagged: 0 Thread(s)
Quoted: 3230 Post(s)
Liked 3,868 Times
in
1,439 Posts

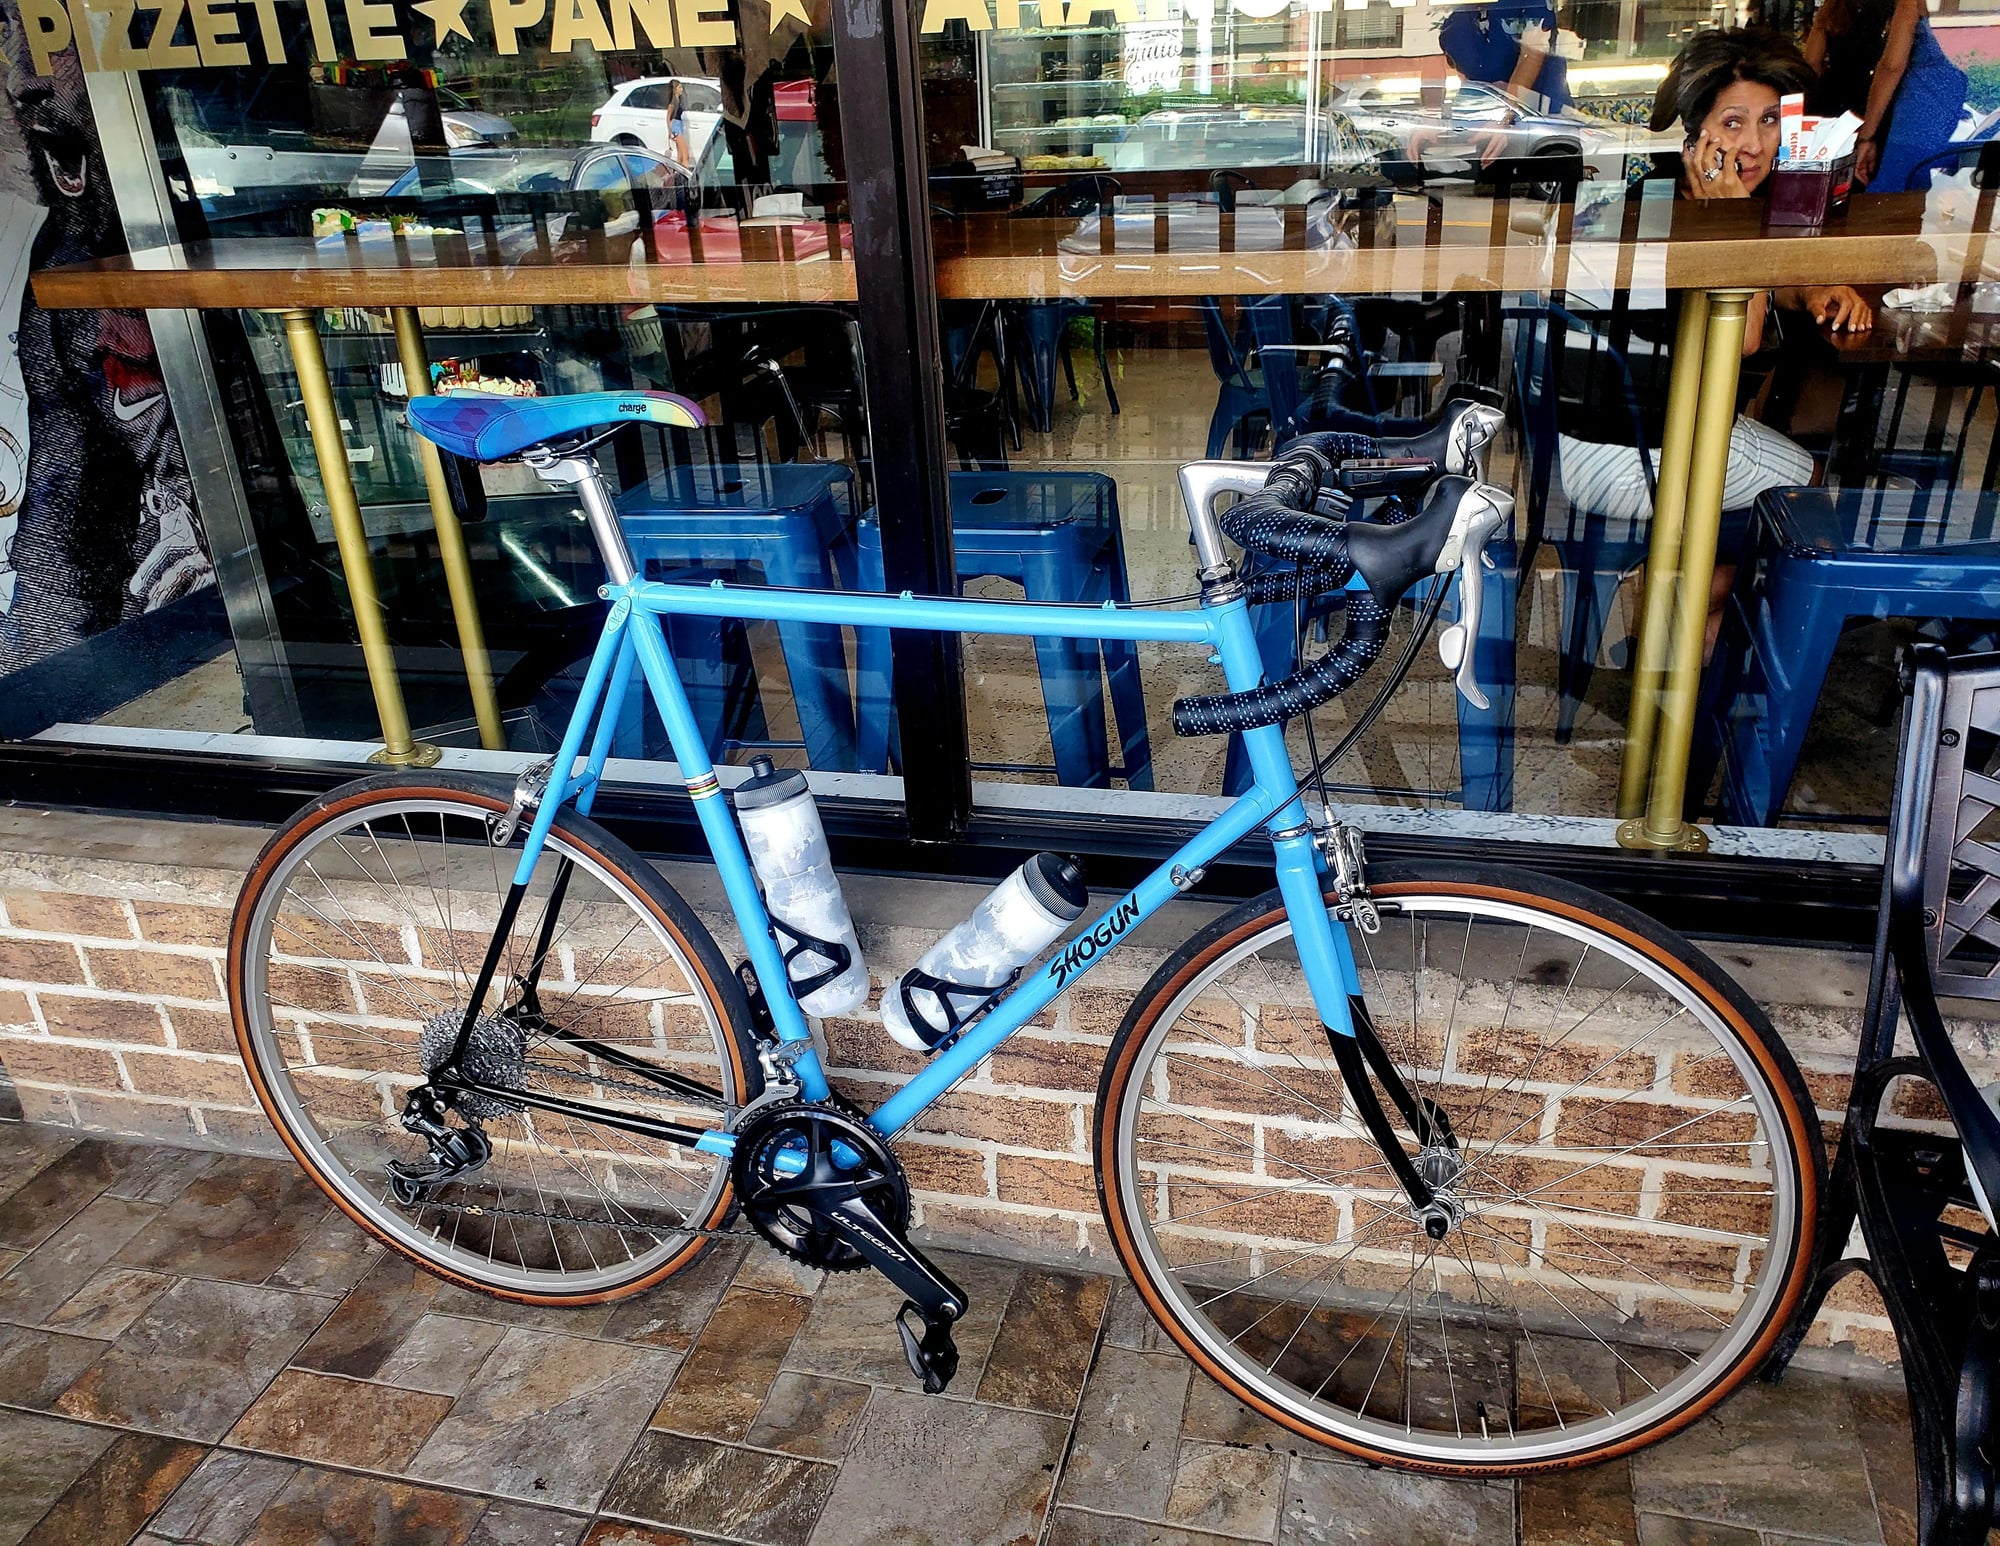
I absolutely bought this bike just for the lugs. It's also a great bike. I rode it today, and I couldn't be happier with it.

By the way, in this case I got the decals from VeloCals, which sadly has since closed up shop, but I could have bought replacements directly from Mercian because they're still in business. I mention this because Miyata is also still in business and might be willing to sell you decals. It's worth asking.
__________________
My Bikes
My Bikes
09-10-23, 05:02 PM
#17
Newbie
Thread Starter
Wooooooooooooooow well done that looks great
Likes For cornerstore1:
09-10-23, 05:16 PM
#18
...
Join Date: Oct 2021
Location: Whitestone and Rensselaerville, New York
Posts: 1,517
Bikes: Bicycles? Yup.
Mentioned: 8 Post(s)
Tagged: 0 Thread(s)
Quoted: 482 Post(s)
Liked 1,593 Times
in
739 Posts
Not to be the health & safety dork, but get a cartridge mask for the 2k paints. You don't want the 2 part isocyanate micro droplets hardening in your lungs. I'm a fan of the 2k primer too. 2k primer, Duplicolor color coats, and 2k gloss clearcoats give pretty good results.
My shade-tree repaint:
My shade-tree repaint:
09-11-23, 01:32 AM
#19
Strong Walker

check out the youtube channel from "EtoE". Its in english with a wild german accent and a sometimes annoying delivery, but the guy knows what he is doing.
There are a lot of tutorials by him about getting good results without having all the expensive equipment.
Channel https://www.youtube.com/channel/UCj-...2IbTmNComCIZtw
Spray paint at home:
1 yes, you should strip the paint to get best result
2 yes you need to use a primer and sand it down
5 oh yes but a talented rattle can operator can achieve a good reslut if follofing a few basic principles (see video linked)
6 i run without a workbooth but if you want one, there are some not super expensive folding solutions for home garage painters
7 inkjet and sticker paper wont give you good results. You can invest in a cricut or silhouette entry level vinyl plotter to create masks for painted logos. you can also just design them and have them cut by an online service. For transfer decals, i'd stick with the pros, theree are really expensive printers involved to get a good result.
Likes For martl:
09-11-23, 05:09 AM
#20
Senior Member

Join Date: Apr 2007
Location: Thunder Bay, Ontario, Canada - burrrrr!
Posts: 11,674
Bikes: 1958 Rabeneick 120D, 1968 Legnano Gran Premio, 196? Torpado Professional, 2000 Marinoni Piuma
Mentioned: 210 Post(s)
Tagged: 0 Thread(s)
Quoted: 1372 Post(s)
Likes: 0
Liked 1,752 Times
in
939 Posts
Those intricate lugs are darn hard to mask. I have tried and tried, rarely happy with the results...
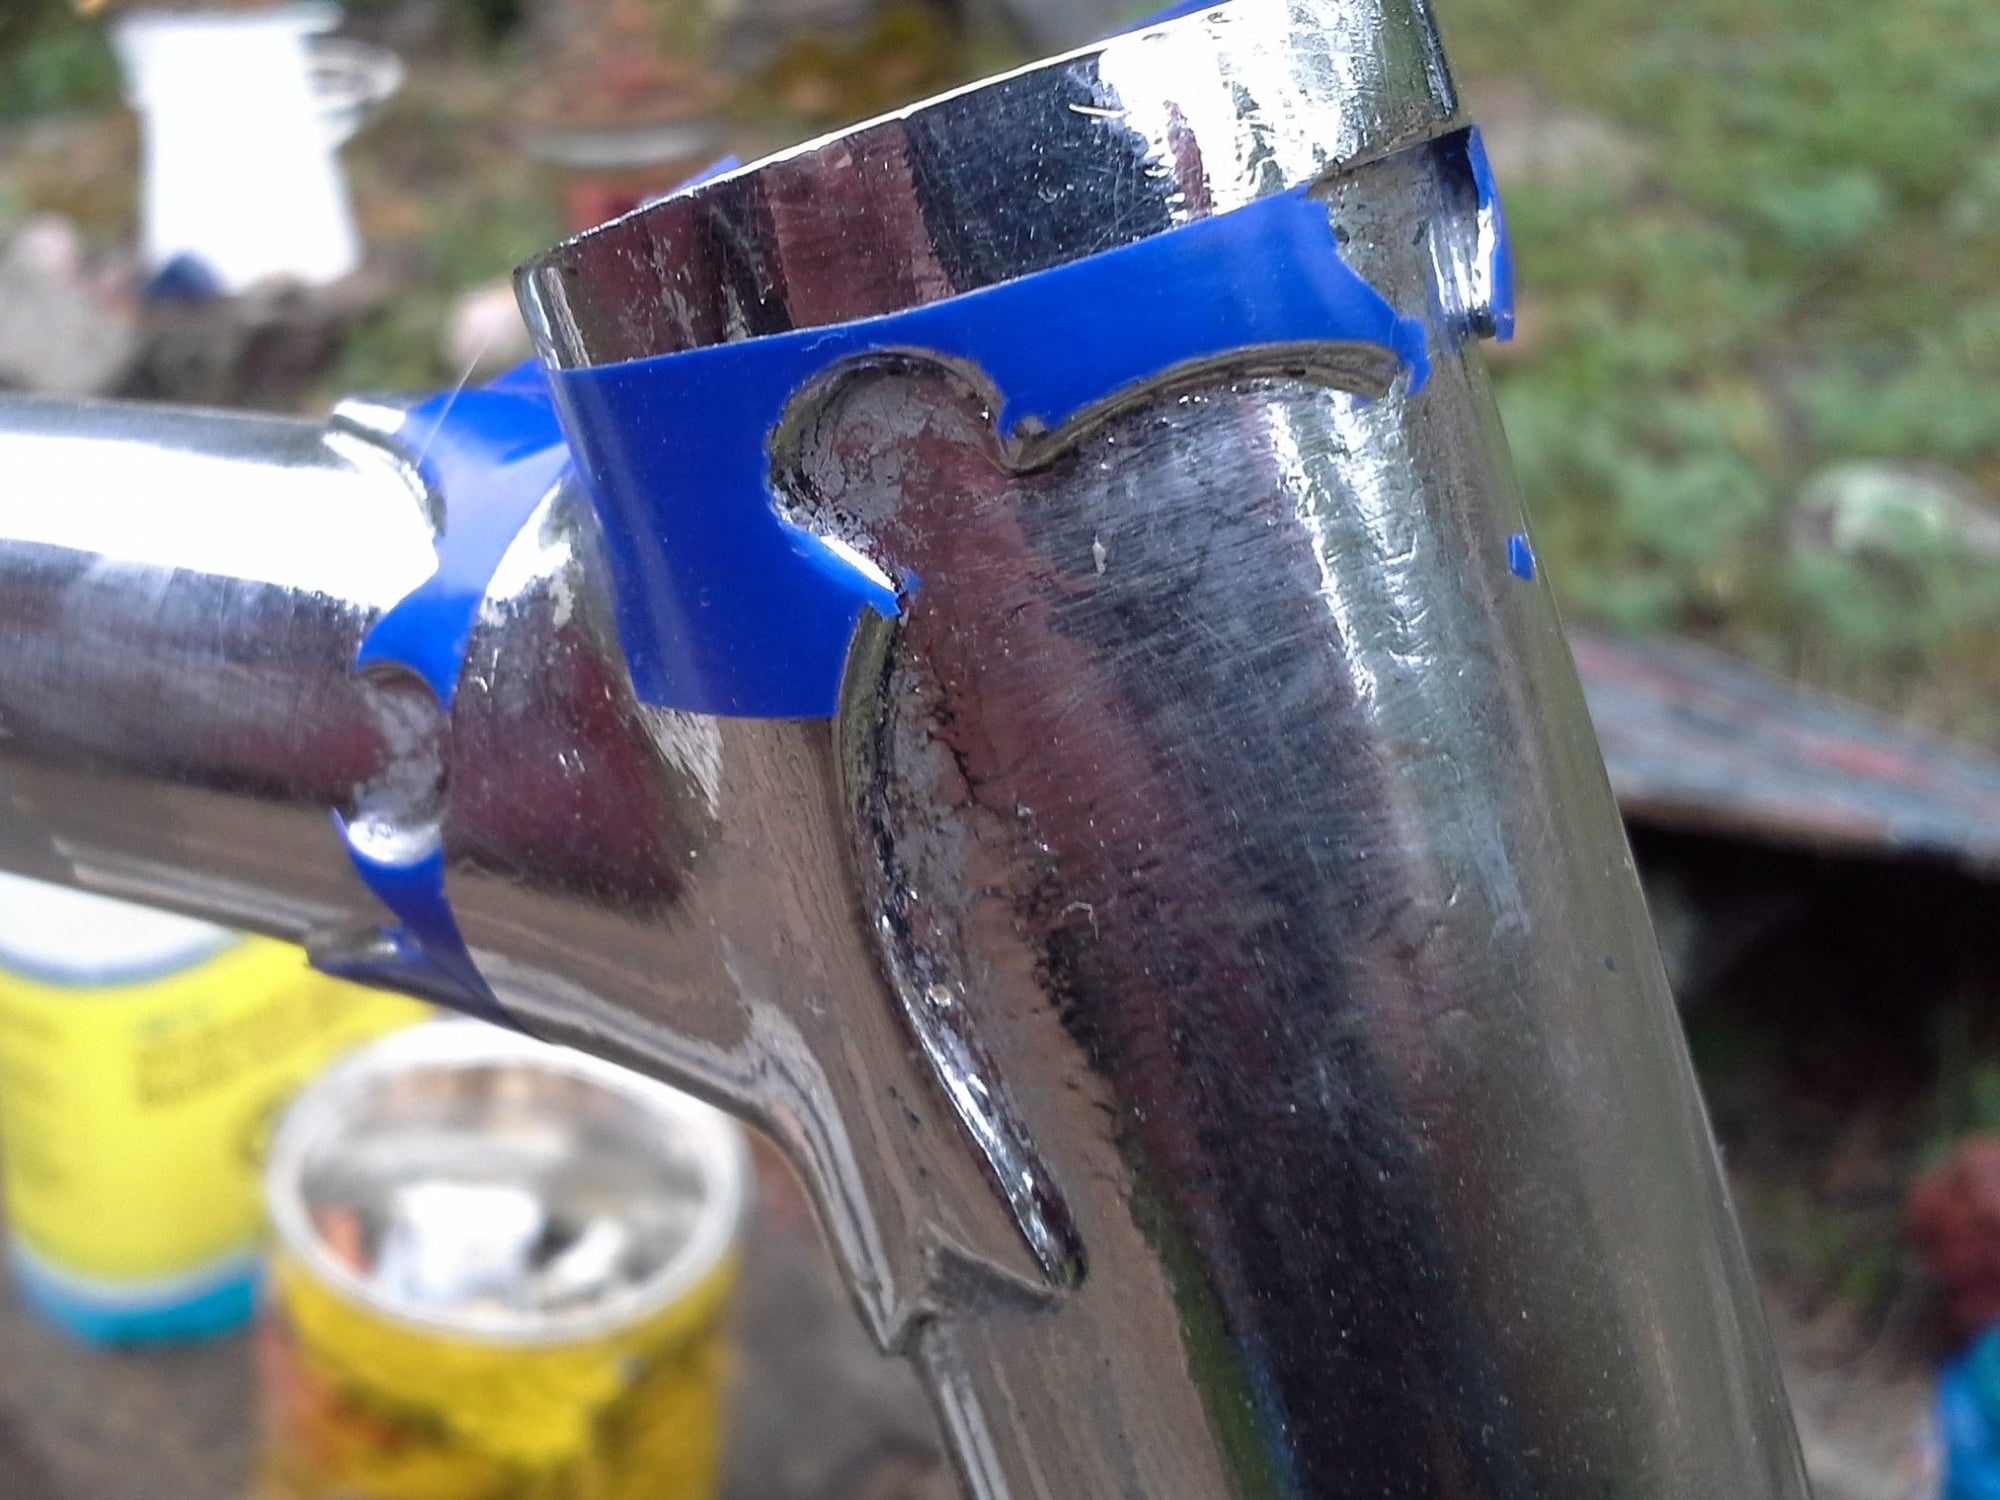

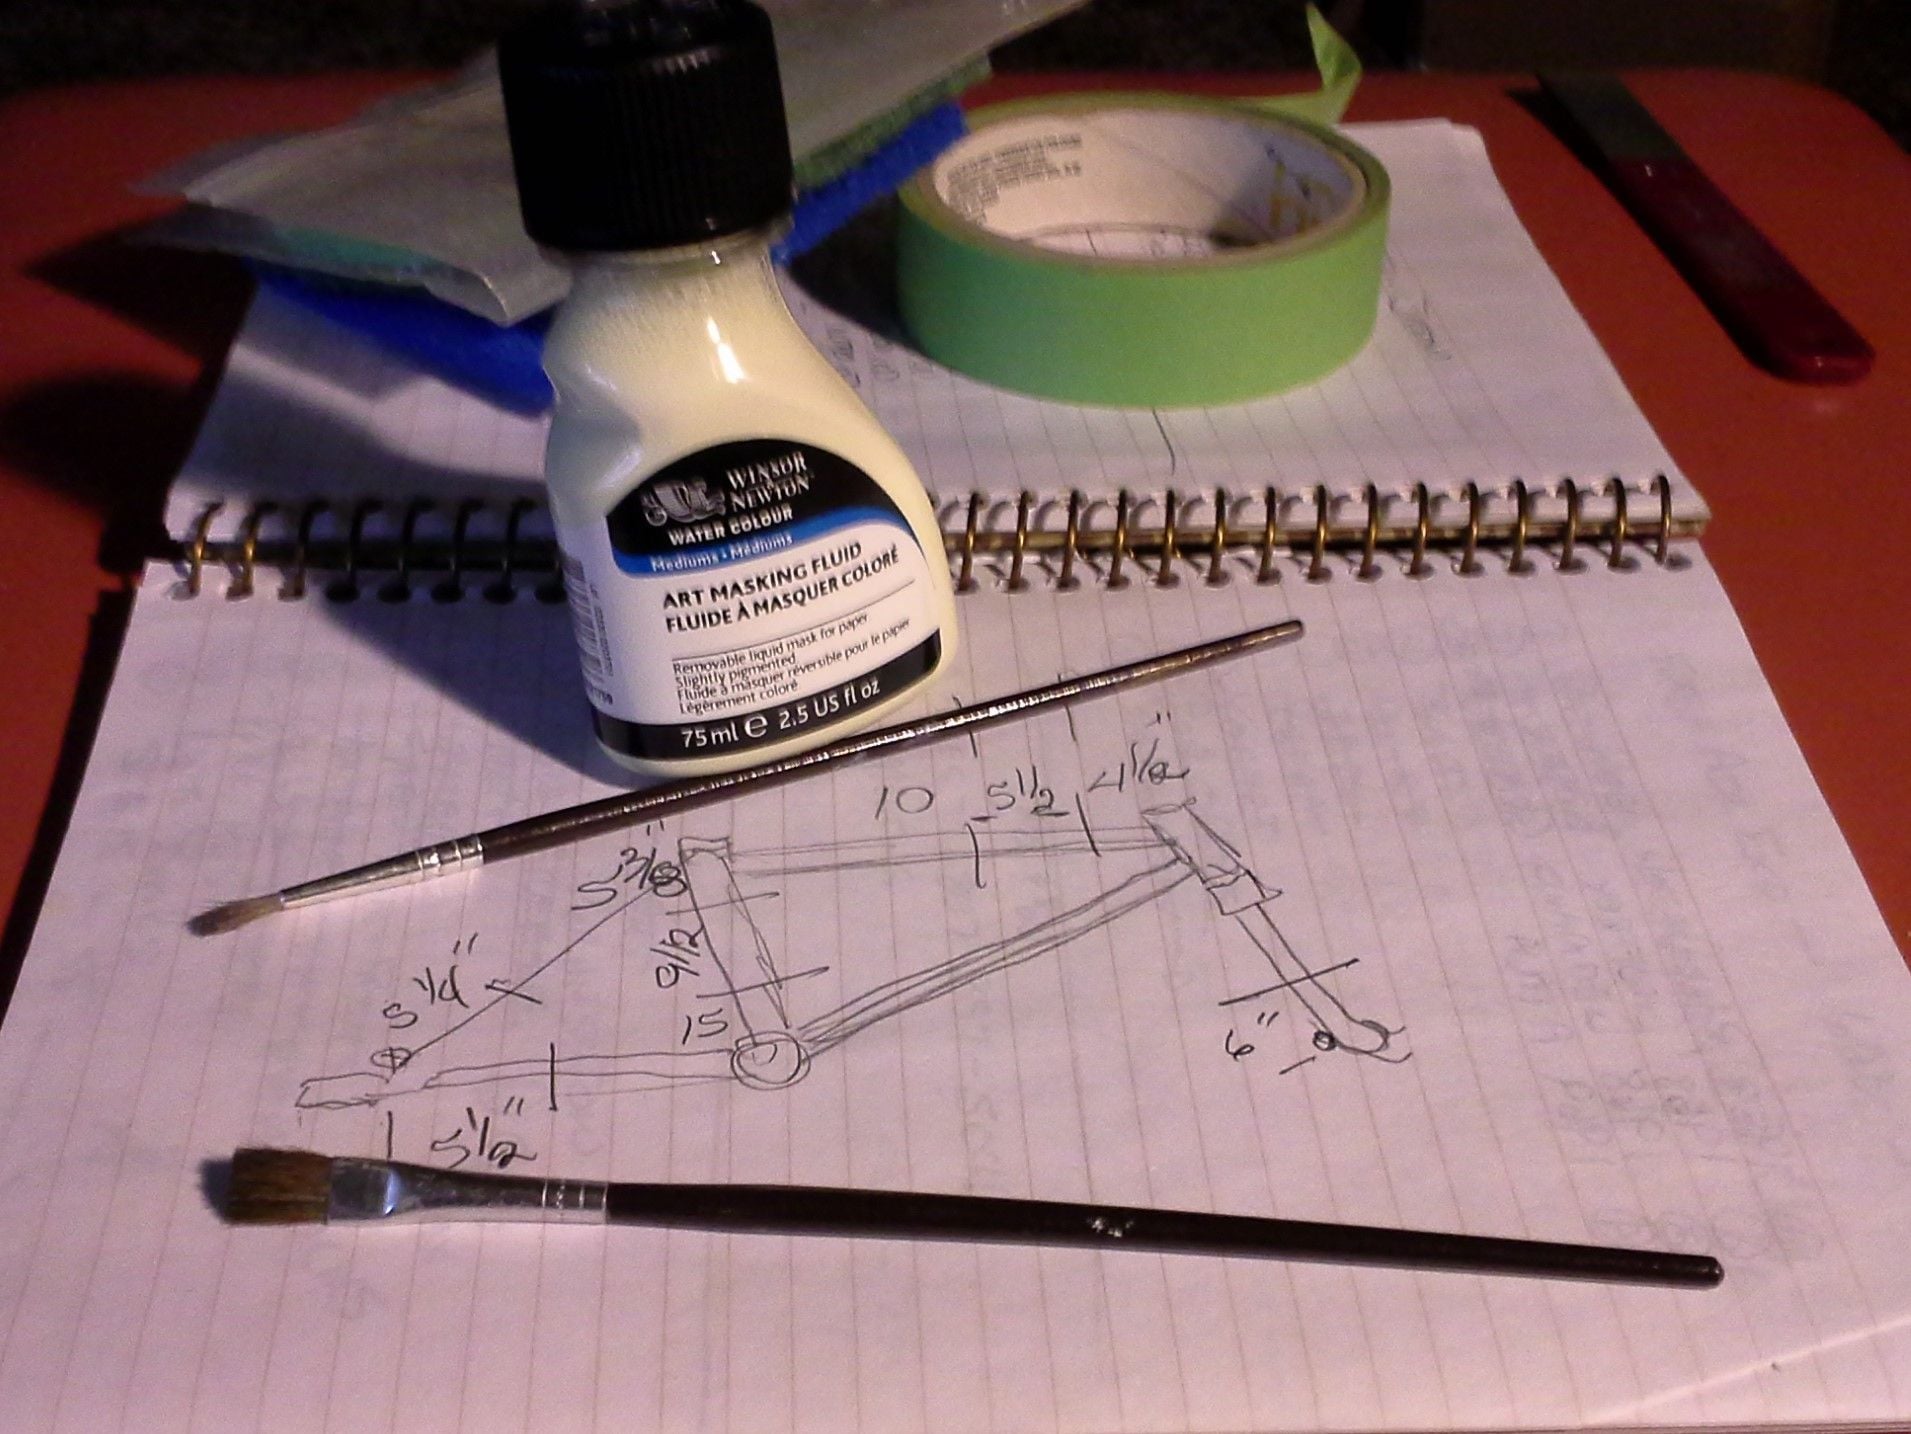
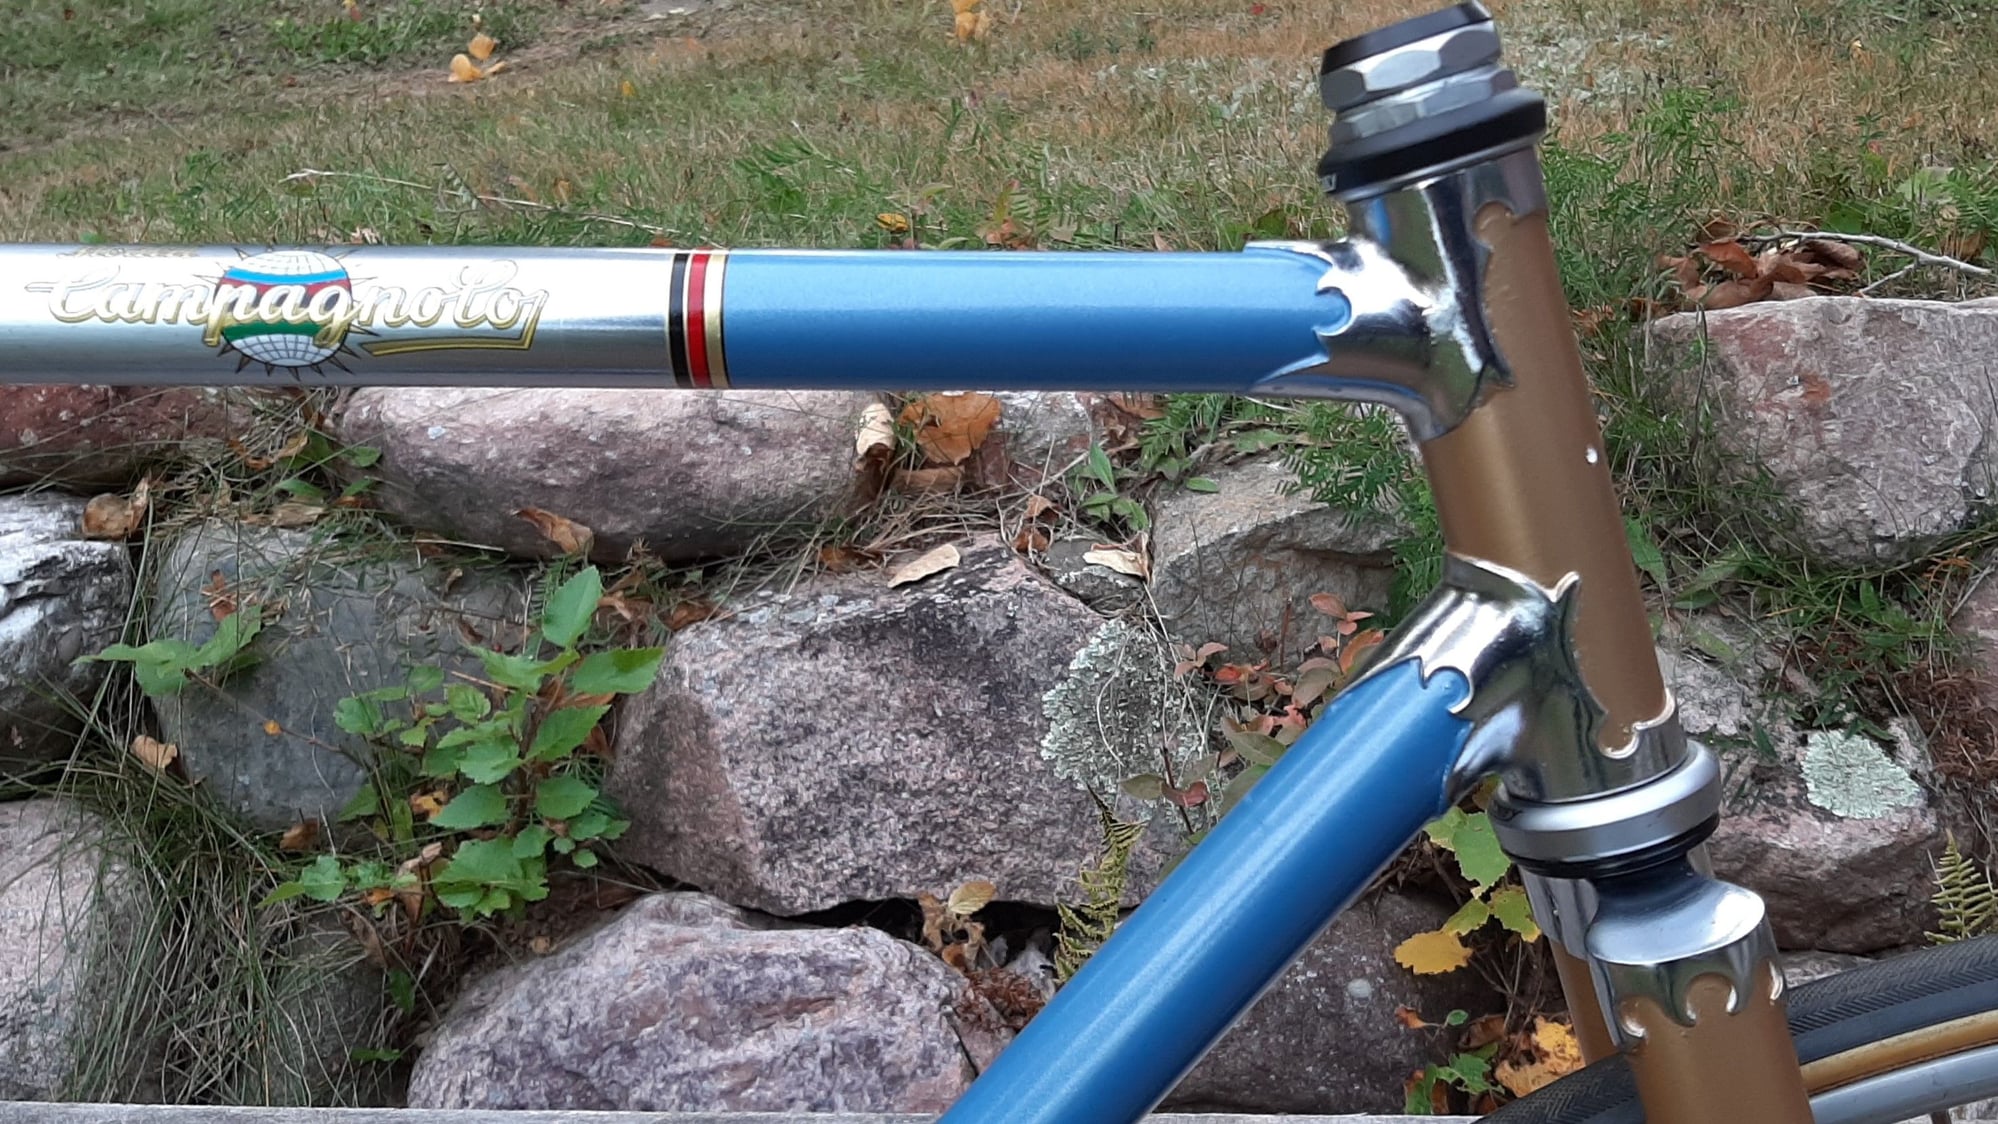
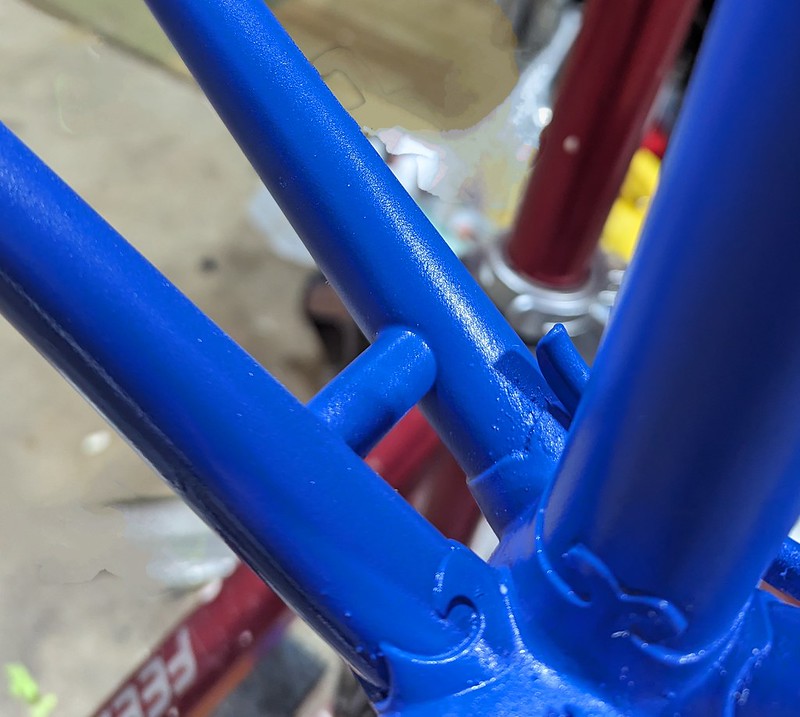
Until I discovered liquid mask. Using a small brush, brush it exactly where you don't want paint. Paint (I tend to use a brush but the Rabeneick was rattle canned primer, color and clear coat) and then, with great care, rub the liquid mask off...
Works pretty good for me...
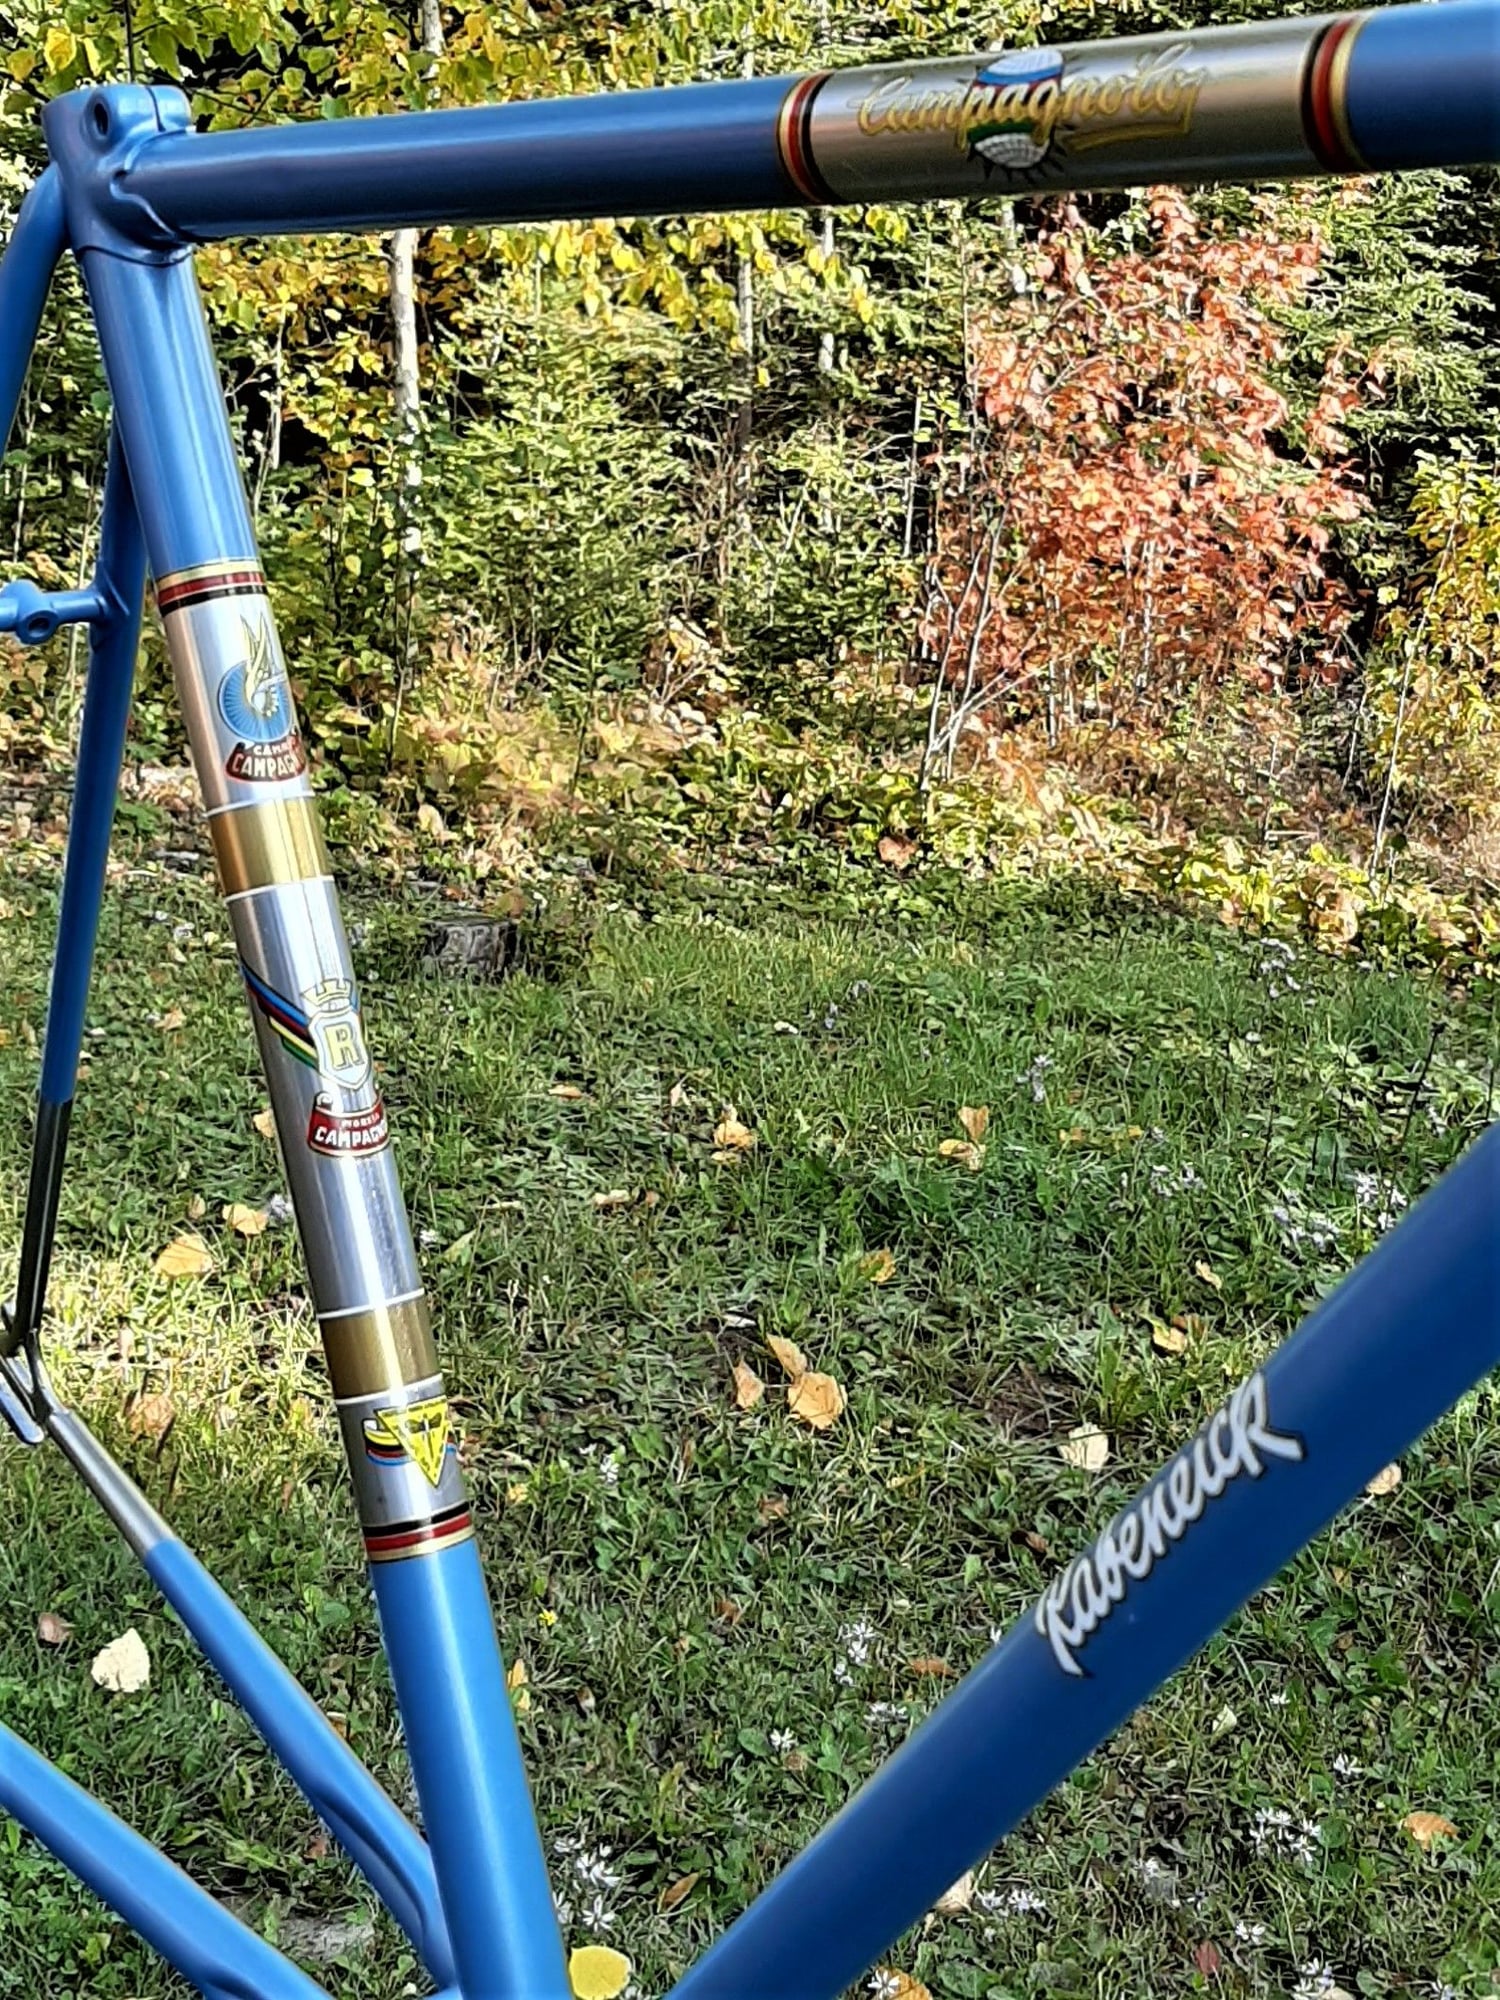
And, for those who are wondering about my crappy art sketch. It helped me remember where the decals were going to go. At $90 US a set, boo-boos were not an option...
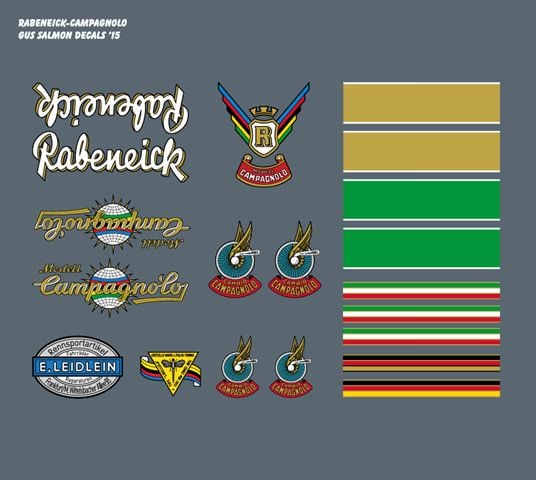
And, how it looks when brush painted...

Until I discovered liquid mask. Using a small brush, brush it exactly where you don't want paint. Paint (I tend to use a brush but the Rabeneick was rattle canned primer, color and clear coat) and then, with great care, rub the liquid mask off...
Works pretty good for me...
And, for those who are wondering about my crappy art sketch. It helped me remember where the decals were going to go. At $90 US a set, boo-boos were not an option...
And, how it looks when brush painted...
__________________
"98% of the bikes I buy are projects".
"98% of the bikes I buy are projects".
Likes For randyjawa:
09-12-23, 08:07 AM
#21
framebuilder
As a pro builder and painter, I have all the equipment and paint to do the job right. Some of frame building class students have painted the frames they made in class with rattle can paint and done a very nice job. Spray.Max as I understand them is a company that can provide empty rattle cans to local automotive paint suppliers that can fill them with whatever type of auto paint is chosen. There are 2 things special about their cans. !st, are designed to work with epoxy type of paints (that hardens by chemical action when activator is used). They have a button in the bottom of the can that when pushed will mix in the activator. Of course once pushed the chemicals start to work and the time available to paint is limited before it hardens. 2nd, according to their advertising, their spray nozzles are superior for atomizing the paint spray.
All primers are not the same and the best primers to use are 2 part epoxy type of primers. This is because they serve as a barrier to letting moisture through to the base metal. One has to be careful when choosing because auto repainters put a premium on cost and speed and not quality. I use House of Color (spelled with a K instead of a C that autocorrect insists on changing). It comes in the 3 primary colors of red, blue and yellow as well as black and white. These primary colors are good enough to use as the color coat on your frame as long as you like their red, yellow and blue. These primary colors can be mixed to get many primer color variations. After the primer has cured, it should be sanded with 600 wet sandpaper. All sanding residue needs to be removed.
There are hundreds of color coats available that are put on next. Usually there needs to be about 3 coats applied. Then a two part clear (like the Spray.Max clear already mentioned) needs to be sprayed over the color before doing anything else. It is on top of this clear that decals or striping or a 2nd color is applied. More clear may have to go on top of these additional steps. I recommend at least 2 coats of intermediate clears and probably 3 if the clears need to be polished out later. Then the intermediate clears are wet sanded as preparation to do the final clears. I use 3M wet/dry 600 grit here as well. I sand it wet after cutting a single sheet of sandpaper into 1/16th pieces. I have a bread pan I use to keep dipping into to keep the paper wet and Bounty paper towels to keep wiping off the residue. I don't want to use too course (scratches can show through) or too fine (the top coats adhere better to a not-too-smooth surface) sandpaper.
It is extremely unlikely an amateur will get anywhere near as close to a grossly smooth paint job I can get with my expensive spray guns and years of experience. But it is possible to smooth out the orange peal or roughness or even runs by wet sanding with progressively fine sandpaper and afterwards using polishing compounds. What grit of sandpaper to start with depends on how smooth you got the final clears. Your last sanding will probably be with 2000 grit (depending on how fussy you want to get). For polishing, I use 3 kinds of Meguiars polish in succession. I start with Ultra-cut Compound #105, then I go to Medium-cut Cleaner #1. And finally I finish with Ultra-Finishing Polish #205. Yes the final sanding and polishing is a lot of work but it provides an outstanding pro quality finish. Even after using rattle can spray cans and less than perfect spray techniques. Just avoid sand throughs. Those are a pros nightmare.
It takes about a month of an epoxy clear to achieve its final hardness. I know because I leave the left over clears in disposable cups. The clear in the bottom of the cup slowly shrinks until it get to be about 2/3rds of its volume in about a month. The best clear that I've found is H of K USC01. All of us old pros used to use Imron 500S but the new H of K is clearer that appears to provide more depth.
Likes For Doug Fattic:
09-13-23, 11:42 AM
#22

Senior Member

Join Date: Jul 2006
Location: San Jose (Willow Glen) Ca
Posts: 9,847
Bikes: Kirk Custom JK Special, '84 Team Miyata,(dura ace old school) 80?? SR Semi-Pro 600 Arabesque
Mentioned: 106 Post(s)
Tagged: 0 Thread(s)
Quoted: 2338 Post(s)
Liked 2,827 Times
in
1,543 Posts
Hi all, I'm finishing up a thorough restoration project of a 1981 miyata 912. I've flipped bikes in the past by just throwing new consumables on and cleaning them up, but this is my first foray into painting. I did not do it right! I spot-sanded rust spots, masked off the decals, then painted over with acrylic using sponge brushes, then enamel clear coat (hoped the enamel coat would protect the less durable acrylic). It doesn't look awful, but it's not right. I can see the spots I sanded to remove rust. Decals don't look right with the new paint even though its the same color as the old paint.
I decided I want to learn to do this right (or as close to right as I can get). New plan is to strip all paint with industrial paint stripper, buy an aerosol paint can handle and give it several light coats of paint, then add decals, then clear coat. Hoping the forums can give me info on the following:
1. Is it always necessary to strip ALL paint down to bare metal before repainting?
2. Should I use a primer?
3. What type of paint is best? Enamel? Epoxy?
4. What finish? Matte? High gloss?
5. Is there a noticeable difference between aerosol/rattle can spray paint and a professional sprayer? I'm not going to drop lots of money on a pro sprayer, but might be open to a budget one if there's a real benefit (I love doing resto stuff and am ready to drop a little money if needed to take this next step)
6. Do I really need a paint booth? Why? They're available on amazon for cheap but would just like the opinion of the forums before buying
7. I want to try printing my own decals with inkjet printer and sticker paper. Anyone have any files/images for 1981 Miyata 912 (silver), 1983 Univega specialissima (black), or 1981 Miyata 610 (gold) to share? Or have wisdom to share in generating my own from pictures of the old labels? Not real sure where to start with this part but I think it would be a lot of fun to try.
Money is not the motivator here. This is a hobby. I'm fine with putting more time/money into a bike than will be reflected in resale price. I just enjoy the process.
Thanks all, appreciate you.
I decided I want to learn to do this right (or as close to right as I can get). New plan is to strip all paint with industrial paint stripper, buy an aerosol paint can handle and give it several light coats of paint, then add decals, then clear coat. Hoping the forums can give me info on the following:
1. Is it always necessary to strip ALL paint down to bare metal before repainting?
2. Should I use a primer?
3. What type of paint is best? Enamel? Epoxy?
4. What finish? Matte? High gloss?
5. Is there a noticeable difference between aerosol/rattle can spray paint and a professional sprayer? I'm not going to drop lots of money on a pro sprayer, but might be open to a budget one if there's a real benefit (I love doing resto stuff and am ready to drop a little money if needed to take this next step)
6. Do I really need a paint booth? Why? They're available on amazon for cheap but would just like the opinion of the forums before buying
7. I want to try printing my own decals with inkjet printer and sticker paper. Anyone have any files/images for 1981 Miyata 912 (silver), 1983 Univega specialissima (black), or 1981 Miyata 610 (gold) to share? Or have wisdom to share in generating my own from pictures of the old labels? Not real sure where to start with this part but I think it would be a lot of fun to try.
Money is not the motivator here. This is a hobby. I'm fine with putting more time/money into a bike than will be reflected in resale price. I just enjoy the process.
Thanks all, appreciate you.
but if you are doing it for the experience (which i am guilty of)
spray paint from hardware or auto stores can may a great looking result, but it will not be as durable as if you use auto paint. (depending on wear you live you can get auto paint put in spray cans)
my limited experience (2 frames) is that it costs way more than you would think to paint a frame and it is lot of work to get it to look good I would go powder coat
good facemask with filters is first purchase (60 buck or so and my not be really enough for auto paint)
paint stripper
degreaser
rags, brushes, sand paper ,tack cloth gloves, miscellaneous
sprayer of not using spray cans (I used a pre-val sprayer one bike to spray auto paint)
acid etch primer, sandable primer, color coat, clear coat
easily 150 to 200 before auto paint
- take bike all apart
- strip paint, anything left will show
- degrease
- mask
- acid etch primer
- sandable primer
- sand, may need to do another coat of sandable primer
- color coats 2 to 3 with proper respray time between
- clear coats 2 to 4 depending again proper respray times
that is what I recall anyway
__________________
Life is too short not to ride the best bike you have, as much as you can
(looking for Torpado Super light frame/fork or for Raleigh International frame fork 58cm)
Life is too short not to ride the best bike you have, as much as you can
(looking for Torpado Super light frame/fork or for Raleigh International frame fork 58cm)
09-13-23, 03:04 PM
#23
Senior Member
Join Date: Jan 2008
Location: Beaverton, OR
Posts: 14,744
Bikes: Yes
Mentioned: 525 Post(s)
Tagged: 0 Thread(s)
Quoted: 3230 Post(s)
Liked 3,868 Times
in
1,439 Posts
It is extremely unlikely an amateur will get anywhere near as close to a grossly smooth paint job I can get with my expensive spray guns and years of experience. But it is possible to smooth out the orange peal or roughness or even runs by wet sanding with progressively fine sandpaper and afterwards using polishing compounds. What grit of sandpaper to start with depends on how smooth you got the final clears. Your last sanding will probably be with 2000 grit (depending on how fussy you want to get). For polishing, I use 3 kinds of Meguiars polish in succession. I start with Ultra-cut Compound #105, then I go to Medium-cut Cleaner #1. And finally I finish with Ultra-Finishing Polish #205. Yes the final sanding and polishing is a lot of work but it provides an outstanding pro quality finish. Even after using rattle can spray cans and less than perfect spray techniques. Just avoid sand throughs. Those are a pros nightmare.
I've read mixed claims about whether or not this is a good idea, but I did some wet sanding on my color coat before applying decals or clear coat. Mostly this was to get rid of runs and drips. I don't know if this has been mentioned before, but definitely do not try to fix runs and drips while the paint is wet. It will make things much worse. Ask me how I know. I stopped at 800 grit sanding the color coat and then applied another layer on top of that. (Note that this meant a long wait time to be sure I wasn't painting over a layer that wasn't dry.) That left me relatively smooth when I got to the clear coat. A couple of places required 800 grit, but 1000 grit worked on most of it. A tip I saw on YouTube is that if you have a mix of dull and shiny after sanding, you need to go back and do it again with a lower grit count. As you sand the clear coat, you shouldn't see color on the sandpaper. If you do, you've sanded through the clear and need another coat or two. This happened to me a couple of times.
Here are a couple of examples of what I had before sanding.

I think this one is midway through the sanding process and shows the effect of starting with too high of a grit count.

I don't have any pictures that show the final product at this level of detail. I didn't have the patience to get a perfectly smooth finish everywhere. On the open sections of the main tubes with no obstacles like braze-ons or lugs it's easy. Around the braze-ons and lugs, I basically stopped when I got to the point that I didn't think I'd notice it when the bike wasn't freshly washed. Sanding around decals is also tricky because if you go through the clear there you're likely to peel up the edge of the decal. I did that too.
I eventually hit a point where I decided that I had achieved maximum practical quality. That is, everything I did to fix something also risked introducing a problem. When you hit this point you can either stop and call it good enough, or step away and try again in a few days. I opted for the former and I have no regrets.
Did I mention that you're entering a world of pain?
__________________
My Bikes
My Bikes
09-14-23, 12:10 AM
#24
Strong Walker
I would suggest you get it powder coated rather than paint it your self, almost certain to be less expensive and certain less hassle
but if you are doing it for the experience (which i am guilty of)
spray paint from hardware or auto stores can may a great looking result, but it will not be as durable as if you use auto paint. (depending on wear you live you can get auto paint put in spray cans)
my limited experience (2 frames) is that it costs way more than you would think to paint a frame and it is lot of work to get it to look good I would go powder coat
good facemask with filters is first purchase (60 buck or so and my not be really enough for auto paint)
You can skip the chemical paint stripper, imo its not worth it; it just creates a different kind of mess in the workshop and all the iffy bits and hidden corners have to be treated with sanding any way. Just my experience. Also dont wear your good glasses when spraying
09-14-23, 01:48 AM
#25
Senior Member
Join Date: Jan 2008
Location: Beaverton, OR
Posts: 14,744
Bikes: Yes
Mentioned: 525 Post(s)
Tagged: 0 Thread(s)
Quoted: 3230 Post(s)
Liked 3,868 Times
in
1,439 Posts
More than anything, I find the chemical stripping to be very satisfying. While I sleep, the paint removes itself.

__________________
My Bikes
My Bikes