Bottom Bracket spindle loose 1986 Schwinn Prelude
 07-13-20, 07:28 AM
#1

Senior Member
Thread Starter
Join Date: Mar 2016
Location: North of Boston
Posts: 898
Bikes: 1973 Schwinn Sports Tourer plus a " few" more :)
Mentioned: 4 Post(s)
Tagged: 0 Thread(s)
Quoted: 211 Post(s)
Liked 199 Times
in
147 Posts
Bottom Bracket spindle loose 1986 Schwinn Prelude
Hi
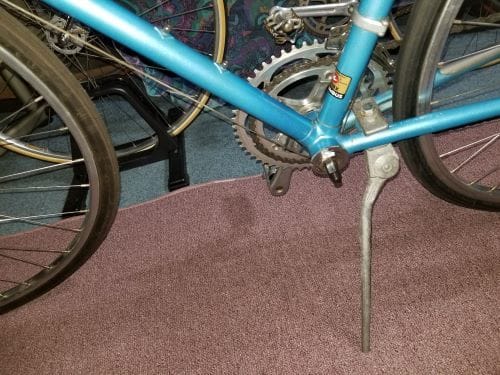
I have a 1986 Schwinn Prelude.
There is a little play in the spindle. I test rode it and it worked fine thru all the gears.
I checked my other bikes and the spindle is tight. No play from side to side.
It wiggles back and forth about a 1/4 of a mm.
I have the pedal arm off and there is still some " play" in the spindle. Slight, but there.
Wondering what my next step should be?
Appreciate any and all help.
 07-13-20, 07:32 AM
#2
Old fart

Join Date: Nov 2004
Location: Appleton WI
Posts: 24,786
Bikes: Several, mostly not name brands.
Mentioned: 153 Post(s)
Tagged: 0 Thread(s)
Quoted: 3588 Post(s)
Liked 3,400 Times
in
1,934 Posts
Loosen the lockring, tighten the cup a little, re-tighten the lockring, check for play, repeat as needed.
07-13-20, 07:38 AM
#3
The dropped

Join Date: Oct 2018
Location: Columbus, OH
Posts: 2,144
Bikes: Pake C'Mute Touring/Commuter Build, 1989 Kona Cinder Cone, 1995 Trek 5200, 1973 Raleigh Super Course FG, 1960/61 Montgomery Ward Hawthorne "thrift" 3 speed, by Hercules (sold) : 1966 Schwinn Deluxe Racer (sold)
Mentioned: 10 Post(s)
Tagged: 0 Thread(s)
Quoted: 1739 Post(s)
Liked 1,014 Times
in
696 Posts
 07-13-20, 07:42 AM
#4
www.theheadbadge.com

Join Date: Sep 2005
Location: Southern Florida
Posts: 28,513
Bikes: https://www.theheadbadge.com
Mentioned: 124 Post(s)
Tagged: 0 Thread(s)
Quoted: 2422 Post(s)
Liked 4,395 Times
in
2,092 Posts
I don't get the fetish for cartridge bottom brackets either. They wear faster, aren't rebuildable, and Shimano's installation tool for them is idiotic (especially in comparison to the Phil BB and tool). Again, if it ain't broke...
-Kurt
__________________


07-13-20, 07:54 AM
#5
Senior Member
If they were able to take the crank arm off they've got some bike specific tools. For this job you'll need an adjustable wrench to hold the adjustable cup, a lockring tool, and the crank remover/socket for the crank arm fixing bolt.
May as well take it apart, clean, grease and adjust. Essentially you want it to spin freely but without any play. Getting it to that point is a bit tricky and can take a couple tries.
May as well take it apart, clean, grease and adjust. Essentially you want it to spin freely but without any play. Getting it to that point is a bit tricky and can take a couple tries.
07-13-20, 07:55 AM
#6
The dropped
Join Date: Oct 2018
Location: Columbus, OH
Posts: 2,144
Bikes: Pake C'Mute Touring/Commuter Build, 1989 Kona Cinder Cone, 1995 Trek 5200, 1973 Raleigh Super Course FG, 1960/61 Montgomery Ward Hawthorne "thrift" 3 speed, by Hercules (sold) : 1966 Schwinn Deluxe Racer (sold)
Mentioned: 10 Post(s)
Tagged: 0 Thread(s)
Quoted: 1739 Post(s)
Liked 1,014 Times
in
696 Posts
All things considered, if the OP doesn't have all the tools to do a proper non-sealed BB service, they are probably best off adjusting the play and leaving it alone. Not that I'm against a BB repack, but if it ain't broke, don't fix it until it is.
I don't get the fetish for cartridge bottom brackets either. They wear faster, aren't rebuildable, and Shimano's installation tool for them is idiotic (especially in comparison to the Phil BB and tool). Again, if it ain't broke...
-Kurt
I don't get the fetish for cartridge bottom brackets either. They wear faster, aren't rebuildable, and Shimano's installation tool for them is idiotic (especially in comparison to the Phil BB and tool). Again, if it ain't broke...
-Kurt
If you are unable to find an adjustment that eliminates play, while also being loose enough that you don't feel grittiness when you turn the spindle, it's probably time to open it up and see what it looks like.
Kurt, I love a good adjustable BB as much as the next guy, but they don't offer many advantages over cartridge BBs for the average cyclist.
07-13-20, 07:57 AM
#7
www.theheadbadge.com
Join Date: Sep 2005
Location: Southern Florida
Posts: 28,513
Bikes: https://www.theheadbadge.com
Mentioned: 124 Post(s)
Tagged: 0 Thread(s)
Quoted: 2422 Post(s)
Liked 4,395 Times
in
2,092 Posts
-Kurt
__________________
07-13-20, 08:31 AM
#8
The dropped
Join Date: Oct 2018
Location: Columbus, OH
Posts: 2,144
Bikes: Pake C'Mute Touring/Commuter Build, 1989 Kona Cinder Cone, 1995 Trek 5200, 1973 Raleigh Super Course FG, 1960/61 Montgomery Ward Hawthorne "thrift" 3 speed, by Hercules (sold) : 1966 Schwinn Deluxe Racer (sold)
Mentioned: 10 Post(s)
Tagged: 0 Thread(s)
Quoted: 1739 Post(s)
Liked 1,014 Times
in
696 Posts
True! But I said average cyclist. What if you just want to ride it? There are enough NOS adjustable BBs out there to keep it period correct, and there's value in learning a new skill in adjusting the bearing, but the reality is that it's very difficult to find new adjustable cup BBs of mid-range quality or better outside Ebay.
07-13-20, 10:35 AM
#9
Senior Member
Thread Starter
Join Date: Mar 2016
Location: North of Boston
Posts: 898
Bikes: 1973 Schwinn Sports Tourer plus a " few" more :)
Mentioned: 4 Post(s)
Tagged: 0 Thread(s)
Quoted: 211 Post(s)
Liked 199 Times
in
147 Posts
Thank you all for the great responses!!!
Very much appreciated
I have a crank puller and proper park tools to remove the BB, but would prefer the try to tighten the cup.
I am starting to gain a little more confidence to work on my bikes.
Latest was replacing bearings on 2 rear tires.
Thank you again for ALL the responses
Great advice as usual 🙂🚴♂️🚴♂️🚲🚲🚲🚴♂️🚴♂️🚲🚲
07-13-20, 11:03 AM
#10
Senior Member

Join Date: Nov 2010
Location: Magnolia State, 100� with 110% humidity
Posts: 1,230
Bikes: American, Italian, and Japanese.. in no particular order.
Mentioned: 21 Post(s)
Tagged: 0 Thread(s)
Quoted: 350 Post(s)
Liked 276 Times
in
128 Posts
Make sure that you hold the adjustable cup secure with wrench when tightening the lock ring; otherwise, you may end up with the adjustment too tight.
07-13-20, 11:26 AM
#11
Senior Member
Join Date: Nov 2013
Location: Southern California
Posts: 1,467
Mentioned: 14 Post(s)
Tagged: 0 Thread(s)
Quoted: 800 Post(s)
Liked 753 Times
in
410 Posts
I find it easiest to get a perfect adjustment when both cranks are attached so I can rock them back and forth to check for play.
As far as cartridge bottom brackets, I have a love/hate relationship with them. They make it easier for the average person to work on their bike, but are disposable rather than serviceable. I see no reason why shimano couldn't come up with a bottom bracket where the cartridges can be replaced. Hell, I wouldn't even mind too much if they forced some proprietary bearing cartridge onto us so that they could make such an idea more profitable for them. Anything to get more repairable/servicable parts in bicycling.
As far as cartridge bottom brackets, I have a love/hate relationship with them. They make it easier for the average person to work on their bike, but are disposable rather than serviceable. I see no reason why shimano couldn't come up with a bottom bracket where the cartridges can be replaced. Hell, I wouldn't even mind too much if they forced some proprietary bearing cartridge onto us so that they could make such an idea more profitable for them. Anything to get more repairable/servicable parts in bicycling.
07-13-20, 12:49 PM
#12
Ride, Wrench, Swap, Race

Join Date: Jan 2010
Location: Northern California
Posts: 9,194
Bikes: Cheltenham-Pedersen racer, Boulder F/S Paris-Roubaix, Varsity racer, '52 Christophe, '62 Continental, '92 Merckx, '75 Limongi, '76 Presto, '72 Gitane SC, '71 Schwinn SS, etc.
Mentioned: 132 Post(s)
Tagged: 0 Thread(s)
Quoted: 1565 Post(s)
Liked 1,296 Times
in
866 Posts
Having rebuilt and/or adjusted hundreds of these things, I found that I like to arrive at a final tightening setting on the adjustable cup by turning the cup and lockring together into their final resting position.
Since the mating stress on the bb shell threads is much lower than on the lockring threads, I feel that having the cup itself move into final position in the shell threads will better retain tightness over the long haul, especially when the threads in the shell may be slightly dirty or simply less than perfectly smooth.
So, in this instance, where the amount of tightening is to be slight, I would first try turning the cup and ring together into a slightly tighter position, which would make the shortest work of this minor misadjustment.
From there, if more tightening is needed, I would back off the lockring by itself just a hair, like an eighth of an inch out at the periphery, then tighten the cup and ring together back into tightness.
Also, it's best to leave a bit of a rough-turning feel to the final adjustment. These aren't polished bearing races here and with the weight of the rider's loading on the pedals the bearing surface defects will level themselves elastically, so the slightly-tighter adjustment should give a longer service interval all things considered.
Such a pre-loaded adjustment also is better in terms of keeping the chainrings in-plane under the loading at the pedals, which makes for easier adjustment of the front derailer.
07-15-20, 08:50 AM
#13
Senior Member
Thread Starter
Join Date: Mar 2016
Location: North of Boston
Posts: 898
Bikes: 1973 Schwinn Sports Tourer plus a " few" more :)
Mentioned: 4 Post(s)
Tagged: 0 Thread(s)
Quoted: 211 Post(s)
Liked 199 Times
in
147 Posts
Thanks again to all who responded
Especially Dave who I have been corresponding with
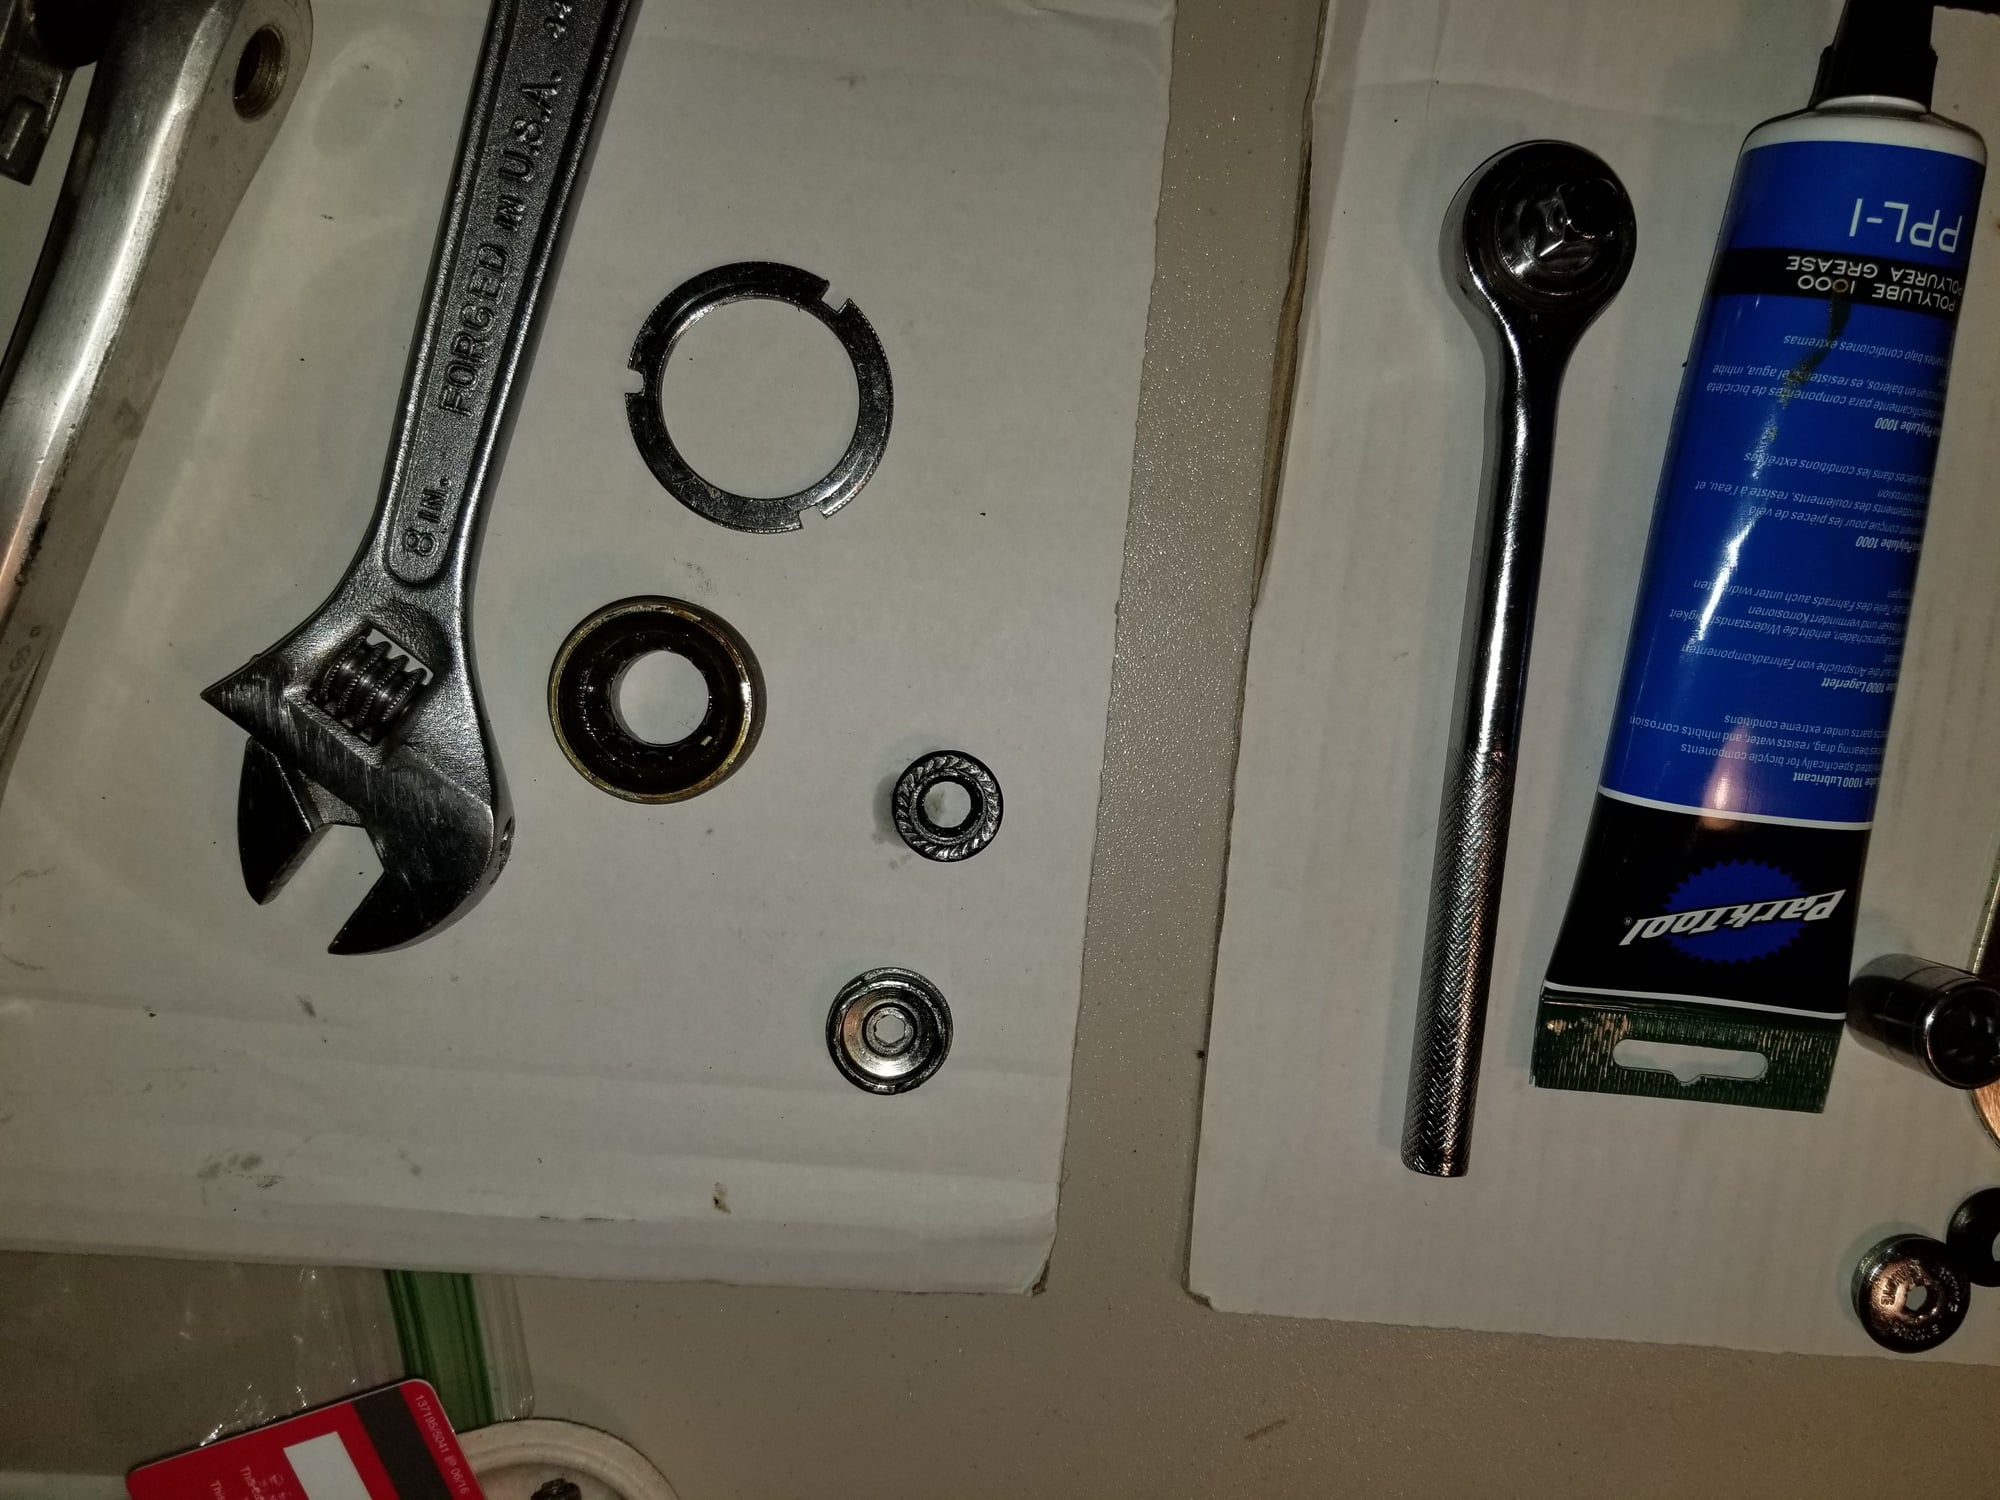
Here are some pics !!
The BB is OUT !!! Along with the plastic insert.
Just wondering if I should replace the bearings, or clean and grease ?
Looks like you just pop out the ring that is holding them in place. But I do not know for sure and do not want to ruin


Especially Dave who I have been corresponding with
Here are some pics !!
The BB is OUT !!! Along with the plastic insert.
Just wondering if I should replace the bearings, or clean and grease ?
Looks like you just pop out the ring that is holding them in place. But I do not know for sure and do not want to ruin
07-15-20, 09:09 AM
#14
Senior Member

Join Date: May 2008
Location: Fredericksburg, Va
Posts: 9,579
Bikes: '65 Frejus TDF, '73 Bottecchia Giro d'Italia, '83 Colnago Superissimo, '84 Trek 610, '84 Trek 760, '88 Pinarello Veneto, '88 De Rosa Pro, '89 Pinarello Montello, '94 Burley Duet, 97 Specialized RockHopper, 2010 Langster, Tern Link D8
Mentioned: 73 Post(s)
Tagged: 0 Thread(s)
Quoted: 1608 Post(s)
Liked 2,216 Times
in
1,103 Posts
bikemike73 Thanks for the pictures but they are either out of focus or too dark to respond with an opinion. Clean the bearing surfaces and check for pitting or any surface anomalies. If they are clear and smooth, you can replace the BB to ensure retaining the good surface.
Example
 Stronglight BB Cups, on Flickr
Example
Stronglight BB Cups, on Flickr
__________________
Bikes don't stand alone. They are two tired.
Bikes don't stand alone. They are two tired.
07-15-20, 10:05 AM
#15
se�or miembro

Join Date: Dec 2018
Location: Pac NW
Posts: 6,626
Bikes: '70s - '80s Campagnolo
Mentioned: 92 Post(s)
Tagged: 0 Thread(s)
Quoted: 3888 Post(s)
Liked 6,485 Times
in
3,209 Posts

Likes For SurferRosa:
07-15-20, 10:15 AM
#16
The dropped
Join Date: Oct 2018
Location: Columbus, OH
Posts: 2,144
Bikes: Pake C'Mute Touring/Commuter Build, 1989 Kona Cinder Cone, 1995 Trek 5200, 1973 Raleigh Super Course FG, 1960/61 Montgomery Ward Hawthorne "thrift" 3 speed, by Hercules (sold) : 1966 Schwinn Deluxe Racer (sold)
Mentioned: 10 Post(s)
Tagged: 0 Thread(s)
Quoted: 1739 Post(s)
Liked 1,014 Times
in
696 Posts
Best practice, and good enough
In your BB, the balls are the wearing part. Best practice is to replace them (loose or in a retainer) when you have everything apart. It's not really possible for the human eye to see how worn the balls are until they're past due for replacement. New balls are shiny, and very gradually lose that shine.
However, I have cleaned the old grease off of the retainer and balls, looked for any obvious defects, and reused them if I just want to ride or the cups and spindle are already very worn. New grease and fastidious bearing setup does wonders to old components.
If you want to do both, measure the size of the balls in the retainer, and order some grade 200 up to grade 25 stainless bearings in that size. The retainer is really to make shipping and assembly easier, so you don't really need to find an exact replacement. A good bead of appropriate grease has always held the balls in the cup for me while I'm installing them.
07-17-20, 07:25 AM
#17
Senior Member
Thread Starter
Join Date: Mar 2016
Location: North of Boston
Posts: 898
Bikes: 1973 Schwinn Sports Tourer plus a " few" more :)
Mentioned: 4 Post(s)
Tagged: 0 Thread(s)
Quoted: 211 Post(s)
Liked 199 Times
in
147 Posts
Thanks again or all the great responses.
I cleaned , greased, and reinstalled everything.
The ball bearings looked ok.
Now that I see a close up pic( attached here), I see they are in rough shape.
Have not got an an answer if the ring around the bearings pops out?
It looks like it is in the VERY tight.
Does anyone know if the ring pops out ? Or have to buy new cups?
07-17-20, 07:35 AM
#18
The dropped
Join Date: Oct 2018
Location: Columbus, OH
Posts: 2,144
Bikes: Pake C'Mute Touring/Commuter Build, 1989 Kona Cinder Cone, 1995 Trek 5200, 1973 Raleigh Super Course FG, 1960/61 Montgomery Ward Hawthorne "thrift" 3 speed, by Hercules (sold) : 1966 Schwinn Deluxe Racer (sold)
Mentioned: 10 Post(s)
Tagged: 0 Thread(s)
Quoted: 1739 Post(s)
Liked 1,014 Times
in
696 Posts
Thanks again or all the great responses.
I cleaned , greased, and reinstalled everything.
The ball bearings looked ok.
Now that I see a close up pic( attached here), I see they are in rough shape.
Have not got an an answer if the ring around the bearings pops out?
It looks like it is in the VERY tight.
Does anyone know if the ring pops out ? Or have to buy new cups?
I serviced a Sturmey Archer AW hub this week and dealt with the pressed retainers there, which meant gingerly prying the ring out of the cup with a screwdriver so the retainer didn't become distorted.
But post your pictures and show us the problem. I concur that your bearings are shot. Running them in that condition will damage the irreplaceable parts of the BB.
07-17-20, 07:54 AM
#19
Senior Member
Thread Starter
Join Date: Mar 2016
Location: North of Boston
Posts: 898
Bikes: 1973 Schwinn Sports Tourer plus a " few" more :)
Mentioned: 4 Post(s)
Tagged: 0 Thread(s)
Quoted: 211 Post(s)
Liked 199 Times
in
147 Posts
Hey Sam
Thank s again for the info
That's why I did not attempt to remove the ring. I was afraid the ring would be damaged and then I am stuck.
I have already reassembled the entire BB.
With the naked eye the bearings looked ok .At least with my eyesight .
I took the bike for a test ride and it was ok.....not REAL smooth...but ok
I would be happy to purchase new ones already sealed like pictured but I have just started looking with no real success
The pics of the BB have the plastic tube inside. I am sorry they are a little out of focus.
Maybe I'll go down stairs today and pull everything off again. It will sure be easier the 2nd time around
07-17-20, 08:17 AM
#20
www.theheadbadge.com
Join Date: Sep 2005
Location: Southern Florida
Posts: 28,513
Bikes: https://www.theheadbadge.com
Mentioned: 124 Post(s)
Tagged: 0 Thread(s)
Quoted: 2422 Post(s)
Liked 4,395 Times
in
2,092 Posts
I've never seen a BB that clean with that many pits - are you sure that's not grease or lint from the cleaning rag on the surfaces?
If it isn't, best to replace.
-Kurt
If it isn't, best to replace.
-Kurt
__________________
07-17-20, 08:56 AM
#21
Senior Member
Thread Starter
Join Date: Mar 2016
Location: North of Boston
Posts: 898
Bikes: 1973 Schwinn Sports Tourer plus a " few" more :)
Mentioned: 4 Post(s)
Tagged: 0 Thread(s)
Quoted: 211 Post(s)
Liked 199 Times
in
147 Posts
Mmmmm
I never thought of that !!!
The bearings looked clean when I took them out
I used a toothbrush after it soaked in de greaser
I did use paper towels and put it on my finger to spin many times to get the dirt off.
I am wondering if there is a special tool to remove the metal ring holding the bearings in place ?
Thank you for you response
Greatly appreciated
07-17-20, 09:05 AM
#22
The dropped
Join Date: Oct 2018
Location: Columbus, OH
Posts: 2,144
Bikes: Pake C'Mute Touring/Commuter Build, 1989 Kona Cinder Cone, 1995 Trek 5200, 1973 Raleigh Super Course FG, 1960/61 Montgomery Ward Hawthorne "thrift" 3 speed, by Hercules (sold) : 1966 Schwinn Deluxe Racer (sold)
Mentioned: 10 Post(s)
Tagged: 0 Thread(s)
Quoted: 1739 Post(s)
Liked 1,014 Times
in
696 Posts
Mmmmm
I never thought of that !!!
The bearings looked clean when I took them out
I used a toothbrush after it soaked in de greaser
I did use paper towels and put it on my finger to spin many times to get the dirt off.
I am wondering if there is a special tool to remove the metal ring holding the bearings in place ?
Thank you for you response
Greatly appreciated
I never thought of that !!!
The bearings looked clean when I took them out
I used a toothbrush after it soaked in de greaser
I did use paper towels and put it on my finger to spin many times to get the dirt off.
I am wondering if there is a special tool to remove the metal ring holding the bearings in place ?
Thank you for you response
Greatly appreciated
Consider that you don't need to reuse the retainer. The retainer holds the bearings in place while shipping or assembling, it's out of the way during use (or should be). A bead of grease holds bearings in the cup just as well.
07-17-20, 09:26 AM
#23
The dropped
Join Date: Oct 2018
Location: Columbus, OH
Posts: 2,144
Bikes: Pake C'Mute Touring/Commuter Build, 1989 Kona Cinder Cone, 1995 Trek 5200, 1973 Raleigh Super Course FG, 1960/61 Montgomery Ward Hawthorne "thrift" 3 speed, by Hercules (sold) : 1966 Schwinn Deluxe Racer (sold)
Mentioned: 10 Post(s)
Tagged: 0 Thread(s)
Quoted: 1739 Post(s)
Liked 1,014 Times
in
696 Posts
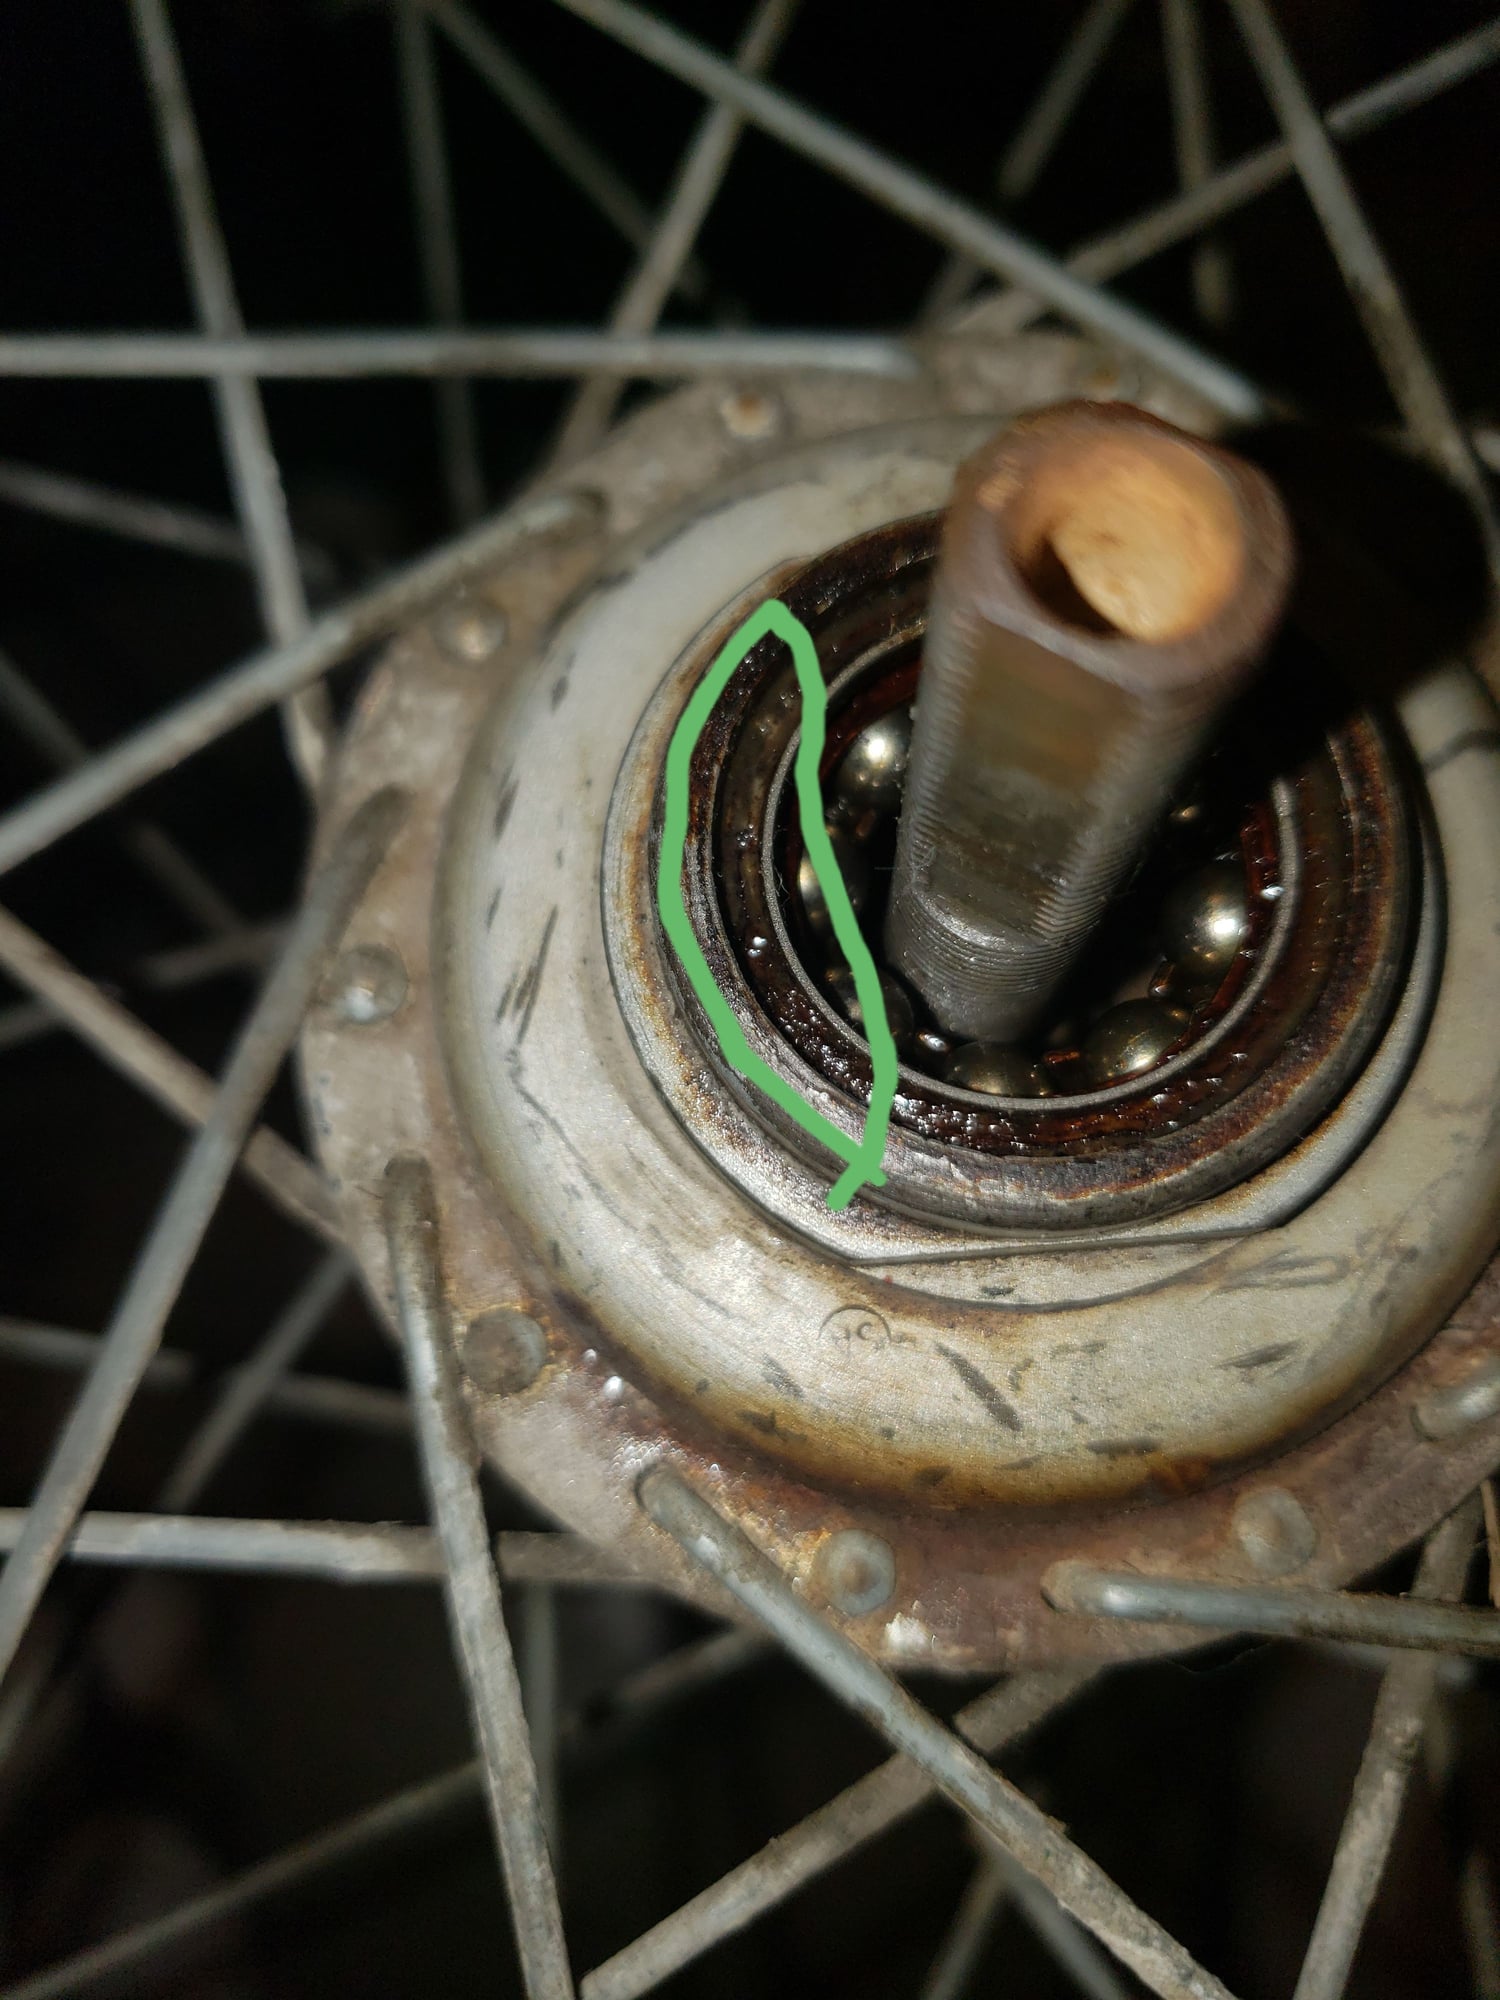
Highlighting the interface between retainer and hub shell.
I looked more closely at your earlier photos and saw that your retainer is using the same press-fit retainer, minus the raised inside annular lip (part of the labyrinthine seal used by Sturmey Archer). I'd use a screwdriver just like RJ does in
07-17-20, 04:16 PM
#24
Senior Member
Thread Starter
Join Date: Mar 2016
Location: North of Boston
Posts: 898
Bikes: 1973 Schwinn Sports Tourer plus a " few" more :)
Mentioned: 4 Post(s)
Tagged: 0 Thread(s)
Quoted: 211 Post(s)
Liked 199 Times
in
147 Posts
Thanks again for all the responses
Hey Sam thanks for the video
I was trying to figure out how the bearings would stay in place without the pressed retainer.
i do not see how it would be possible. The spindle is not big enough to push and keep the bearings in place.
I guess I'll take it apart and attempt to pry open the retainer with patience and luck.
I will keep all posted.
If anyone has a procedure for this, please share it.
Thank you all again
Stay/be safe
07-17-20, 05:00 PM
#25
The dropped
Join Date: Oct 2018
Location: Columbus, OH
Posts: 2,144
Bikes: Pake C'Mute Touring/Commuter Build, 1989 Kona Cinder Cone, 1995 Trek 5200, 1973 Raleigh Super Course FG, 1960/61 Montgomery Ward Hawthorne "thrift" 3 speed, by Hercules (sold) : 1966 Schwinn Deluxe Racer (sold)
Mentioned: 10 Post(s)
Tagged: 0 Thread(s)
Quoted: 1739 Post(s)
Liked 1,014 Times
in
696 Posts
Thanks again for all the responses
Hey Sam thanks for the video
I was trying to figure out how the bearings would stay in place without the pressed retainer.
i do not see how it would be possible. The spindle is not big enough to push and keep the bearings in place.
I guess I'll take it apart and attempt to pry open the retainer with patience and luck.
I will keep all posted.
If anyone has a procedure for this, please share it.
Thank you all again
Stay/be safe
Hey Sam thanks for the video
I was trying to figure out how the bearings would stay in place without the pressed retainer.
i do not see how it would be possible. The spindle is not big enough to push and keep the bearings in place.
I guess I'll take it apart and attempt to pry open the retainer with patience and luck.
I will keep all posted.
If anyone has a procedure for this, please share it.
Thank you all again
Stay/be safe
Now, Calvin pastes the balls to the spindle which I've never done. I'll paste the balls into the cup and feed the spindle through.
The bottom bracket doesn't work as a bearing unless the spindle is in contact with the balls, which are in contact with the cup. The spindle will hold 11 1/4" balls in place.