


Bar and brake lever position?
 08-02-19, 08:40 AM
#1
Senior Member
Thread Starter

Join Date: Apr 2019
Location: Central Illinois
Posts: 552
Bikes: 1985 Cannondale SR500, 1990 Cannondale ST600, 1993 Cannondale M700
Mentioned: 4 Post(s)
Tagged: 0 Thread(s)
Quoted: 171 Post(s)
Liked 277 Times
in
108 Posts
Bar and brake lever position?
Is there any kind of reference to setting drop bar and brake lever positions?
I'm new to drop bar bikes. Although I've biked all my adult life, it's mostly been on mountain bikes. I bought a road bike about 3 months ago, and just now bought another. My bikes have always been for running errands, light grocery shopping, occasional commuting, and recreational riding with my family. Until a couple months ago, I doubt I had ever ridden further than 4 miles at a time. Lately I've been riding 8 miles regularly, on a MUP. I've tried a couple very short rides on rural highway, but yesterday I did my first longer ride. I rode 20 miles yesterday, all on rural highway.
My goal with road biking is to eventually tour long distance, that's what I'm working towards. Now that I have 2 road bikes I can set them up differently, one for around town, one for the highway. My "highway" bike is a work in progress and not yet road ready. So yesterday I rode my around town bike, a 2012 Jamis Satellite Sport. It is set up for a more upright riding position, which has been perfect around town. The stem is flipped to angle up, and my bars are somewhat angled up also, set up so that I ride mostly on the hoods. On the long, flat highway yesterday I wanted to be on the drops, and it was not comfortable, and the brakes were hard to reach.
So I guess there is no in between position? Should I work on changing my riding position so both my bikes can be setup the same, or does it matter?
Thanks!


Likes For noodle soup:
08-02-19, 09:29 AM
#3

Non omnino gravis

Yeah, bottoms of levers parallel with bottoms of drops is my general starting position as well-- though sometimes a very compact drop messes with that. And of course flared bars have their own thing altogether.
There is no "correct" setup other than the one that feels good to you. I see a lot of people with their hoods or bars kicked back, so the levers are pointing slightly forward. Tried it. Hated it.
For me, the flats of the hoods must be parallel to the tops of the bars. I also have wonky lever positioning thanks to a bad back and a messed up shoulder-- so one hood is angled in a little more than the other.
It's not about appearances, it's about comfort.
__________________

Likes For DrIsotope:
08-02-19, 10:14 AM
#4
Senior Member
Join Date: Jul 2018
Location: Annapolis, MD
Posts: 157
Bikes: BMC Teammachine SLR02 Disc, Cannondale CAAD 4
Mentioned: 1 Post(s)
Tagged: 0 Thread(s)
Quoted: 77 Post(s)
Likes: 0
Liked 16 Times
in
10 Posts
It's all about your fit. On my new bike I was experiencing hand numbness. I went back for a second bike fit and they moved the hoods further forward and down so my wrist wasn't supporting most of my weight, but is now more on my fingers and hands. No more numbness. You have to find what works for you, so get a good bike fitting.
08-02-19, 10:26 AM
#5
Senior Member
Join Date: Nov 2015
Posts: 8,922
Mentioned: 20 Post(s)
Tagged: 0 Thread(s)
Quoted: 4717 Post(s)
Liked 1,882 Times
in
998 Posts
Yeah, bottoms of levers parallel with bottoms of drops is my general starting position as well-- though sometimes a very compact drop messes with that. And of course flared bars have their own thing altogether.
There is no "correct" setup other than the one that feels good to you.
For me, the flats of the hoods must be parallel to the tops of the bars. I also have wonky lever positioning thanks to a bad back and a messed up shoulder-- so one hood is angled in a little more than the other.
It's not about appearances, it's about comfort.
08-02-19, 10:31 AM
#6
Senior Member
Join Date: Jan 2010
Posts: 39,232
Mentioned: 211 Post(s)
Tagged: 1 Thread(s)
Quoted: 18409 Post(s)
Liked 15,525 Times
in
7,325 Posts
 08-02-19, 10:31 AM
#7
Senior Member

Join Date: Oct 2015
Location: San Diego, California
Posts: 4,077
Bikes: Velo Orange Piolet
Mentioned: 28 Post(s)
Tagged: 0 Thread(s)
Quoted: 2228 Post(s)
Liked 2,011 Times
in
972 Posts
... It is set up for a more upright riding position, which has been perfect around town. The stem is flipped to angle up, and my bars are somewhat angled up also, set up so that I ride mostly on the hoods. On the long, flat highway yesterday I wanted to be on the drops, and it was not comfortable, and the brakes were hard to reach.
 08-02-19, 10:37 AM
#8
Senior Member
Join Date: Nov 2015
Posts: 8,922
Mentioned: 20 Post(s)
Tagged: 0 Thread(s)
Quoted: 4717 Post(s)
Liked 1,882 Times
in
998 Posts
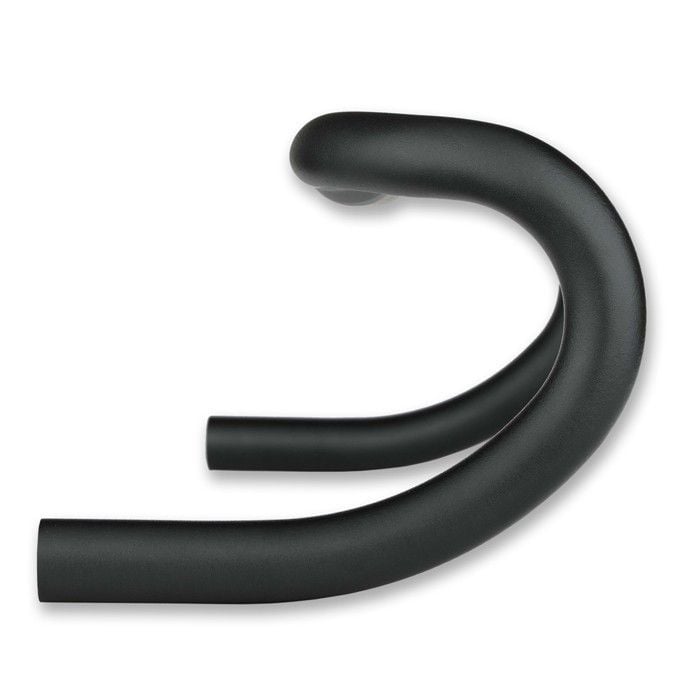
That's not me. It's just a photo I found that displays what I was talking about.
https://www.parktool.com/blog/repair...ning-drop-bars
https://www.parktool.com/blog/repair...ning-drop-bars
08-02-19, 10:39 AM
#9

Senior Member
Join Date: Jun 2018
Location: SW Ohio
Posts: 2,397
Mentioned: 93 Post(s)
Tagged: 0 Thread(s)
Quoted: 1104 Post(s)
Liked 1,824 Times
in
878 Posts
I'm with Doc ^. On modern compact, short reach, shallow drop bars I like my lever tops (not the points) to be level with the tops. Using a straight edge on the bottom like we did back in the pre-aero lever days on Cinelli bars would have me reaching over the tops of the bars to get my hands on the hoods. In my opinion, modern bars have killed any standard methods of lever positioning from the old days.
08-02-19, 10:51 AM
#10
Senior Member
Join Date: Nov 2015
Posts: 8,922
Mentioned: 20 Post(s)
Tagged: 0 Thread(s)
Quoted: 4717 Post(s)
Liked 1,882 Times
in
998 Posts
I'm with Doc ^. On modern compact, short reach, shallow drop bars I like my lever tops (not the points) to be level with the tops. Using a straight edge on the bottom like we did back in the pre-aero lever days on Cinelli bars would have me reaching over the tops of the bars to get my hands on the hoods. In my opinion, modern bars have killed any standard methods of lever positioning from the old days.
08-02-19, 11:12 AM
#11
HarborBandS
Join Date: Jun 2018
Location: Chicago Western Suburbs
Posts: 477
Mentioned: 4 Post(s)
Tagged: 0 Thread(s)
Quoted: 266 Post(s)
Liked 104 Times
in
57 Posts
The old rule was to always have the drops parallel to the ground, the ends of the brake levers lined up with the line of the drops (like the photo above).
But for me, I want a comfortable transition from the ramps to the hoods, so I usually pay more attention to that than where the brake levers line up. It's usually within a centimeter.
Also, I tilt the whole bar/brake hood assembly to avoid having my wrists at a weird angle. This is totally rider and bike fit dependent. We all have different proportions, and may have a different wrist angle depending on our arm to torso ratios and the angles of or backs. As a result, my bike photos don't look as perfect as they could, but I avoid pain. And at the end of the day, all of my adjustments are subtle deviations from the "rules", not massive tilts and changes.
08-02-19, 11:15 AM
#12
Senior Member
Join Date: Jun 2018
Location: SW Ohio
Posts: 2,397
Mentioned: 93 Post(s)
Tagged: 0 Thread(s)
Quoted: 1104 Post(s)
Liked 1,824 Times
in
878 Posts

When it comes to "compact" bars, even the definition of "rounded" is literally a matter of opinion. I use Cinelli Vai bars and I wouldn't consider them to have "rounded" drops.
Last edited by nomadmax; 08-02-19 at 11:22 AM.
08-02-19, 11:19 AM
#13
climber has-been

Join Date: Dec 2004
Location: Palo Alto, CA
Posts: 7,102
Bikes: Scott Addict R1, Felt Z1
Mentioned: 10 Post(s)
Tagged: 0 Thread(s)
Quoted: 3427 Post(s)
Liked 3,561 Times
in
1,790 Posts
There's also the standard rule that the hooks of the bars should point towards the rear brake bridge — assuming the bike has a brake bridge.

__________________
Ride, Rest, Repeat. ROUVY: terrymorse

Ride, Rest, Repeat. ROUVY: terrymorse
Likes For terrymorse:
08-02-19, 11:45 AM
#14
Senior Member
Join Date: Oct 2014
Location: Portland, OR
Posts: 12,902
Bikes: (2) ti TiCycles, 2007 w/ triple and 2011 fixed, 1979 Peter Mooney, ~1983 Trek 420 now fixed and ~1973 Raleigh Carlton Competition gravel grinder
Mentioned: 129 Post(s)
Tagged: 0 Thread(s)
Quoted: 4802 Post(s)
Liked 3,923 Times
in
2,552 Posts
Rules, rules, rules
For me, it is all about fit. Bars and levers are one of the three contact point with the bike. When I set up a bike I do not tape the bars. Just a little electrical tape to keep the cable housings in place. I go for rides with all the wrenches (and a crescent wrench) so I can tweak bar rotation and lever placement. (Crescent wrench for leverage on the 5mm used for the brake clamp.)
When I like the setup, the first tape job is with cheap cloth HB tape, wrapped from the bottom. Easy to unwrap from the top, move the brake lever a bit and re-tape, even on the road.
What others do, say or think never enters my considerations on bike fit and setup. No one but me is ever going to ride these bikes. To keep my fingers and old injured thumb happy and both pain and numbness free, I rotate my bars down so the bottom flat sometimes goes past horizontal (aimed closed tot he seatpin than the brake bridge) and levers extend well below the line of the bottom flat. Looks very old-school (like 60 years ago) and radical but my hands don't complain.
Try the bare bar approach. On the road tweaks are so easy you can try things you would never dare if you had to enshrine it with bar tape. (Two suggestions - before you leave put a piece of masking tape on the seatstay to mark where your bar aims and likewise 1" above your brake hoods. Means you can get back to exactly where you started.)
Edit: My bars are all "rounded". Classic shapes from the '70s made by Nitto, SR and the like or pista-like bends. I loved the TTT Superleggero bend. Copied faithfully by several Japanese manufacturers. (I raced a Japanese copy, not knowing it was a copy. Bought a TT SuperL bar and stem for the Mooney to be in 1978. Was delighted to find it was identical to the bars I'd raced and loved. And later, finding that bend again was easy. The Japanese bent thousands of bars to that shape.) I ride nothing remotely "compact" or "ergo".
Ben
Last edited by 79pmooney; 08-02-19 at 11:57 AM.
Likes For 79pmooney:
08-02-19, 12:07 PM
#15
Advocatus Diaboli

Join Date: Feb 2015
Location: Wherever I am
Posts: 8,634
Bikes: Merlin Cyrene, Nashbar steel CX
Mentioned: 14 Post(s)
Tagged: 1 Thread(s)
Quoted: 4733 Post(s)
Liked 1,531 Times
in
1,002 Posts
Likes For Sy Reene:
08-02-19, 02:21 PM
#16
Senior Member
Join Date: Jan 2014
Location: Southern California, USA
Posts: 10,474
Bikes: 1979 Raleigh Team 753
Mentioned: 153 Post(s)
Tagged: 0 Thread(s)
Quoted: 3374 Post(s)
Liked 371 Times
in
253 Posts
Make the top of the brakes an extension of the bars, so a part of the tray you can use to have your forearms parallel to the ground with. That generally means raising the bars (unless doing pro power) so the rise stem, or just higher is "better".
Likes For Doge:
08-03-19, 01:05 AM
#17
bike whisperer

Join Date: Dec 2009
Location: Melbourne, Oz
Posts: 9,545
Bikes: https://weightweenies.starbike.com/forum/viewtopic.php?f=10&t=152015&p=1404231
Mentioned: 15 Post(s)
Tagged: 0 Thread(s)
Quoted: 1527 Post(s)
Liked 718 Times
in
510 Posts
The old rule was to always have the drops parallel to the ground, the ends of the brake levers lined up with the line of the drops (like the photo above).
But for me, I want a comfortable transition from the ramps to the hoods, so I usually pay more attention to that than where the brake levers line up.
But for me, I want a comfortable transition from the ramps to the hoods, so I usually pay more attention to that than where the brake levers line up.
So I tighten up a lever where I want it, then pull the bar/stem off and sit it against a piece of glass to get the other lever in the same place (bar ends and lever bottoms on the glass, obvs).
__________________
Sheldon Brown's bike info ~~~ Park Tools repair help
Half-step triple, using double gear ~~~ 6400 STI rebuild walkthrough ~~~ Want 8/9/10s @126mm OLD? OCR. ~~~ Shimano cassette body overhaul ~~~ Ergopower Escape wear repair ~~~ PSA: drivetrain wear
List of US/Canada bike co-ops ~~~ Global list
Sheldon Brown's bike info ~~~ Park Tools repair help
Half-step triple, using double gear ~~~ 6400 STI rebuild walkthrough ~~~ Want 8/9/10s @126mm OLD? OCR. ~~~ Shimano cassette body overhaul ~~~ Ergopower Escape wear repair ~~~ PSA: drivetrain wear
List of US/Canada bike co-ops ~~~ Global list
Likes For Kimmo:

Thread
Thread Starter
Forum
Replies
Last Post
TKJava
General Cycling Discussion
10
12-24-17 11:47 PM
misskaz
Bicycle Mechanics
44
01-10-14 08:12 AM
