


Just stripped my DS crank arm - any ideas?
 05-29-18, 05:46 AM
#1
Senior Member
Thread Starter

Just stripped my DS crank arm - any ideas?
Oh dear. So while I knew the crank was seized to the BB axle so I liberally sprayed WD40 in and hit it with my hammer several times to try to break the corrosion. Worked on the NDS, and I thought it was working on the DS when the wrench started to move (using all my strength) but then I noticed a load of silvery rings poking out and my crank remover plopped into my hand...
I've done a fair bit of learning in this area already as it's not my first stripped crank. But the difference here is that is it's an old mtb one-piece crank where I can't remove the chainrings, and the inner chainring is shaped in such a way that I can't get in behind it to wedge anything larger than a screwdriver between the BB plate and the crank.
Any suggestions before I launch it into the skip? Thanks
 05-29-18, 06:06 AM
#2

Old fart

Join Date: Nov 2004
Location: Appleton WI
Posts: 24,792
Bikes: Several, mostly not name brands.
Mentioned: 153 Post(s)
Tagged: 0 Thread(s)
Quoted: 3591 Post(s)
Liked 3,401 Times
in
1,935 Posts
I've done destructive removal of stripped cranks that lack clearance to get wedges or other tools behind the arm and force it off. Saw off the chainrings and crank spider to get access behind the arm, then use your wedges, gear puller/whatever to get the remains of the arm off the spindle. Not pretty, not easy, but it can work.
05-29-18, 06:11 AM
#3
Mechanic/Tourist
Search the forum for Jacob's chuck wedges.
05-29-18, 07:20 AM
#4
Senior Member
Join Date: May 2003
Location: Mountain Brook. AL
Posts: 4,002
Mentioned: 14 Post(s)
Tagged: 0 Thread(s)
Quoted: 303 Post(s)
Likes: 0
Liked 136 Times
in
104 Posts
As per John D, extensive use of hacksaw to reduce the diameter of the metal around the sq taper axle and whatever to remove the rest.
FWIW there are 4 different Jacobs chuck wedges and only the JT3 set is guaranteed to fit over a sq taper axle (clears 0.81"). The JT6
wedge set clears 0.67" which is just over the sq taper axle diameter on the one on my garage which appears to be ~21/32" or ~0.66".
Finding a wedge set is another matter in the UK. In US they run $8 or so and are mostly mail order items.
On further thought, only the JT3 wedge set is likely to work as JT tapers all have a smaller diameter at the base of the wedge and that is
where the tapers work, measurements above are max diameter of the wedge itself, so JT6 probably will NOT go over the axle.
4" rotary grinder and a few discs would make short work of this and even cut the crank parallel to the axle splitting the crank and allowing a
screwdriver to wedge open the crank for removal.
Last edited by sch; 05-29-18 at 07:41 AM.
05-29-18, 09:00 AM
#5
Old fart
Join Date: Nov 2004
Location: Appleton WI
Posts: 24,792
Bikes: Several, mostly not name brands.
Mentioned: 153 Post(s)
Tagged: 0 Thread(s)
Quoted: 3591 Post(s)
Liked 3,401 Times
in
1,935 Posts
05-29-18, 09:10 AM
#6
Senior Member
Thread Starter
05-29-18, 02:00 PM
#7
Engineer
Join Date: May 2010
Location: Bucharest, Romania, Europe
Posts: 591
Bikes: 1989 Krapf (with Dura-ace) road bike, 1973 Sputnik (made by XB3) road bike , 1961 Peugeot fixed gear, 2010 Trek 4400
Mentioned: 1 Post(s)
Tagged: 0 Thread(s)
Quoted: 38 Post(s)
Likes: 0
Liked 0 Times
in
0 Posts
Get a gear puller and pull by the spider closest to the axle. Apply plenty of penetrating oil, and after the screw from the gear puller is tighten firmly, get a hammer and strike the center screw of the puller. This will shock the interface and will loosen it. Crank the bolt a bit more and strike with the hammer again. Repeat until done.
This is the same procedure for any crank puller as well. Tighten the threads fully into the crank (with a wrench), snug up the screw and strike with a hammer the screw and 90% will pop at first blow.
Just torquing the bolt is not advisable as you saw.. it stresses the components and does not disturb the tapered interface. A sharp hammer blow where it counts is required to relieve the stress from the threads and stimulate the taper to loosen. - it should be in any operation manual for a crank puller.
Same thing is done to any pulling of interface bearings and whatnot.. if it does not slide smoothly or at all, first it's got to get it move by sharp shocks. Just cranking the center bolt will warp the other piece, bend the screw, strip the thread on the puller and still will not unsettle the stuck part.
06-04-18, 01:10 AM
#8
Senior Member
Thread Starter
Get a gear puller and pull by the spider closest to the axle. Apply plenty of penetrating oil, and after the screw from the gear puller is tighten firmly, get a hammer and strike the center screw of the puller. This will shock the interface and will loosen it. Crank the bolt a bit more and strike with the hammer again. Repeat until done.
This is the same procedure for any crank puller as well. Tighten the threads fully into the crank (with a wrench), snug up the screw and strike with a hammer the screw and 90% will pop at first blow.
Just torquing the bolt is not advisable as you saw.. it stresses the components and does not disturb the tapered interface. A sharp hammer blow where it counts is required to relieve the stress from the threads and stimulate the taper to loosen. - it should be in any operation manual for a crank puller.
Same thing is done to any pulling of interface bearings and whatnot.. if it does not slide smoothly or at all, first it's got to get it move by sharp shocks. Just cranking the center bolt will warp the other piece, bend the screw, strip the thread on the puller and still will not unsettle the stuck part.
This is the same procedure for any crank puller as well. Tighten the threads fully into the crank (with a wrench), snug up the screw and strike with a hammer the screw and 90% will pop at first blow.
Just torquing the bolt is not advisable as you saw.. it stresses the components and does not disturb the tapered interface. A sharp hammer blow where it counts is required to relieve the stress from the threads and stimulate the taper to loosen. - it should be in any operation manual for a crank puller.
Same thing is done to any pulling of interface bearings and whatnot.. if it does not slide smoothly or at all, first it's got to get it move by sharp shocks. Just cranking the center bolt will warp the other piece, bend the screw, strip the thread on the puller and still will not unsettle the stuck part.
Actually, minus the pulling action, the next thing I'm going to try is striking the axle away from the crank to try and release it. The guy from my LBS told me he's unstuck many using this method.
06-04-18, 02:56 AM
#9
Engineer
Join Date: May 2010
Location: Bucharest, Romania, Europe
Posts: 591
Bikes: 1989 Krapf (with Dura-ace) road bike, 1973 Sputnik (made by XB3) road bike , 1961 Peugeot fixed gear, 2010 Trek 4400
Mentioned: 1 Post(s)
Tagged: 0 Thread(s)
Quoted: 38 Post(s)
Likes: 0
Liked 0 Times
in
0 Posts
Striking the axle is the key but you need to apply moderate to high tension to pull away the crank from the axle while the shock is produced. This is done by the crank puller and the center screw that rests on the axle has play in the threads so a sharp shock on that screw will transfer it directly to the axle while the puller still exerts tension to get the crank out.
If the thread is stripped, the same technique is used with bearing pullers like this:
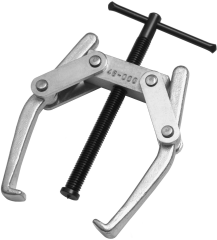
Or three jaw pullers. The idea is to rest the hooks on the puller right underneath the crank arm near the BB spindle. find one with thin jaws that can be inserted though the cutouts inside the granny ring. If not possible then catching the spider of the crank is another option but try to be closest to the axle since you will run the risk of warping the spider.
If damage to the crank is not that important put the crank in a solid vice get someone to hold the bike and hammer away the BB spindle. - this way if the jaws are soft you may get it out without damage.
Taking the chainrings off first is a good idea. especially the granny ring (even if will not let you take it out the chainring itself, let it hang near the frame, it will provide space for a puller mentioned above or jacobs chuck wedges)
Also if the cranks are aluminium, heating things up will make the aluminium expand more than the steel axle loosening the join quite a lot. - don't go crazy with a blowtorch.. first try with a heat-gun or even a hair drier. (heat will also make penetrating oil .. penetrate more).
If cranks are steel then heating things up will work but i doubt anything will happen unless heat is distributed only to the crank and not the spindle and in a rapid rise of temperature => blowtorch time
If the thread is stripped, the same technique is used with bearing pullers like this:
Or three jaw pullers. The idea is to rest the hooks on the puller right underneath the crank arm near the BB spindle. find one with thin jaws that can be inserted though the cutouts inside the granny ring. If not possible then catching the spider of the crank is another option but try to be closest to the axle since you will run the risk of warping the spider.
If damage to the crank is not that important put the crank in a solid vice get someone to hold the bike and hammer away the BB spindle. - this way if the jaws are soft you may get it out without damage.
Taking the chainrings off first is a good idea. especially the granny ring (even if will not let you take it out the chainring itself, let it hang near the frame, it will provide space for a puller mentioned above or jacobs chuck wedges)
Also if the cranks are aluminium, heating things up will make the aluminium expand more than the steel axle loosening the join quite a lot. - don't go crazy with a blowtorch.. first try with a heat-gun or even a hair drier. (heat will also make penetrating oil .. penetrate more).
If cranks are steel then heating things up will work but i doubt anything will happen unless heat is distributed only to the crank and not the spindle and in a rapid rise of temperature => blowtorch time
Last edited by Asi; 06-04-18 at 03:10 AM.
06-04-18, 06:07 AM
#10
Senior Member
Join Date: May 2003
Location: Mountain Brook. AL
Posts: 4,002
Mentioned: 14 Post(s)
Tagged: 0 Thread(s)
Quoted: 303 Post(s)
Likes: 0
Liked 136 Times
in
104 Posts
Sometimes simplest is best, the no-tool approach I should have remembered, is to just get on the bike and ride it around without the spindle bolt
or with the spindle bolt loosened several turns.
Particularly riding up some steep hills will frequently loosen the crank on the spindle. I have, on several occasions discovered
this inadvertently, once when I rebuilt a sq taper bike over several weeks and forgot to reinstall the spindle bolt, having been unable
to pull the crank off and not needing to at the time. Rode about 8 miles before the crank fell off the spindle. This approach might
trash the aluminum taper hole but not the steel crank taper surfaces.
Last edited by sch; 06-04-18 at 06:12 AM.
06-04-18, 01:14 PM
#11
Senior Member
Join Date: Sep 2016
Location: RVA
Posts: 514
Bikes: 2013 Cannondale Synapse 6 Tiagra + 2016 Cannondale CAAD 12 Dura Ace
Mentioned: 6 Post(s)
Tagged: 0 Thread(s)
Quoted: 231 Post(s)
Likes: 0
Liked 0 Times
in
0 Posts
I just had this happen to my sisl2 crank. It was stuck on the spindle. I put it into the freezer, put the arm in a vise, found a socket that fit in the arm and matched the circumference of the spindle and hit it with a rubber mallet.
Good luck
Good luck
06-04-18, 01:45 PM
#12
Engineer
Join Date: May 2010
Location: Bucharest, Romania, Europe
Posts: 591
Bikes: 1989 Krapf (with Dura-ace) road bike, 1973 Sputnik (made by XB3) road bike , 1961 Peugeot fixed gear, 2010 Trek 4400
Mentioned: 1 Post(s)
Tagged: 0 Thread(s)
Quoted: 38 Post(s)
Likes: 0
Liked 0 Times
in
0 Posts
Putting a bike in a freezer is no easy task.
But heating the crank near the spindle and if needed blast an air can (inverted.. will shoot liquid at -60degrees) on the spindle itself will work nicely most times at least to loosen it enough.
But heating the crank near the spindle and if needed blast an air can (inverted.. will shoot liquid at -60degrees) on the spindle itself will work nicely most times at least to loosen it enough.
06-04-18, 02:29 PM
#13
Senior Member
Join Date: Sep 2016
Location: RVA
Posts: 514
Bikes: 2013 Cannondale Synapse 6 Tiagra + 2016 Cannondale CAAD 12 Dura Ace
Mentioned: 6 Post(s)
Tagged: 0 Thread(s)
Quoted: 231 Post(s)
Likes: 0
Liked 0 Times
in
0 Posts
True, but as you said more clearly, cooling it may help it to contract and come out easier. I was just stating what I did, should have been more clear.
06-04-18, 04:38 PM
#15
Senior Member

Join Date: Oct 2016
Location: San Mateo,Ca.
Posts: 3,988
Bikes: TRIMMED DOWN THE HERD
Mentioned: 46 Post(s)
Tagged: 0 Thread(s)
Quoted: 1092 Post(s)
Liked 936 Times
in
601 Posts
This happened to me on my Karakoram. I had a senior moment and forgot to remove the crank bolt. Just went straight to cutting the crank with a dremel as I had a replacement set anyway.
06-05-18, 12:38 AM
#16
Engineer
Join Date: May 2010
Location: Bucharest, Romania, Europe
Posts: 591
Bikes: 1989 Krapf (with Dura-ace) road bike, 1973 Sputnik (made by XB3) road bike , 1961 Peugeot fixed gear, 2010 Trek 4400
Mentioned: 1 Post(s)
Tagged: 0 Thread(s)
Quoted: 38 Post(s)
Likes: 0
Liked 0 Times
in
0 Posts
Just cooling will not do much or make it worse if done on both parts. Heating the crank first will help a lot (more expansion for the crank hole), and even more if while the crank is heated, carefully, only the spindle is shot with an inverted aircan (like in the screw hole) and avoid cooling the crank. - it's much more hassle to use cooling and the amount of contraction of the spindle is quite low for several reasons (low thermal expansion coefficient, small dimensions of the spindle will net a total contraction of low value, small temperature difference.. 80 degrees of thermal difference while cooling is a lot inferior to 200-300 degrees while heating) - so for this reasons just cooling is not ideal.
Use heat first (a heatgun, not a blowtorch) then bother with cooling if still no dice.
Cooling has their applications where you can cool just the part that is needed. Like bearings in housing.. put the bearing in the freezer and then it will slide easier in the bore. (of course the housing can be expanded by heating it as well and for pressfit bearings anything will help.. heat the housing, cool the bearing, press the bearing with proper tools and then when temperatures revert it ill ensure a very tight fit).
In contrast for the same reason cooling shafts for an arbor bearing is less useful than heating the bearing. Even for the same difference of temperature a bearing race will expand more than a solid arbor.
06-05-18, 01:56 PM
#17
Senior Member
Join Date: Jul 2009
Posts: 786
Mentioned: 14 Post(s)
Tagged: 0 Thread(s)
Quoted: 384 Post(s)
Likes: 0
Liked 6 Times
in
6 Posts
Oh dear. So while I knew the crank was seized to the BB axle so I liberally sprayed WD40 in and hit it with my hammer several times to try to break the corrosion. Worked on the NDS, and I thought it was working on the DS when the wrench started to move (using all my strength) but then I noticed a load of silvery rings poking out and my crank remover plopped into my hand...
I've done a fair bit of learning in this area already as it's not my first stripped crank. But the difference here is that is it's an old mtb one-piece crank where I can't remove the chainrings, and the inner chainring is shaped in such a way that I can't get in behind it to wedge anything larger than a screwdriver between the BB plate and the crank.
Any suggestions before I launch it into the skip? Thanks
I've done a fair bit of learning in this area already as it's not my first stripped crank. But the difference here is that is it's an old mtb one-piece crank where I can't remove the chainrings, and the inner chainring is shaped in such a way that I can't get in behind it to wedge anything larger than a screwdriver between the BB plate and the crank.
Any suggestions before I launch it into the skip? Thanks
The reason press-fit square tapers are used on cranks and BB axles is that cranks need to be relatively easily removable. So there was no need to bang on the cranks to get them loose. In use they would be self-extracting but for the bolt, which only keeps that from happening. All you have to do is to start the crank moving on the taper and it will eventually fall off.
So in the future, please try this technique first:
Loosen the crank bolt between one and a half turns, but no more than two. This is because most cranks are pressed on between 1.5 and 2mm and you don't want to damage the tapered hole.
(If you want, you can heat the crankarm with a heat gun or perhaps a blow dryer until it's too hot to touch. Doesn't hurt even when extracting "clean" cranks.)
Take the bike outside, and ride it slowly. While standing on the pedals with the cranks horizontal, "hop" a little on the pedals. You don't need to catch air, you just need to load the cranks up. Change which pedal is in front after a couple hops. Check if the end of the crank is now flush against the bolt (in other words, can you still tighten the bolt with your fingers?) If not, repeat the process until it is. (And don't exceed that two-turns of the bolt unless you plan to bin the crank.) Once it is flush, the crank may not be able to be pulled off by hand, but it will be able to be extracted easily. If the extractor threads are already stripped, chances are you can tap it off with a soft hammer. Or unscrew the bolt another turn and repeat the above. At that point it should fall off.
06-06-18, 12:27 AM
#18
Senior Member
Thread Starter
You're killing me man. You made it harder than you need to. Since it's not your first stripped crank, let me suggest there's an error in your thinking and theory, not just your technique.
The reason press-fit square tapers are used on cranks and BB axles is that cranks need to be relatively easily removable. So there was no need to bang on the cranks to get them loose. In use they would be self-extracting but for the bolt, which only keeps that from happening. All you have to do is to start the crank moving on the taper and it will eventually fall off.
So in the future, please try this technique first:
Loosen the crank bolt between one and a half turns, but no more than two. This is because most cranks are pressed on between 1.5 and 2mm and you don't want to damage the tapered hole.
(If you want, you can heat the crankarm with a heat gun or perhaps a blow dryer until it's too hot to touch. Doesn't hurt even when extracting "clean" cranks.)
Take the bike outside, and ride it slowly. While standing on the pedals with the cranks horizontal, "hop" a little on the pedals. You don't need to catch air, you just need to load the cranks up. Change which pedal is in front after a couple hops. Check if the end of the crank is now flush against the bolt (in other words, can you still tighten the bolt with your fingers?) If not, repeat the process until it is. (And don't exceed that two-turns of the bolt unless you plan to bin the crank.) Once it is flush, the crank may not be able to be pulled off by hand, but it will be able to be extracted easily. If the extractor threads are already stripped, chances are you can tap it off with a soft hammer. Or unscrew the bolt another turn and repeat the above. At that point it should fall off.
Shall I say I've learned my lesson? I think so, and I hope so. Trouble is, most cranks will just pull, even if a little muscle is needed to get it started. I just thought this one was tighter than most, and had no idea I actually had the strength to strip those threads... Another lesson I need to learn is to strip the cranks first - I'm going to have to rebuild the bike to use this method
 06-07-18, 09:51 AM
#19
Senior Member
Join Date: Sep 2016
Location: RVA
Posts: 514
Bikes: 2013 Cannondale Synapse 6 Tiagra + 2016 Cannondale CAAD 12 Dura Ace
Mentioned: 6 Post(s)
Tagged: 0 Thread(s)
Quoted: 231 Post(s)
Likes: 0
Liked 0 Times
in
0 Posts
Contraction of steel is lower than aluminium, so cooling the crank area including the spindle will make the crank even tighter. Also thermal expansion or contraction is dependent of the size of the object.. so the spindle is very thin in contrast to the crank arm square hole.
Just cooling will not do much or make it worse if done on both parts. Heating the crank first will help a lot (more expansion for the crank hole), and even more if while the crank is heated, carefully, only the spindle is shot with an inverted aircan (like in the screw hole) and avoid cooling the crank. - it's much more hassle to use cooling and the amount of contraction of the spindle is quite low for several reasons (low thermal expansion coefficient, small dimensions of the spindle will net a total contraction of low value, small temperature difference.. 80 degrees of thermal difference while cooling is a lot inferior to 200-300 degrees while heating) - so for this reasons just cooling is not ideal.
Use heat first (a heatgun, not a blowtorch) then bother with cooling if still no dice.
Cooling has their applications where you can cool just the part that is needed. Like bearings in housing.. put the bearing in the freezer and then it will slide easier in the bore. (of course the housing can be expanded by heating it as well and for pressfit bearings anything will help.. heat the housing, cool the bearing, press the bearing with proper tools and then when temperatures revert it ill ensure a very tight fit).
In contrast for the same reason cooling shafts for an arbor bearing is less useful than heating the bearing. Even for the same difference of temperature a bearing race will expand more than a solid arbor.
 06-07-18, 11:46 AM
#20
I'm good to go!
Join Date: Jul 2017
Location: Mississippi
Posts: 15,002
Bikes: Tarmac Disc Comp Di2 - 2020
Mentioned: 51 Post(s)
Tagged: 0 Thread(s)
Quoted: 6199 Post(s)
Liked 4,816 Times
in
3,323 Posts
As @AnkleWork pointed out, you said it was a one piece crank. Or maybe you were talking about another bike, but it didn't seem so to us.
If it is a one piece crank, then you have to unscrew the cone on the drive side which also holds the chainwheel in place. Or is that what you are saying you stripped?
If it is a one piece crank, then you have to unscrew the cone on the drive side which also holds the chainwheel in place. Or is that what you are saying you stripped?
06-07-18, 02:48 PM
#21
Senior Member
Join Date: Jul 2009
Posts: 786
Mentioned: 14 Post(s)
Tagged: 0 Thread(s)
Quoted: 384 Post(s)
Likes: 0
Liked 6 Times
in
6 Posts
He's totally correct about the properties. Seems counter-intuitive, but I wonder if the thermal contraction of the aluminum crankarm caused it to squeeze and thus slip down the taper a fraction of a millimeter (which would only happen if the bolt were removed.) Once it warmed up or the temperature equalized, it would then be a bit easier to extract. Might be an interesting experiment to repeat.
06-07-18, 02:56 PM
#22
Senior Member
Thread Starter
OH! I didn't know about that. I'll have a look tomorrow and see if I can get an adjustable wrench in there. Thanks!
06-08-18, 08:27 AM
#23
I'm good to go!
Join Date: Jul 2017
Location: Mississippi
Posts: 15,002
Bikes: Tarmac Disc Comp Di2 - 2020
Mentioned: 51 Post(s)
Tagged: 0 Thread(s)
Quoted: 6199 Post(s)
Liked 4,816 Times
in
3,323 Posts
Some you might have flats on them that you can get with a really big wrench, but others use a hook spanner and I think I've seen some that use a pin spanner. If you are careful and know what you are doing you can hold the crank securely in a vise or something and then use a hammer and edge of a cold chisel or punch to loosen it. But used wrong, you can easily destroy it.

