


Mechanicals on tour
 11-13-19, 09:49 AM
#26
Senior Member
Re the crank arm break, even though I'm pretty good for regularly going over my bike, I can honestly say that I've never thought of checking closely for cracks anywhere, and can see how it would be very very easy not to notice a small thing starting, especially when at a spot where there has always been rub marks.
Even though I'm a pretty meagre power outputter, so very unlikely to overstress parts, its also realistic that cranks could get a good whack in transit and we'd never know about it.
Even though I'm a pretty meagre power outputter, so very unlikely to overstress parts, its also realistic that cranks could get a good whack in transit and we'd never know about it.
 11-13-19, 10:07 AM
#27
bicycle tourist
Reason I say this is when I looked at the break, the cross section was a hollow doughnut. Almost all was a clean metal but there was a small bit of black on one side, much less than half way into the doughnut hole. It was otherwise a smooth surface next to the toe strap. That is why my hypothesis was a crack. I didn't notice a scratch and so don't know if I had noticed a scratch how I would have seen/noticed how deep it might be and then whether it would somehow lead to catastrophic failure of the crank arm...
I expect cast aluminum may eventually fail given enough duty cycles and this crank arm was original on a 12 year old bike that had seen a lot of touring. So in hindsight I can guess why it might have failed - but I also didn't have any advance warning/indication it was going to fail. Also not sure I could have spotted it if I were looking for it.
Likes For mev:
11-13-19, 12:47 PM
#28
Senior Member
Join Date: Aug 2010
Location: Madison, WI
Posts: 11,175
Bikes: 1961 Ideor, 1966 Perfekt 3 Speed AB Hub, 1994 Bridgestone MB-6, 2006 Airnimal Joey, 2009 Thorn Sherpa, 2013 Thorn Nomad MkII, 2015 VO Pass Hunter, 2017 Lynskey Backroad, 2017 Raleigh Gran Prix, 1980s Bianchi Mixte on a trainer. Others are now gone.
Mentioned: 47 Post(s)
Tagged: 0 Thread(s)
Quoted: 3452 Post(s)
Liked 1,452 Times
in
1,131 Posts
As noted above by Saddlesores, tire boot.
I forgot to mention with my photos of my spares that I make tire boots out of the Tyvek envelopes that US Postal Service uses, I pack one with each spare tube. The tire boots were free, they only cost me the few minutes spent with a scissors, so why not pack one with each tube? The tire boots were there, just did not show up in the photo.
I forgot to mention with my photos of my spares that I make tire boots out of the Tyvek envelopes that US Postal Service uses, I pack one with each spare tube. The tire boots were free, they only cost me the few minutes spent with a scissors, so why not pack one with each tube? The tire boots were there, just did not show up in the photo.
11-13-19, 01:04 PM
#29
Senior Member

Perhaps an example:
That's not to make fun of the situations, but if a cross-threaded pedal was the root of the "failure" then being a bit more proactive on the pedal install so as to avoid to cross threading could have prevented the failure.
Though, I am still not sure what to make of this one:
That's not to make fun of the situations, but if a cross-threaded pedal was the root of the "failure" then being a bit more proactive on the pedal install so as to avoid to cross threading could have prevented the failure.
Though, I am still not sure what to make of this one:
11-13-19, 02:19 PM
#30
Crawler

As noted above by Saddlesores, tire boot.
I forgot to mention with my photos of my spares that I make tire boots out of the Tyvek envelopes that US Postal Service uses, I pack one with each spare tube. The tire boots were free, they only cost me the few minutes spent with a scissors, so why not pack one with each tube? The tire boots were there, just did not show up in the photo.
I forgot to mention with my photos of my spares that I make tire boots out of the Tyvek envelopes that US Postal Service uses, I pack one with each spare tube. The tire boots were free, they only cost me the few minutes spent with a scissors, so why not pack one with each tube? The tire boots were there, just did not show up in the photo.
Likes For linus:
11-14-19, 06:08 PM
#31

Disco Infiltrator

Join Date: May 2013
Location: Folsom CA
Posts: 13,446
Bikes: Stormchaser, Paramount, Tilt, Samba tandem
Mentioned: 72 Post(s)
Tagged: 0 Thread(s)
Quoted: 3126 Post(s)
Liked 2,102 Times
in
1,366 Posts
I wonder if anyone has followed this with a similar dingus for thru axles or xD drivers
__________________
Genesis 49:16-17
Genesis 49:16-17
11-14-19, 10:33 PM
#32
Senior Member
Thank you. What a nifty thing https://uniorusa.com/shop-bicycle-to...emover-wrench/
I wonder if anyone has followed this with a similar dingus for thru axles or xD drivers
I wonder if anyone has followed this with a similar dingus for thru axles or xD drivers
I have however done a fair amount of mechanical stuff and can attest that stuff can sometimes be a real bugger to loosen, so I believe this warning has merit.
Testing it out would be wise methinks
11-14-19, 11:27 PM
#33
Crawler
Thank you. What a nifty thing https://uniorusa.com/shop-bicycle-to...emover-wrench/
I wonder if anyone has followed this with a similar dingus for thru axles or xD drivers
I wonder if anyone has followed this with a similar dingus for thru axles or xD drivers

https://www.wolftoothcomponents.com/...ch-hex-inserts
It is superlight(85g for the wrench, 30g for the cassette insert) and you can use it to open Centerlock rotors as well as Shimano External BB. Those 3 taps around 1inch hex side are magnets and the insert snaps in when you put it there. Awesome quality tools.
Wolftooth Chain whip is great as well, but I no longer use them since I find out that I can use my S&S coupler tool to hold the cassette cog.
Last edited by linus; 11-14-19 at 11:40 PM.
11-15-19, 05:01 AM
#34
Senior Member
I can't speak from personal experience, but i have read that for these to work, the cassette cannot be on too tight or you can damage your frame.
I have however done a fair amount of mechanical stuff and can attest that stuff can sometimes be a real bugger to loosen, so I believe this warning has merit.
Testing it out would be wise methinks
I have however done a fair amount of mechanical stuff and can attest that stuff can sometimes be a real bugger to loosen, so I believe this warning has merit.
Testing it out would be wise methinks
Could it damage some dropout designs? I don't know, but it seems unlikely to me for it to do real damage unless you fail to follow the directions for the tool. Minor paint issues can occur in a spot I wouldn't even notice, but they can be avoided. These days Unior provides a piece of what looks like HDPE plastic to protect the paint where the tool bears against the dropout. I never bothered protecting that spot and never noticed any damage, but you certainly can if you are worried about it either with the now provided piece of plastic or with something else.
Check out a video of it at
11-15-19, 05:57 AM
#35
Senior Member
Join Date: Jun 2014
Location: Ontario, Canada
Posts: 4,624
Bikes: iele Latina, Miele Suprema, Miele Uno LS, Miele Miele Beta, MMTB, Bianchi Model Unknown, Fiori Venezia, Fiori Napoli, VeloSport Adamas AX
Mentioned: 16 Post(s)
Tagged: 0 Thread(s)
Quoted: 1324 Post(s)
Liked 927 Times
in
640 Posts
I can say is that I have used it quite a few times and have not had any problems. I don't tighten cassettes super tight though.
Could it damage some dropout designs? I don't know, but it seems unlikely to me for it to do real damage unless you fail to follow the directions for the tool. Minor paint issues can occur in a spot I wouldn't even notice, but they can be avoided. These days Unior provides a piece of what looks like HDPE plastic to protect the paint where the tool bears against the dropout. I never bothered protecting that spot and never noticed any damage, but you certainly can if you are worried about it either with the now provided piece of plastic or with something else.
Check out a video of it at https://www.youtube.com/watch?v=jcuUjEzsuT8
Thanks and cheers.
11-15-19, 07:24 AM
#36
Senior Member
I can say is that I have used it quite a few times and have not had any problems. I don't tighten cassettes super tight though.
Could it damage some dropout designs? I don't know, but it seems unlikely to me for it to do real damage unless you fail to follow the directions for the tool. Minor paint issues can occur in a spot I wouldn't even notice, but they can be avoided. These days Unior provides a piece of what looks like HDPE plastic to protect the paint where the tool bears against the dropout. I never bothered protecting that spot and never noticed any damage, but you certainly can if you are worried about it either with the now provided piece of plastic or with something else.
Check out a video of it at https://www.youtube.com/watch?v=jcuUjEzsuT8
Could it damage some dropout designs? I don't know, but it seems unlikely to me for it to do real damage unless you fail to follow the directions for the tool. Minor paint issues can occur in a spot I wouldn't even notice, but they can be avoided. These days Unior provides a piece of what looks like HDPE plastic to protect the paint where the tool bears against the dropout. I never bothered protecting that spot and never noticed any damage, but you certainly can if you are worried about it either with the now provided piece of plastic or with something else.
Check out a video of it at https://www.youtube.com/watch?v=jcuUjEzsuT8
I do know that I have overtightened cassettes, and learned from that.
But a few times I have seen friends bikes that had weird stuff going on and when checking, saw that their cassettes were on too loosely, so I guess its a matter of being careful of how tight its put on, and perhaps being careful of using the doohickey to avoid frame damage.
So far, I've just carried a kevlar spoke string thingee, but it makes sense that being able to deal with a busted spoke properly with a replacement is a good thing.
will watch the vid.
11-15-19, 07:34 AM
#37
Senior Member
As noted above by Saddlesores, tire boot.
I forgot to mention with my photos of my spares that I make tire boots out of the Tyvek envelopes that US Postal Service uses, I pack one with each spare tube. The tire boots were free, they only cost me the few minutes spent with a scissors, so why not pack one with each tube? The tire boots were there, just did not show up in the photo.
I forgot to mention with my photos of my spares that I make tire boots out of the Tyvek envelopes that US Postal Service uses, I pack one with each spare tube. The tire boots were free, they only cost me the few minutes spent with a scissors, so why not pack one with each tube? The tire boots were there, just did not show up in the photo.
11-15-19, 08:53 AM
#38
Senior Member
So far, I've just carried a kevlar spoke string thingee, but it makes sense that being able to deal with a busted spoke properly with a replacement is a good thing.
will watch the vid.
will watch the vid.
BTW, I never found that I needed to carry three sizes like some seem to find necessary. There is quite a bit of range between having a few threads engaged and having enough sticking through the rim to cause flats. Given that range I find that one size in the middle can generally work in a pinch in all three positions. If I am really concerned I might use a different color to remind me to put in the right length later at home, but I have never actually bothered. It will depend on the hubs and rims, but that has been my experience.
FWIW, I do find it extremely helpful to have the exact correct length spokes when building new wheels.
11-15-19, 09:31 AM
#39
Senior Member
Join Date: Dec 2015
Location: San Diego
Posts: 702
Bikes: 1978 Bruce Gordon, 1977 Lippy, 199? Lippy tandem, Bike Friday NWT, 1982 Trek 720, 2012 Rivendell Atlantis, 1983 Bianchi Specialissima?
Mentioned: 11 Post(s)
Tagged: 0 Thread(s)
Quoted: 345 Post(s)
Liked 174 Times
in
106 Posts
thanks staep, I guess I would have to actually try this thing to really have a properly informed opinion on it.
I do know that I have overtightened cassettes, and learned from that.
But a few times I have seen friends bikes that had weird stuff going on and when checking, saw that their cassettes were on too loosely, so I guess its a matter of being careful of how tight its put on, and perhaps being careful of using the doohickey to avoid frame damage.
So far, I've just carried a kevlar spoke string thingee, but it makes sense that being able to deal with a busted spoke properly with a replacement is a good thing.
will watch the vid.
https://www.adventurecycling.org/cyc...ool---shimano/
11-15-19, 01:00 PM
#40
Senior Member
I always figured that is just a few clicks and not really very tight, but I think the tool will still work with a fairly tight free hub.
Lots of folks have good luck with those, so I am not knocking them. That said, I always figured that with high or even moderate spoke count wheels I can limp along with one broken spoke. With multiple broken spokes maybe not. Also I figure I'd rather just fix the problem permanently right off if possible. So when I have taken something I have taken some spokes. There have been some trips where I have taken nothing and probably should have taken at least a fiber-fix spoke. They do have the advantage of fitting any wheel of any bike you might need to fix so you can help anyone you ride with or anyone you meet.
BTW, I never found that I needed to carry three sizes like some seem to find necessary. There is quite a bit of range between having a few threads engaged and having enough sticking through the rim to cause flats. Given that range I find that one size in the middle can generally work in a pinch in all three positions. If I am really concerned I might use a different color to remind me to put in the right length later at home, but I have never actually bothered. It will depend on the hubs and rims, but that has been my experience.
FWIW, I do find it extremely helpful to have the exact correct length spokes when building new wheels.
re spoke lengths, Ive never built up a wheel from scratch, and when Ive sourced some spare spokes to have with me on trips, Ive always gotten knowledgeable mechanics to (hopefully) measure properly. Seems to me that Ive had two lengths, driveside and non driveside, and that the non ds is the same as the front wheel spokes.
11-17-19, 06:13 AM
#41
Senior Member
you know, I have a car torque wrench, but I dont think Ive ever used it to torque down a cassette to X ft lbs, and to be honest, I dont keep track of how many clicks I go to, but it must be 5 or 6 or something--so yes, I would have to do some experiementing to see if what I find is an acceptable tightness would work with one of these removers that brace up against part of the frame.
My point is that I think the tool's limitations are not that much of a worry other than to say it probably is a good idea to not over tighten your cassette (a good idea in any case). I don't think it is a case of needing to under tighten it or really worry about it at all. If you want to I am pretty sure you could tighten it to the proper torque an have no problems if you use the tool properly. To that end, I'd advise watching the video and doing a dry run or two to get the procedure down.
11-17-19, 08:23 AM
#42
Senior Member
Join Date: Aug 2010
Location: Madison, WI
Posts: 11,175
Bikes: 1961 Ideor, 1966 Perfekt 3 Speed AB Hub, 1994 Bridgestone MB-6, 2006 Airnimal Joey, 2009 Thorn Sherpa, 2013 Thorn Nomad MkII, 2015 VO Pass Hunter, 2017 Lynskey Backroad, 2017 Raleigh Gran Prix, 1980s Bianchi Mixte on a trainer. Others are now gone.
Mentioned: 47 Post(s)
Tagged: 0 Thread(s)
Quoted: 3452 Post(s)
Liked 1,452 Times
in
1,131 Posts
you know, I have a car torque wrench, but I dont think Ive ever used it to torque down a cassette to X ft lbs, and to be honest, I dont keep track of how many clicks I go to, but it must be 5 or 6 or something--so yes, I would have to do some experiementing to see if what I find is an acceptable tightness would work with one of these removers that brace up against part of the frame.
re spoke lengths, Ive never built up a wheel from scratch, and when Ive sourced some spare spokes to have with me on trips, Ive always gotten knowledgeable mechanics to (hopefully) measure properly. Seems to me that Ive had two lengths, driveside and non driveside, and that the non ds is the same as the front wheel spokes.
re spoke lengths, Ive never built up a wheel from scratch, and when Ive sourced some spare spokes to have with me on trips, Ive always gotten knowledgeable mechanics to (hopefully) measure properly. Seems to me that Ive had two lengths, driveside and non driveside, and that the non ds is the same as the front wheel spokes.
Regarding fiber fix (kevlar?) spokes, I would not worry about using one to get you to the next bike shop. A fiber fix spoke, just like a regular spoke is an insurance policy against having a spoke failure, but on modern spokes on a well built wheel a spoke failure is very unlikely. When I say that, I am assuming it is a conventional wheel with 32 or 36 spokes, not one of those ultra light wheels. I think the only spoke failures I have had were on a wheel built up in 1961, never had a spoke failure on a wheel that I built. I do not carry a fiber fix spoke for one simple reason - I built up my touring wheels, thus I owned the correct length spare spokes so it is simplest to just carry spare spokes instead of buying a fiber fix. I stick my spare spokes in the seatpost, held in with a wine cork so the correct length spokes stay with the bike. Some 700c spokes were a bit too long and I had to drill a hole into the cork to accommodate the extra length of spoke in the seatpost. My point is that if you have the fiber fix spoke, just keep carrying that and don't worry about not having the correct length spokes.
I have never had a bike with aluminum alloy nipples, but if I did I would put a higher priority on carrying a couple brass nipples.
11-17-19, 08:55 AM
#43
Senior Member
thanks guys for the comments.
Staep for the specifics of your experiences. I did try to find out if I could buy one of these Unior parts, and sent the company an email to ask if they had any Canadian distributors or if I could purchase one or two from them (have one as a gift to someone), so hopefully will hear back.
TMSN, I recall your bolt loosening the lockring story.
I still like having a couple of ds and nds spokes with me, figuring that if I do have a problem, at least I'll have them when getting to a bike store if I go that route. I certainly liked having them with me on the latin american trips, but yes, I really should source one of these small removal tools for the inevitable at some point.
I agree though, that a good 32 or 36 spoked tough wheel, properly adjusted, seems in my experience to have good resistance to spoke breakage. Ive mentioned this often, but using those 2in Supremes to me was a real factor in being a lot easier on my 32h 26in rims on the Troll, especially given the range of roads I was on, and I was frankly amazed that no spokes broke the time I slightly dented my rear rim hitting a pothole pretty good my second day in Guatemala on a downhill--I attribute this a lot to all the factors, but very much so to the absorbtion the tire did in lessening the impact.
touch wood touch wood
11-17-19, 09:16 AM
#44
Senior Member
never tried the union tool. i found that if i tighten the lockring to 6-clicks past finger tight, i can remove with the wrench holding the cogs with a sock or old newspaper or whatever i find roadside.
don't mind the couple ounces of 6" crescent. many uses on tour.
11-17-19, 06:02 PM
#45
Crawler
thanks guys for the comments.
Staep for the specifics of your experiences. I did try to find out if I could buy one of these Unior parts, and sent the company an email to ask if they had any Canadian distributors or if I could purchase one or two from them (have one as a gift to someone), so hopefully will hear back.
TMSN, I recall your bolt loosening the lockring story.
I still like having a couple of ds and nds spokes with me, figuring that if I do have a problem, at least I'll have them when getting to a bike store if I go that route. I certainly liked having them with me on the latin american trips, but yes, I really should source one of these small removal tools for the inevitable at some point.
I agree though, that a good 32 or 36 spoked tough wheel, properly adjusted, seems in my experience to have good resistance to spoke breakage. Ive mentioned this often, but using those 2in Supremes to me was a real factor in being a lot easier on my 32h 26in rims on the Troll, especially given the range of roads I was on, and I was frankly amazed that no spokes broke the time I slightly dented my rear rim hitting a pothole pretty good my second day in Guatemala on a downhill--I attribute this a lot to all the factors, but very much so to the absorbtion the tire did in lessening the impact.
touch wood touch wood
Staep for the specifics of your experiences. I did try to find out if I could buy one of these Unior parts, and sent the company an email to ask if they had any Canadian distributors or if I could purchase one or two from them (have one as a gift to someone), so hopefully will hear back.
TMSN, I recall your bolt loosening the lockring story.
I still like having a couple of ds and nds spokes with me, figuring that if I do have a problem, at least I'll have them when getting to a bike store if I go that route. I certainly liked having them with me on the latin american trips, but yes, I really should source one of these small removal tools for the inevitable at some point.
I agree though, that a good 32 or 36 spoked tough wheel, properly adjusted, seems in my experience to have good resistance to spoke breakage. Ive mentioned this often, but using those 2in Supremes to me was a real factor in being a lot easier on my 32h 26in rims on the Troll, especially given the range of roads I was on, and I was frankly amazed that no spokes broke the time I slightly dented my rear rim hitting a pothole pretty good my second day in Guatemala on a downhill--I attribute this a lot to all the factors, but very much so to the absorbtion the tire did in lessening the impact.
touch wood touch wood
11-18-19, 08:05 AM
#46
Senior Member
Join Date: Jun 2014
Location: Ontario, Canada
Posts: 4,624
Bikes: iele Latina, Miele Suprema, Miele Uno LS, Miele Miele Beta, MMTB, Bianchi Model Unknown, Fiori Venezia, Fiori Napoli, VeloSport Adamas AX
Mentioned: 16 Post(s)
Tagged: 0 Thread(s)
Quoted: 1324 Post(s)
Liked 927 Times
in
640 Posts
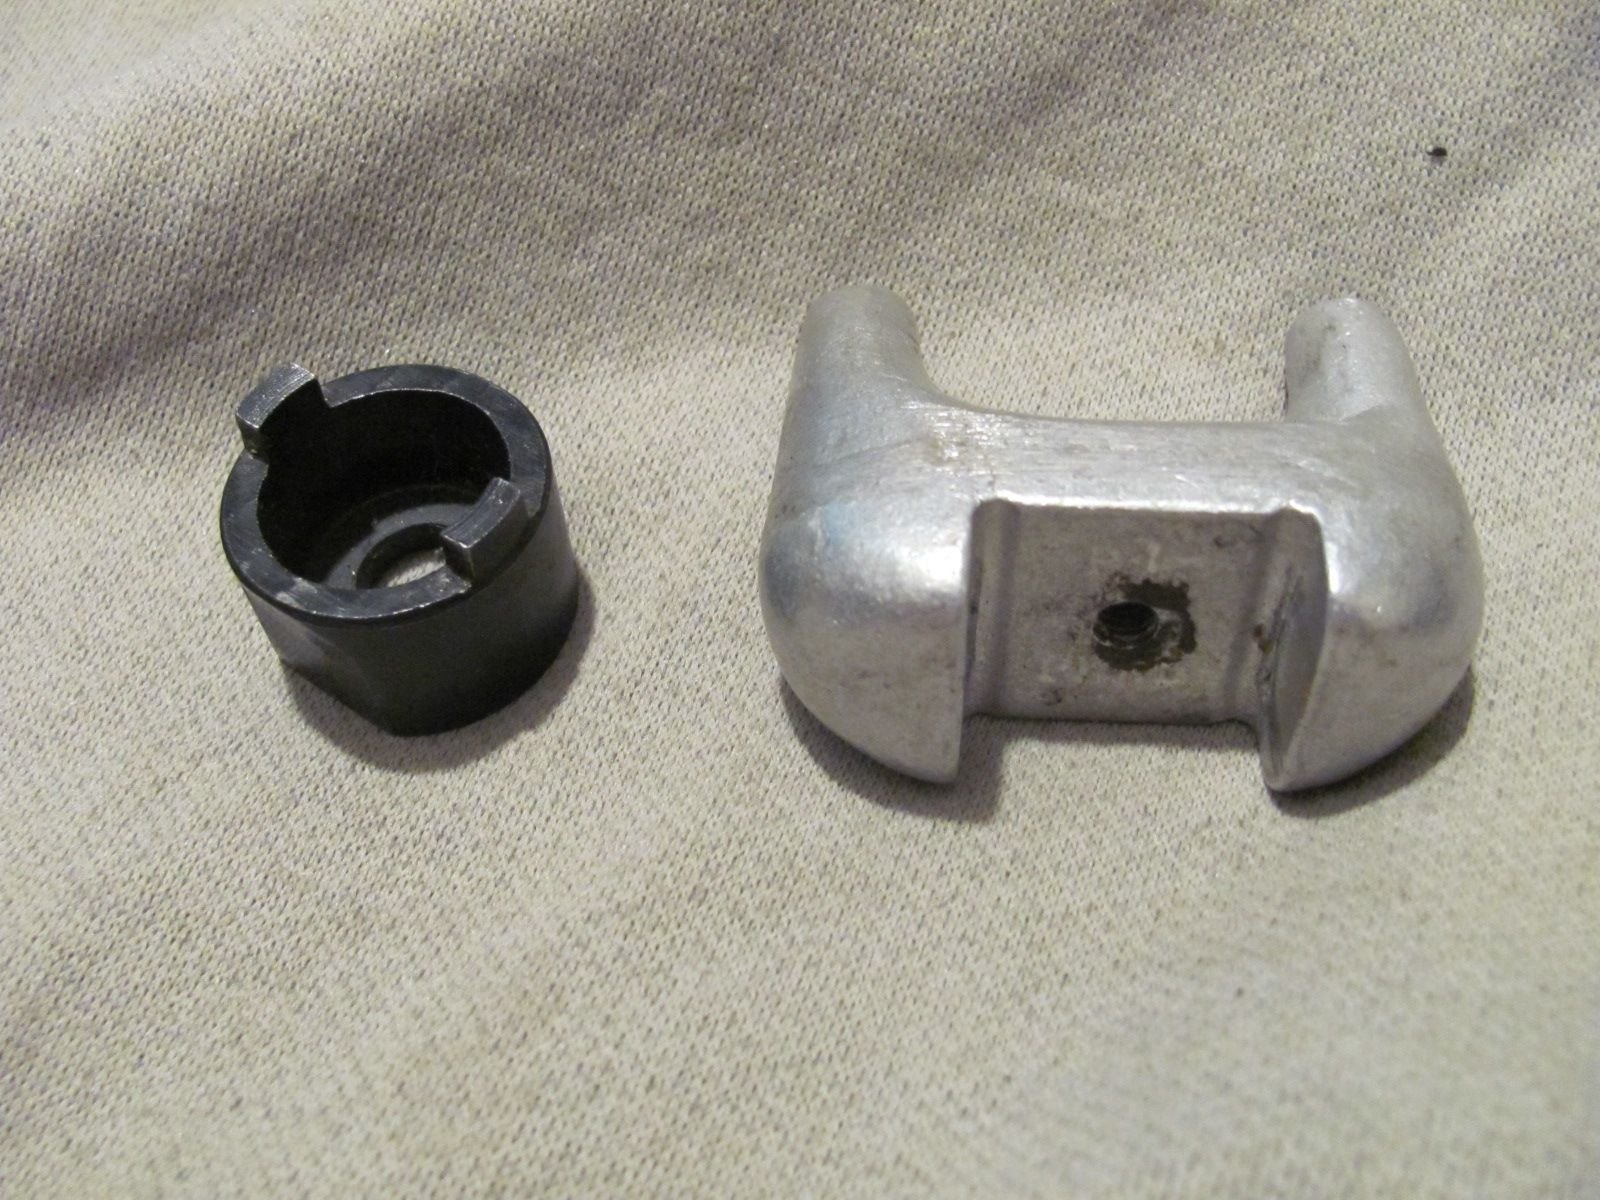
had a similar tool for removing freewheels - one side would hold the FW tool, the other had two posts that would fit either side of a fence or pipe or similar. piece of carp, broke after a couple uses, fw's spin on too tight, tool cracked in half.
never tried the union tool. i found that if i tighten the lockring to 6-clicks past finger tight, i can remove with the wrench holding the cogs with a sock or old newspaper or whatever i find roadside.
don't mind the couple ounces of 6" crescent. many uses on tour.
never tried the union tool. i found that if i tighten the lockring to 6-clicks past finger tight, i can remove with the wrench holding the cogs with a sock or old newspaper or whatever i find roadside.
don't mind the couple ounces of 6" crescent. many uses on tour.
Cheers
11-18-19, 08:28 AM
#47
Senior Member
why, yes, it looked exactly like that......other than it was in two pieces when i left it in a bin somewheres.
was running 7-spd freewheels, 4-bags, riding up mountain passes. that's a lotta torque - wasn't sure what was gonna go first......would the FW release, or would i pull some spokes thru the rim. turns out that aluminum tool wasn't up to the task.
was running 7-spd freewheels, 4-bags, riding up mountain passes. that's a lotta torque - wasn't sure what was gonna go first......would the FW release, or would i pull some spokes thru the rim. turns out that aluminum tool wasn't up to the task.
11-18-19, 08:35 AM
#48
Senior Member
Join Date: Jun 2014
Location: Ontario, Canada
Posts: 4,624
Bikes: iele Latina, Miele Suprema, Miele Uno LS, Miele Miele Beta, MMTB, Bianchi Model Unknown, Fiori Venezia, Fiori Napoli, VeloSport Adamas AX
Mentioned: 16 Post(s)
Tagged: 0 Thread(s)
Quoted: 1324 Post(s)
Liked 927 Times
in
640 Posts
why, yes, it looked exactly like that......other than it was in two pieces when i left it in a bin somewheres.
was running 7-spd freewheels, 4-bags, riding up mountain passes. that's a lotta torque - wasn't sure what was gonna go first......would the FW release, or would i pull some spokes thru the rim. turns out that aluminum tool wasn't up to the task.
was running 7-spd freewheels, 4-bags, riding up mountain passes. that's a lotta torque - wasn't sure what was gonna go first......would the FW release, or would i pull some spokes thru the rim. turns out that aluminum tool wasn't up to the task.
Cheers
11-18-19, 09:14 AM
#49
Mad bike riding scientist

Join Date: Nov 2004
Location: Denver, CO
Posts: 27,341
Bikes: Some silver ones, a red one, a black and orange one, and a few titanium ones
Mentioned: 152 Post(s)
Tagged: 1 Thread(s)
Quoted: 6200 Post(s)
Liked 4,200 Times
in
2,357 Posts
As noted above by Saddlesores, tire boot.
I forgot to mention with my photos of my spares that I make tire boots out of the Tyvek envelopes that US Postal Service uses, I pack one with each spare tube. The tire boots were free, they only cost me the few minutes spent with a scissors, so why not pack one with each tube? The tire boots were there, just did not show up in the photo.
I forgot to mention with my photos of my spares that I make tire boots out of the Tyvek envelopes that US Postal Service uses, I pack one with each spare tube. The tire boots were free, they only cost me the few minutes spent with a scissors, so why not pack one with each tube? The tire boots were there, just did not show up in the photo.
__________________
Stuart Black
Plan Epsilon Around Lake Michigan in the era of Covid
Old School�When It Wasn�t Ancient bikepacking
Gold Fever Three days of dirt in Colorado
Pokin' around the Poconos A cold ride around Lake Erie
Dinosaurs in Colorado A mountain bike guide to the Purgatory Canyon dinosaur trackway
Solo Without Pie. The search for pie in the Midwest.
Picking the Scablands. Washington and Oregon, 2005. Pie and spiders on the Columbia River!
11-18-19, 09:21 AM
#50
Mad bike riding scientist
Join Date: Nov 2004
Location: Denver, CO
Posts: 27,341
Bikes: Some silver ones, a red one, a black and orange one, and a few titanium ones
Mentioned: 152 Post(s)
Tagged: 1 Thread(s)
Quoted: 6200 Post(s)
Liked 4,200 Times
in
2,357 Posts
Typically I think 40 NM is recommended. That is about 30 foot pounds. If you don't pull more than about 30 pounds on the end of a 12" wrench you won't have any problem. I probably go on the light side when installing cassettes, but I have removed cassettes that were factory installed and had been on for a long time and cassettes that were installed by other people (including pros) to unknown tightness using the Unior tool and I never had a problem.
My point is that I think the tool's limitations are not that much of a worry other than to say it probably is a good idea to not over tighten your cassette (a good idea in any case). I don't think it is a case of needing to under tighten it or really worry about it at all. If you want to I am pretty sure you could tighten it to the proper torque an have no problems if you use the tool properly. To that end, I'd advise watching the video and doing a dry run or two to get the procedure down.
__________________
Stuart Black
Plan Epsilon Around Lake Michigan in the era of Covid
Old School�When It Wasn�t Ancient bikepacking
Gold Fever Three days of dirt in Colorado
Pokin' around the Poconos A cold ride around Lake Erie
Dinosaurs in Colorado A mountain bike guide to the Purgatory Canyon dinosaur trackway
Solo Without Pie. The search for pie in the Midwest.
Picking the Scablands. Washington and Oregon, 2005. Pie and spiders on the Columbia River!
Stuart Black
Plan Epsilon Around Lake Michigan in the era of Covid
Old School�When It Wasn�t Ancient bikepacking
Gold Fever Three days of dirt in Colorado
Pokin' around the Poconos A cold ride around Lake Erie
Dinosaurs in Colorado A mountain bike guide to the Purgatory Canyon dinosaur trackway
Solo Without Pie. The search for pie in the Midwest.
Picking the Scablands. Washington and Oregon, 2005. Pie and spiders on the Columbia River!

