


Cloth tape / bar end help
 08-03-20, 08:41 AM
#1
Junior Member
Thread Starter
Cloth tape / bar end help
Hi all,
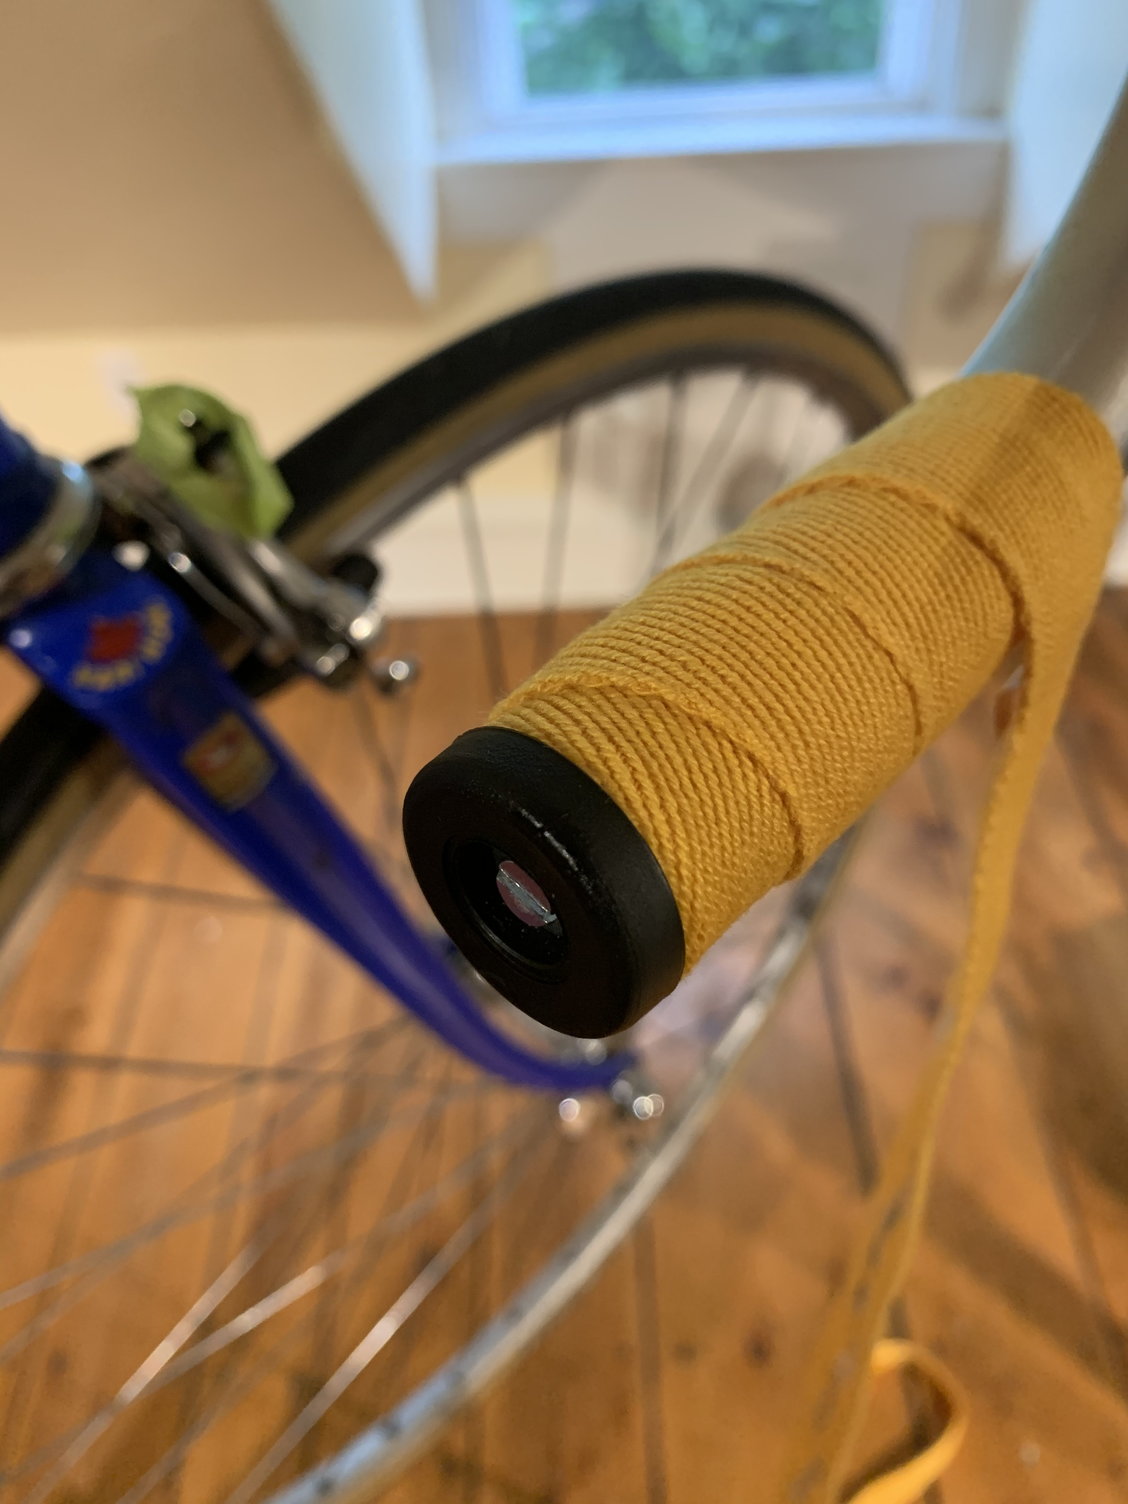
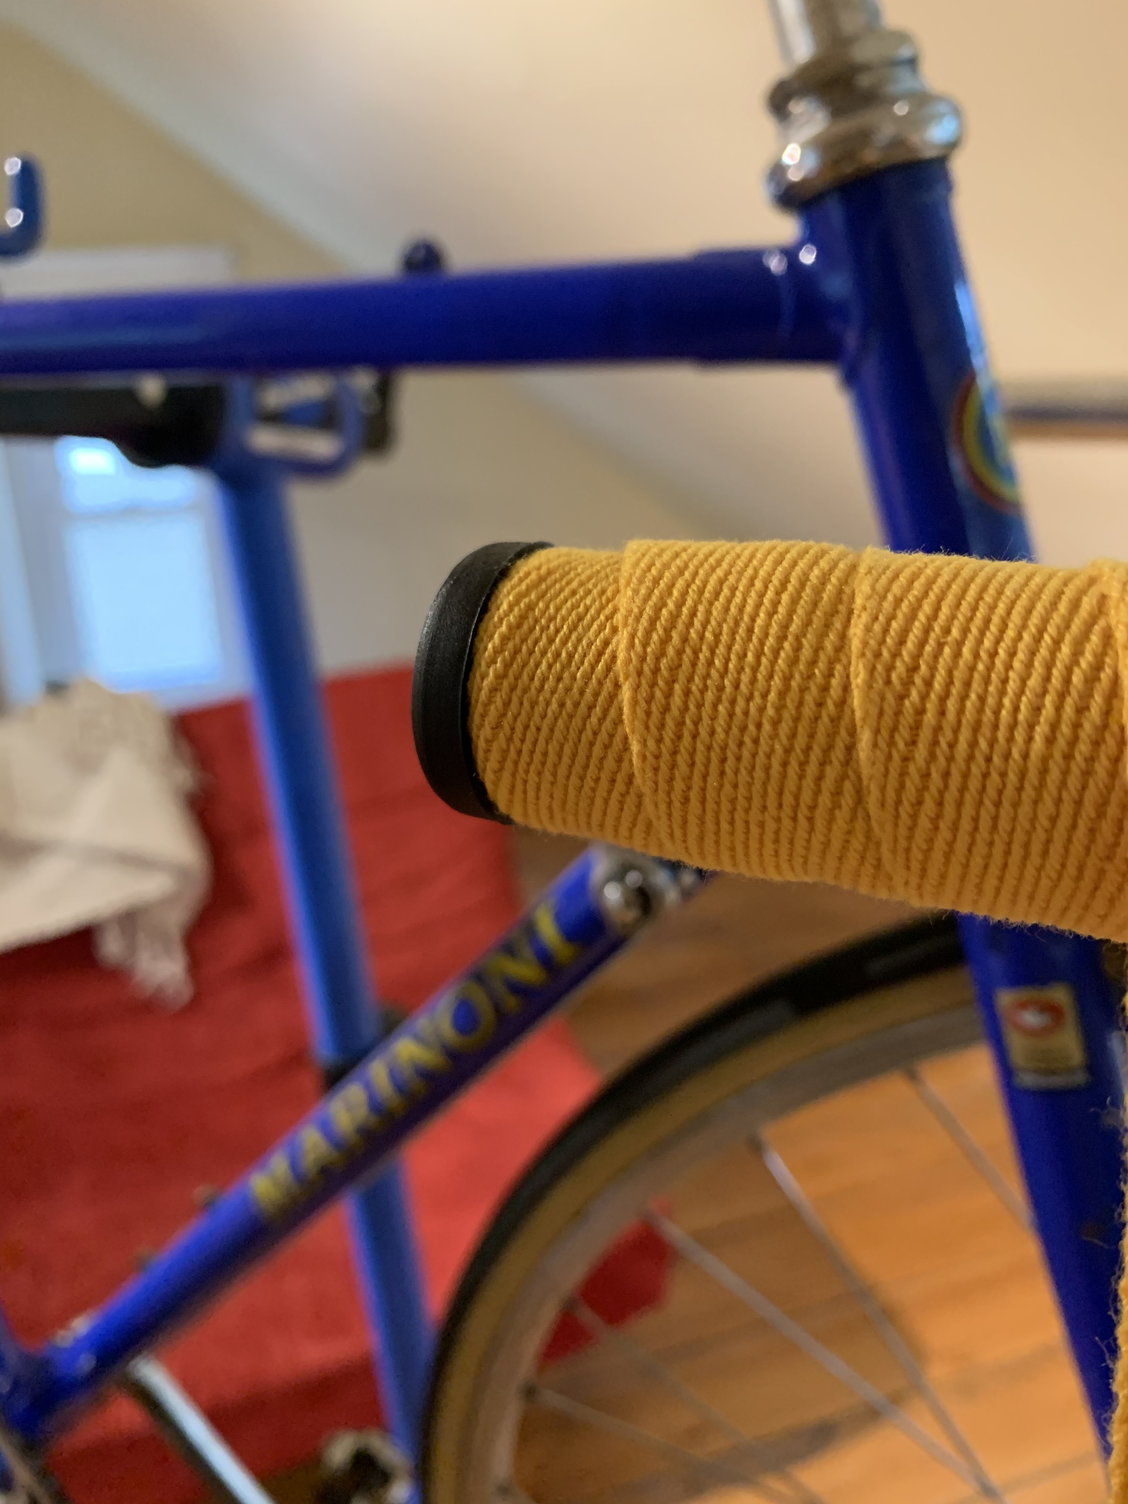
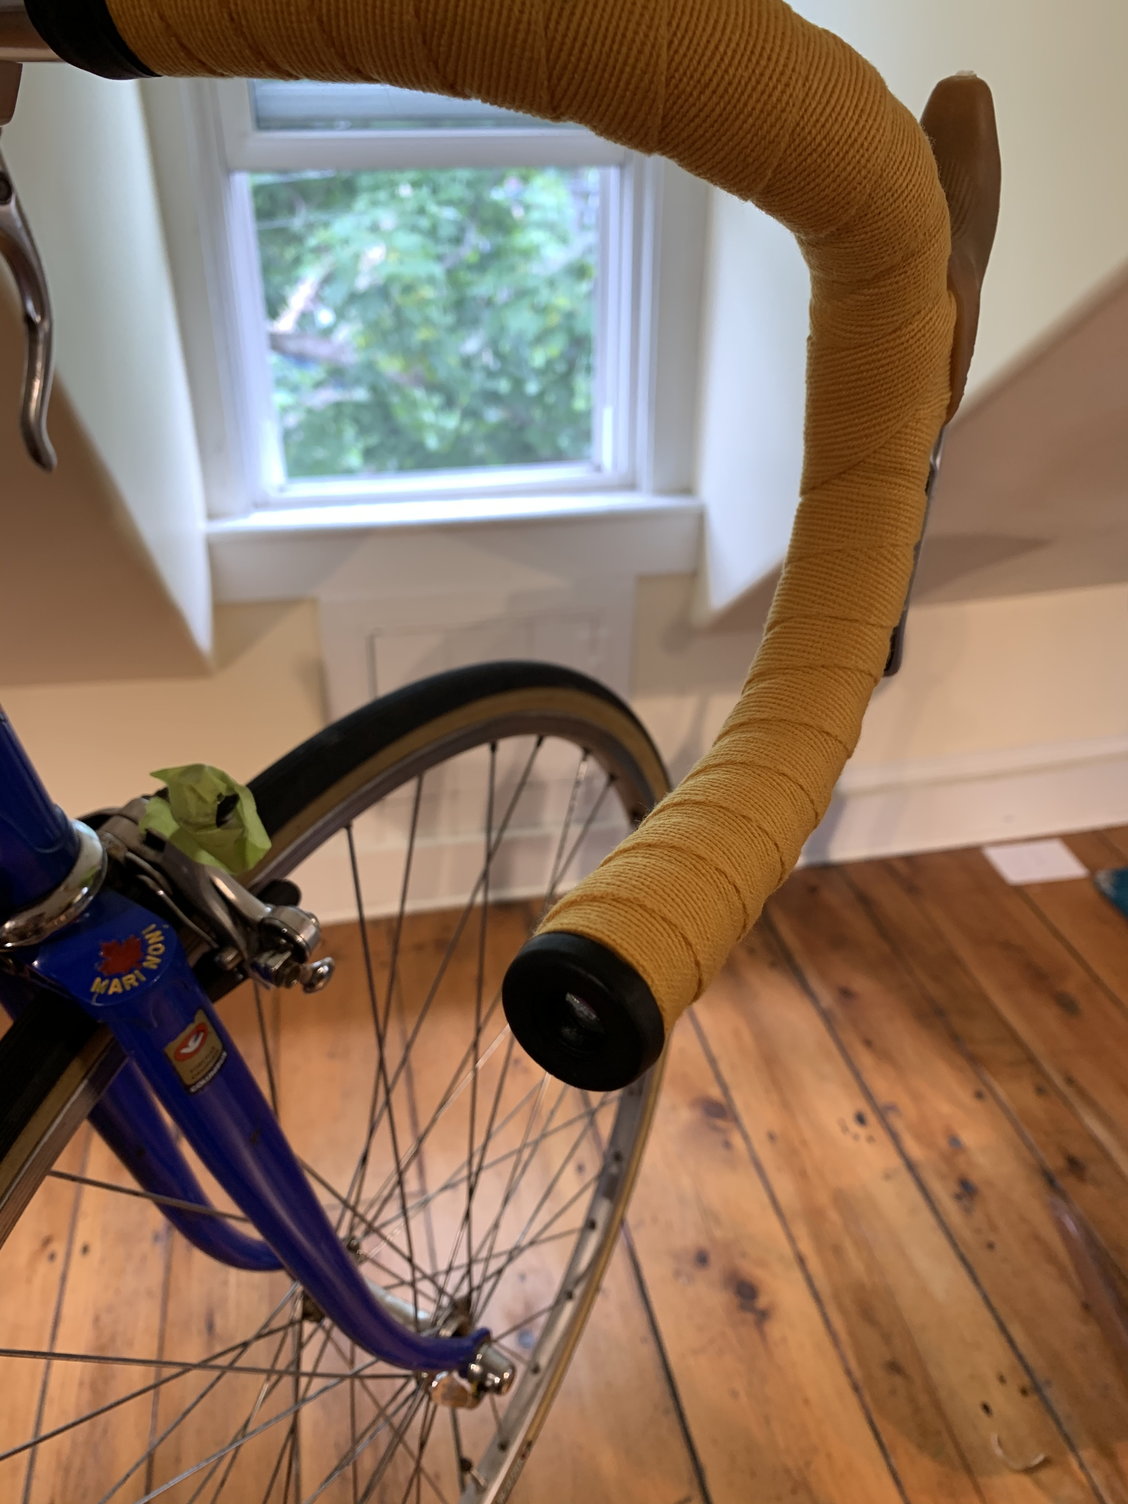
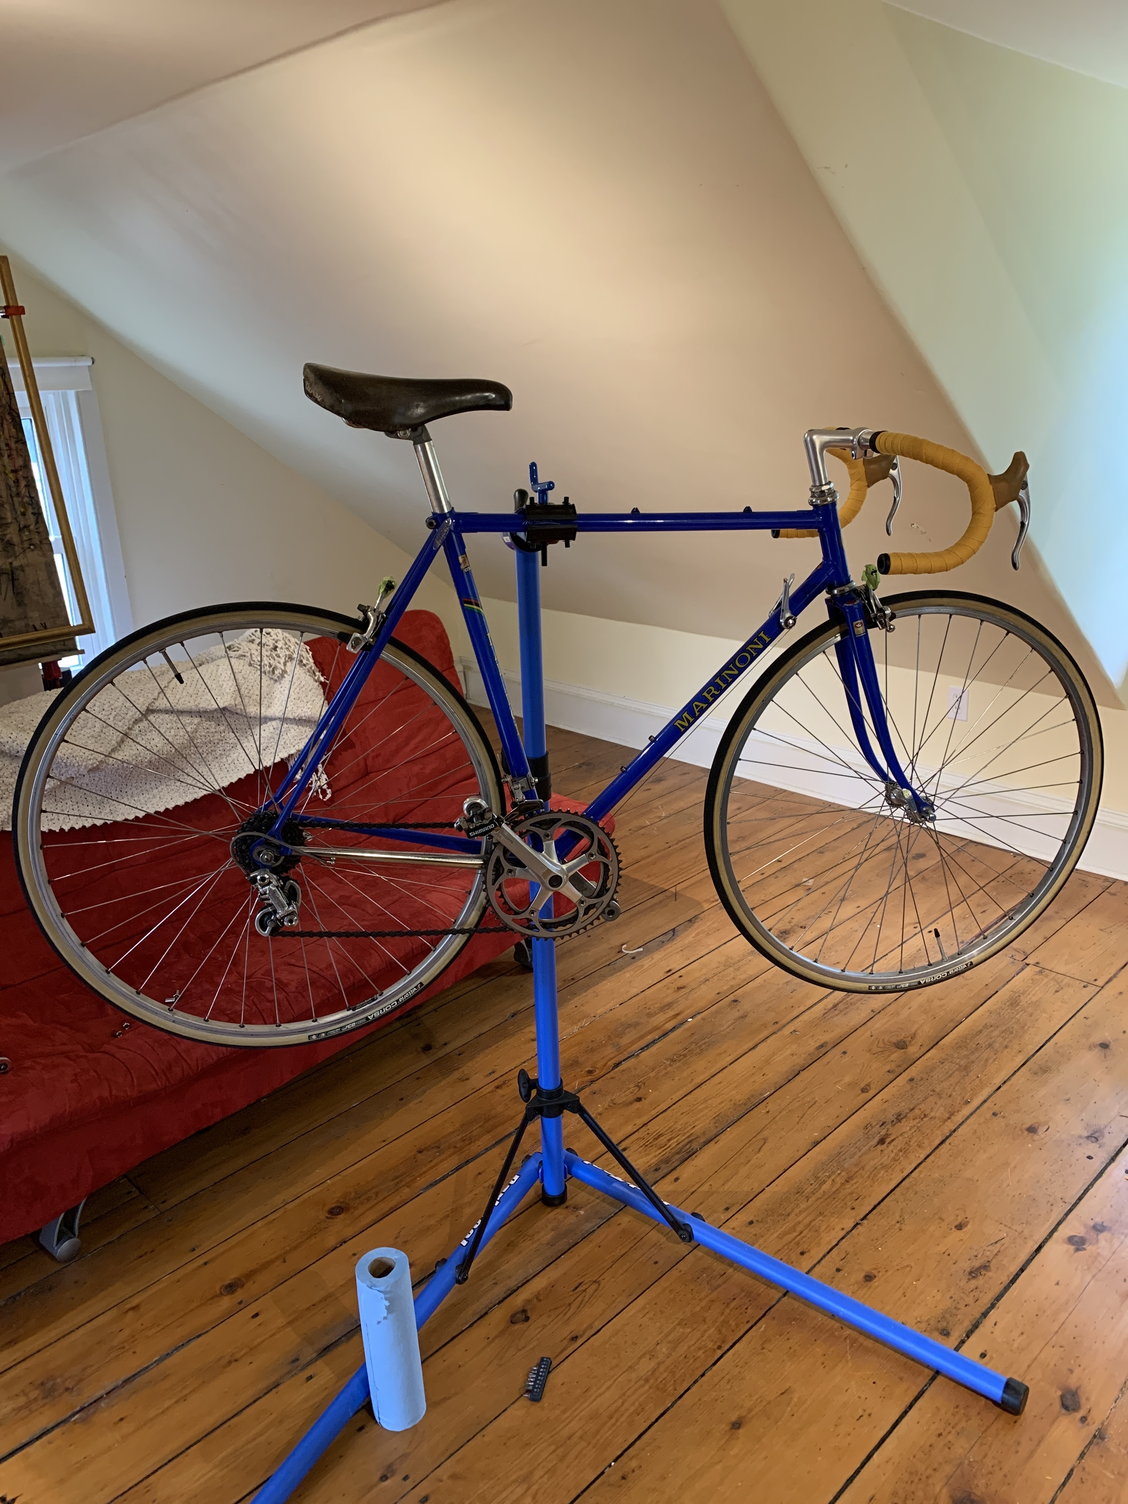
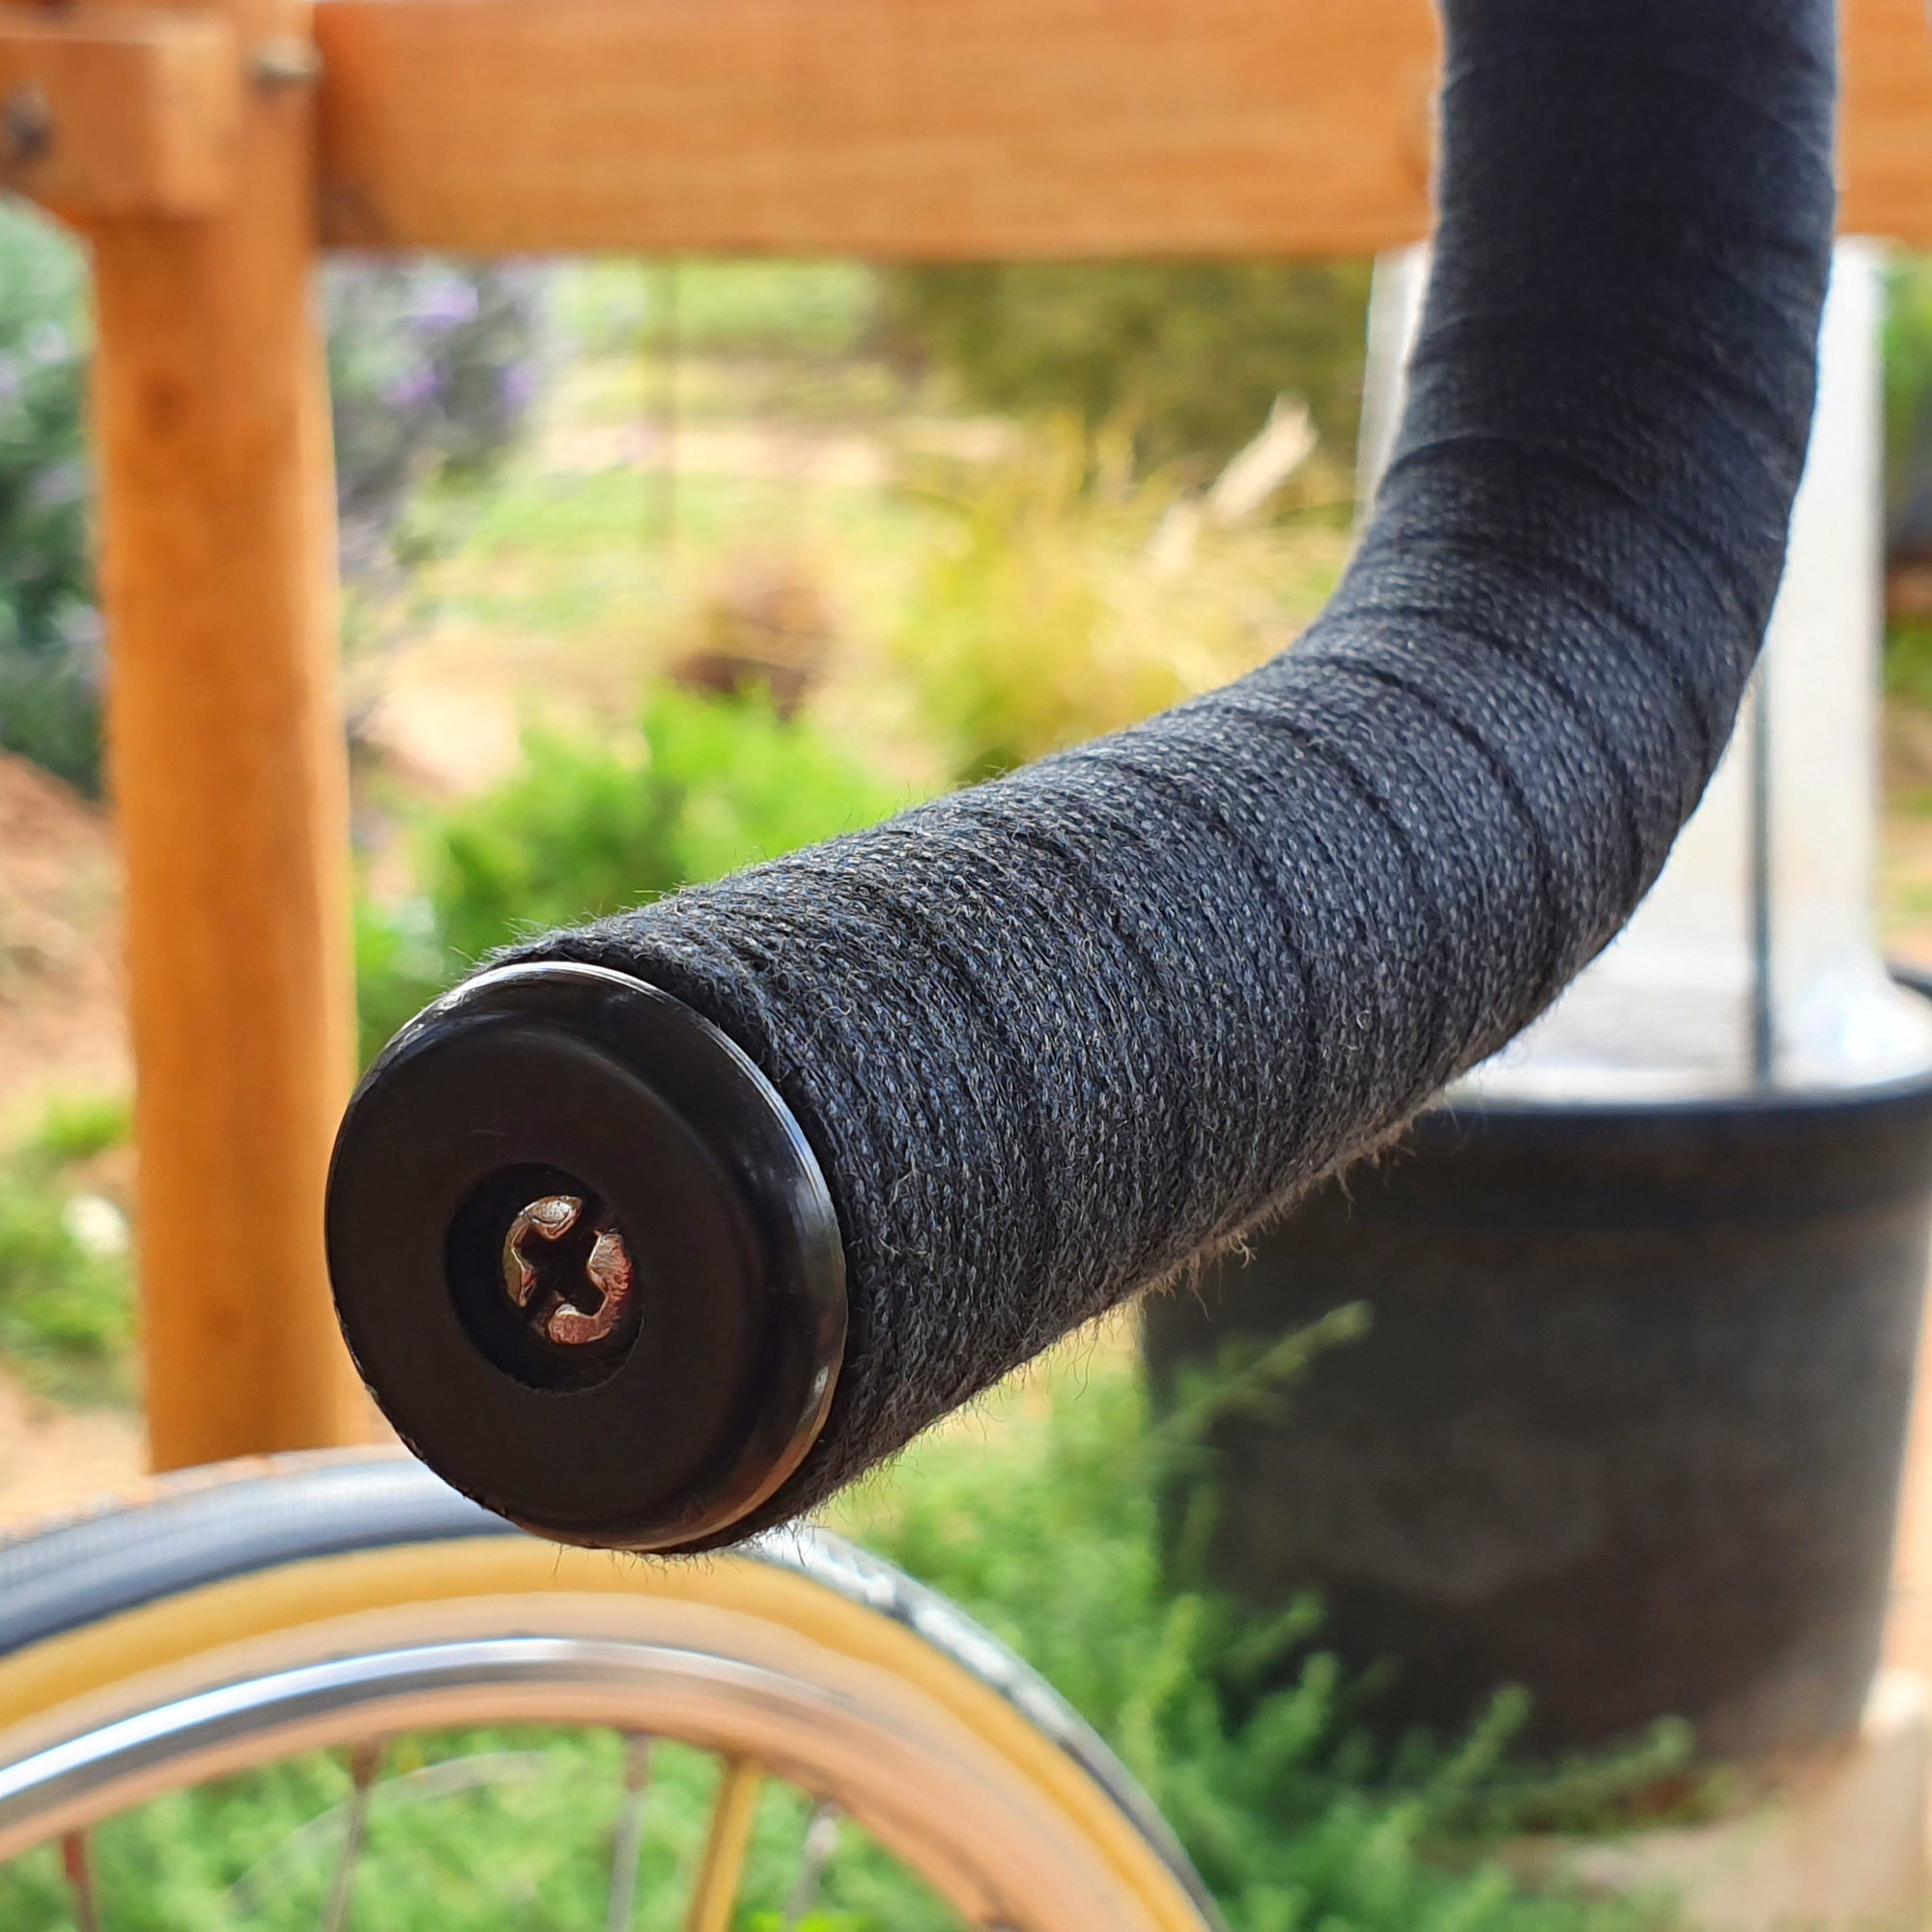
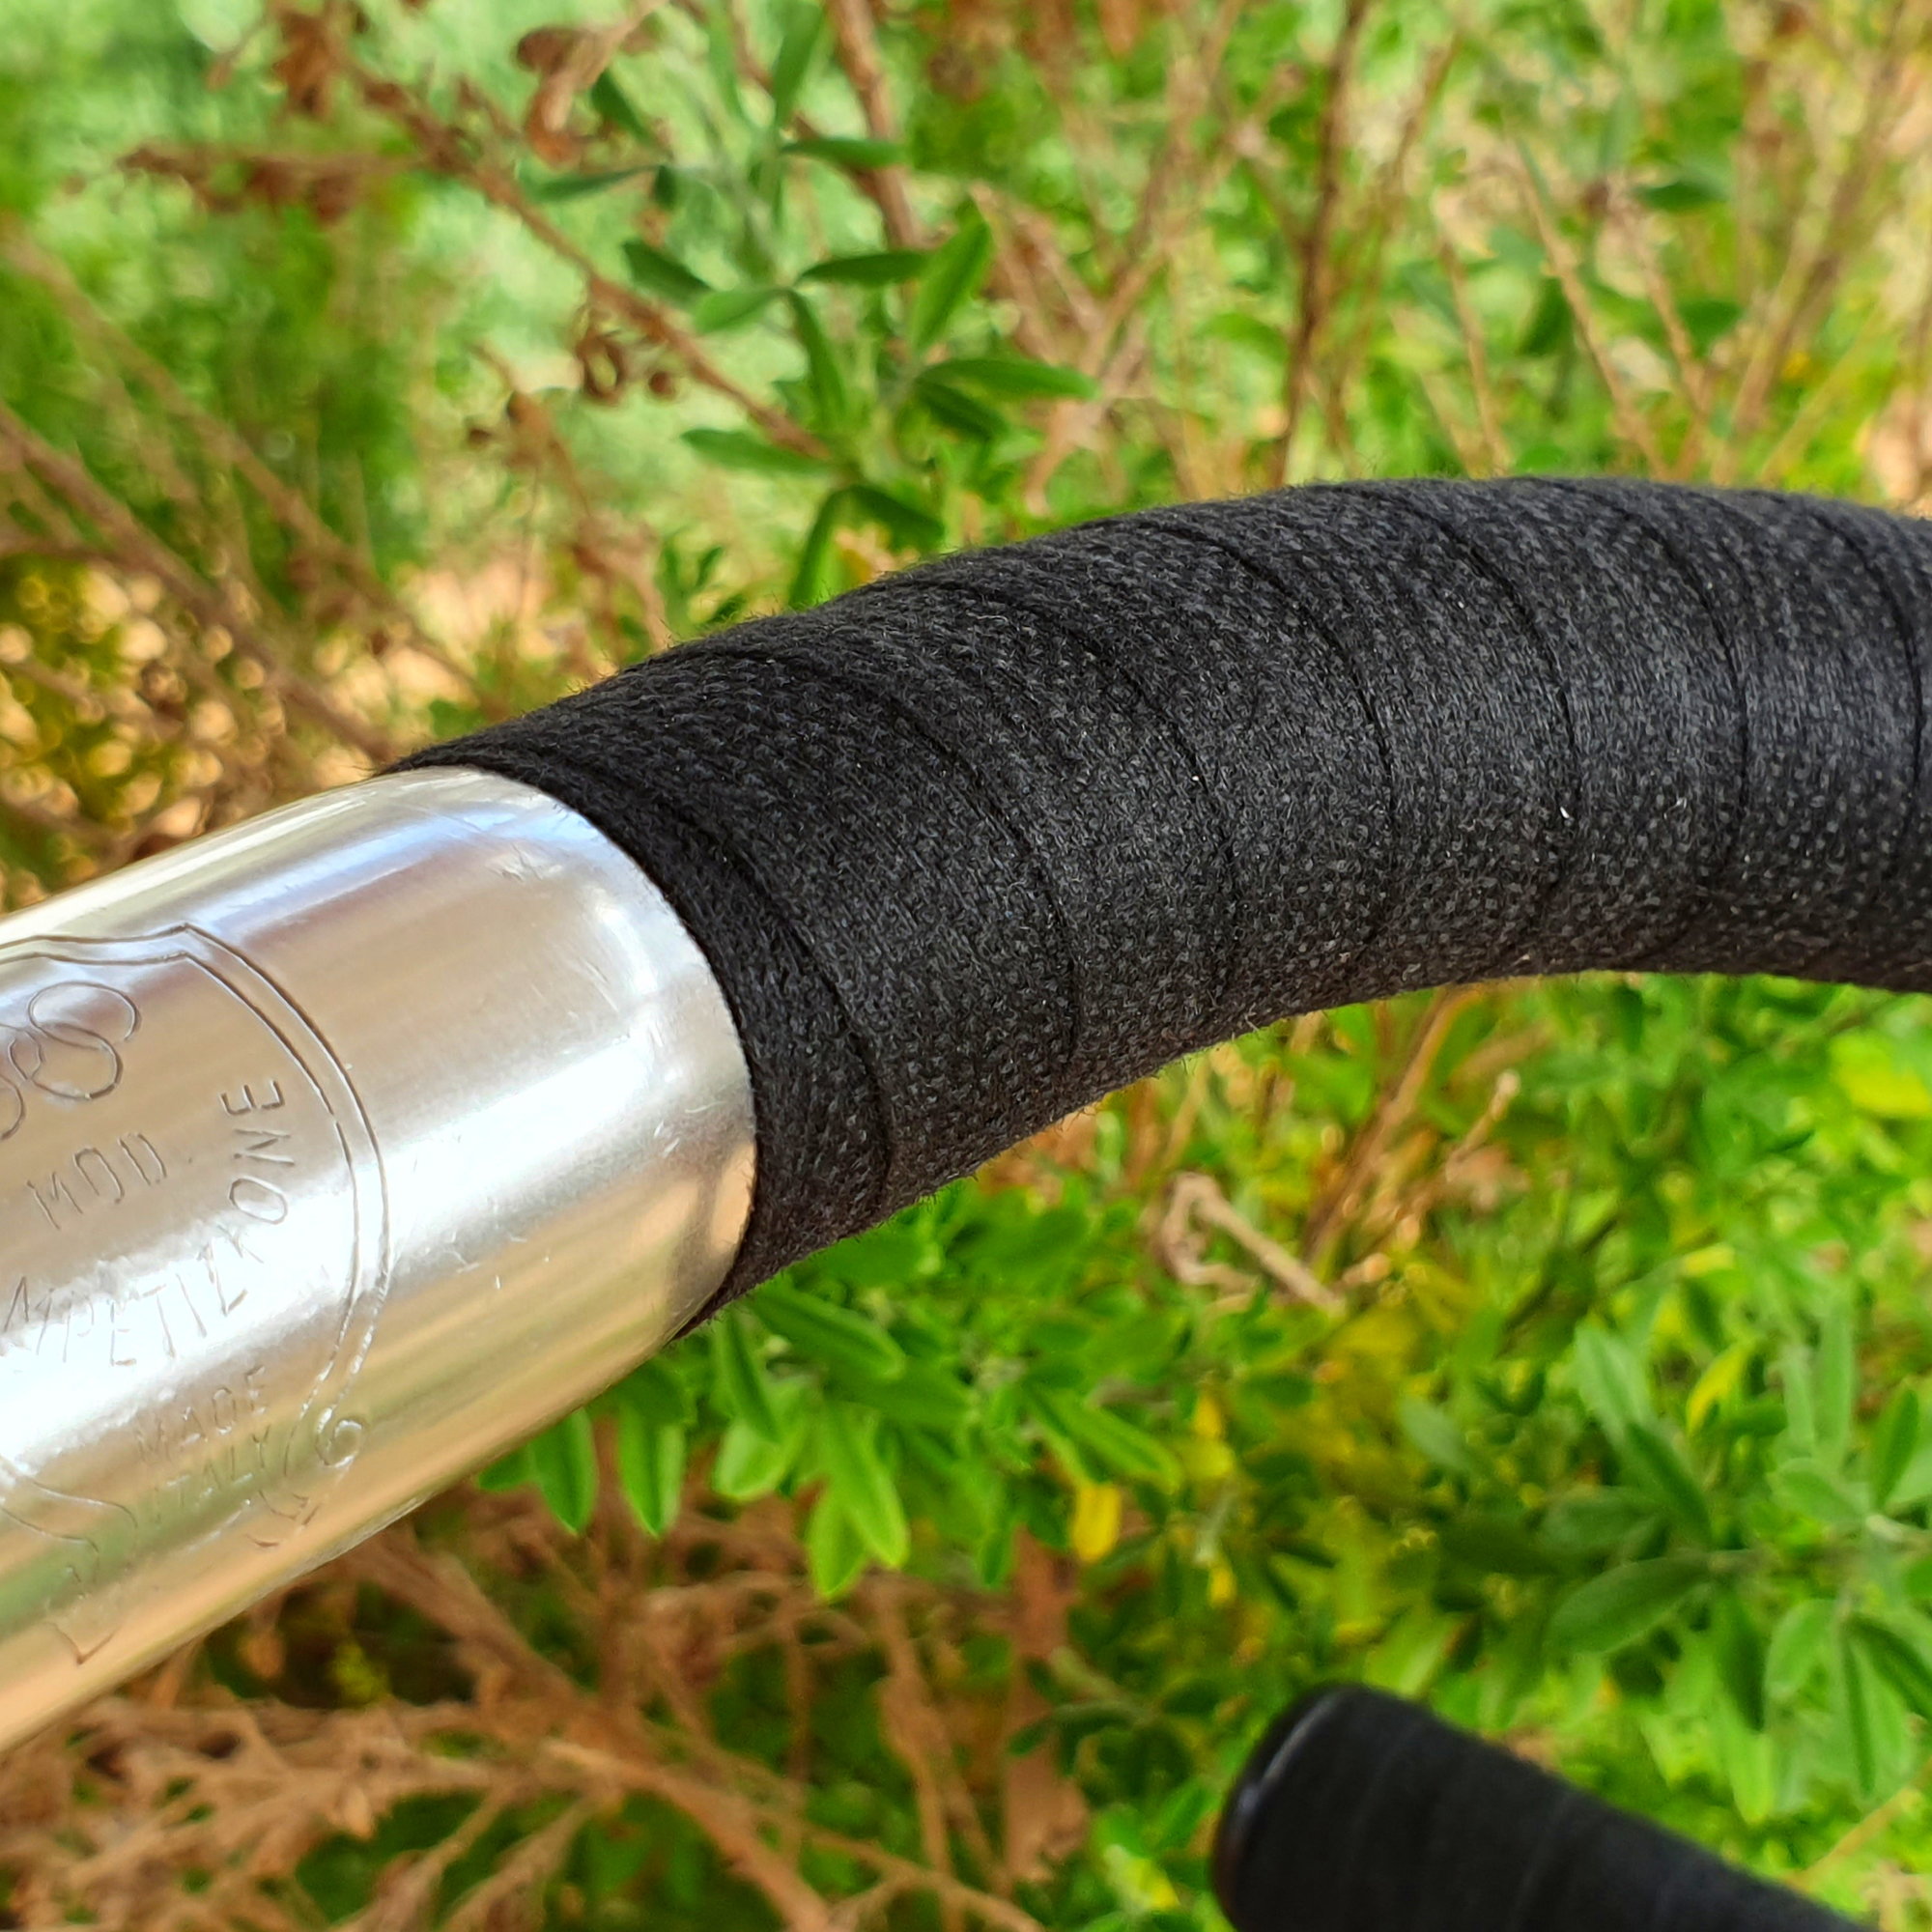
I'm installing cloth tape on my bike with a velox style plug and I’m wondering if I need to tuck the cloth into the bar end? Doesn’t fit that way it seems.
here are some photos but keep in mind it’s just a test fit - I haven’t cut and angles or wrapped it too tight.
Brake cables are not in yet but from what I can tell that shouldn’t matter with this style.
Last edited by kidadam; 08-03-20 at 09:09 AM.


Likes For ofajen:
08-03-20, 10:32 AM
#4

Senior Member
Join Date: Oct 2017
Posts: 2,040
Mentioned: 26 Post(s)
Tagged: 0 Thread(s)
Quoted: 837 Post(s)
Liked 1,080 Times
in
521 Posts
I’ve always found the biggest benefit of cloth to be that you can wrap from the top down, then you don’t need tape or twine at the top. And yeah then tuck on at the bottom.
Likes For polymorphself:
08-03-20, 10:35 AM
#5
Senior Member
Join Date: Apr 2007
Location: Ottawa, Canada
Posts: 777
Bikes: Raleigh Classic 15, 84; Miyata 912, 85; Miyata Ridge Runner SE, 85; Miyata 610, 86; Miyata 100M, 86; Miyata Valley Runner, 88; Miyata Triple Cross, 89; GT Karakoram, 90; Miyata Elevation 300, 91; Marinoni Touring, 95; Long Haul Trucker, 2013
Mentioned: 9 Post(s)
Tagged: 0 Thread(s)
Quoted: 159 Post(s)
Liked 133 Times
in
80 Posts
Yes, start at the top, and tuck in at the bar ends. No tape, no worries.
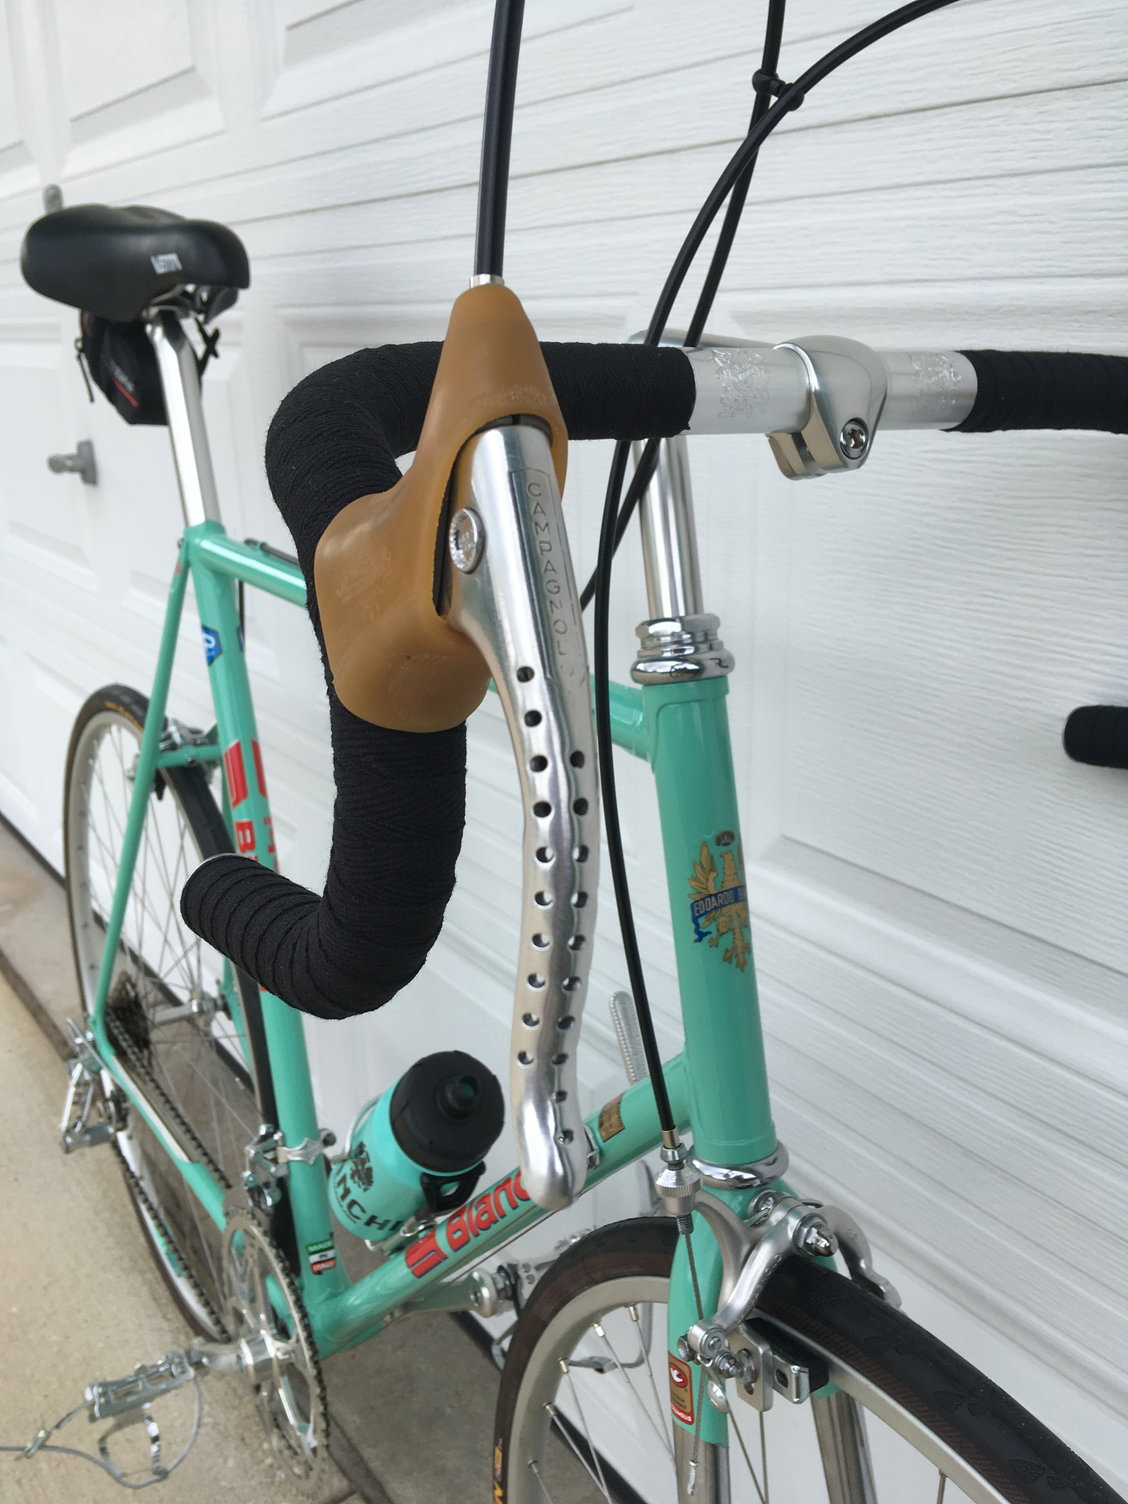
Marinoni, eh?
Marinoni, eh?

Likes For John Nolan:
08-03-20, 10:37 AM
#6
Senior Member
Traditionally, the end is tucked in. However, if you are starting from the bottom, it isn't really necessary. In the days when cotton tape was king, most people taped starting from the top, and tucking in the loose end at the bottom was normal.
If you want to tuck the end in, wrap really hard stretching the tape. This should make it sort of bend in. Cut off excess. Leave maybe 1/4"-3/8" past the end of the bar. Push it in with your finger. Force in the Velox plug. OK to use a mallet. OK to use a little water for lube. Screw it down to hold it.
Occasionally you'll run into a bar that is slightly undersized and/or thicker walled, and a standard velox plug will never fit without sanding or whittling it down a little.
Likes For Salamandrine:
08-03-20, 10:59 AM
#7
Junior Member
Thread Starter
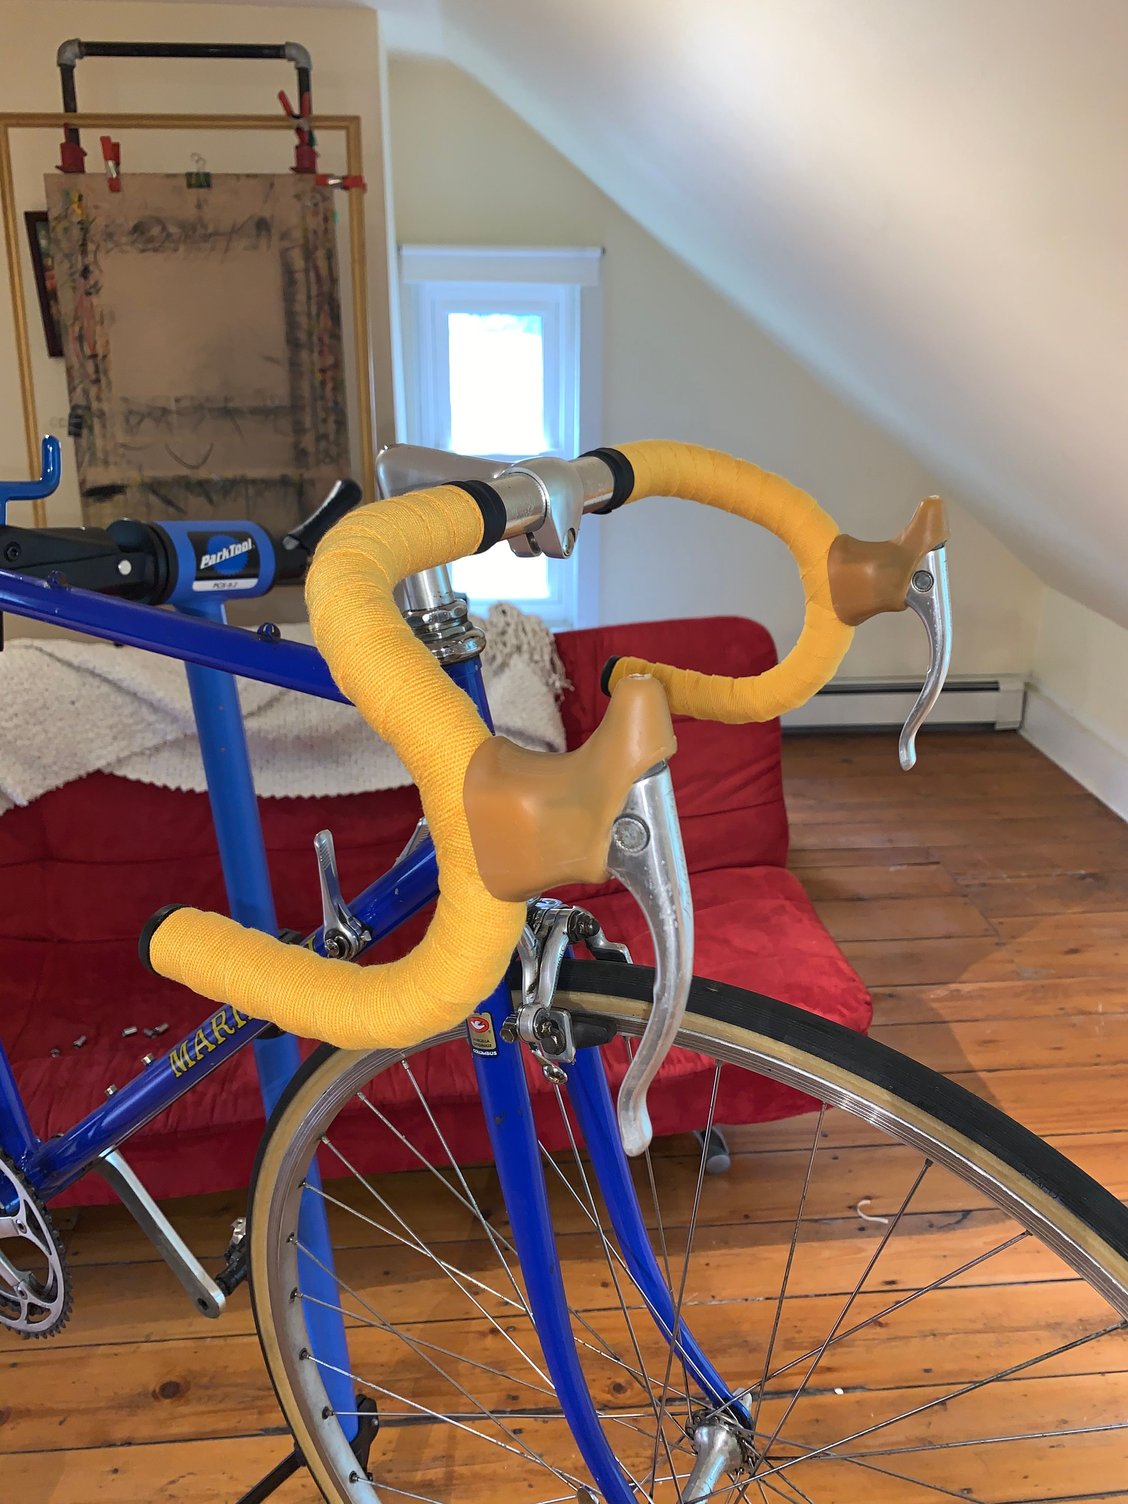
Hmmm I did see that starting at the top is possible but I wasn’t too sure about it. I just completed one side and actually found it to be pretty nerve racking. It took weeks for me to get the stuff. It is OK - maybe the second side will be improved. Pausing for a beer break.
it’s an 82/83 Marinoni (commissioned in 82 - delivered in 83) for a racer.

it’s an 82/83 Marinoni (commissioned in 82 - delivered in 83) for a racer.
Last edited by kidadam; 08-03-20 at 11:03 AM.
08-03-20, 11:02 AM
#8
Cheerfully low end
Join Date: Jun 2020
Posts: 1,971
Mentioned: 5 Post(s)
Tagged: 0 Thread(s)
Quoted: 644 Post(s)
Liked 1,044 Times
in
667 Posts
This go around, I taped from the bottom to the brake hood and stopped on the outside of the hood, cut the tape and then started from there, right next to it under the outside of the hood, going under and then wrapping the ramp and top in the same way as if I had gone around the hood on the inside.
Hope that makes sense. Somehow that seems easier with cloth tape than going around the inside, like I would with cork tape. Cloth tape handles differently.
Otto
08-03-20, 11:11 AM
#9
Senior Member
Join Date: Oct 2017
Posts: 2,040
Mentioned: 26 Post(s)
Tagged: 0 Thread(s)
Quoted: 837 Post(s)
Liked 1,080 Times
in
521 Posts
Not bad for a first try! Top down will definitely be easier and cleaner looking. Also, unless it’s a period thing, you can get good cloth tape from newbaums in that color and won’t have to wait weeks!
This is the tutorial I used to learn it, it’s very good (as are all of his videos):
This is the tutorial I used to learn it, it’s very good (as are all of his videos):
Last edited by polymorphself; 08-03-20 at 11:14 AM.
Likes For polymorphself:
Likes For kidadam:
08-03-20, 12:00 PM
#11
Member
Join Date: Jul 2020
Posts: 29
Mentioned: 1 Post(s)
Tagged: 0 Thread(s)
Quoted: 7 Post(s)
Likes: 0
Liked 21 Times
in
8 Posts
Hello, I take the opportunity to ask in addition to the cotton or fabric tape ... do you put something else on top? Here in Argentina, old cyclists apply two-layer shellac (goma laca).
Likes For Petit Breton:
08-03-20, 12:50 PM
#13
Senior Member

Join Date: Jan 2015
Location: Los Angeles
Posts: 4,692
Bikes: 82 Medici, 2011 Richard Sachs, 2011 Milwaukee Road
Mentioned: 55 Post(s)
Tagged: 0 Thread(s)
Quoted: 1946 Post(s)
Liked 2,004 Times
in
1,105 Posts
Nice job. Bottom up is the way to go so you don’t unravel the tape as your hands press down. And I think tressostar is Plenty long enough and nicer on my ungloved hands
__________________
I don't do: disks, tubeless, e-shifting, or bead head nymphs.
I don't do: disks, tubeless, e-shifting, or bead head nymphs.
Likes For schwinnderella:
08-03-20, 02:12 PM
#15
Bike Butcher of Portland

Join Date: Jul 2014
Location: Portland, OR
Posts: 11,630
Bikes: It's complicated.
Mentioned: 1299 Post(s)
Tagged: 0 Thread(s)
Quoted: 4677 Post(s)
Liked 5,790 Times
in
2,279 Posts
This is my favorite way to finish off cotton tape. Most of my bikes are finished off with shellac. I find that I can get many seasons out of the same bar tape. When it starts looking worn and dirty, it's easy to clean with a bit of alchol, then add another coat of shellac. The finish is nearly indestructable as the shellac "glues" the tape together.
__________________
If someone tells you that you have enough bicycles and you don't need any more, stop talking to them. You don't need that kind of negativity in your life.
If someone tells you that you have enough bicycles and you don't need any more, stop talking to them. You don't need that kind of negativity in your life.
Likes For gugie:
08-03-20, 05:50 PM
#16
Junior Member
Thread Starter
Both colour schemes are online to compare on vintage colnagos.
08-03-20, 06:49 PM
#17
Senior Member
Join Date: Jan 2016
Posts: 3,434
Mentioned: 33 Post(s)
Tagged: 0 Thread(s)
Quoted: 870 Post(s)
Liked 2,264 Times
in
1,268 Posts
Those are my favorite end plugs and yes tuck in, it is worth the effort. Start at the top and wrap so that your grip “tightens” the wrap. With a lighter color I would shellac to try and keep clean.
Likes For Kabuki12:
08-03-20, 07:14 PM
#18
Senior Member

Join Date: Mar 2014
Location: City of Angels
Posts: 4,867
Bikes: A few too many
Mentioned: 42 Post(s)
Tagged: 1 Thread(s)
Quoted: 1360 Post(s)
Liked 2,175 Times
in
1,180 Posts
OP,
It may have already been said, but I would start at the top and wrap down...that way I do not need any tape at the top of the bar.
JM2C's, Ben
It may have already been said, but I would start at the top and wrap down...that way I do not need any tape at the top of the bar.
JM2C's, Ben
Likes For xiaoman1:
08-03-20, 08:46 PM
#19
Senior Member
Join Date: Dec 2015
Location: Menomonee Falls, WI
Posts: 1,832
Bikes: 1984 Schwinn Supersport, 1988 Trek 400T, 1977 Trek TX900, 1982 Bianchi Champione del Mondo, 1978 Raleigh Supercourse, 1986 Trek 400 Elance, 1991 Waterford PDG OS Paramount, 1971 Schwinn Sports Tourer, 1985 Trek 670
Mentioned: 7 Post(s)
Tagged: 0 Thread(s)
Quoted: 603 Post(s)
Liked 1,061 Times
in
533 Posts
If the plug is a tight fit a rubber mallet comes in handy. Top down with adhesive tape is a no-brainer, never had it unravel gripping the bars. Prefer a clean look at the top of the bars.
Tim
Tim
08-04-20, 05:04 AM
#20
Junior Member
Thread Starter
I don’t think the adhesive on velo-orange is good for that to be honest. It’s a single small stripe in the middle of the cloth.


Likes For jbchybridrider:
08-04-20, 05:59 AM
#22
Senior Member

Join Date: May 2008
Location: Fredericksburg, Va
Posts: 9,578
Bikes: '65 Frejus TDF, '73 Bottecchia Giro d'Italia, '83 Colnago Superissimo, '84 Trek 610, '84 Trek 760, '88 Pinarello Veneto, '88 De Rosa Pro, '89 Pinarello Montello, '94 Burley Duet, 97 Specialized RockHopper, 2010 Langster, Tern Link D8
Mentioned: 73 Post(s)
Tagged: 0 Thread(s)
Quoted: 1606 Post(s)
Liked 2,209 Times
in
1,102 Posts
It is challening the first, second, third.... multiple times! BITD I always wrapped top down. Advice above all good. One approach I use is to make the overlaps even is at the bends make the overlap the same as the flat at the flat part of the bend. In other words, overlap the same at the bends on the outside.. Transitions are fun too. Then on the top, last radius, overlap evenly in the top of the bar bend. This cause the tape to overlap a lot on the inside and less on the outside but look OK all around.
I never know how long the tape is and therefore guess the angle of the wrap and the overlap. If it is short or too long, start over.
I never know how long the tape is and therefore guess the angle of the wrap and the overlap. If it is short or too long, start over.
__________________
Bikes don't stand alone. They are two tired.
Bikes don't stand alone. They are two tired.
Likes For SJX426:
08-04-20, 06:33 AM
#23
Cheerfully low end
Join Date: Jun 2020
Posts: 1,971
Mentioned: 5 Post(s)
Tagged: 0 Thread(s)
Quoted: 644 Post(s)
Liked 1,044 Times
in
667 Posts
It now occurs to me that you could tape the tops starting from the top and tape the drops starting from the bar end and leave the ends of both sections snugly taped to the outside of the brake lever and tucked under the hood, much as I did, but using the bar lever as the destination for both parts of the wrap.
That way you have the clean look of starting from the top and the simplicity of starting from the bottom without having to tuck inside the bar end or having to use tape or twine to secure the top.
Probably not traditional enough for some, but I think it’s another good option.
Otto
That way you have the clean look of starting from the top and the simplicity of starting from the bottom without having to tuck inside the bar end or having to use tape or twine to secure the top.
Probably not traditional enough for some, but I think it’s another good option.
Otto
08-04-20, 08:26 AM
#24

Disraeli Gears

I am surprised to see the number of "wrap tops to ends" posts here; it may indeed be vintage, when Eddy's mechanics put a fresh wrap of pristine white tape on his bike each morning (taking longevity of the wrap out of the equation). That's what I did when I first had a "Disraeli gears" bike, but over the years realized that hand grasp lifted the edges of the tape wraps, so with further investigation I've developed a confirmed opinion is that it's better to go "ends to tops", starting on the underside at the bar's open end; and wrapping clockwise on the right bar (looking from the rear, the wrap direction being that your fingers follow when grasping the drop while riding) -- IOW, inside to outside over the top, and then changing direction at the lever (by wrapping a half turn around the outside of lever housing there) to change the wrap rotation to "outside to inside over the top". Repeat for left bar, symmetrically of course.
For bars that are wide (44 or 46 cm), I sometimes run out of tape such as Velox. 3 rolls can do the trick, though, with splicing at the brake hoods (as suggested by the Rivendell video linked-to below). Also, a double wrap at the tops, where I do most of my grasping, is an idea I would like to try (suggested, I think, by rhm ). I also put a strip of tape from one side of the brake hood around the bar and up the other side, as shown in the Riv video, to eliminate gapping there. I'm in favor of the twine finish at the center barrel, done pretty much in the fashion of Rivendell (also linked-to below).
Some of this "revisionist" handlebar wrap lore:
St. Sheldon, as interpreted by John Allen: https://www.sheldonbrown.com/handlebar-tape.html with an inconclusive (perhaps rendering it unnecessary) commentary at https://www.sheldonbrown.com/handlebar-tape.html#nerdy
I believe that the upshot of Sheldon's method, unfortunately obscured by John Allen's supposed improvements, is what I've described above. Allen's description "Sheldon generally started from the underside of the bar with the tape feeding outwards." is (to me) murky because he doesn't clarify whether "outwards" is "from the bottom" or "over the top". I believe it's the latter.
Park Tool (bottom up, with variations): https://www.parktool.com/blog/repair...tion-drop-bars
BF "mechanics" thread from a decade ago; opinions vary, but it seems to me the preponderance support the description above: https://www.bikeforums.net/bicycle-m...direction.html
Rivendell video instructional: https://www.bikeforums.net/bicycle-m...direction.html
Note that they start "outside to inside over the top" at the end of the drop, unlike the description above, and unaccountably cut the tape at the brake housing (while appearing to keep the wrap rotation WRT the tube the same). That accomplishes what's good for the tops of the bars, but means that when using the drops (which I seldom do) your grasp will tend to loosen or unwind the wrap, rather than tightening it, relative to the tape coming from the brake lever.
And finally, the twine finish: https://docs.google.com/open?id=0Bze...Y5MzBmMDJkMjU2 Now that's vintage!
None of this is critical, of course, compared to having something tractile on your bars, and as always, YMMV.
Last edited by Charles Wahl; 08-04-20 at 09:27 AM.
08-04-20, 08:50 AM
#25
Senior Member
Yeah, the insistence that “top down is correct” on this forum always cracks me up. I always wrap bottom up, works perfectly for me.
Looks great by the way.
Looks great by the way.

