


Fastening a Pinarello headbadge
 09-30-19, 07:44 AM
#1

I never finish anyth
Thread Starter

Join Date: Jul 2010
Location: Western KY
Posts: 1,114
Bikes: 2008 Merckx LXM, 2003 Giant XTC mtb, 2001 Lemond Alpe d'Huez, 1997 Lemond Zurich, 1989 Cannondale ST, 1988 Masi Nuovo Strada, 1983 Pinarello Turismo
Mentioned: 63 Post(s)
Tagged: 0 Thread(s)
Quoted: 294 Post(s)
Liked 137 Times
in
86 Posts
Fastening a Pinarello headbadge
I think these are the right "screws" to fasten a headbadge to the headtube. They're not actually screws, the head is round like a rivet and they have helical threads that cause it to turn as it is tapped into place. There is no slot in the head.
https://www.mcmaster.com/drive-screws
Any words of wisdom before I order some? Kind of silly to buy 100 of them when I need only 2, but I want this to be done right. I'd be happy to mail some to others if needed. Would it be smart to put a dab of caulk on the back of the badge before I put the drive screws in? Do I need to support the inside of the headtube before I tap the screws in? If so, is there a good way to do that?
__________________
Dale, NL4T
Dale, NL4T
Last edited by speedevil; 09-30-19 at 05:16 PM.
 09-30-19, 08:14 AM
#2
Friendship is Magic

Join Date: Nov 2010
Location: Sacramento, CA
Posts: 22,984
Bikes: old ones
Mentioned: 304 Post(s)
Tagged: 0 Thread(s)
Quoted: 26382 Post(s)
Liked 10,364 Times
in
7,196 Posts
...I've never had much luck doing this with screws. The last one I did, the screws looked so clunky that i finally removed them, and refastened the badge with a piece of 3M trim tape. Then I glued some short small rivets in the holes so the rivet heads would show.
Likes For 3alarmer:
09-30-19, 08:16 AM
#3
Senior Member

Join Date: Mar 2014
Location: City of Angels
Posts: 4,870
Bikes: A few too many
Mentioned: 42 Post(s)
Tagged: 1 Thread(s)
Quoted: 1363 Post(s)
Liked 2,178 Times
in
1,182 Posts
^^^^
Ben
Ben
__________________
"EVERY PERSON IS GUILTY OF ALL THE GOOD THEY DID NOT DO"
Voltaire
Voice recognition may sometimes create odd spelling and grammatical errors
"EVERY PERSON IS GUILTY OF ALL THE GOOD THEY DID NOT DO"
Voltaire
Voice recognition may sometimes create odd spelling and grammatical errors
 09-30-19, 03:29 PM
#5
Senior Member

Join Date: Jan 2008
Location: Beaverton, OR
Posts: 14,742
Bikes: Yes
Mentioned: 525 Post(s)
Tagged: 0 Thread(s)
Quoted: 3230 Post(s)
Liked 3,865 Times
in
1,439 Posts
...I've never had much luck doing this with screws. The last one I did, the screws looked so clunky that i finally removed them, and refastened the badge with a piece of 3M trim tape. Then I glued some short small rivets in the holes so the rivet heads would show.
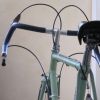
I've got a Pinarello on which a local paint shop installed the head badge with drive screws. Here's a visual of both methods:


Pretty much a wash in appearance, IMO. The trim tape was probably easier.
__________________
My Bikes
My Bikes
09-30-19, 06:24 PM
#6
Banned.

Join Date: Jul 2009
Location: PAZ
Posts: 12,294
Mentioned: 255 Post(s)
Tagged: 0 Thread(s)
Quoted: 2588 Post(s)
Liked 4,823 Times
in
1,709 Posts
In addition to refinishing this badge, I also found a couple fake rivets to add to it. I fastened the badge to the headtube with JB Weld. Worked great!

Sorry I can't recall where I found the brass "rivets".
DD
Sorry I can't recall where I found the brass "rivets".
DD
 09-30-19, 06:56 PM
#7
Senior Member
I have some 3/16� in silver finish. If that would work, pm me with your address and I�ll send a few.
ie. The McMaster Carr ones in the OP.
Btw I had a hard time with these. I drilled per the MMC spec, but when I tried to tap them in, it seemed like I was denting the headtube. So I bailed on that plan and used a bead of silicone and faux rivets made from brass escutcheon nails.
ie. The McMaster Carr ones in the OP.
Btw I had a hard time with these. I drilled per the MMC spec, but when I tried to tap them in, it seemed like I was denting the headtube. So I bailed on that plan and used a bead of silicone and faux rivets made from brass escutcheon nails.
Last edited by due ruote; 09-30-19 at 07:02 PM.
10-01-19, 07:22 AM
#8
I never finish anyth
Thread Starter
Join Date: Jul 2010
Location: Western KY
Posts: 1,114
Bikes: 2008 Merckx LXM, 2003 Giant XTC mtb, 2001 Lemond Alpe d'Huez, 1997 Lemond Zurich, 1989 Cannondale ST, 1988 Masi Nuovo Strada, 1983 Pinarello Turismo
Mentioned: 63 Post(s)
Tagged: 0 Thread(s)
Quoted: 294 Post(s)
Liked 137 Times
in
86 Posts
@due rote - thanks for the offer, but I placed an order last night. I ordered a bag of 100, in sizes 00 and 0 and 1/8" length from McMaster-Carr. So when I'm finished, I'll have 198 of them to give away to anyone that needs them. I am also concerned about denting the headtube, so I'll watch carefully for that and enlarge the hole in the headtube if that seems to be needed.
I'll probably put a dab of silicone caulk under the badge and around the drive screws as I install it. That way, even if the headtube hole is a little larger than it should be, I won't lose the badge.
I'll follow up with photos and a report of how it goes when the drive screws get here.
I'll probably put a dab of silicone caulk under the badge and around the drive screws as I install it. That way, even if the headtube hole is a little larger than it should be, I won't lose the badge.
I'll follow up with photos and a report of how it goes when the drive screws get here.
__________________
Dale, NL4T
Dale, NL4T
10-01-19, 08:00 AM
#9
Senior Member
@due rote - thanks for the offer, but I placed an order last night. I ordered a bag of 100, in sizes 00 and 0 and 1/8" length from McMaster-Carr. So when I'm finished, I'll have 198 of them to give away to anyone that needs them. I am also concerned about denting the headtube, so I'll watch carefully for that and enlarge the hole in the headtube if that seems to be needed.
I'll probably put a dab of silicone caulk under the badge and around the drive screws as I install it. That way, even if the headtube hole is a little larger than it should be, I won't lose the badge.
I'll follow up with photos and a report of how it goes when the drive screws get here.
I'll probably put a dab of silicone caulk under the badge and around the drive screws as I install it. That way, even if the headtube hole is a little larger than it should be, I won't lose the badge.
I'll follow up with photos and a report of how it goes when the drive screws get here.
Make sure you have a decent pair of needle nose tweezers. And something like a jeweler�s hammer. They are pretty tiny.
