


Running wires for Dynamo lights
 04-24-19, 09:32 PM
#1
Senior Member
Thread Starter
Running wires for Dynamo lights
How are y’all keeping the wiring neat and tidy? What are the preferred methods of attaching? Zip ties, electrical tape?
Last edited by XXLHardrock; 04-28-19 at 09:15 AM.
 04-25-19, 05:50 AM
#2


Randomhead
Join Date: Aug 2008
Location: Happy Valley, Pennsylvania
Posts: 24,386
Mentioned: 0 Post(s)
Tagged: 0 Thread(s)
Quoted: 4 Post(s)
Liked 3,687 Times
in
2,510 Posts
I have used both of those, but nowadays I mostly use Gorilla clear repair tape
04-25-19, 06:25 AM
#3
Senior Member

On my vintage touring bike I used a few dabs of a weaker silicone adhesive to mount some thin aluminum tubes to my fork blade and my downtube. I bought them at a hardware store. Then from the bottom bracket it runs in the underside of my fender, with some thick adhesive tape as protection, to the fender-mounted taillight. The tricky part was to bend the one tube to the gentle, elegant sweep of my fork blade, as I recall. The silicone peels off without trouble if I change my mind, and has held everything tight without rattling for more than 5 yeas now. The bike and light are silver, and the adhesive is milky-white/transparent, so it looks nice.
On my city bike with only a dynamo front light I used zip ties on the fork. I even left a foot or so of slack in a loop for a year before I cut it to length. [shrugs] It's a city bike, so nobody cares.
On my city bike with only a dynamo front light I used zip ties on the fork. I even left a foot or so of slack in a loop for a year before I cut it to length. [shrugs] It's a city bike, so nobody cares.
04-25-19, 06:34 AM
#4
Half way there

Join Date: Sep 2015
Location: North Carolina
Posts: 2,955
Bikes: Many, and the list changes frequently
Mentioned: 5 Post(s)
Tagged: 0 Thread(s)
Quoted: 985 Post(s)
Liked 879 Times
in
526 Posts
I've used aluminum tape to fix them to the inner side of a fork blade or underside of top tube. It works well without looking too bad. I recently ran coax to a tail light by running it along the brake cable using electrical shrink insulation at a few points. This looks a bit cleaner, however I think I will try inside tubing the next time.
04-25-19, 06:43 AM
#5
Senior Guest
red wire loom encloses Dynohub wires
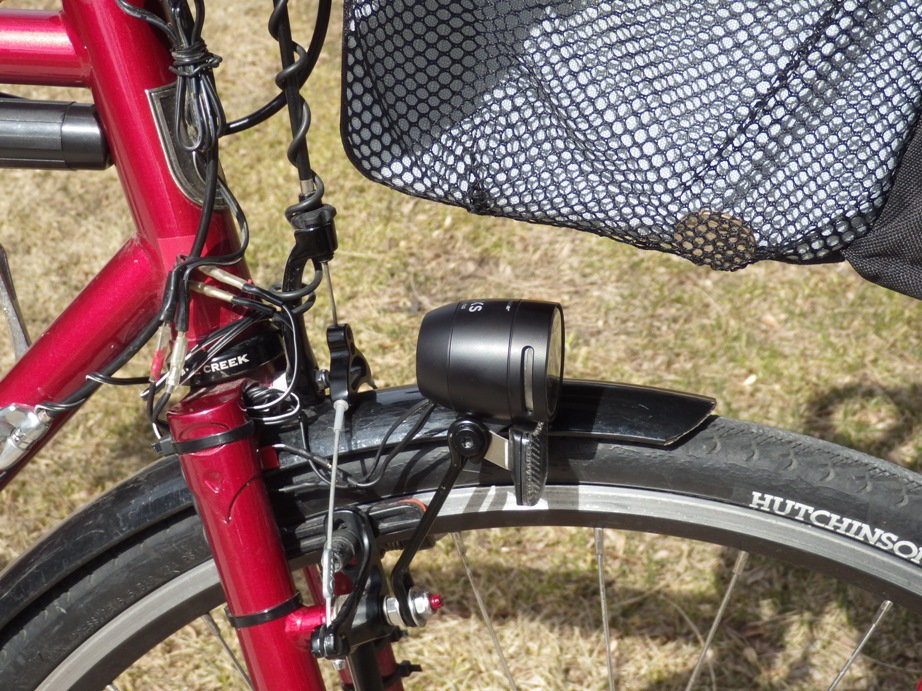
I used a wire loom to make wiring neat and then secure them with zip ties to the frame.This is the best picture I have on the computer.
04-25-19, 07:06 AM
#6
Senior Member
Join Date: Dec 2007
Location: columbus, ohio
Posts: 895
Bikes: Soma Saga, 1980 Schwinn Voyageur 11.8, New Albion Privateer
Mentioned: 2 Post(s)
Tagged: 0 Thread(s)
Quoted: 76 Post(s)
Likes: 0
Liked 9 Times
in
7 Posts
Loosely wrapped around fork with maybe a zip tie near the hub connection. For rear light, loosely wrapped around brake cable under the top tub then zipped tied underneath rear rack to tail light connection. I don't go to elaborate pains to hide the thin wires because you do not really notice it.
04-25-19, 01:44 PM
#7
Banned
I even use heat shrink tubing , sometimes not even shrunken , like the liner of the chainstay tube on my Brompton ..
headlight under front tack, ot bag, taillight on the place where the reflector was..

some wires follow the cable housing
a few dabs of hot melt glue and the wire can run from near the BB to an on the mudguard tail light..
under the mudguard ..
headlight under front tack, ot bag, taillight on the place where the reflector was..
some wires follow the cable housing
a few dabs of hot melt glue and the wire can run from near the BB to an on the mudguard tail light..
under the mudguard ..
04-25-19, 09:12 PM
#8
Randomhead
Join Date: Aug 2008
Location: Happy Valley, Pennsylvania
Posts: 24,386
Mentioned: 0 Post(s)
Tagged: 0 Thread(s)
Quoted: 4 Post(s)
Liked 3,687 Times
in
2,510 Posts
I always leave extra wire because I always feel like I could do a better job. Bad habit, I know
04-26-19, 10:13 AM
#9
Senior Member
Join Date: Aug 2010
Location: Madison, WI
Posts: 11,180
Bikes: 1961 Ideor, 1966 Perfekt 3 Speed AB Hub, 1994 Bridgestone MB-6, 2006 Airnimal Joey, 2009 Thorn Sherpa, 2013 Thorn Nomad MkII, 2015 VO Pass Hunter, 2017 Lynskey Backroad, 2017 Raleigh Gran Prix, 1980s Bianchi Mixte on a trainer. Others are now gone.
Mentioned: 47 Post(s)
Tagged: 0 Thread(s)
Quoted: 3454 Post(s)
Liked 1,454 Times
in
1,133 Posts
My methods have evolved. But first I should put some of my philosophy on dynopower into perspective so you can better understand my choices. I did not buy a dynohub for lighting, I bought it for USB power for bike touring. And the first touring bike I put a dynohub on is an S&S coupled bike, I chose not to put a wired taillight on that bike as that is one more thing to mess with when assembling or disassembling the bike.
Initially I had one dynohub wheel that I used on four different forks. I bought some extra plastic wire connectors to plug into the hub, an SP that will also use the Shimano connectors. I zip tied wire to all four forks so that it would be easy to move the wheel from bike to bike, at the fork crown I used some female 2.8mm spade wire connectors to make it easy to connect or disconnect things. The reason that I chose the 2.8mm connectors was that since B&M used that type of connector, I decided to standardize all my connection on that one connector. And initially, I only had a headlamp, no dyno powered taillights, I stayed with battery for taillights.
As I accumulated more dynohubs and used them on more bikes, I stayed with the same system.
I also later picked up a Sinewave Revolution USB charger. On that I wired it so that it had two female and two male 2.8mm connectors, so I could add that to any bike in parallel by connecting the tires at the fork crown where the headlight and fork wires connected. I have used this one charger on three different bikes, so this is always wired in a temporary fashion wherever I wire it.
Later I started to add dyno powered taillights, but since I often use a red blinking taillight during daytime, I consider my battery taillights to be primary lighting, dyno taillights to be supplemental.
As all of this progressed, I made no effort to keep things tidy, the wiring is all exposed. There is one exception to that, on one bike I put a taillight on the rear fender, I run the wires to it inside the rear fender. That was a lot of extra work that I do not plan to repeat again.
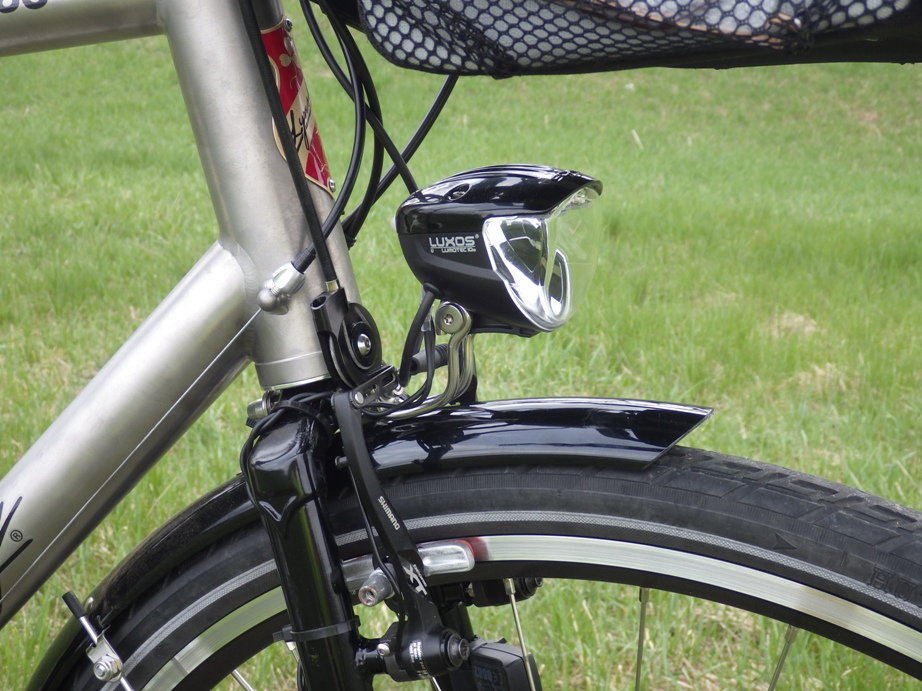
Photo of my first dyno powered headlight, no taillight, wiring quite simple. Headlight also has USB power.
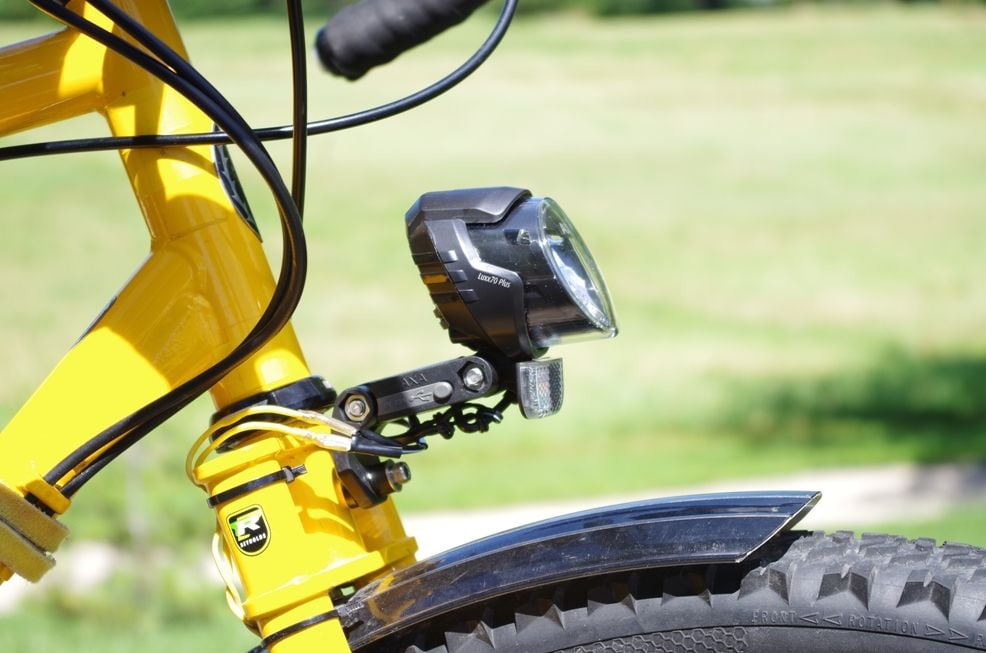
I think this is my third dyno powered setup, again no taillight, wiring quite simple. Headlight also supplies USB power, there is a wire up to the handlebar from the headlight with the USB port and a switch. I made this light mount by bending the extra long B&M wire mount to fit my purposes better, you can't buy one just like it.
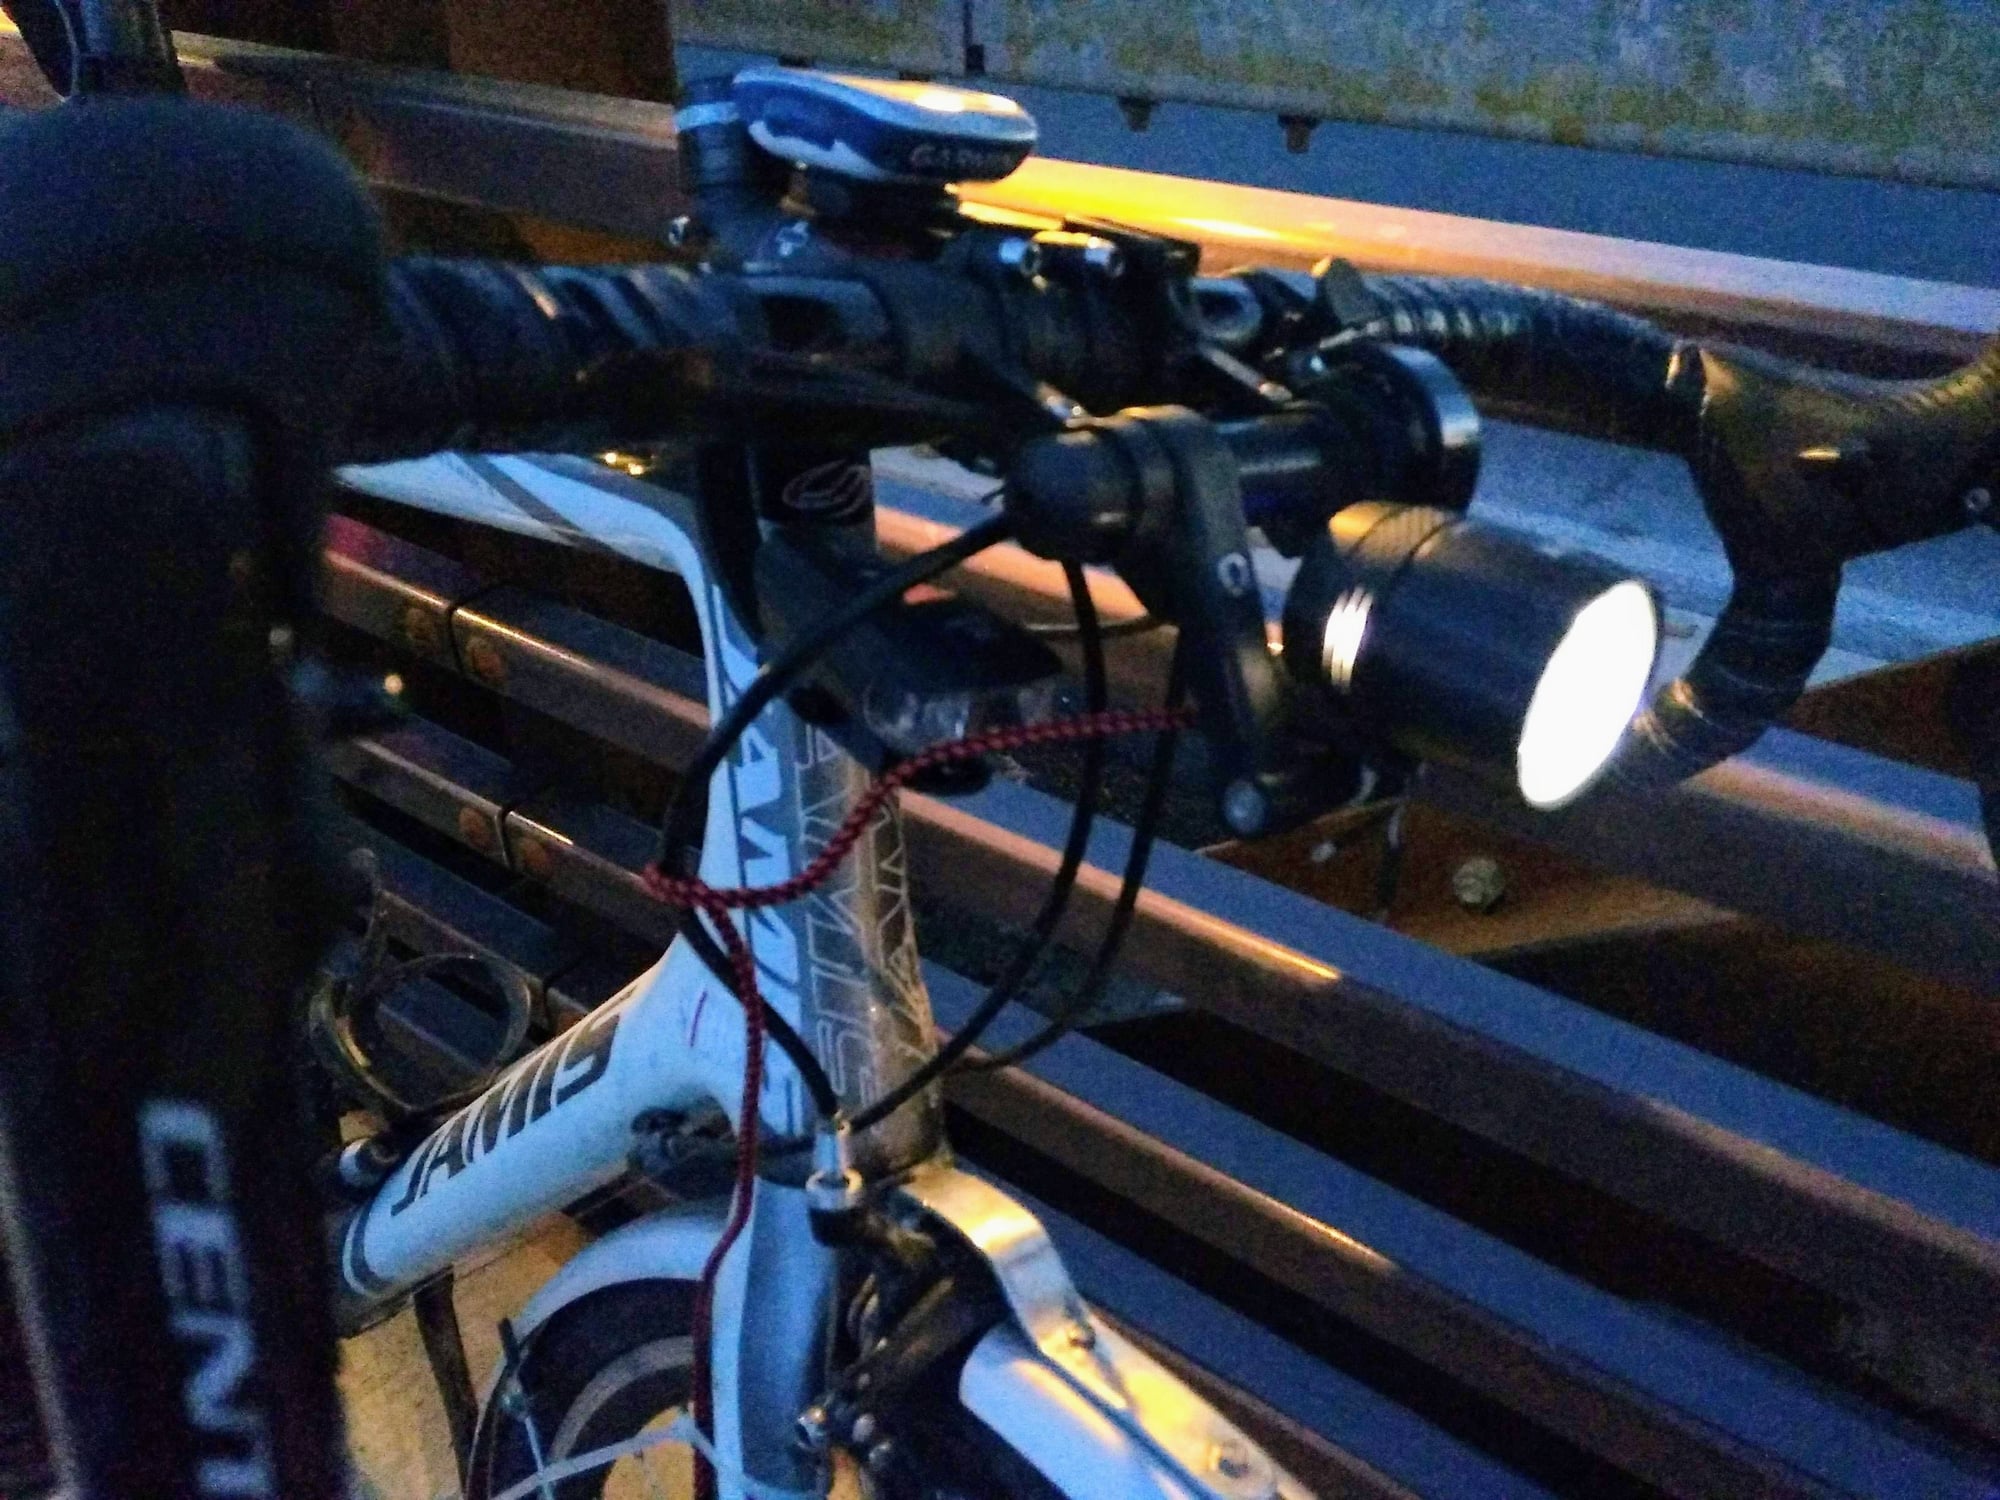
My most recent dyno powered setup, a bowl of spaghetti wiring, I chose not to cut any of the wires shorter yet but instead bundled them up (temporarily) until I decide exactly how to leave this. I wired this up a few weeks ago. Headlight, wired taillight, and the wires for the Sinewave Revolution are all in the photo but the Sinewave itself is not. And to make it a bit more complicated, the wires for my wired bike computer also shown. In this example, I wrapped my taillight wires around the right side shifter wire along the downtube. I suspect sometime mid-summer I will make this bowl of spagettii look better and trim some of my extra long wires in length.
Initially I had one dynohub wheel that I used on four different forks. I bought some extra plastic wire connectors to plug into the hub, an SP that will also use the Shimano connectors. I zip tied wire to all four forks so that it would be easy to move the wheel from bike to bike, at the fork crown I used some female 2.8mm spade wire connectors to make it easy to connect or disconnect things. The reason that I chose the 2.8mm connectors was that since B&M used that type of connector, I decided to standardize all my connection on that one connector. And initially, I only had a headlamp, no dyno powered taillights, I stayed with battery for taillights.
As I accumulated more dynohubs and used them on more bikes, I stayed with the same system.
I also later picked up a Sinewave Revolution USB charger. On that I wired it so that it had two female and two male 2.8mm connectors, so I could add that to any bike in parallel by connecting the tires at the fork crown where the headlight and fork wires connected. I have used this one charger on three different bikes, so this is always wired in a temporary fashion wherever I wire it.
Later I started to add dyno powered taillights, but since I often use a red blinking taillight during daytime, I consider my battery taillights to be primary lighting, dyno taillights to be supplemental.
As all of this progressed, I made no effort to keep things tidy, the wiring is all exposed. There is one exception to that, on one bike I put a taillight on the rear fender, I run the wires to it inside the rear fender. That was a lot of extra work that I do not plan to repeat again.
Photo of my first dyno powered headlight, no taillight, wiring quite simple. Headlight also has USB power.
I think this is my third dyno powered setup, again no taillight, wiring quite simple. Headlight also supplies USB power, there is a wire up to the handlebar from the headlight with the USB port and a switch. I made this light mount by bending the extra long B&M wire mount to fit my purposes better, you can't buy one just like it.
My most recent dyno powered setup, a bowl of spaghetti wiring, I chose not to cut any of the wires shorter yet but instead bundled them up (temporarily) until I decide exactly how to leave this. I wired this up a few weeks ago. Headlight, wired taillight, and the wires for the Sinewave Revolution are all in the photo but the Sinewave itself is not. And to make it a bit more complicated, the wires for my wired bike computer also shown. In this example, I wrapped my taillight wires around the right side shifter wire along the downtube. I suspect sometime mid-summer I will make this bowl of spagettii look better and trim some of my extra long wires in length.
Last edited by Tourist in MSN; 04-26-19 at 10:18 AM.
 04-26-19, 11:14 AM
#10
Senior Member
Join Date: Sep 2004
Location: Chicago area
Posts: 2,546
Bikes: Airborne "Carpe Diem", Motobecane "Mirage", Trek 6000, Strida 2, Dahon "Helios XL", Dahon "Mu XL", Tern "Verge S11i"
Mentioned: 22 Post(s)
Tagged: 0 Thread(s)
Quoted: 980 Post(s)
Liked 580 Times
in
398 Posts
On one of my folding bikes, the wire kept getting damaged near one of the joints. I ran an insulated wire through a piece of brake cable housing ("coax" of a sort, with the spiral metal acting as one conductor) and secured each end with a couple sturdy zip-ties. Wires soldered to each end of the metal housing, then covered by heat-shrink tubing. No more problems!
04-26-19, 11:34 AM
#11
Banned
One of last years tourists had a USB rechargeable tail light and a steady on dynamo wired one
ran a wire with USB plug , so was able to top up the charge on the blinking ones battery off 'the Plug'
My own bikes, heat shrink tubing, and soldered joints, electric tape, zip ties..
Or dabs of hot melt glue.. dabs for running wires under the mud guards..
....
ran a wire with USB plug , so was able to top up the charge on the blinking ones battery off 'the Plug'
My own bikes, heat shrink tubing, and soldered joints, electric tape, zip ties..
Or dabs of hot melt glue.. dabs for running wires under the mud guards..
....
Last edited by fietsbob; 06-27-19 at 01:26 PM.
04-26-19, 11:50 AM
#12

Jedi Master

On one of my dynamo bikes I was able to run the wire through the drain holes in the fork blade so that was pretty cool. I also use 6mm heat-shrink to run the wire along the the cables when that's possible. On another bike I used little o-rings every couple of inches to attach the tail light wire to bare brake cable. Whenever I have a fender light, I put a rubber grommet in the fender and run the wire on the inside of the fender with HVAC foil tape.
04-28-19, 09:26 AM
#13
Senior Member
Thread Starter
On my MTB/ touring bike I’ve used 1/4” plastic air line (like what is found on heavy trucks) to shield the 2 conductor wire that comes with B&M lights. Both for the tail light and to the hub. It’s a bit bulky looking but pretty tough. That bike has a SON hub.
On my road bike I bought the coax cable that Peter White sells, along with the mini jack for disconnecting near the hub. I’m worried that routinely disconnecting the SP plug will wear it out.
On my road bike I bought the coax cable that Peter White sells, along with the mini jack for disconnecting near the hub. I’m worried that routinely disconnecting the SP plug will wear it out.
04-28-19, 12:36 PM
#14
Senior Member
Join Date: Aug 2010
Location: Madison, WI
Posts: 11,180
Bikes: 1961 Ideor, 1966 Perfekt 3 Speed AB Hub, 1994 Bridgestone MB-6, 2006 Airnimal Joey, 2009 Thorn Sherpa, 2013 Thorn Nomad MkII, 2015 VO Pass Hunter, 2017 Lynskey Backroad, 2017 Raleigh Gran Prix, 1980s Bianchi Mixte on a trainer. Others are now gone.
Mentioned: 47 Post(s)
Tagged: 0 Thread(s)
Quoted: 3454 Post(s)
Liked 1,454 Times
in
1,133 Posts
SP Plug for the SP hubs is interchangeable with Shimano hubs. On one of my bikes with a Shimano hub, I have a SP plug on that bike. And on one of my bikes with a SP hub I use a Shimano plug. Shimano plug is extraordinarily cheap.
04-29-19, 10:50 AM
#15
aka Tom Reingold

Join Date: Jan 2009
Location: New York, NY, and High Falls, NY, USA
Posts: 40,498
Bikes: 1962 Rudge Sports, 1971 Raleigh Super Course, 1971 Raleigh Pro Track, 1974 Raleigh International, 1975 Viscount Fixie, 1982 McLean, 1996 Lemond (Ti), 2002 Burley Zydeco tandem
Mentioned: 511 Post(s)
Tagged: 0 Thread(s)
Quoted: 7346 Post(s)
Liked 2,452 Times
in
1,430 Posts
Great stuff here!
I agree that it can make plenty of sense to use a battery taillight rather than a dynamo one. The load on taillights is low, so you don't have to charge them often. On my commuter bike, I use both a dynamo and a battery one. The battery one flashes, and, of course, the dynamo one doesn't.
I agree that it can make plenty of sense to use a battery taillight rather than a dynamo one. The load on taillights is low, so you don't have to charge them often. On my commuter bike, I use both a dynamo and a battery one. The battery one flashes, and, of course, the dynamo one doesn't.
__________________
Tom Reingold, tom@noglider.com
New York City and High Falls, NY
Blogs: The Experienced Cyclist; noglider's ride blog
“When man invented the bicycle he reached the peak of his attainments.” — Elizabeth West, US author
Please email me rather than PM'ing me. Thanks.
Tom Reingold, tom@noglider.com
New York City and High Falls, NY
Blogs: The Experienced Cyclist; noglider's ride blog
“When man invented the bicycle he reached the peak of his attainments.” — Elizabeth West, US author
Please email me rather than PM'ing me. Thanks.
04-29-19, 11:17 AM
#16
Randomhead
Join Date: Aug 2008
Location: Happy Valley, Pennsylvania
Posts: 24,386
Mentioned: 0 Post(s)
Tagged: 0 Thread(s)
Quoted: 4 Post(s)
Liked 3,687 Times
in
2,510 Posts
you aren't going to wear out either the shimano or SP connector, since the contacts inside are actually the wire. Plastic isn't going to care about being detached, unless we are talking about millions of cycles
04-29-19, 08:58 PM
#17
Senior Member
Thread Starter
My concern is about wearing out the end on the hub itself and not the piece that attaches to it. Good to hear you guys have such confidence it the unit.
05-01-19, 09:21 PM
#18
Clark W. Griswold
Join Date: Mar 2014
Location: ,location, location
Posts: 13,467
Bikes: Foundry Chilkoot Ti W/Ultegra Di2, Salsa Timberjack Ti, Cinelli Mash Work RandoCross Fun Time Machine, 1x9 XT Parts Hybrid, Co-Motion Cascadia, Specialized Langster, Phil Wood Apple VeloXS Frame (w/DA 7400), R+M Supercharger2 Rohloff, Habanero Ti 26
Mentioned: 54 Post(s)
Tagged: 0 Thread(s)
Quoted: 4335 Post(s)
Liked 3,958 Times
in
2,646 Posts
Nobody has mentioned Di2 Wire Covers? That is what I used on my Co-Motion way better than the zip ties I used on the Single Speed/Fixed Gear RandoCross FunTime Machine which works fine and has had zero problems but doesn't look quite as nice.
05-02-19, 09:16 AM
#19
Randomhead
Join Date: Aug 2008
Location: Happy Valley, Pennsylvania
Posts: 24,386
Mentioned: 0 Post(s)
Tagged: 0 Thread(s)
Quoted: 4 Post(s)
Liked 3,687 Times
in
2,510 Posts
do you have any pictures of those wire covers in use? I have some of the di2 frame plugs, but I wasn't aware of the wire covers
05-02-19, 11:55 AM
#20
Senior Member
Join Date: Aug 2010
Location: Madison, WI
Posts: 11,180
Bikes: 1961 Ideor, 1966 Perfekt 3 Speed AB Hub, 1994 Bridgestone MB-6, 2006 Airnimal Joey, 2009 Thorn Sherpa, 2013 Thorn Nomad MkII, 2015 VO Pass Hunter, 2017 Lynskey Backroad, 2017 Raleigh Gran Prix, 1980s Bianchi Mixte on a trainer. Others are now gone.
Mentioned: 47 Post(s)
Tagged: 0 Thread(s)
Quoted: 3454 Post(s)
Liked 1,454 Times
in
1,133 Posts
That is unlikely to wear down very much at all. The wear would only occur if you remove and replace the plug many many times, probably thousands of times. If you are still concerned, keep it clean as dirt and grime would be an abrasive.
06-27-19, 09:34 AM
#21
Senior Member
Join Date: Jun 2009
Location: philadelphia, pa
Posts: 242
Bikes: 650b traditional rando, 700c SS rando, 700c fast rando..... plus a mountain, folder, and retired urban track in the basement
Mentioned: 6 Post(s)
Tagged: 0 Thread(s)
Quoted: 37 Post(s)
Likes: 0
Liked 0 Times
in
0 Posts
On my vintage touring bike I used a few dabs of a weaker silicone adhesive to mount some thin aluminum tubes to my fork blade and my downtube. I bought them at a hardware store. Then from the bottom bracket it runs in the underside of my fender, with some thick adhesive tape as protection, to the fender-mounted taillight. The tricky part was to bend the one tube to the gentle, elegant sweep of my fork blade, as I recall. The silicone peels off without trouble if I change my mind, and has held everything tight without rattling for more than 5 yeas now. The bike and light are silver, and the adhesive is milky-white/transparent, so it looks nice.
On my city bike with only a dynamo front light I used zip ties on the fork. I even left a foot or so of slack in a loop for a year before I cut it to length. [shrugs] It's a city bike, so nobody cares.
On my city bike with only a dynamo front light I used zip ties on the fork. I even left a foot or so of slack in a loop for a year before I cut it to length. [shrugs] It's a city bike, so nobody cares.
My current dilemma is wiring up my new travel bike for Paris-Brest-Paris and general air travel, which will also pull double-duty as a go-fast road bike stripped of lights and baggage. I want to be able to quickly unwire/rewire the bike, and also avoid tape or zip ties or anything that could cause rub and mar the frame when it gets dirty. I got Supernova connectors for the set-up too, and will basically have 4 pieces: headlight with a short strand of wire to a disconnect, tail light with a short strand to a disconnect, and then one shorter wire for headlight to hub, and another longer wire for headlight to tail light.
I like your silicone-adhered tube idea, and was thinking about attaching these on the inside of the fork blade and along the downtube and chainstay-seatstay for a seatstay mounted Secula.
The grander idea is to replicate this system on more than one bike so we can put a dyno on whatever bike needs one at any given time.
06-27-19, 12:45 PM
#22
Randomhead
Join Date: Aug 2008
Location: Happy Valley, Pennsylvania
Posts: 24,386
Mentioned: 0 Post(s)
Tagged: 0 Thread(s)
Quoted: 4 Post(s)
Liked 3,687 Times
in
2,510 Posts
seajaye, did you get the bike painted?
I'm not sure about removable, but you could tape down a wire and just use connectors to remove parts of the system. I finally bent up some spokes into loops and brazed them on my new fork. but I don't think that removal will be easy.
On my own bike, I'm a little concerned about running wires through my travel bike frame. I feel like it will be okay, but there is a non-zero probability of running into a TSA person that can't handle loose wires coming out of a frame.
06-27-19, 01:30 PM
#23
Banned
I’m worried that routinely disconnecting the SP plug will wear it out.
then solder the thinner wires to the thicker..
I have come to prefer Schmidt hubs, because the spade lug connects solidly ..
...
Last edited by fietsbob; 06-27-19 at 01:33 PM.
06-27-19, 02:03 PM
#24
Senior Member
Join Date: Jun 2009
Location: philadelphia, pa
Posts: 242
Bikes: 650b traditional rando, 700c SS rando, 700c fast rando..... plus a mountain, folder, and retired urban track in the basement
Mentioned: 6 Post(s)
Tagged: 0 Thread(s)
Quoted: 37 Post(s)
Likes: 0
Liked 0 Times
in
0 Posts
seajaye, did you get the bike painted?
I'm not sure about removable, but you could tape down a wire and just use connectors to remove parts of the system. I finally bent up some spokes into loops and brazed them on my new fork. but I don't think that removal will be easy.
On my own bike, I'm a little concerned about running wires through my travel bike frame. I feel like it will be okay, but there is a non-zero probability of running into a TSA person that can't handle loose wires coming out of a frame.
I'm not sure about removable, but you could tape down a wire and just use connectors to remove parts of the system. I finally bent up some spokes into loops and brazed them on my new fork. but I don't think that removal will be easy.
On my own bike, I'm a little concerned about running wires through my travel bike frame. I feel like it will be okay, but there is a non-zero probability of running into a TSA person that can't handle loose wires coming out of a frame.
Internal wiring scares me, but not in the way it would scare a TSA agent. Only cause it seems like too much of a PITA if something goes wrong. As for the TSA agent, you could always tuck the loose ends into the frame and fish them out upon arrival with a spoke or something?
06-27-19, 05:42 PM
#25
Senior Member
Could you post pictures of this set up?
My current dilemma is wiring up my new travel bike for Paris-Brest-Paris and general air travel, which will also pull double-duty as a go-fast road bike stripped of lights and baggage. I want to be able to quickly unwire/rewire the bike, and also avoid tape or zip ties or anything that could cause rub and mar the frame when it gets dirty. I got Supernova connectors for the set-up too, and will basically have 4 pieces: headlight with a short strand of wire to a disconnect, tail light with a short strand to a disconnect, and then one shorter wire for headlight to hub, and another longer wire for headlight to tail light.
I like your silicone-adhered tube idea, and was thinking about attaching these on the inside of the fork blade and along the downtube and chainstay-seatstay for a seatstay mounted Secula.
The grander idea is to replicate this system on more than one bike so we can put a dyno on whatever bike needs one at any given time.
Just picture a thin aluminum tube, which is easy to bend to whatever curves you need. Then you use a few dabs or a thin bead of clear (or whatever) light silicone adhesive to mount it to the frame. I used the thinner dual strand wire that you get with many lights and I can even pull the connectors through the tube if I'm careful.
I rode some rough roads and cobblestones for 5 years in Europe and never had a problem, and it survived the trip across the Atlantic just fine the first time. I just glued a tube on the fork leg and one on the underside of the downtube. The chainstay should be easy, too, but I ran mine under the fender.
My craftsmanship with the silicone was admittedly a bit poor, but if I used an "application tool" and practiced a bit more, I could have done better. One could see how much my skills improved with caulking from one dark corner of my bathroom before I tackled more important areas.