


Revisiting Avocet (+/- 1980) sealed bearings
 01-28-19, 08:49 AM
#1

Senior Member
Thread Starter
Join Date: Apr 2011
Location: Maryland, USA
Posts: 2,442
Bikes: Drysdale/Gitane/Zeus/Masi/Falcon/Palo Alto/Raleigh/Legnano
Mentioned: 34 Post(s)
Tagged: 0 Thread(s)
Quoted: 987 Post(s)
Liked 641 Times
in
407 Posts
Revisiting Avocet (+/- 1980) sealed bearings
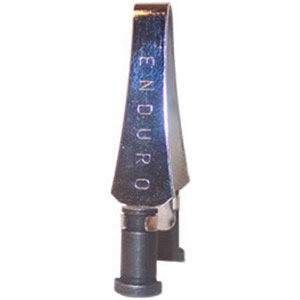
Well, I got through the summer and fall riding seasons knowing the hub bearings were not pristine. Today, I went to try to remove the bearings to see if I can determine what replacement bearings are needed by measuring with a micrometer (in an earlier topic, I noted that the numbers on the bearing are not the common-today 6xxx type numbers). I had bought an Enduro BBT-105 bearing puller but the tool will not go through the hole in the bearings, not quite. Are there alternatives, like a smaller version?
BTW, was watching a YouTube video on bearing replacement and what was shown was that the axle has a "shoulder" that the bearing seats against. Well, not on these Avocets, so "how tight" does one tighten the... well, they are not cones, are they?
BTW, was watching a YouTube video on bearing replacement and what was shown was that the axle has a "shoulder" that the bearing seats against. Well, not on these Avocets, so "how tight" does one tighten the... well, they are not cones, are they?
__________________
Larry:1958 Drysdale, 1961 Gitane Gran Sport, 1974 Zeus track, 1988 Masi Gran Corsa, 1974 Falcon, 1980 Palo Alto, 1973 Raleigh Gran Sport, 1974 Legnano. Susan: 1976 Windsor Profesional.
Larry:1958 Drysdale, 1961 Gitane Gran Sport, 1974 Zeus track, 1988 Masi Gran Corsa, 1974 Falcon, 1980 Palo Alto, 1973 Raleigh Gran Sport, 1974 Legnano. Susan: 1976 Windsor Profesional.
 01-28-19, 09:33 AM
#2
Extraordinary Magnitude

Join Date: Aug 2009
Location: Waukesha WI
Posts: 13,649
Bikes: 1978 Trek TX700; 1978/79 Trek 736; 1984 Specialized Stumpjumper Sport; 1984 Schwinn Voyageur SP; 1985 Trek 620; 1985 Trek 720; 1986 Trek 400 Elance; 1987 Schwinn High Sierra; 1990 Miyata 1000LT
Mentioned: 84 Post(s)
Tagged: 0 Thread(s)
Quoted: 2608 Post(s)
Liked 1,703 Times
in
937 Posts
I've had 2 sets of Avocet sealed bearing hubs. The first was the smoothest sealed bearing hub I'd experienced to that point- they ended up on my Schwinn Voyageur. The other set is *currently* on my Trek 620.
The only time I've even thought of redoing the bearings was a while when I was getting some noise out of (what I thought was) the rear hub- I just didn't have the wheel seated properly and something was rubbing.
And FWIW- If it helps- these are rebranded Ofmega hubs, so if there's instructions and/or tutorials about the Ofmega hubs- that should apply to the Avocets.
__________________
*Recipient of the 2006 Time Magazine "Person Of The Year" Award*
Commence to jigglin� huh?!?!
"But hey, always love to hear from opinionated amateurs." -says some guy to Mr. Marshall.
Commence to jigglin� huh?!?!
"But hey, always love to hear from opinionated amateurs." -says some guy to Mr. Marshall.
01-28-19, 04:37 PM
#3
Senior Member
Thread Starter
Join Date: Apr 2011
Location: Maryland, USA
Posts: 2,442
Bikes: Drysdale/Gitane/Zeus/Masi/Falcon/Palo Alto/Raleigh/Legnano
Mentioned: 34 Post(s)
Tagged: 0 Thread(s)
Quoted: 987 Post(s)
Liked 641 Times
in
407 Posts
Well, I decided to grind a fraction of a millimeter off the tool to get it to fit in the hole. OK, but once in, there's no place for it to grab, insufficient space behind the bearing. Need a better way to get the bearings out.
I did a search on that. Nothing.
I did a search on that. Nothing.
__________________
Larry:1958 Drysdale, 1961 Gitane Gran Sport, 1974 Zeus track, 1988 Masi Gran Corsa, 1974 Falcon, 1980 Palo Alto, 1973 Raleigh Gran Sport, 1974 Legnano. Susan: 1976 Windsor Profesional.
Larry:1958 Drysdale, 1961 Gitane Gran Sport, 1974 Zeus track, 1988 Masi Gran Corsa, 1974 Falcon, 1980 Palo Alto, 1973 Raleigh Gran Sport, 1974 Legnano. Susan: 1976 Windsor Profesional.
01-28-19, 07:16 PM
#4
Senior Member
IF that won't work, maybe you can bend your own bearing puller out of sheet metal, just thick enough to fit in whatever space you have behind the bearings. Or maybe just grind the lips of your bearing puller thinner?
01-28-19, 07:23 PM
#5
Senior Member
I had a junk screw driver that I modified into a bearing pusher-outer. It is a narrow flat tip driver and I bent the tip 90 degrees. I insert the tool from the opposite side of the hub and am able to just catch a little edge of the inner race and whack it out of the hub. Slow process as I must go around and around the bearing to push it out evenly. I use a socket to reinstall pushing on the outer race only. Grease the hub and outside of bearing before installation.
There has to be some edge available to purchase a tool on to get the bearing out of the hub.
There has to be some edge available to purchase a tool on to get the bearing out of the hub.
Likes For TiHabanero:
01-28-19, 11:28 PM
#6
Senior Member
A "blind extractor' is what you want.
https://wheelsmfg.com/presses-tools/bearing-extractors/608-688-8mm-sealed-bearing-extractor.html
These are the "cheap" version. Expensive one attach to a slide hammer, so they actually live up to the 'blind' bit of their name.
https://wheelsmfg.com/presses-tools/bearing-extractors/608-688-8mm-sealed-bearing-extractor.html
These are the "cheap" version. Expensive one attach to a slide hammer, so they actually live up to the 'blind' bit of their name.
01-29-19, 02:12 AM
#7
Ride, Wrench, Swap, Race

Join Date: Jan 2010
Location: Northern California
Posts: 9,194
Bikes: Cheltenham-Pedersen racer, Boulder F/S Paris-Roubaix, Varsity racer, '52 Christophe, '62 Continental, '92 Merckx, '75 Limongi, '76 Presto, '72 Gitane SC, '71 Schwinn SS, etc.
Mentioned: 132 Post(s)
Tagged: 0 Thread(s)
Quoted: 1565 Post(s)
Liked 1,296 Times
in
866 Posts
I would consider using a QR axle or other metal tube, and put four slots at one end, along a short length of the axle, perhaps 3/4" or 1".
Then I would flare the end like a headset cup remover.
The end could be flared after insertion in the hub, using a tapered thin, round spike or pick (some of these have a short screwdriver handle on them).
With the end of the axle inside the hub and flared out, it should not fit through the bearing, so you can hit the other end of the axle with a hammer to force out the bearing.
It will help to heat up the hubshell to around 300F, just enough to really sizzle water droplets or smoke olive oil slightly.
And be sure to brace the flange evenly against a solid piece of wood with a hole cut in it for the bearing to pass through.
I would rest the piece of wood on the open jaws of my bench vise, to allow for the spike/pick to pass through while still wedged in the axle/tube. The square, tapered end of a round file might sub perfectly for the round spike.
Good luck with it.
Last edited by dddd; 01-29-19 at 02:24 AM.
01-29-19, 06:32 AM
#8
Senior Member
Thread Starter
Join Date: Apr 2011
Location: Maryland, USA
Posts: 2,442
Bikes: Drysdale/Gitane/Zeus/Masi/Falcon/Palo Alto/Raleigh/Legnano
Mentioned: 34 Post(s)
Tagged: 0 Thread(s)
Quoted: 987 Post(s)
Liked 641 Times
in
407 Posts
Some great ideas here, thanks!
Willing to try that! As I'm still worried about finding the correct replacement bearings (see post #1 ), ruining the existing bearings is risky, but I'll do that.
I have plenty of c**p screwdrivers I'm willing to sacrifice. Indeed, what I asked for for Xmas from my wife, and did not get, was a pro quality set like Snap-On. Let's call this Plan B.
That looks neat, and I saw a guy on the internet remove bearings with a household expanding bolt like one inserts in holes drilling in concrete... similar. Let's call this Plan C.
More work/fabrication, so this is Plan D.
Can you stick a screwdriver or similar stick shaped object through from the other side, and tap them out with a hammer or mallet? Assuming you plan to replace them, it shouldn't be a big deal to mangle them a little. Depends on the shape of the space inside the hub.
I had a junk screw driver that I modified into a bearing pusher-outer. It is a narrow flat tip driver and I bent the tip 90 degrees. I insert the tool from the opposite side of the hub and am able to just catch a little edge of the inner race and whack it out of the hub. Slow process as I must go around and around the bearing to push it out evenly. I use a socket to reinstall pushing on the outer race only. Grease the hub and outside of bearing before installation. There has to be some edge available to purchase a tool on to get the bearing out of the hub.
A "blind extractor' is what you want.
https://wheelsmfg.com/presses-tools/...extractor.html
These are the "cheap" version. Expensive one attach to a slide hammer, so they actually live up to the 'blind' bit of their name.
https://wheelsmfg.com/presses-tools/...extractor.html
These are the "cheap" version. Expensive one attach to a slide hammer, so they actually live up to the 'blind' bit of their name.
I would consider using a QR axle or other metal tube, and put four slots at one end, along a short length of the axle, perhaps 3/4" or 1".
Then I would flare the end like a headset cup remover.
The end could be flared after insertion in the hub, using a tapered thin, round spike or pick (some of these have a short screwdriver handle on them).
With the end of the axle inside the hub and flared out, it should not fit through the bearing, so you can hit the other end of the axle with a hammer to force out the bearing.
It will help to heat up the hubshell to around 300F, just enough to really sizzle water droplets or smoke olive oil slightly.
And be sure to brace the flange evenly against a solid piece of wood with a hole cut in it for the bearing to pass through.
I would rest the piece of wood on the open jaws of my bench vise, to allow for the spike/pick to pass through while still wedged in the axle/tube. The square, tapered end of a round file might sub perfectly for the round spike.
Good luck with it.
Then I would flare the end like a headset cup remover.
The end could be flared after insertion in the hub, using a tapered thin, round spike or pick (some of these have a short screwdriver handle on them).
With the end of the axle inside the hub and flared out, it should not fit through the bearing, so you can hit the other end of the axle with a hammer to force out the bearing.
It will help to heat up the hubshell to around 300F, just enough to really sizzle water droplets or smoke olive oil slightly.
And be sure to brace the flange evenly against a solid piece of wood with a hole cut in it for the bearing to pass through.
I would rest the piece of wood on the open jaws of my bench vise, to allow for the spike/pick to pass through while still wedged in the axle/tube. The square, tapered end of a round file might sub perfectly for the round spike.
Good luck with it.
__________________
Larry:1958 Drysdale, 1961 Gitane Gran Sport, 1974 Zeus track, 1988 Masi Gran Corsa, 1974 Falcon, 1980 Palo Alto, 1973 Raleigh Gran Sport, 1974 Legnano. Susan: 1976 Windsor Profesional.
Larry:1958 Drysdale, 1961 Gitane Gran Sport, 1974 Zeus track, 1988 Masi Gran Corsa, 1974 Falcon, 1980 Palo Alto, 1973 Raleigh Gran Sport, 1974 Legnano. Susan: 1976 Windsor Profesional.
Last edited by tiger1964; 01-29-19 at 08:14 AM. Reason: .
01-29-19, 08:13 AM
#9
Senior Member
Thread Starter
Join Date: Apr 2011
Location: Maryland, USA
Posts: 2,442
Bikes: Drysdale/Gitane/Zeus/Masi/Falcon/Palo Alto/Raleigh/Legnano
Mentioned: 34 Post(s)
Tagged: 0 Thread(s)
Quoted: 987 Post(s)
Liked 641 Times
in
407 Posts
The bearings are out!  The first attempt, with a straight screwdriver, failed because the hub barrels were so narrow I could not get enough angle to get purchase on the back of the bearing.
This worked. First, I tried cold-hammering on the screwdriver to bend it; of course, the tip simply snapped off. So, i broke out the plumbing torch and did some amateur blacksmithing. As there's not much mass at the tip, it cooled quickly, so it took about six "sessions" to get a nice 90 degree bend at the very tip.
For the four hub, this pulled out the bearings readily from the front face of the wheel with little effort. On the rear, that did not work, but tapping from the back did, only two taps at 180 degrees around the bearing to pop them out, not a super amount of effort and the bearing-to-hub surfaces look clear of corrosion, which I'll take as good news.
Now for bearings. I'd like suggestions on replacements, as in brand, source, model numbers (something that I don't have to wait six weeks for while being shipped from Switzerland would help, too). Note that while I measured each dimension repeatedly, I kept getting readings about 2 hundredths of a millimeter off on either side, perhaps my hands to unsteady on the micrometer).
FRONT: 26mm OD, 9mm ID, 8mm width
REAR: 30mm OD, 10mm ID, 9mm width
(oddly, the fronts had both inside and outside seals, the rears had outside seals only?)
The first attempt, with a straight screwdriver, failed because the hub barrels were so narrow I could not get enough angle to get purchase on the back of the bearing.I had a junk screw driver that I modified into a bearing pusher-outer. It is a narrow flat tip driver and I bent the tip 90 degrees. I insert the tool from the opposite side of the hub and am able to just catch a little edge of the inner race and whack it out of the hub.
For the four hub, this pulled out the bearings readily from the front face of the wheel with little effort. On the rear, that did not work, but tapping from the back did, only two taps at 180 degrees around the bearing to pop them out, not a super amount of effort and the bearing-to-hub surfaces look clear of corrosion, which I'll take as good news.
Now for bearings. I'd like suggestions on replacements, as in brand, source, model numbers (something that I don't have to wait six weeks for while being shipped from Switzerland would help, too). Note that while I measured each dimension repeatedly, I kept getting readings about 2 hundredths of a millimeter off on either side, perhaps my hands to unsteady on the micrometer).
FRONT: 26mm OD, 9mm ID, 8mm width
REAR: 30mm OD, 10mm ID, 9mm width
(oddly, the fronts had both inside and outside seals, the rears had outside seals only?)
__________________
Larry:1958 Drysdale, 1961 Gitane Gran Sport, 1974 Zeus track, 1988 Masi Gran Corsa, 1974 Falcon, 1980 Palo Alto, 1973 Raleigh Gran Sport, 1974 Legnano. Susan: 1976 Windsor Profesional.
Larry:1958 Drysdale, 1961 Gitane Gran Sport, 1974 Zeus track, 1988 Masi Gran Corsa, 1974 Falcon, 1980 Palo Alto, 1973 Raleigh Gran Sport, 1974 Legnano. Susan: 1976 Windsor Profesional.
01-29-19, 10:45 AM
#10
Senior Member
The inside seals are unnecessary, and you can remove them if you want...might save a fraction of a joule of energy.
SKF, NSK, Tange (difficult to find outside of Japan, other than their headset bearings) are all well respected bearing manufacturers. You will be very satisfied with them, despite the price. Enduro bearings are, well...kind of crummy, to be honest. If you don't want to repeat replacing them any time soon, spend for the slightly nicer bearings.
Search for 629 for the front bearings, and 6200 for the rear. You'll probably want bearings with LLB seals on them, rather than permanent metal shields.
I would suggest searching for a local bearing supplier--they'll likely have the bearings in stock, or be able to get them in a couple of days.
Incidentally, all bearings are marked somewhere with a numeric code, either on the shield or engraved on the bearing somewhere--these will confirm what size you need.
01-29-19, 11:26 AM
#11
Senior Member
Thread Starter
Join Date: Apr 2011
Location: Maryland, USA
Posts: 2,442
Bikes: Drysdale/Gitane/Zeus/Masi/Falcon/Palo Alto/Raleigh/Legnano
Mentioned: 34 Post(s)
Tagged: 0 Thread(s)
Quoted: 987 Post(s)
Liked 641 Times
in
407 Posts
Thanks!
I think that's exactly what I need to know, because...
...These are marked "W217" on the front bearings, and "F230" on the rears; not much help when I started checking into this last summer.
I think that's exactly what I need to know, because...
...These are marked "W217" on the front bearings, and "F230" on the rears; not much help when I started checking into this last summer.
__________________
Larry:1958 Drysdale, 1961 Gitane Gran Sport, 1974 Zeus track, 1988 Masi Gran Corsa, 1974 Falcon, 1980 Palo Alto, 1973 Raleigh Gran Sport, 1974 Legnano. Susan: 1976 Windsor Profesional.
Larry:1958 Drysdale, 1961 Gitane Gran Sport, 1974 Zeus track, 1988 Masi Gran Corsa, 1974 Falcon, 1980 Palo Alto, 1973 Raleigh Gran Sport, 1974 Legnano. Susan: 1976 Windsor Profesional.
01-29-19, 01:45 PM
#12
Senior Member
A friendly FYI, you could probably get the bearings you need from McMaster Carr or Grainger, but you will definitely overpay for it.
Unfortunately, 629 bearings have fallen out of favor in the bicycle world, so a bike shop probably won't be very helpful.
Unfortunately, 629 bearings have fallen out of favor in the bicycle world, so a bike shop probably won't be very helpful.
01-29-19, 02:56 PM
#13
Senior Member
Thread Starter
Join Date: Apr 2011
Location: Maryland, USA
Posts: 2,442
Bikes: Drysdale/Gitane/Zeus/Masi/Falcon/Palo Alto/Raleigh/Legnano
Mentioned: 34 Post(s)
Tagged: 0 Thread(s)
Quoted: 987 Post(s)
Liked 641 Times
in
407 Posts
Too small? Other reason? Regardless, both ordered (from two different places but both SKF brand) and on the way.
It occurs to me, worthwhile to put the bearings in the chest freezer overnight to shrink them a tiny bit for ease of installation?
It occurs to me, worthwhile to put the bearings in the chest freezer overnight to shrink them a tiny bit for ease of installation?
__________________
Larry:1958 Drysdale, 1961 Gitane Gran Sport, 1974 Zeus track, 1988 Masi Gran Corsa, 1974 Falcon, 1980 Palo Alto, 1973 Raleigh Gran Sport, 1974 Legnano. Susan: 1976 Windsor Profesional.
Larry:1958 Drysdale, 1961 Gitane Gran Sport, 1974 Zeus track, 1988 Masi Gran Corsa, 1974 Falcon, 1980 Palo Alto, 1973 Raleigh Gran Sport, 1974 Legnano. Susan: 1976 Windsor Profesional.
01-29-19, 03:03 PM
#14
Senior Member
You can freeze them if you want, but it makes almost no difference. They don't require a high pressing force. A small threaded rod with a couple of nuts/fender washers will do it just fine. Use the old bearing to help push the new one in, if you don't have a small bearing press.
Yes, most cartridge bearing hubs use convertible caps now, to switch between 9/10mm and through-axle compatibility. As such, it would not be possible to fit a through axle through the smaller size. Some suspension bearings may still use that size, but again, quite small for the forces involved there.
Yes, most cartridge bearing hubs use convertible caps now, to switch between 9/10mm and through-axle compatibility. As such, it would not be possible to fit a through axle through the smaller size. Some suspension bearings may still use that size, but again, quite small for the forces involved there.
02-01-19, 09:08 AM
#15
Senior Member
Thread Starter
Join Date: Apr 2011
Location: Maryland, USA
Posts: 2,442
Bikes: Drysdale/Gitane/Zeus/Masi/Falcon/Palo Alto/Raleigh/Legnano
Mentioned: 34 Post(s)
Tagged: 0 Thread(s)
Quoted: 987 Post(s)
Liked 641 Times
in
407 Posts
You can freeze them if you want, but it makes almost no difference. They don't require a high pressing force. A small threaded rod with a couple of nuts/fender washers will do it just fine. Use the old bearing to help push the new one in, if you don't have a small bearing press.
__________________
Larry:1958 Drysdale, 1961 Gitane Gran Sport, 1974 Zeus track, 1988 Masi Gran Corsa, 1974 Falcon, 1980 Palo Alto, 1973 Raleigh Gran Sport, 1974 Legnano. Susan: 1976 Windsor Profesional.
Larry:1958 Drysdale, 1961 Gitane Gran Sport, 1974 Zeus track, 1988 Masi Gran Corsa, 1974 Falcon, 1980 Palo Alto, 1973 Raleigh Gran Sport, 1974 Legnano. Susan: 1976 Windsor Profesional.
02-01-19, 11:35 AM
#16
Ride, Wrench, Swap, Race
Join Date: Jan 2010
Location: Northern California
Posts: 9,194
Bikes: Cheltenham-Pedersen racer, Boulder F/S Paris-Roubaix, Varsity racer, '52 Christophe, '62 Continental, '92 Merckx, '75 Limongi, '76 Presto, '72 Gitane SC, '71 Schwinn SS, etc.
Mentioned: 132 Post(s)
Tagged: 0 Thread(s)
Quoted: 1565 Post(s)
Liked 1,296 Times
in
866 Posts
You can use thick washers to simulate the dropouts, or use actual dropouts cut from a dead frame, but the actual lever force you will be using is what you should test with to verify free axle rotation with the wheel off of the bike.
The same goes for all cup/cone hubs of course. Not a lot of work at all.
A common alternative to that is to just set the axle up with a tad of free-play off of the bike, then install the wheels and adjust the QR tension (within it's safe range of operation) until the free-play is (hopefully) gone. I find myself doing this often with some of the cheaper hubs having less-than-perfect bearing race alignment/condition, or having stamped bearing cups. It becomes a source of adjustment between real adjustments you could say. The adjustment may appear different at different rotational positions of the wheel in these cases, though not likely the case with your cartridge-bearing units.
02-01-19, 12:33 PM
#17
Senior Member
Thread Starter
Join Date: Apr 2011
Location: Maryland, USA
Posts: 2,442
Bikes: Drysdale/Gitane/Zeus/Masi/Falcon/Palo Alto/Raleigh/Legnano
Mentioned: 34 Post(s)
Tagged: 0 Thread(s)
Quoted: 987 Post(s)
Liked 641 Times
in
407 Posts
Good info there, thanks. I recall reading here that someone recommended using a couple of 10mm open-end wrenches as pseudo-dropouts to adjust off-the-bike on ball and cone hubs, I like that idea.
Well, I can certainly imagine being able to tell "too loose", perhaps "too tight", less so.
Well, I can certainly imagine being able to tell "too loose", perhaps "too tight", less so.
You'll absolutely need to test the assembly under the force of your QR levers to know if the adjustment is perhaps too tight once assembled.
You can use thick washers to simulate the dropouts, or use actual dropouts cut from a dead frame, but the actual lever force you will be using is what you should test with to verify free axle rotation with the wheel off of the bike.
The same goes for all cup/cone hubs of course. Not a lot of work at all.
A common alternative to that is to just set the axle up with a tad of free-play off of the bike, then install the wheels and adjust the QR tension (within it's safe range of operation) until the free-play is (hopefully) gone. I find myself doing this often with some of the cheaper hubs having less-than-perfect bearing race alignment/condition, or having stamped bearing cups. It becomes a source of adjustment between real adjustments you could say. The adjustment may appear different at different rotational positions of the wheel in these cases, though not likely the case with your cartridge-bearing units.
__________________
Larry:1958 Drysdale, 1961 Gitane Gran Sport, 1974 Zeus track, 1988 Masi Gran Corsa, 1974 Falcon, 1980 Palo Alto, 1973 Raleigh Gran Sport, 1974 Legnano. Susan: 1976 Windsor Profesional.
Larry:1958 Drysdale, 1961 Gitane Gran Sport, 1974 Zeus track, 1988 Masi Gran Corsa, 1974 Falcon, 1980 Palo Alto, 1973 Raleigh Gran Sport, 1974 Legnano. Susan: 1976 Windsor Profesional.
02-01-19, 12:40 PM
#18
Senior Member
To add to that, there are two primary types of arrangements for cartridge bearing hubs:
- press fit on the axle, slip fit in the hub
- press fit in the hub, slipped over the axle
02-03-19, 02:06 PM
#19
Senior Member
Thread Starter
Join Date: Apr 2011
Location: Maryland, USA
Posts: 2,442
Bikes: Drysdale/Gitane/Zeus/Masi/Falcon/Palo Alto/Raleigh/Legnano
Mentioned: 34 Post(s)
Tagged: 0 Thread(s)
Quoted: 987 Post(s)
Liked 641 Times
in
407 Posts
To add to that, there are two primary types of arrangements for cartridge bearing hubs:
- press fit on the axle, slip fit in the hub
- press fit in the hub, slipped over the axle
Anyway, The bearings are in. I did use the freezer method, plus I built up a "press" from threaded rod, nuts and fender washers, and I liked the idea of using the old bearings as correct-diameter "pushers", the new bearings popped right in and did not need a lot of pressing to seat into the hub shells.
While at it, I did something I've done on no other bike, ever -- I took apart the QR skewers and greased the innards, they were a bit crusty inside. Big improvement.
Also, I put the axles in the freezer, to insure them slipping into the bearings, probably not needed. They slipped in just fine.
It took perhaps six attempts for each hub to set the bearings/axle tension, so that there was play when loose but not with the QR tightened. Maybe Avocet axles are strong but there's very little "compression", I'm trying to hit a small window here. Not quite like ball and cone bearings. The results are like velvet, however. By the way, I used two 10mm wrenches as pseudo-dropouts -- that sounds handy, but I had one slip as I tightened it, and ended up with a bent QR shaft with fortunately straightened OK. After that, I repeatedly used the bike itself, more work but safer. Also, on the Avocet skewers, there's a plastic inert in the "nut" on the side opposite the lever, that's fine but it keeps backing out, I have no idea how to secure it and does it really matter anyway?
Well, the forecast is for +/- 60F on Tuesday and ready for a test ride to see how this all works out. With a Velo Orange headset, Shimano
 clipless pedals and aftermarket derailleur pulleys, the new hub bearings and the new BB means this bike no longer has any traditional cone/ball bearings anywhere.
__________________
Larry:1958 Drysdale, 1961 Gitane Gran Sport, 1974 Zeus track, 1988 Masi Gran Corsa, 1974 Falcon, 1980 Palo Alto, 1973 Raleigh Gran Sport, 1974 Legnano. Susan: 1976 Windsor Profesional.
Larry:1958 Drysdale, 1961 Gitane Gran Sport, 1974 Zeus track, 1988 Masi Gran Corsa, 1974 Falcon, 1980 Palo Alto, 1973 Raleigh Gran Sport, 1974 Legnano. Susan: 1976 Windsor Profesional.
Last edited by tiger1964; 02-03-19 at 07:19 PM. Reason: lever not liver
02-03-19, 07:13 PM
#20

Senior Member
Join Date: Jun 2006
Posts: 20,305
Mentioned: 130 Post(s)
Tagged: 0 Thread(s)
Quoted: 3464 Post(s)
Liked 2,831 Times
in
1,997 Posts
Pro mechanics used to have a set up of a short section of tube with front and rear dropouts, Campagnolo of course, brazed in.
The concept is to verify the cone adjustment with the quick release installed, which also provides a preset of the quick release tension for exchanging wheels in a race. This was before the "Lawyer lip" feature on dropouts... which the UCI now requires!
The concept is to verify the cone adjustment with the quick release installed, which also provides a preset of the quick release tension for exchanging wheels in a race. This was before the "Lawyer lip" feature on dropouts... which the UCI now requires!
02-03-19, 09:51 PM
#21
Full Member
With the Avocet sealed bearing cartridge style hubs, it is very important to not over tighten the cones during the assembly and adjustment. The factory-stock adjustment, which feels great out-of-the-box, may become a tad loose once the wheels are built and tensioned. The slight play in a sealed bearing hub is normal and correct for this bearing type.
Unlike a traditional cone and loose bearing hub where the ideal adjustment is "smooth turning and no wiggle at the rim" the sealed bearing hubs will sometimes have a touch of "wiggle at the rim."
If a mechanic accidentally over tightens the sealed bearing cartridge hub to eliminate the side-play entirely, there is axial force on the sealed bearing cartridges. Many sealed bearing cartridges are not designed for excessive axial/lateral force, only for the radial force, and can be damaged by over tightening.
I have an Avocet-branded front hub that needs replacement bearing cartridges due to an ill-advised tightening to remove the side play. The wheel seemed to turn smoothly, with no discernible play, when the quick release skewer was tight. After some miles the front hub bearings began to make a slight creak/knock noise. By the time the adjustment was returned to slightly loose, the damage had already been done to the bearing cartridges.
02-04-19, 06:03 AM
#22
Senior Member
Thread Starter
Join Date: Apr 2011
Location: Maryland, USA
Posts: 2,442
Bikes: Drysdale/Gitane/Zeus/Masi/Falcon/Palo Alto/Raleigh/Legnano
Mentioned: 34 Post(s)
Tagged: 0 Thread(s)
Quoted: 987 Post(s)
Liked 641 Times
in
407 Posts
With the Avocet sealed bearing cartridge style hubs, it is very important to not over tighten the cones during the assembly and adjustment. The factory-stock adjustment, which feels great out-of-the-box, may become a tad loose once the wheels are built and tensioned. The slight play in a sealed bearing hub is normal and correct for this bearing type.
")
__________________
Larry:1958 Drysdale, 1961 Gitane Gran Sport, 1974 Zeus track, 1988 Masi Gran Corsa, 1974 Falcon, 1980 Palo Alto, 1973 Raleigh Gran Sport, 1974 Legnano. Susan: 1976 Windsor Profesional.
Larry:1958 Drysdale, 1961 Gitane Gran Sport, 1974 Zeus track, 1988 Masi Gran Corsa, 1974 Falcon, 1980 Palo Alto, 1973 Raleigh Gran Sport, 1974 Legnano. Susan: 1976 Windsor Profesional.
02-04-19, 07:20 AM
#23
Senior Member
Technically, if there is at least one side of the axle that has a locknut, there's no reason you couldn't use an angular contact [cartridge] bearing. They are more than happy to work with no side-to-side wiggle.
Just make sure you arrange them so the locknuts are pushing the inner race the right direction.
Just make sure you arrange them so the locknuts are pushing the inner race the right direction.
02-04-19, 02:03 PM
#24
Senior Member
Thread Starter
Join Date: Apr 2011
Location: Maryland, USA
Posts: 2,442
Bikes: Drysdale/Gitane/Zeus/Masi/Falcon/Palo Alto/Raleigh/Legnano
Mentioned: 34 Post(s)
Tagged: 0 Thread(s)
Quoted: 987 Post(s)
Liked 641 Times
in
407 Posts
Thanks. Well, I readjusted the bearings so there's a ghost of free play. Took it out for a ride. Nice and quiet, and as smooth as velvet...
... until two miles out, rolled the bike at about 20mph, pretzeled the front wheel, long walk home. I'm a bit roughed up, probably won't be riding tomorrow.
... until two miles out, rolled the bike at about 20mph, pretzeled the front wheel, long walk home. I'm a bit roughed up, probably won't be riding tomorrow.
__________________
Larry:1958 Drysdale, 1961 Gitane Gran Sport, 1974 Zeus track, 1988 Masi Gran Corsa, 1974 Falcon, 1980 Palo Alto, 1973 Raleigh Gran Sport, 1974 Legnano. Susan: 1976 Windsor Profesional.
Larry:1958 Drysdale, 1961 Gitane Gran Sport, 1974 Zeus track, 1988 Masi Gran Corsa, 1974 Falcon, 1980 Palo Alto, 1973 Raleigh Gran Sport, 1974 Legnano. Susan: 1976 Windsor Profesional.

Thread
Thread Starter
Forum
Replies
Last Post
migrantwing
Bicycle Mechanics
25
11-18-18 11:31 AM
clones2
Bicycle Mechanics
9
12-14-13 11:57 PM
