


'73 Raleigh Professional paint scheme
 03-31-20, 04:57 PM
#1
Junior Member
Thread Starter
'73 Raleigh Professional paint scheme
So i picked up a 73 Raleigh professional that received a 80's make over (charcoal black paint and misc parts swapped). Im trying to bring it back to some of it original glory. I'm going to be doing the mink blue and silver paint scheme. I was wondering if someone could give me some measurements from the seat tube stripes. Mine is a 22.5in frame so I would imagine that may play into measurements some. Any help greatly appreciated.... once I have enough posts I'll add some pics
Last edited by Steven_04; 03-31-20 at 05:36 PM.
 04-01-20, 12:39 PM
#2
Senior Member
Join Date: Aug 2017
Location: Minneapolis
Posts: 936
Bikes: 1968 Raleigh Super Course, 1972 Raleigh Professional, 1975 Raleigh International, 1978 Raleigh Professional, 1985 Raleigh Prestige, 1972 Schwinn Paramount, 1980 Schwinn Voyageur 11.8, 1960 Carlton Franco Suisse Peugeot PX10, 1972 Motobecane Le Champ
Mentioned: 9 Post(s)
Tagged: 0 Thread(s)
Quoted: 323 Post(s)
Liked 690 Times
in
351 Posts
I have a 72 MK IV that is the same size as yours. A previous owner had it repainted and though it�s well done I cannot guarantee that the placement of the stripes is perfect. I think that it is though because the measurements didn�t seem to change from year to year or MK to MK. I also have a 78 MK V and the measurements of the stripes are exactly the same on both bikes.
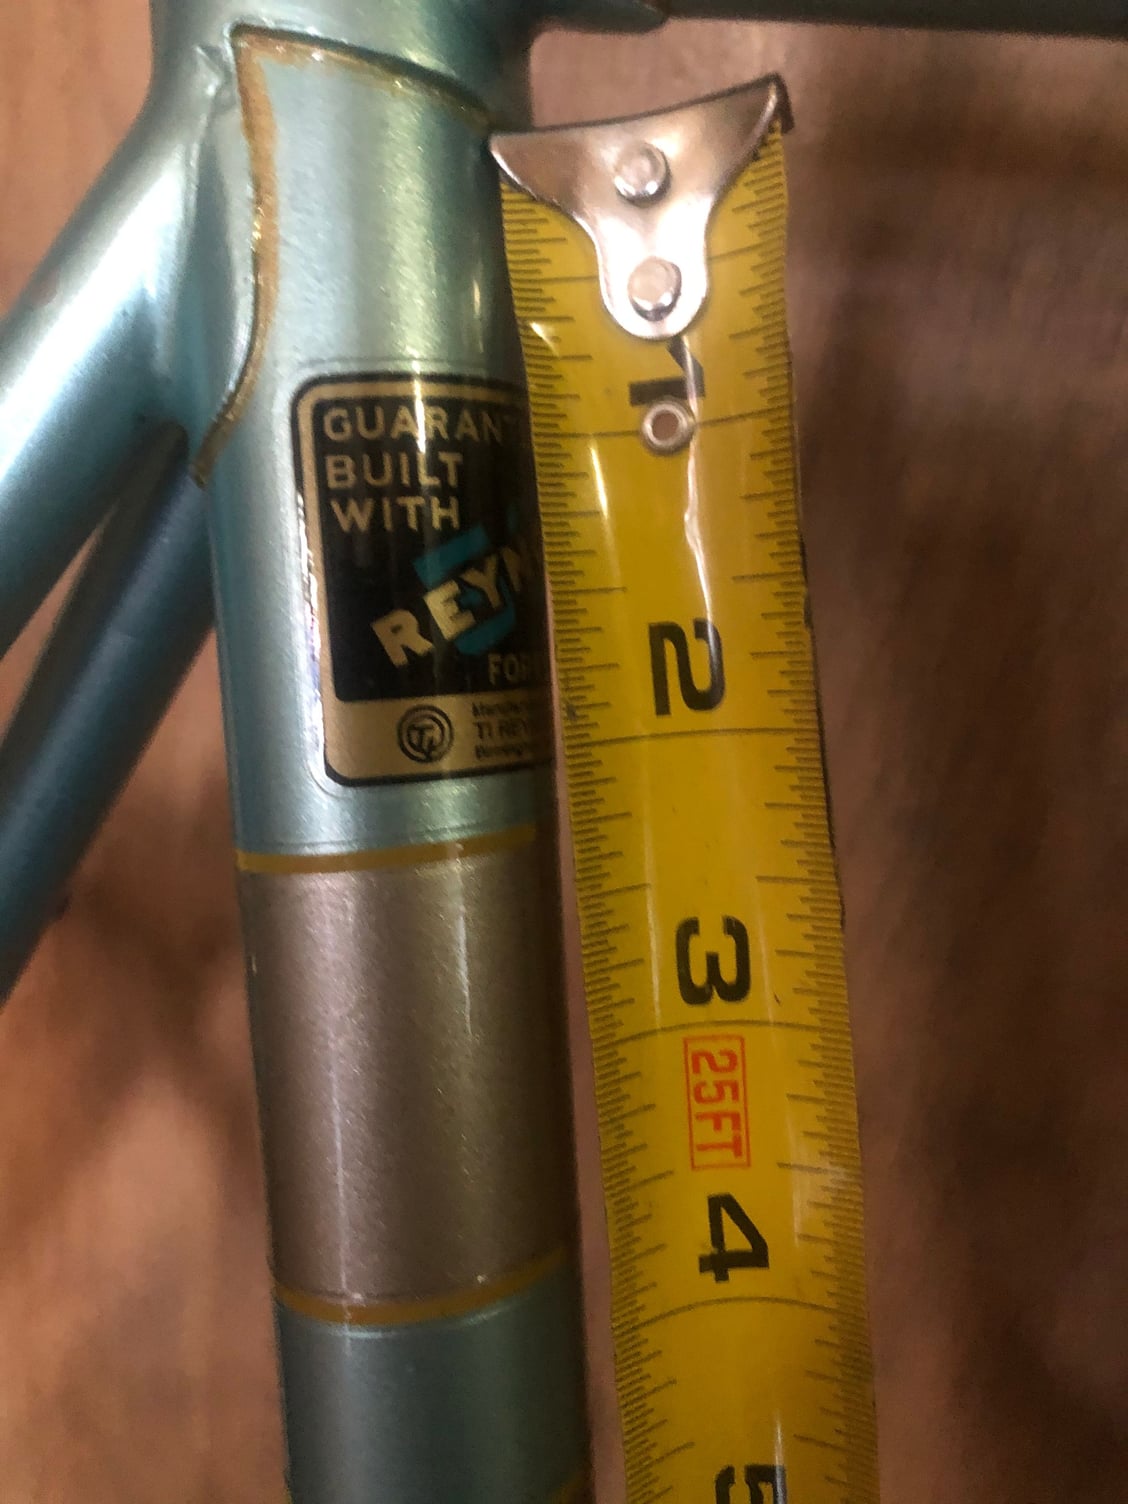
Top stripe begins 2 1/2� from the absolute bottom of the seat lug. I believe mine has the incorrect Reynolds decal for 72 but it�s likely the one you�ll need for 73. I�m not a fan of the vinyl decals on mine and I�m considering redecaling with something nicer if I can find the right stuff.

Spacing is 3/4�

Accent stripes are 1 1/2� including pinstripes.
The main panel is 4 1/2� including pinstripes.

About a 22 1/2� frame.

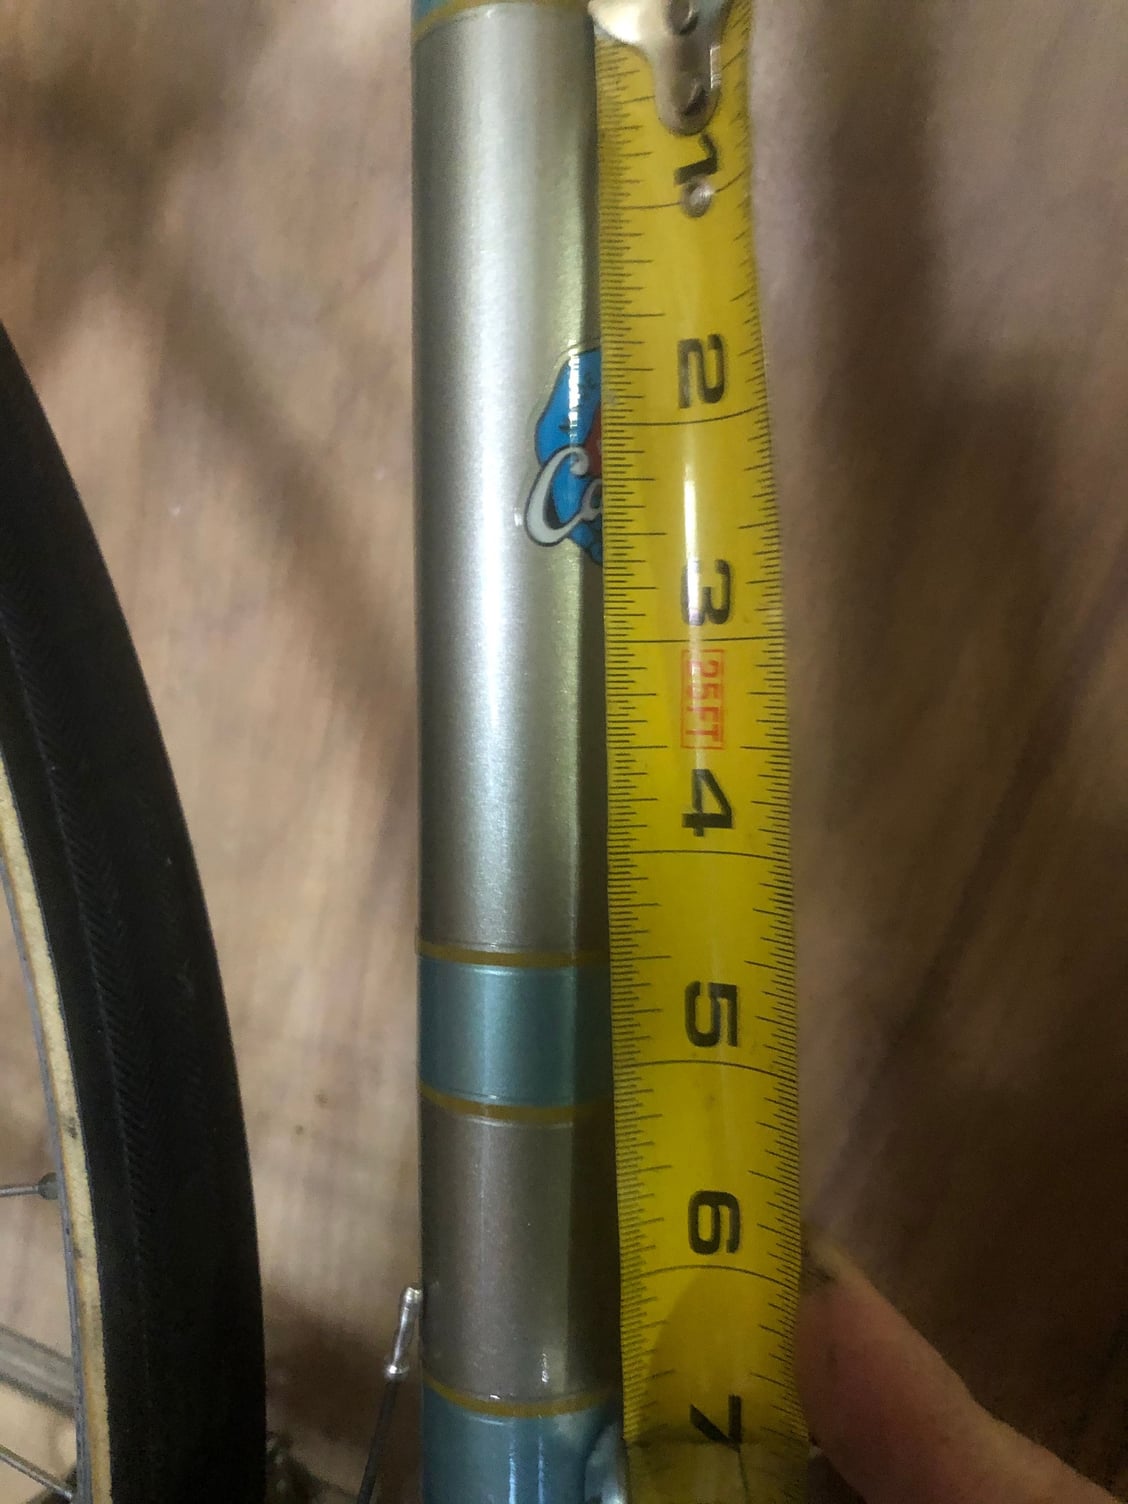
This is my MK V showing the same sizes.

Again the same size center panel on the MK V.
I hope these photos help.
Top stripe begins 2 1/2� from the absolute bottom of the seat lug. I believe mine has the incorrect Reynolds decal for 72 but it�s likely the one you�ll need for 73. I�m not a fan of the vinyl decals on mine and I�m considering redecaling with something nicer if I can find the right stuff.
Spacing is 3/4�
Accent stripes are 1 1/2� including pinstripes.
The main panel is 4 1/2� including pinstripes.
About a 22 1/2� frame.
This is my MK V showing the same sizes.
Again the same size center panel on the MK V.
I hope these photos help.
 04-01-20, 01:39 PM
#5
Senior Member
Join Date: Aug 2017
Location: Minneapolis
Posts: 936
Bikes: 1968 Raleigh Super Course, 1972 Raleigh Professional, 1975 Raleigh International, 1978 Raleigh Professional, 1985 Raleigh Prestige, 1972 Schwinn Paramount, 1980 Schwinn Voyageur 11.8, 1960 Carlton Franco Suisse Peugeot PX10, 1972 Motobecane Le Champ
Mentioned: 9 Post(s)
Tagged: 0 Thread(s)
Quoted: 323 Post(s)
Liked 690 Times
in
351 Posts
Looking forward to seeing what you do with it.
04-01-20, 03:46 PM
#6

Friendship is Magic

Join Date: Nov 2010
Location: Sacramento, CA
Posts: 22,984
Bikes: old ones
Mentioned: 304 Post(s)
Tagged: 0 Thread(s)
Quoted: 26424 Post(s)
Liked 10,380 Times
in
7,208 Posts

...I kind of went with some quick measurements and a sense of what seemed proportional to my frame size. In this case, the black stripes on the seat tube are @1.5 inches in width, and the larger center portion is three times as wide, @4.5". The spaces between the overpainted stripes are 1 "
You need to more or less leave enough room at the top for your 531 sticker, and you wan the stripes to end just before where the front derailleur will mount. You can't get 1" masking tape any more, but whatever the metric equivalent from 3M was, it works OK.
More important is that it's difficult to get clean lines spraying stripes like this, so let the base color coat dry a few days before you stripe over it. Then wait until the striping is dry to the touch, unmask, and see if you need to clean up any overspray with mineral spirits. Then after a couple of days you use some kind of vinyl striping to clean up the edge lines and give a visual impression of clear, sharp lining. (The originals used gold, I went with black as more minimalist.) Good luck. This one was finished with a final coat over everything of Spraymax 2K Clear Glamor.
04-01-20, 03:52 PM
#7
Friendship is Magic
Join Date: Nov 2010
Location: Sacramento, CA
Posts: 22,984
Bikes: old ones
Mentioned: 304 Post(s)
Tagged: 0 Thread(s)
Quoted: 26424 Post(s)
Liked 10,380 Times
in
7,208 Posts
.
^^^BTW, this one is a 24" frame.
^^^BTW, this one is a 24" frame.
04-01-20, 05:23 PM
#8

Senior Member
Join Date: Jun 2006
Posts: 20,305
Mentioned: 130 Post(s)
Tagged: 0 Thread(s)
Quoted: 3464 Post(s)
Liked 2,830 Times
in
1,996 Posts
I would double check measuring from the bottom bracket, the front mech with a 52 or 52t should be in the blue primary paint zone, no matter the size. Screams respray when it is not.
04-01-20, 05:34 PM
#9
verktyg

Join Date: Jul 2006
Location: SF Bay Area
Posts: 4,030
Bikes: Current favorites: 1988 Peugeot Birraritz, 1984 Gitane Super Corsa, 1980s DeRosa, 1981 Bianchi Campione Del Mondo, 1992 Paramount OS, 1988 Colnago Technos, 1985 RalieghUSA SBDU Team Pro
Mentioned: 207 Post(s)
Tagged: 0 Thread(s)
Quoted: 1036 Post(s)
Liked 1,238 Times
in
654 Posts
1975 Raleigh Pro Paint
The bike is stored away so I didn't take any measurements on my 22.5" 1975 Pro but the mink blue in this picture is pretty accurate... Course it will probably look different on your screen.
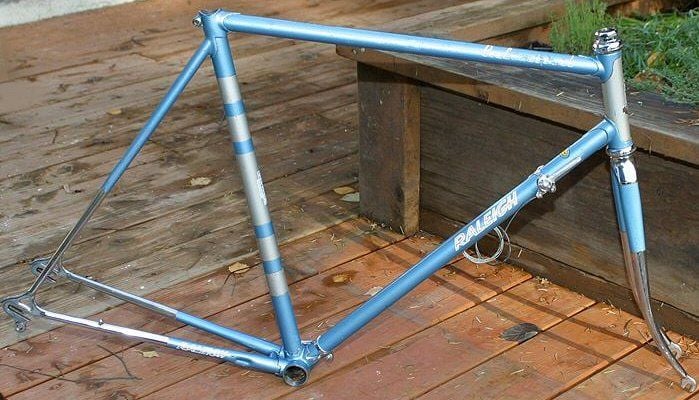
A lot of (most of) the mink blue resprays I've seen online look too pale. Some painters play foot loose and fancy free with colors....")
verktyg
A lot of (most of) the mink blue resprays I've seen online look too pale. Some painters play foot loose and fancy free with colors....
verktyg
__________________
Don't believe everything you think! History is written by those who weren't there....
Chas. ;-)
Don't believe everything you think! History is written by those who weren't there....
Chas. ;-)

