


Removing 3 Sturmey-Archer speed hub rebuild
 03-31-20, 02:26 AM
#26
Overdoing projects

Join Date: Oct 2011
Location: Rotterdam, former republic of the Netherlands
Posts: 2,397
Bikes: Batavus Randonneur GL, Gazelle Orange Excellent, Gazelle Super Licht, Gazelle Grand Tourist, Gazelle Lausanne, Gazelle Tandem, Koga-Miyata SilverAce, Koga-Miyata WorldTraveller
Mentioned: 58 Post(s)
Tagged: 0 Thread(s)
Quoted: 784 Post(s)
Liked 1,238 Times
in
686 Posts
I like MonkeyShred's video on a Sturmey Archer AW 3-speed overhaul. As you can tell in this video this hub really doesn't need to be handled with soft gloves. A hammer and punch is the preferred method for some parts.
Personally, I have taken a 3-speed apart a couple of times and rebuild a 5-speed last year. The tricky part is opening things up but other than that there is not a lot you can do wrong.
Personally, I have taken a 3-speed apart a couple of times and rebuild a 5-speed last year. The tricky part is opening things up but other than that there is not a lot you can do wrong.
 03-31-20, 02:49 PM
#27

WGB
Thread Starter
Join Date: Jul 2017
Location: Niagara Region
Posts: 2,913
Bikes: Panasonic PT-4500
Mentioned: 46 Post(s)
Tagged: 0 Thread(s)
Quoted: 1794 Post(s)
Liked 2,328 Times
in
1,375 Posts
It's still a work in progress. The R.H. ball Ring (I think that's it) is seized (approx 3:25 on the video). You should see my knuckles. Soaking it in PB Blaster then a few judicious strikes with a hammer and punch. It will come.
Last edited by WGB; 03-31-20 at 02:54 PM.
03-31-20, 03:42 PM
#28
aka Tom Reingold

Join Date: Jan 2009
Location: New York, NY, and High Falls, NY, USA
Posts: 40,498
Bikes: 1962 Rudge Sports, 1971 Raleigh Super Course, 1971 Raleigh Pro Track, 1974 Raleigh International, 1975 Viscount Fixie, 1982 McLean, 1996 Lemond (Ti), 2002 Burley Zydeco tandem
Mentioned: 511 Post(s)
Tagged: 0 Thread(s)
Quoted: 7346 Post(s)
Liked 2,452 Times
in
1,430 Posts
Did you get your sprocket off? You may have to hit the screwdriver harder than you think. You probably won't wreck it but be prepared. Wear glasses, and whack a thin blade screwdriver into the space between the notch and the lockring. Then once it's wedged under, hold onto it tight and pry hard. Be strong, and you'll get it.
I recommend you don't try to revive those rims, even though I left a previous comment to the opposite effect. Your spokes are probably seized and corroding, so it's time for some rebuilds. If you haven't built wheels yet, we will walk you through it. This hub is worth rebuilding on, and the new rims and spokes are nicer than the old ones ever were.
I recommend you don't try to revive those rims, even though I left a previous comment to the opposite effect. Your spokes are probably seized and corroding, so it's time for some rebuilds. If you haven't built wheels yet, we will walk you through it. This hub is worth rebuilding on, and the new rims and spokes are nicer than the old ones ever were.
__________________
Tom Reingold, tom@noglider.com
New York City and High Falls, NY
Blogs: The Experienced Cyclist; noglider's ride blog
�When man invented the bicycle he reached the peak of his attainments.� � Elizabeth West, US author
Please email me rather than PM'ing me. Thanks.
Tom Reingold, tom@noglider.com
New York City and High Falls, NY
Blogs: The Experienced Cyclist; noglider's ride blog
�When man invented the bicycle he reached the peak of his attainments.� � Elizabeth West, US author
Please email me rather than PM'ing me. Thanks.
04-01-20, 07:14 AM
#29
Half way there

Join Date: Sep 2015
Location: North Carolina
Posts: 2,955
Bikes: Many, and the list changes frequently
Mentioned: 5 Post(s)
Tagged: 0 Thread(s)
Quoted: 985 Post(s)
Liked 879 Times
in
526 Posts
Good luck.
Likes For Moe Zhoost:
04-01-20, 09:10 AM
#30
Senior member

Join Date: Oct 2004
Location: Oakville Ontario
Posts: 8,115
Mentioned: 25 Post(s)
Tagged: 0 Thread(s)
Quoted: 942 Post(s)
Liked 656 Times
in
370 Posts
I've found using a brass punch is better than steel. First, the softer brass conforms to the notch and won't slide off as easily when hammering. Secondly (and really important) brass will not damage the notch. My punch is just a 6" length of brass rod tapered at the end. Don't be tentative when hammering, you need a sharp blow to start it moving.
Good luck.
Good luck.
Likes For Dan Burkhart:
10-27-23, 09:16 AM
#31
Volunteer wrench
Join Date: Feb 2023
Location: Arizona
Posts: 69
Bikes: 1971 Schwinn Suburan, 1971 Peugoet UO8, 1984 Nishiki Cresta, 1984 Nishiki Olympic, 1987 Schwinn Super Sport, 1996 Waterford 1250, 2018 Cannondale Synaspe Carbon
Mentioned: 0 Post(s)
Tagged: 0 Thread(s)
Quoted: 19 Post(s)
Liked 52 Times
in
22 Posts
After reading this thread, I decided to take the plunge, I used #8D finishing nails threaded through the left and right hand spoke holes to stop it from rotating in the vise. That, two days of soaking in Blaster and a large hammer.
11-01-23, 03:48 PM
#32
Senior Member

Join Date: Jul 2005
Location: Boulder County, CO
Posts: 4,390
Bikes: '80 Masi Gran Criterium, '12 Trek Madone, early '60s Frejus track
Mentioned: 6 Post(s)
Tagged: 0 Thread(s)
Quoted: 513 Post(s)
Liked 445 Times
in
335 Posts
It will be easier to test your hub rebuild if the spokes are not cut.
11-01-23, 04:16 PM
#33
Volunteer wrench
Join Date: Feb 2023
Location: Arizona
Posts: 69
Bikes: 1971 Schwinn Suburan, 1971 Peugoet UO8, 1984 Nishiki Cresta, 1984 Nishiki Olympic, 1987 Schwinn Super Sport, 1996 Waterford 1250, 2018 Cannondale Synaspe Carbon
Mentioned: 0 Post(s)
Tagged: 0 Thread(s)
Quoted: 19 Post(s)
Liked 52 Times
in
22 Posts
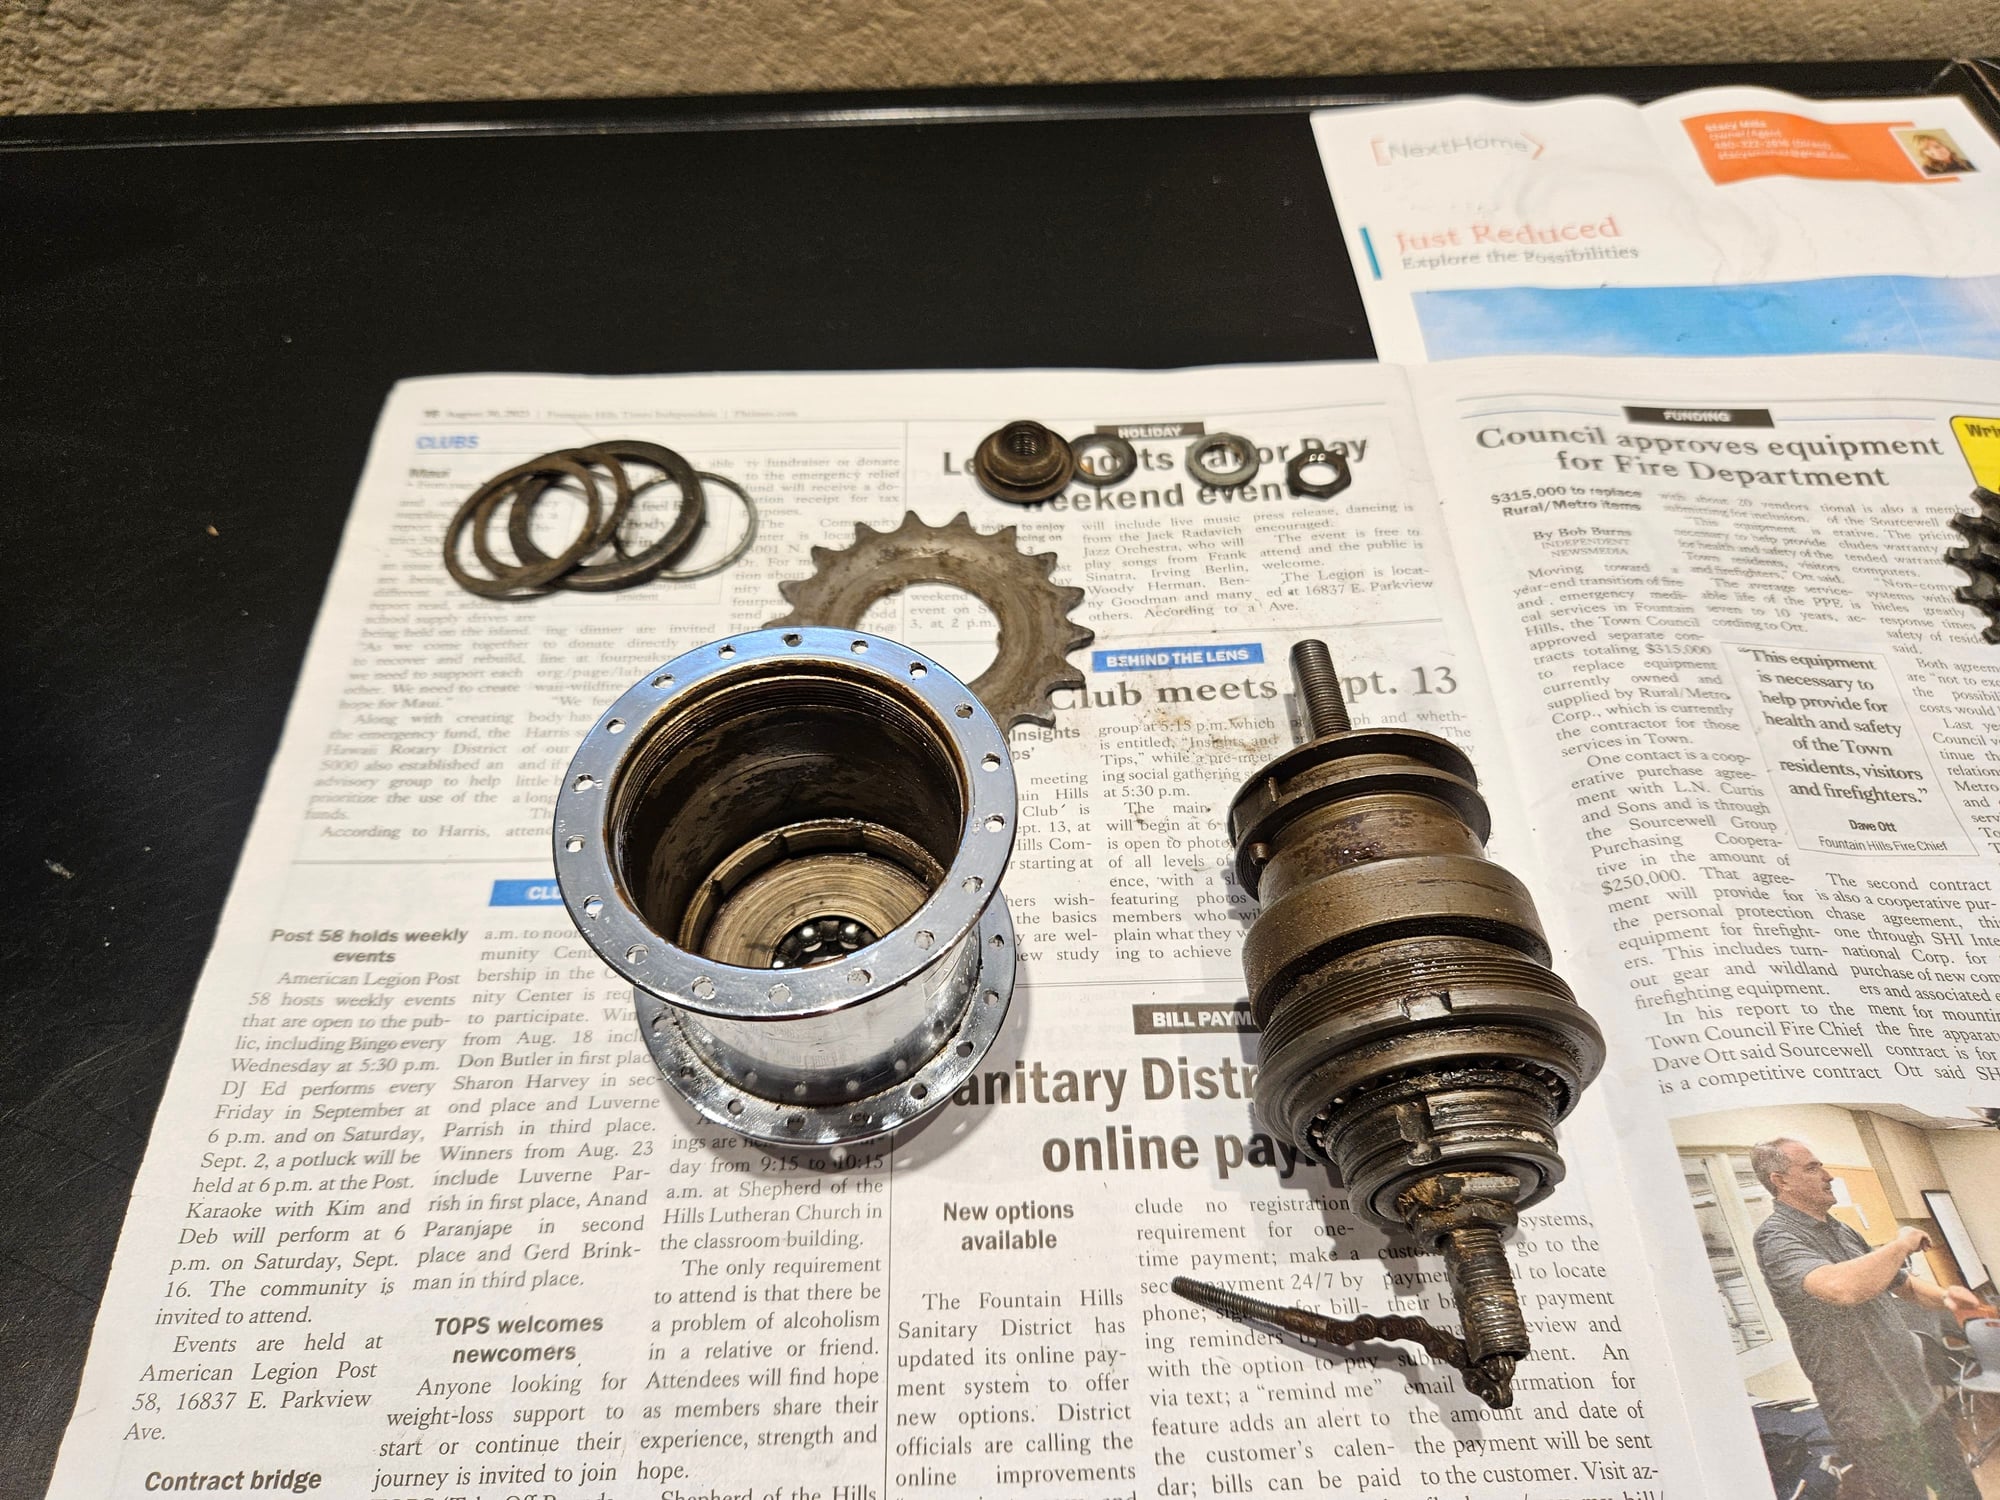
In my case, the hub was in a parts bin, not part of a wheel assembly. I wanted to become familiar with the process before tackling the rear wheel on my Robinhood. The parts bin hub internal unit has been fully disassembled and cleaned using a sonic cleaner. Should be re-assembled this weekend and ready to test in the Robinhood wheel.
Likes For retlaw53:
11-02-23, 10:39 AM
#34
Senior Member
Join Date: Apr 2016
Posts: 1,179
Mentioned: 3 Post(s)
Tagged: 0 Thread(s)
Quoted: 476 Post(s)
Liked 426 Times
in
326 Posts
I was given two early 70's Raleigh Sports
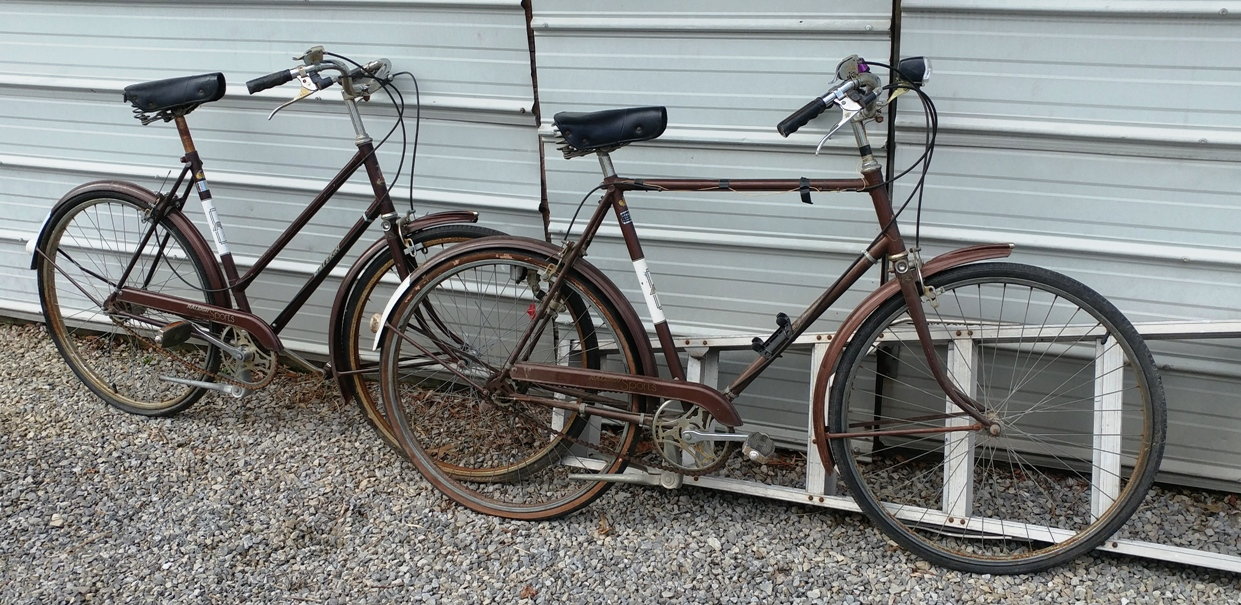
They have seriously rusted rims and I can't see trying to save the rims but wanted to see if the internal hubs are worth saving and rebuilding. I've never taken apart one of these but there are a lot of how to videos available. Problem is all the videos start with the hubs already free from their rims.
I'm pretty sure that it's okay to simply cut out a Sturmey Archer hub (unlike a hub with a cassette or freewheel attached) but wanted to check first.
Do I need to leave the hubs attached to the rims to start the dismantle process?
Likes For grumpus:
