


Clear-coat question
 12-06-19, 01:29 PM
#1

Senior Member
Thread Starter
Join Date: Jul 2004
Location: Twin Cities
Posts: 927
Mentioned: 14 Post(s)
Tagged: 0 Thread(s)
Quoted: 206 Post(s)
Liked 102 Times
in
46 Posts
Clear-coat question
For those of you who repaint your own bikes, what is your process for the final clear-coat stages? I’ll be using Spray Max 2-part clear-coat spray and am confident about getting it on the frame. But beyond that, is there still a lot if sanding, buffing, and polishing left to do? And do you also clear-coat the chrome areas on the frame (chainstays and lugs)? My previous experience is with nitrocellulose lacquer on guitars, but this is my first time with the 2-part stuff. Thanks!
__________________
Some days, it's not even worth gnawing through the restraints.
Some days, it's not even worth gnawing through the restraints.
 12-06-19, 01:41 PM
#2
PM me your cotters

Join Date: Jun 2015
Location: ATL
Posts: 3,241
Mentioned: 80 Post(s)
Tagged: 0 Thread(s)
Quoted: 1137 Post(s)
Liked 590 Times
in
422 Posts
Sorry if any of this is redundant based on prior experience you have. I'm also adding the extra bits for others who may be inspired by your post.
First of all, first thing you need to know is you need proper respiratory gear if using 2K, and you need to keep yourself covered, long sleeves is ideal. Use in a well ventilated area, that stuff is serious business and can cause permanent damage.
Second, you need to confirm the paint you're clearing over is compatible and read about the application window if your base color. Super critical to check the application window, most paints I've cleared over suggest applying the clear within 30 minutes of base coat application, OR you need to wait until 1-2 weeks of curing time before you can clear.
Finally, pre=spray prep. Using a suitable oil and residue prep with a lint-free towel is key.
I like to make sure my base/primer is smooth before shooting color, I'll shoot my color in multiple coats within the window instructions on the can, then shoot my clear if going on-shot. If I'm concerned about garbage like stray dust etc, or I notice the color isn't very smooth when laying it down, I'll wait the week or more for cure time per the can/clear instructions, then wet sand, solvent, then shoot clear.
One thing I've notice though, everyone has their thing. You don't need to go much farther than YouTube and search "paint with 2K clear" to see about 20 different methods, and some serious safety ignorance out of people.
EDIT - For full disclosure, the above is what I've used when I used to work on Motorcycles, what I've used on various around the house projects, and custom case mods for electronics. So, take with a grain of salt. There are some guys on here who have way more experience specifically with bikes, and I'm not that guy.
Likes For francophile:
12-06-19, 02:04 PM
#3

Seńor Member

Join Date: Oct 2004
Location: Hardy, VA
Posts: 17,923
Bikes: Mostly English - predominantly Raleighs
Mentioned: 70 Post(s)
Tagged: 0 Thread(s)
Quoted: 1491 Post(s)
Liked 1,090 Times
in
638 Posts
Last December, I had my son (who has equipment and is far better at it than I) paint two bicycles for me with automotive paint. One thing that I learned while shopping for the paint is that there are cons - as well as pros - to clearcoating. They are prone to scratching, and you will only make things worse if you try to undo the scratches using a rubbing or polishing compound. I didn't apply any decals to either of those two bicycles, and decided to not go the route of clearcoating. On the other hand, I did apply a 2K clear on a different bicycle that I painted.
You DEFINITELY need to follow the safety precautions. Even with a pretty serious respirator mask and applying it outdoors, the fumes were very strong, and I had to take micro-breaks to let the air clear as I was spraying.
You DEFINITELY need to follow the safety precautions. Even with a pretty serious respirator mask and applying it outdoors, the fumes were very strong, and I had to take micro-breaks to let the air clear as I was spraying.
__________________
In search of what to search for.
In search of what to search for.
Likes For USAZorro:
12-06-19, 02:49 PM
#4
Friendship is Magic

Join Date: Nov 2010
Location: Sacramento, CA
Posts: 22,984
Bikes: old ones
Mentioned: 304 Post(s)
Tagged: 0 Thread(s)
Quoted: 26410 Post(s)
Liked 10,376 Times
in
7,204 Posts
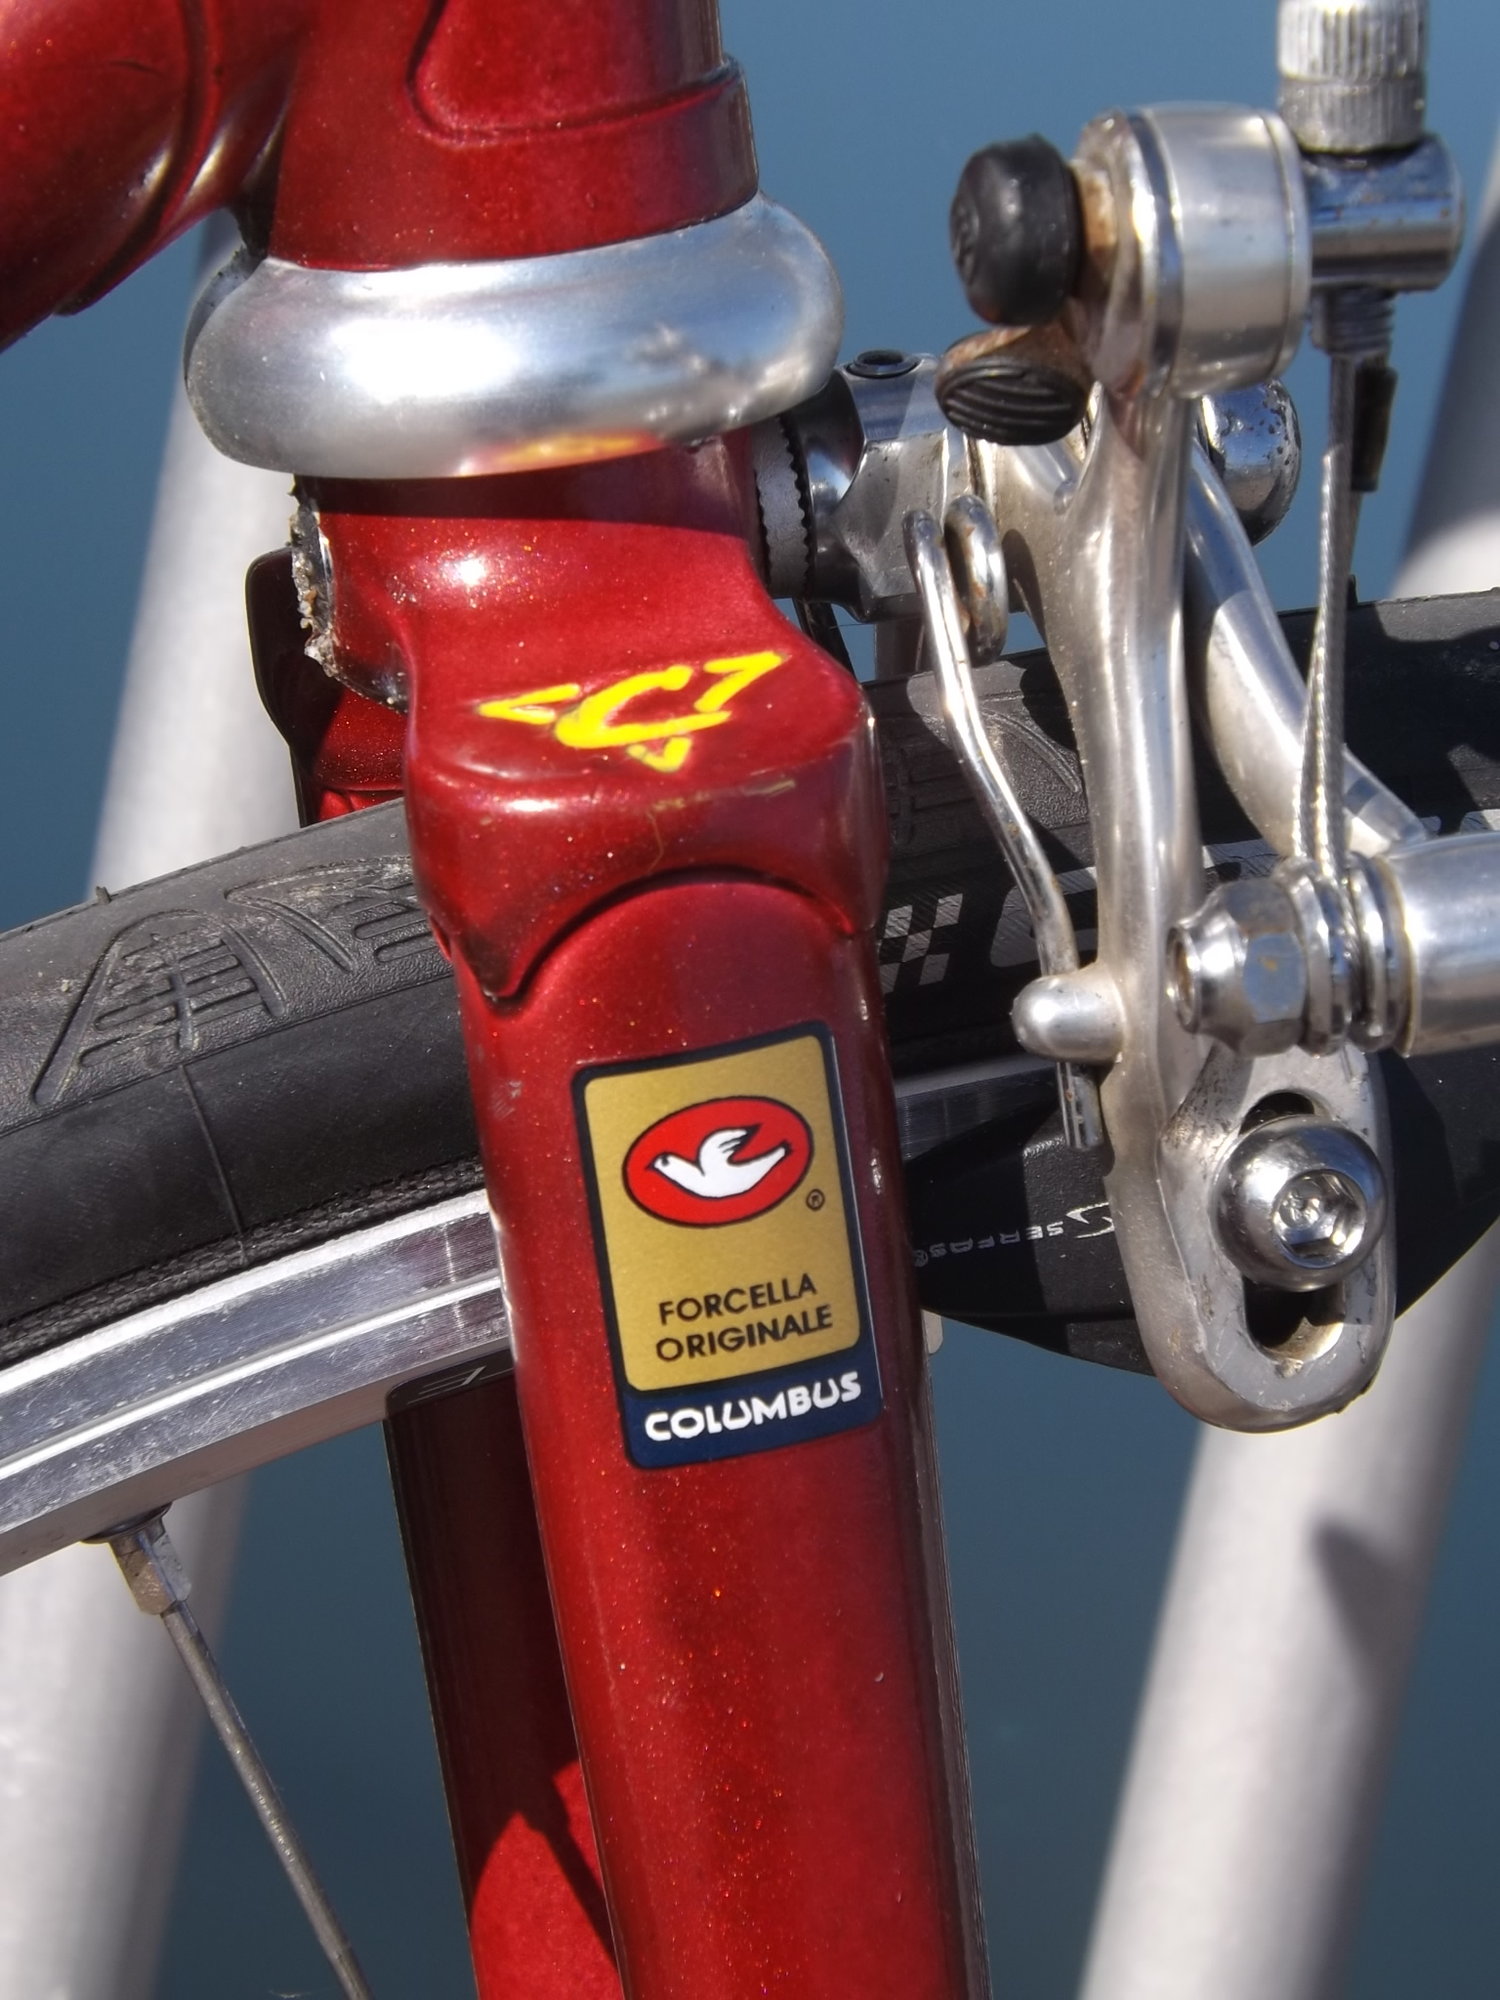
...apart from the respirator mask advice, which I will not repeat ( have one rated for this stuff from the Home Depot, and I paint outdoors in the back yard), here is my experience with the Spraymaxx 2K clear glamour paint, which I have now used on maybe 7 -10 frames as the final step.
It seems to cover all paints equally well. I have used it over both enamel and lacquer, with equally impressive results. I've only been using it for maybe 5 yers now, so I can't speak to whether there might be some longer term problems with using it over lacquer...but thus far it has been a magnificent final finish both for looks and durability. You do have to make certain to mix it very well before you start spraying...the full two minutes of shaking and another two after puncturing the hardener compartment. The spray can and nozzle are pretty high quality, and if there is anything you need to watch out for, it is to get a good saturated coat on the surface of your bike tubing (without runs), or you will probably end up with a little orange peel in the final surface. Which is not all that bad, given that this is a clear, so orange peel is less noticeable.
I have never done any surface prep to the underlying color coats, other than to apply the decals before the final clear with Spraymaxx. One can seems to cover an average frame and fork nicely. There is some cautionary advice in the literature to apply it within a certain recoat window for the color coat...I think it's maybe 48 or 72 hours. But on my projects I have often gone longer than that because I like to let the color coats dry some before I apply the vinyl decals. When applied properly, the stuff goes on as a relatively thick paint layer. So I've never seen any point in trying to wet sand the undercoats smoother than they go on over the primer.
You do need to hit the thing with some kind of tack rag to get rid of any dust or surface lint a little before you do the final clear. And the can only has a useful pot life of about 24 hours. so I spray it all out in one go...fork first, then frame. Don't spray out the final few sloshes in the can as it goes empty, because there's some risk of losing the quality of the spray stream right at the end. I mask any polished chrome, and don't paint it with clear. I am fearful that there will be some adhesion problems down the road, and pealing clear coat is a problem I'd rather avoid.
Some examples:

Likes For 3alarmer:
12-06-19, 02:53 PM
#5
Friendship is Magic
Join Date: Nov 2010
Location: Sacramento, CA
Posts: 22,984
Bikes: old ones
Mentioned: 304 Post(s)
Tagged: 0 Thread(s)
Quoted: 26410 Post(s)
Liked 10,376 Times
in
7,204 Posts
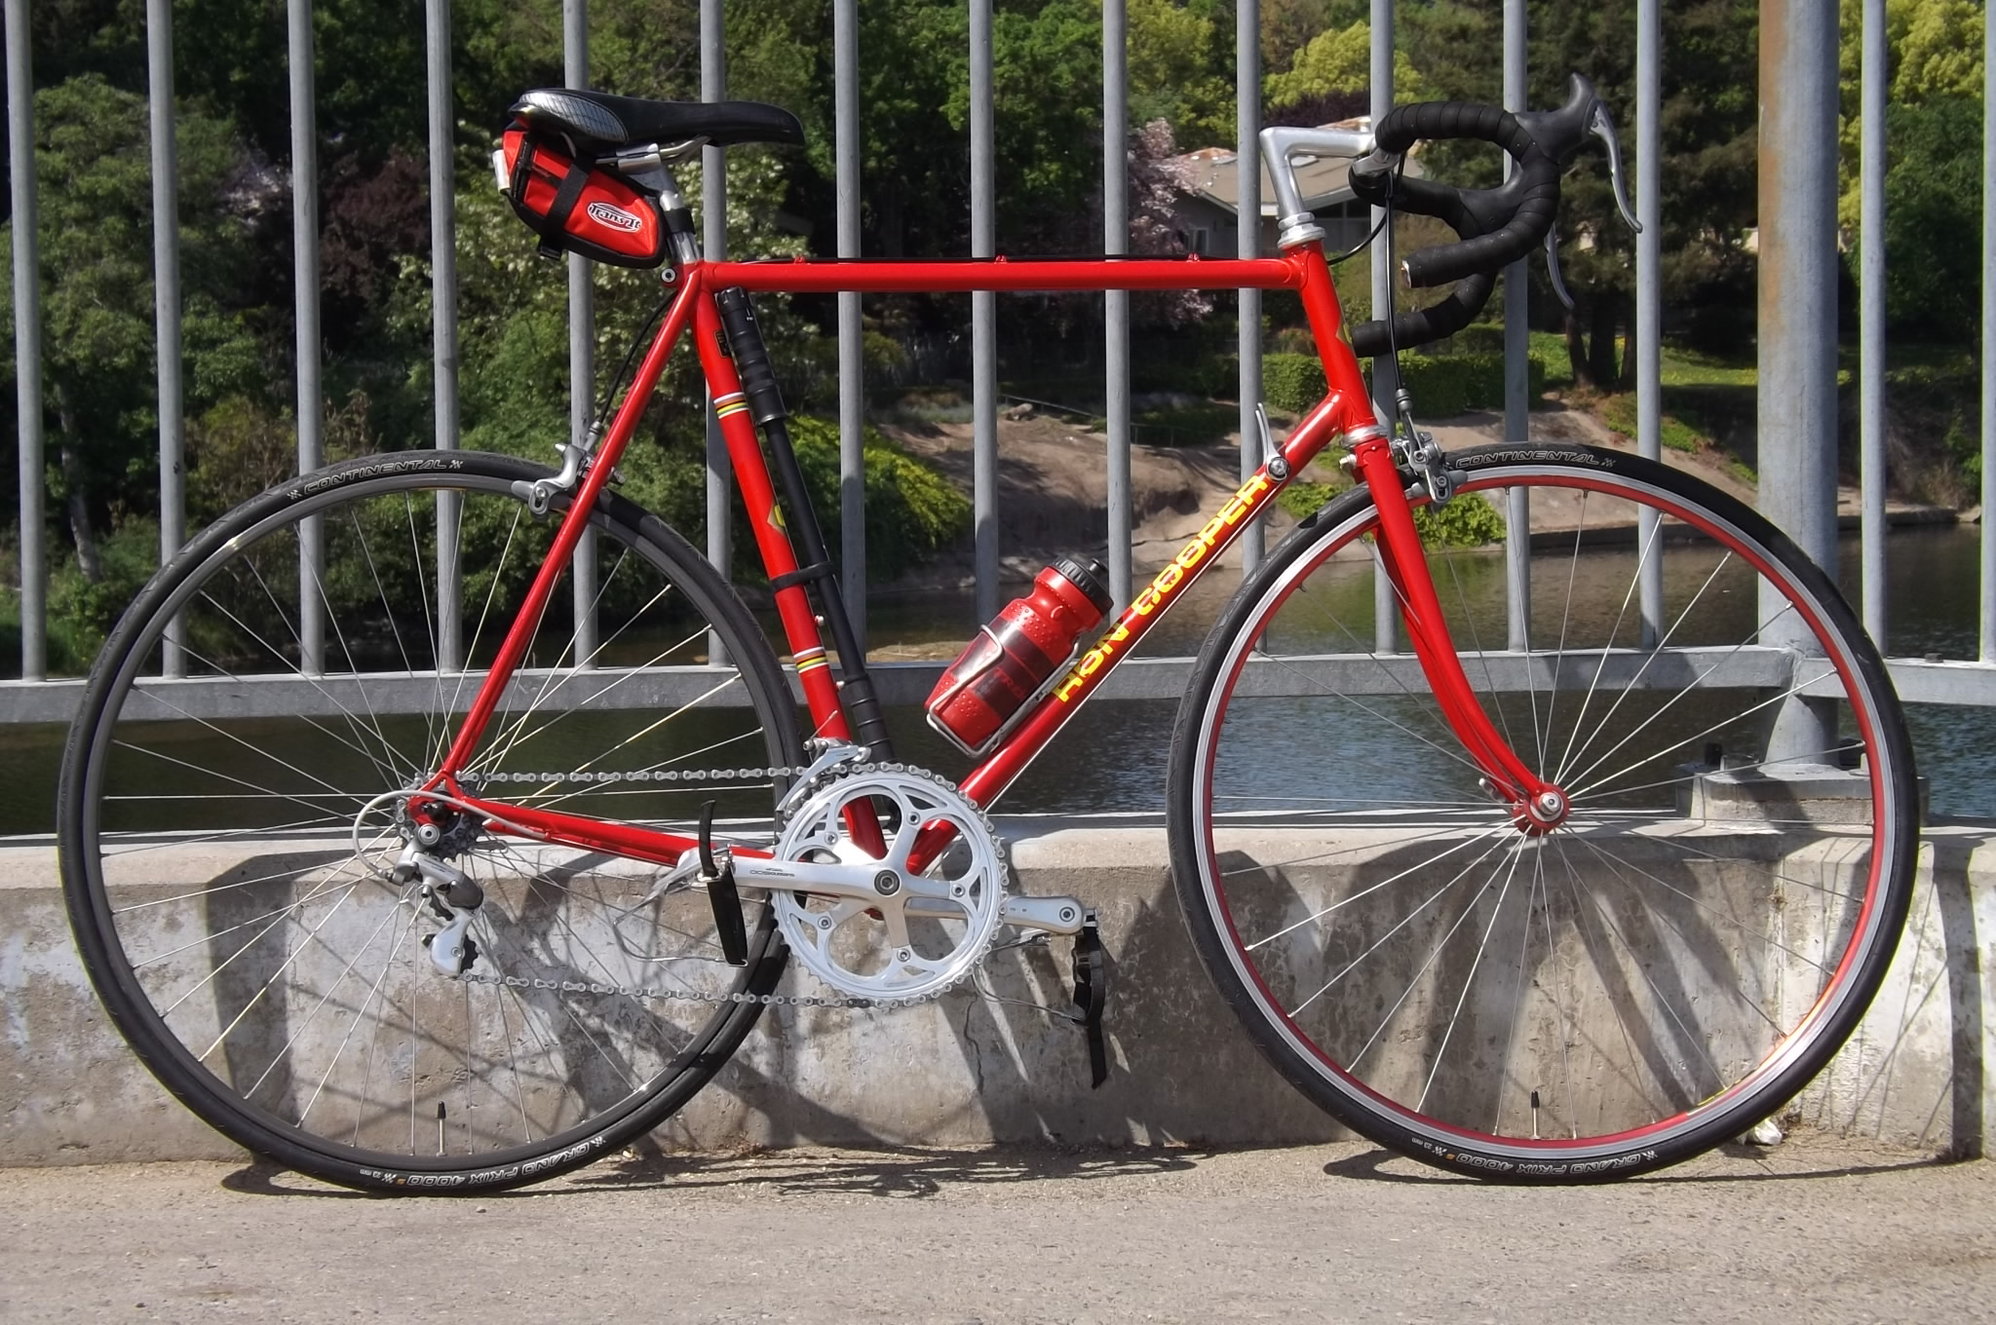
^^^the Lenton on the bottom was a project that had pretty good, old (1958) original paint and decals. I used the Spraymaxx as a compromise with the idea of preserving the old paint and decals (which were a little fragile), but still having a bike I could ride without worrying too much about it.
12-06-19, 03:03 PM
#6
PM me your cotters
Join Date: Jun 2015
Location: ATL
Posts: 3,241
Mentioned: 80 Post(s)
Tagged: 0 Thread(s)
Quoted: 1137 Post(s)
Liked 590 Times
in
422 Posts
^^^the Lenton on the bottom was a project that had pretty good, old (1958) original paint and decals. I used the Spraymaxx as a compromise with the idea of preserving the old paint and decals (which were a little fragile), but still having a bike I could ride without worrying too much about it.
12-06-19, 03:08 PM
#7
Senior Member
Thread Starter
Join Date: Jul 2004
Location: Twin Cities
Posts: 927
Mentioned: 14 Post(s)
Tagged: 0 Thread(s)
Quoted: 206 Post(s)
Liked 102 Times
in
46 Posts
Thanks! Exactly the sort of ideas I was hoping for. On the bike I’m doing, the base coat will have cured for quite a while, and I’m still trying to decide if I want to get repro decals. The color is non-original, but I’d still like to identify the frame. I also have started the process of smoothing out the base coat - 400/600/800/1200 grit sandpaper followed by rubbing and polishing compound. I’ll get a good respirator and wait for some warmer weather or maybe try to find a spray booth to use. I’ve also thought about buying a very cheap, used 4-6 person tent to use as a spray booth in my garage. Again, I appreciate the thorough advice.
__________________
Some days, it's not even worth gnawing through the restraints.
Some days, it's not even worth gnawing through the restraints.
12-06-19, 03:37 PM
#8
Senior Member
Join Date: Dec 2016
Location: Long Island, NY
Posts: 2,109
Bikes: Trek 800 x 2, Schwinn Heavy Duti, Schwinn Traveler, Schwinn Le Tour Luxe, Schwinn Continental, Cannondale M400 and Lambert, Schwinn Super Sport
Mentioned: 14 Post(s)
Tagged: 0 Thread(s)
Quoted: 809 Post(s)
Liked 1,022 Times
in
665 Posts
I use automotive 2 component clear coat. I used to not like clear coat, however, I've changed my tune. I don't have any experience with the spray can 2K clear coat. There is no reason that it cannot be as good as the stuff that gets mixed and shot with a spray gun. I do use Dupicolor color paint on projects and have gotten good results.
Clean the frame, keep the dust down, wear a mask and a tip that I learned from a YouTube video, shoot in the morning. The bugs are lazy and they are not out of their beds yet.
You may want to practice on something first. Just to get the feel of the how fast you need to move and how wide a path you will cover.
I paint under a carport tent. So, the sides are open.
Likes For Velo Mule:
12-06-19, 05:39 PM
#9
Senior Member

Join Date: Oct 2016
Location: San Mateo,Ca.
Posts: 3,987
Bikes: TRIMMED DOWN THE HERD
Mentioned: 46 Post(s)
Tagged: 0 Thread(s)
Quoted: 1092 Post(s)
Liked 936 Times
in
601 Posts
I've never had a problem clear coating over decals on the bikes that have been done. I wait a couple of days before the next coat. I never coat chrome. Final stage for me is a wax job.
12-06-19, 06:00 PM
#10
Friendship is Magic
Join Date: Nov 2010
Location: Sacramento, CA
Posts: 22,984
Bikes: old ones
Mentioned: 304 Post(s)
Tagged: 0 Thread(s)
Quoted: 26410 Post(s)
Liked 10,376 Times
in
7,204 Posts
Curious, has top-coating over the old paint held-up pretty well over the years? I've seen people do similar on automotive repairs in cases where the original clearcoat isn't peeling and the paint isn't a single-stage, which a lot of the solid color paints pre-1980 seem to be. I'd read elsewhere you can't use Spraymax 2K over single-stage paints, but I've failed to fact-check fully.
Likes For 3alarmer:
12-06-19, 07:12 PM
#11
Banned.

Join Date: Jun 2004
Location: Torrance, CA
Posts: 3,061
Bikes: Homebuilt steel
Mentioned: 18 Post(s)
Tagged: 0 Thread(s)
Quoted: 2193 Post(s)
Liked 425 Times
in
337 Posts
On the bike I’m doing, the base coat will have cured for quite a while, and I’m still trying to decide if I want to get repro decals. The color is non-original, but I’d still like to identify the frame. I also have started the process of smoothing out the base coat - 400/600/800/1200 grit sandpaper followed by rubbing and polishing compound. I’ll get a good respirator and wait for some warmer weather or maybe try to find a spray booth to use. I’ve also thought about buying a very cheap, used 4-6 person tent to use as a spray booth in my garage. Again, I appreciate the thorough advice.
Likes For Nessism:
12-07-19, 10:55 AM
#12
Senior Member
Join Date: Sep 2017
Location: Eastern Shore, MD
Posts: 2,107
Bikes: Road ready: 1993 Koga Miyata City Liner Touring Hybrid, 1989 Centurion Sport DLX, "I Blame GP" Bridgestone CB-1. Projects: Yea, I got a problem....
Mentioned: 24 Post(s)
Tagged: 0 Thread(s)
Quoted: 753 Post(s)
Liked 737 Times
in
422 Posts
What kind of prep is necessary for using this stuff over "Patina"?
12-07-19, 01:41 PM
#13
Friendship is Magic
Join Date: Nov 2010
Location: Sacramento, CA
Posts: 22,984
Bikes: old ones
Mentioned: 304 Post(s)
Tagged: 0 Thread(s)
Quoted: 26410 Post(s)
Liked 10,376 Times
in
7,204 Posts
...depends on what you want to achieve. In the case of that Lenton, in the few spots that were rusted back near the dropouts, I used some Rustoleum rust converter/primer tha leaves the spot black and ready to accept paint. Anything loose orr peeling needs to come off, but otherwise it's pretty user friendly. Note that I am not using this stuff in accordance with the commonly accepted "recoat window" advice. I accept all that as probably the best way to achieve maximum advantage in your final result (in terms of toughness and durability). But there are some practical limitations when painting bicycles that get in the way. One of them is application of stickers, which is kind of an ifffy experience when your color coat is less than 24 hours old. Another is in using the stuff as a topcoat in an attempt to preserve original paint and decals.
I freely admit I'm using it in experiments, and my experiments are in contravention of the literature that comes from the manufacturer. But I'm thus far pleased with the results.
I freely admit I'm using it in experiments, and my experiments are in contravention of the literature that comes from the manufacturer. But I'm thus far pleased with the results.
Likes For 3alarmer:
12-07-19, 01:48 PM
#14
Friendship is Magic
Join Date: Nov 2010
Location: Sacramento, CA
Posts: 22,984
Bikes: old ones
Mentioned: 304 Post(s)
Tagged: 0 Thread(s)
Quoted: 26410 Post(s)
Liked 10,376 Times
in
7,204 Posts
^^^I presume it goes without saying that you need to strip the frame of components, mask anything you don't want painted, and to clean off any wax or other coatings with mineral spirits or some other solvent suitable to the job that will not further damage your patina.
12-07-19, 02:31 PM
#15
Friendship is Magic
Join Date: Nov 2010
Location: Sacramento, CA
Posts: 22,984
Bikes: old ones
Mentioned: 304 Post(s)
Tagged: 0 Thread(s)
Quoted: 26410 Post(s)
Liked 10,376 Times
in
7,204 Posts
...depends on what you want to achieve. In the case of that Lenton, in the few spots that were rusted back near the dropouts, I used some Rustoleum rust converter/primer tha leaves the spot black and ready to accept paint. Anything loose orr peeling needs to come off, but otherwise it's pretty user friendly. Note that I am not using this stuff in accordance with the commonly accepted "recoat window" advice. I accept all that as probably the best way to achieve maximum advantage in your final result (in terms of toughness and durability). But there are some practical limitations when painting bicycles that get in the way. One of them is application of stickers, which is kind of an ifffy experience when your color coat is less than 24 hours old. Another is in using the stuff as a topcoat in an attempt to preserve original paint and decals.
I freely admit I'm using it in experiments, and my experiments are in contravention of the literature that comes from the manufacturer. But I'm thus far pleased with the results.
I freely admit I'm using it in experiments, and my experiments are in contravention of the literature that comes from the manufacturer. But I'm thus far pleased with the results.
I have mostly used it as a final step in complete repaints/rebadges. It's a lot of work. Patina preservation is not hat important to me. You just wax it and get more patina with use.
 12-07-19, 06:19 PM
#16
Banned
Join Date: Aug 2013
Posts: 6,480
Mentioned: 93 Post(s)
Tagged: 0 Thread(s)
Quoted: 1361 Post(s)
Likes: 0
Liked 423 Times
in
282 Posts
Sikkens 2 part. Actually covers flaws and blems in the color coat. Had someone bring me their pre-sprayed color coat done, with issues but was easily covered over smooth. Build it up with light coats, typically wait 30-45 min between coats, of which each coat gets a very light scuff of 320. Don't compare this to heavily sanding and gumming. Also, the product is very forgiving when you first see flashing on the complicated tubing. Best described as the flashing disappears or melts in. That's it. Cures fast.
Another that builds depth and with robust quality is from Gemini (better known for coating wood products). Like above, the two part urethane cures really fast, can actually lightly touch by hand in 15 minutes. Wicked catylist to not mess around with and certainly suggest using better breathing apparatus.
Another that builds depth and with robust quality is from Gemini (better known for coating wood products). Like above, the two part urethane cures really fast, can actually lightly touch by hand in 15 minutes. Wicked catylist to not mess around with and certainly suggest using better breathing apparatus.
Last edited by crank_addict; 12-07-19 at 06:22 PM.
08-13-21, 08:29 PM
#17
Senior Member
Join Date: Feb 2016
Location: SE Wisconsin
Posts: 1,851
Bikes: Lemond '01 Maillot Jaune, Lemond '02 Victoire, Lemond '03 Poprad, Lemond '03 Wayzata DB conv(Poprad), '79 AcerMex Windsor Carrera Professional(pur new), '88 GT Tequesta(pur new), '01 Bianchi Grizzly, 1993 Trek 970 DB conv, Trek 8900 DB conv
Mentioned: 12 Post(s)
Tagged: 0 Thread(s)
Quoted: 759 Post(s)
Likes: 0
Liked 810 Times
in
471 Posts
... here is my experience with the Spraymaxx 2K clear glamour paint, which I have now used on maybe 7 -10 frames as the final step.
I have never done any surface prep to the underlying color coats, other than to apply the decals before the final clear with Spraymaxx. One can seems to cover an average frame and fork nicely. There is some cautionary advice in the literature to apply it within a certain recoat window for the color coat...I think it's maybe 48 or 72 hours. But on my projects I have often gone longer than that because I like to let the color coats dry some before I apply the vinyl decals. When applied properly, the stuff goes on as a relatively thick paint layer. So I've never seen any point in trying to wet sand the undercoats smoother than they go on over the primer.
I have never done any surface prep to the underlying color coats, other than to apply the decals before the final clear with Spraymaxx. One can seems to cover an average frame and fork nicely. There is some cautionary advice in the literature to apply it within a certain recoat window for the color coat...I think it's maybe 48 or 72 hours. But on my projects I have often gone longer than that because I like to let the color coats dry some before I apply the vinyl decals. When applied properly, the stuff goes on as a relatively thick paint layer. So I've never seen any point in trying to wet sand the undercoats smoother than they go on over the primer.
To do a proper paint job the base coat should be sealed with the clear within the "critical recoat time," typically 24 hours. Further, the base coat should not be sanded. Failing to follow these steps will affect the durability of the finish. Lastly, with catalyzed urethane paint you don't want to inhale too many fumes, even with a charcoal spray mask, thus painting outdoors with good ventilation is recommended. If you get a dust spec here and there sand it out and polish. That's better than breathing the fumes.
My apologies for bringing back a partial zombie-thread, but I think you folks can help me out.
In the next couple days I plan to paint a bike frame. All the materials are auto-paint grade (PPG). I had the color coats custom made and loaded into rattle cans.
The frame and fork are hand-stripped down to bare metal(steel).
Paint schedule:
1) Dewax-degrease spray
2) 2K primer (Spray Max)
3) Spray color coat #1 (fork, head tube, parts of the top & down tubes, Spray Max 368 2071)
4) Wait 5-6 hrs (suggested by paint desk guy)
5) Mask up parts of fork, top & down tube with auto grade fine-line tape(3M)
6) Spray color coat #2 (frame & over masked parts of color coat #1, Spray Max 368 2071)
7) Wait 2-3 minutes and pull off masking tape
8) Wait ????
9) Apply decals (dry application)
10) Spray 2K clear coat (Spray Max Glamour Coat)
The guy at the paint desk says the base coat needs to be clear coated within 24 hours.
Question 1) I'm not sure how long I have to wait to apply the decals over fresh paint (color coat #2). Any ideas/experience? If I have to wait 5-6 hours to mask off the first color coat and then another 5-6 hours to apply decals...and then do the clear coat, this will be a very long day, assuming the day doesn't go south with wind, humidity....(I'm painting outside)
Question #2) As a fallback option, I'm considering skipping the decal step and going straight to the clearcoat 30 minutes after I spray color coat #2. If I let the clear coat set up for a day or two (the tech data sheet says the 2K clear coat can be sanded and polished after 24 hours), can I apply the decals and then clear coat again? I'm guessing the cured clear coat will need to be wet sanded with 1000-1500 grit, wipe with tack solvent, and then sprayed?
thx..
08-13-21, 09:25 PM
#18
framebuilder
I'm relaxing at a camp site after the 3rd week of teaching another frame building class. My student had literally no idea whatsoever how a frame was put together and English is his 2nd language. Fortunately his frame turned out beautifully. Determination can make up a lot for any lack of skills. And years of teaching experience helps. He'll stick around and we will paint it together next week. So answering this question is a little like getting called to go back in to the office for a couple of hours after you've left for the week. Because of that I'm not going to review all your steps but just provide some basic suggestions.
Let your primer set up as long as possible. Auto respray places want to move as quickly as possible through the whole process to make a profit so they are focused on as little as possiible time delays. I assume you can take your time. I usually put on 2 or 3 primer coats. I wet sand the primers with 600 grit paper. Then I apply the color casts. The House of Kolor paint I use requires putting clears over color coats without delay or that can weaken the bond between coats. The time between the color and clear depends on your paint choice. Now again I would let the clear have plenty of time to harden (I'm assuming you have activated clear that hardens by chemical action). These are your intermediate clears designed to protect your fragile color coats. You can speed up and improve this process by putting the frame in a car parked in the sun. Use courser sandpaper like 600 grit on your intermediate clears (at least 2 coats to prevent sand throughs) so the later final clear coats can bond better with the hardened clears. Now you can do whatever with decals without worries about time windows before putting on the final clears.
Polishing final clears is a whole other chapter.
08-14-21, 08:04 AM
#19
Friendship is Magic
Join Date: Nov 2010
Location: Sacramento, CA
Posts: 22,984
Bikes: old ones
Mentioned: 304 Post(s)
Tagged: 0 Thread(s)
Quoted: 26410 Post(s)
Liked 10,376 Times
in
7,204 Posts
My apologies for bringing back a partial zombie-thread, but I think you folks can help me out.
In the next couple days I plan to paint a bike frame. All the materials are auto-paint grade (PPG). I had the color coats custom made and loaded into rattle cans.
The frame and fork are hand-stripped down to bare metal(steel).
Paint schedule:
1) Dewax-degrease spray
2) 2K primer (Spray Max)
3) Spray color coat #1 (fork, head tube, parts of the top & down tubes, Spray Max 368 2071)
4) Wait 5-6 hrs (suggested by paint desk guy)
5) Mask up parts of fork, top & down tube with auto grade fine-line tape(3M)
6) Spray color coat #2 (frame & over masked parts of color coat #1, Spray Max 368 2071)
7) Wait 2-3 minutes and pull off masking tape
8) Wait ????
9) Apply decals (dry application)
10) Spray 2K clear coat (Spray Max Glamour Coat)
The guy at the paint desk says the base coat needs to be clear coated within 24 hours.
Question 1) I'm not sure how long I have to wait to apply the decals over fresh paint (color coat #2). Any ideas/experience? If I have to wait 5-6 hours to mask off the first color coat and then another 5-6 hours to apply decals...and then do the clear coat, this will be a very long day, assuming the day doesn't go south with wind, humidity....(I'm painting outside)
Question #2) As a fallback option, I'm considering skipping the decal step and going straight to the clearcoat 30 minutes after I spray color coat #2. If I let the clear coat set up for a day or two (the tech data sheet says the 2K clear coat can be sanded and polished after 24 hours), can I apply the decals and then clear coat again? I'm guessing the cured clear coat will need to be wet sanded with 1000-1500 grit, wipe with tack solvent, and then sprayed?
thx..

Second, and more importantly, I have already said up thread that I routinely go outside the manufacturers recommendations about recoat windows. Thus far, this has worked out OK for me. But the timing off sticker or decal installation is a major sticking point in painting a bicycle, as opposed to a car (which are usually graphics free.) When the Urethane clears first came out, all the car guys were oohing and ahhing about how cool it was to have this clear, high gloss finish coat that would go on over almost anything, create a durable final surface, and I still feel that way.
It is true that you can put some sort of intermediate clear coat over your more fragile color coat within the window. Then wait for it to dry (it sets up pretty rapidly to where you can work in the stickers.) But I remain unconvinced that this makes for a better overall result. The issue with applying the decals to a color coat that has not had time to fully bond and harden (it never gets really hard unless you use an epoxy paint as your color coat, and this is rarely done), is, off course, that in positioning and repositioning the vinyl graphics, some of it will lift. Which makes the job still salvageable, but a lot more time consuming to fix.
Take it for what it is worth, since I am satisfied with somewhat lesser results (I don't set up a spray booth, and I paint in the back yard, in the shade of a tree). But I prefer to simply let the color coat cure for a couple of days before I go at it. The only way I can get the graphics on there straight is with the use off some low tack masking tape boundaries, on which I have inked some alignment lines. Even the low tack stuff needs to be toned down a little, by sticking it on your shirt or a rag to make the adhesive less aggressive. Otherwise I risk lifting some of the color. And I'm too slow at this to get the graphics positioned rightly without those guides and some measuring while in process.
I have not, to date, noticed any tendency toward early failure of my paint jobs, even though done in this manner. I wish I had the time and patience (and money), to mix and apply intermediate clear coats, but I don't. I do have a policy of doing fill color in any pantographing and any lug lining after the final clear coat is already on and cured, for this very reason. I often make small errors on that stuff, and it's easier to remove it and fix it once you have the clear urethane on and hardened. I've been doing frames this way at a rate off four or five annually for about six or seven years now, so it's a small sample size.
On getting a good result from your final application of clear urethane: Buy and use the stuff called "Clear Glamour". It is formulated to go on and hold a little bit thicker than some of the other clear urethane formulations. And take an old piece of pipe or round conduit, and use it to practice applying the paint so it is covers the surface all around to a point just short of running. It's hard to describe, but the surface gets a wet look, and what is happening is that the paint layer is on there in sufficient quantity that it levels itself, creating a surface that will look glassy as the final result. Done correctly, it requires no polishing to look good.
If you do get a couple of runs, don't attempt to fix them, other than to rotate the frame to reverse its direction, so they won't continue. I paint with the frame held from an old seat post of the proper diameter, inserted far enough to hold securely. That post is secured in a standard bicycle work stand clamp, masked with old socks. So I can spin the frame I'm painting in any orientation I need to work on any aspect of it. Saves my aging body from awkward positioning.
Any small runs will eventually dry clear, like the rest of the paint. You can polish them out if they bother you, but it's a lot of work. Otherwise, with multiple light coats of clear urethane, there's some risk of a less glossy surface in the final result, or even the dreaded orange peel.
Try to relax, and be grateful it's just a bicycle. I hope this is of value to you. If nothing else, as a primer on how the less fastidious do it. You can choose your personal standard of perfection.
08-14-21, 08:08 AM
#20
Friendship is Magic
Join Date: Nov 2010
Location: Sacramento, CA
Posts: 22,984
Bikes: old ones
Mentioned: 304 Post(s)
Tagged: 0 Thread(s)
Quoted: 26410 Post(s)
Liked 10,376 Times
in
7,204 Posts
Fwiw

 08-14-21, 08:10 AM
#21
Friendship is Magic
Join Date: Nov 2010
Location: Sacramento, CA
Posts: 22,984
Bikes: old ones
Mentioned: 304 Post(s)
Tagged: 0 Thread(s)
Quoted: 26410 Post(s)
Liked 10,376 Times
in
7,204 Posts
.
...and don't try to do it all in one day. A reasonable schedule for me is to get through a couple of primer coats, and a color coat one day, let it hang from the roof gutter in the back yard for a couple of days. Then apply the vinyl graphics, wait a day for the water to fully evaporate from the wet method application and for the adhesive to cure. Then do the final clear the following day. Might take longer if there are some color bands or it's a two color paint scheme. These are not full days, just a couple of hours at a time each day.
...and don't try to do it all in one day. A reasonable schedule for me is to get through a couple of primer coats, and a color coat one day, let it hang from the roof gutter in the back yard for a couple of days. Then apply the vinyl graphics, wait a day for the water to fully evaporate from the wet method application and for the adhesive to cure. Then do the final clear the following day. Might take longer if there are some color bands or it's a two color paint scheme. These are not full days, just a couple of hours at a time each day.
Last edited by 3alarmer; 08-14-21 at 08:44 AM.
08-14-21, 10:17 AM
#22
framebuilder
I use disposable cups on my clear coat only spray gun. After I finish, I'll leave whatever is left in the cup undisturbed. It can take a full month for the liquid to shrink to its final solid size. Even after a week it has only shrunk a third of its final size. This depends on weather conditions of course. The process can be speeded up or slowed down depending on the ratios of activator and reducer involved. I don't want a fast drying clear or I am more likly to get the dreaded overspray (a dulling) or orange peal (where the paint doesn't flow out smooth because it is hardening up too fast).
08-14-21, 07:21 PM
#23
framebuilder
House of Kolor paint was formulated by a custom car painter wanting to do glamor candy and pearl paint jobs. His last name started with a K and that is why they spell Kolor with a K to promote their brand. It eventually got bought out by Valspar paints. Over the years their formulas have changed. I got started using it 35 or so years ago to get more eye popping results than I could with Dupont Imron. One of its problems for covering bicycle frames by some professionals was that the paint would separate between layers when it was hit. The reason for the separation was that those painters did not keep within the recommended time windows between coats. It was more efficient when doing several frames at a time to wait longer so more frames would be ready for the clears (or whatever came next). I was always very strict about staying within the recommended time windows so that I didn't have unhappy customers. And I never had trouble with paint separation. My experience is entirely with H of K paint and I have no knowledge if other kind of paint is more forgiving.
I also almost always spray a sealer coat between the primer and color coats. This serves multiple purposes but most importantly creates better adhesion. This would be too much bother and expense for a hobby painter. I love H of K primers because they work well and come in primary colors (red, yellow, blue as well as white and black) so they can be mixed so the primer color is similar to the top coat colors. I've converted a few of my fellow pros to using those primers because of its advantages. These primers could work very well for hobbyists too. In fact their primer colors are so good they can be used as a color coat.
This is a bike I made and painted for myself using only H of K primer colors including the yellow and blue decals. They are painted on. I put an additive in the clear to create the matte finish. I made the frame in one of my framebuilding classes as an example to students to show them how to braze.
08-14-21, 07:53 PM
#24
Friendship is Magic
Join Date: Nov 2010
Location: Sacramento, CA
Posts: 22,984
Bikes: old ones
Mentioned: 304 Post(s)
Tagged: 0 Thread(s)
Quoted: 26410 Post(s)
Liked 10,376 Times
in
7,204 Posts
.
...here is a link to the manufacturer's data sheet for Spraymax Clear Glamour.
I have pretty much taken this as a carte blanche for experimentation, and have, thus far, not been disappointed. I'm familiar enough with a couple of different paint systems to know that you will get a more cohesive overall finish staying within some reasonable recoat windows. As already stated, I find the application of vinyl graphics to be a limitation in this regard. I might be more relaxed about this because I'm only doing it for myself, and I won't complain.
...here is a link to the manufacturer's data sheet for Spraymax Clear Glamour.
Substrate: Solvent and waterborne base coat systems, old paint coats dried according to manufacturer's instructions (cleaned and sanded).
08-15-21, 07:51 AM
#25
Senior Member
Join Date: Feb 2016
Location: SE Wisconsin
Posts: 1,851
Bikes: Lemond '01 Maillot Jaune, Lemond '02 Victoire, Lemond '03 Poprad, Lemond '03 Wayzata DB conv(Poprad), '79 AcerMex Windsor Carrera Professional(pur new), '88 GT Tequesta(pur new), '01 Bianchi Grizzly, 1993 Trek 970 DB conv, Trek 8900 DB conv
Mentioned: 12 Post(s)
Tagged: 0 Thread(s)
Quoted: 759 Post(s)
Likes: 0
Liked 810 Times
in
471 Posts
THX! to both of you guys for offering your thoughts and experience. You've been very helpful.
As with most "new" things there's always plenty of fog when trying to figure out the nuts and bolts of how to do something and separate that info from the hundred of other bits of info surrounding the topic. Thanks to you guys and lots more research, the fog is beginning to clear.
Doug..can't think of a better way to end a work-day-week than sitting around a campfire. I started out my "learning how to paint a bike with auto-grade paints quest" at the HOK website. Beautiful paints. I have just two bikes to paint and didn't want to invest in all the traditional refinish spray equipment(and learning how to use it) for essentially a one-off task. That landed me in the rattle can solution. HOK can be loaded into rattle cans, but despite extensive searching...there's just next to zero info on the web of someone going the rattle can route. Without a reasonable understanding of how t go about it..decided not to go that route. (remember..I'm starting with minimal understanding of pro-painting techniques and equipment) I was tending to go down the path of primer, basecoat, clearcoat, decals, more clearcoat when you posted your thoughts. Given the time restrictions suggested by, in this case the PPG Shopline JB basecoat tech data sheet, and my reluctance to apply decals to fresh paint, it seemed the basecoat-clear-decal-clear route would give some time to let things set up and allow more time to apply the decals. The down side is a little more work and the expense of another can of clear ($23). Nice looking ride that you posted. 35+ years of doing this..yikes..the body of knowledge that's in your head..yikes.
3alarmer..lots of info..as I continue to do research, and after talking to a guy that does auto-refinishing at a local body shop, I'm realizing the degree that auto paints differ from hardware store rattle can enamels is SO HUGE that it's hard to call both of them "paint". I found a tech sheet for the JB basecoats and they say the tape time is 45 minutes...not the 5-6 hours I was initially told. Hard to imagine. Auto paints seem to set up very fast..really fast. I'm sure the speed that all the refinish steps can be done is a product design & selling point used by the various paint suppliers. That said, I looked into the "clear needs to go on in (for PPG JB basecoats) 24hrs" thing. From a number of forums, with guys that do refinishing and/or custom painting for a living, the "clear needs to go on in X hrs" is an understandably conservative guideline from paint suppliers. Their interest is in insuring the most success possible to limit customer service issues. Apparently, in the not so distant past it was understood that the wait time to apply a clear over basecoat was "indefinite as long as the vehicle wasn't removed from the booth". What the paint suppliers have concerns about is a car getting sprayed with basecoat, being removed from the spray booth and sitting outside or in the shop, the basecoat get contaminated or UV works on it........etc... and then gets cleared, adhesion problems arise..and they have to deal with the customer service issues that come next, regardless whether they are at fault or not. I was in a related profession and can appreciate the suppliers stance.
I plan to apply the decals via a process you've described. Mine are dry-applied vinyl (Wantit out of the UK)..no second chances or repositioning. I do have SprayMax Clear Glamour clear coat.
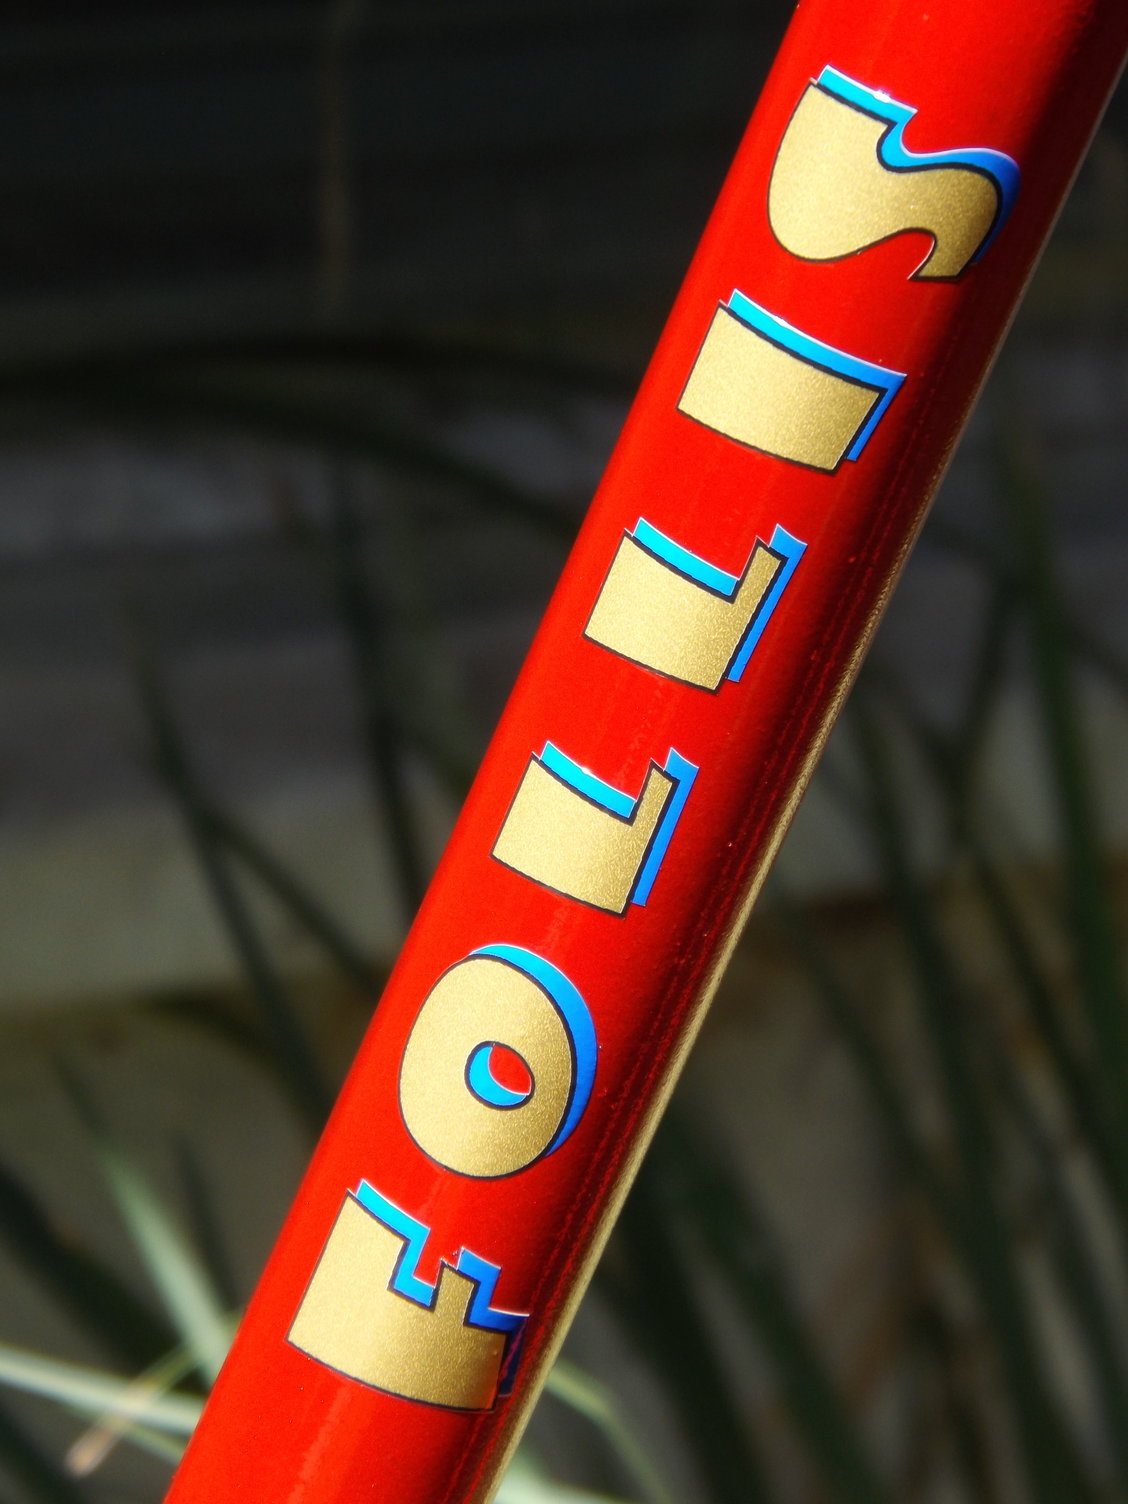
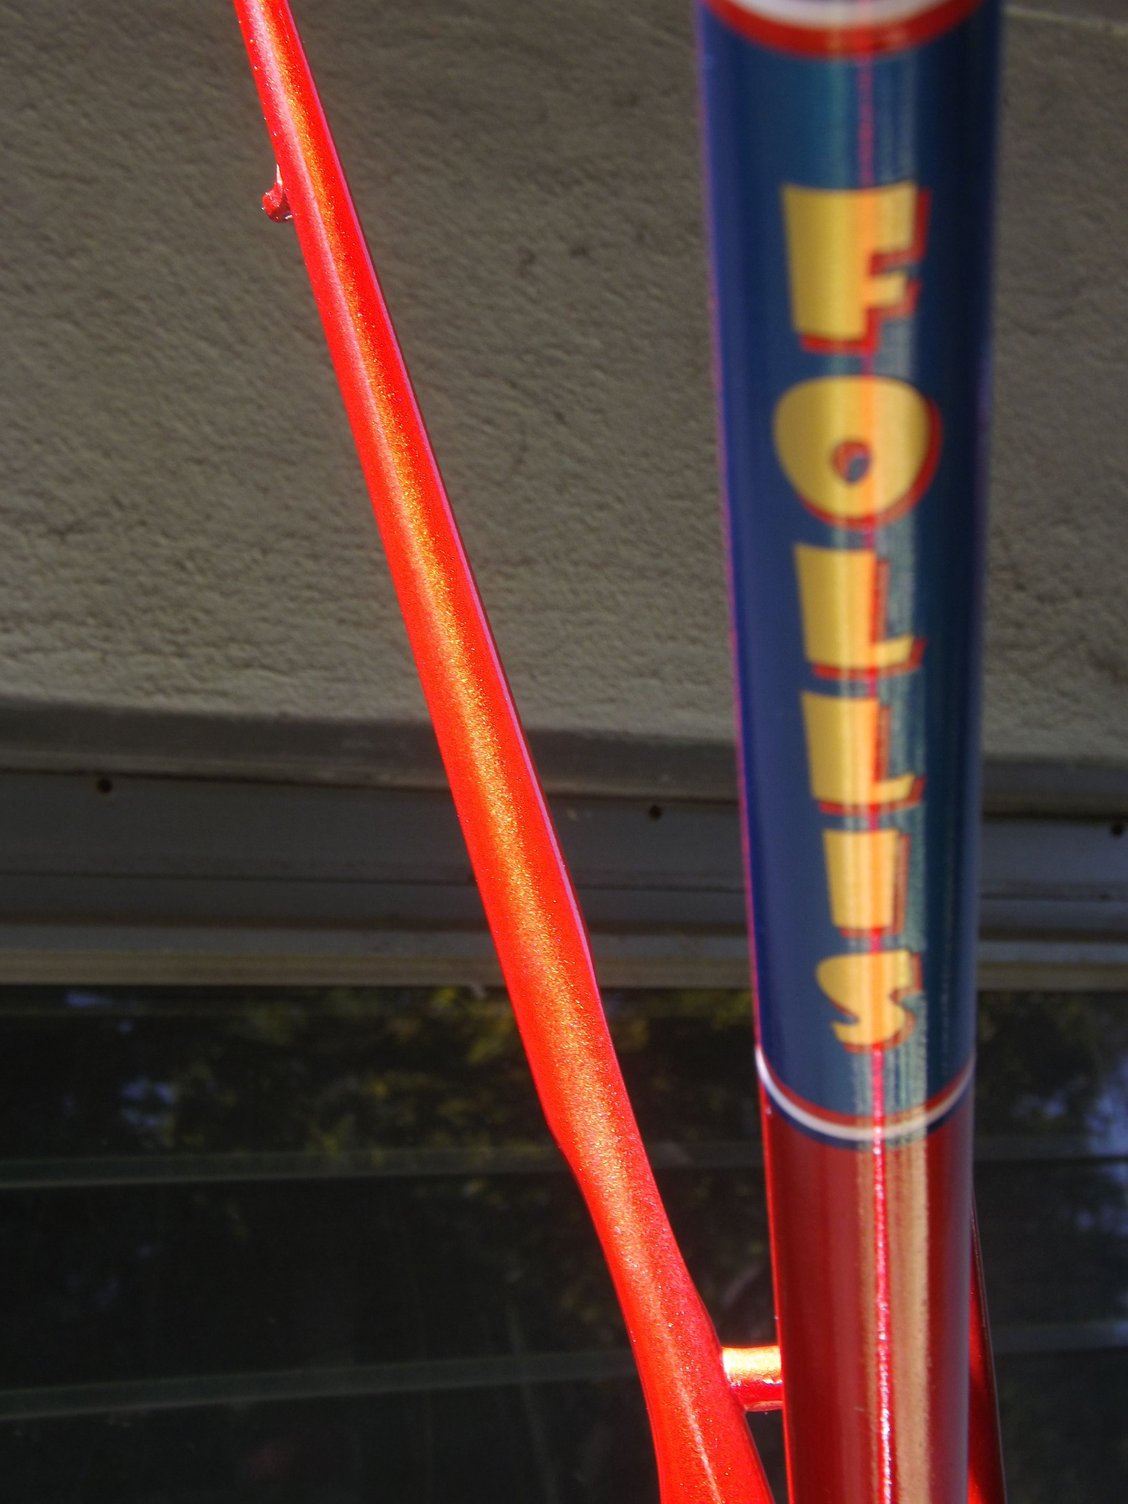
Orange Follis..very nice looking frame.
Still deciding which route I'll take. Doug's path is a little more work and cost, but it's minimal in the overall scheme of things. I have $150 in primer, paints(2 colors), and clear. Another $50 in PPE and various supplies. Exceeding the 24hr thing offers a relaxed pace, lower cost & effort, and minimal risk I think.
In the end..take a deep breath..it's only some paint and a bike. It'll surely look MUCH better than what I started with, and I'll learn something.
As with most "new" things there's always plenty of fog when trying to figure out the nuts and bolts of how to do something and separate that info from the hundred of other bits of info surrounding the topic. Thanks to you guys and lots more research, the fog is beginning to clear.
Doug..can't think of a better way to end a work-day-week than sitting around a campfire. I started out my "learning how to paint a bike with auto-grade paints quest" at the HOK website. Beautiful paints. I have just two bikes to paint and didn't want to invest in all the traditional refinish spray equipment(and learning how to use it) for essentially a one-off task. That landed me in the rattle can solution. HOK can be loaded into rattle cans, but despite extensive searching...there's just next to zero info on the web of someone going the rattle can route. Without a reasonable understanding of how t go about it..decided not to go that route. (remember..I'm starting with minimal understanding of pro-painting techniques and equipment) I was tending to go down the path of primer, basecoat, clearcoat, decals, more clearcoat when you posted your thoughts. Given the time restrictions suggested by, in this case the PPG Shopline JB basecoat tech data sheet, and my reluctance to apply decals to fresh paint, it seemed the basecoat-clear-decal-clear route would give some time to let things set up and allow more time to apply the decals. The down side is a little more work and the expense of another can of clear ($23). Nice looking ride that you posted. 35+ years of doing this..yikes..the body of knowledge that's in your head..yikes.
3alarmer..lots of info..as I continue to do research, and after talking to a guy that does auto-refinishing at a local body shop, I'm realizing the degree that auto paints differ from hardware store rattle can enamels is SO HUGE that it's hard to call both of them "paint". I found a tech sheet for the JB basecoats and they say the tape time is 45 minutes...not the 5-6 hours I was initially told. Hard to imagine. Auto paints seem to set up very fast..really fast. I'm sure the speed that all the refinish steps can be done is a product design & selling point used by the various paint suppliers. That said, I looked into the "clear needs to go on in (for PPG JB basecoats) 24hrs" thing. From a number of forums, with guys that do refinishing and/or custom painting for a living, the "clear needs to go on in X hrs" is an understandably conservative guideline from paint suppliers. Their interest is in insuring the most success possible to limit customer service issues. Apparently, in the not so distant past it was understood that the wait time to apply a clear over basecoat was "indefinite as long as the vehicle wasn't removed from the booth". What the paint suppliers have concerns about is a car getting sprayed with basecoat, being removed from the spray booth and sitting outside or in the shop, the basecoat get contaminated or UV works on it........etc... and then gets cleared, adhesion problems arise..and they have to deal with the customer service issues that come next, regardless whether they are at fault or not. I was in a related profession and can appreciate the suppliers stance.
I plan to apply the decals via a process you've described. Mine are dry-applied vinyl (Wantit out of the UK)..no second chances or repositioning. I do have SprayMax Clear Glamour clear coat.
Orange Follis..very nice looking frame.
Still deciding which route I'll take. Doug's path is a little more work and cost, but it's minimal in the overall scheme of things. I have $150 in primer, paints(2 colors), and clear. Another $50 in PPE and various supplies. Exceeding the 24hr thing offers a relaxed pace, lower cost & effort, and minimal risk I think.
In the end..take a deep breath..it's only some paint and a bike. It'll surely look MUCH better than what I started with, and I'll learn something.