


Baby Colnago Super project (circa 1974)
 06-26-12, 08:02 PM
#1

Banned.
Thread Starter

Join Date: Jul 2009
Location: PAZ
Posts: 12,294
Mentioned: 255 Post(s)
Tagged: 0 Thread(s)
Quoted: 2588 Post(s)
Liked 4,826 Times
in
1,709 Posts
Baby Colnago Super project (circa 1974)
Just received today via UPS from BlueDevil63:


Frame has suffered very slight damage to the top and down tubes just aft of the head lugs. Ripples are mainly confined to the sides of the tubes vice bottom and top as can be seen in pics 6 and 7 above. Note there doesn't appear to be any change to the geometry of the frame - a straightedge placed along both tubes shows nothing out of line.
Plans: roll or use frame blocks to remove ripples. Drew off the top tube brake cable guides and FD boss (neither are original spec). Leave the gear lever bosses - these are said to have been an option as early as 1972. Bead-blast frame and repaint in Molteni orange to exactly match my 56cm Super.
Details point to 1974. In fact, this frame has all the same details as my '74 Super with the exception of the chromed dropouts. However, I believe the chrome there - and the fork crown, too - was re-done during this repaint.
Blasting this weekend when I see Andycapp - we were already planning on doing the Guerciotti, so what the hey. Two for the price of one (said price being a pair of old-school leather Lotto shoes in near-NOS condition).
Another project underway - two frames in a month. Oops - actually, I'll be making that three in one month. More on that at a later date...
DD

Last edited by Drillium Dude; 06-27-12 at 12:04 AM.
 06-26-12, 08:45 PM
#2
Senior Member
Join Date: Jul 2008
Location: Nampa Idaho
Posts: 1,081
Bikes: 76' Centrurion Pro-Tour, 86' Specialized Rock Hopper, 88' Centurion Iron Man, 89' Bruce Gordon "Hikari", 95' Rock Hopper Ultra.
Mentioned: 1 Post(s)
Tagged: 0 Thread(s)
Quoted: 14 Post(s)
Likes: 0
Liked 3 Times
in
3 Posts
This will be a fun one to watch! What size is this frame?
Cheers,
Chris
Cheers,
Chris
06-26-12, 08:45 PM
#3
- Bikes Not Bombs -

Will media blasting remove any of the chrome?
 06-26-12, 08:48 PM
#5
Senior Member

Join Date: Aug 2011
Location: Puyallup, WA
Posts: 443
Bikes: Tommasini Super Prestige, Kamra Triathlee, Nishiki Tri-A equipe', Sakai 2000
Mentioned: 2 Post(s)
Tagged: 0 Thread(s)
Quoted: 0 Post(s)
Likes: 0
Liked 3 Times
in
3 Posts
How/what would be the least detrimental way to remove the braze-ons mentioned above? I've got a torch to heat them off. Or, we could cut/grind/sand them off. I don't think either method would be difficult just wondering which would be safer for the frame. Also you said the chrome is not stock. Do you want it removed? We can mask it and avoid the area while bead blasting if you want to save the shiny stuff.
-Andy
-Andy
06-26-12, 08:52 PM
#6
Senior Member
Join Date: Aug 2011
Location: Puyallup, WA
Posts: 443
Bikes: Tommasini Super Prestige, Kamra Triathlee, Nishiki Tri-A equipe', Sakai 2000
Mentioned: 2 Post(s)
Tagged: 0 Thread(s)
Quoted: 0 Post(s)
Likes: 0
Liked 3 Times
in
3 Posts
It might but I'm not sure. If he wants it removed and the glass bead doesn't cut it, I figure we'll hit with a light-grit sanding disk before finishing in the blast cabinet. The chrome on the Guerciotti looks to be flaking off on it's own so I don't think that one will be an issue.
-Andy
-Andy
06-26-12, 09:17 PM
#7
- Bikes Not Bombs -
It might but I'm not sure. If he wants it removed and the glass bead doesn't cut it, I figure we'll hit with a light-grit sanding disk before finishing in the blast cabinet. The chrome on the Guerciotti looks to be flaking off on it's own so I don't think that one will be an issue.
-Andy
-Andy
Ahhhh, just curious. I'm storing the information in my brain for an impending future resto
 06-26-12, 10:10 PM
#8
Banned.
Thread Starter
Join Date: Jul 2009
Location: PAZ
Posts: 12,294
Mentioned: 255 Post(s)
Tagged: 0 Thread(s)
Quoted: 2588 Post(s)
Liked 4,826 Times
in
1,709 Posts

DD
06-26-12, 10:12 PM
#9
Banned.
Thread Starter
Join Date: Jul 2009
Location: PAZ
Posts: 12,294
Mentioned: 255 Post(s)
Tagged: 0 Thread(s)
Quoted: 2588 Post(s)
Liked 4,826 Times
in
1,709 Posts
Andy says no, but I figure to start with the rear dropouts IOT be sure. If the DO chrome comes off, I won't be upset - I suspect it's not original. We can probably protect the crown chrome with duct tape and only go halfway up the fork blades and then use paint stripper on the remainder.
DD
DD
 06-26-12, 10:15 PM
#11
Banned.
Thread Starter
Join Date: Jul 2009
Location: PAZ
Posts: 12,294
Mentioned: 255 Post(s)
Tagged: 0 Thread(s)
Quoted: 2588 Post(s)
Liked 4,826 Times
in
1,709 Posts
I don't think so - going by the CR List timeline, clover cutouts in all three lugs stopped in '73, so it can't be that old. Campy 1010a long dropouts were replaced by 1010b's in '75 or '76. The timeline suggests in '74 the tangs could have holes or clovers. Just as with my 56cm Super, I feel confident in saying this fits the '74 profile.
Close enough for Government work
DD
Last edited by Drillium Dude; 06-27-12 at 12:07 AM.
06-26-12, 10:22 PM
#13
Banned.
Thread Starter
Join Date: Jul 2009
Location: PAZ
Posts: 12,294
Mentioned: 255 Post(s)
Tagged: 0 Thread(s)
Quoted: 2588 Post(s)
Liked 4,826 Times
in
1,709 Posts
I've talked to some people and they suggest clamping an adjustable wrench to the boss, turning the frame upside down and then hitting the boss with a torch. Once the brass melts, the weight of the wrench pulls the boss off and onto the floor. Apparently that ensures one doesn't heat the area too much.
For me, I think the safest way is to Dremel them off. Lots less heat involved there, plus, as many of you know, I love to work with a Dremel
Except for the chrome on the crown, I don't mind losing the DO chrome. Masking sounds like a plan!
DD
For me, I think the safest way is to Dremel them off. Lots less heat involved there, plus, as many of you know, I love to work with a Dremel
Except for the chrome on the crown, I don't mind losing the DO chrome. Masking sounds like a plan!
DD
06-26-12, 10:22 PM
#14
Senior Member
Join Date: May 2006
Posts: 2,162
Mentioned: 0 Post(s)
Tagged: 0 Thread(s)
Quoted: 4 Post(s)
Likes: 0
Liked 3 Times
in
3 Posts
My original finish '73 has chrome rear dropouts so yours may be original also.
Wrap some duct tape around the chrome, bead blast everything else, use paint stripper around the chrome.
Wrap some duct tape around the chrome, bead blast everything else, use paint stripper around the chrome.
 06-26-12, 10:27 PM
#16
Senior Member

Join Date: Aug 2010
Location: Toronto
Posts: 1,763
Bikes: Pinarello Veneto, Pinarello Montello, Bianchi Celeste
Mentioned: 2 Post(s)
Tagged: 0 Thread(s)
Quoted: 25 Post(s)
Likes: 0
Liked 1 Time
in
1 Post
that's awesome DD , looking forward to seeing the detailed process of this build just like in your other threads!, can't wait
06-26-12, 10:33 PM
#17
Banned.
Thread Starter
Join Date: Jul 2009
Location: PAZ
Posts: 12,294
Mentioned: 255 Post(s)
Tagged: 0 Thread(s)
Quoted: 2588 Post(s)
Liked 4,826 Times
in
1,709 Posts
DD
06-26-12, 10:38 PM
#18
Banned.
Thread Starter
Join Date: Jul 2009
Location: PAZ
Posts: 12,294
Mentioned: 255 Post(s)
Tagged: 0 Thread(s)
Quoted: 2588 Post(s)
Liked 4,826 Times
in
1,709 Posts
I am sure the chrome was re-done - there are small pits that were not removed prior to re-chroming the crown, and the DO chrome is pretty thin and scraped off nearest the opening. The rear DOs also show clamping serrations under the chrome further back on the DO, again suggesting new chrome.
For sure I want to preserve the chrome on the crown; pits or not, it looks fantastic.
DD
Last edited by Drillium Dude; 06-27-12 at 12:16 AM.
06-26-12, 11:55 PM
#19
MIKE is my name!

Join Date: Mar 2012
Location: finland,baltimore
Posts: 2,846
Bikes: hans lutz, , puch mistral ultima,2x Austro Daimler Smoked chrome Ultima,Austro Daimler Mixte,Austro Daimler 531 mixte, flying arrow,F Moser,
Mentioned: 5 Post(s)
Tagged: 0 Thread(s)
Quoted: 7 Post(s)
Liked 20 Times
in
4 Posts
I like the heat hanging wrench idea-
if you can get a small part of kevlar string(boat shop) the wrench wont absorb the heat
try this
upsidedown
with a super small flame just heat the top half of the guide, so the heat travels throught the guide to the brass, less heat on the tube.
if you can get a small part of kevlar string(boat shop) the wrench wont absorb the heat
try this
upsidedown
with a super small flame just heat the top half of the guide, so the heat travels throught the guide to the brass, less heat on the tube.
06-27-12, 12:13 AM
#20
Banned.
Thread Starter
Join Date: Jul 2009
Location: PAZ
Posts: 12,294
Mentioned: 255 Post(s)
Tagged: 0 Thread(s)
Quoted: 2588 Post(s)
Liked 4,826 Times
in
1,709 Posts
Thanks!
Dunno about learning anything from this one - other than what might be the best/safest method for removing braze-ons. This little lady is going to be a sequel every bit the same as the 56cm Super, right down to the paint and decals.
Even has the same thick BB shell all the way through; I've noticed on the early Supers I've seen that the middle area of earlier BB shells is a lot thicker (evidenced by the thickness of the metal at the clover cutout's edges) than later models.
Pretty psyched to see this one with her clothing removed
Oh, and yes - pinned construction; four in the BB and one in the fork crown.
DD
Last edited by Drillium Dude; 03-18-13 at 10:09 PM.
06-27-12, 12:15 AM
#21
Banned.
Thread Starter
Join Date: Jul 2009
Location: PAZ
Posts: 12,294
Mentioned: 255 Post(s)
Tagged: 0 Thread(s)
Quoted: 2588 Post(s)
Liked 4,826 Times
in
1,709 Posts
I think you'll have to take a number, Henry 
I get you, though - I hope to end up in the wills of a number of C&Vers!
DD
I get you, though - I hope to end up in the wills of a number of C&Vers!
DD
06-27-12, 09:25 PM
#22
Banned.
Thread Starter
Join Date: Jul 2009
Location: PAZ
Posts: 12,294
Mentioned: 255 Post(s)
Tagged: 0 Thread(s)
Quoted: 2588 Post(s)
Liked 4,826 Times
in
1,709 Posts
Just call me "Drew"
I just finished three hours worth of Dremel-work removing the three top tube cable guides and the FD boss. The FD boss was a PITA - that's a pretty good hunk of metal! I first used a fiber cutting wheel to remove most of the cable guides and the FD boss extension, then tried a grinding stone on the remaining bits of the bosses. Slow going. So, I reverted back to the cutting wheel and basically shaved the metal down bit by painstaking bit until I could see brass.
At that point, I got out a large file and went to town.
Once all the braze-ons had been seen to, I took the file to the small rippled areas to get an idea what the damage really was; it was rather hard to tell for sure through the paint. The ripples are very small, but can be felt - if not really seen - when down to bare metal. I was thinking to simply file down the small bumps, but the opposite sides of the tubes from the bumps have very, very shallow depressions. So, I will take the frame to Elliott Bay Bicycles for either a roll or frame block treatment.
I also cleaned up the ends of the BB shell and then screwed in a BB to ensure I hadn't messed up the facing. I'm good there.
Last but not least, I cleaned up the BB shell cutout a little and took the paint down/filed a bit - and discovered that some PO had used an engraving tool to ID the frame. I didn't remove enough paint to get the whole thing, but tomorrow I will. If it appears to be an SSN, I will keep that info to myself - and remove it from the shell. If not, I'll get a picture of that, too.
Pics of today's fun and games follow.
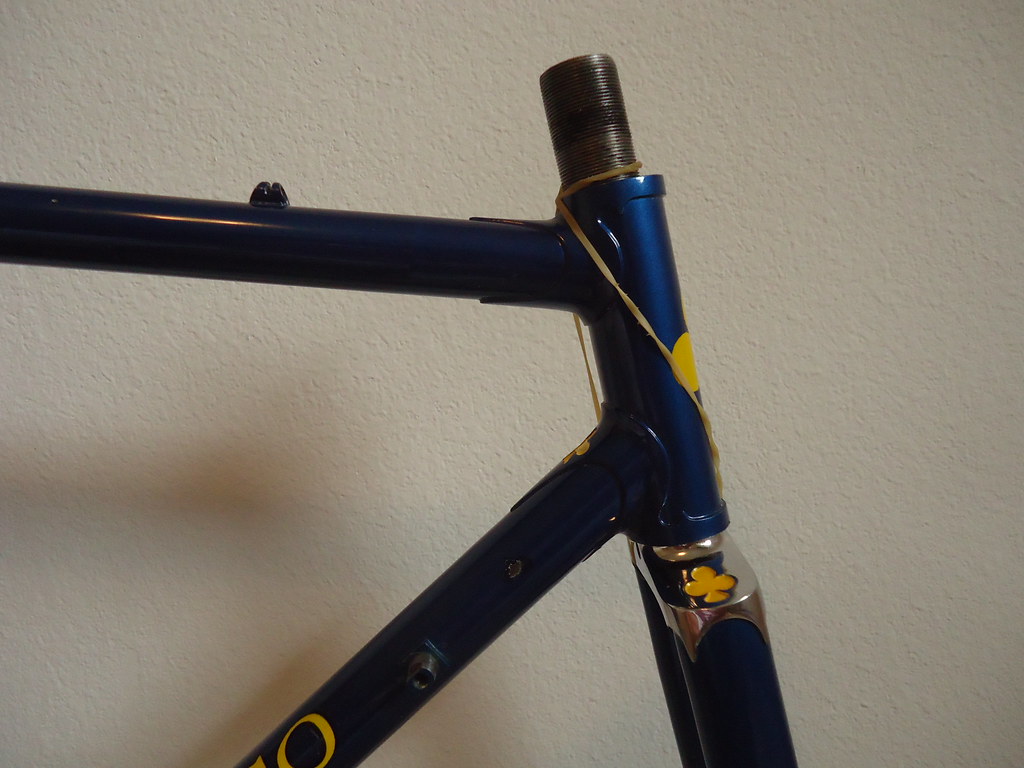
Old-style Columbus stamping on fork steerer:
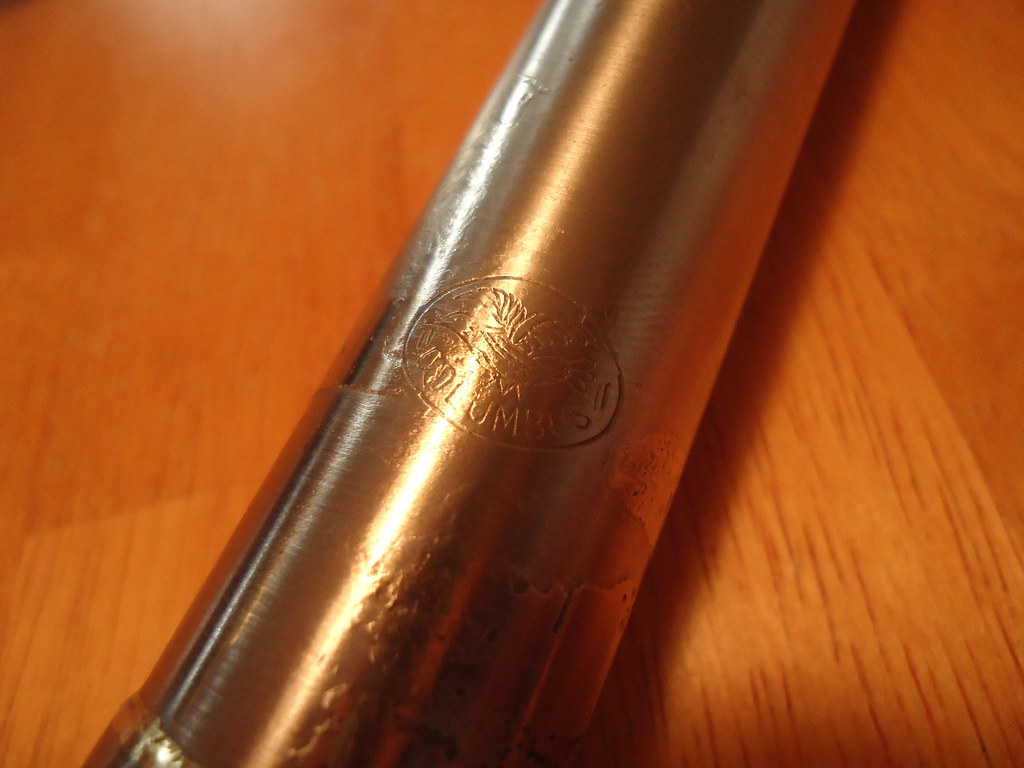
No ding from the front brake caliper hit - also note the faint Columbus stamping:
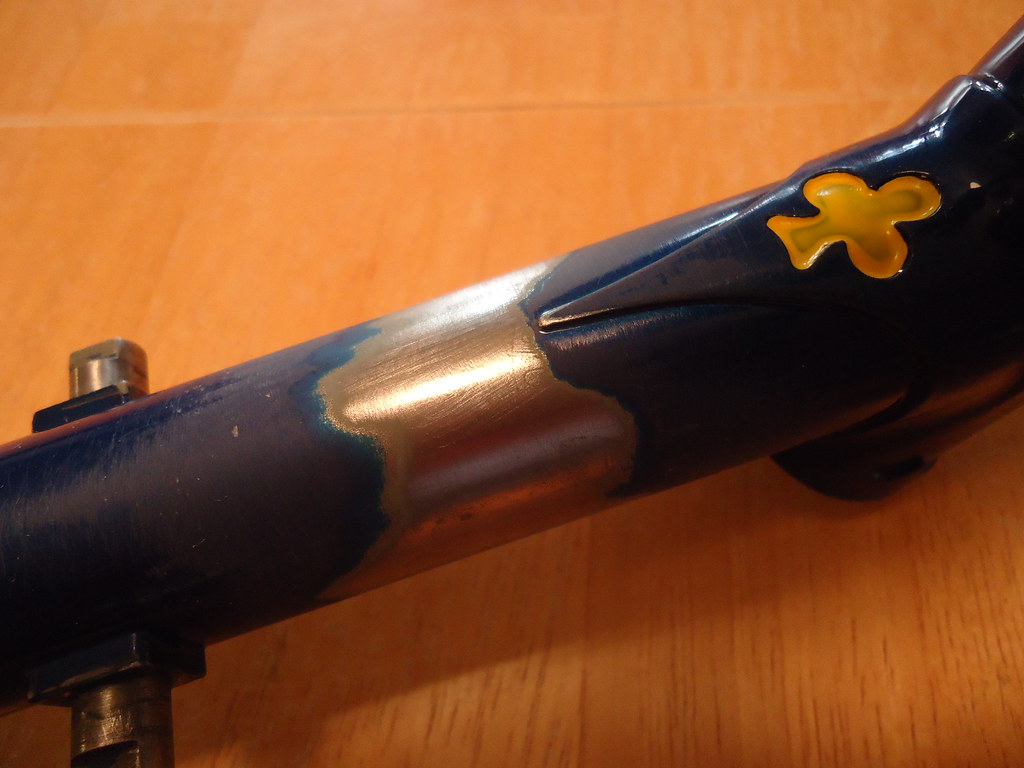
Very faint bulge on the side of the drive side of the top tube:

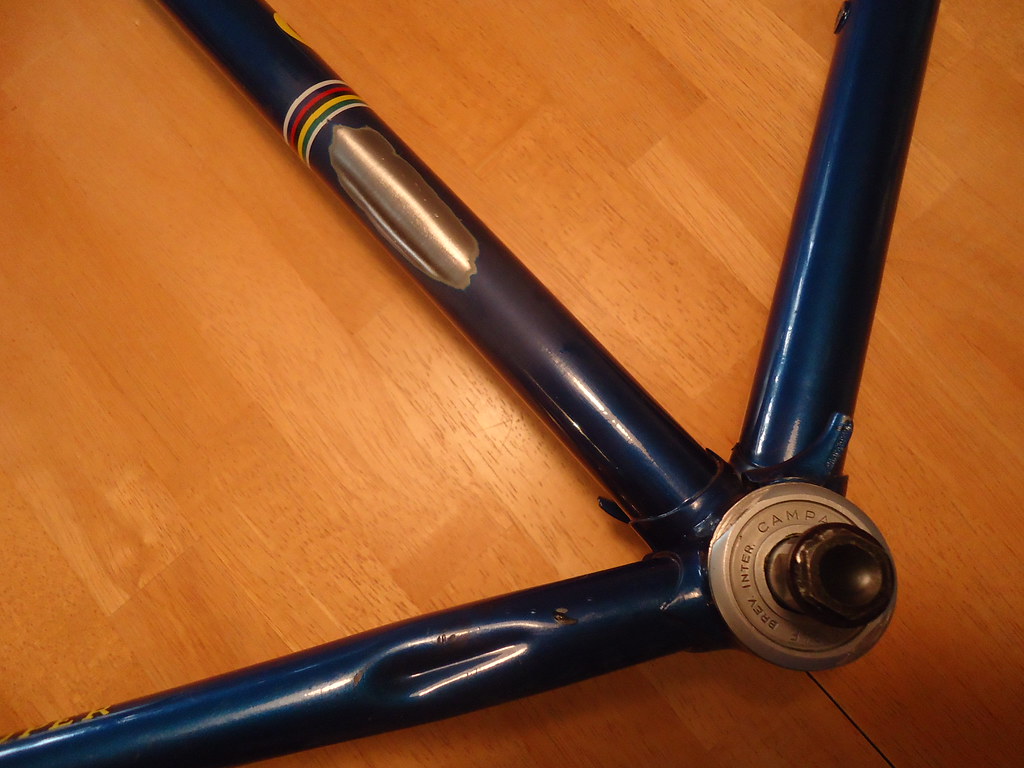
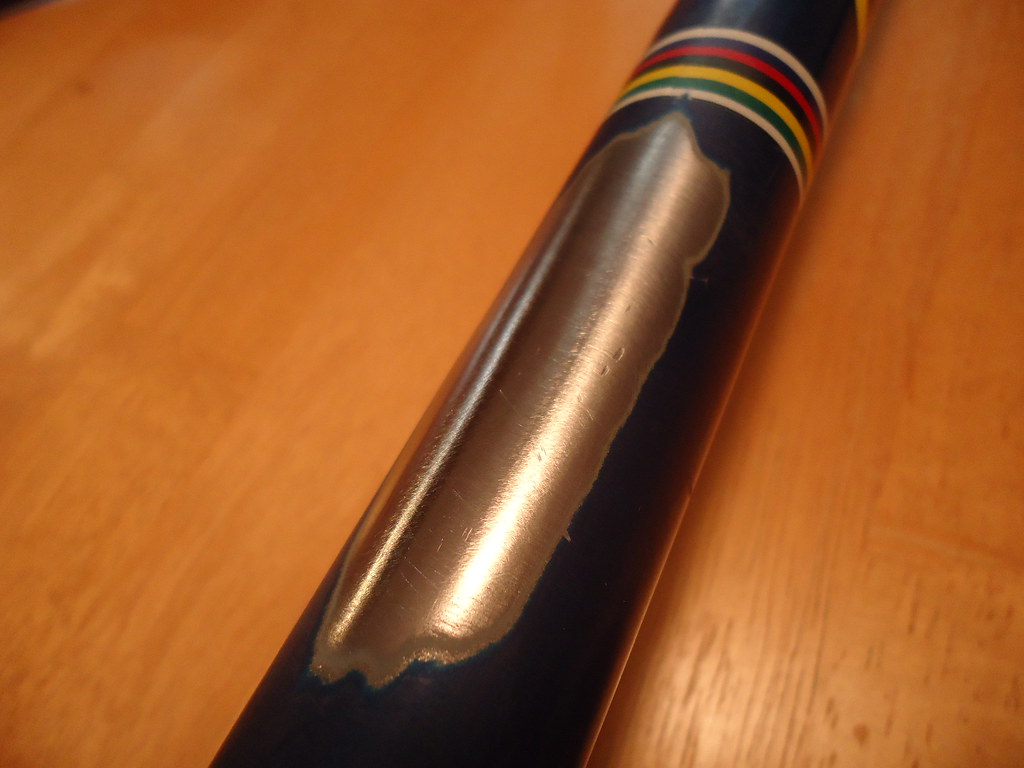
Very faint depressions on the side of the non-drive side of the top and down tubes:

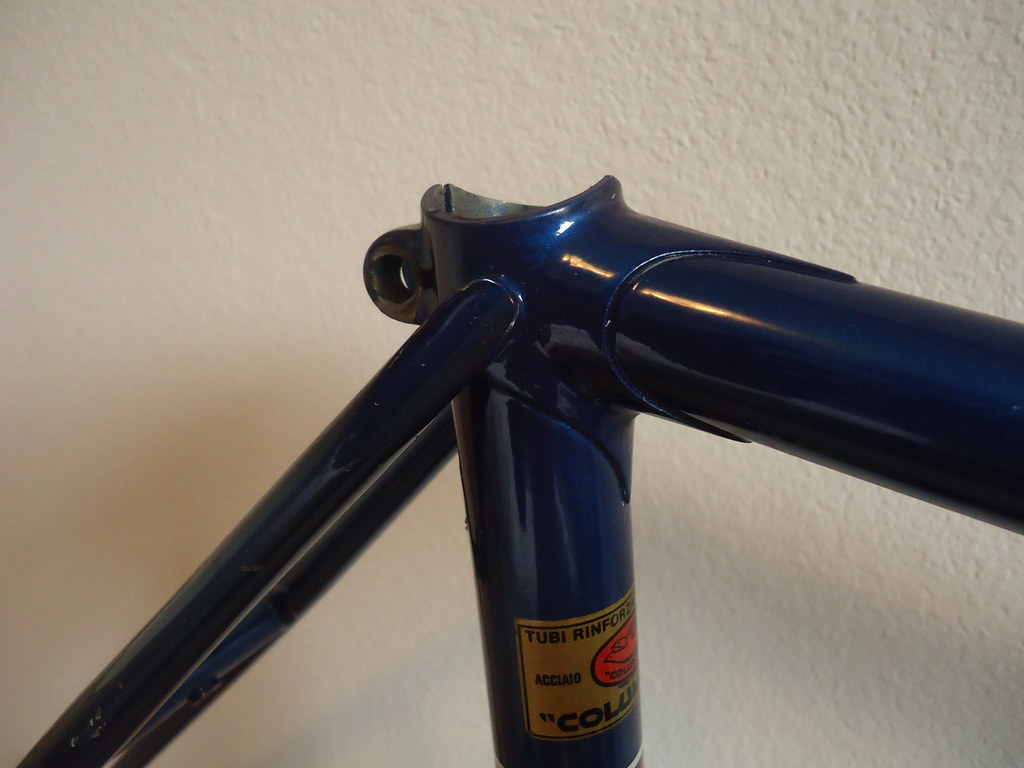
Braze-on brake cable guides removed:

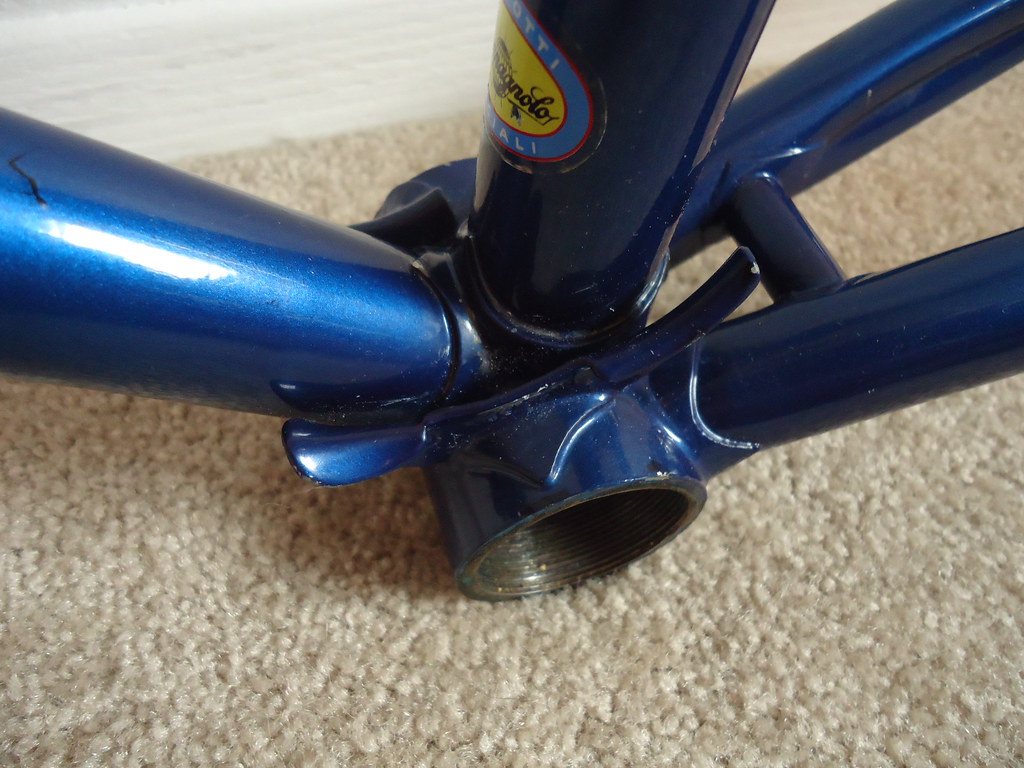
FD boss removed and BB test-fitted:
FD boss removal site:
BB shell clean-up begins:

A pair of widgets arrived from Italy today:

DD
I just finished three hours worth of Dremel-work removing the three top tube cable guides and the FD boss. The FD boss was a PITA - that's a pretty good hunk of metal! I first used a fiber cutting wheel to remove most of the cable guides and the FD boss extension, then tried a grinding stone on the remaining bits of the bosses. Slow going. So, I reverted back to the cutting wheel and basically shaved the metal down bit by painstaking bit until I could see brass.
At that point, I got out a large file and went to town.
Once all the braze-ons had been seen to, I took the file to the small rippled areas to get an idea what the damage really was; it was rather hard to tell for sure through the paint. The ripples are very small, but can be felt - if not really seen - when down to bare metal. I was thinking to simply file down the small bumps, but the opposite sides of the tubes from the bumps have very, very shallow depressions. So, I will take the frame to Elliott Bay Bicycles for either a roll or frame block treatment.
I also cleaned up the ends of the BB shell and then screwed in a BB to ensure I hadn't messed up the facing. I'm good there.
Last but not least, I cleaned up the BB shell cutout a little and took the paint down/filed a bit - and discovered that some PO had used an engraving tool to ID the frame. I didn't remove enough paint to get the whole thing, but tomorrow I will. If it appears to be an SSN, I will keep that info to myself - and remove it from the shell. If not, I'll get a picture of that, too.
Pics of today's fun and games follow.
Old-style Columbus stamping on fork steerer:
No ding from the front brake caliper hit - also note the faint Columbus stamping:
Very faint bulge on the side of the drive side of the top tube:
Very faint depressions on the side of the non-drive side of the top and down tubes:
Braze-on brake cable guides removed:
FD boss removed and BB test-fitted:
FD boss removal site:
BB shell clean-up begins:
A pair of widgets arrived from Italy today:
DD
Last edited by Drillium Dude; 06-27-12 at 11:24 PM.
06-27-12, 11:03 PM
#23
Senior Member
Join Date: Aug 2011
Location: Puyallup, WA
Posts: 443
Bikes: Tommasini Super Prestige, Kamra Triathlee, Nishiki Tri-A equipe', Sakai 2000
Mentioned: 2 Post(s)
Tagged: 0 Thread(s)
Quoted: 0 Post(s)
Likes: 0
Liked 3 Times
in
3 Posts
Looking good, DD. That work is about as "Drew" as your Davidson is "blasphemous"! See you Saturday...
-Andy
PS - If you have some bring a pair of old/"scrap" BB cups to screw in to protect and keep the glass out of the threads. If not we can tape over them.
-Andy
PS - If you have some bring a pair of old/"scrap" BB cups to screw in to protect and keep the glass out of the threads. If not we can tape over them.
Last edited by Andycapp; 06-27-12 at 11:09 PM.
06-28-12, 01:22 AM
#24
Banned.
Thread Starter
Join Date: Jul 2009
Location: PAZ
Posts: 12,294
Mentioned: 255 Post(s)
Tagged: 0 Thread(s)
Quoted: 2588 Post(s)
Liked 4,826 Times
in
1,709 Posts
Andy: well, I did remove stuff with a Dremel, so...
I'll see if I have a beater set of Italian BB cups - I am going to bring bottle mount screws, a beat-up NR RD hanger bolt and two long screws for the gear lever bosses. These will take care of protecting all the other threads, too.
I'm looking forward to a busy Saturday at the racetrack and the bead-blasting booth. Bring an appetite for after
DD
06-28-12, 01:23 AM
#25
Banned.
Thread Starter
Join Date: Jul 2009
Location: PAZ
Posts: 12,294
Mentioned: 255 Post(s)
Tagged: 0 Thread(s)
Quoted: 2588 Post(s)
Liked 4,826 Times
in
1,709 Posts
Hmmmmm.....
I just noticed that this frame has a chain-peg. None of my Colnagos - not even the '83 Mexico - have one. Added later?
DD
I just noticed that this frame has a chain-peg. None of my Colnagos - not even the '83 Mexico - have one. Added later?
DD