


My Ratcruiser build
 09-30-14, 11:33 AM
#1
Member
Thread Starter
Join Date: Sep 2014
Posts: 42
Mentioned: 2 Post(s)
Tagged: 0 Thread(s)
Quoted: 2 Post(s)
Likes: 0
Liked 0 Times
in
0 Posts
My Ratcruiser build
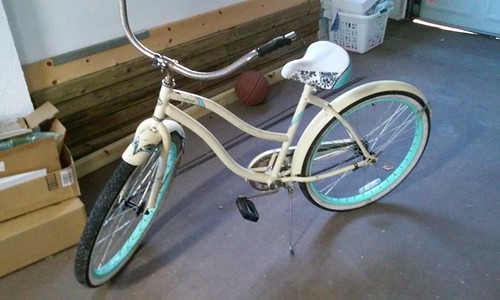
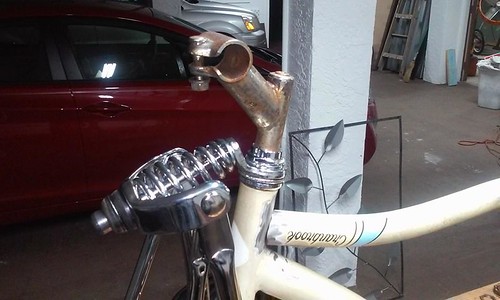
Hello all! Name's Chris, I'm the owner of Cburke.Industries, a small fabrication and metal art business. I picked up this bike for free and wanted to play around with it. I'm super into rat rods, but without the money to build a car, I thought a bike would be the next best thing lol.
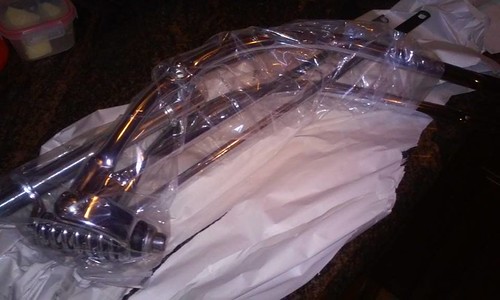
The only thing I need to do is order the front, but other then that I'll be making everything.
I like taking a lot of pictures as I go, hope you don't mind!
When I picked her up!
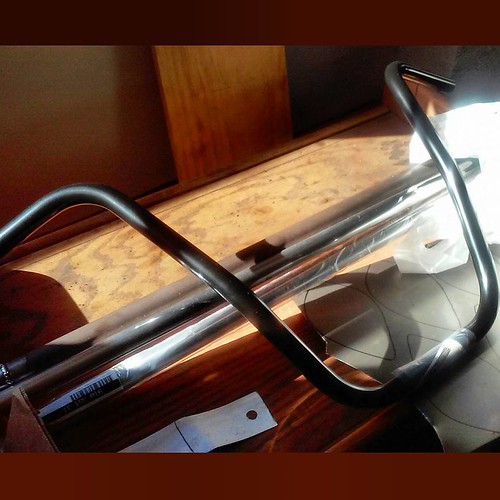
First thing was to flip the girl bar around.
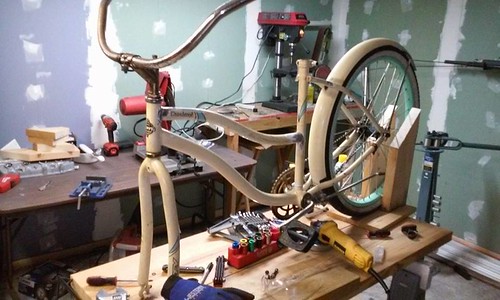
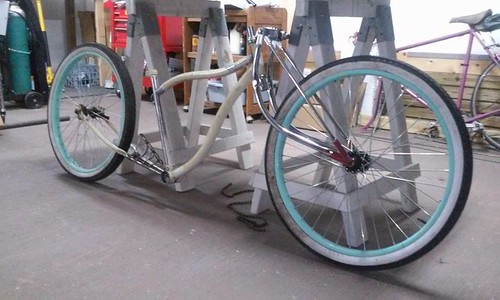
Then I started cutting her up!
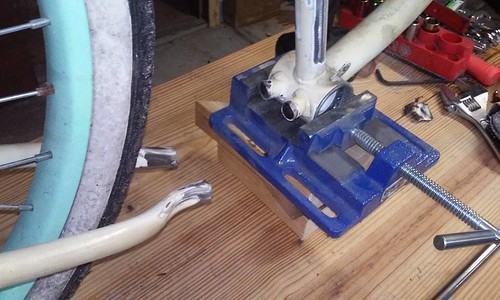
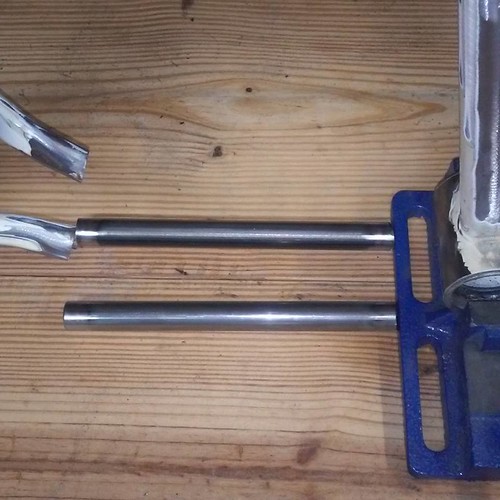
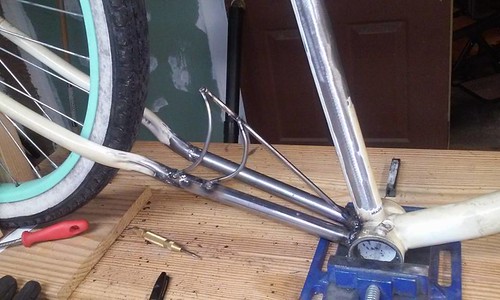
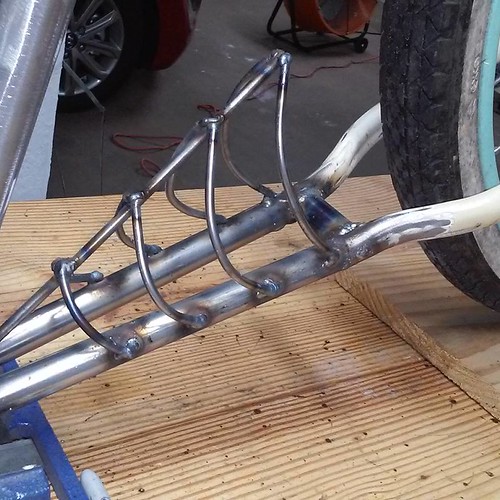
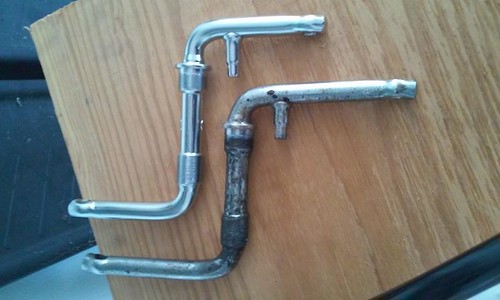
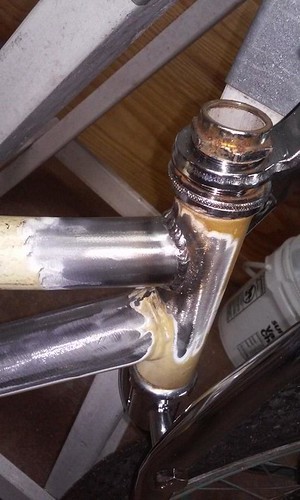
Building the extension
I love spider webs, well in metal not real life lol.
The only thing I need to do is order the front, but other then that I'll be making everything.
I like taking a lot of pictures as I go, hope you don't mind!
When I picked her up!
First thing was to flip the girl bar around.
Then I started cutting her up!
Building the extension
I love spider webs, well in metal not real life lol.
Last edited by CBURKE23; 10-18-14 at 08:50 AM.
 09-30-14, 11:33 AM
#2
Member
Thread Starter
Join Date: Sep 2014
Posts: 42
Mentioned: 2 Post(s)
Tagged: 0 Thread(s)
Quoted: 2 Post(s)
Likes: 0
Liked 0 Times
in
0 Posts
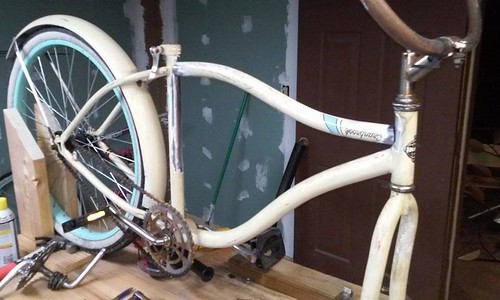
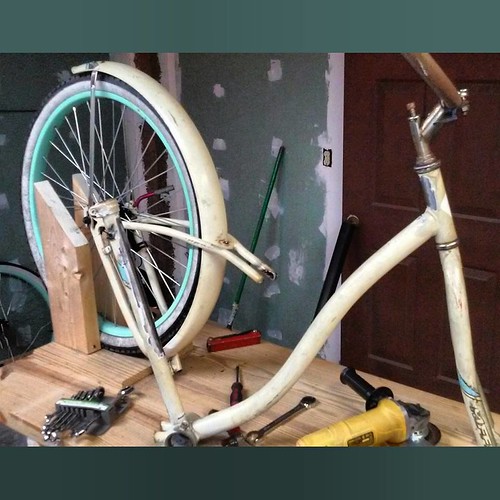
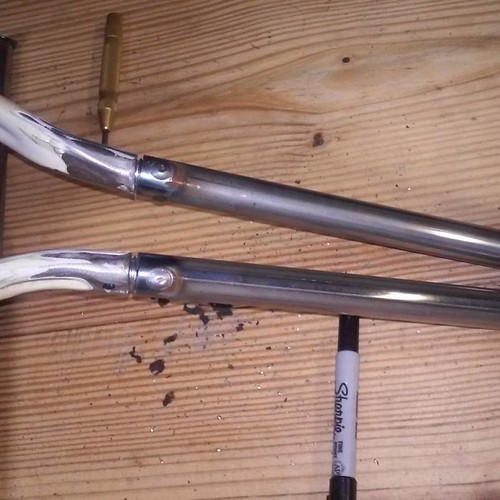
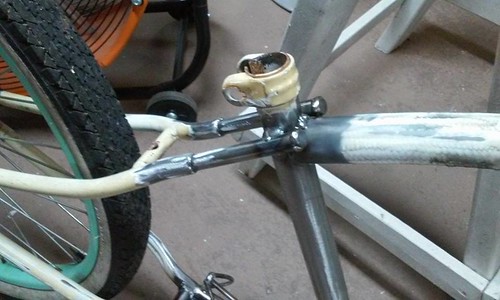
I cut the upper back off to flip it so I could maybe cut the seat bar to bring it down
I'll need to extend this as well
So that's all for now. I really need to order the front so I can see where the seat will sit before I weld that back piece back on. I want the back tire to sit just behind your back.
Oh and sorry for the crap cell pics, I post these to IG so I didn't break out the good camera! Maybe when it's all done!

 10-01-14, 06:16 AM
#6
Member
Thread Starter
Join Date: Sep 2014
Posts: 42
Mentioned: 2 Post(s)
Tagged: 0 Thread(s)
Quoted: 2 Post(s)
Likes: 0
Liked 0 Times
in
0 Posts
Nope, already checked the chain. I had to check it anyway because of the upper back tail being flipped. It's close for sure!
Thanks guys, can't wait to get it done and painted.
Thanks guys, can't wait to get it done and painted.
 10-17-14, 11:02 AM
#12
Member
Thread Starter
Join Date: Sep 2014
Posts: 42
Mentioned: 2 Post(s)
Tagged: 0 Thread(s)
Quoted: 2 Post(s)
Likes: 0
Liked 0 Times
in
0 Posts
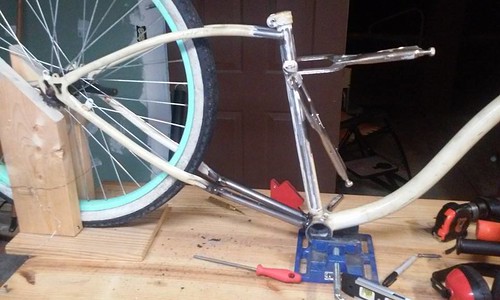
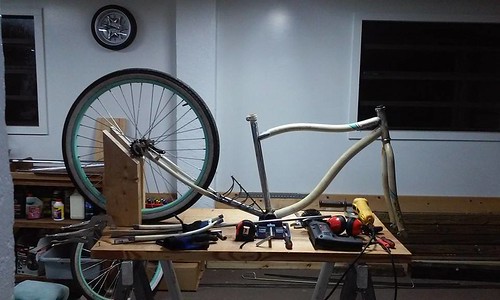
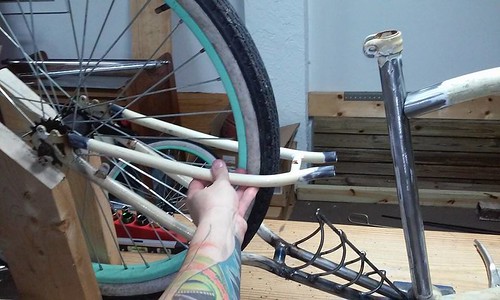
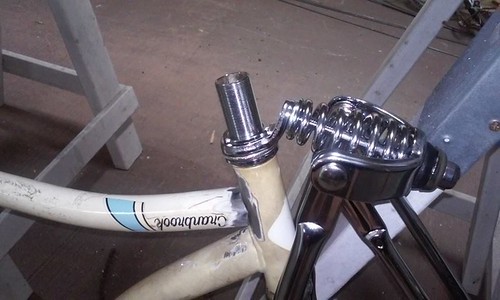
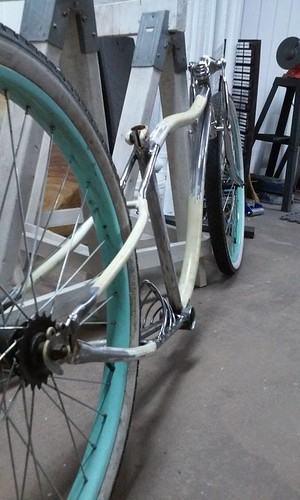
Ok, got the front in so I installed it to see just how low it would sit. Well, It's lower then I thought so I'll either need to order a 3" crank or cut an inch out of the one I have. Any suggestion?
I also had to trim down the front a little at the top to get it closer to the head.
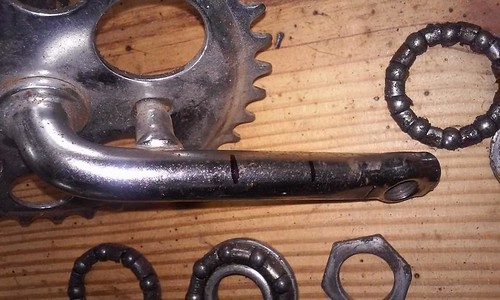
I'm happy with it! Just need to make sure I can ride it lol.
 10665096_305055113006725_1801282065951295754_n1 by cburke.industries, on Flickr
I also had to trim down the front a little at the top to get it closer to the head.

I'm happy with it! Just need to make sure I can ride it lol.
10665096_305055113006725_1801282065951295754_n1 by cburke.industries, on Flickr
10-19-14, 03:37 AM
#14


What happened?

Join Date: Jun 2007
Location: Around here somewhere
Posts: 7,927
Bikes: 3 Rollfasts, 3 Schwinns, a Shelby and a Higgins Flightliner in a pear tree!
Mentioned: 57 Post(s)
Tagged: 1 Thread(s)
Quoted: 1835 Post(s)
Liked 292 Times
in
255 Posts
Working or not, it is a major improvement on a Huffy Cranbrook.
__________________
I don't know nothing, and I memorized it in school and got this here paper I'm proud of to show it.
10-21-14, 06:19 AM
#15
Member
Thread Starter
Join Date: Sep 2014
Posts: 42
Mentioned: 2 Post(s)
Tagged: 0 Thread(s)
Quoted: 2 Post(s)
Likes: 0
Liked 0 Times
in
0 Posts
Got my crank in 3 1/2
 ZOMBIEHEARSEHEADBADGE by cburke.industries, on Flickr
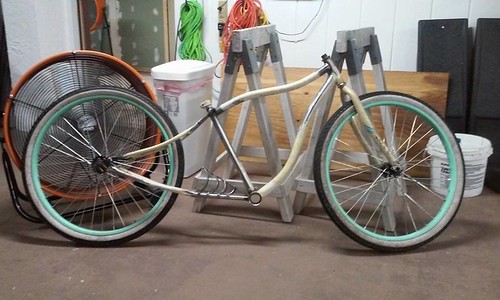
Rear end is all welded up and done!
 10710888_314711445374425_4321345389009455963_n by cburke.industries, on Flickr
And upper is flipped and welded on
 64358_314711522041084_4345900885637051554_n by cburke.industries, on Flickr
 1779869_314711492041087_1951183253733496275_n by cburke.industries, on Flickr
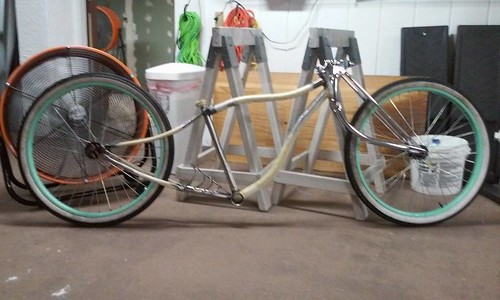
Now, I slapped on the old front and I kind of like it! So now I'm not sure which one I like. LMK what you guys think.....
 10632619_314711408707762_3492592946326338967_n by cburke.industries, on Flickr
 10580022_314711425374427_2278780187866099103_n by cburke.industries, on Flickr
ZOMBIEHEARSEHEADBADGE by cburke.industries, on FlickrRear end is all welded up and done!
10710888_314711445374425_4321345389009455963_n by cburke.industries, on FlickrAnd upper is flipped and welded on
64358_314711522041084_4345900885637051554_n by cburke.industries, on Flickr1779869_314711492041087_1951183253733496275_n by cburke.industries, on FlickrNow, I slapped on the old front and I kind of like it! So now I'm not sure which one I like. LMK what you guys think.....
10632619_314711408707762_3492592946326338967_n by cburke.industries, on Flickr10580022_314711425374427_2278780187866099103_n by cburke.industries, on Flickr
10-22-14, 11:46 AM
#17
Member
Thread Starter
Join Date: Sep 2014
Posts: 42
Mentioned: 2 Post(s)
Tagged: 0 Thread(s)
Quoted: 2 Post(s)
Likes: 0
Liked 0 Times
in
0 Posts
I think that's the plan. So far everyone is saying springer. I think if I make a bent seat post I can take some of the weight off the front and that should help a little. If I need to I'll cut the lower bar off, make my own new bar and move the sprocket over....
10-23-14, 03:06 PM
#18
Senior Member
Join Date: Sep 2014
Location: Fayetteville,AR.
Posts: 65
Bikes: Surly Big Dummy 2013
Mentioned: 0 Post(s)
Tagged: 0 Thread(s)
Quoted: 0 Post(s)
Likes: 0
Liked 0 Times
in
0 Posts
Looking real good can't wait to see it finish.What color are you thinking about?
10-24-14, 08:30 AM
#19
Member
Thread Starter
Join Date: Sep 2014
Posts: 42
Mentioned: 2 Post(s)
Tagged: 0 Thread(s)
Quoted: 2 Post(s)
Likes: 0
Liked 0 Times
in
0 Posts
I'm doing the sea foam green with brown under it and sanding it down in places that would show rust. So fake rust is how it will be painted but with chrome accents.
10-24-14, 12:08 PM
#20
Member
Thread Starter
Join Date: Sep 2014
Posts: 42
Mentioned: 2 Post(s)
Tagged: 0 Thread(s)
Quoted: 2 Post(s)
Likes: 0
Liked 0 Times
in
0 Posts
New grips in! Now need to find a seat to match... This this color will really set off the Rat Rod look!
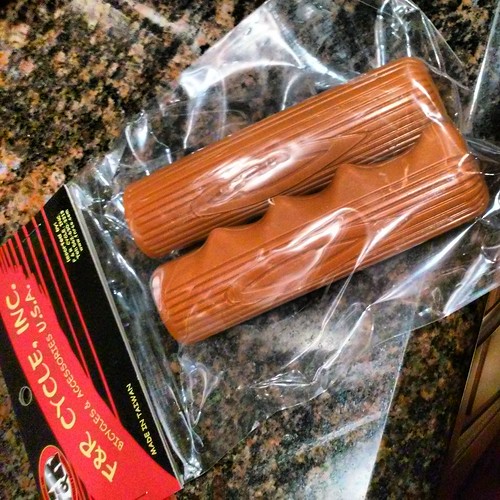 IMG_20141023_193249 by cburke.industries, on Flickr
IMG_20141023_193249 by cburke.industries, on Flickr
10-26-14, 10:29 AM
#23
Member
Thread Starter
Join Date: Sep 2014
Posts: 42
Mentioned: 2 Post(s)
Tagged: 0 Thread(s)
Quoted: 2 Post(s)
Likes: 0
Liked 0 Times
in
0 Posts
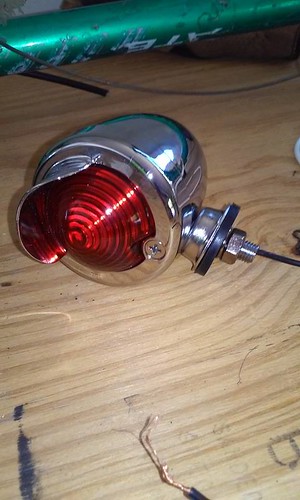
Taillight came in. Will need to build a bracket to hold it. Not sure how I'm going to get this light to work. I only has one wire....
 ZOMBIEHEARSEHEADBADGE by cburke.industries, on Flickr
ZOMBIEHEARSEHEADBADGE by cburke.industries, on Flickr
10-26-14, 11:10 AM
#24
Senior Member
Join Date: Sep 2013
Posts: 107
Mentioned: 0 Post(s)
Tagged: 0 Thread(s)
Quoted: 1 Post(s)
Likes: 0
Liked 0 Times
in
0 Posts
Lights like that are made to ground to the frame. On a typical car or motorcycle, the negative lead from the battery connects directly to the frame and this effectively turns any metal part that touches it into a ground wire. What you need to do to make it work on your bike is either create a chassis ground like on a car, or open up the light and rewire it enough to run the ground to a second wire.
10-26-14, 11:46 AM
#25
Member
Thread Starter
Join Date: Sep 2014
Posts: 42
Mentioned: 2 Post(s)
Tagged: 0 Thread(s)
Quoted: 2 Post(s)
Likes: 0
Liked 0 Times
in
0 Posts
Lights like that are made to ground to the frame. On a typical car or motorcycle, the negative lead from the battery connects directly to the frame and this effectively turns any metal part that touches it into a ground wire. What you need to do to make it work on your bike is either create a chassis ground like on a car, or open up the light and rewire it enough to run the ground to a second wire.
I'll give a try! I guess finding a nice place to put a battery would be the next problem. It really only needs to be on at shows and what not....
Thank you again!