


French classic homemade folding bicycle
 01-02-20, 02:53 PM
#1
Senior Member
Thread Starter
French classic homemade folding bicycle
I'm not sure if this is the right place for this project but the basis for this project is an old French bike. I wanted to build my own folding bike because I commute regularly between two big cities in the Netherlands. I used parts off a scrap folding bike and a unknown french frame.
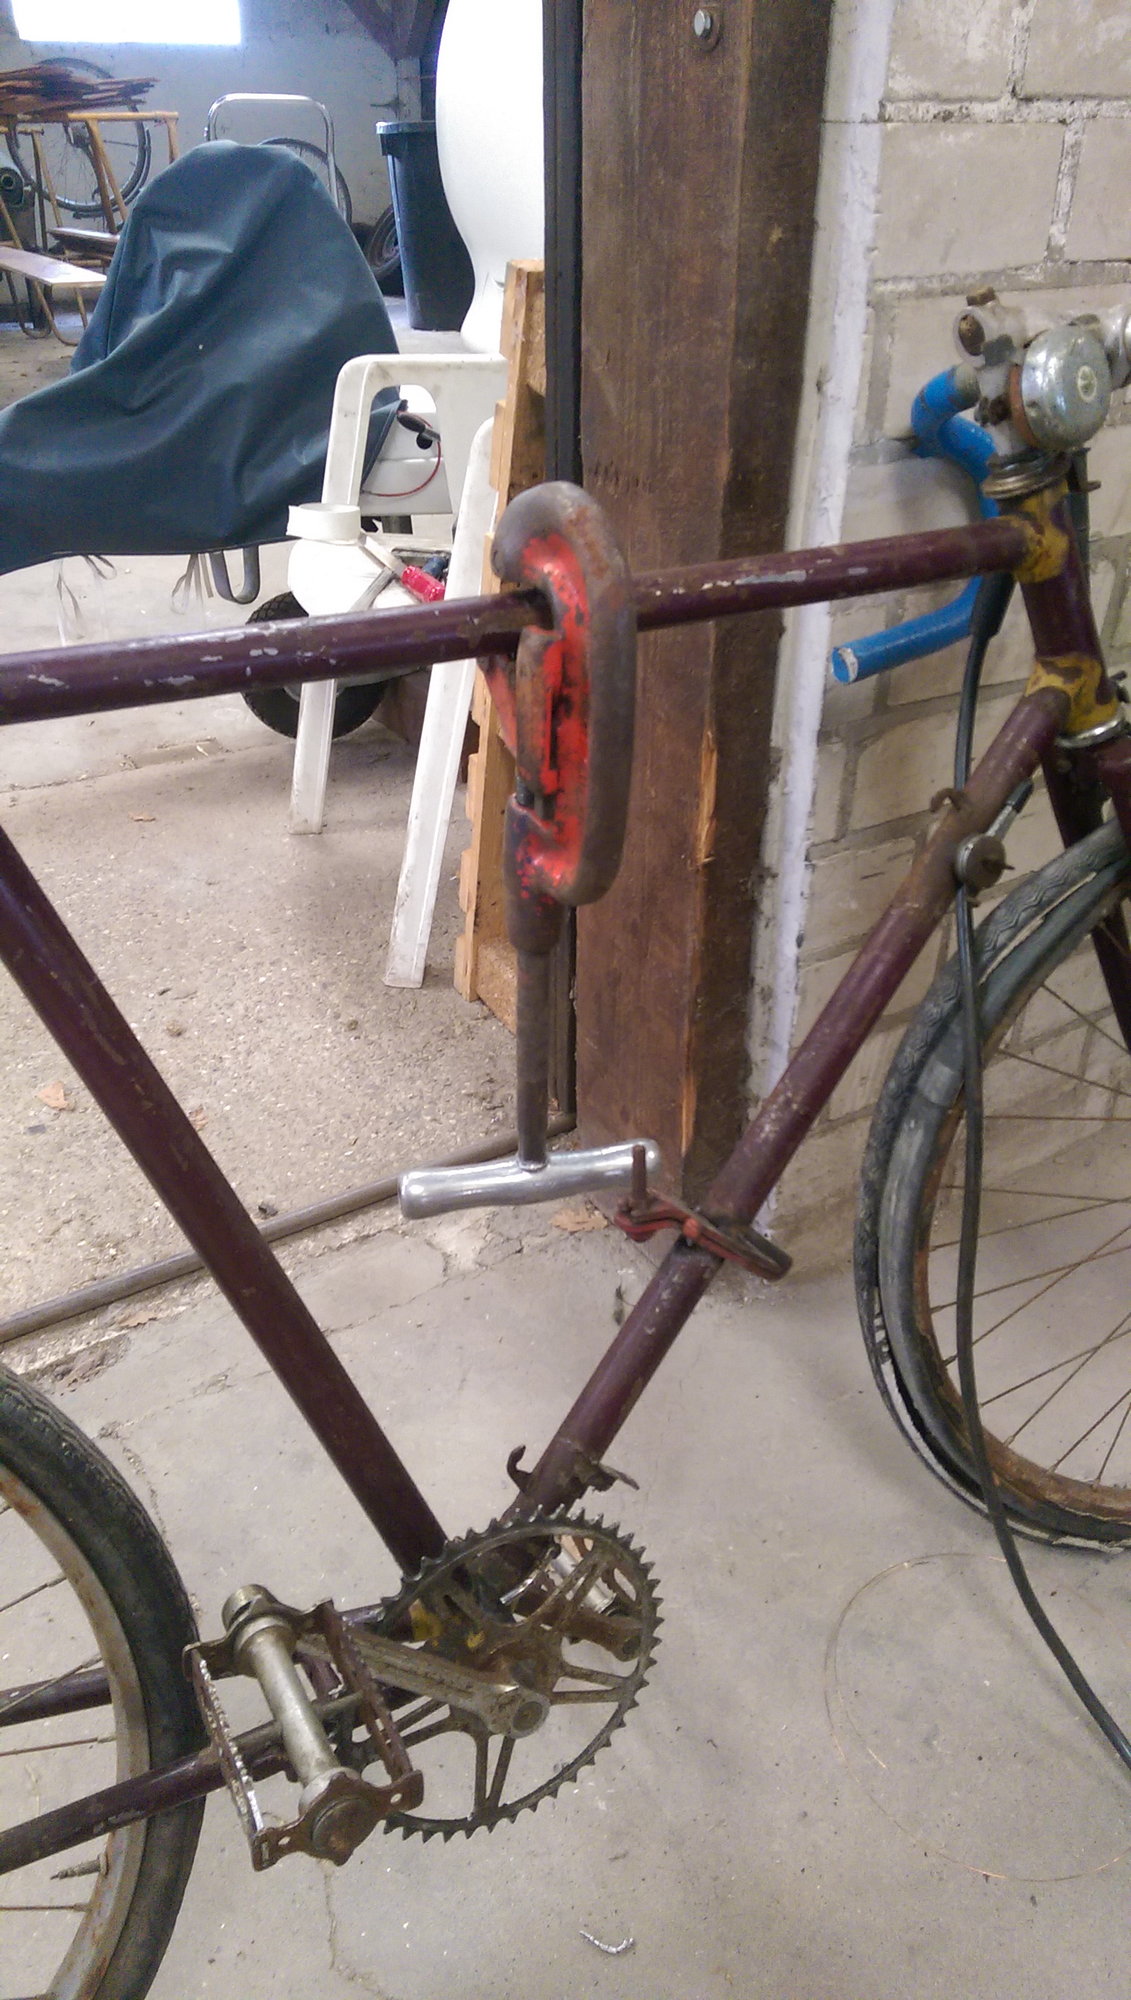
first I cut a two cm piece out of the bottom pipe and welded in the separating part from the folding pipe. Then I cut the top pipe.
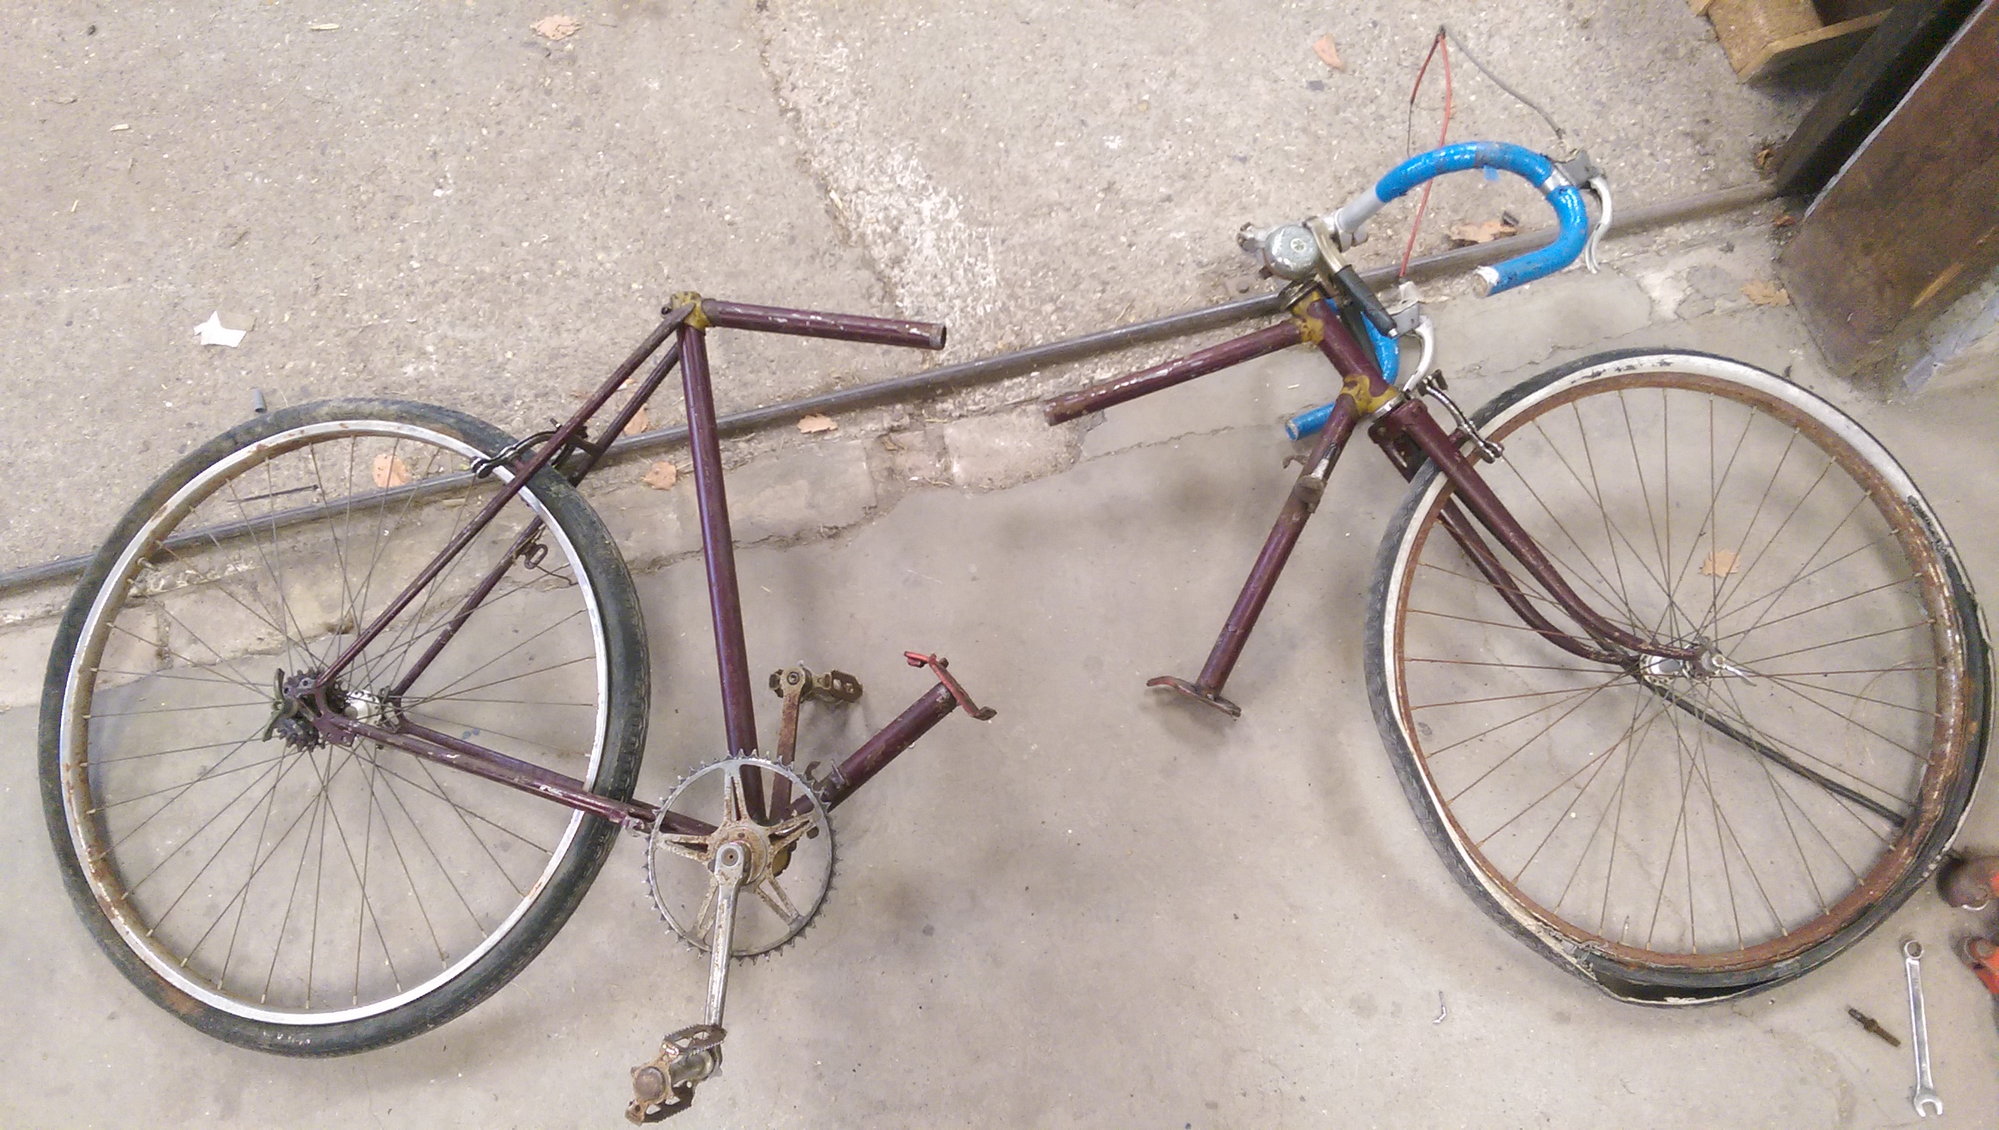
To connect the top pipe for now I'm using a piece of pipe that fits over the two parts of the bike. Need to make something stronger in the future. But first I want to make a test drive.


this is how the bike looks now.
first I cut a two cm piece out of the bottom pipe and welded in the separating part from the folding pipe. Then I cut the top pipe.
To connect the top pipe for now I'm using a piece of pipe that fits over the two parts of the bike. Need to make something stronger in the future. But first I want to make a test drive.
this is how the bike looks now.

Likes For Locomotief:
01-02-20, 03:01 PM
#2

Senior Member

Join Date: Sep 2015
Location: Madison, WI
Posts: 2,701
Mentioned: 52 Post(s)
Tagged: 0 Thread(s)
Quoted: 1136 Post(s)
Liked 650 Times
in
336 Posts
Cool project.
For the downtube - so you need a wrench to undo the nut on the threaded rod to separate the two halves of the bike? Could you use a quick release skewer, cut to length, instead? That would make opening it faster and you wouldn't need to bring a wrench with you.
For the top tube - Is there nothing holding the top tube together besides the piece of pipe you slipped over the two halves? I think you would want something more secure.
01-02-20, 03:03 PM
#3
Senior Member
Thread Starter
Brakes work but I have an issue with the rear derailleur. The sprockets are made for thinner chain than the rest off the bike. Now I want to replace the two small sprockets off the derailleur but I don't know how to take it apart.


this is rear derailleur. its an huret. Does anybody have any experience with these derailleurs?
this is rear derailleur. its an huret. Does anybody have any experience with these derailleurs?
01-02-20, 03:08 PM
#4
Senior Member
Thread Starter
TenGrainBread your right about the top part being the weak point at the moment. I'll have to think something to keep the two halfs together. So sort off locking magnetism.
And do you have a picture off a quick release?
And do you have a picture off a quick release?
01-02-20, 03:11 PM
#5
Senior Member
Join Date: Sep 2015
Location: Madison, WI
Posts: 2,701
Mentioned: 52 Post(s)
Tagged: 0 Thread(s)
Quoted: 1136 Post(s)
Liked 650 Times
in
336 Posts
Brakes work but I have an issue with the rear derailleur. The sprockets are made for thinner chain than the rest off the bike. Now I want to replace the two small sprockets off the derailleur but I don't know how to take it apart.
this is rear derailleur. its an huret. Does anybody have any experience with these derailleurs?
this is rear derailleur. its an huret. Does anybody have any experience with these derailleurs?
01-02-20, 03:13 PM
#6
Senior Member
Join Date: Sep 2015
Location: Madison, WI
Posts: 2,701
Mentioned: 52 Post(s)
Tagged: 0 Thread(s)
Quoted: 1136 Post(s)
Liked 650 Times
in
336 Posts
TenGrainBread your right about the top part being the weak point at the moment. I'll have to think something to keep the two halfs together. So sort off locking magnetism.
And do you have a picture off a quick release?
And do you have a picture off a quick release?
The smaller tube slides into the larger tube. He slit the larger tube at the end and brazed on a binder to mount a quick release skewer so that the ends of the larger tube can be clamped onto the smaller tube once in place.
Notice also how he avoided putting the shift levers on the front of the bike, so that all the shift cables stay with the rear of the bike when the bike is split. I'm pretty sure the bike in the first picture used push-rod derailleurs. The bike in the second picture had the levers mounted on the seattube.


Last edited by TenGrainBread; 01-02-20 at 03:17 PM.
01-02-20, 03:16 PM
#7
Senior Member

Join Date: Jun 2010
Location: Medford MA
Posts: 2,089
Bikes: Ron Cooper touring, 1959 Jack Taylor 650b ladyback touring tandem, Vitus 979, Joe Bell painted Claud Butler Dalesman, Colin Laing curved tube tandem, heavily-Dilberted 1982 Trek 6xx, Ren� Herse tandem
Mentioned: 80 Post(s)
Tagged: 0 Thread(s)
Quoted: 964 Post(s)
Liked 1,451 Times
in
723 Posts
The way Ren� Herse and Panasonic did it basically is with a piece of pipe, like yours, brazed to one end and with clamps on the end like a seat post clamp to squeeze it down over the tube that slides into it. That top tube is French so who knows what diameter, but it should be easy to slit the pipe and put a clamp on it to squeeze it a little bit. They do sell seat post clamps that you can braze on, and also seat post clamps that you can fit on the end of the tube if you have the correct diameter tube.
I think you're well on your way to having this thing working, and I admire your willingness to dive into something that few others have done
edit: TenGrainBread beat me to it.
I think you're well on your way to having this thing working, and I admire your willingness to dive into something that few others have done
edit: TenGrainBread beat me to it.
__________________
Owner & co-founder, Cycles Ren� Hubris. Unfortunately attaching questionable braze-ons to perfectly good frames since about 2015. With style.
Owner & co-founder, Cycles Ren� Hubris. Unfortunately attaching questionable braze-ons to perfectly good frames since about 2015. With style.
01-02-20, 03:37 PM
#8
Senior Member
Thread Starter
TenGrainBread thanks for the English technical names for all the parts.
I tried twisting the flat screw but it will only move a little and then it won't move at all. I'll try it from the other end next time.
I tried twisting the flat screw but it will only move a little and then it won't move at all. I'll try it from the other end next time.
01-02-20, 03:41 PM
#9
Senior Member
Thread Starter
I like what he did with his bike. I was planning to have a pipe or piece of steel made that fits inside one of the two pieces to connect them. And use a clamb to hold them in place.
im curious how he separates the cable to the rear brake?
im curious how he separates the cable to the rear brake?
01-02-20, 03:47 PM
#10
Senior Member
Join Date: Jun 2010
Location: Medford MA
Posts: 2,089
Bikes: Ron Cooper touring, 1959 Jack Taylor 650b ladyback touring tandem, Vitus 979, Joe Bell painted Claud Butler Dalesman, Colin Laing curved tube tandem, heavily-Dilberted 1982 Trek 6xx, Ren� Herse tandem
Mentioned: 80 Post(s)
Tagged: 0 Thread(s)
Quoted: 964 Post(s)
Liked 1,451 Times
in
723 Posts
im curious how he separates the cable to the rear brake?
__________________
Owner & co-founder, Cycles Ren� Hubris. Unfortunately attaching questionable braze-ons to perfectly good frames since about 2015. With style.
Owner & co-founder, Cycles Ren� Hubris. Unfortunately attaching questionable braze-ons to perfectly good frames since about 2015. With style.
01-02-20, 03:53 PM
#11

Senior Member
Join Date: Jun 2006
Posts: 20,305
Mentioned: 130 Post(s)
Tagged: 0 Thread(s)
Quoted: 3464 Post(s)
Liked 2,829 Times
in
1,995 Posts
Makes one wonder where Herse sourced tubing to get a tube of proper inside diameter tube for the aft section of the 26.0mm top tube.
01-02-20, 03:53 PM
#12
Senior Member
Join Date: Sep 2015
Location: Madison, WI
Posts: 2,701
Mentioned: 52 Post(s)
Tagged: 0 Thread(s)
Quoted: 1136 Post(s)
Liked 650 Times
in
336 Posts
There are also cable splitter attachments that you can use to split cables with an allen key, without fully uninstalling them from the brakes. These should be unnecessary when using brakes that require a straddle cable.
Last edited by TenGrainBread; 01-02-20 at 03:58 PM.
01-02-20, 03:57 PM
#13
Senior Member
Join Date: Sep 2015
Location: Madison, WI
Posts: 2,701
Mentioned: 52 Post(s)
Tagged: 0 Thread(s)
Quoted: 1136 Post(s)
Liked 650 Times
in
336 Posts
A lathe with a boring bar would work! Did Herse have a lathe? If not, perhaps a friendly metal supplier in St. Etienne provided the tubes?
01-02-20, 04:15 PM
#14
Senior Member
Join Date: Apr 2014
Location: Back in Lincoln Sq, Chicago...🙄
Posts: 1,609
Bikes: '84 Miyata 610 �91 Cannondale ST600,'83 Trek 720 �84 Trek 520, 620, �91 Miyata 1000LT, '79 Trek 514, '78 Trek 706, '73 Raleigh Int. frame.
Mentioned: 13 Post(s)
Tagged: 0 Thread(s)
Quoted: 685 Post(s)
Liked 370 Times
in
219 Posts
This is SO the right place for this project.

01-02-20, 04:39 PM
#15
Senior Member
Thread Starter
I'll have a look at the rear brakes next time I'm in my other place. Would be nice to disconnect the two halves completely. And I'll have to find a single shifter somewhere.
01-02-20, 07:16 PM
#16
Senior Member
Join Date: Jun 2010
Location: Medford MA
Posts: 2,089
Bikes: Ron Cooper touring, 1959 Jack Taylor 650b ladyback touring tandem, Vitus 979, Joe Bell painted Claud Butler Dalesman, Colin Laing curved tube tandem, heavily-Dilberted 1982 Trek 6xx, Ren� Herse tandem
Mentioned: 80 Post(s)
Tagged: 0 Thread(s)
Quoted: 964 Post(s)
Liked 1,451 Times
in
723 Posts
I'm pretty sure he did. There are quite a few things on my '46 Herse tandem that couldn't have been done any other way, and quite a few tool marks with chatter and grooving from dull tooling or aggressive feeds, which indicate to me in-house production rather than production runs at a shop.
__________________
Owner & co-founder, Cycles Ren� Hubris. Unfortunately attaching questionable braze-ons to perfectly good frames since about 2015. With style.
Owner & co-founder, Cycles Ren� Hubris. Unfortunately attaching questionable braze-ons to perfectly good frames since about 2015. With style.
Likes For scarlson:
01-03-20, 02:57 AM
#17
Senior Member
Thread Starter
My uncle has a lathe he can use. I have to figure out the shape of the insert. Because of the lower connection I can't use something straight at the top. It folds in under an angle. (Hope it makes sense what I'm trying to explaine 
The rear brake is of this type.

disconnecting at the rear brake is gone be a challenge I think. Have to think of something half way.
The rear brake is of this type.
disconnecting at the rear brake is gone be a challenge I think. Have to think of something half way.
01-03-20, 03:14 AM
#18
Me duelen las nalgas
Join Date: Aug 2015
Location: Texas
Posts: 13,513
Bikes: Centurion Ironman, Trek 5900, Univega Via Carisma, Globe Carmel
Mentioned: 199 Post(s)
Tagged: 0 Thread(s)
Quoted: 4560 Post(s)
Liked 2,802 Times
in
1,800 Posts
Take a look at the Co-Motion design for ideas on other methods for assembly/disassembly. The fellow in this video has toured the world on Co-Motion bikes, with lots of takedowns and packing the bike into a single large case. Co-Motion seems to have figured out a pretty good approach to the full size takedown bike.
01-03-20, 04:11 PM
#19
Senior Member
Join Date: Jan 2019
Posts: 528
Mentioned: 8 Post(s)
Tagged: 0 Thread(s)
Quoted: 237 Post(s)
Likes: 0
Liked 83 Times
in
64 Posts
I wish dumpster bikes were nearly ad interesting where I am. In regards to telescoping tubing and lathes and constructeurs don't forget that since they had 26mm metric top tubes, they also had access to other metric tubes, including 28mm metric downtubes of which a 9/10 cut off would be ideal, and 30mm tubing which is a pretty standard metric size. I'm not sure how thick the tubing is, but I would probably reinforce the ends with an external sleeve or internal plug. A sliding clamp sleeve could be made like the ones used on the downtubes of demountables.
01-03-20, 04:37 PM
#20
Shifting is fun!

Join Date: Aug 2009
Location: South Holland, NL
Posts: 11,006
Bikes: Yes, please.
Mentioned: 280 Post(s)
Tagged: 0 Thread(s)
Quoted: 2198 Post(s)
Liked 4,601 Times
in
1,764 Posts
Nice project! Sawing a vintage French randonneuse in two is always an excellent way to make an entrance here at C&V.
I'll be following closely, if only because I have a similar project in the pipeline, using these:

I'll be following closely, if only because I have a similar project in the pipeline, using these:
Last edited by non-fixie; 01-04-20 at 01:17 AM. Reason: Typo
01-03-20, 05:35 PM
#21
Senior Member
Thread Starter
I wish I joined this forum years ago. I'm impressed by all the interesting replies you guys and girls have given me with my project. There have been some projects in the past I would have loved to share with you guys. Projects would have gone faster and probably been nicer.
and I love all the projects and bikes I've seen on the forum. Very inspirational.
and I love all the projects and bikes I've seen on the forum. Very inspirational.
01-04-20, 01:20 AM
#23
Senior Member
Thread Starter
I wish dumpster ikes were nearly ad interesting where I am. In regards to telescoping tubing and lathes and constructeurs don't forget that since they had 26mm metric top tubes, they also had access to other metric tubes, including 28mm metric downtubes of which a 9/10 cut off would be ideal, and 30mm tubing which is a pretty standard metric size. I'm not sure how thick the tubing is, but I would probably reinforce the ends with an external sleeve or internal plug. A sliding clamp sleeve could be made like the ones used on the downtubes of demountables.
01-04-20, 01:36 AM
#25
Senior Member
Thread Starter
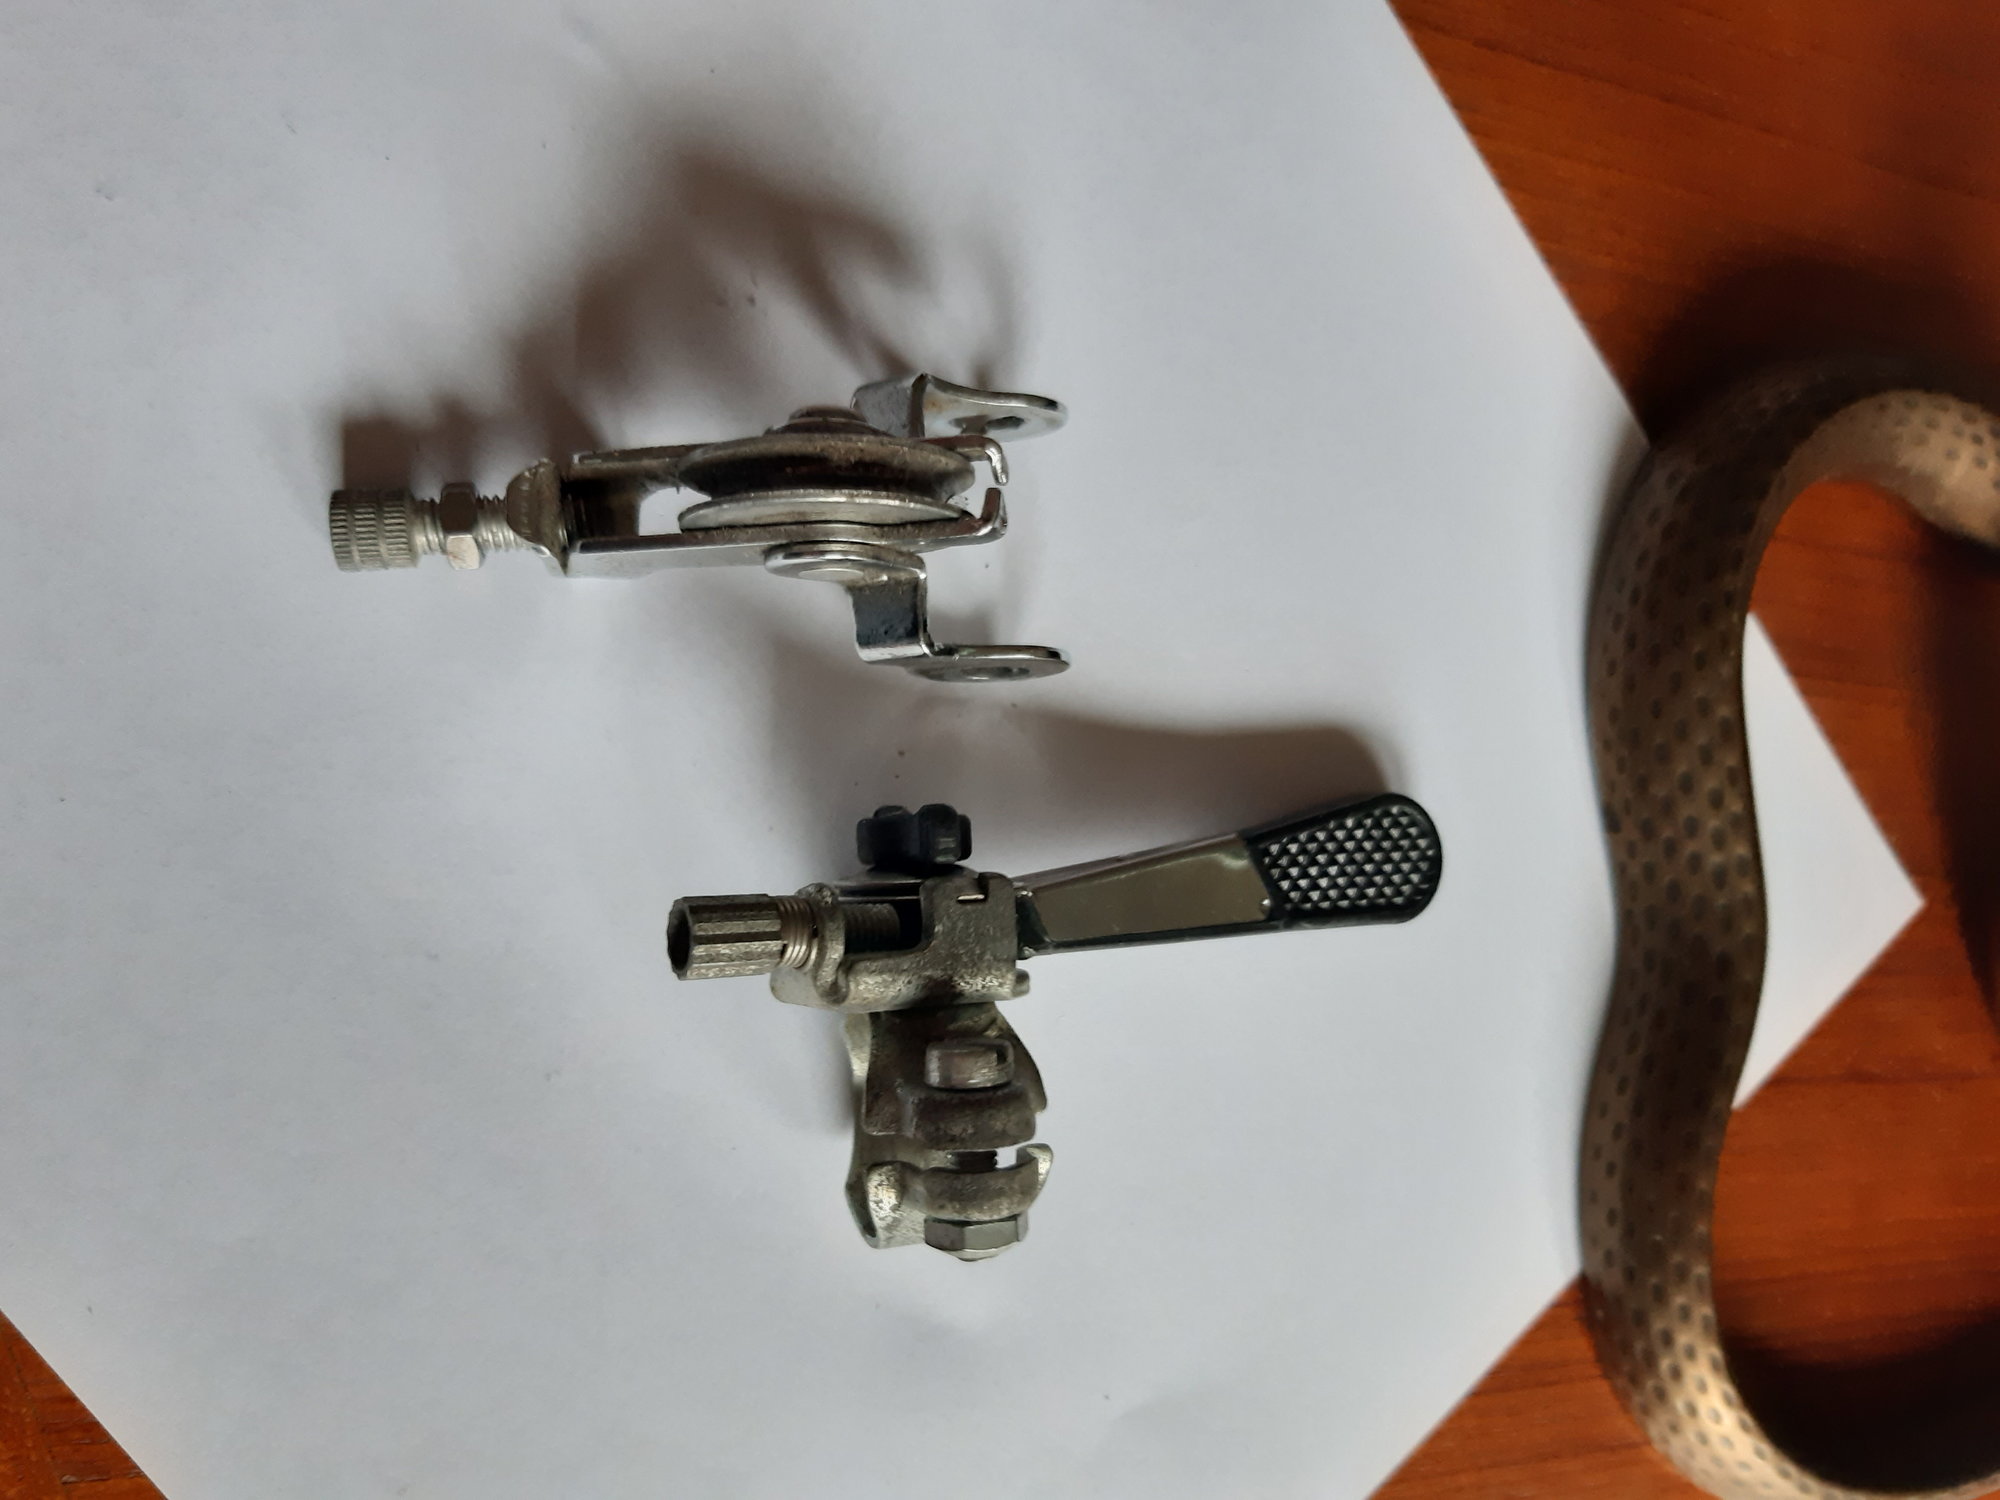


Found these at my local bike shop yesterday. I'm not sure if the simplex schifter is the right size for the down pipe but it was cheap and nice. I could weld a piece of tubing on the bike if necessary. The roller wheel is for a future project. I suspect that my local bike shop has some interesting stuff lying around. There where parts everywhere and the prices are very reasonable.