


1 + 1 = 1952...Say hello to another Raleigh Sports
 08-21-20, 10:13 AM
#51

aka Tom Reingold

Join Date: Jan 2009
Location: New York, NY, and High Falls, NY, USA
Posts: 40,496
Bikes: 1962 Rudge Sports, 1971 Raleigh Super Course, 1971 Raleigh Pro Track, 1974 Raleigh International, 1975 Viscount Fixie, 1982 McLean, 1996 Lemond (Ti), 2002 Burley Zydeco tandem
Mentioned: 511 Post(s)
Tagged: 0 Thread(s)
Quoted: 7342 Post(s)
Liked 2,442 Times
in
1,426 Posts
The fenders look good, even with the war wounds!
The chrome has left large parts of the rims on my Florida bike, my 1962 Rudge Sports. It enhances braking, so I'm living with it.
The chrome has left large parts of the rims on my Florida bike, my 1962 Rudge Sports. It enhances braking, so I'm living with it.
__________________
Tom Reingold, tom@noglider.com
New York City and High Falls, NY
Blogs: The Experienced Cyclist; noglider's ride blog
�When man invented the bicycle he reached the peak of his attainments.� � Elizabeth West, US author
Please email me rather than PM'ing me. Thanks.
Tom Reingold, tom@noglider.com
New York City and High Falls, NY
Blogs: The Experienced Cyclist; noglider's ride blog
�When man invented the bicycle he reached the peak of his attainments.� � Elizabeth West, US author
Please email me rather than PM'ing me. Thanks.

Likes For noglider:
08-24-20, 07:26 PM
#52
www.theheadbadge.com
Thread Starter

Join Date: Sep 2005
Location: Southern Florida
Posts: 28,508
Bikes: https://www.theheadbadge.com
Mentioned: 124 Post(s)
Tagged: 0 Thread(s)
Quoted: 2420 Post(s)
Liked 4,381 Times
in
2,090 Posts
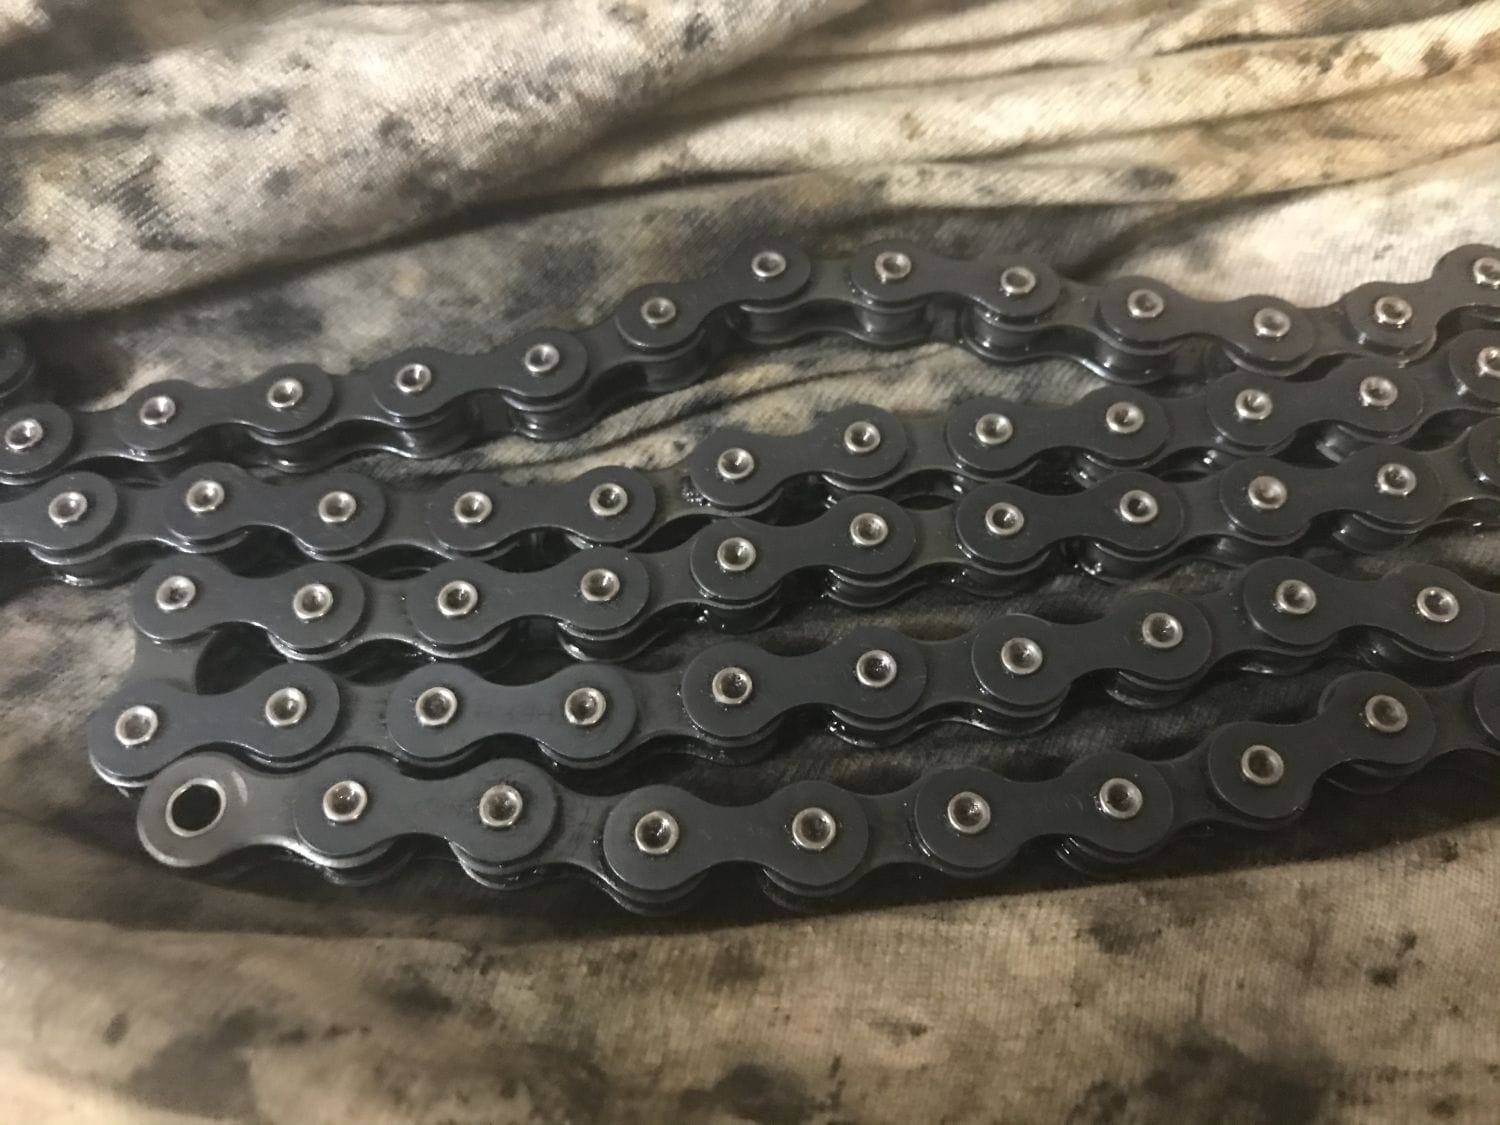
I've been cleaning and prepping the wheels and hubs in the meantime. No photos of that though - but I did snap a photo of the chain for another thread. Cleaned up quite well with a dunk in mineral spirits. Not bad for 68 years old.

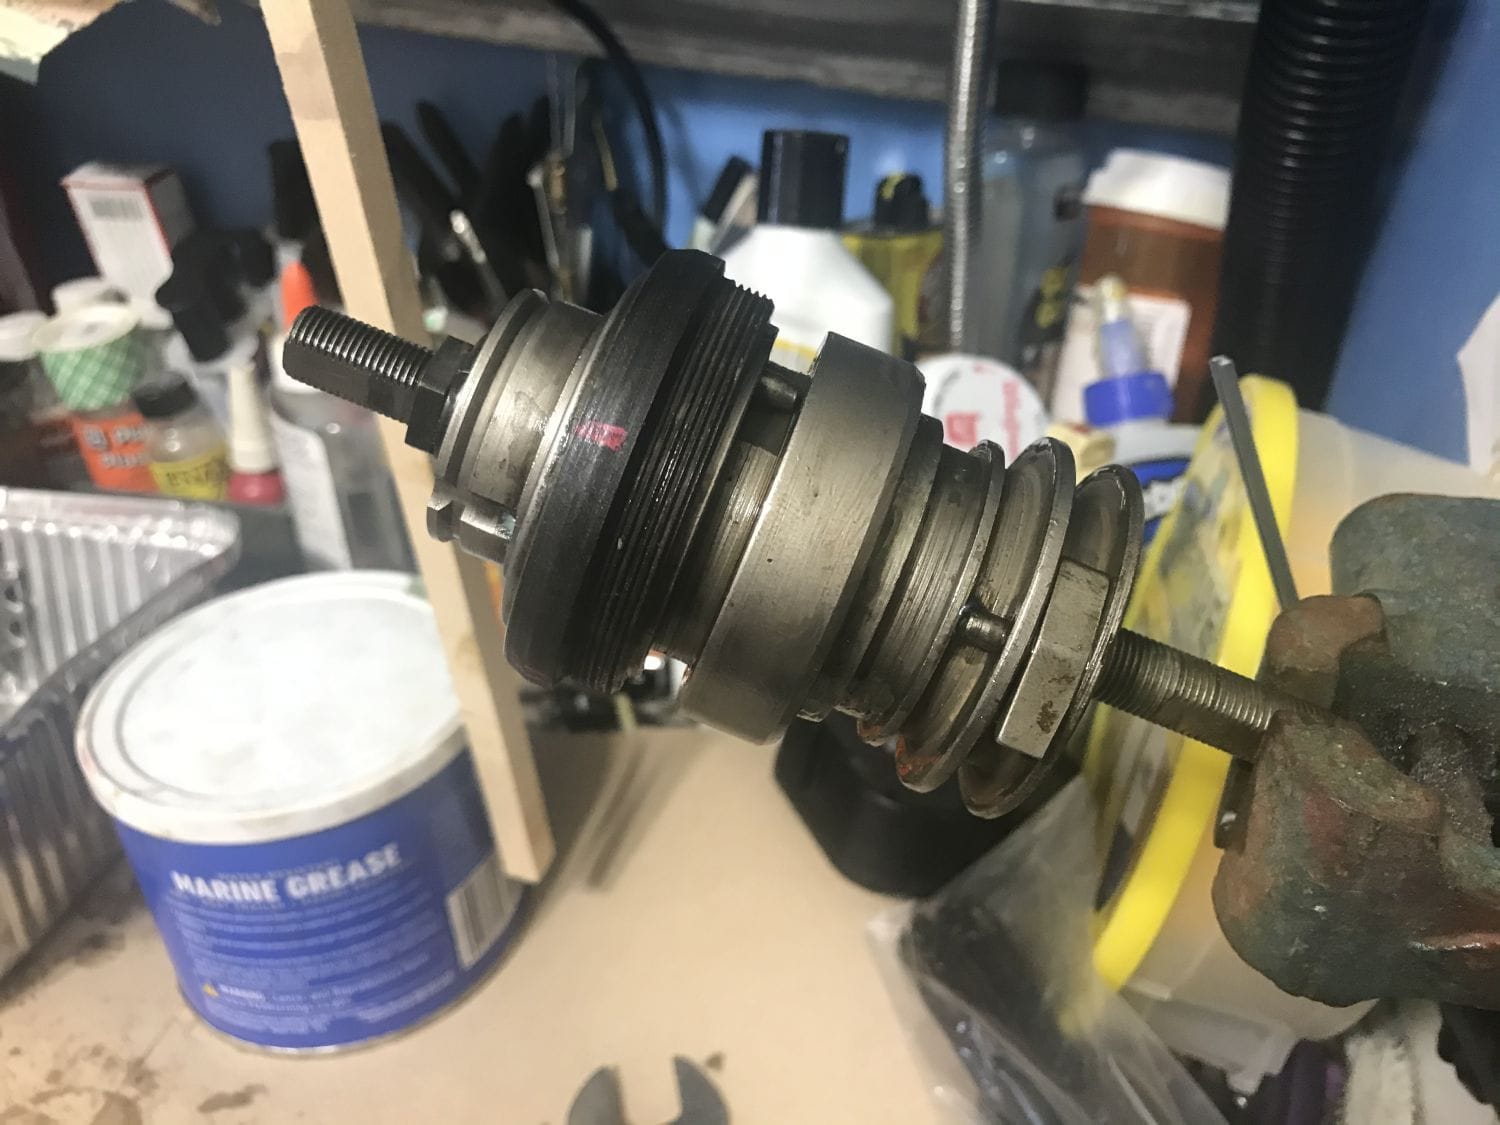
I also went ahead and pulled the AW. Whatever someone poured in this thing to lubricate it with turned into a sticky, oily film that feels like sticking your fingers in tacky paint. The pawls were barely engaging, and when I tried to move the clutch retainer off, the entire clutch AND the rest of the hub (stuck to the clutch) came with it. I dribbled a bit of mineral spirits on it and everything broke apart pretty easily. I'm going to let it soak overnight.
On the plus side, this thing looks brand new.

-Kurt
I also went ahead and pulled the AW. Whatever someone poured in this thing to lubricate it with turned into a sticky, oily film that feels like sticking your fingers in tacky paint. The pawls were barely engaging, and when I tried to move the clutch retainer off, the entire clutch AND the rest of the hub (stuck to the clutch) came with it. I dribbled a bit of mineral spirits on it and everything broke apart pretty easily. I'm going to let it soak overnight.
On the plus side, this thing looks brand new.
-Kurt
__________________


Last edited by cudak888; 06-01-21 at 08:41 AM.
Likes For cudak888:
08-24-20, 07:41 PM
#53
Freewheel Medic

Join Date: Oct 2005
Location: An Island on the Coast of GA!
Posts: 12,881
Bikes: Snazzy* Schwinns, Classy Cannondales & a Super Pro Aero Lotus (* Ed.)
Mentioned: 140 Post(s)
Tagged: 0 Thread(s)
Quoted: 1452 Post(s)
Liked 2,184 Times
in
961 Posts
Dang--- I know I won't look that good in another five years when I'm 68! ")
__________________
Bob
Enjoying the GA coast all year long!
Thanks for visiting my website: www.freewheelspa.com
Bob
Enjoying the GA coast all year long!
Thanks for visiting my website: www.freewheelspa.com
08-24-20, 09:54 PM
#54
Senior Member

Join Date: May 2018
Location: Ottawa, Ontario, Canada
Posts: 578
Bikes: 1951 Sun Wasp, 1953 Armstrong Consort, 1975 Raleigh Competition, 1980 Apollo Gran Sport, 1988 Schwinn Voyageur, Mystery MTB
Mentioned: 31 Post(s)
Tagged: 0 Thread(s)
Quoted: 359 Post(s)
Liked 457 Times
in
190 Posts
I've been cleaning and prepping the wheels and hubs in the meantime. No photos of that though - but I did snap a photo of the chain for another thread. Cleaned up quite well with a dunk in mineral spirits. Not bad for 68 years old.
I also went ahead and pulled the AW. Whatever someone poured in this thing to lubricate it with turned into a sticky, oily film that feels like sticking your fingers in wet clearcoat. The pawls were barely engaging, and when I tried to move the clutch retainer off, the entire clutch AND the rest of the hub (stuck to the clutch) came with it. I dribbled a bit of mineral spirits on it and everything broke apart pretty easily. I'm going to let it soak overnight.
On the plus side, this thing looks brand new.
-Kurt
08-24-20, 10:50 PM
#55
www.theheadbadge.com
Thread Starter
Join Date: Sep 2005
Location: Southern Florida
Posts: 28,508
Bikes: https://www.theheadbadge.com
Mentioned: 124 Post(s)
Tagged: 0 Thread(s)
Quoted: 2420 Post(s)
Liked 4,381 Times
in
2,090 Posts

I'm considering redoing this one with ATF and marine grease in the bearings. Crossing my fingers the marine grease doesn't slosh into the mix and jam the clutch key. Super easy for it to happen, if the wrong grease is used.
-Kurt
__________________
08-28-20, 07:26 PM
#56
www.theheadbadge.com
Thread Starter
Join Date: Sep 2005
Location: Southern Florida
Posts: 28,508
Bikes: https://www.theheadbadge.com
Mentioned: 124 Post(s)
Tagged: 0 Thread(s)
Quoted: 2420 Post(s)
Liked 4,381 Times
in
2,090 Posts
A tube of NLGI 00 grease arrived today, so I lubed up the AW and put it back together. The 00 grease was used for the moving bits, and I used a marine grease for the bearings.
Came out quite nice. The 00 grease also holds everything together for assembly. We'll see how it acts with the clutch and key.

-Kurt
Came out quite nice. The 00 grease also holds everything together for assembly. We'll see how it acts with the clutch and key.
-Kurt
__________________
Likes For cudak888:
09-05-20, 12:10 PM
#57
www.theheadbadge.com
Thread Starter
Join Date: Sep 2005
Location: Southern Florida
Posts: 28,508
Bikes: https://www.theheadbadge.com
Mentioned: 124 Post(s)
Tagged: 0 Thread(s)
Quoted: 2420 Post(s)
Liked 4,381 Times
in
2,090 Posts
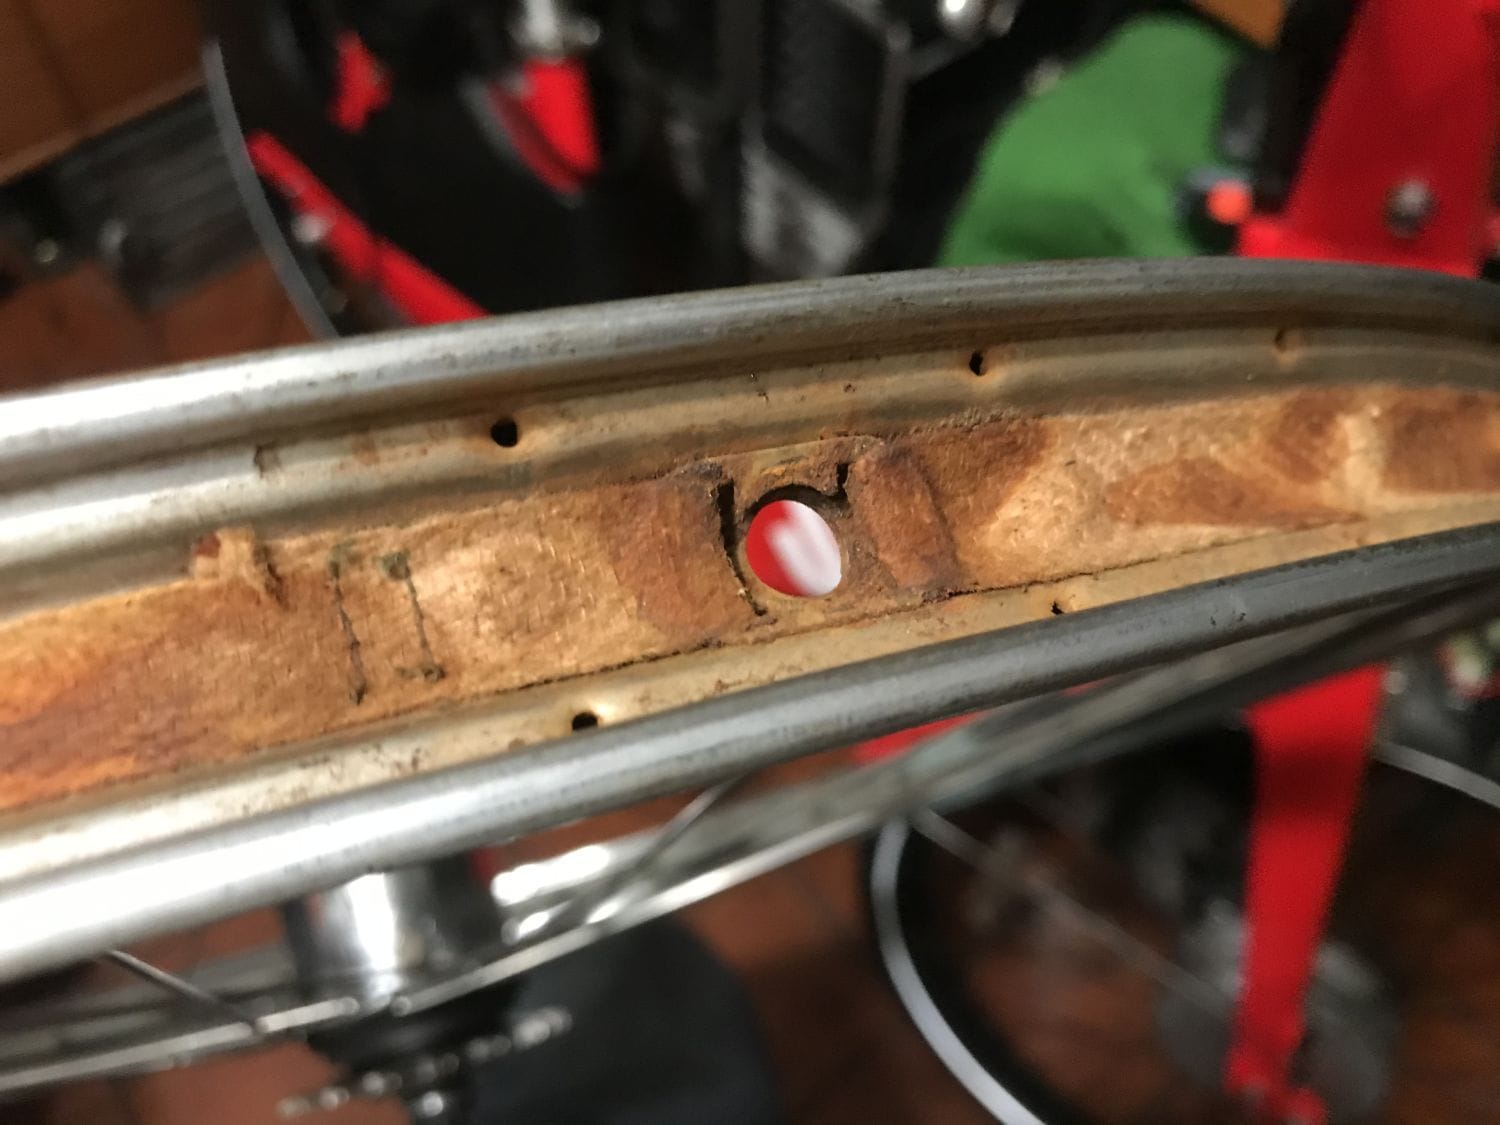
A few updates, now that some very-delayed rim strips have arrived along with some bottom bracket bearings. Here's the rear wheel. It's not 100% cleaned up around the spoke nipples, but 80% of the grunge removal has been taken care of.


Now, obvious point is obvious: Trying to re-use a 50+ year old tire is a bad idea. I knew it going into this, but was curious to see if I could squeeze some display life out of these Goodyears.
Found a bulge in one spot and aired it down, for I do want to use the tubes it came with (which are in excellent shape w/no rot whatsoever).


So that means new tires are in order (no surprise there). Unlike the '51, I am not open to the Schwalbe Delta Cruisers for this build. I want to maintain as period a look as possible, but I'm finding it quite difficult to find block-tread tires with wire beads that aren't undersized and/or complete junk. Panaracer has a pretty nice tire available via Japan, but it's Kevlar bead. Shipping is a killer too.
Personally I believe it is not a good idea to use folding Kevlar beads on these shallow, straight-sided rims. I don't care how tight they sit.
In other news, as I suspected, the cranks are bent - as are the pedal shafts. A shame, as these black enamel Raleigh chainrings aren't as easy to find as the later stuff - and this one cleaned up really beautifully, regardless. Oh well, another wall hanger.

Drive side:

Non-drive side:

The pedals. I can clean them up, but I'll still have to find new shafts. I'm not sure that's feasible, unless there's a later pedal out there with a compatible shaft.

-Kurt
Now, obvious point is obvious: Trying to re-use a 50+ year old tire is a bad idea. I knew it going into this, but was curious to see if I could squeeze some display life out of these Goodyears.
Found a bulge in one spot and aired it down, for I do want to use the tubes it came with (which are in excellent shape w/no rot whatsoever).
So that means new tires are in order (no surprise there). Unlike the '51, I am not open to the Schwalbe Delta Cruisers for this build. I want to maintain as period a look as possible, but I'm finding it quite difficult to find block-tread tires with wire beads that aren't undersized and/or complete junk. Panaracer has a pretty nice tire available via Japan, but it's Kevlar bead. Shipping is a killer too.
Personally I believe it is not a good idea to use folding Kevlar beads on these shallow, straight-sided rims. I don't care how tight they sit.
In other news, as I suspected, the cranks are bent - as are the pedal shafts. A shame, as these black enamel Raleigh chainrings aren't as easy to find as the later stuff - and this one cleaned up really beautifully, regardless. Oh well, another wall hanger.
Drive side:
Non-drive side:
The pedals. I can clean them up, but I'll still have to find new shafts. I'm not sure that's feasible, unless there's a later pedal out there with a compatible shaft.
-Kurt
__________________
Likes For cudak888:
09-05-20, 12:11 PM
#58
www.theheadbadge.com
Thread Starter
Join Date: Sep 2005
Location: Southern Florida
Posts: 28,508
Bikes: https://www.theheadbadge.com
Mentioned: 124 Post(s)
Tagged: 0 Thread(s)
Quoted: 2420 Post(s)
Liked 4,381 Times
in
2,090 Posts
And just so I don't leave out the beauty shot. I threw the crank on for looks.

-Kurt
-Kurt
__________________
Likes For cudak888:
09-07-20, 09:58 AM
#59
www.theheadbadge.com
Thread Starter
Join Date: Sep 2005
Location: Southern Florida
Posts: 28,508
Bikes: https://www.theheadbadge.com
Mentioned: 124 Post(s)
Tagged: 0 Thread(s)
Quoted: 2420 Post(s)
Liked 4,381 Times
in
2,090 Posts
I tried cold-setting the crank by installing it on a spindle in the vise. It might work. We'll see.
In the meantime, the oxalic acid worked its magic. Time to rebuild the brakes and reinstall them.

-Kurt
In the meantime, the oxalic acid worked its magic. Time to rebuild the brakes and reinstall them.
-Kurt
__________________
Likes For cudak888:
09-07-20, 11:12 AM
#60
www.theheadbadge.com
Thread Starter
Join Date: Sep 2005
Location: Southern Florida
Posts: 28,508
Bikes: https://www.theheadbadge.com
Mentioned: 124 Post(s)
Tagged: 0 Thread(s)
Quoted: 2420 Post(s)
Liked 4,381 Times
in
2,090 Posts
Next batch of parts (forgot about these!) going into the bath.

Brakes look good.


-Kurt
Brakes look good.
-Kurt
__________________
09-07-20, 11:18 AM
#61
Senior Member

What did you use to polish that frame! looks amazing!
09-07-20, 11:30 AM
#62
www.theheadbadge.com
Thread Starter
Join Date: Sep 2005
Location: Southern Florida
Posts: 28,508
Bikes: https://www.theheadbadge.com
Mentioned: 124 Post(s)
Tagged: 0 Thread(s)
Quoted: 2420 Post(s)
Liked 4,381 Times
in
2,090 Posts
Meguiars #7 . Good old fashioned formula for single-stage paints. Nothing else like it. It's followed by Meguiars #26 wax.
Unlike single-stage automotive paint, you can apply #7 to the black Raleigh enamel with a power drill and foam applicators like these: https://www.amazon.com/gp/product/B0...?ie=UTF8&psc=1. The paint is thick enough that you'll get a shine before you burn through anything.
I wouldn't recommend this method on a post-TI era bike - definitely stick with elbow grease if you can. You may need to break out a soft pad for the areas around the lugs, but it's easy to make a mistake on the thinner, later paint. Softest pad and slow RPM settings are your friend.
I try to stay as far away from compounds as possible, but I will break out some 3M Microfinishing Compound on particularly stubborn areas.
-Kurt
__________________
09-07-20, 10:46 PM
#63
www.theheadbadge.com
Thread Starter
Join Date: Sep 2005
Location: Southern Florida
Posts: 28,508
Bikes: https://www.theheadbadge.com
Mentioned: 124 Post(s)
Tagged: 0 Thread(s)
Quoted: 2420 Post(s)
Liked 4,381 Times
in
2,090 Posts
The bits cleaned up pretty nicely.

The pulley wheel is a bit beyond salvage though - partially because of appearance, and partially because its seized solid. Screw won't come out, pulley won't turn.
Didn't have luck getting it unstuck initially, which is a good enough excuse to replace it. PM if you have a spare!


I'm also looking for a few 1950's Raleigh hex and half nuts for the left side brake lever - like the ones here.

I haven't dipped the bars, but I was able to get the grip off (in one piece!) to free the Fraim lock.

The 4-speed shifter clicks well, so I won't have to worry about the return spring on this one. It also started to clean up really nicely after a quick wipe. Much to do still.

The lock. Nope, that's not the original key - its just a blank I found that happened to fit.

-Kurt
The pulley wheel is a bit beyond salvage though - partially because of appearance, and partially because its seized solid. Screw won't come out, pulley won't turn.
Didn't have luck getting it unstuck initially, which is a good enough excuse to replace it. PM if you have a spare!
I'm also looking for a few 1950's Raleigh hex and half nuts for the left side brake lever - like the ones here.
I haven't dipped the bars, but I was able to get the grip off (in one piece!) to free the Fraim lock.
The 4-speed shifter clicks well, so I won't have to worry about the return spring on this one. It also started to clean up really nicely after a quick wipe. Much to do still.
The lock. Nope, that's not the original key - its just a blank I found that happened to fit.
-Kurt
__________________
09-08-20, 11:03 AM
#64
aka Tom Reingold
Join Date: Jan 2009
Location: New York, NY, and High Falls, NY, USA
Posts: 40,496
Bikes: 1962 Rudge Sports, 1971 Raleigh Super Course, 1971 Raleigh Pro Track, 1974 Raleigh International, 1975 Viscount Fixie, 1982 McLean, 1996 Lemond (Ti), 2002 Burley Zydeco tandem
Mentioned: 511 Post(s)
Tagged: 0 Thread(s)
Quoted: 7342 Post(s)
Liked 2,442 Times
in
1,426 Posts
What rim strip did you use?
__________________
Tom Reingold, tom@noglider.com
New York City and High Falls, NY
Blogs: The Experienced Cyclist; noglider's ride blog
�When man invented the bicycle he reached the peak of his attainments.� � Elizabeth West, US author
Please email me rather than PM'ing me. Thanks.
Tom Reingold, tom@noglider.com
New York City and High Falls, NY
Blogs: The Experienced Cyclist; noglider's ride blog
�When man invented the bicycle he reached the peak of his attainments.� � Elizabeth West, US author
Please email me rather than PM'ing me. Thanks.
09-08-20, 11:22 AM
#65
www.theheadbadge.com
Thread Starter
Join Date: Sep 2005
Location: Southern Florida
Posts: 28,508
Bikes: https://www.theheadbadge.com
Mentioned: 124 Post(s)
Tagged: 0 Thread(s)
Quoted: 2420 Post(s)
Liked 4,381 Times
in
2,090 Posts
 09-09-20, 11:42 AM
#66
aka Tom Reingold
Join Date: Jan 2009
Location: New York, NY, and High Falls, NY, USA
Posts: 40,496
Bikes: 1962 Rudge Sports, 1971 Raleigh Super Course, 1971 Raleigh Pro Track, 1974 Raleigh International, 1975 Viscount Fixie, 1982 McLean, 1996 Lemond (Ti), 2002 Burley Zydeco tandem
Mentioned: 511 Post(s)
Tagged: 0 Thread(s)
Quoted: 7342 Post(s)
Liked 2,442 Times
in
1,426 Posts
Those old cloth strips weren't that bad.
If the Velox doesn't stick, maybe there's something oily on the rim. Maybe contact cement or rubber cement will help.
If the Velox doesn't stick, maybe there's something oily on the rim. Maybe contact cement or rubber cement will help.
__________________
Tom Reingold, tom@noglider.com
New York City and High Falls, NY
Blogs: The Experienced Cyclist; noglider's ride blog
�When man invented the bicycle he reached the peak of his attainments.� � Elizabeth West, US author
Please email me rather than PM'ing me. Thanks.
Tom Reingold, tom@noglider.com
New York City and High Falls, NY
Blogs: The Experienced Cyclist; noglider's ride blog
�When man invented the bicycle he reached the peak of his attainments.� � Elizabeth West, US author
Please email me rather than PM'ing me. Thanks.
09-09-20, 12:41 PM
#67
www.theheadbadge.com
Thread Starter
Join Date: Sep 2005
Location: Southern Florida
Posts: 28,508
Bikes: https://www.theheadbadge.com
Mentioned: 124 Post(s)
Tagged: 0 Thread(s)
Quoted: 2420 Post(s)
Liked 4,381 Times
in
2,090 Posts
Was considering contact cement, but I don't want to leave a mess on the rim either. For a flipper or in an emergency, maybe. For something I'm taking my time on...nah.
-Kurt
__________________
09-09-20, 04:23 PM
#68
aka Tom Reingold
Join Date: Jan 2009
Location: New York, NY, and High Falls, NY, USA
Posts: 40,496
Bikes: 1962 Rudge Sports, 1971 Raleigh Super Course, 1971 Raleigh Pro Track, 1974 Raleigh International, 1975 Viscount Fixie, 1982 McLean, 1996 Lemond (Ti), 2002 Burley Zydeco tandem
Mentioned: 511 Post(s)
Tagged: 0 Thread(s)
Quoted: 7342 Post(s)
Liked 2,442 Times
in
1,426 Posts
You should be able to tape the rim tape together together with something like packing tape.
__________________
Tom Reingold, tom@noglider.com
New York City and High Falls, NY
Blogs: The Experienced Cyclist; noglider's ride blog
�When man invented the bicycle he reached the peak of his attainments.� � Elizabeth West, US author
Please email me rather than PM'ing me. Thanks.
Tom Reingold, tom@noglider.com
New York City and High Falls, NY
Blogs: The Experienced Cyclist; noglider's ride blog
�When man invented the bicycle he reached the peak of his attainments.� � Elizabeth West, US author
Please email me rather than PM'ing me. Thanks.
09-09-20, 05:10 PM
#69
Senior Member
Join Date: Jun 2019
Location: Portland Oregon
Posts: 996
Mentioned: 7 Post(s)
Tagged: 0 Thread(s)
Quoted: 457 Post(s)
Liked 462 Times
in
270 Posts
how did the crank straightening work out? I would absolutely spend some time on that, I'd be surprised if you couldn't get them close enough to straight to be acceptable.
For rim tape I have used fiber packing tape for the last 20 years or so, you can tear it to any width you need and its super cheap, and very lightweight, I run 2 layers of it and it does fine even on road wheels with 100 PSI in them, the tape is strong enough that it can span the spoke nipple wells without issue.
For rim tape I have used fiber packing tape for the last 20 years or so, you can tear it to any width you need and its super cheap, and very lightweight, I run 2 layers of it and it does fine even on road wheels with 100 PSI in them, the tape is strong enough that it can span the spoke nipple wells without issue.
09-09-20, 06:22 PM
#70
www.theheadbadge.com
Thread Starter
Join Date: Sep 2005
Location: Southern Florida
Posts: 28,508
Bikes: https://www.theheadbadge.com
Mentioned: 124 Post(s)
Tagged: 0 Thread(s)
Quoted: 2420 Post(s)
Liked 4,381 Times
in
2,090 Posts
I haven't tortured the left arm. Yet.
-Kurt
__________________
Likes For cudak888:
09-10-20, 03:05 AM
#71
Senior Member
Join Date: Oct 2016
Location: Cambridge UK
Posts: 852
Bikes: 1903 24 spd Sunbeam, 1927 Humber, 3 1930 Raleighs, 2 1940s Sunbeams, 2 1940s Raleighs, Rudge, 1950s Robin Hood, 1958 Claud Butler, 2 1973 Colnago Supers, Eddie Merckx, 2 1980 Holdsworth, EG Bates funny TT bike, another 6 or so 1990s bikes
Mentioned: 15 Post(s)
Tagged: 0 Thread(s)
Quoted: 331 Post(s)
Liked 332 Times
in
185 Posts
Raleigh paint-job BITD
The amazing thing is these old Raleighs were dip tank painted. It took about 5 seconds. Dip the frame into the tank of paint and hang it on the moving assembly line.
To see the whole process go on YouTube and type in How a Bicycle is Made. The painting is about half way thru.
To see the whole process go on YouTube and type in How a Bicycle is Made. The painting is about half way thru.
Likes For Johno59:
09-10-20, 09:11 AM
#72
Senior Member

Join Date: Jan 2015
Posts: 3,240
Mentioned: 103 Post(s)
Tagged: 0 Thread(s)
Quoted: 1299 Post(s)
Likes: 0
Liked 103 Times
in
85 Posts
That's an absolutely stellar job you're doing here. Very fortunate that this bike came into such capable hands. I'm sure I have a frame mounted guide wheel. I'll hunt for it after work and PM if I find it.
__________________
Inflate Hard
Inflate Hard
09-10-20, 04:01 PM
#73
www.theheadbadge.com
Thread Starter
Join Date: Sep 2005
Location: Southern Florida
Posts: 28,508
Bikes: https://www.theheadbadge.com
Mentioned: 124 Post(s)
Tagged: 0 Thread(s)
Quoted: 2420 Post(s)
Liked 4,381 Times
in
2,090 Posts
The amazing thing is these old Raleighs were dip tank painted. It took about 5 seconds. Dip the frame into the tank of paint and hang it on the moving assembly line.
To see the whole process go on YouTube and type in How a Bicycle is Made. The painting is about half way thru.
To see the whole process go on YouTube and type in How a Bicycle is Made. The painting is about half way thru.
It's always a joy to work with these '50s Raleighs as a canvas for refurbishing though. It's always satisfying and a very different experience from, say, refurbing something with Campagnolo NR on it.
Really appreciate any help you can provide with that pulley wheel. Haven't had any luck so far. If you happen to have a top tube fulcrum clamp, that'd also be quite beneficial. I have one, but it's a early-1960's piece that doesn't have the dull chrome on the inside or bottom of the clamp.
-Kurt
__________________
Last edited by cudak888; 09-10-20 at 05:04 PM.
09-11-20, 01:57 AM
#74
Senior Member
Join Date: Oct 2016
Location: Cambridge UK
Posts: 852
Bikes: 1903 24 spd Sunbeam, 1927 Humber, 3 1930 Raleighs, 2 1940s Sunbeams, 2 1940s Raleighs, Rudge, 1950s Robin Hood, 1958 Claud Butler, 2 1973 Colnago Supers, Eddie Merckx, 2 1980 Holdsworth, EG Bates funny TT bike, another 6 or so 1990s bikes
Mentioned: 15 Post(s)
Tagged: 0 Thread(s)
Quoted: 331 Post(s)
Liked 332 Times
in
185 Posts
Pulley bolt
The bolt has a shoulder that bottoms out before it tightens on the wheel. This is so the wheel may rotate freely. It has a whitworth thread and as such will not seize like a modern thread, - but it will be tight. Use a pair of good pliers or vice grips to give it a twist to help the screw driver. It only turns a 1/8 of a revolution whilst facilitating the gear cable travel as the rider selects btwn 1st and 3rd.
Wire brush it and clear coat or wax it and it will look great. They are very solidly made so you can give it some teddy.
The steel in these bikes have a considerable amount of chromium in the steel alloy so giving it a good brush or sanding gives a nice shiny finish that only needs waterproofing to stay great.
The same applies to the fulcrum clamp.
Last edited by Johno59; 09-11-20 at 02:07 AM.
09-11-20, 10:40 PM
#75
www.theheadbadge.com
Thread Starter
Join Date: Sep 2005
Location: Southern Florida
Posts: 28,508
Bikes: https://www.theheadbadge.com
Mentioned: 124 Post(s)
Tagged: 0 Thread(s)
Quoted: 2420 Post(s)
Liked 4,381 Times
in
2,090 Posts
I'm experimenting with a little something on a pair of brake pads: Soaking them in 3 parts isopropyl alcohol to one part wintergreen oil. Supposedly restores the rubber without distorting it.

It's a bit nuts, but it so happens the only replacement pads for this thing that are old NOS and not soft. Trying it this way to see how it affects the old pads...before blowing money on more old pads. Hope it works. I'm experimenting with one pad from my ladies' 51 Sports, and one of the Fibrax pads off the '52.
In the meantime, the cranks have been straightened and installed, along with the chain:


Cleaned up the headlamp bezel and reflector too. Original sticker survives back there, but the glue gave out a long time ago.The front still has its rubber O-ring.


It can't hurt, but it'll probably damage the bolt head. Believe me, it's WELL jammed.
I figure I'll booger it up once I have a replacement in hand.
-Kurt
It's a bit nuts, but it so happens the only replacement pads for this thing that are old NOS and not soft. Trying it this way to see how it affects the old pads...before blowing money on more old pads. Hope it works. I'm experimenting with one pad from my ladies' 51 Sports, and one of the Fibrax pads off the '52.
In the meantime, the cranks have been straightened and installed, along with the chain:
Cleaned up the headlamp bezel and reflector too. Original sticker survives back there, but the glue gave out a long time ago.The front still has its rubber O-ring.
The bolt has a shoulder that bottoms out before it tightens on the wheel. This is so the wheel may rotate freely. It has a whitworth thread and as such will not seize like a modern thread, - but it will be tight. Use a pair of good pliers or vice grips to give it a twist to help the screw driver.
I figure I'll booger it up once I have a replacement in hand.
-Kurt
__________________
Likes For cudak888:

