


Tear down for new project hitting some speed bumps.
 09-13-19, 08:39 PM
#1
Senior Member
Thread Starter

Join Date: Aug 2019
Posts: 124
Mentioned: 1 Post(s)
Tagged: 0 Thread(s)
Quoted: 29 Post(s)
Likes: 0
Liked 38 Times
in
18 Posts
Tear down for new project hitting some speed bumps.


I�ve torn down and refurbished 5 vintage bikes this year, and who knows how many over the years, but I�ve neber had one fight me like this one.
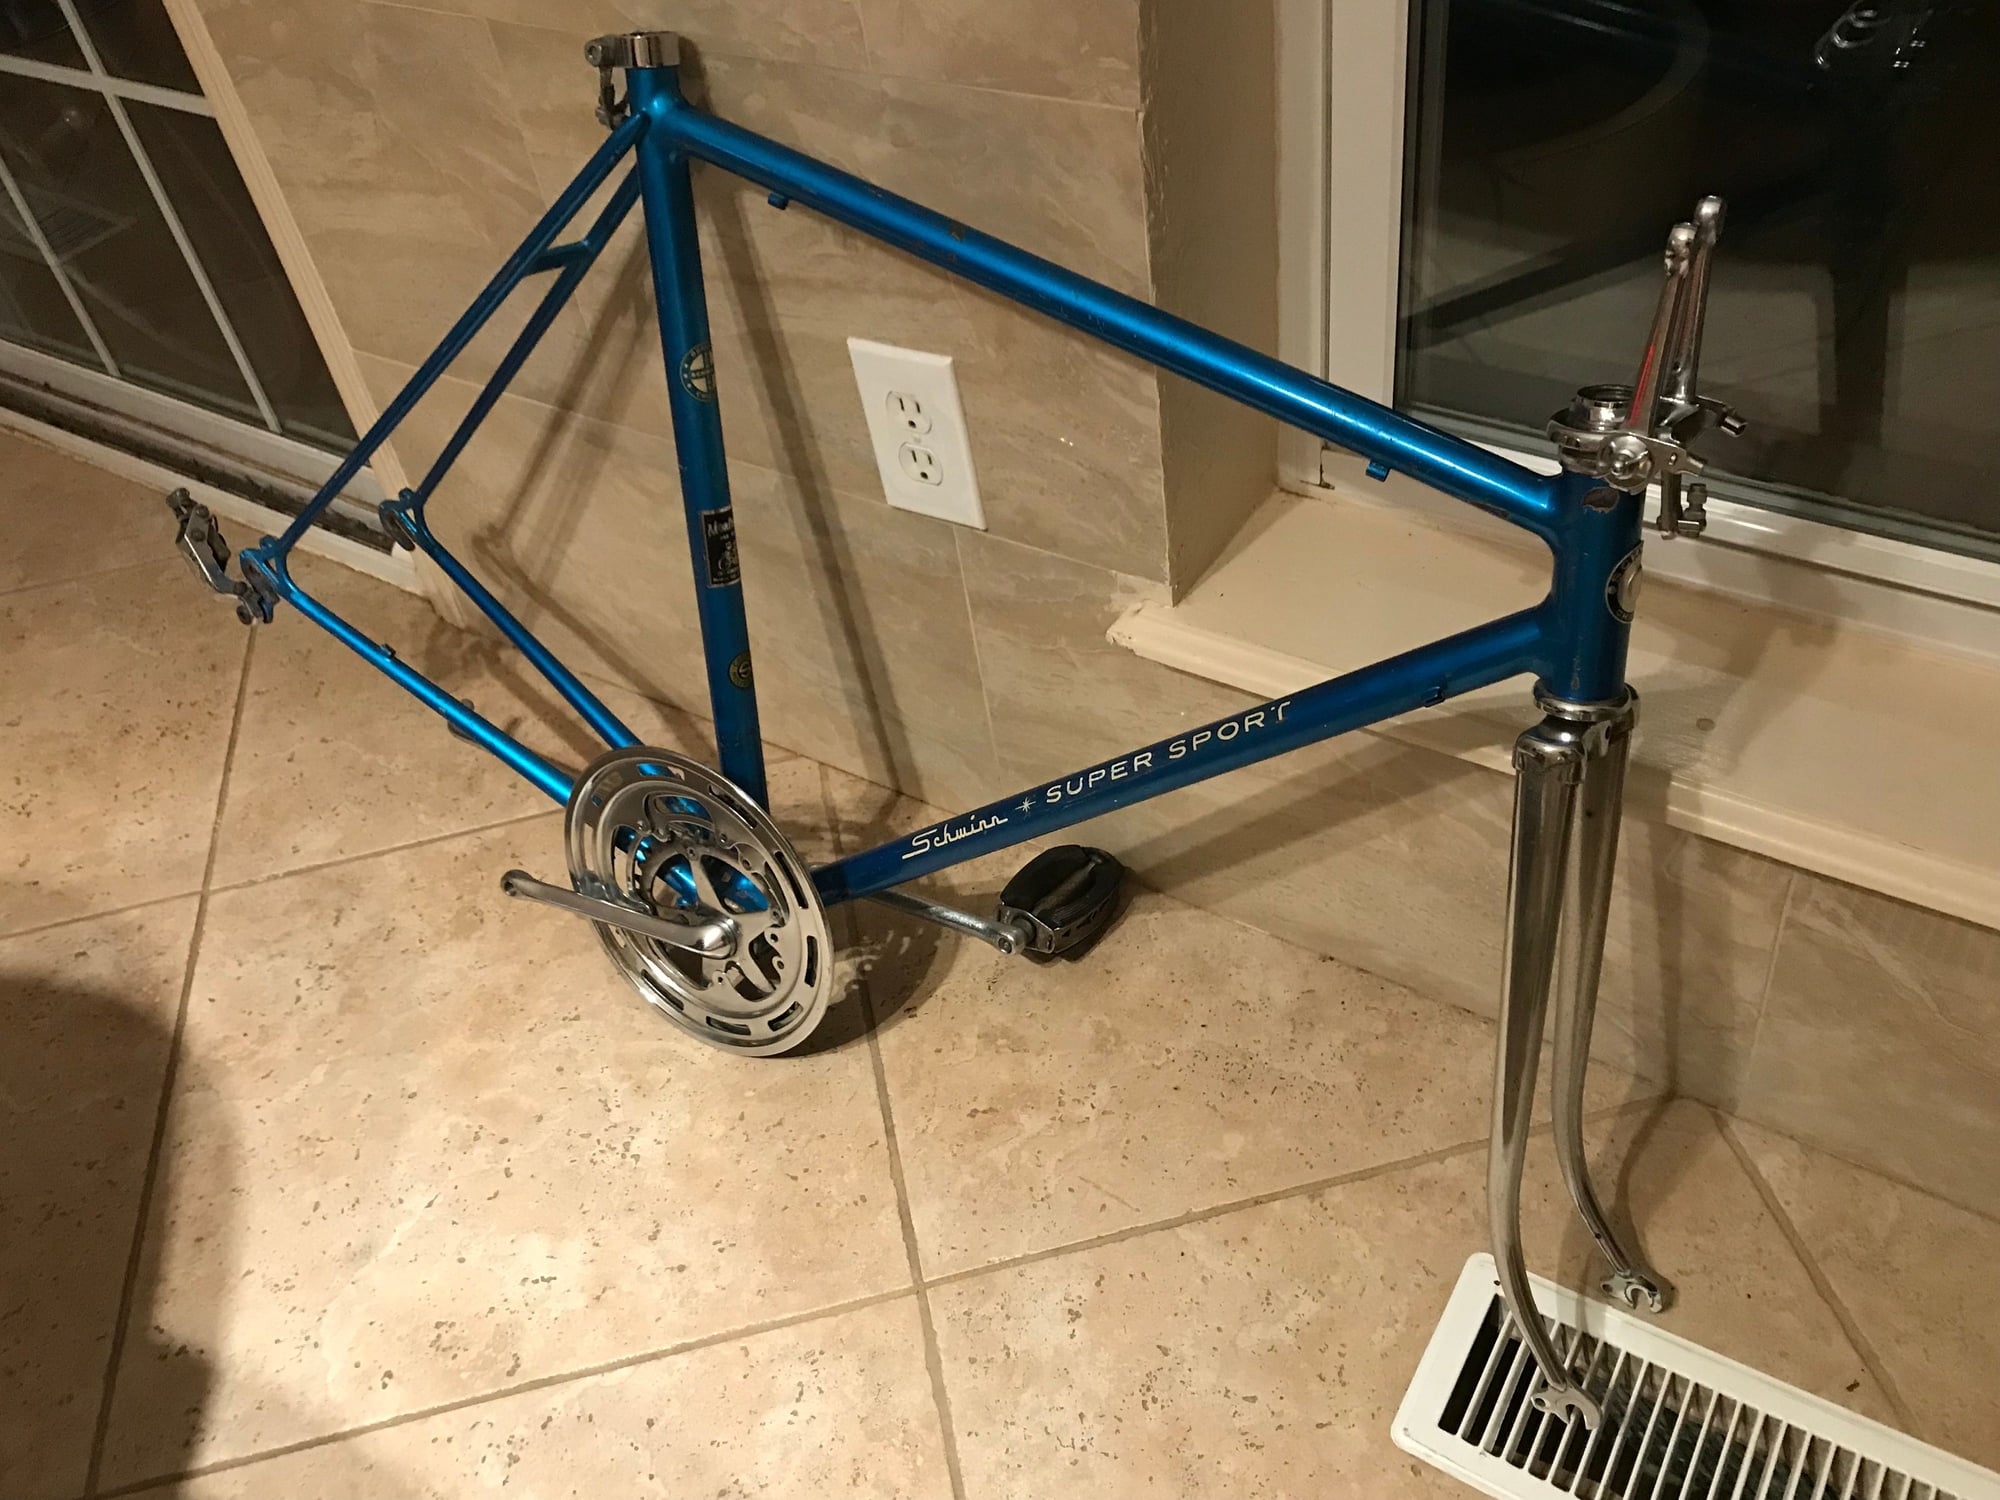
It has been reduced down and cleaned up as best as can be done at this point.
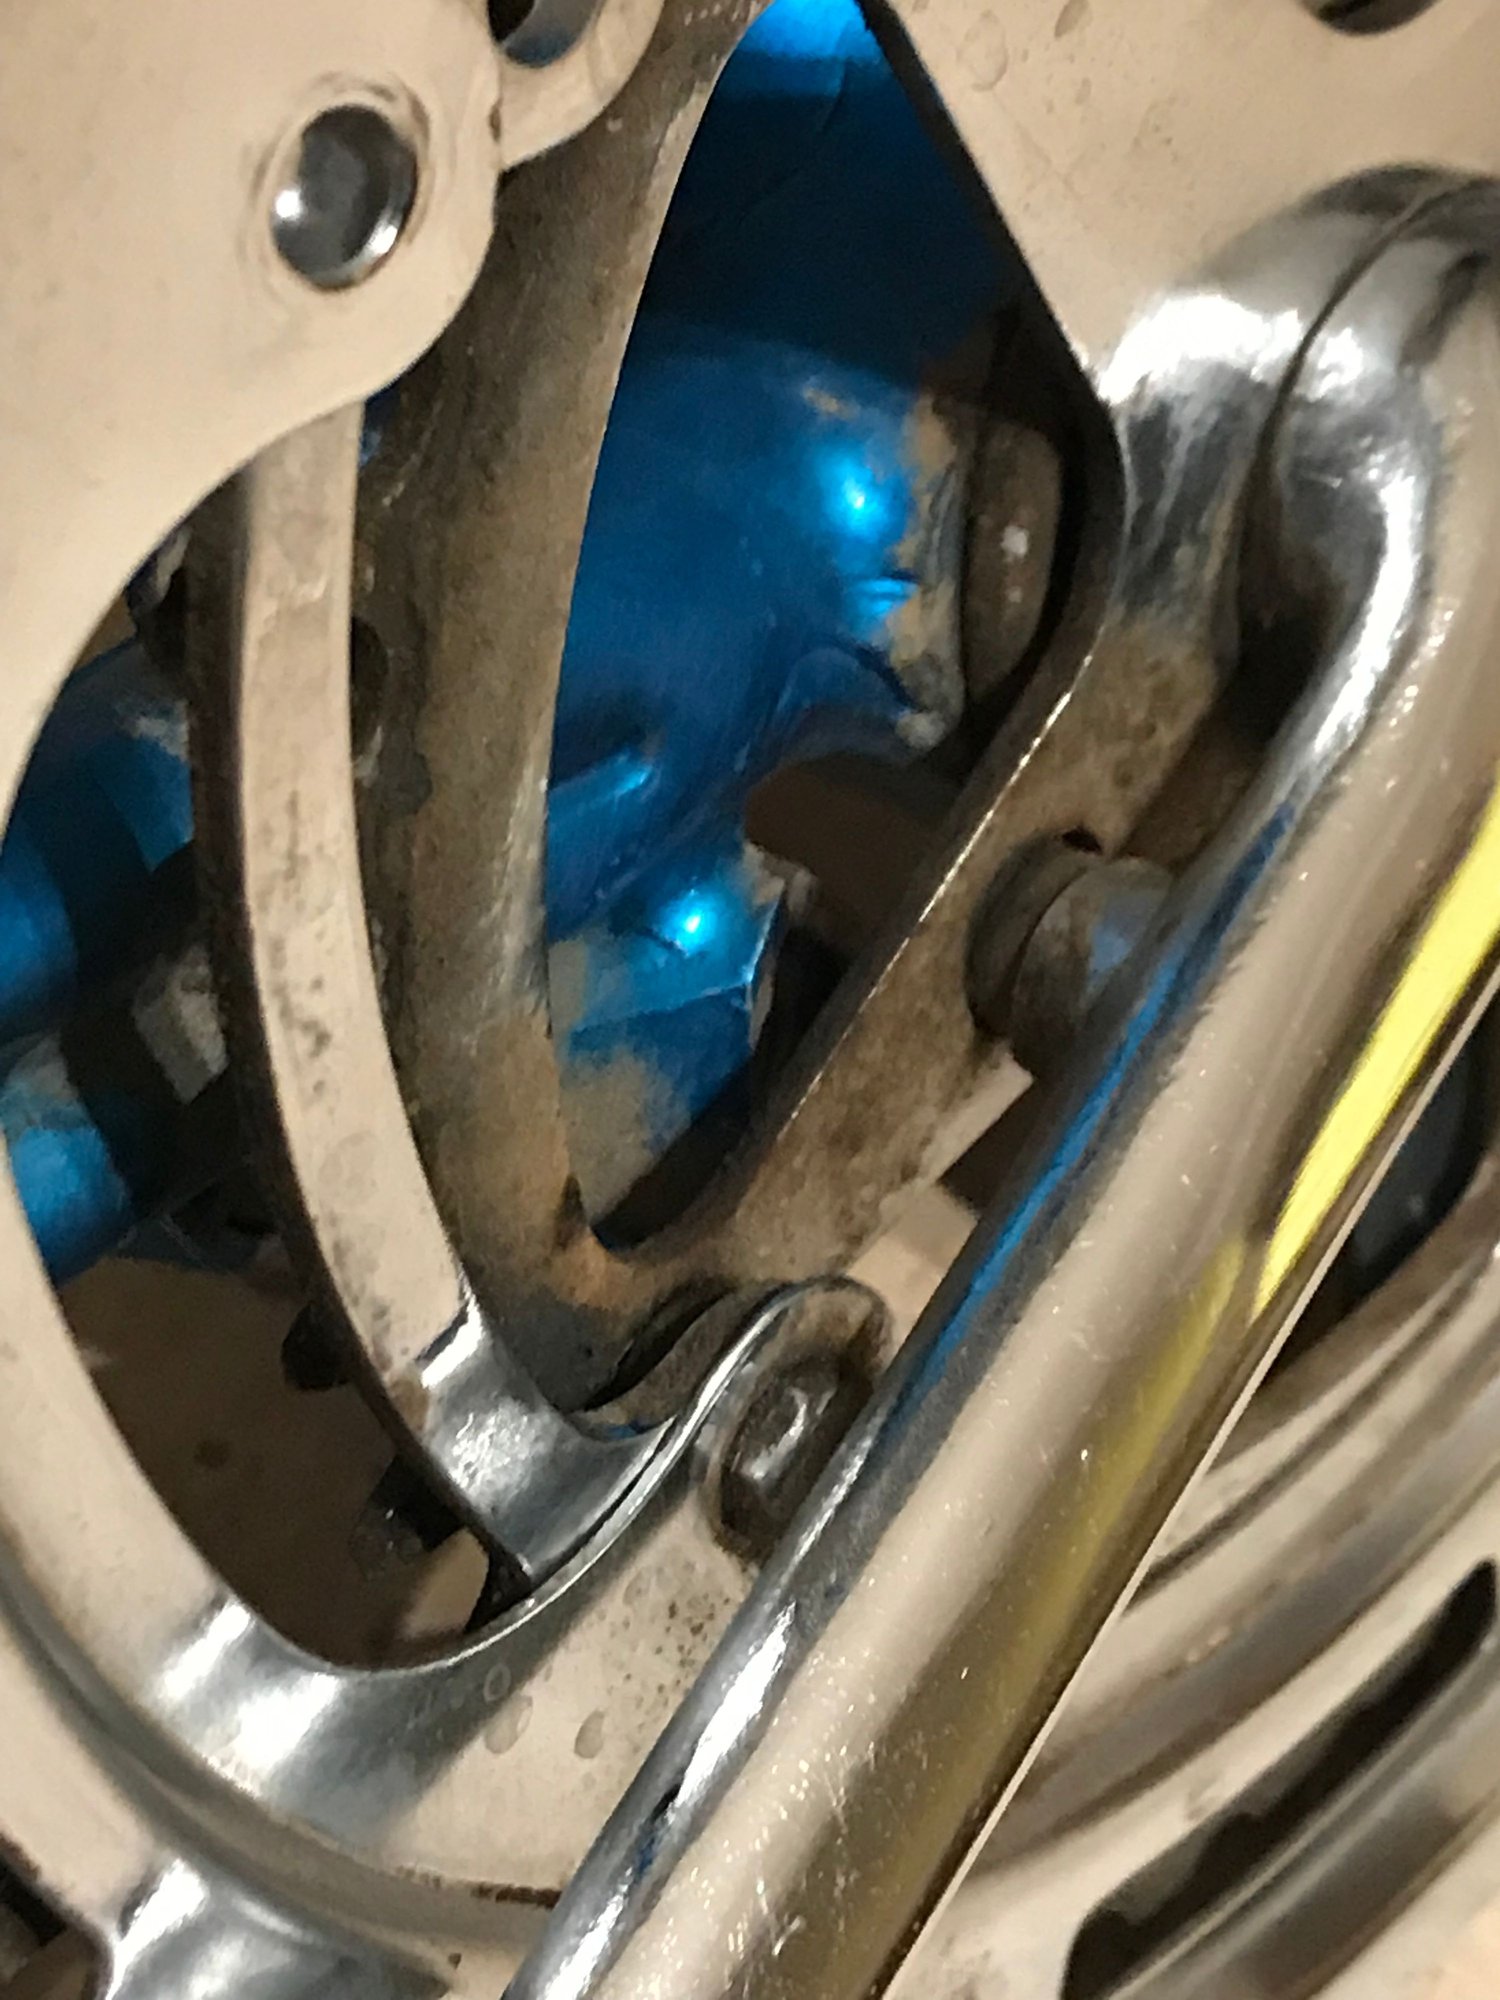
A couple of the obstacles: the chainrings can�t be removed without removing the entire crankset. One of the bolts is wedged right under the crank arm. I�ve never run into this before.
I wanted to replace the worn incorrect rubber pedals with proper rat-traps, but one of them is frozen solid to the crank. Even a break over bar won�t budge it.
The frame shims crumbled for both brakes when the brake sets were removed.
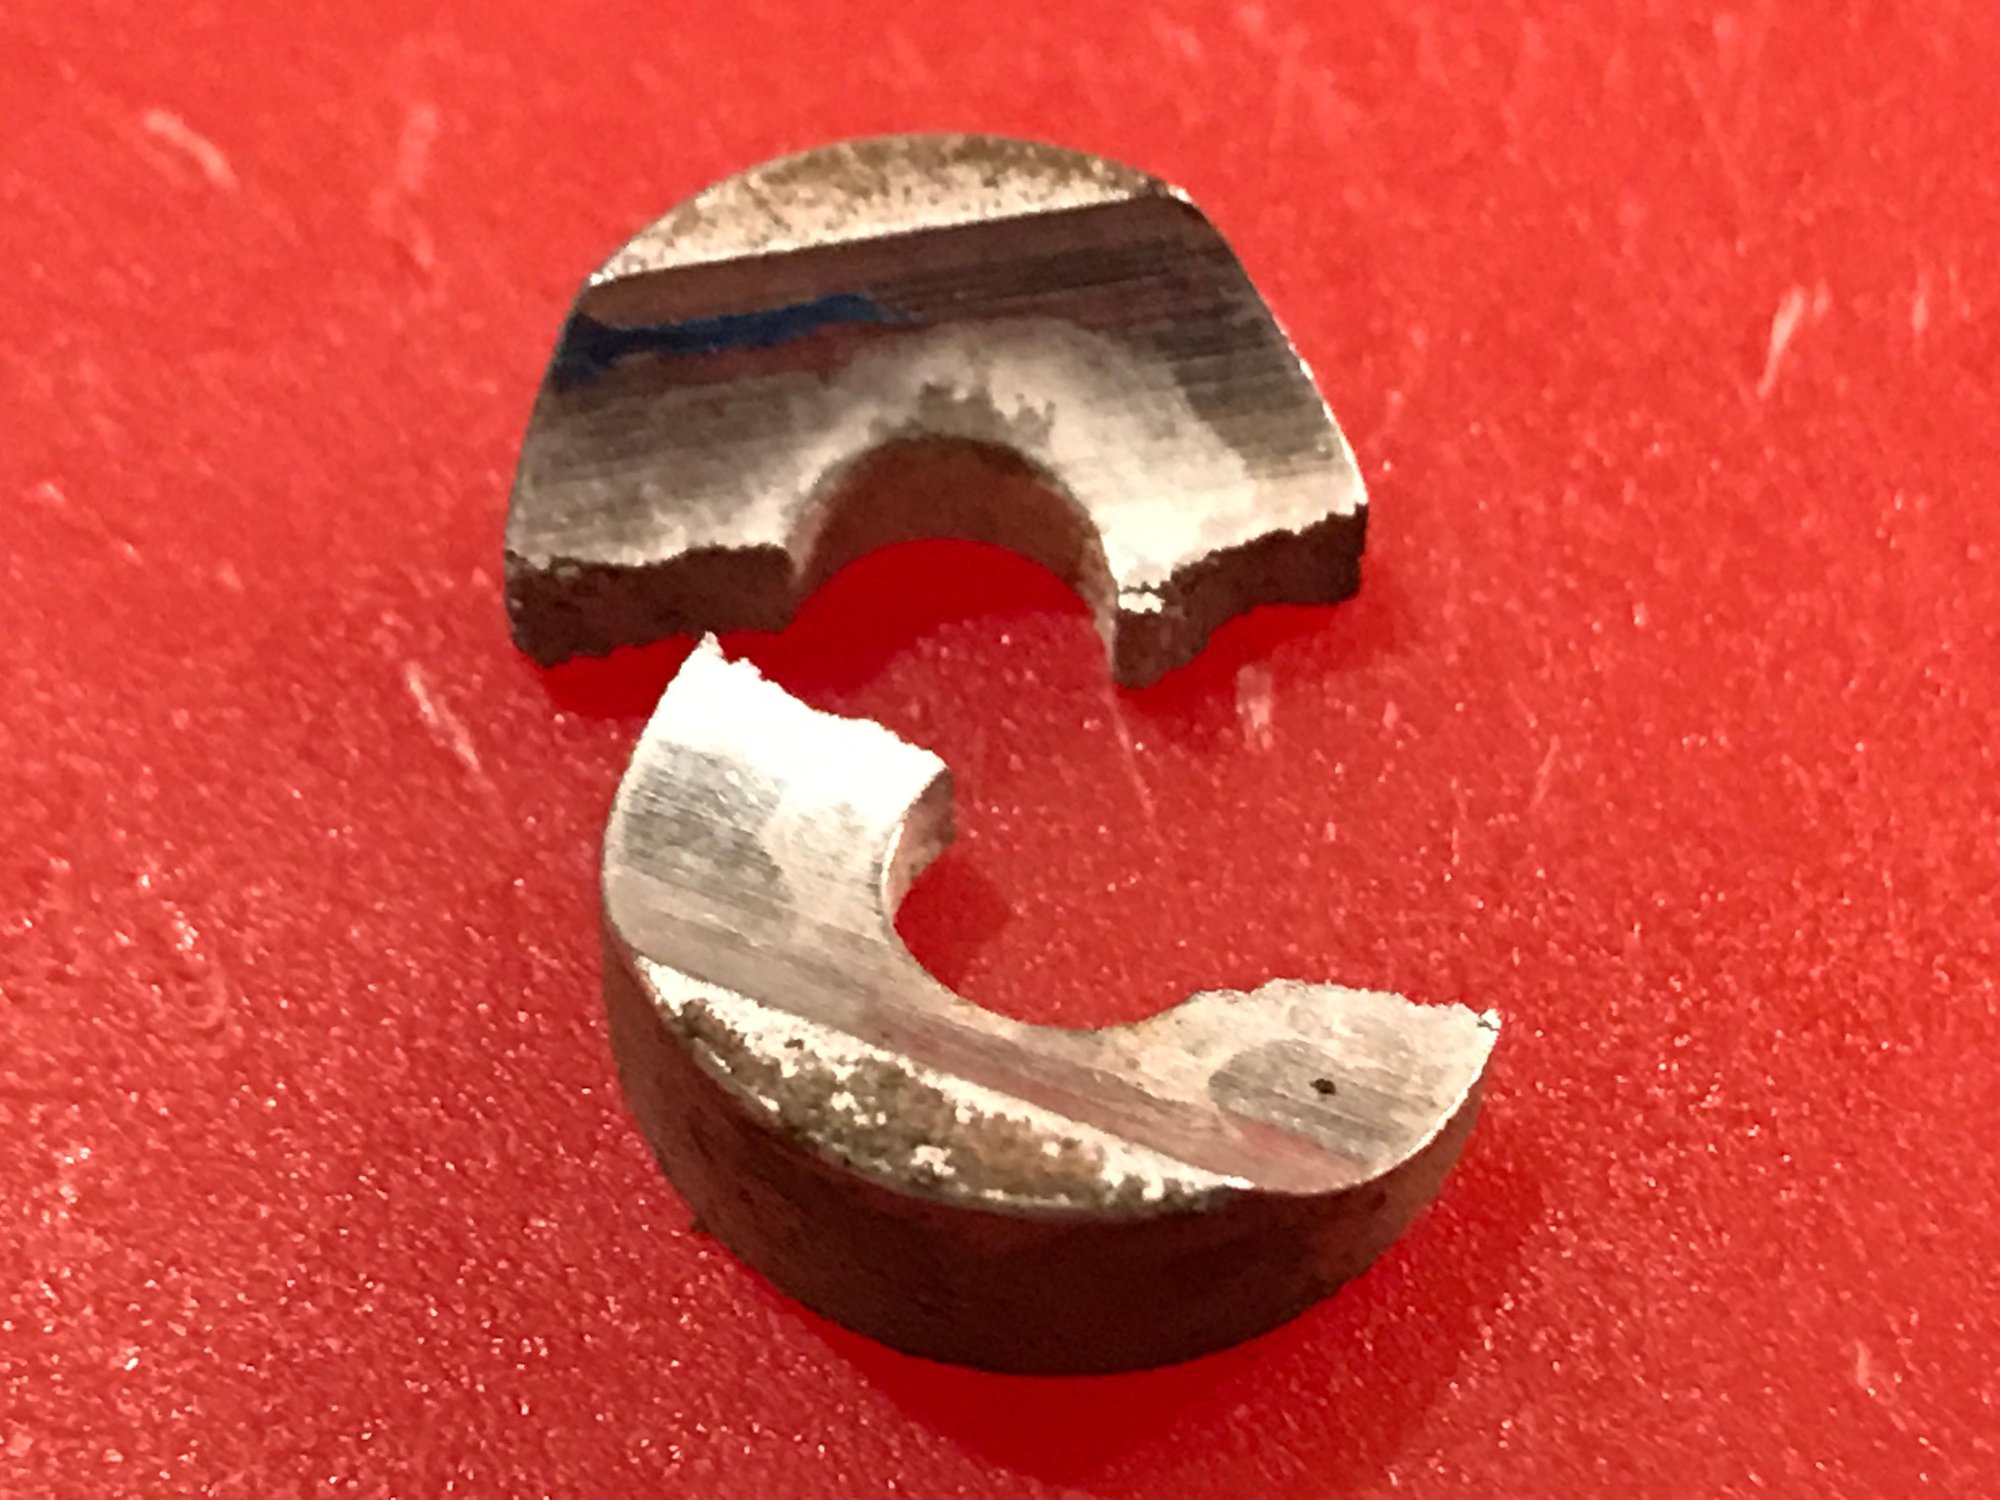
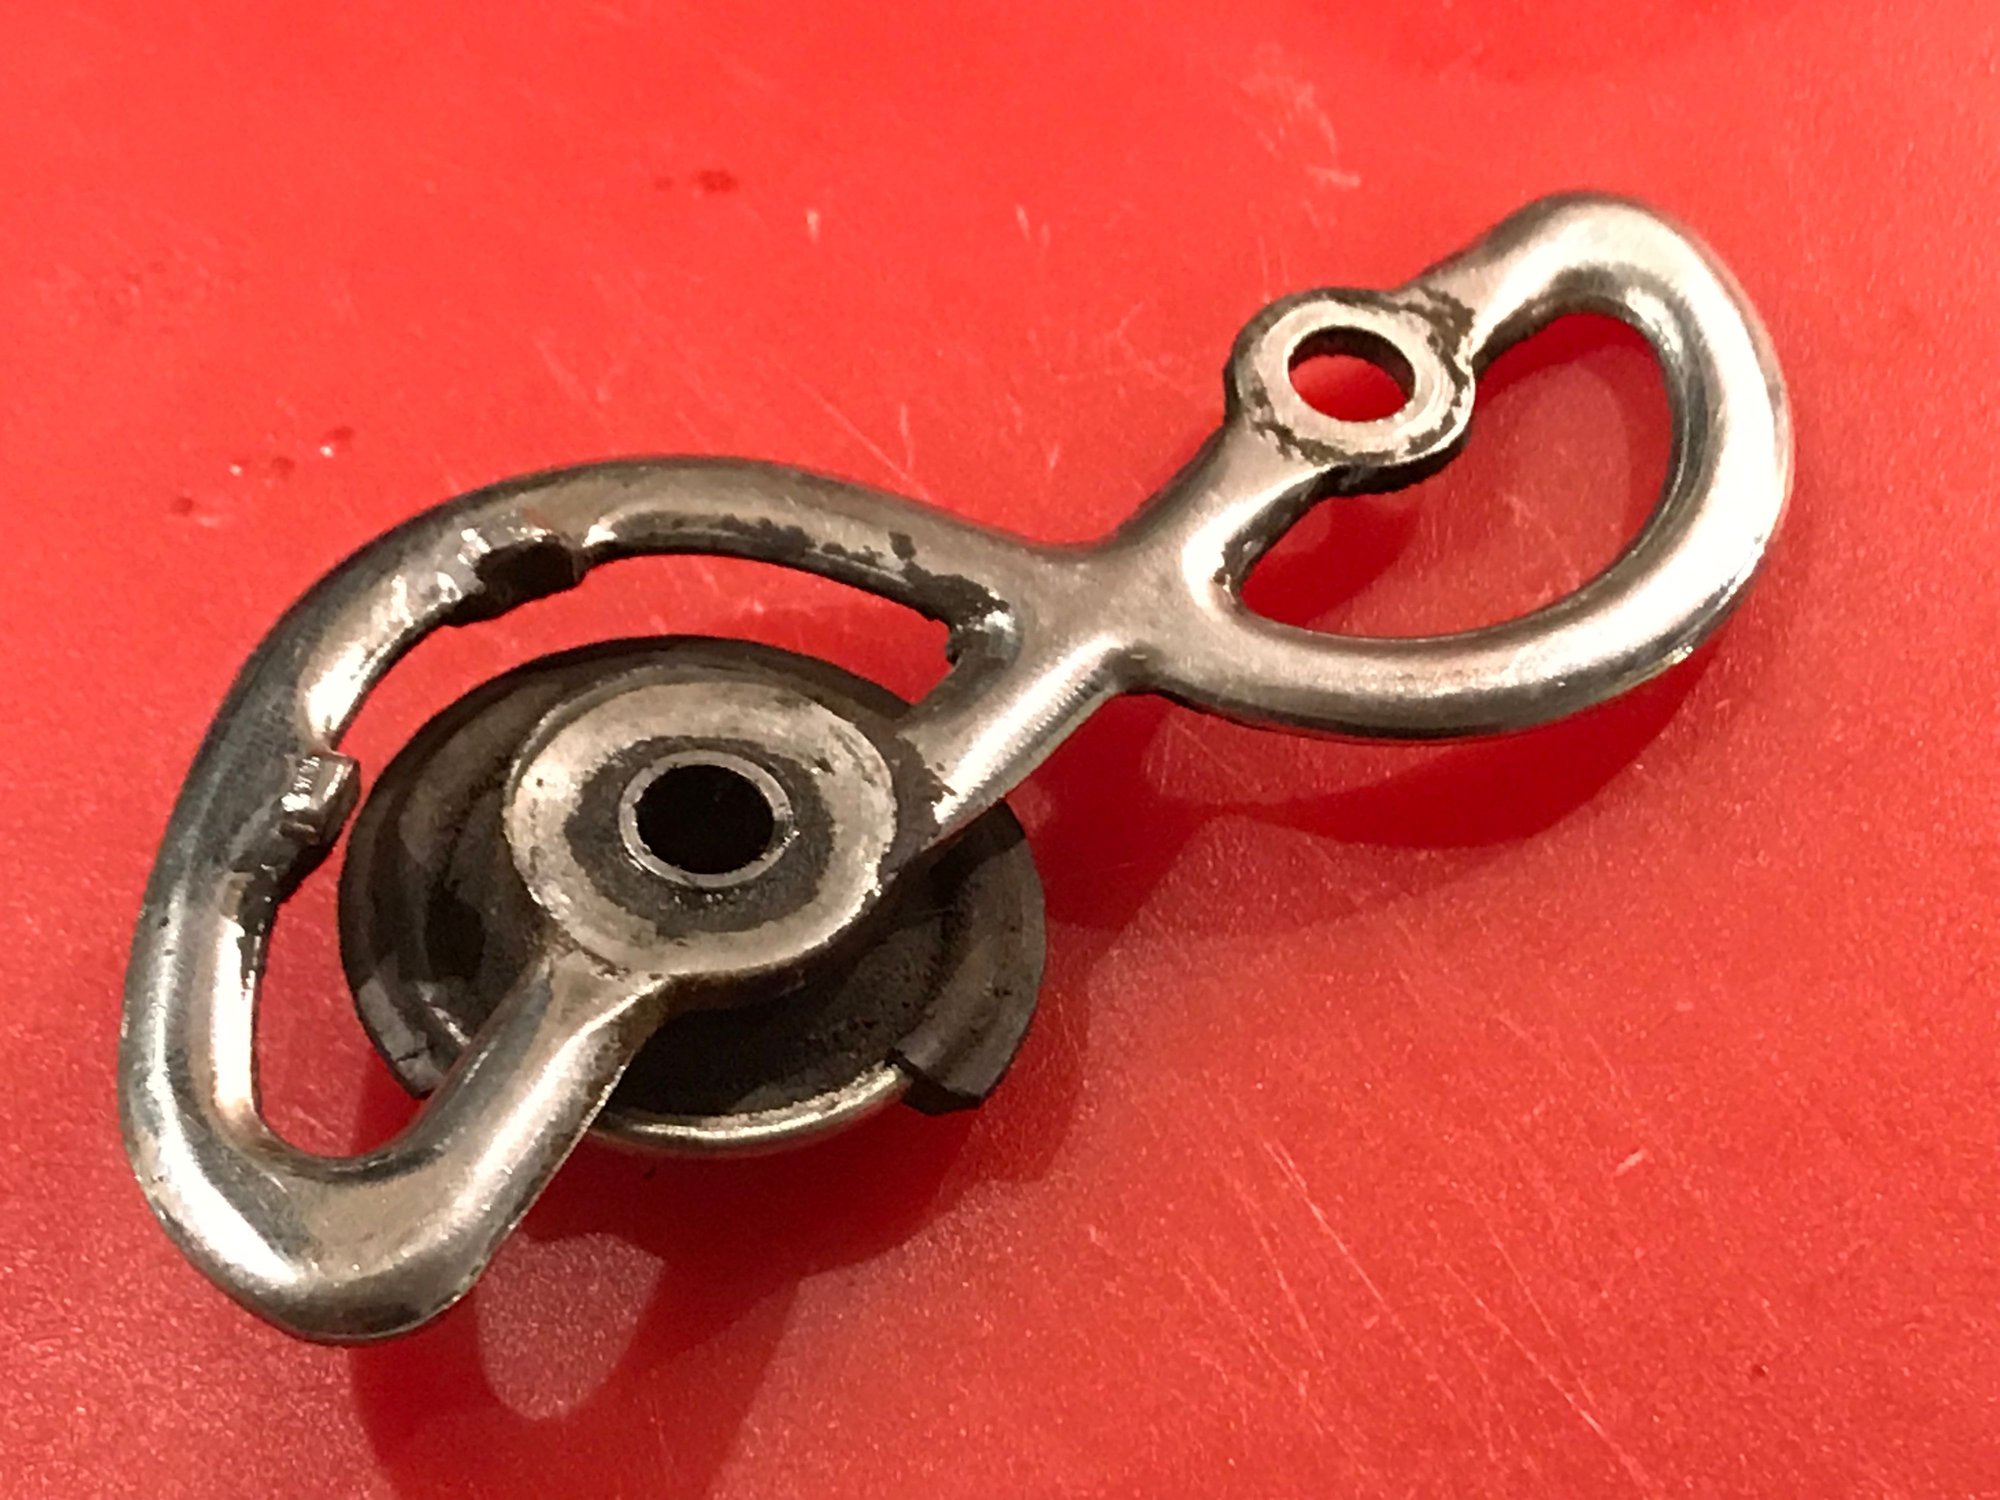
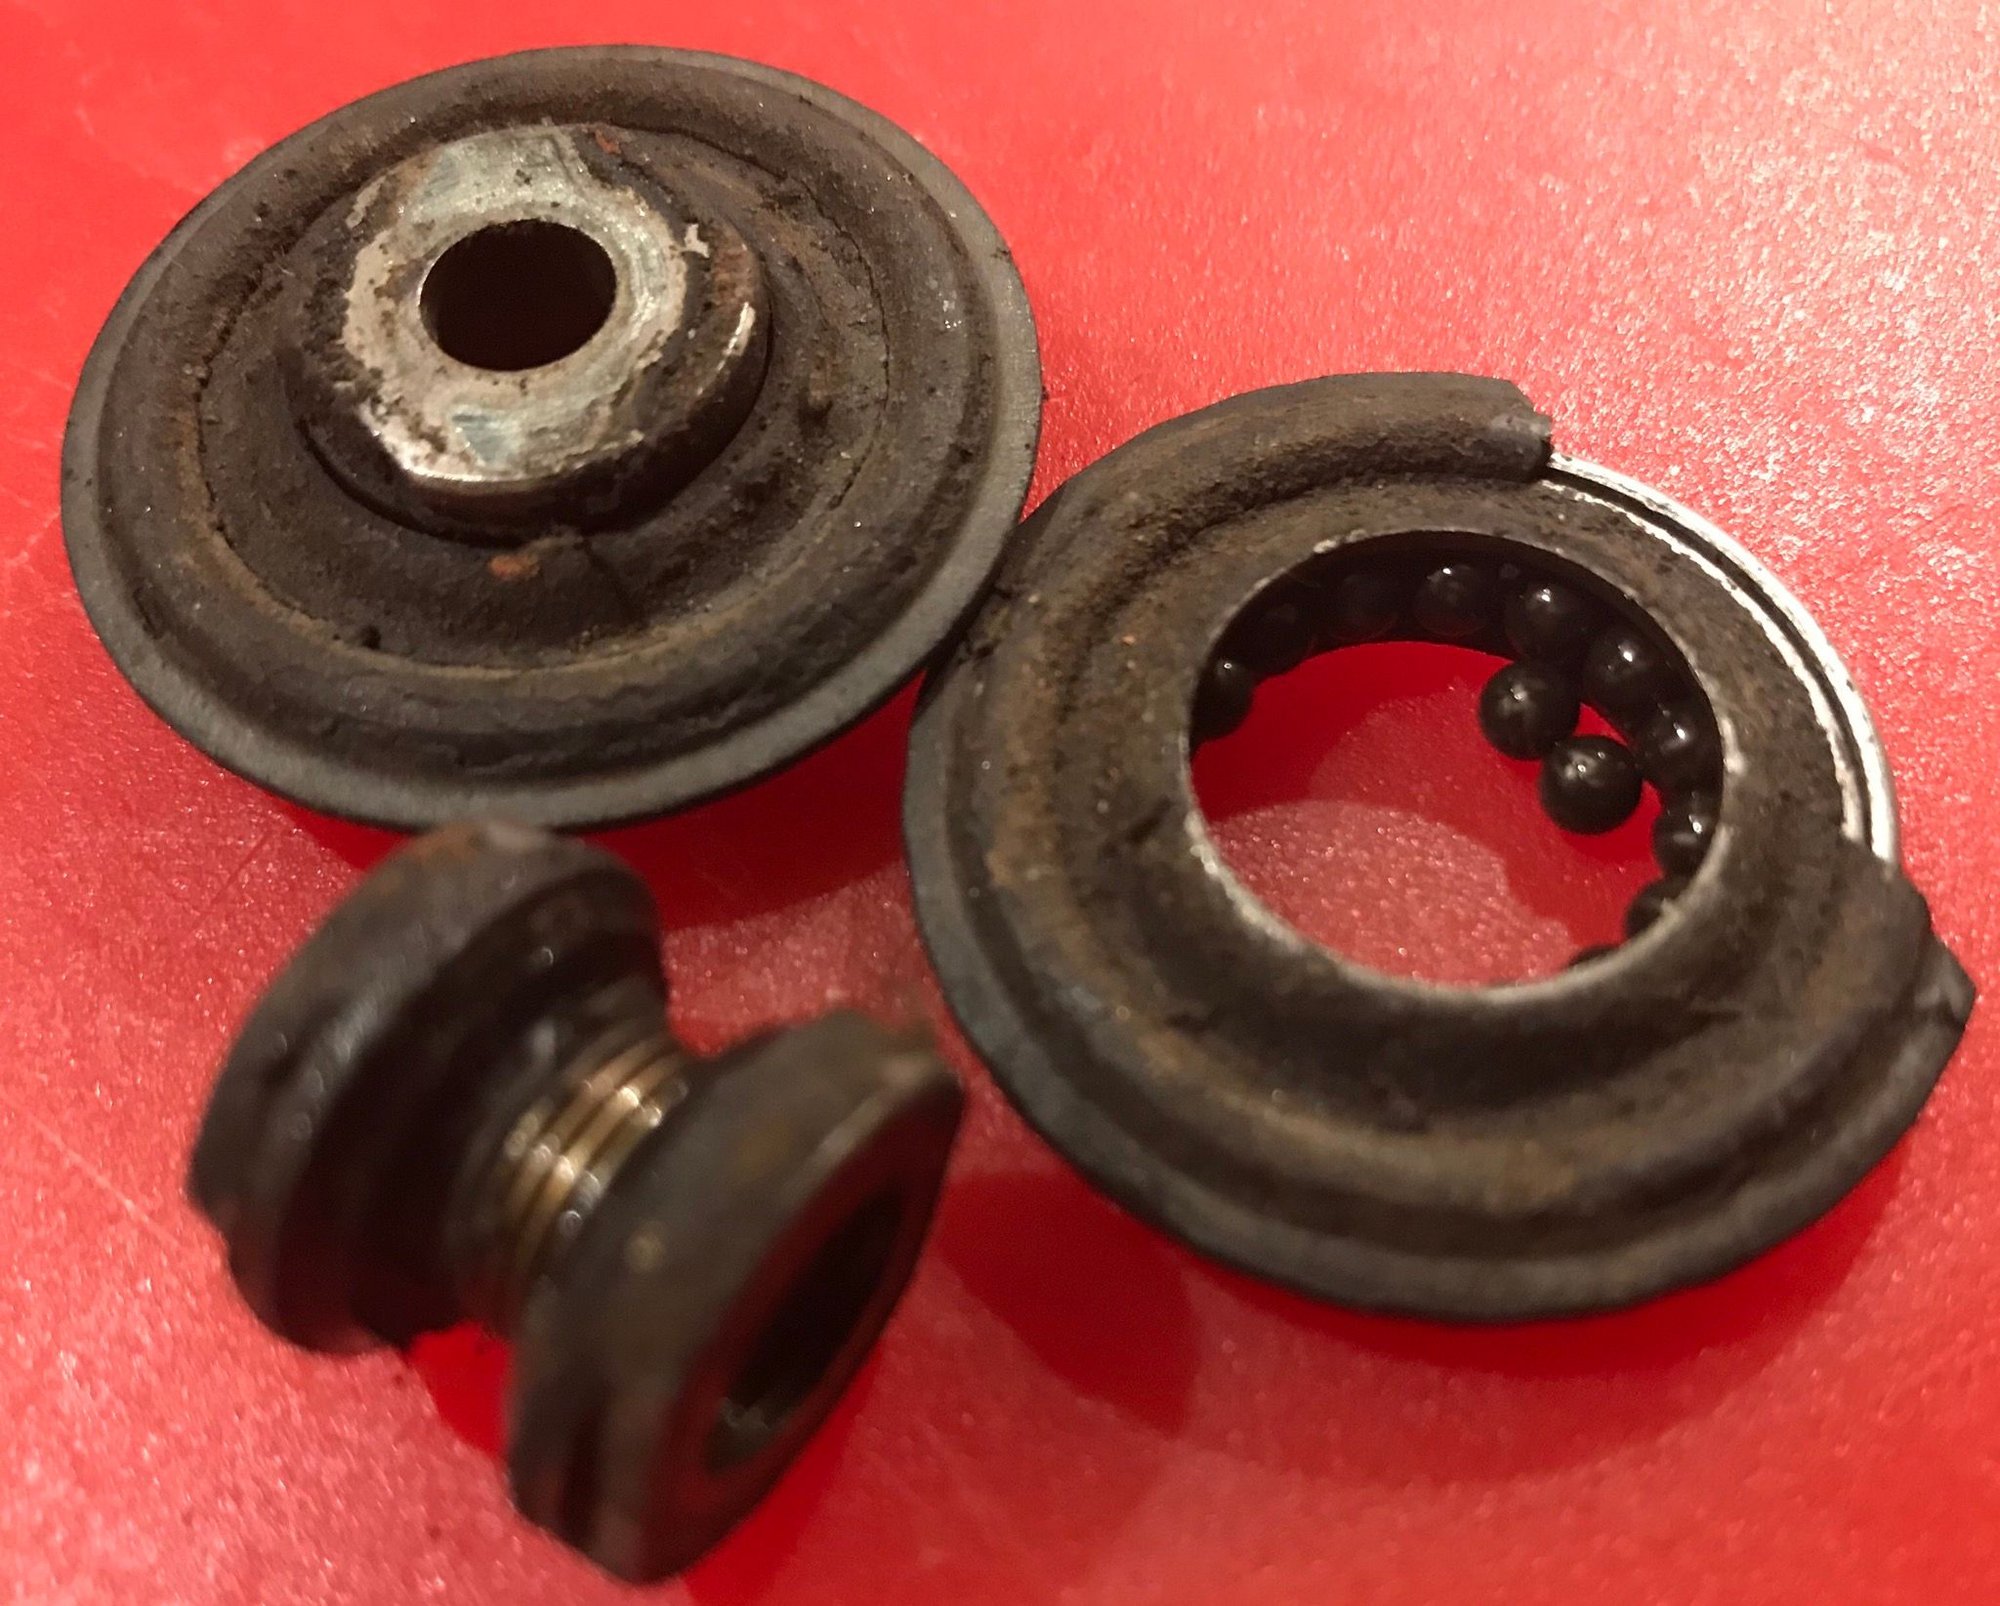
The pulleys for the rear derailleur crumbled when the chain was removed. Okay, I�ll just replace them. But one of them is frozen to the cage. I can�t quite see how it�s stuck in there. May not be serviceable.
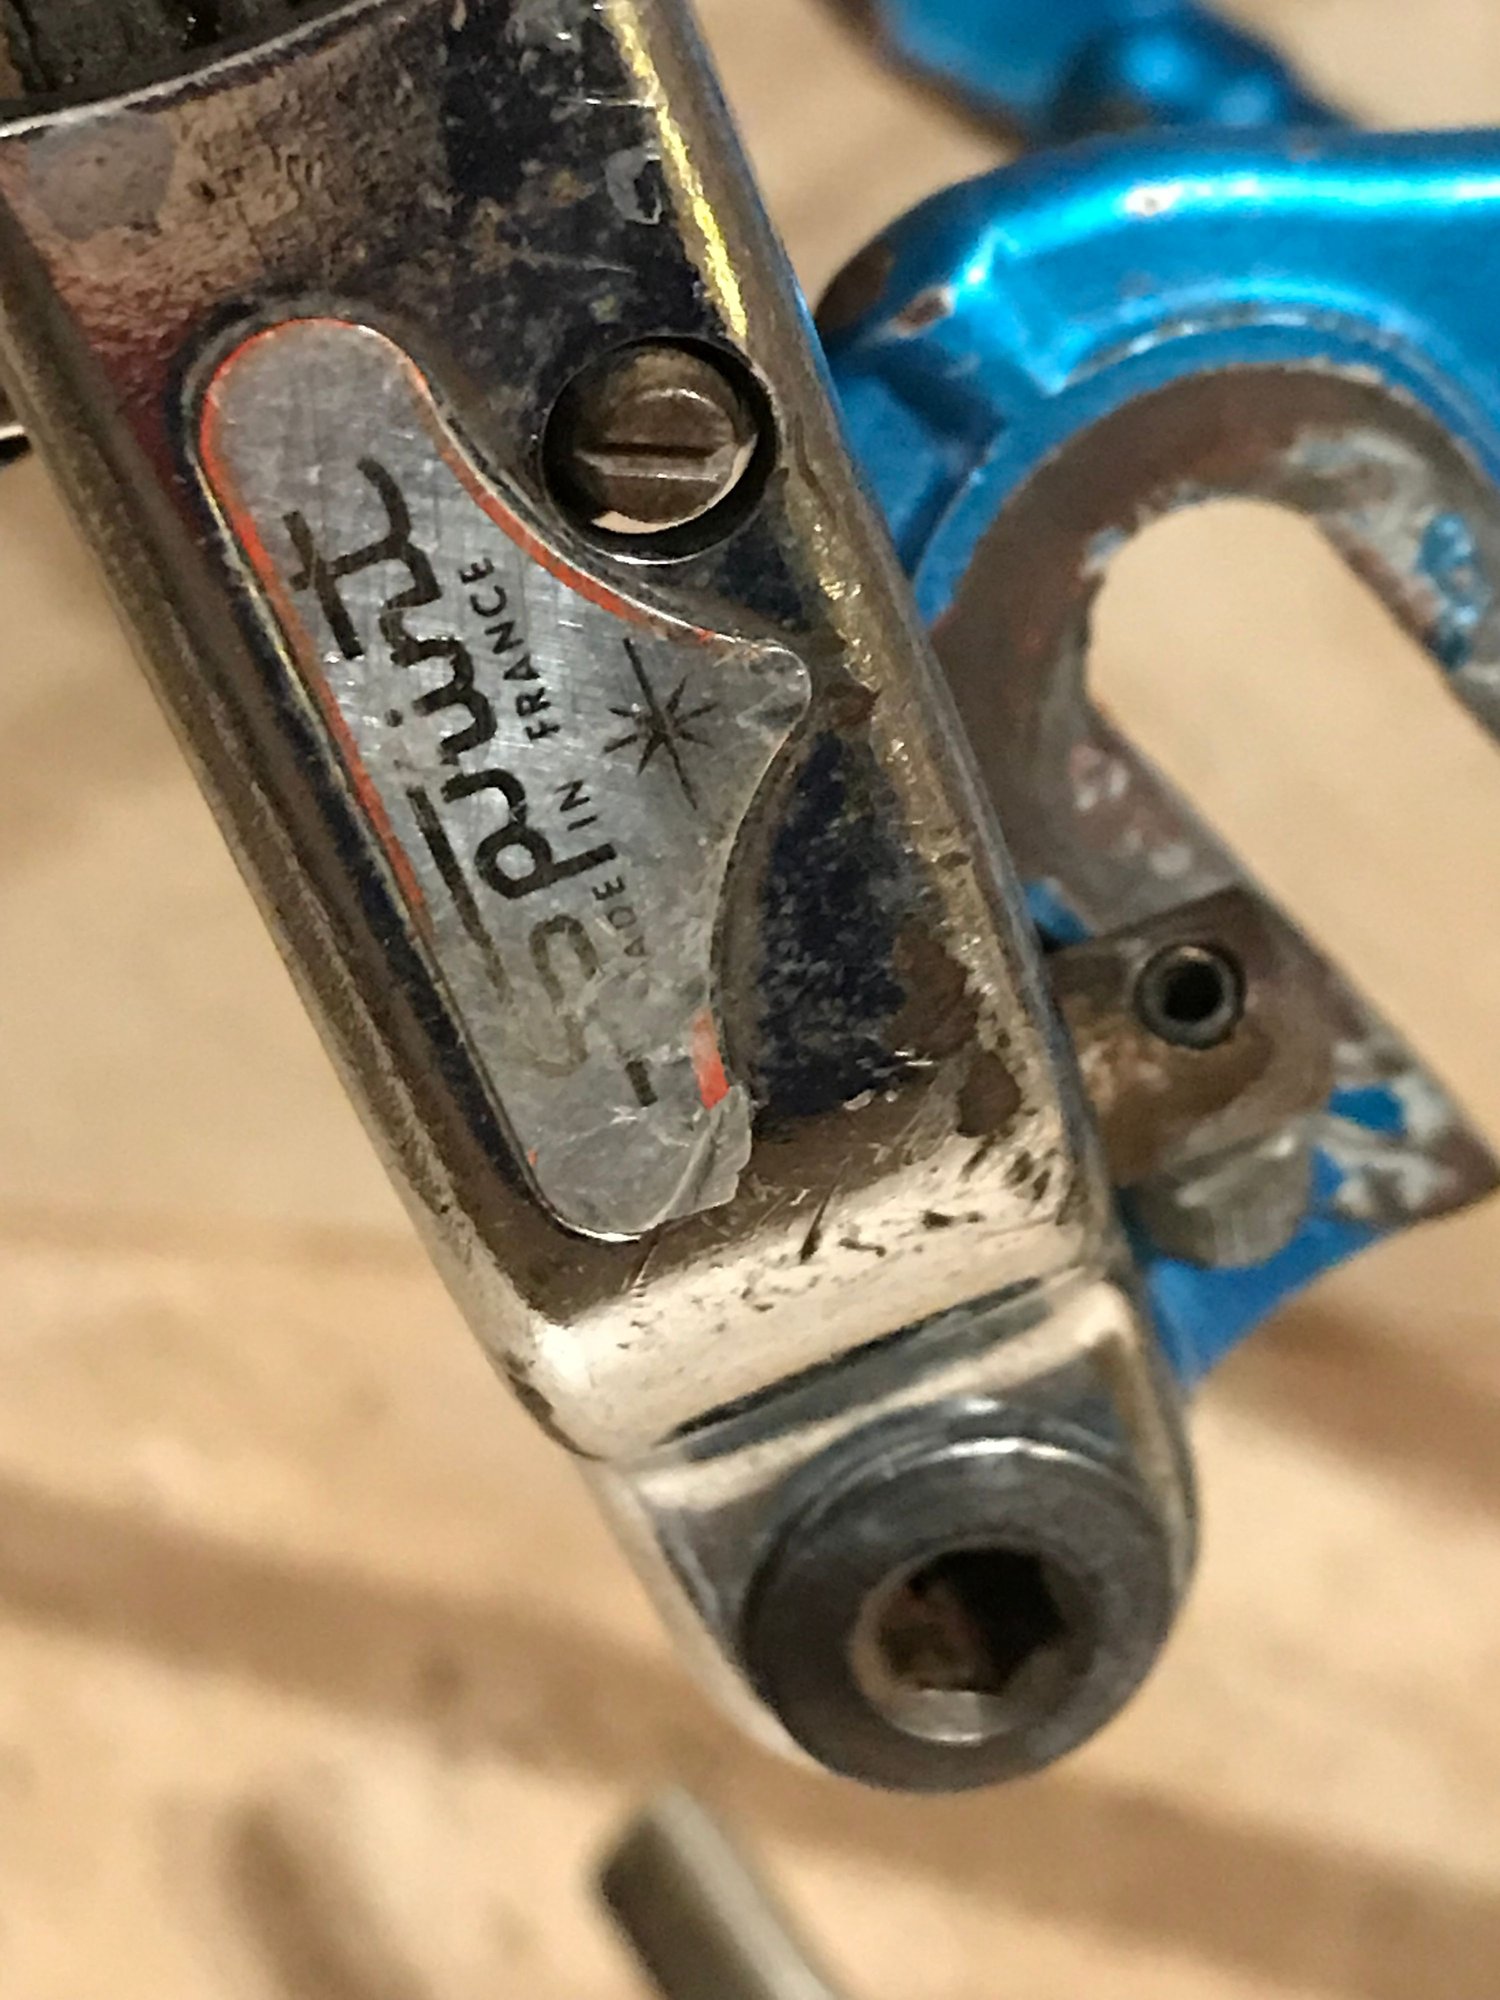
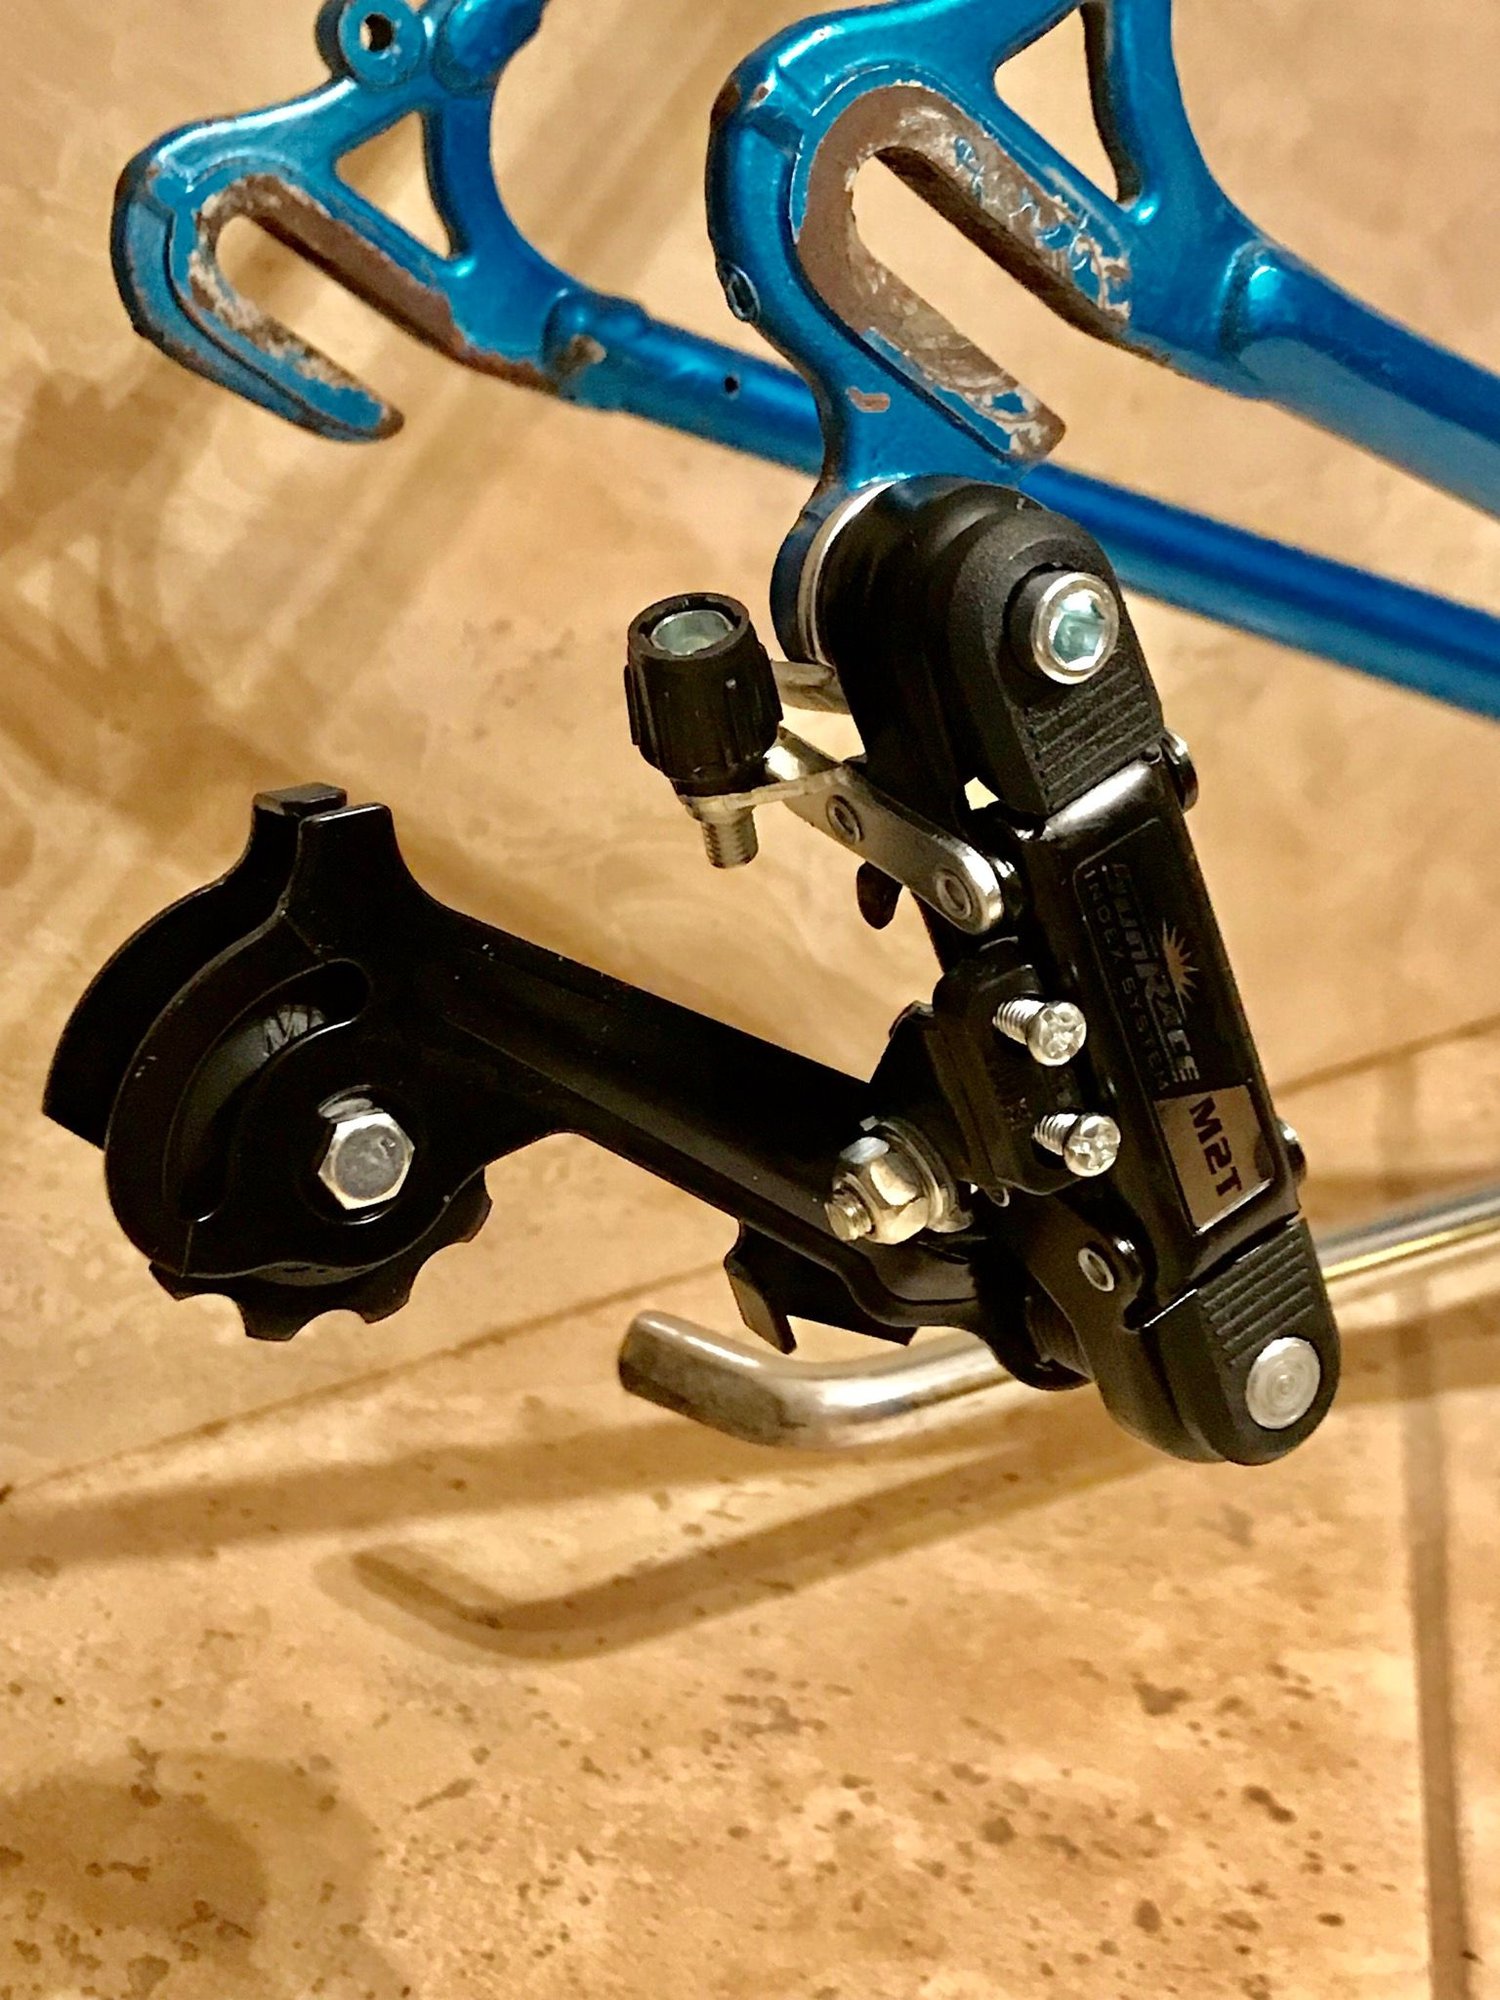
Okay, I�ll just replace the whole derailleur. Guess what? It�s frozen the the dropout. Bolt won�t budge no matter how much force I put on it.
There�s virtually no rust on this bike, so I�m starting to wonder if the person that assembled it was drunk and cross threaded most of it?

I hate to give up, but I think I�m going to let a shop do the rest of the work.
Any advice or even encouragement would be greatly appreciated.

Last edited by Retroman69; 09-13-19 at 08:46 PM.
 09-13-19, 08:54 PM
#2

www.theheadbadge.com

Join Date: Sep 2005
Location: Southern Florida
Posts: 28,510
Bikes: https://www.theheadbadge.com
Mentioned: 124 Post(s)
Tagged: 0 Thread(s)
Quoted: 2420 Post(s)
Liked 4,381 Times
in
2,090 Posts
Sounds like you need to submerge some of these bits in your penetrating oil (yes, I know many argue their effectiveness) of choice, then get back to giving it a try.
It might help to put a dummy wheel in the frame and a chain to the chainrings to help keep the crankset in place while yanking off the pedal. I've had worse, years ago, and it was steel to aluminum
Huret pulley wheels don't have bushings, they have bearings. The free side of that pulley wheel is the adjustable cup, and I'd assume the cage has the other side (I've never cared enough about the Allvit to find out). Unscrew it carefully over a small container and let the bearings fall through the bottom and pick them out from the top as well. You can get another Allvit as a pulley wheel donor.
-Kurt
__________________


09-13-19, 08:57 PM
#3
Senior Member
Join Date: Jun 2008
Location: Ozark Mountains
Posts: 121
Bikes: '64 Varsity, '69 Varsity, '71 Varsity, '71 Super Sport, '72 Super Sport, PX10 times 4, '72 Paramount, '73 Sports Tourer, '73 Paramount '77 Paramount, two NOS Pros
Mentioned: 0 Post(s)
Tagged: 0 Thread(s)
Quoted: 13 Post(s)
Liked 15 Times
in
13 Posts
If there's insufficient room to remove the last chainring bolt then I think you answered the question. Crank out and remove the nut that is also the bearing race that holds the inner chainring to the crank arm.
For the pedal heat is an option. Or, I've had good luck with a 50/50 mix of automotive ATF and acetone as a penetrating fluid.
Penetrating fluid might help the derailleur bolt but you need something that won't harm paint rather than the 50/50 mix that's OK for the crank/pedal area. I've had luck heating something (like a slightly smaller bolt) that would contact the derailleur bolt from the inside and using to transfer heat without heating the whole area (like a torch would do). You need to monitor the paint while transferring the heat and have a damp rag ready in case things get too hot. Sometimes multiple heating cycles get the bolt ready for removal (while hot).
Likes For KerryP:
09-13-19, 09:10 PM
#4
Senior Member
The bike looks pretty nice.
HI. No expert on restoring, but everything can be overcome:
But as long as you have access, who cares? Worst case scenario is to drill them out from front or back and use a set of "easy outs" or LH threaded self tapping screws)
I recently had to use a harmonic balancer remover to get a set of cranks off a bike. Was able to salvage the BB, but the arms and chainrings are DONE. Worst case? Knock the plastic to bits and have a long bar (3 ft +) welded solid to the axle. Or cut the axle down so a deep 12 point socket and breaker bar can be used (or impact wrench)
So metal ones can be had if wanting to stick with the existing brakes. you can even make your own
From your pics, it may not be serviceable.
Apply heat directly to the Allen (?) bolt that holds the derailleur to the frame., or to the frame itself. Use low heat, and as soon as it can be budged, stop with the heat. Else, cut off with a Dremel or similar. and hog out the bolt. Of course use care.
These are just ideas, but have been used for years on similar items over many years to good effect. The scariest of all of the ideas as presented above is the use of heat, but you may not have much of a choice. Love to see the Schwinn all done.
You can of course check with some of the experts. Perhaps Randy Jawa?
the chainrings can�t be removed without removing the entire crankset. One of the bolts is wedged right under the crank arm. I�ve never run into this before.
I wanted to replace the worn incorrect rubber pedals with proper rat-traps, but one of them is frozen solid to the crank. Even a break over bar won�t budge it.
The frame shims crumbled for both brakes when the brake sets were removed.
The pulleys for the rear derailleur crumbled when the chain was removed. Okay, I�ll just replace them. But one of them is frozen to the cage. I can�t quite see how it�s stuck in there. May not be serviceable.
Okay, I�ll just replace the whole derailleur. Guess what? It�s frozen the the dropout. Bolt won�t budge no matter how much force I put on it.
These are just ideas, but have been used for years on similar items over many years to good effect. The scariest of all of the ideas as presented above is the use of heat, but you may not have much of a choice. Love to see the Schwinn all done.
You can of course check with some of the experts. Perhaps Randy Jawa?
09-13-19, 09:20 PM
#5
The dropped

Join Date: Oct 2018
Location: Columbus, OH
Posts: 2,144
Bikes: Pake C'Mute Touring/Commuter Build, 1989 Kona Cinder Cone, 1995 Trek 5200, 1973 Raleigh Super Course FG, 1960/61 Montgomery Ward Hawthorne "thrift" 3 speed, by Hercules (sold) : 1966 Schwinn Deluxe Racer (sold)
Mentioned: 10 Post(s)
Tagged: 0 Thread(s)
Quoted: 1739 Post(s)
Liked 1,014 Times
in
696 Posts
Heat, heat pad too.
When I refurbished the wife's Berkeley, the right pedal was a bear to remove. I watched
video and determined that there was only one thing to do. A couple seconds with a propane torch and the pedal came off without a fight. Use a heat pad (non flammable soldering shield) to protect heat sensitive parts and heat steel, not aluminum.
Likes For Unca_Sam:
09-13-19, 09:27 PM
#6
Senior Member
Thread Starter
Join Date: Aug 2019
Posts: 124
Mentioned: 1 Post(s)
Tagged: 0 Thread(s)
Quoted: 29 Post(s)
Likes: 0
Liked 38 Times
in
18 Posts
Thank you guys for the tips!
I at least finally got the derailleur out!
I heated it up and just kept on it with steady brute force. Removing the bolt was like pulling your leg out of a tub of semi-hardened tar. Must have been fighting 52 year old petrified grease.
I�ll probably just replace the derailleur with a new one. Since I had to order new bars and brake levers anyway, this will just end up being a �mostly correct� resto-mod.
I might even switch to a lighter 3-piece crank.
Actually those brake spacers are metal. That�s why it surprised me when they fell apart upon removal.
Still no luck on the pedal (man, it�s really on there!!), but I�ll try again in the morning.
Thanks again for all the great input!
09-13-19, 09:38 PM
#7
Senior Member
Join Date: Jun 2008
Location: Ozark Mountains
Posts: 121
Bikes: '64 Varsity, '69 Varsity, '71 Varsity, '71 Super Sport, '72 Super Sport, PX10 times 4, '72 Paramount, '73 Sports Tourer, '73 Paramount '77 Paramount, two NOS Pros
Mentioned: 0 Post(s)
Tagged: 0 Thread(s)
Quoted: 13 Post(s)
Liked 15 Times
in
13 Posts
Even if you don't use it on to that Sprint derailleur.
09-13-19, 10:08 PM
#8
www.theheadbadge.com
Join Date: Sep 2005
Location: Southern Florida
Posts: 28,510
Bikes: https://www.theheadbadge.com
Mentioned: 124 Post(s)
Tagged: 0 Thread(s)
Quoted: 2420 Post(s)
Liked 4,381 Times
in
2,090 Posts
Thank you guys for the tips!
I at least finally got the derailleur out!
I heated it up and just kept on it with steady brute force. Removing the bolt was like pulling your leg out of a tub of semi-hardened tar. Must have been fighting 52 year old petrified grease.
I�ll probably just replace the derailleur with a new one. Since I had to order new bars and brake levers anyway, this will just end up being a �mostly correct� resto-mod.
I might even switch to a lighter 3-piece crank.
Actually those brake spacers are metal. That�s why it surprised me when they fell apart upon removal.
Still no luck on the pedal (man, it�s really on there!!), but I�ll try again in the morning.
Thanks again for all the great input!
I at least finally got the derailleur out!
I heated it up and just kept on it with steady brute force. Removing the bolt was like pulling your leg out of a tub of semi-hardened tar. Must have been fighting 52 year old petrified grease.
I�ll probably just replace the derailleur with a new one. Since I had to order new bars and brake levers anyway, this will just end up being a �mostly correct� resto-mod.
I might even switch to a lighter 3-piece crank.
Actually those brake spacers are metal. That�s why it surprised me when they fell apart upon removal.
Still no luck on the pedal (man, it�s really on there!!), but I�ll try again in the morning.
Thanks again for all the great input!
-Kurt
__________________
09-14-19, 05:25 AM
#9
Senior Member
Thread Starter
Join Date: Aug 2019
Posts: 124
Mentioned: 1 Post(s)
Tagged: 0 Thread(s)
Quoted: 29 Post(s)
Likes: 0
Liked 38 Times
in
18 Posts
I didn�t get too crazy with the heat, and the paint held out fine.
At last the pulley came out, but it took a vice and a long handled wrench.
I don�t think aftermarket modern pulleys can replace these and vintage donor units that I�m seeing around the Internet are surprisingly expensive, so I�m likely going to have to replace the whole derailleur anyway.
At last the pulley came out, but it took a vice and a long handled wrench.
I don�t think aftermarket modern pulleys can replace these and vintage donor units that I�m seeing around the Internet are surprisingly expensive, so I�m likely going to have to replace the whole derailleur anyway.
Last edited by Retroman69; 09-14-19 at 05:34 AM.
09-14-19, 06:04 AM
#10
Senior Member
Replacing the rear derailleur with something better is likely to be your most cost effective solution. I'm not sure if replacement pulleys will fit the bolts you have.
09-14-19, 06:30 AM
#11

feros ferio

Join Date: Jul 2000
Location: www.ci.encinitas.ca.us
Posts: 21,793
Bikes: 1959 Capo Modell Campagnolo; 1960 Capo Sieger (2); 1962 Carlton Franco Suisse; 1970 Peugeot UO-8; 1982 Bianchi Campione d'Italia; 1988 Schwinn Project KOM-10;
Mentioned: 44 Post(s)
Tagged: 0 Thread(s)
Quoted: 1391 Post(s)
Liked 1,322 Times
in
835 Posts
You will want to pull the entire crankset anyway, to lube the bearings and probably replace the balls themselves. A thin profile wrench of the proper size should get that stuck bolt out. (Removing the crank won't help with this particular fitting, other than letting you work in a more comfortable position or location.) It's a LH thread on the left side of the one-piece crank.
Just scrap the entire derailleur and find either another Huret Allvit or take advantage of this opportunity to upgrade (to almost anything else). Note -- if you upgrade to a SunTour V-GT, you may have to grind back the stop on the shift lever in order to hit all gears properly, because SunTours require a lot of cable wrap. (Been there ... done that ... worked like a champ, if you don't mind the right side lever going forward past vertical.)
Just scrap the entire derailleur and find either another Huret Allvit or take advantage of this opportunity to upgrade (to almost anything else). Note -- if you upgrade to a SunTour V-GT, you may have to grind back the stop on the shift lever in order to hit all gears properly, because SunTours require a lot of cable wrap. (Been there ... done that ... worked like a champ, if you don't mind the right side lever going forward past vertical.)
__________________
"Far and away the best prize that life offers is the chance to work hard at work worth doing." --Theodore Roosevelt
Capo: 1959 Modell Campagnolo, S/N 40324; 1960 Sieger (2), S/N 42624, 42597
Carlton: 1962 Franco Suisse, S/N K7911
Peugeot: 1970 UO-8, S/N 0010468
Bianchi: 1982 Campione d'Italia, S/N 1.M9914
Schwinn: 1988 Project KOM-10, S/N F804069
Likes For John E:
09-14-19, 10:07 AM
#12
Senior Member
Join Date: Jun 2008
Location: Ozark Mountains
Posts: 121
Bikes: '64 Varsity, '69 Varsity, '71 Varsity, '71 Super Sport, '72 Super Sport, PX10 times 4, '72 Paramount, '73 Sports Tourer, '73 Paramount '77 Paramount, two NOS Pros
Mentioned: 0 Post(s)
Tagged: 0 Thread(s)
Quoted: 13 Post(s)
Liked 15 Times
in
13 Posts
You will want to pull the entire crankset anyway, to lube the bearings and probably replace the balls themselves. A thin profile wrench of the proper size should get that stuck bolt out. (Removing the crank won't help with this particular fitting, other than letting you work in a more comfortable position or location.) It's a LH thread on the left side of the one-piece crank.
09-14-19, 11:29 AM
#13
Ride, Wrench, Swap, Race

Join Date: Jan 2010
Location: Northern California
Posts: 9,181
Bikes: Cheltenham-Pedersen racer, Boulder F/S Paris-Roubaix, Varsity racer, '52 Christophe, '62 Continental, '92 Merckx, '75 Limongi, '76 Presto, '72 Gitane SC, '71 Schwinn SS, etc.
Mentioned: 132 Post(s)
Tagged: 0 Thread(s)
Quoted: 1562 Post(s)
Liked 1,287 Times
in
858 Posts
As long as the freewheel is to remain at five speeds, I vote for saving the less-common, original Sprint/Allvit.
I wouldn't take the main body apart though, these were assembled/adjusted well at the factory and typically just need some freeing-up to shift snappily. The springs seem to never go bad.
This looks like an easy one actually. First the top pulley has extended threading on the one cone that threads into the cage plate. Remove the "extended" cone and fit it into the good lower pulley with the plastic ring still intact.
Then find any pulley with a 6mm hole for use in the lower pulley position (Suntour pulleys are the most plentiful, but there are still many discarded Allvit derailers to be found for next to nothing in terms of effort or cost).
The remaining pulley with the broken plastic ring may work fine as a lower pulley once the remaining plastic is stripped off. It won't work so well as a top pulley though.
The long Twin-Stik levers are perfect for use with the Sprint derailer's spring rate, gives plenty of leverage for light-touch shifting if lined cable housing is used.
Note that the matching front derailer has a Schwinn-proprietary clamping diameter, so be gentle with it! There are no other derailers that will fit (other than reducing a modern 1-1/4" clamp derailer).
You'd probably want to grease the bottom bracket anyway, so off comes the drive-side cone and the chainring using the same 12" adjustable wrench needed on the bb nut.
The end of the crank can be heated to remove the pedal. Don't heat to a point much further than smoking some of the oil out of the threaded area, and use a good-fitting wrench. Heat makes all the difference.
Last edited by dddd; 09-14-19 at 11:42 AM.
09-14-19, 11:57 AM
#14
feros ferio
Join Date: Jul 2000
Location: www.ci.encinitas.ca.us
Posts: 21,793
Bikes: 1959 Capo Modell Campagnolo; 1960 Capo Sieger (2); 1962 Carlton Franco Suisse; 1970 Peugeot UO-8; 1982 Bianchi Campione d'Italia; 1988 Schwinn Project KOM-10;
Mentioned: 44 Post(s)
Tagged: 0 Thread(s)
Quoted: 1391 Post(s)
Liked 1,322 Times
in
835 Posts
I'm confused. I thought the OP's problem was the head of the bolt being trapped by the crank arm. A thin open end wrench would turn the last chainring bolt but I assumed the issue was it hitting the crank arm before it was free of its threads. That's why I suggested removing the crank set and then separating the chainring assembly from the arm to allow the bolt's removal.
__________________
"Far and away the best prize that life offers is the chance to work hard at work worth doing." --Theodore Roosevelt
Capo: 1959 Modell Campagnolo, S/N 40324; 1960 Sieger (2), S/N 42624, 42597
Carlton: 1962 Franco Suisse, S/N K7911
Peugeot: 1970 UO-8, S/N 0010468
Bianchi: 1982 Campione d'Italia, S/N 1.M9914
Schwinn: 1988 Project KOM-10, S/N F804069
"Far and away the best prize that life offers is the chance to work hard at work worth doing." --Theodore Roosevelt
Capo: 1959 Modell Campagnolo, S/N 40324; 1960 Sieger (2), S/N 42624, 42597
Carlton: 1962 Franco Suisse, S/N K7911
Peugeot: 1970 UO-8, S/N 0010468
Bianchi: 1982 Campione d'Italia, S/N 1.M9914
Schwinn: 1988 Project KOM-10, S/N F804069
09-14-19, 12:53 PM
#15
Used to be Conspiratemus
Join Date: Jan 2009
Location: Hamilton ON Canada
Posts: 1,512
Mentioned: 4 Post(s)
Tagged: 0 Thread(s)
Quoted: 297 Post(s)
Liked 245 Times
in
163 Posts
I know the OP is an experienced bicycle restorer, but since the recalcitrant pedal is the left, I can't resist asking, "Are you torquing it the right way, i.e., clockwise?" Sometimes we get tired, frustrated, disoriented working with the bike upside down from the wrong side of the clock and we just get lost. Honestly, no offense intended. (And you don't even have to confess. )
)
09-14-19, 01:22 PM
#16
Senior Member
Join Date: Jun 2008
Location: Ozark Mountains
Posts: 121
Bikes: '64 Varsity, '69 Varsity, '71 Varsity, '71 Super Sport, '72 Super Sport, PX10 times 4, '72 Paramount, '73 Sports Tourer, '73 Paramount '77 Paramount, two NOS Pros
Mentioned: 0 Post(s)
Tagged: 0 Thread(s)
Quoted: 13 Post(s)
Liked 15 Times
in
13 Posts
Likes For KerryP:
09-14-19, 08:10 PM
#17
Senior Member
Join Date: May 2011
Location: Seattle WA
Posts: 2,841
Bikes: 2009 Handsome Devil, 1987 Trek 520 Cirrus, 1978 Motobecane Grand Touring, 1987 Nishiki Cresta GT, 1989 Specialized Allez Former bikes; 1986 Miyata Trail Runner, 1979 Miyata 912, 2011 VO Rando, 1999 Cannondale R800, 1986 Schwinn Passage
Mentioned: 72 Post(s)
Tagged: 0 Thread(s)
Quoted: 796 Post(s)
Liked 522 Times
in
367 Posts
Hitting some speed bumps...... so the usual vintage tear down then? good luck with sorting through the issues OP, I find patience, beer and the knowledge of BF is often quite helpful in these situations, oh and a willingness to walk away and come back to the problem later. I am often shocked at how clear a solution becomes once I have cleared my head of the red mist
Likes For ryansu:
09-14-19, 10:18 PM
#18
Senior Member
Thread Starter
Join Date: Aug 2019
Posts: 124
Mentioned: 1 Post(s)
Tagged: 0 Thread(s)
Quoted: 29 Post(s)
Likes: 0
Liked 38 Times
in
18 Posts
Thank you guys for so much great advice!
I took a trip today to take a break from it.
Tomorrow morning I will get a fresh start on it.
Yes, on the chainrings it doesn�t look like there is enough clearance to back the trapped bolt all the way out. And you guys are right, even though it is spinning smoothly, it wouldn�t hurt to clean and repack the BB anyway.
I fitted a new rear derailleur, but I�m slapping my forehead for not thinking about swapping pulleys or noticing that the bottom pulley bolt would allow for a modern sealed-bearing pulley to be fitted. Brilliant observation sir!
I carefully preserved the packaging in case I wanted to return the new derailleur.
I�m pretty sure I was I was turning the pedal clockwise, but when I hit it tomorrow I�ll pay attention to make sure that I am.
Everyone, thanks again!
Last edited by Retroman69; 09-14-19 at 10:24 PM.
09-15-19, 06:36 AM
#19
Death fork? Naaaah!!

The brake spacers are still available new It's not uncommon for them to split. I'm pretty sure I have some Huret pulleys out in the barn. PM me and I'll send you one.
IIWM, the RD and crank would be the first to go.

Top
IIWM, the RD and crank would be the first to go.
Top
__________________
You know it's going to be a good day when the stem and seatpost come right out.
(looking for a picture and not seeing it? Thank the Photobucket fiasco.PM me and I'll link it up.)
You know it's going to be a good day when the stem and seatpost come right out.
(looking for a picture and not seeing it? Thank the Photobucket fiasco.PM me and I'll link it up.)
Likes For top506:
09-15-19, 07:27 AM
#20
www.theheadbadge.com
Join Date: Sep 2005
Location: Southern Florida
Posts: 28,510
Bikes: https://www.theheadbadge.com
Mentioned: 124 Post(s)
Tagged: 0 Thread(s)
Quoted: 2420 Post(s)
Liked 4,381 Times
in
2,090 Posts
-Kurt
__________________
09-15-19, 09:21 AM
#21
Senior Member
Thread Starter
Join Date: Aug 2019
Posts: 124
Mentioned: 1 Post(s)
Tagged: 0 Thread(s)
Quoted: 29 Post(s)
Likes: 0
Liked 38 Times
in
18 Posts
That�s a gorgeous SS! Love all the mods you did, and they fit with it so well they look like they belong on it.
I�m staring at the bare frame and wheels sitting there and still debating continuing with a mild update/custom myself on this one.
09-15-19, 05:50 PM
#22
Senior Member
Thread Starter
Join Date: Aug 2019
Posts: 124
Mentioned: 1 Post(s)
Tagged: 0 Thread(s)
Quoted: 29 Post(s)
Likes: 0
Liked 38 Times
in
18 Posts
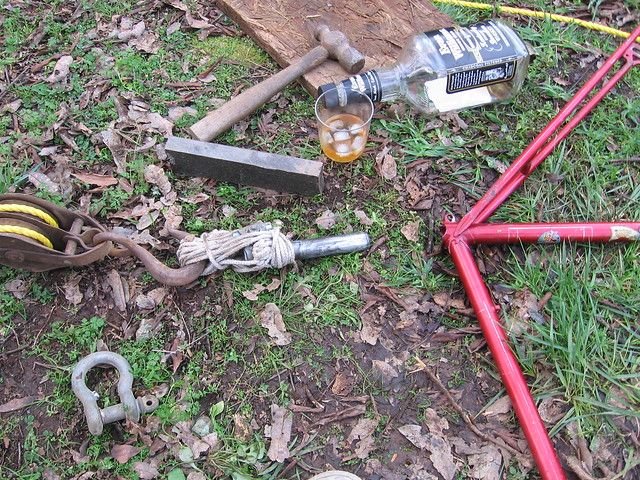
Ah! Finally got the pedal off.
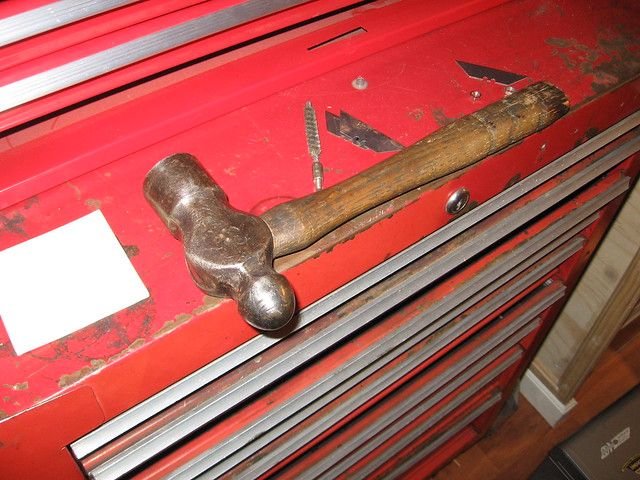
I used the other pedal as a wedge, got a long handled 9/16 wrench on it, and went after it with a 3 pound mini-sledge!
Popped loose immediately.
I again appreciate everyone�s encouragement.

I used the other pedal as a wedge, got a long handled 9/16 wrench on it, and went after it with a 3 pound mini-sledge!
Popped loose immediately.
I again appreciate everyone�s encouragement.
09-15-19, 07:05 PM
#23
www.theheadbadge.com
Join Date: Sep 2005
Location: Southern Florida
Posts: 28,510
Bikes: https://www.theheadbadge.com
Mentioned: 124 Post(s)
Tagged: 0 Thread(s)
Quoted: 2420 Post(s)
Liked 4,381 Times
in
2,090 Posts
Has helped me on more than one pedal in the past.
-Kurt
__________________
09-15-19, 07:33 PM
#24
Ride, Wrench, Swap, Race
Join Date: Jan 2010
Location: Northern California
Posts: 9,181
Bikes: Cheltenham-Pedersen racer, Boulder F/S Paris-Roubaix, Varsity racer, '52 Christophe, '62 Continental, '92 Merckx, '75 Limongi, '76 Presto, '72 Gitane SC, '71 Schwinn SS, etc.
Mentioned: 132 Post(s)
Tagged: 0 Thread(s)
Quoted: 1562 Post(s)
Liked 1,287 Times
in
858 Posts
One step at a time, this SS is definitely coming along, and I predict success with getting that Sprint derailer set working as intended.
Also glad to see that the world's best kickstand is still proudly on board, it's a mere .9lb extra and goes along way to keeping the vibe intact.
At risk of having someone say "note to self, do not ever buy a bicycle from this guy", I must say that the 2 and 3# hammers are some of of my most useful tools, perfect for gently truing chainring spiders in-situ (using a wood dowel drift), and for helping wrenches along. Even on a stubborn bb cup, using a sugino cup wrench, I can hammer a cup loose while holding the wrench centered flat on the cup using my other hand (it's all about keeping the wrench opening pressed perfectly flat against the end of the bb shell, and also on the wrench arriving in a correct-enough clock position friendly to this technique).
The 3# hammer is also a convenient anvil.
Lastly, I can even use either of these to level (read "smash") any large embedded rocks that rise above grade in my ever-more-civilized backyard environs.
Last edited by dddd; 09-15-19 at 07:41 PM.
Likes For dddd:
09-15-19, 07:53 PM
#25
The dropped
Join Date: Oct 2018
Location: Columbus, OH
Posts: 2,144
Bikes: Pake C'Mute Touring/Commuter Build, 1989 Kona Cinder Cone, 1995 Trek 5200, 1973 Raleigh Super Course FG, 1960/61 Montgomery Ward Hawthorne "thrift" 3 speed, by Hercules (sold) : 1966 Schwinn Deluxe Racer (sold)
Mentioned: 10 Post(s)
Tagged: 0 Thread(s)
Quoted: 1739 Post(s)
Liked 1,014 Times
in
696 Posts
Likes For Unca_Sam: