


Vintage Follis resto project
 12-18-19, 05:14 PM
#51
Senior Member
Join Date: Mar 2007
Location: SF Bay Area, East bay
Posts: 7,660
Bikes: Miyata 618 GT, Marinoni, Kestral 200 2002 Trek 5200, KHS Flite, Koga Miyata, Schwinn Spitfire 5, Mondia Special, Univega Alpina, Miyata team Ti, Santa Cruz Highball
Mentioned: 53 Post(s)
Tagged: 0 Thread(s)
Quoted: 1609 Post(s)
Liked 2,590 Times
in
1,224 Posts
Oakland would put that sticker on and pound in a couple of digits on the top of the seat tube for ID...
 12-18-19, 05:32 PM
#52

Senior Member
Thread Starter
I just checked, and this bike seems to have escaped that indignity.
I think I may call the Oakland PD and give ‘em “what for” for slacking off that day!
I think I may call the Oakland PD and give ‘em “what for” for slacking off that day!
 12-18-19, 09:15 PM
#53
Senior Member
Thread Starter
The stem bolt is now loose and the stem freed up. It needed a bit more “persuasion” than the seat pin did, and required the use of a large set of vise grips on the head of the previously rounded-off bolt head to get it to turn.
On another note; would it be a good idea to replace the cotters holding the crank arms to the spindle? I’m anticipating a wrestling match getting these off. Are these somewhat standard parts? What size might I need if they do need replacement?
On another note; would it be a good idea to replace the cotters holding the crank arms to the spindle? I’m anticipating a wrestling match getting these off. Are these somewhat standard parts? What size might I need if they do need replacement?
Last edited by orcas island; 12-18-19 at 10:04 PM.
12-18-19, 09:29 PM
#54
PM me your cotters

Join Date: Jun 2015
Location: ATL
Posts: 3,241
Mentioned: 80 Post(s)
Tagged: 0 Thread(s)
Quoted: 1137 Post(s)
Liked 590 Times
in
422 Posts
The stem bolt is now loose and the stem freed up. It needed a bit more “persuasion” than the seat tube did, and required the use of a large set of vise grips on the head of the previously rounded-off bolt head to get it to turn.
On another note; would it be a good idea to replace the cotters holding the crank arms to the spindle? I’m anticipating a wrestling match getting these off. Are these somewhat standard parts? What size might I need if they do need replacement?
On another note; would it be a good idea to replace the cotters holding the crank arms to the spindle? I’m anticipating a wrestling match getting these off. Are these somewhat standard parts? What size might I need if they do need replacement?
If it's been a long ass time since the last ones were removed, it's worthwhile to either heatgun or torch the arm (not the cotter) prior to attempting removal. Last thing you want to do is (worst) bend the threaded end in a way it's impossible to remove cleanly or (bad) mushroom the threaded end so it can't be used anymore. A cleanly, properly removed cotter can easily be re-used. But that often requires the proper press to achieve.
That said, you can measure the diameter of the cotter with a caliper, analog or digital. If you need a new pair, ping me. I've got 8mm, 8.5mm, 9mm, 9.5mm readily available and happy to send you a pair, will be Sunlite brand so nothing fancy, but again, you *should* use a proper press to install the new ones and, ideally, you want to have the old cotter to determine how the cotters were originally faced/filed to fit if you don't have a proper press to install/remove several times for verification of shape.
I have a proper cotter press. Wish you lived closer, I would love to help you on this one. Seems a little silly to ship you my press only to have you ship it back. You may ask around with local co-op or shops to see if anyone has one.
Oh, and as much as people will recommend over-the-top methods like using a socket and a bench vice, I don't recommend it. If you're going to go that far, just look for RJ The Bike Guy's video on how to build a cotter press for under $15, or there's a post on here on how to modify a Harbor Freight motorcycle chain break tool to work as a great cotter press. Don't mess around with a big ass hammer or vice-based solutions. Does it work? Yes, sometimes. Is it practical? No. High probability of damaging something? Absolutely. Will someone swear by it? Without a doubt, you will find someone who swears by it.
Last edited by francophile; 12-18-19 at 09:32 PM.
12-18-19, 11:48 PM
#55
Senior Member
Join Date: Mar 2007
Location: SF Bay Area, East bay
Posts: 7,660
Bikes: Miyata 618 GT, Marinoni, Kestral 200 2002 Trek 5200, KHS Flite, Koga Miyata, Schwinn Spitfire 5, Mondia Special, Univega Alpina, Miyata team Ti, Santa Cruz Highball
Mentioned: 53 Post(s)
Tagged: 0 Thread(s)
Quoted: 1609 Post(s)
Liked 2,590 Times
in
1,224 Posts
I picked up a Park tool cr2 if needed. You in West Marin?
12-19-19, 12:01 AM
#56
Senior Member
Thread Starter
I am out in West Marin. I thought I might pick up one of those Harbor Freight chain breakers and modify it in accord with the previous thread on BF to make a cotter pin press.
Are you in the East Bay?
Are you in the East Bay?
12-19-19, 01:24 AM
#57
blahblahblah chrome moly

Join Date: Apr 2009
Location: Seattle
Posts: 1,989
Mentioned: 92 Post(s)
Tagged: 0 Thread(s)
Quoted: 1176 Post(s)
Liked 2,572 Times
in
1,074 Posts
Ha, and here I was thinking you were on Orcas Island! I was going to offer my cotterpin services in Seattle. Even from Orcas that's a bit of a slog, but Orcas and other San Juan Islands dwellers sometimes have some other reason to come to the mainland, so a meetup in Seattle wouldn't be too far-fetched especially if you're not in a hurry, can wait until there was some other reason to come here. But NorCal is a whole 'nother story!
I did my first overhauls on cottered cranks in the late '60s. The shop I worked at starting in '71 had a half-price Winter Overhaul deal, and I probably did a hundred of them. I don't think I was ever stumped by a stuck cotter. (Of course just cuz you don't remember something doesn't mean it didn't happen, but I think I would remember that.)
I have a VAR No.7 cotter press (the BIG one)*, but honestly I still prefer a hammer. It's just faster, and always works for me (when combined with heat and a couple other tricks). No, I'm not recommending the hammer for average mechanics, but after a hundred or so, and having been taught by really old-school guys, I deserve to have my quirks and crochets. I'll use the VAR if someone can't bear to watch me hit their bike with a hammer, it'll just take a few seconds longer. Or you can just look the other way... (* A Bikesmith/Stonich press is probably better than a VAR, but the VAR is pretty good, and very impressive due to it's being so ridiculously large.)
It's true, back in the '70s we didn't have to be so careful to preserve the old pins, because we had an endless supply of good replacements. But I still don't shy away from the "impactful" method because (1) I don't ruin cotters, and (2) even if I do, I still have a decent stash of old high-quality ones in all the common sizes.
If you haven't been trained in cotters by someone experienced, then I don't recommend learning on such a nice bike as this Follis. Of course you can do as you please, but my recommendation is to find someone experienced to take it to.
MarkB in Seattle
12-19-19, 10:11 AM
#58
Senior Member
Thread Starter
Mark- we have a small place out on Orcas Island where we spend as much time in the summer as we can manage.
12-19-19, 10:45 AM
#59
Senior Member

Join Date: Feb 2013
Location: Alta California
Posts: 14,266
Mentioned: 415 Post(s)
Tagged: 1 Thread(s)
Quoted: 3812 Post(s)
Liked 3,341 Times
in
2,180 Posts
-----
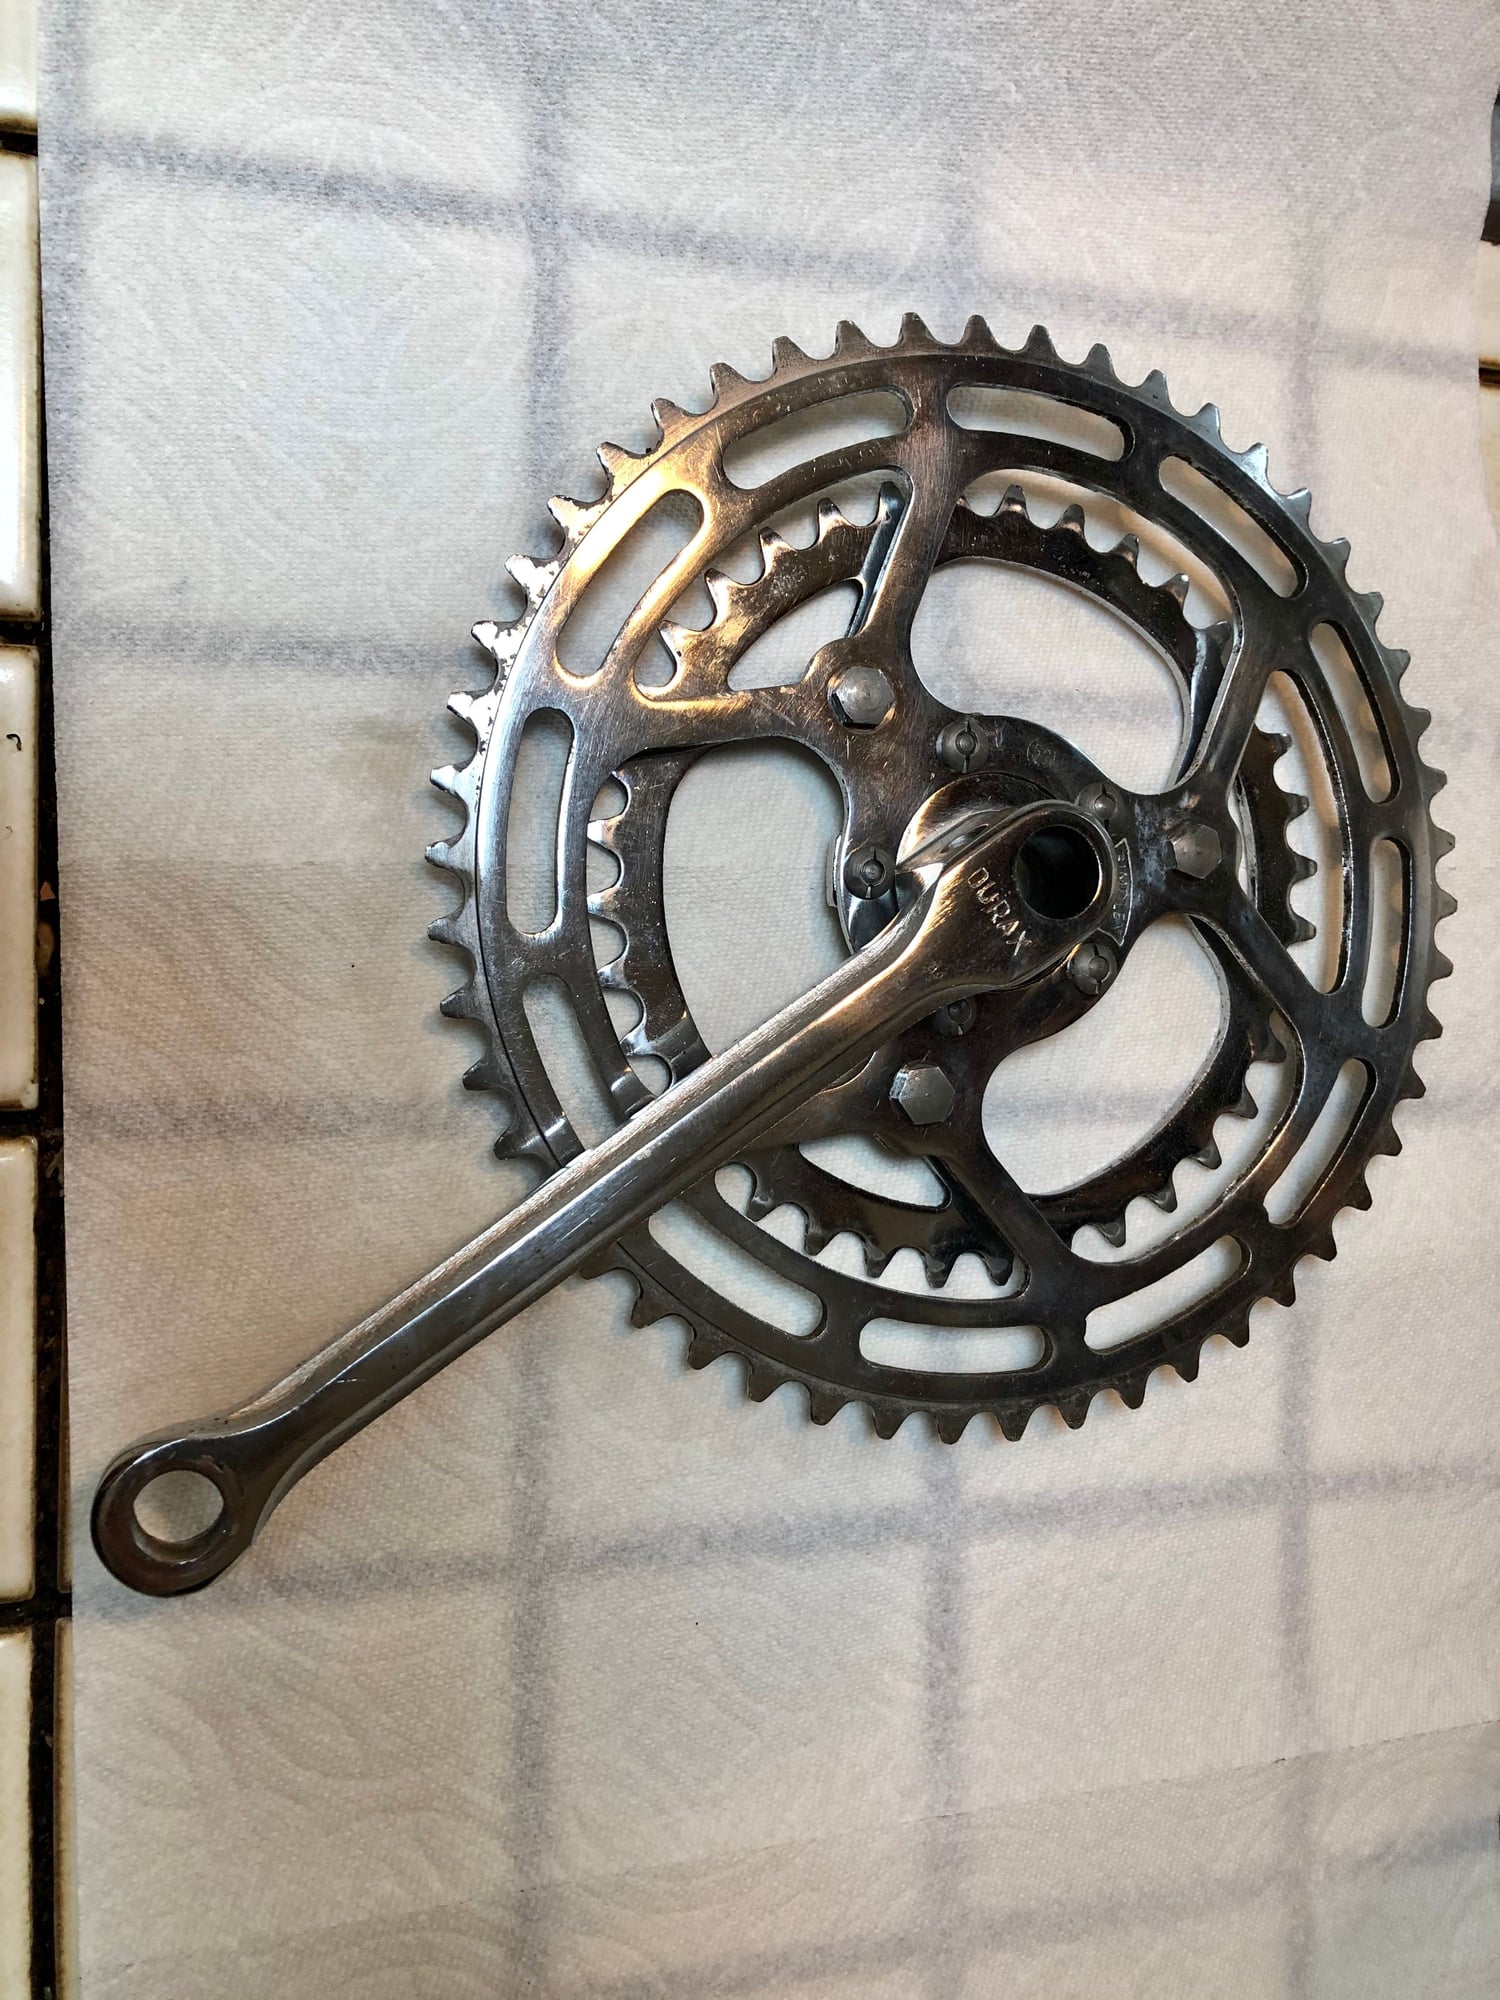
The wedgebolts for the machine's DURAX chainset are 9.0mm in diameter and bear a "medium" cut.
-----
The wedgebolts for the machine's DURAX chainset are 9.0mm in diameter and bear a "medium" cut.
-----
12-19-19, 10:57 AM
#60
Senior Member
Join Date: Mar 2007
Location: SF Bay Area, East bay
Posts: 7,660
Bikes: Miyata 618 GT, Marinoni, Kestral 200 2002 Trek 5200, KHS Flite, Koga Miyata, Schwinn Spitfire 5, Mondia Special, Univega Alpina, Miyata team Ti, Santa Cruz Highball
Mentioned: 53 Post(s)
Tagged: 0 Thread(s)
Quoted: 1609 Post(s)
Liked 2,590 Times
in
1,224 Posts
12-19-19, 11:23 AM
#61
Senior Member
Join Date: Feb 2013
Location: Alta California
Posts: 14,266
Mentioned: 415 Post(s)
Tagged: 1 Thread(s)
Quoted: 3812 Post(s)
Liked 3,341 Times
in
2,180 Posts
-----
Please say hello to Cloris Leachman and Dee Wallace Stone for us the next time you visit.
---
Note on licensing -
Prior to the California statewide system which came in during 1977 it was the practice for each city to have its own distinct symbol it would stamp into a bicycle frame when licensing. For the city of Oakland this was an oak tree (resembles a mushroom) which was usually stamped into the bottom bracket shell, but placement could vary depending on the official doing the work.
Licensing in the city of Oakland was carried out at fire stations.
-----
12-19-19, 11:34 AM
#62
Senior Member
Thread Starter
[QUOTE=juvela;21251237]-----
Please say hello to Cloris Leachman and Dee Wallace Stone for us the next time you visit.
---
Oh, I will. I’ll make sure to drop by on Oprah for a cup of coffee too while I’m there!
Not seeing any sort of stamping on the underside of the BB. I will keep my eyes peeled for it in other locations as the cleanup continues
Last edited by orcas island; 12-19-19 at 11:40 AM.
12-19-19, 12:21 PM
#63
Senior Member
Join Date: Apr 2011
Location: Maryland, USA
Posts: 2,437
Bikes: Drysdale/Gitane/Zeus/Masi/Falcon/Palo Alto/Raleigh/Legnano
Mentioned: 34 Post(s)
Tagged: 0 Thread(s)
Quoted: 984 Post(s)
Liked 634 Times
in
404 Posts
Thanks to Amazon,Ii think I finally have a shipping box, and can arrange for packing material. The RD looks to my eyes to be in pretty nice shape and should polish up well; complete except, oddly, the cable securing the cable is missing, so you may want to re-use the one from your original derailleur if you want "genuine Simplex".
What I found interesting is I contacted my brother who still has the Follis he got used in 1960 and raced on until 1963; it was already repainted when he got it, but recalls that when he stripped it for another repaint the head lugs with the "Follis" and "Lyon" cutouts were not chromed, like in your photos.
What I found interesting is I contacted my brother who still has the Follis he got used in 1960 and raced on until 1963; it was already repainted when he got it, but recalls that when he stripped it for another repaint the head lugs with the "Follis" and "Lyon" cutouts were not chromed, like in your photos.
__________________
Larry:1958 Drysdale, 1961 Gitane Gran Sport, 1974 Zeus track, 1988 Masi Gran Corsa, 1974 Falcon, 1980 Palo Alto, 1973 Raleigh Gran Sport, 1974 Legnano. Susan: 1976 Windsor Profesional.
Larry:1958 Drysdale, 1961 Gitane Gran Sport, 1974 Zeus track, 1988 Masi Gran Corsa, 1974 Falcon, 1980 Palo Alto, 1973 Raleigh Gran Sport, 1974 Legnano. Susan: 1976 Windsor Profesional.
12-19-19, 03:59 PM
#64
Senior Member
Thread Starter
Thanks again! I’m looking forward to it.
The chrome on on the front lug/head badge is really rough on this one and I’m debating whether to get some rechroming done ($ ) or to simply clean it up, or maybe paint the headllug when that decision time comes up
The chrome on on the front lug/head badge is really rough on this one and I’m debating whether to get some rechroming done ($
) or to simply clean it up, or maybe paint the headllug when that decision time comes up
12-21-19, 07:58 PM
#65
Senior Member
Thread Starter
Got a chance to start removing some pieces last night and begin the Evaporust bath process. I began with the front end of the bike; front brake calipers and headset pieces went in first.
Rebuilt the headset (48 little free bearings to keep track of) and cleaned up and rebuilt the front hub.
All of the bearing surfaces seemed fine and things ran smoothly when they were reassembled.
The brake calipers are steel, and even though they came out of the bath much shinier, they are quite pitted and “grainy” where the rust was heaviest. It’s also clear that the steel rims are pretty far gone; plenty of lost chrome means they are never going to look great.
At this point I think the plan is to just continue the component cleanup, rebuild all of the bearings, add new tubes and fat tires, and get this old girl back out on the road again.
If my wife really likes it, then I’ll have to make a decision about a paint job. The original color (discovered underneath the front shift lever bracket) was a lovely, deep cranberry color. It really didn’t age well; all that remains is a uniform dull brown - ugh!
Anyway, here is a terrible photo of the Evaporusted from brake. That stuff is amazing!
Last edited by orcas island; 12-21-19 at 11:30 PM.
12-21-19, 10:16 PM
#66
blahblahblah chrome moly
Join Date: Apr 2009
Location: Seattle
Posts: 1,989
Mentioned: 92 Post(s)
Tagged: 0 Thread(s)
Quoted: 1176 Post(s)
Liked 2,572 Times
in
1,074 Posts
Great progress, thanks for keeping us posted, it's fun to follow this.
Looks like the roller in the brake idler arm is missing. Unless that's the way the steel ones were made? I have only seen the alloy ones before. I think I see the space where the roller would go though. It's just a plain disc with a hole in it, so it might not be hard to find or make a replacement. Even a stack of washers could do in a pinch.
A good fix for the rusty rims would be to rebuild the wheels with new alloy rims. Extra bonus is the brakes work better on alloy. Super Champion Mod.58 rims were available then I think, and they didn't change for decades, still available into the '80s, so not totally unobtainium now. Findable on eBay if you're patient, or maybe someone here will offer you some. Failing that, some sorta vintage-looking modern rims -- Pacenti Brevet maybe? Just a suggestion, I can see wanting to keep the original rims too.
-Mark
12-21-19, 11:39 PM
#67
Senior Member
Thread Starter
Mark - I’m also wondering if the brakes had a somewhat different setup (rollercam?) arrangement when they left the factory. The second, lower concave space on the cabled arm seems like it might function as a sort of non- mechanical quick release position for that cable housing stop, but there is an actual quick release mechanism on the edge of the caliper. So, kind of a mystery if some sort of original piece went missing there, and this was someone’s idea of a fix for that??
12-22-19, 08:59 AM
#68

Senior Member
Join Date: Jun 2006
Posts: 20,305
Mentioned: 130 Post(s)
Tagged: 0 Thread(s)
Quoted: 3464 Post(s)
Liked 2,829 Times
in
1,995 Posts
Got a chance to start removing some pieces last night and begin the Evaporust bath process. I began with the front end of the bike; front brake calipers and headset pieces went in first.
Rebuilt the headset (48 little free bearings to keep track of) and cleaned up and rebuilt the front hub.
All of the bearing surfaces seemed fine and things ran smoothly when they were reassembled.
The brake calipers are steel, and even though they came out of the bath much shinier, they are quite pitted and “grainy” where the rust was heaviest. It’s also clear that the steel rims are pretty far gone; plenty of lost chrome means they are never going to look great.
At this point I think the plan is to just continue the component cleanup, rebuild all of the bearings, add new tubes and fat tires, and get this old girl back out on the road again.
If my wife really likes it, then I’ll have to make a decision about a paint job. The original color (discovered underneath the front shift lever bracket) was a lovely, deep cranberry color. It really didn’t age well; all that remains is a uniform dull brown - ugh!
Anyway, here is a terrible photo of the Evaporusted from brake. That stuff is amazing!
12-22-19, 12:09 PM
#69
Senior Member
Join Date: Mar 2007
Location: SF Bay Area, East bay
Posts: 7,660
Bikes: Miyata 618 GT, Marinoni, Kestral 200 2002 Trek 5200, KHS Flite, Koga Miyata, Schwinn Spitfire 5, Mondia Special, Univega Alpina, Miyata team Ti, Santa Cruz Highball
Mentioned: 53 Post(s)
Tagged: 0 Thread(s)
Quoted: 1609 Post(s)
Liked 2,590 Times
in
1,224 Posts
12-22-19, 12:52 PM
#70
Senior Member
Thread Starter
The seatpost and clamp came out great; honestly that seat clamp looks as good as the day it came from the factory! Front shifter came out fine also.


12-22-19, 03:00 PM
#71
blahblahblah chrome moly
Join Date: Apr 2009
Location: Seattle
Posts: 1,989
Mentioned: 92 Post(s)
Tagged: 0 Thread(s)
Quoted: 1176 Post(s)
Liked 2,572 Times
in
1,074 Posts
Background:
All brakes are a compromise, you want max stopping power (as long as it's controllable, which many people call "modulation"). More MA = more max power. (Note I am using the word "power" in it's normal English sense, not in the physics/engineering jargon sense. No need to point out I am using it "wrong".)
More MA is great until you run out of lever travel and the lever hits the handlebar. If you haven't got enough braking by then, then you're screwed. So MA has to be kept low enough that you don't run out of lever travel.
You can make up for high MA to some extent by adjusting the pads very close to the rim, but that's not practical in the real world. We want the pads to be a certain distance from the rim to allow a little wobble in the wheel, or a little fork/frame flex, say while climbing standing or sprinting without the rim rubbing on the brakes.
So the answer that a few brake designers came up with is variable (increasing) MA. Start out with low MA so the pads can be far enough from the rim. The pads move in rapidly at first (low MA means more pad movement per unit of lever movement). Then about when the pads come in contact with the rim, you start getting higher MA, increasing as you pull the lever further. In theory, more powerful brakes, without running out of lever travel, and without the pads kept super close to the rim.
Not everyone likes variable leverage. If the increase in leverage was dramatic, it could cause people to apply the brakes too hard and skid or endo. I think that would not be true anymore after a few rides -- you'd get used to it -- but manufacturers are sensitive to people crashing on a first test ride...
Anyway this is all kinda moot since the change in leverage is rather modest on a Beborex. It's not enough to make you endo, I promise, maybe not even enough to notice. But at least it's in the correct direction -- not falling rate leverage, which sucks.
Yes the brake is supposed to have a roller attached to that idler arm. I don't know if "idler" is the right word but that's what I'm calling that second lever arm that a Beborex has, that other sidepulls do not. Without a roller, the idler arm has to scrape against the main brake arm as it pulls up. Maybe OK with a little grease there, but the grease will go away and have to be replenished, and it'll attract grime. A roller is much more efficient at reducing the friction there.
OK, since I've never seen the steel version before, maybe they just intended it to scrape, but I doubt it. I think I see a space where the roller was supposed to go, so I'm thinking the roller just got lost on this brake. What does the back brake look like?
Look at the pictures of Beborex brakes with roller to see where it needs to go.
Beborex brakes -- note the slogan "The Brake With Leverage Amplified!"
https://velobase.com/ViewComponent.as...4d1f3&Enum=117 More pictures here
12-22-19, 03:19 PM
#72
blahblahblah chrome moly
Join Date: Apr 2009
Location: Seattle
Posts: 1,989
Mentioned: 92 Post(s)
Tagged: 0 Thread(s)
Quoted: 1176 Post(s)
Liked 2,572 Times
in
1,074 Posts
Oh one more thing about the variable MA on a Beborex -- it's dependent on how wide the rim is and how worn the pads are. The leverage keeps going up as the brake moves further in, so you'll have more leverage on a narrower rim, and also more as the pads wear thin. This is not a good thing IMHO. With a wide rim and new pads, the rising rate will not be noticeable, so at least you know it won't be too much. It will act pretty much like a regular sidepull.
Same problem as on Campy Delta brakes, which had a similar rising rate. They had so-so power (at best) with regular width rims and fresh new pads, but many people thought the leverage was excessive after the pads wore down thinner and then you put in a skinny time-trial wheel. (Aero wheels are not extra narrow anymore nowadays, but that was back in the dark ages of 18 mm wide TT tires.)
The WTB Speedmaster Rollercam did it right, variable leverage perfected, but you had to read the instructions for how to adjust them -- it wasn't obvious. Suntour licensed the design and proceeded to ruin it, because dumbass bike shop mechanics refused to read the instructions, and so they all adjusted them wrong. So Suntour took away the variable leverage, made them into straight-rate, and in the process lost the only advantage of a roller-cam. I have real Speedmasters on my tandem, and the only way you'll get them from me is if you pry them from my cold dead fingers.
12-22-19, 04:57 PM
#73
Senior Member
Thread Starter
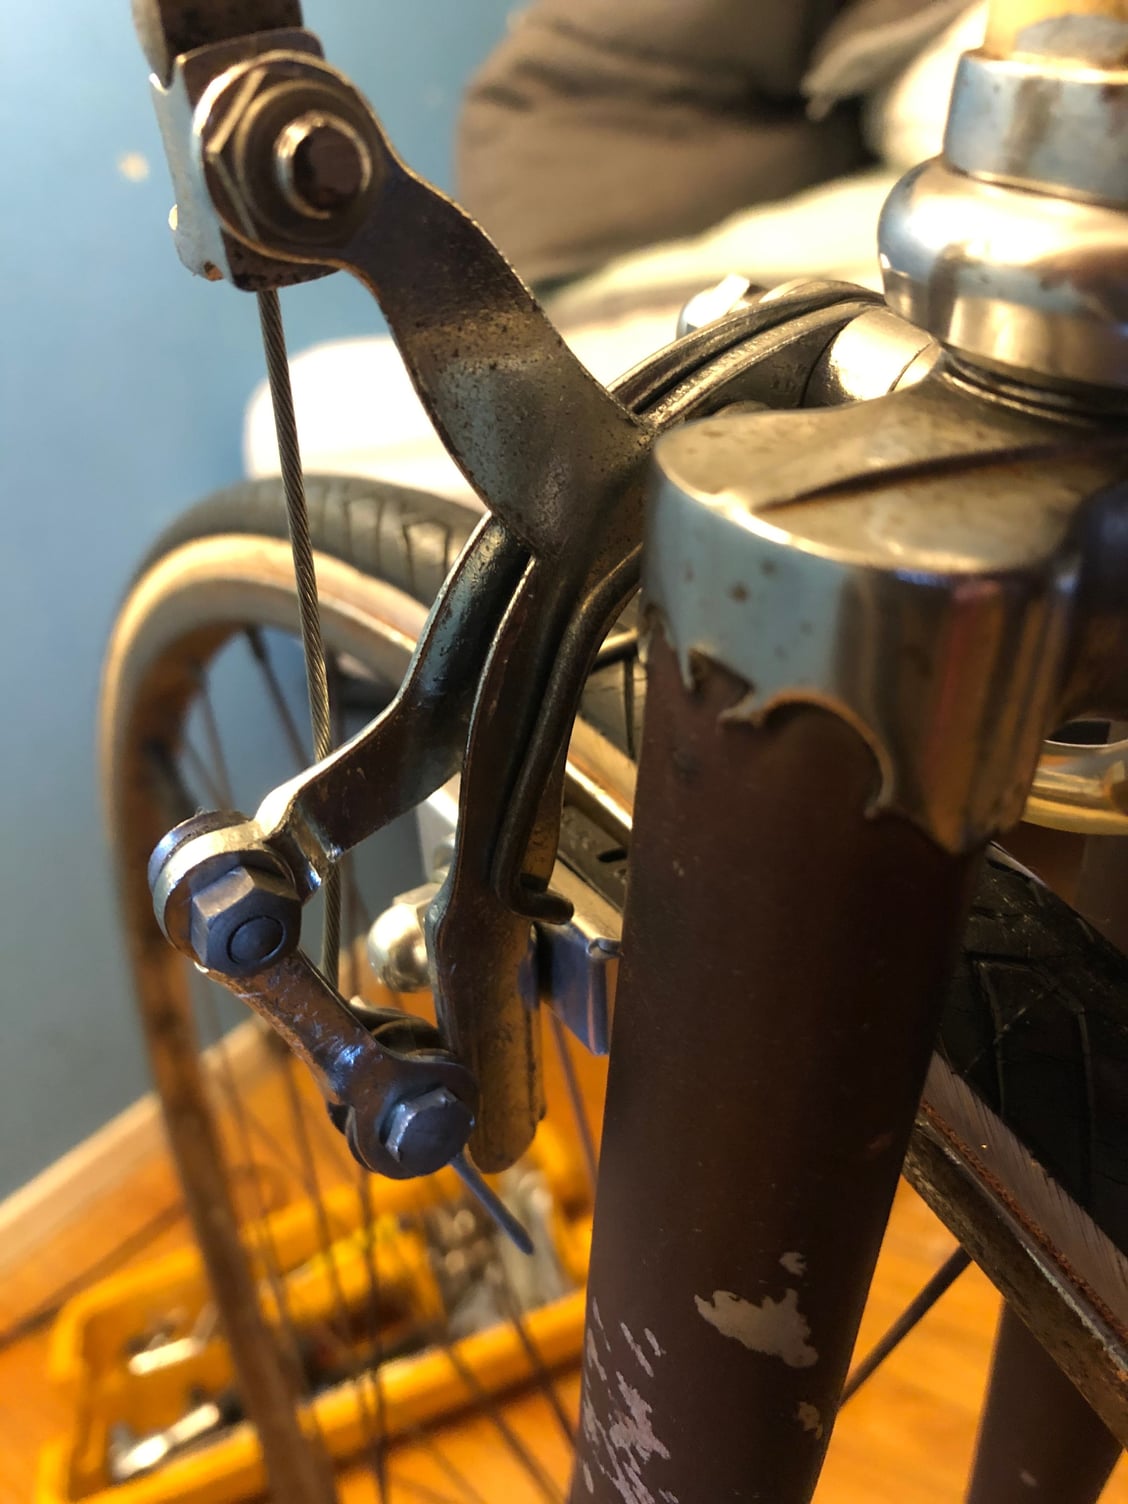
Mark- Now I see what you are getting at. The second link you included clearly shows the largish wheel that is at the rear of the idler arm. It appears to run along inside of a cast-in groove in the brake body as the brakes are applied.
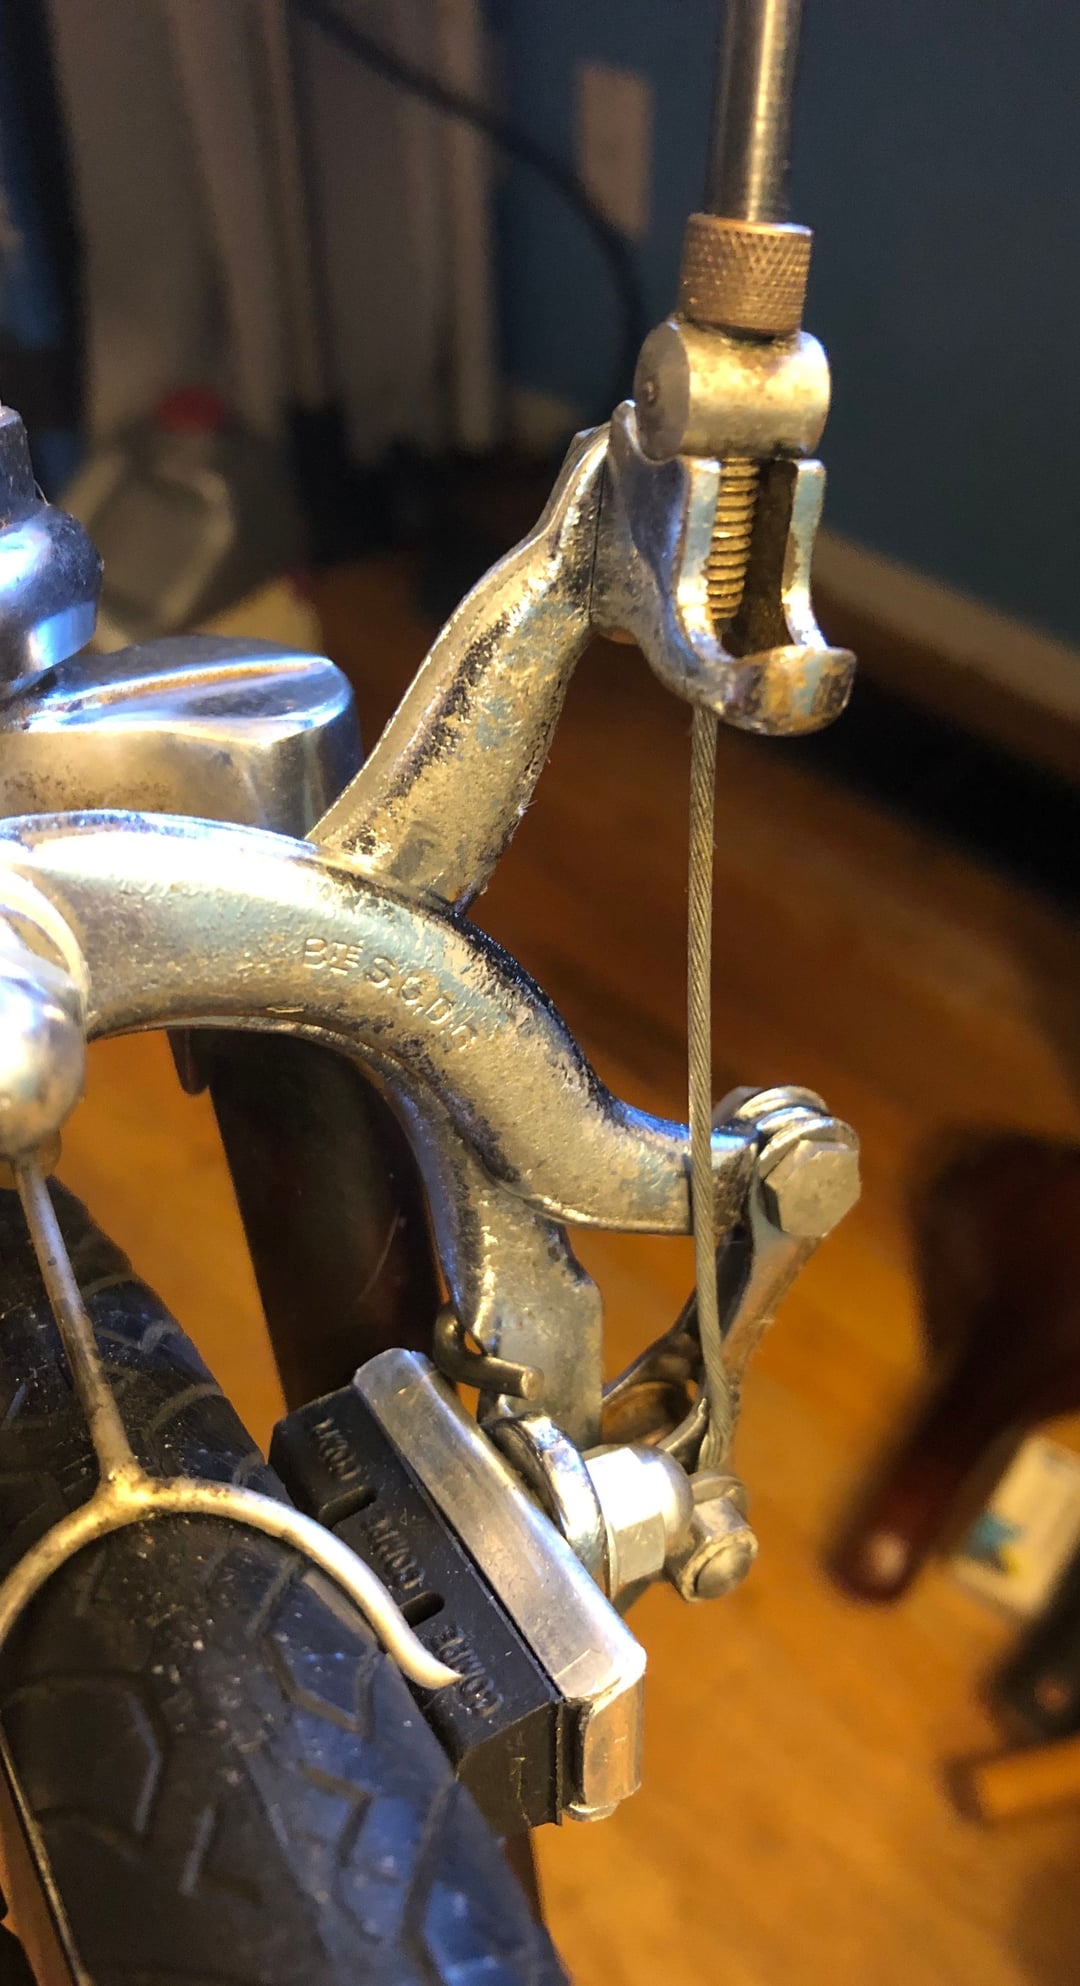
I included some photos of the side and rear of my front brake. It looks like a slightly different design that still uses the same principle.
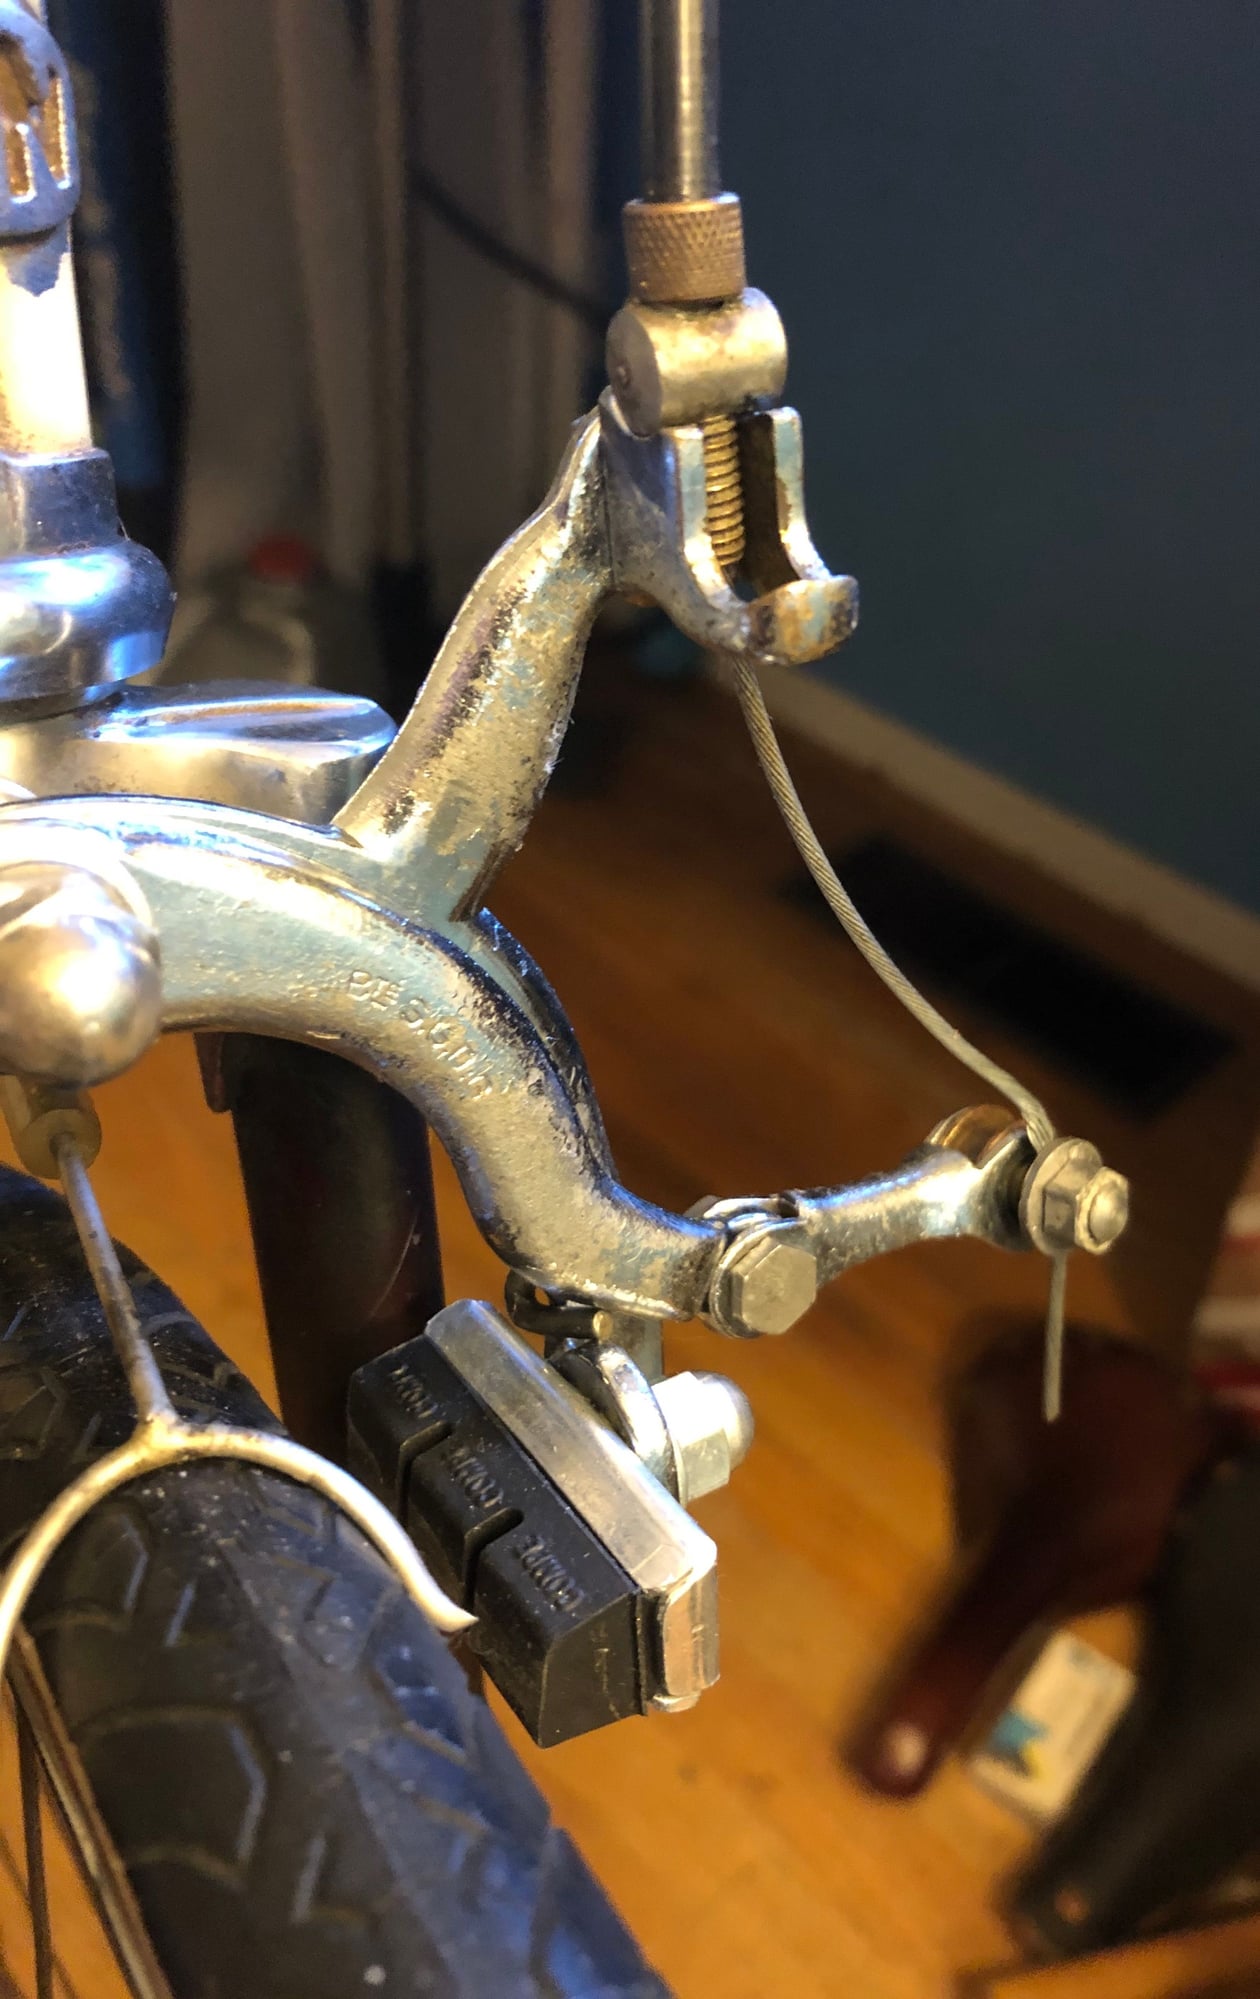
Quick release in open position
Roller incorporates into cable attachment bolt
Quick release in closed position
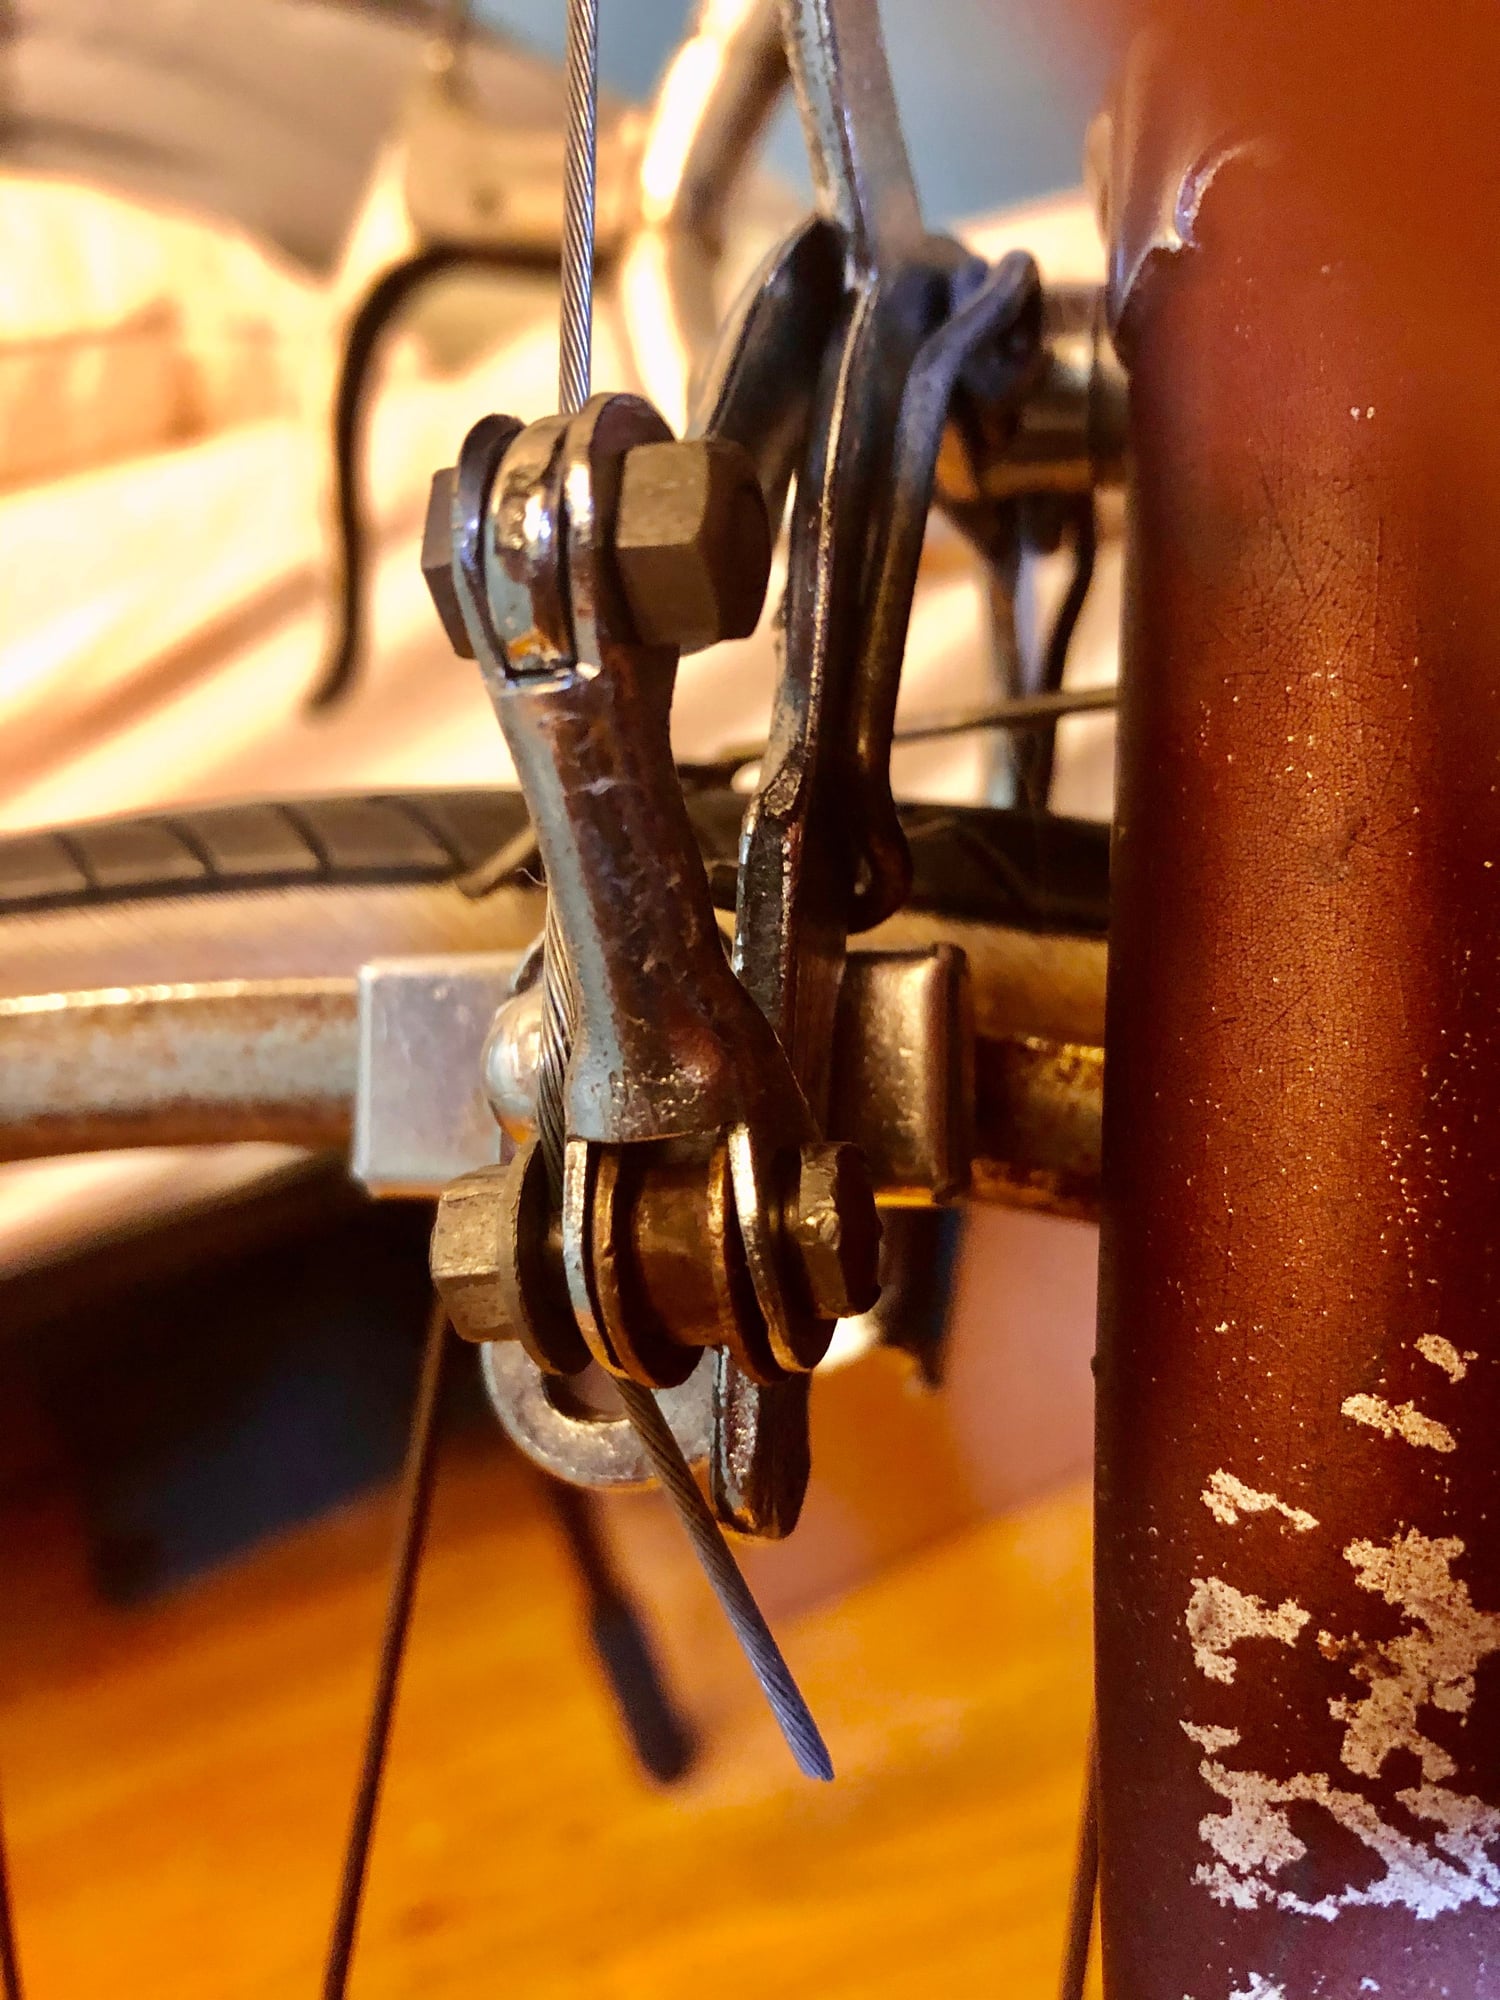
Best view of the roller wheel of which you speak.
There is no quick release or roller built into the rear brake mechanism
I included some photos of the side and rear of my front brake. It looks like a slightly different design that still uses the same principle.
Quick release in open position
Roller incorporates into cable attachment bolt
Quick release in closed position
Best view of the roller wheel of which you speak.
There is no quick release or roller built into the rear brake mechanism
Last edited by orcas island; 12-22-19 at 09:40 PM.
12-22-19, 09:01 PM
#74
blahblahblah chrome moly
Join Date: Apr 2009
Location: Seattle
Posts: 1,989
Mentioned: 92 Post(s)
Tagged: 0 Thread(s)
Quoted: 1176 Post(s)
Liked 2,572 Times
in
1,074 Posts
01-01-20, 03:18 PM
#75
Senior Member
Thread Starter
The bottom bracket has been rebuilt, along with the pedals. The chain set cleaned up reasonably well; however there are areas where the chrome is quite rough or missing entirely.
I realized why the bike came with the nut missing from the cotter pin on the drive side- someone ruined the threads on the cotter with a ham handed attempt at removal sometime in the distant past. Time to check the local shop or co-op for a replacement. This one is toast!
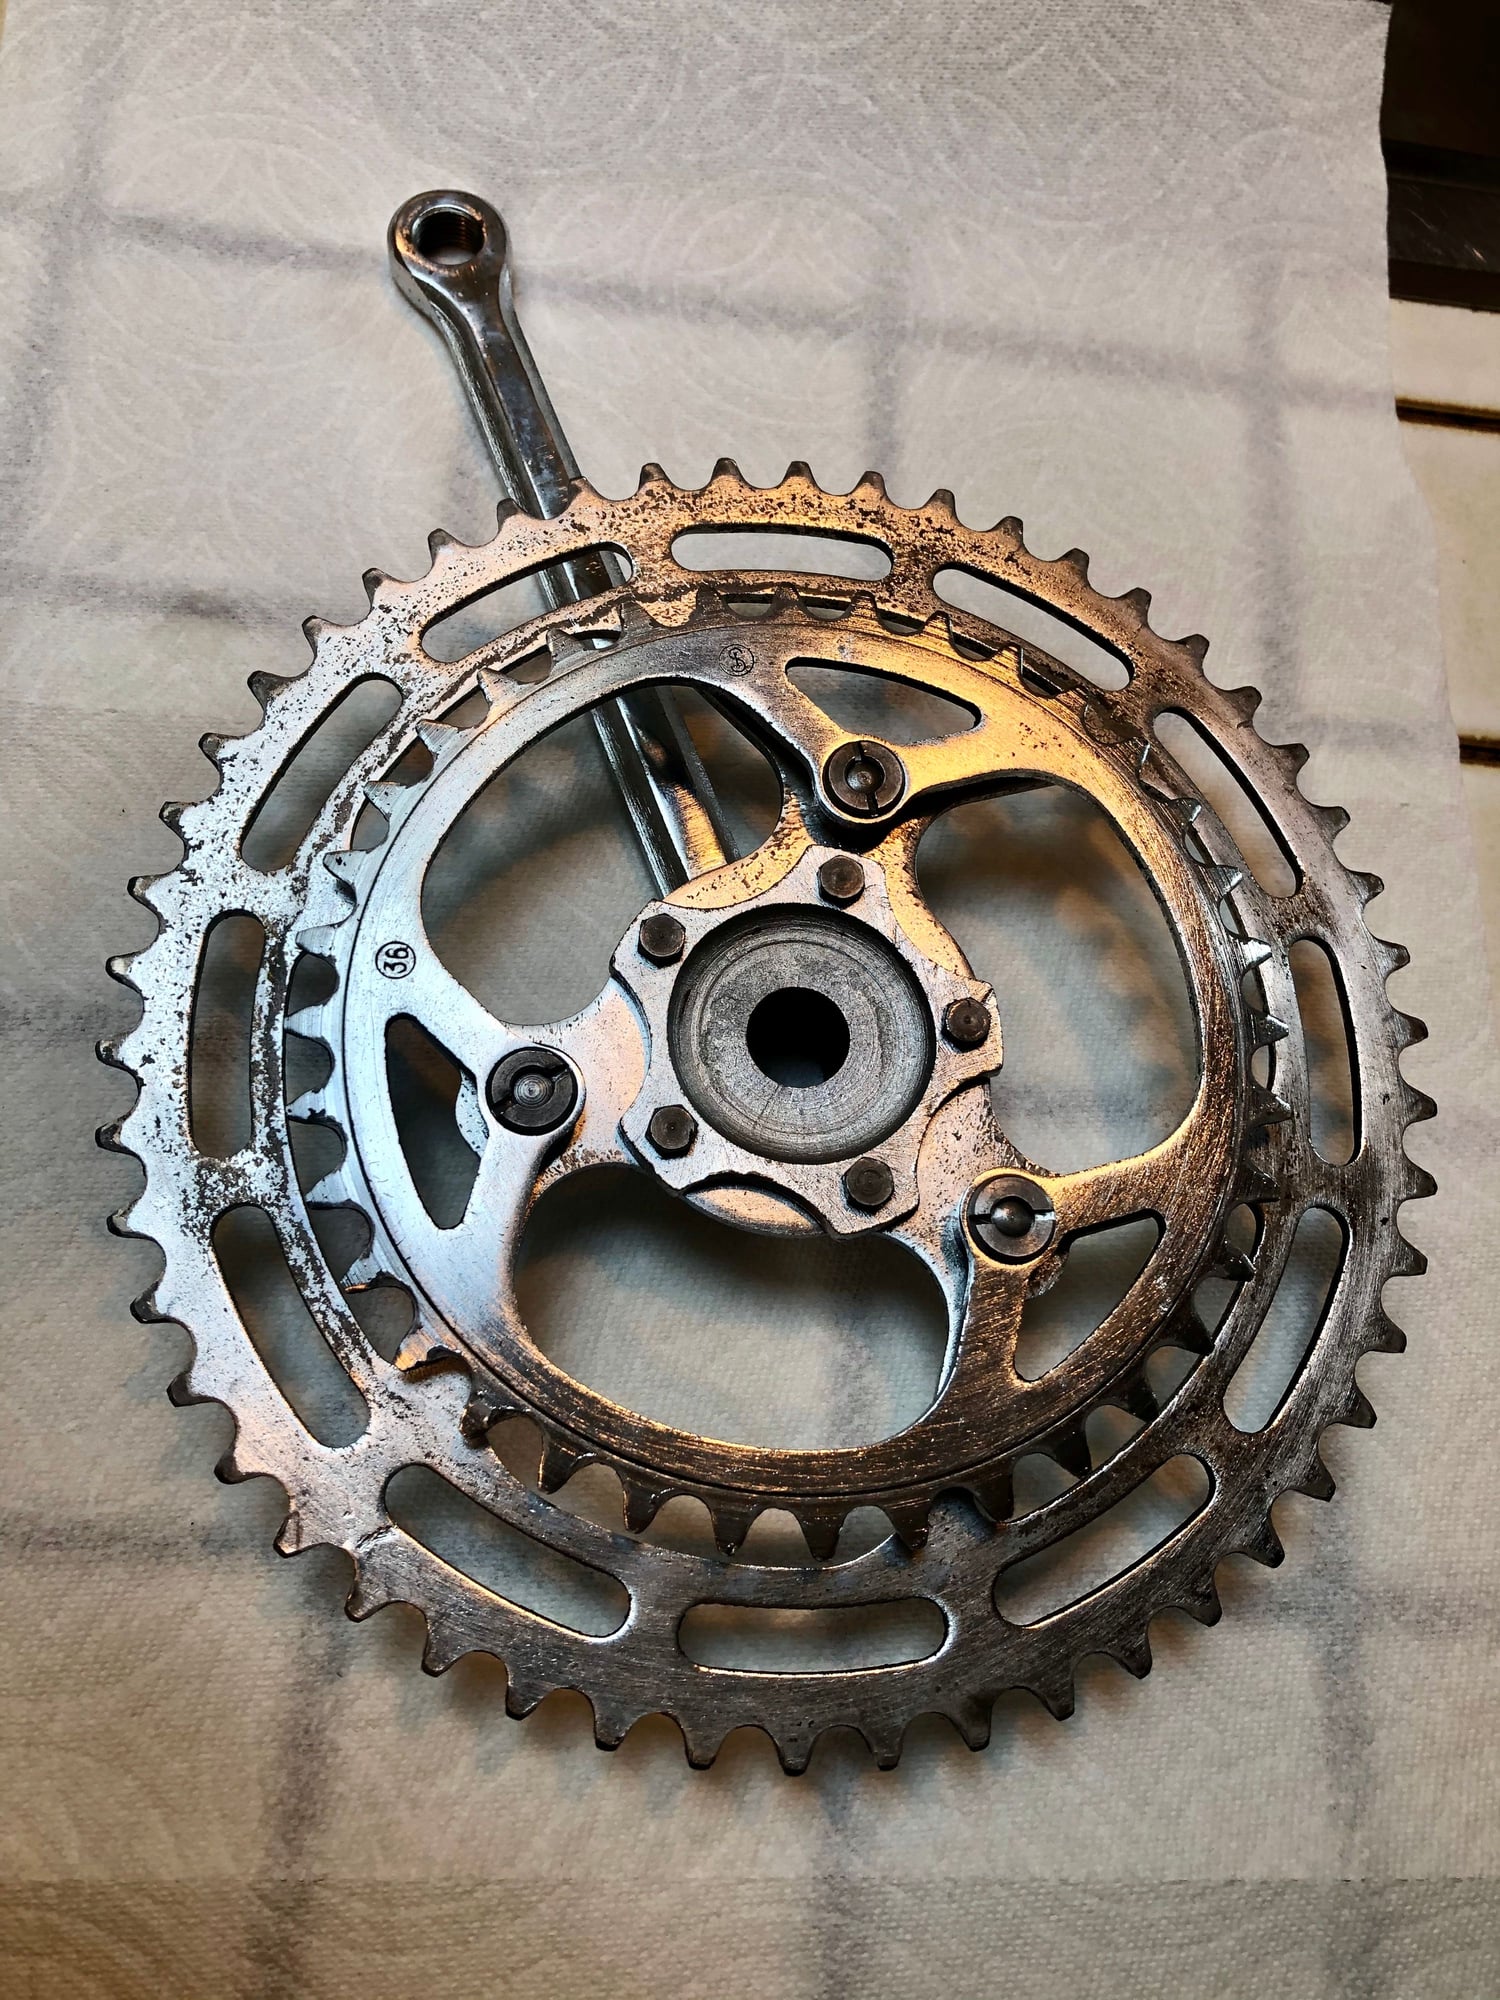
I realized why the bike came with the nut missing from the cotter pin on the drive side- someone ruined the threads on the cotter with a ham handed attempt at removal sometime in the distant past. Time to check the local shop or co-op for a replacement. This one is toast!