


Replacing Down Tube
 02-20-19, 01:20 PM
#1
Banned.
Thread Starter

Join Date: Jun 2004
Location: Torrance, CA
Posts: 3,061
Bikes: Homebuilt steel
Mentioned: 18 Post(s)
Tagged: 0 Thread(s)
Quoted: 2193 Post(s)
Liked 425 Times
in
337 Posts
Replacing Down Tube
Had an accident a few years back and the frames down tube took a pretty good whack. Used tubing blocks to roll out a good portion of the dent but not all would come out that way and now there is rust showing through cracks in the paint so thinking it's time to replace the tube. I've never done a repair like this before and was wondering if this would work (lugged steel frame):
- Chop off down tube just above the BB shell and then grind out remainder.
- Chop off down tube at head tube and then either grind off the lug or heated it and peel it off.
If I miter the down tube and slide on a new head tube lug, and then slide that onto the head tube, is it going to be possible to spring the frame enough to get the down tube into the BB socket? Or is it better to install the DT into the socket and spring the frame while installing the head tube lug around the HT? Or, none of the above? Could use some wisdom here. If I need to completely tear the frame apart to fix the tube it might not be worth the effort.
 02-20-19, 02:41 PM
#2


Randomhead
Join Date: Aug 2008
Location: Happy Valley, Pennsylvania
Posts: 24,387
Mentioned: 0 Post(s)
Tagged: 0 Thread(s)
Quoted: 4 Post(s)
Liked 3,687 Times
in
2,510 Posts
you should be able to get the tube in there, probably without springing anything too much. I have had success thinning the tube with a dremel and then peeling it from the lug.
02-20-19, 08:03 PM
#3

Senior Member
Join Date: Feb 2012
Location: Rochester, NY
Posts: 18,056
Bikes: Stewart S&S coupled sport tourer, Stewart Sunday light, Stewart Commuting, Stewart Touring, Co Motion Tandem, Stewart 3-Spd, Stewart Track, Fuji Finest, Mongoose Tomac ATB, GT Bravado ATB, JCP Folder, Stewart 650B ATB
Mentioned: 0 Post(s)
Tagged: 0 Thread(s)
Quoted: 4195 Post(s)
Liked 3,837 Times
in
2,295 Posts

Yes. Unless there's something unusual going on the frame should have enough spring back to be able to insert a replacement DT without taking more apart. Which way you insert it, first into the head lug or first into the shell, I'll let you find out (I have no opinion, I'm not trying to be snarky).
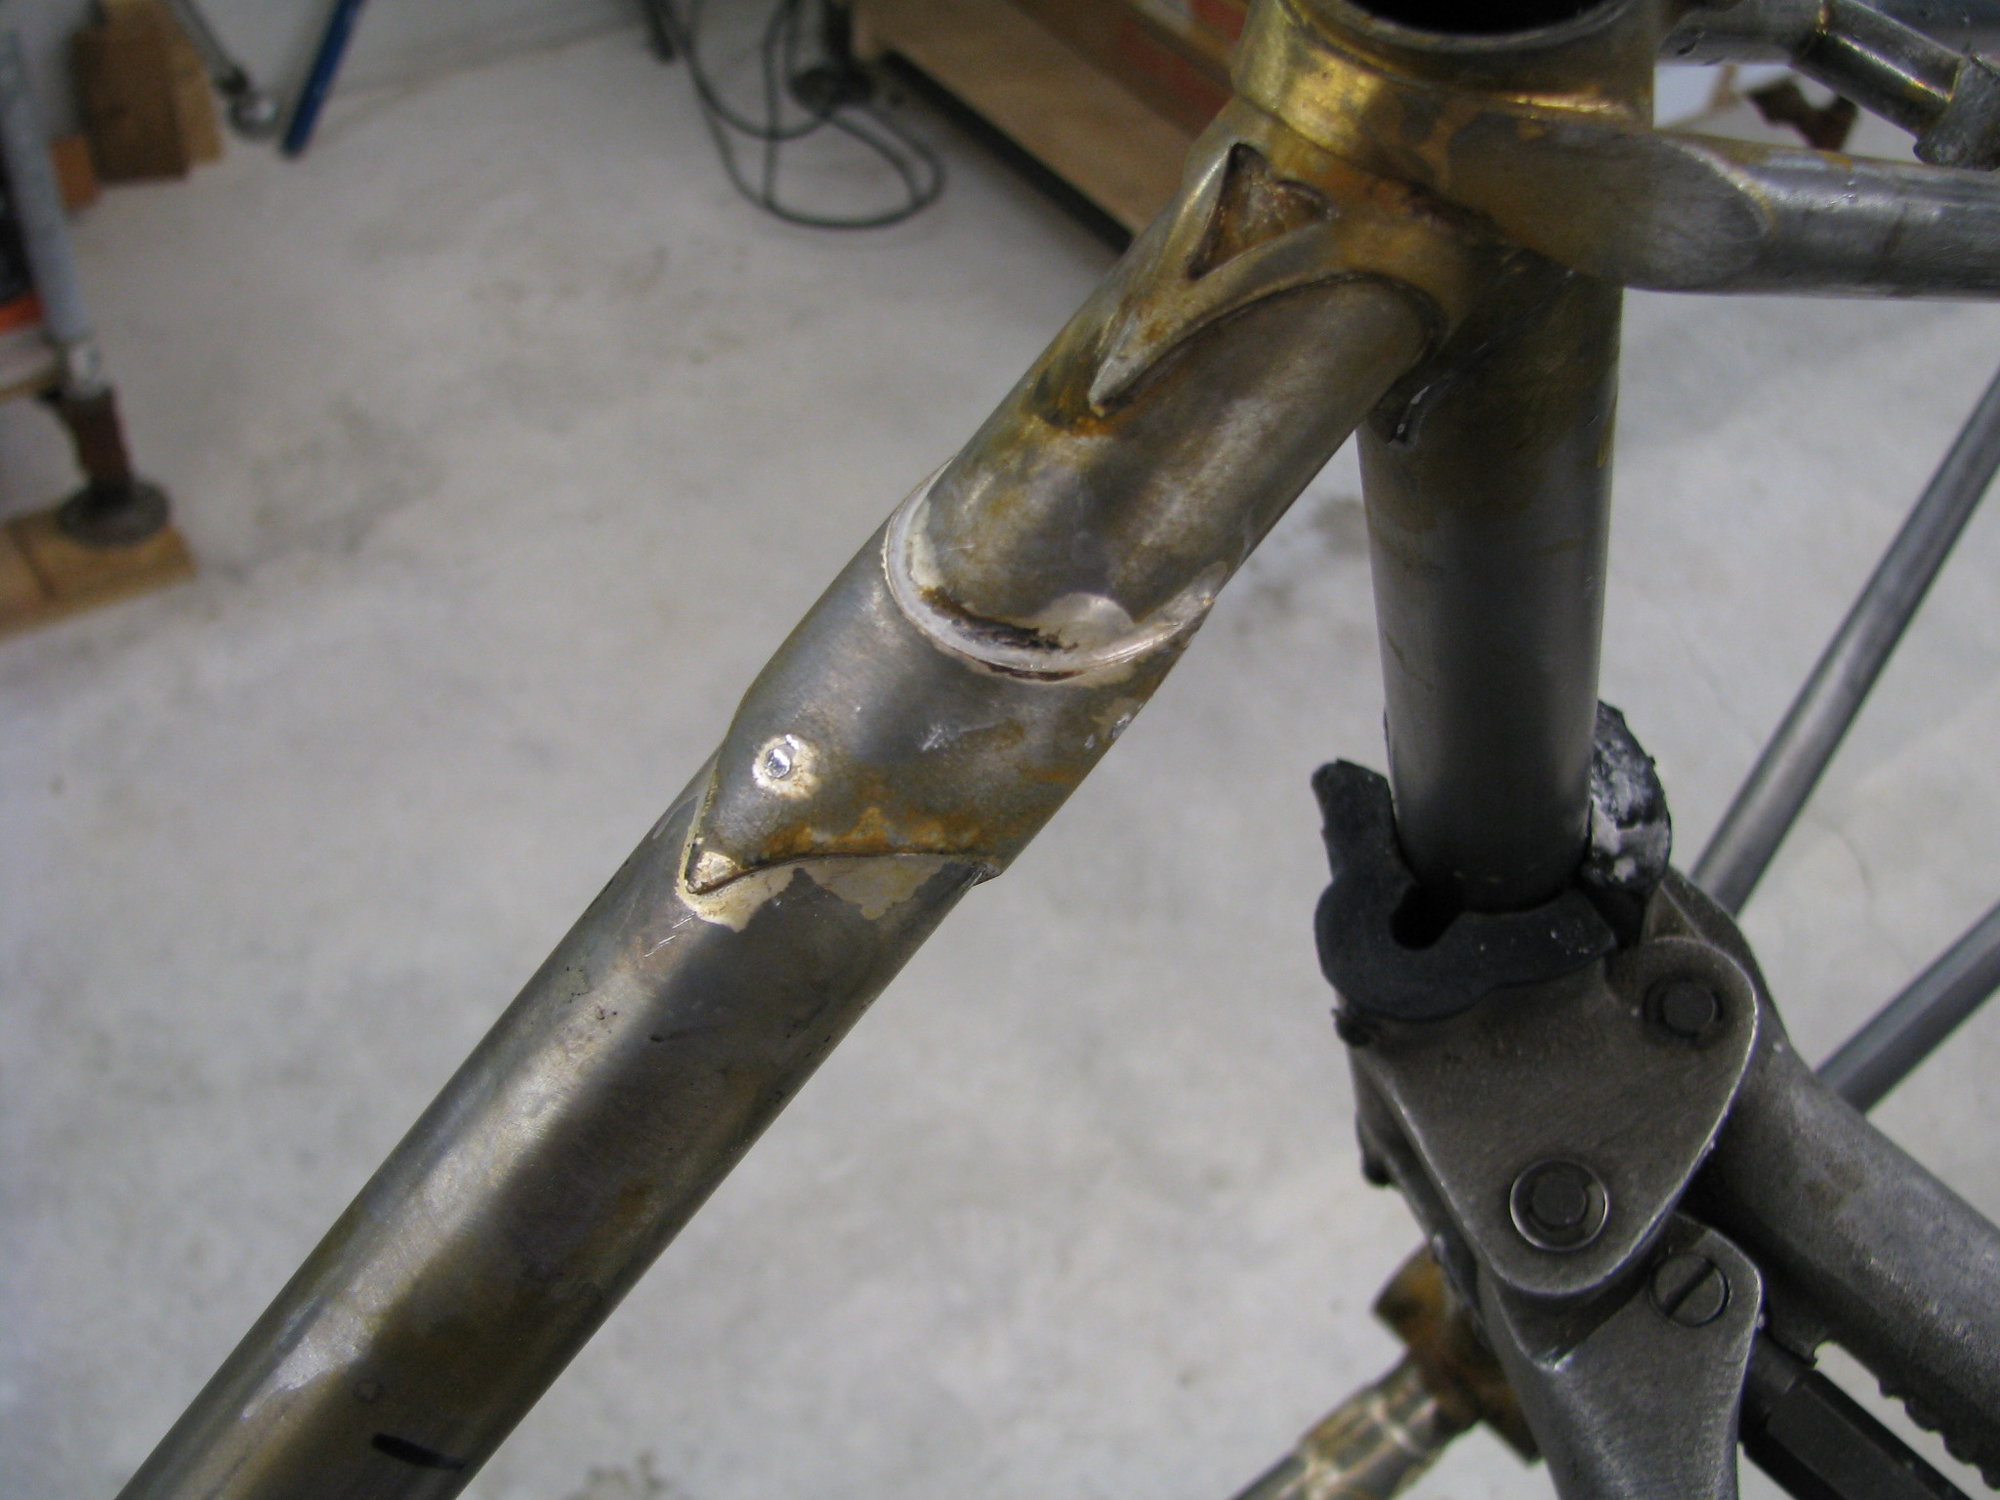
A couple of options- First is to replace the majority of the DT but leave the ends remaining in the lugs. Cutting the central section of the DT out and splicing in a new section using internal (or external, your choice) sleeves at the butt joints (butt as in tubes' ends touching, not as wall thickness changes). I did much of this on a front half of a main triangle replacement for a friend a few years ago.
The other is to remove the DT completely, grinding out the DT from the BB socket but then removing the lower HT lug (grinding or heat). Replace the DT and lower lug. This retains the HT's integrity as it is, no DT sized hole in it to enable grinding out the DT.
Here's a shot of the how I spliced a new front half of a main triangle. Andy
__________________
AndrewRStewart
AndrewRStewart
02-24-19, 06:32 PM
#4
Banned.
Thread Starter
Join Date: Jun 2004
Location: Torrance, CA
Posts: 3,061
Bikes: Homebuilt steel
Mentioned: 18 Post(s)
Tagged: 0 Thread(s)
Quoted: 2193 Post(s)
Liked 425 Times
in
337 Posts
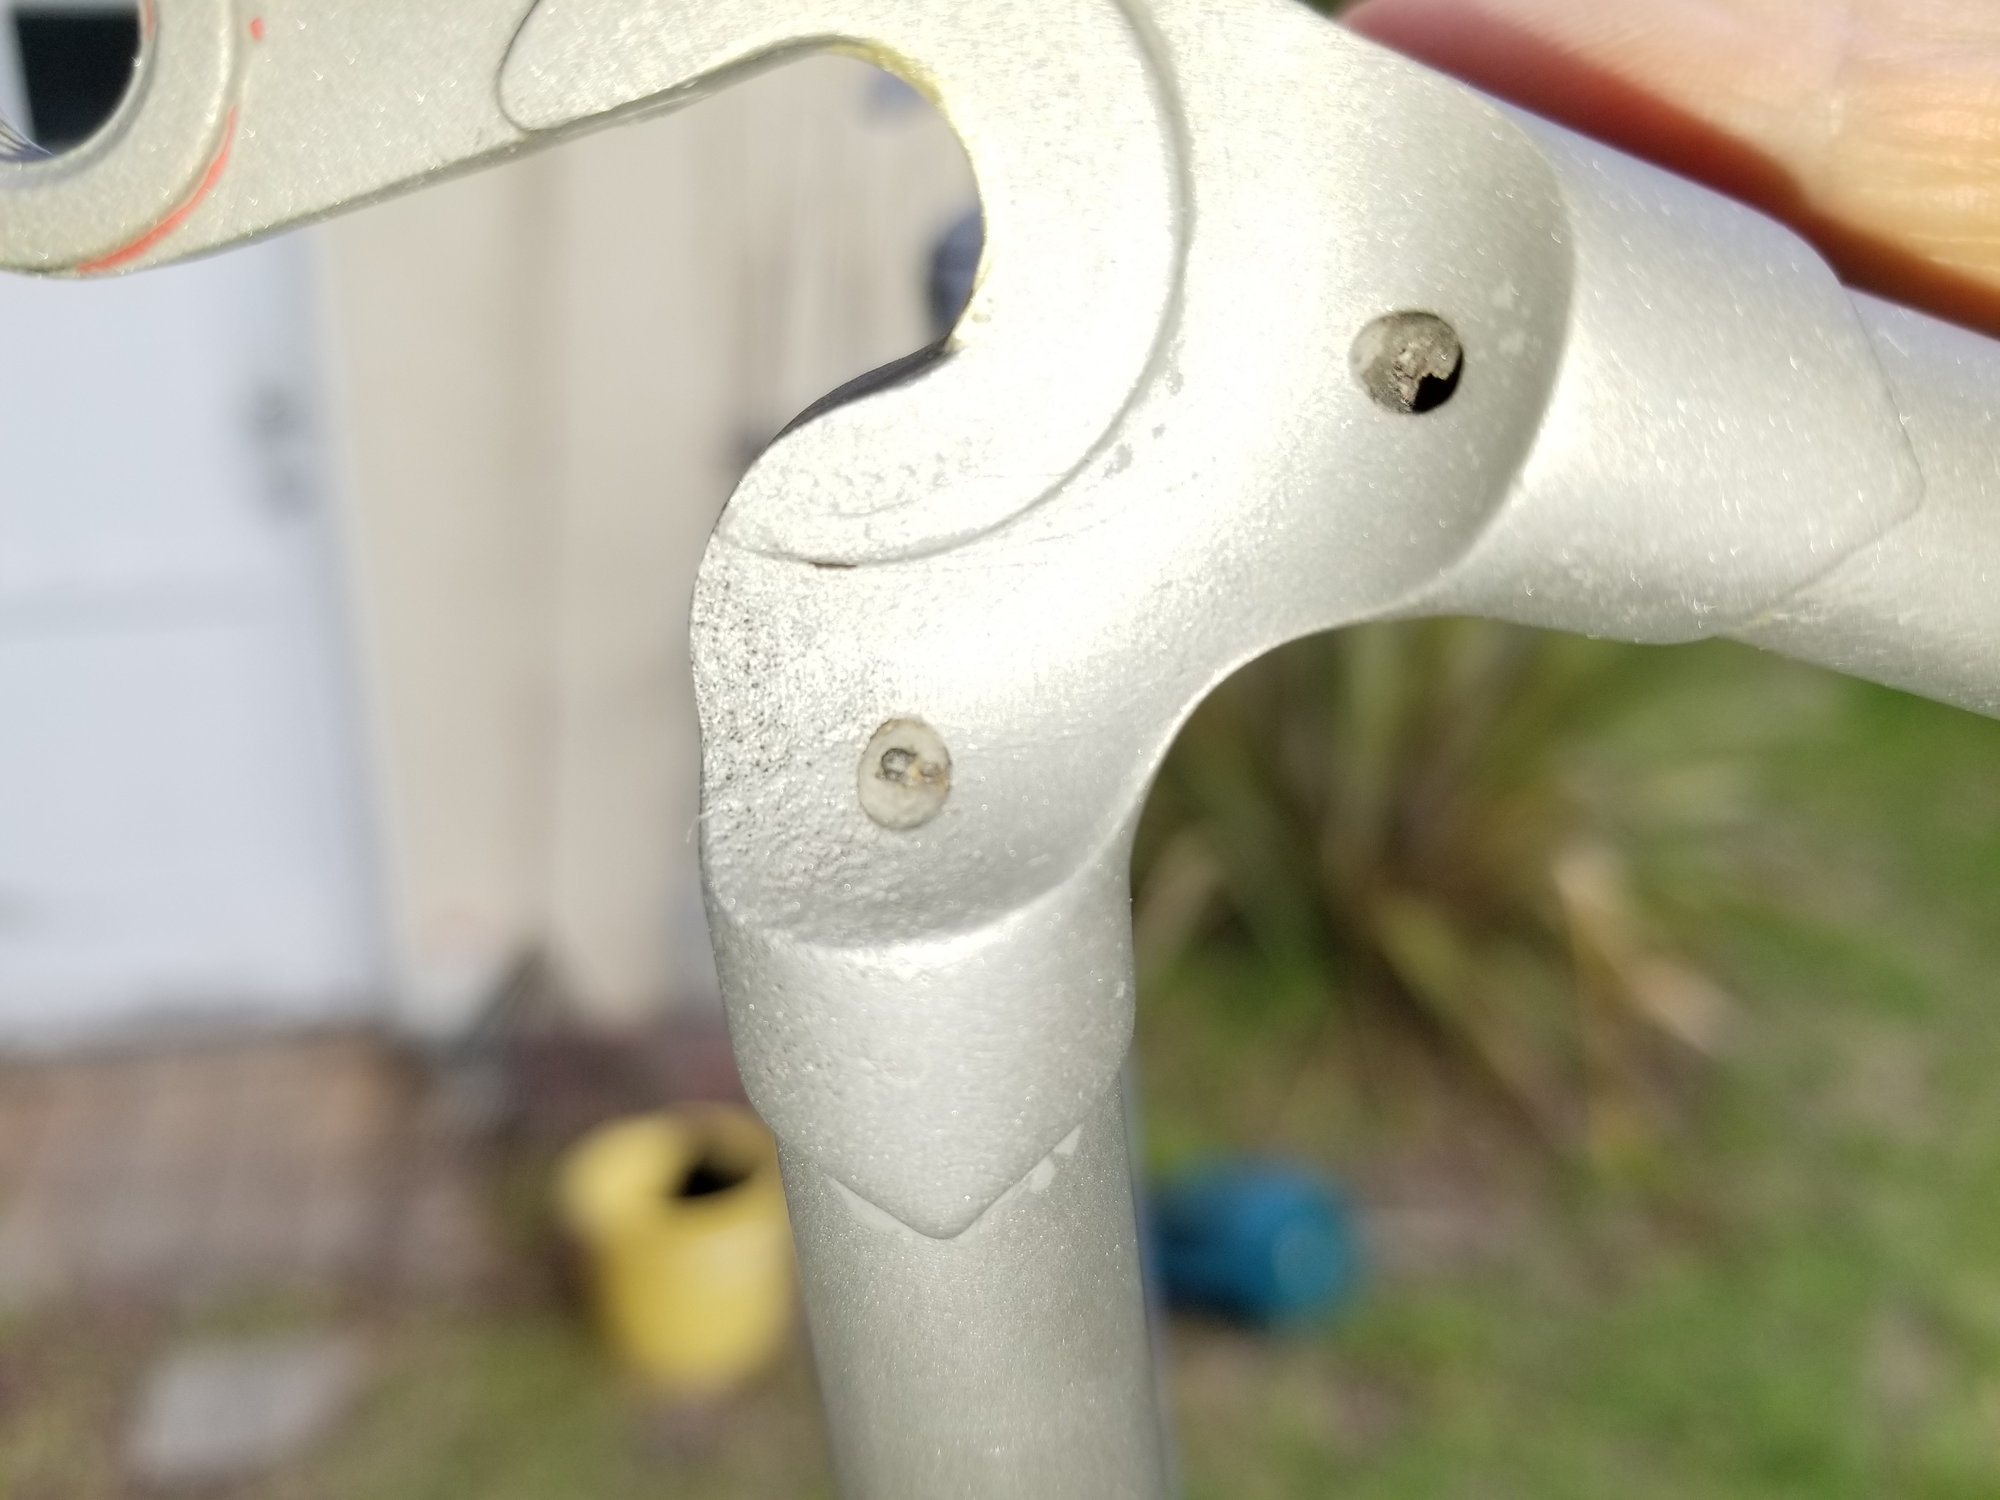
Any suggestions on how to save the down tube lug? This frame is about 13 years old and the lugs came from Ceeway. I don't see them on their website anymore although Nova has a set that may be the same. These are XL OS lugs w/36mm head tube.
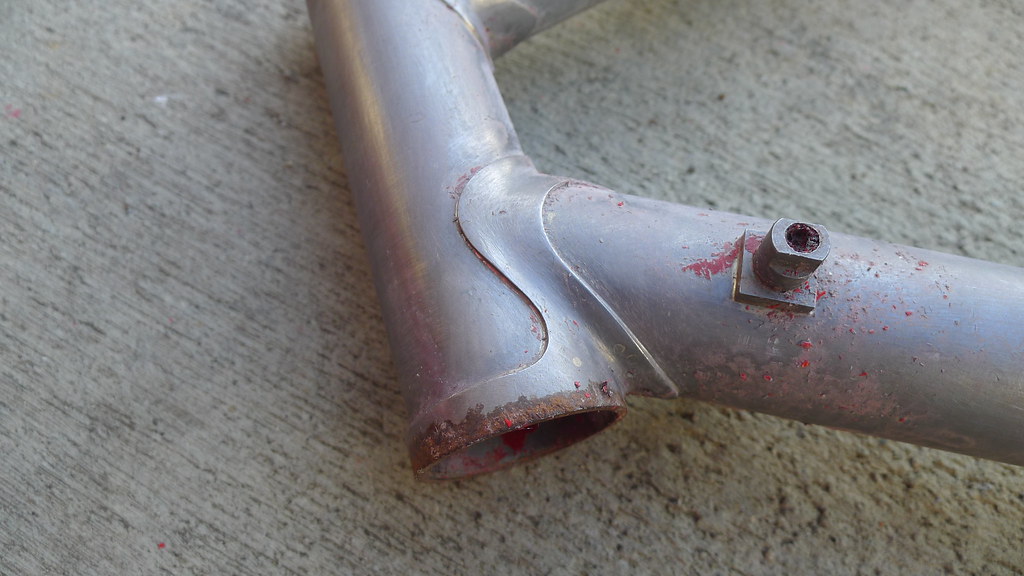
P1040248 by nessism, on Flickr

P1040242 by nessism, on Flickr
P1040248 by nessism, on Flickr
P1040242 by nessism, on Flickr
02-27-19, 06:19 PM
#5
Member
Join Date: Apr 2009
Posts: 34
Mentioned: 0 Post(s)
Tagged: 0 Thread(s)
Quoted: 5 Post(s)
Likes: 0
Liked 1 Time
in
1 Post
Regarding needing to "spring" the frame to get the new downtube in, you shouldn't need to. I've been able to insert the BB end first, but push it in all the way to the back of the shell. Then you can work it back out of the BB and straight into the socket of the HT/DT lug.
02-28-19, 09:36 AM
#6
Banned.
Thread Starter
Join Date: Jun 2004
Location: Torrance, CA
Posts: 3,061
Bikes: Homebuilt steel
Mentioned: 18 Post(s)
Tagged: 0 Thread(s)
Quoted: 2193 Post(s)
Liked 425 Times
in
337 Posts
After stripping the paint I was a little surprised by the amount of rust that was found. The frame was painted with high quality PPG automotive paint, including epoxy primer. Maybe the primer layer was a little too thin? Not sure but I'll keep this in mind for for future builds. I'll also make sure to NOT face the head tube and BB shell down to metal, since both of these areas had a fair bit of rust creap from the faced surfaces.
BTW, during my lug reclamation project I cut off the tube near the lug and then ground down the tube inside using a carbide burr in a dremel tool. I bought this dirt cheap set of burrs a while back and have been very impressed by their quality. Despite a good bit of grinding the burr kept it's edge very nicely. I'm going to order another set to stash away. Count these as dirt cheap tools that don't perform like dirt cheap tools. Anyway, I didn't grind the entire tube away, just thinned it down to just a shell. Then I was able to use some heat and easily peel the remainder out. Grinding out the entire tube is possible of course but it was hard to tell when to stop grinding. I didn't want to grind too deep and gouge out the lug.
Last edited by Nessism; 02-28-19 at 09:40 AM.
02-28-19, 10:13 AM
#7
Senior Member
Join Date: Feb 2012
Location: Rochester, NY
Posts: 18,056
Bikes: Stewart S&S coupled sport tourer, Stewart Sunday light, Stewart Commuting, Stewart Touring, Co Motion Tandem, Stewart 3-Spd, Stewart Track, Fuji Finest, Mongoose Tomac ATB, GT Bravado ATB, JCP Folder, Stewart 650B ATB
Mentioned: 0 Post(s)
Tagged: 0 Thread(s)
Quoted: 4195 Post(s)
Liked 3,837 Times
in
2,295 Posts
If you have the lug w/ tube in your hand, free of the rest of the frame, you stop grinding out the tube when a new one fits in. A bit less easy to judge if the rest of the frame is still attached but still doable. Some say you will see the brass layer that was between the tube and lug as the tube is removed bit by bit. Applying some Navel Jelly to enhance the contrast of the steel and brass might help.
As to the rust- I wonder if the bare frame got a phosphate etching wash just before the primer was done. Good advice to do this on the repaint either way. I question whether leaving paint on the HT and Bb faces will do much for rust prevention. The paint will usually get squished and "squeezed off" the face with the pressure of the cup contact. What I find more important is to make sure any paint squishing doesn't travel around the corner of the face and onto the body of the HT/BB shell. To prevent this I'll take a small and fine file and cut through the paint around the edge, holding the file at a 45* angle to both the face and the outside diameter. Then I'll file off the paint on the face. I'll add some grease to the face during part installs.
But rust is truly a cancer and very hard to totally prevent given moisture and salts. Andy
__________________
AndrewRStewart
AndrewRStewart
03-02-19, 06:45 PM
#8
Banned.
Thread Starter
Join Date: Jun 2004
Location: Torrance, CA
Posts: 3,061
Bikes: Homebuilt steel
Mentioned: 18 Post(s)
Tagged: 0 Thread(s)
Quoted: 2193 Post(s)
Liked 425 Times
in
337 Posts
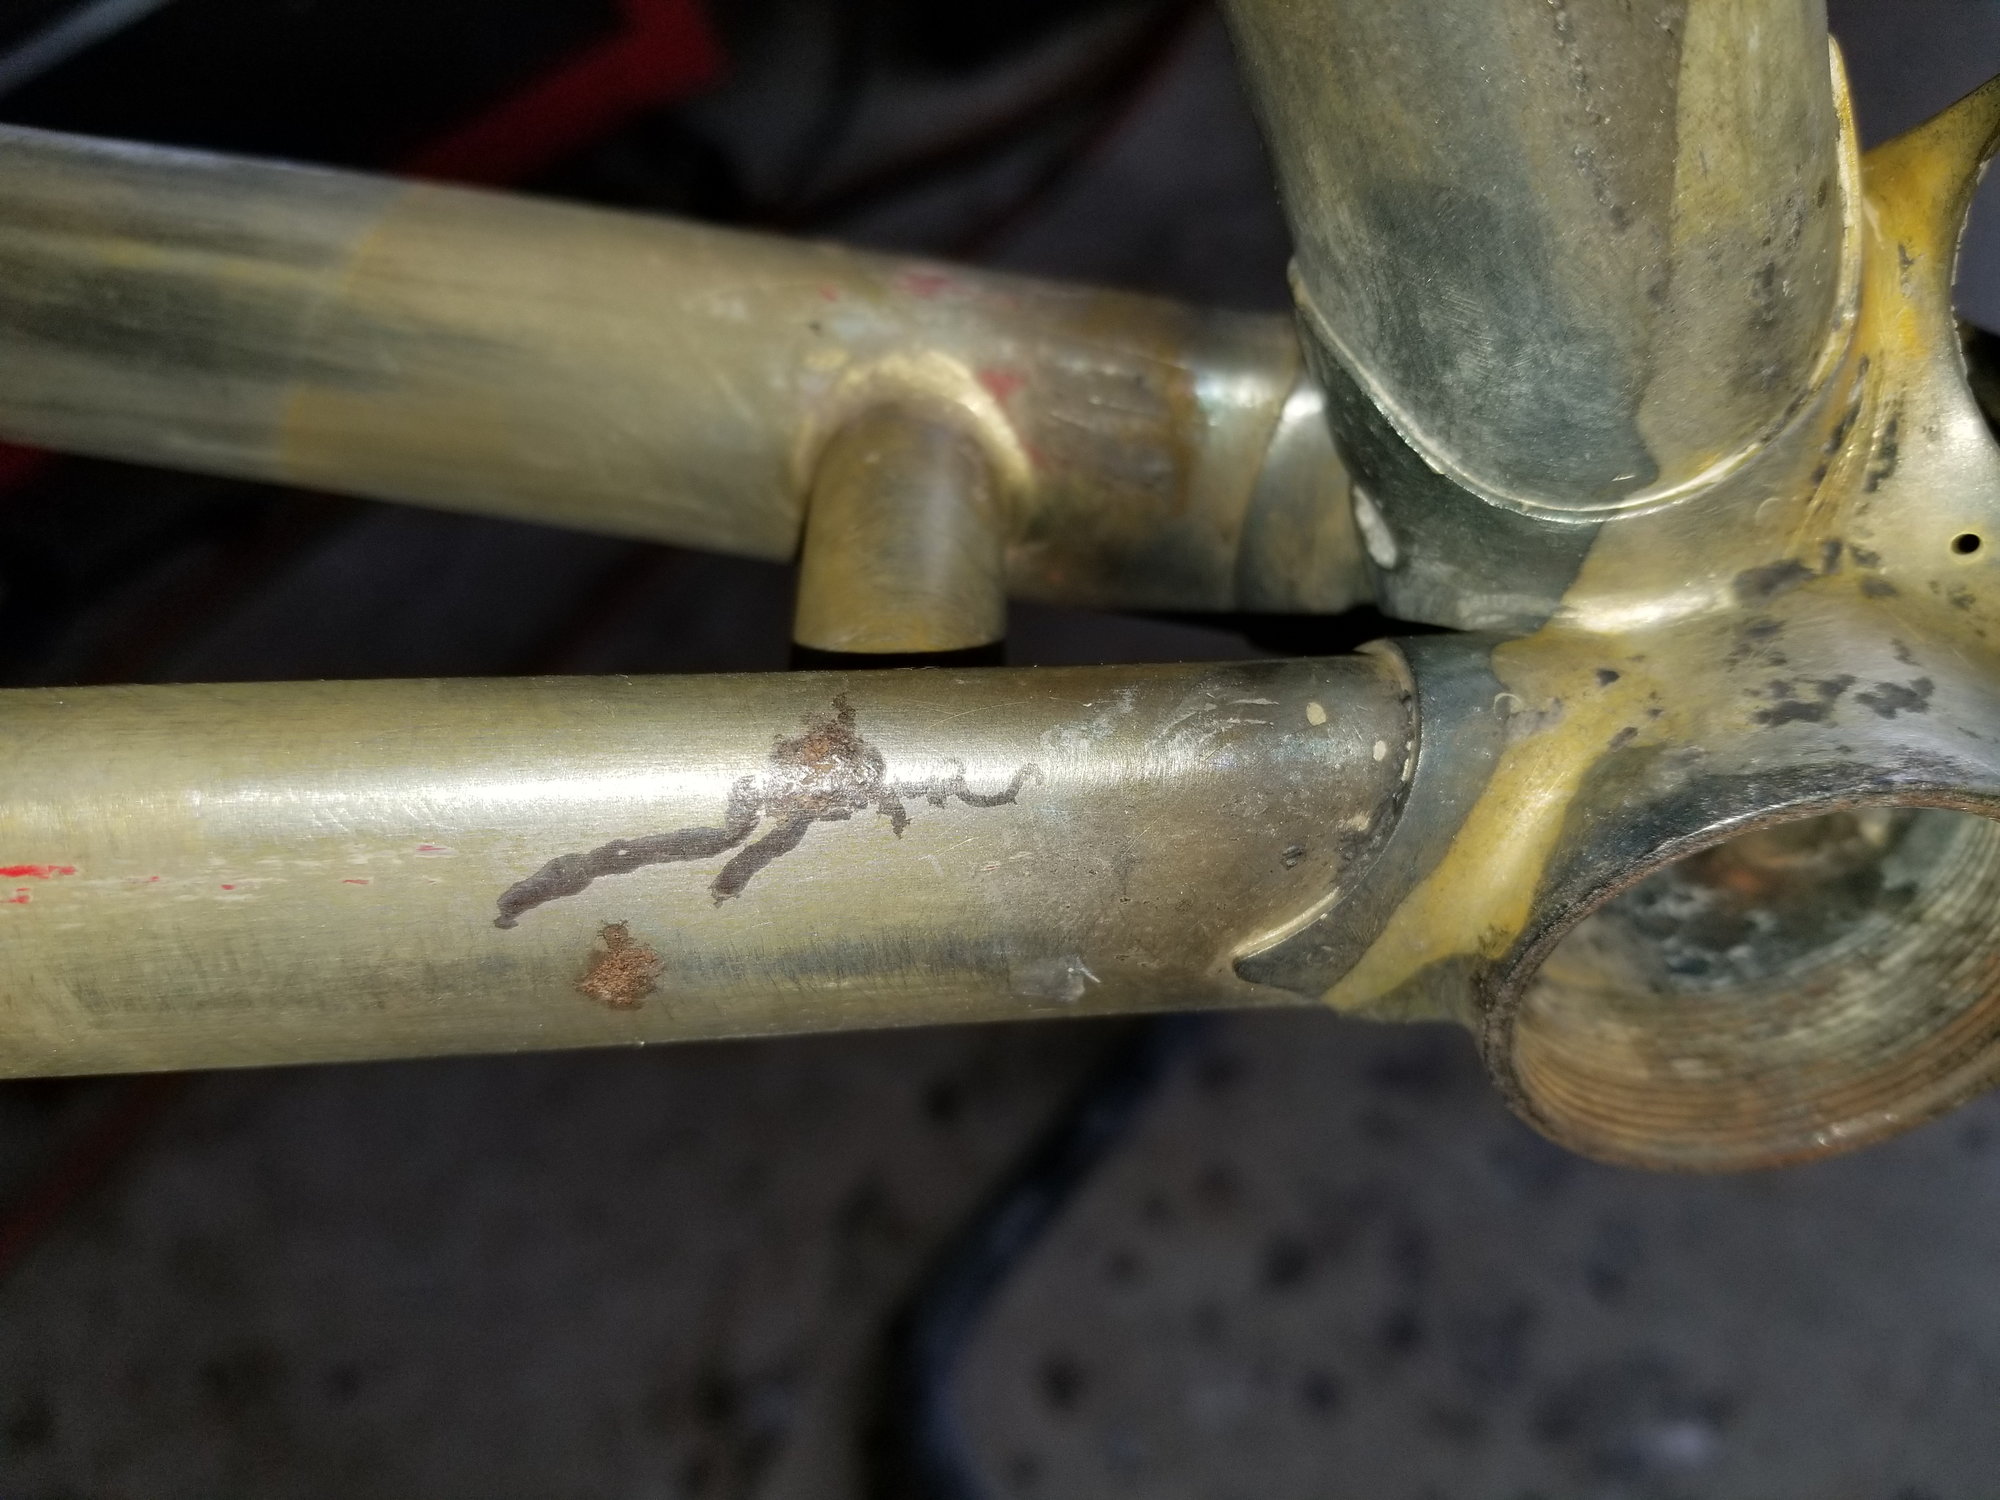
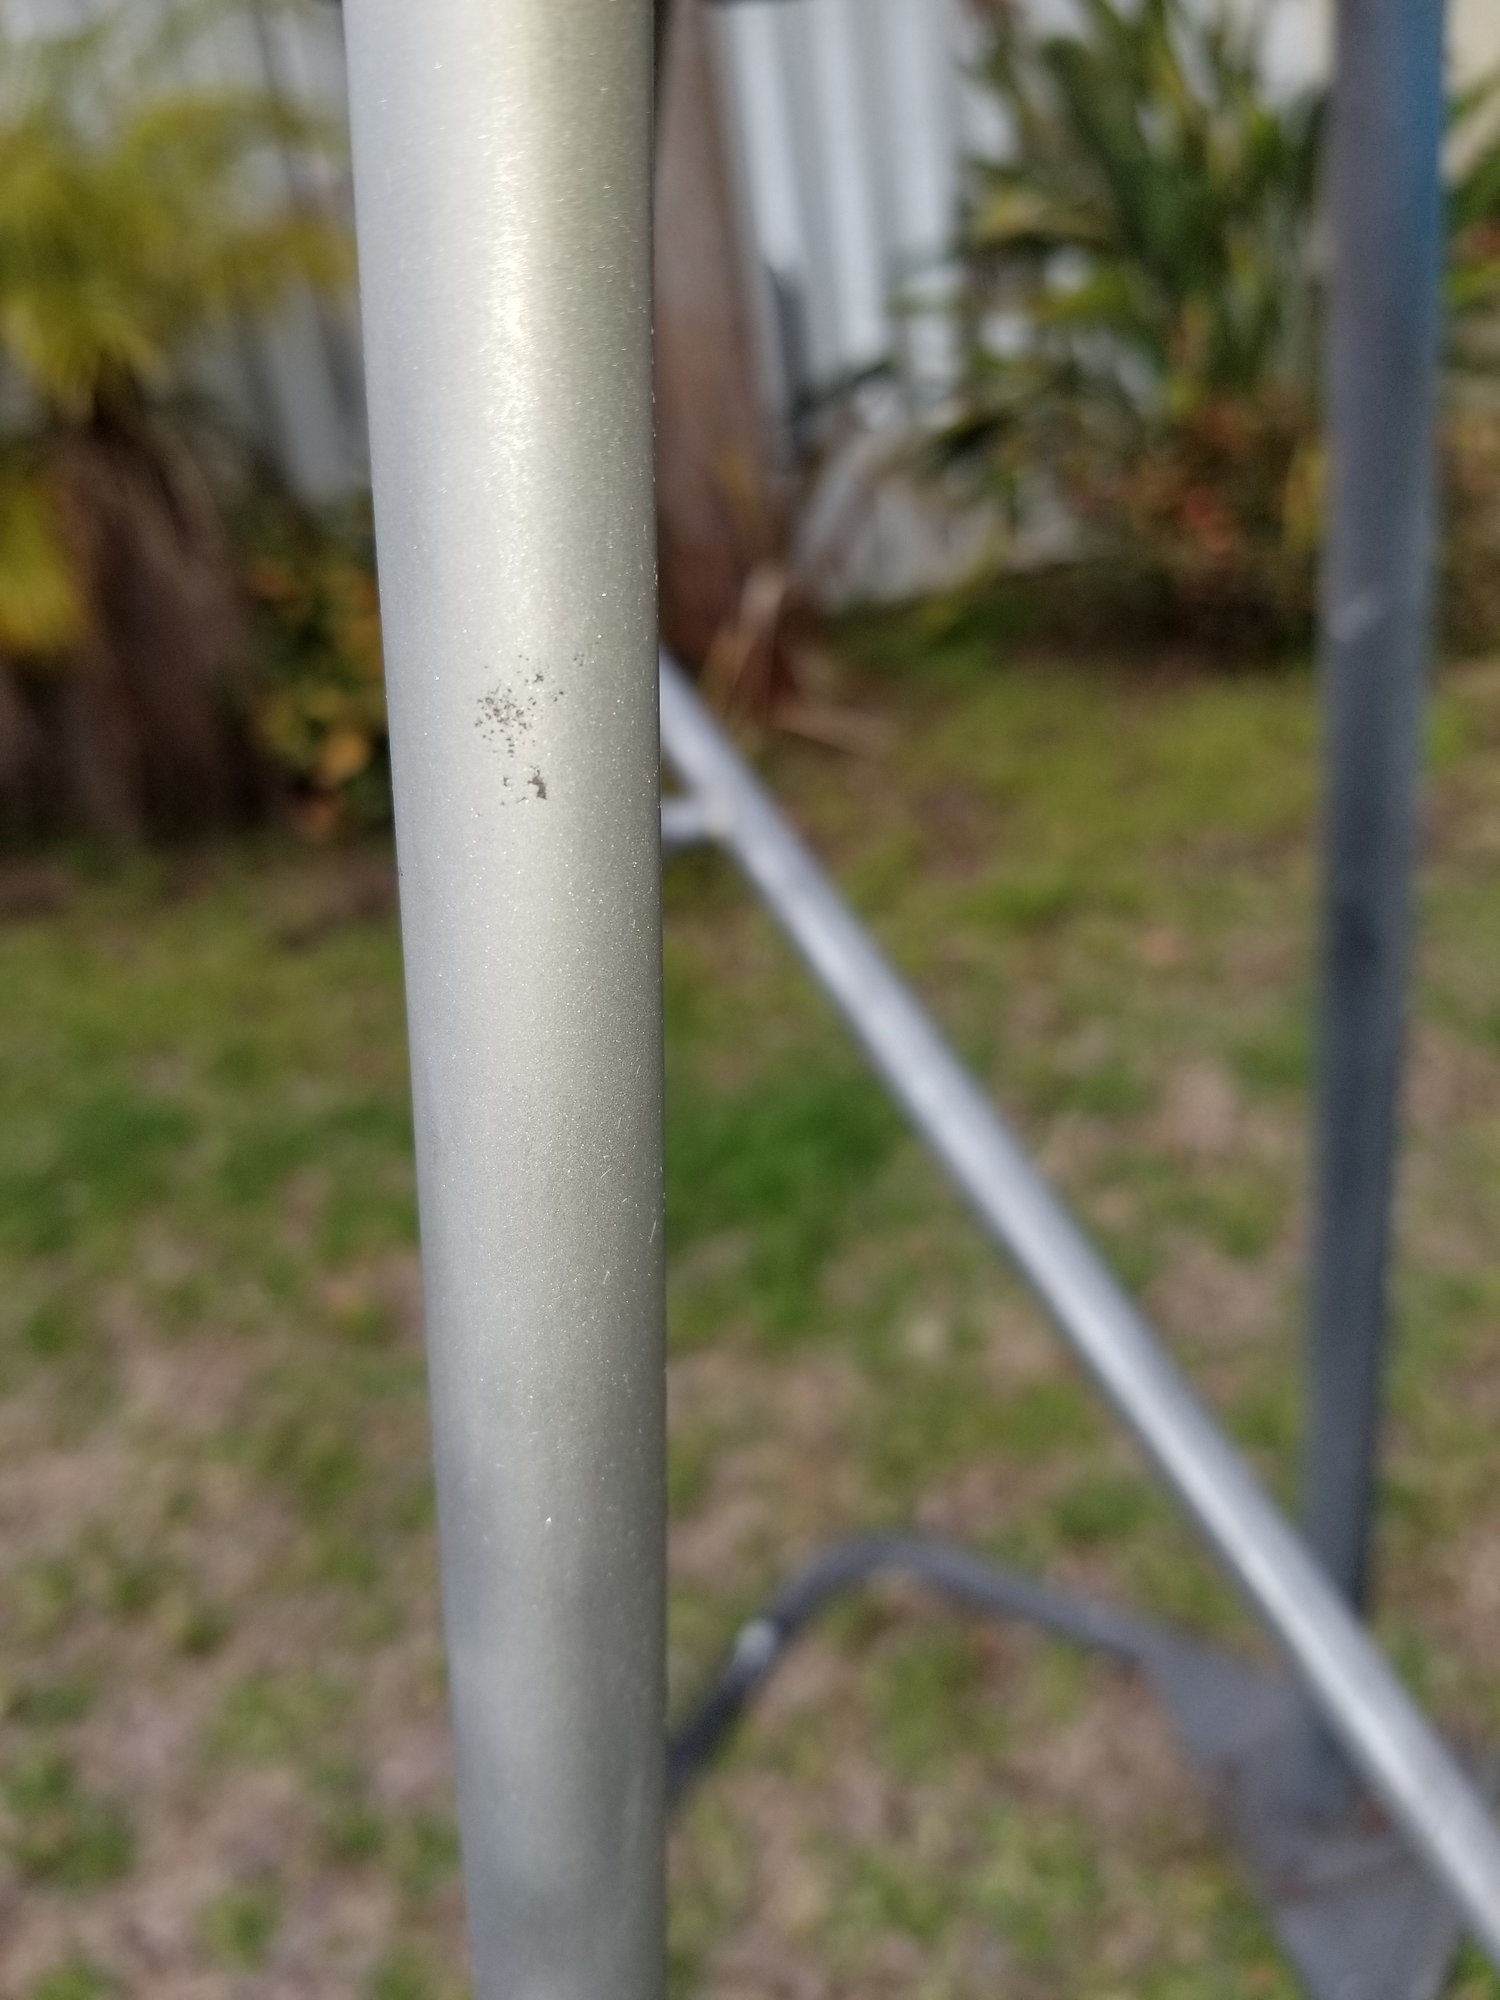
An example of the spider rust. I'm going to be sure to use three coats of epoxy primer next time. I typically sandblast before painting instead of phosphate washing. I could do both if it will help. It just seems that there is always a little flash rusting after the water rinse which is annoying.
03-11-19, 01:48 PM
#9
Banned.
Thread Starter
Join Date: Jun 2004
Location: Torrance, CA
Posts: 3,061
Bikes: Homebuilt steel
Mentioned: 18 Post(s)
Tagged: 0 Thread(s)
Quoted: 2193 Post(s)
Liked 425 Times
in
337 Posts
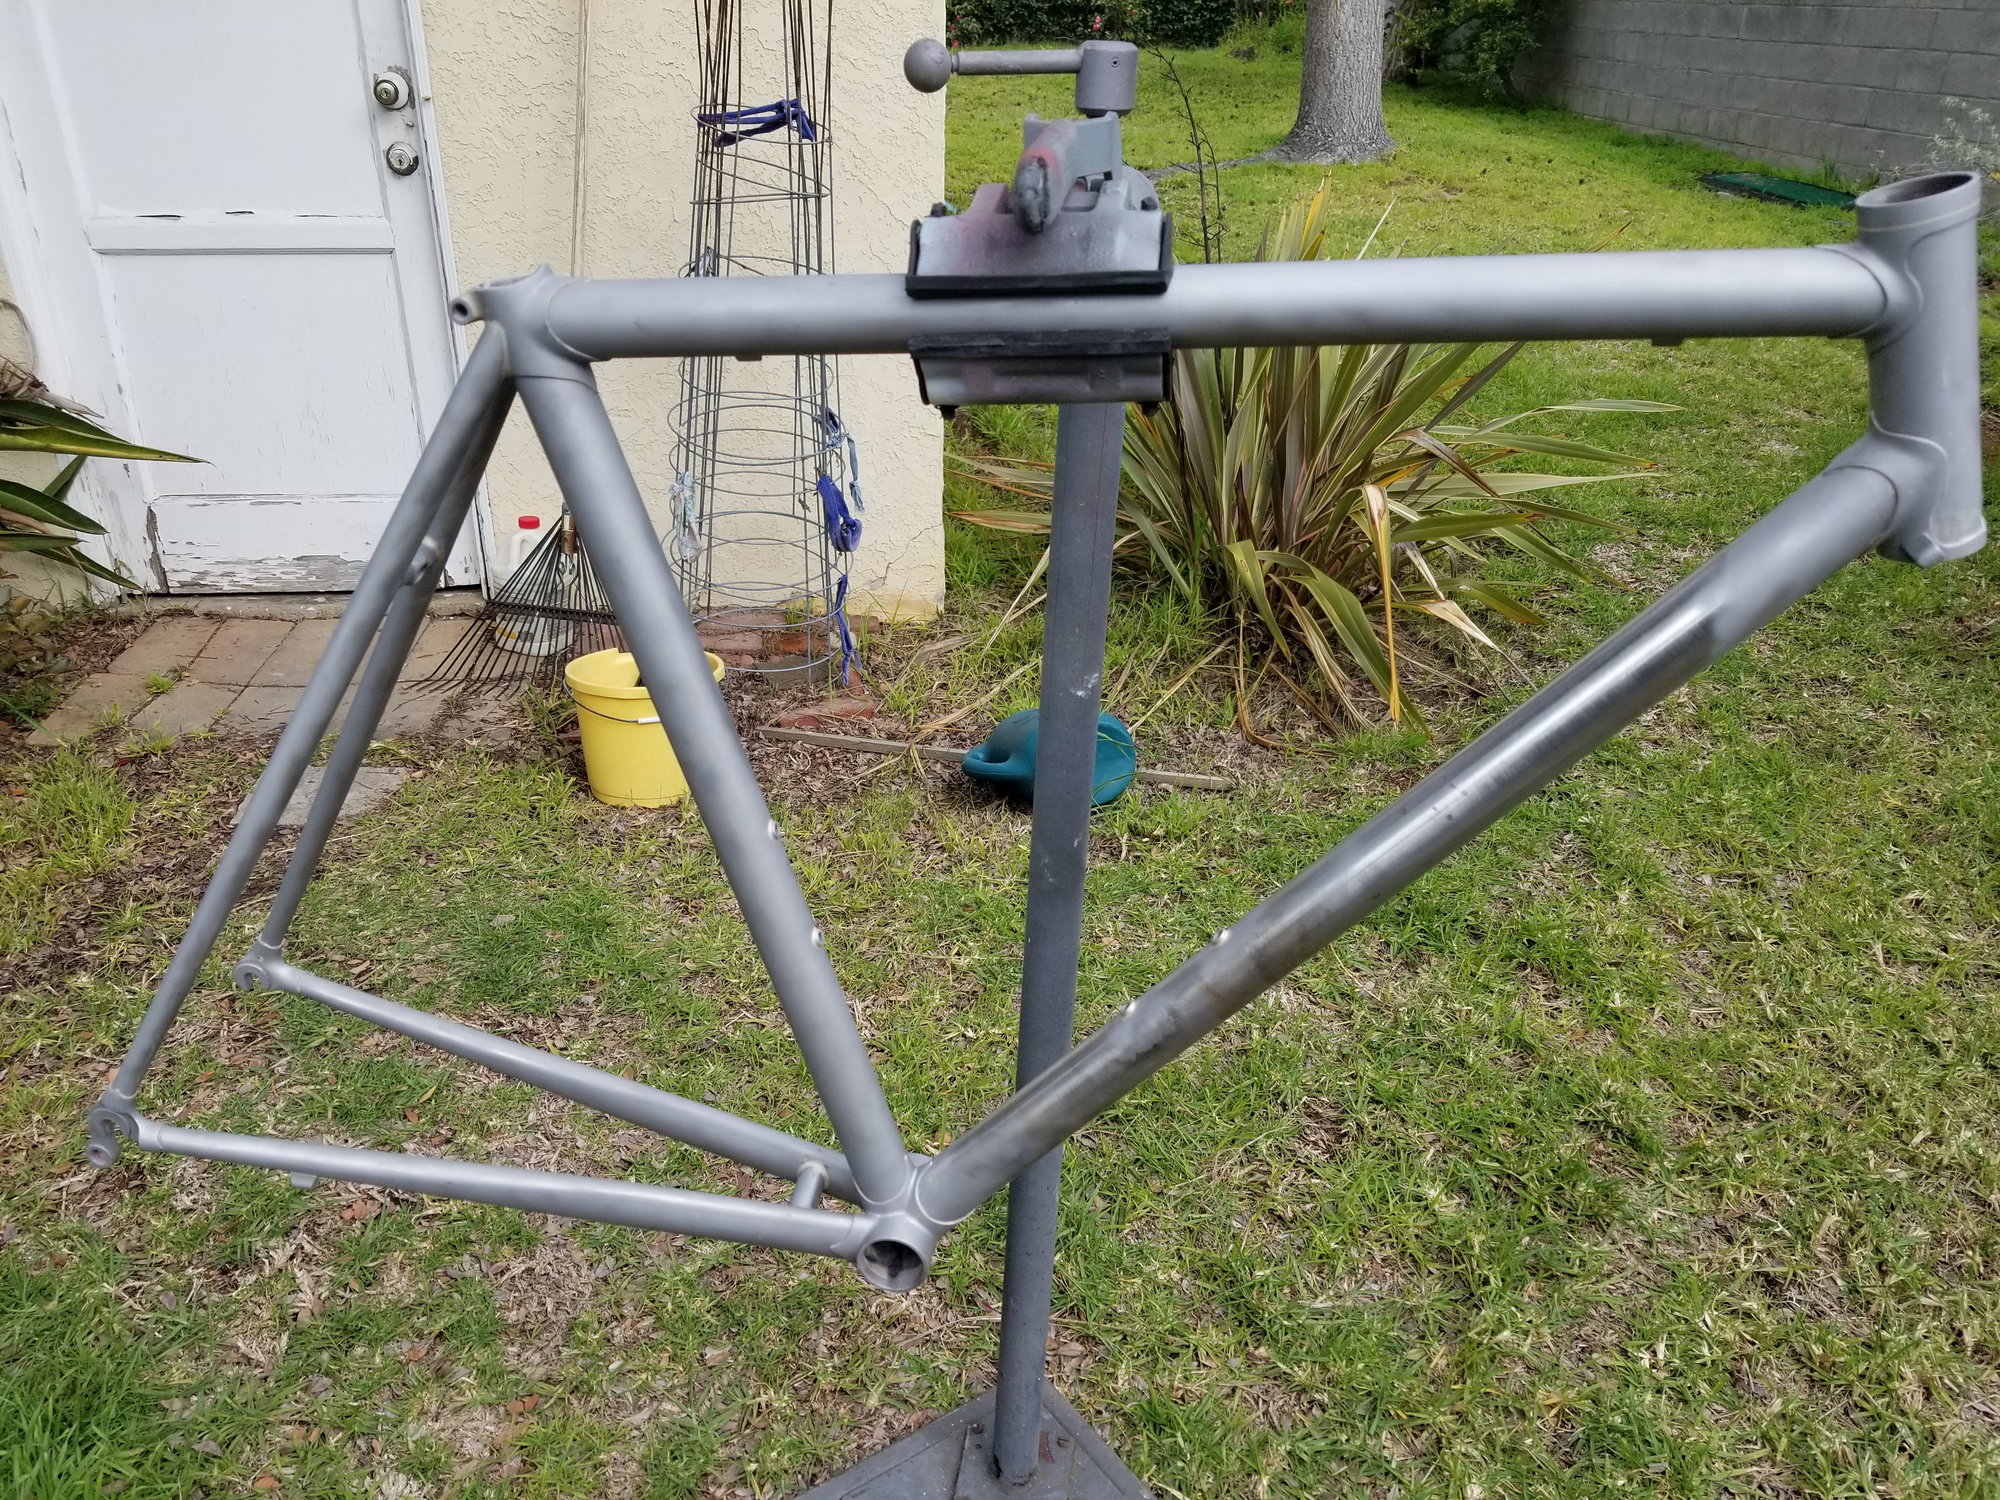
Got the new tube installed. Worked out nicely.
After cutting off the down tube the frame moved out of alignment due to residue stress. I was a little surprised by how far it moved because the frame rode fine. Anyway, I tweaked it into alignment before working on the down tube replacement.
I had to clearance the BB socket with a little extra clearance in order to get the tube inside the shell because it was entering at a slight angle since the tube was contacting the head tube on the other end. To get the down tube lug around the head I had to spring the frame a little but not to too much. Before pinning I was careful to assure nothing was binding, and then is was a simple matter of brazing everything up (the fun part).
Next I'll work on paint prep and get all the rust removed. There are some pitts so I'll soak in phosphate to remove the rust before priming. I'm wondering if some localized Por-15 paint to seal off the pits would be a good idea? Haven't decided on that part yet.
Last edited by Nessism; 03-11-19 at 05:49 PM.
03-11-19, 05:45 PM
#10
Banned.
Thread Starter
Join Date: Jun 2004
Location: Torrance, CA
Posts: 3,061
Bikes: Homebuilt steel
Mentioned: 18 Post(s)
Tagged: 0 Thread(s)
Quoted: 2193 Post(s)
Liked 425 Times
in
337 Posts
Updated the photos above after blasting and added these showing the rust pits. Need to neutralize this rust before painting...

Last edited by Nessism; 03-11-19 at 05:51 PM.
03-31-19, 05:22 PM
#11
Banned.
Thread Starter
Join Date: Jun 2004
Location: Torrance, CA
Posts: 3,061
Bikes: Homebuilt steel
Mentioned: 18 Post(s)
Tagged: 0 Thread(s)
Quoted: 2193 Post(s)
Liked 425 Times
in
337 Posts
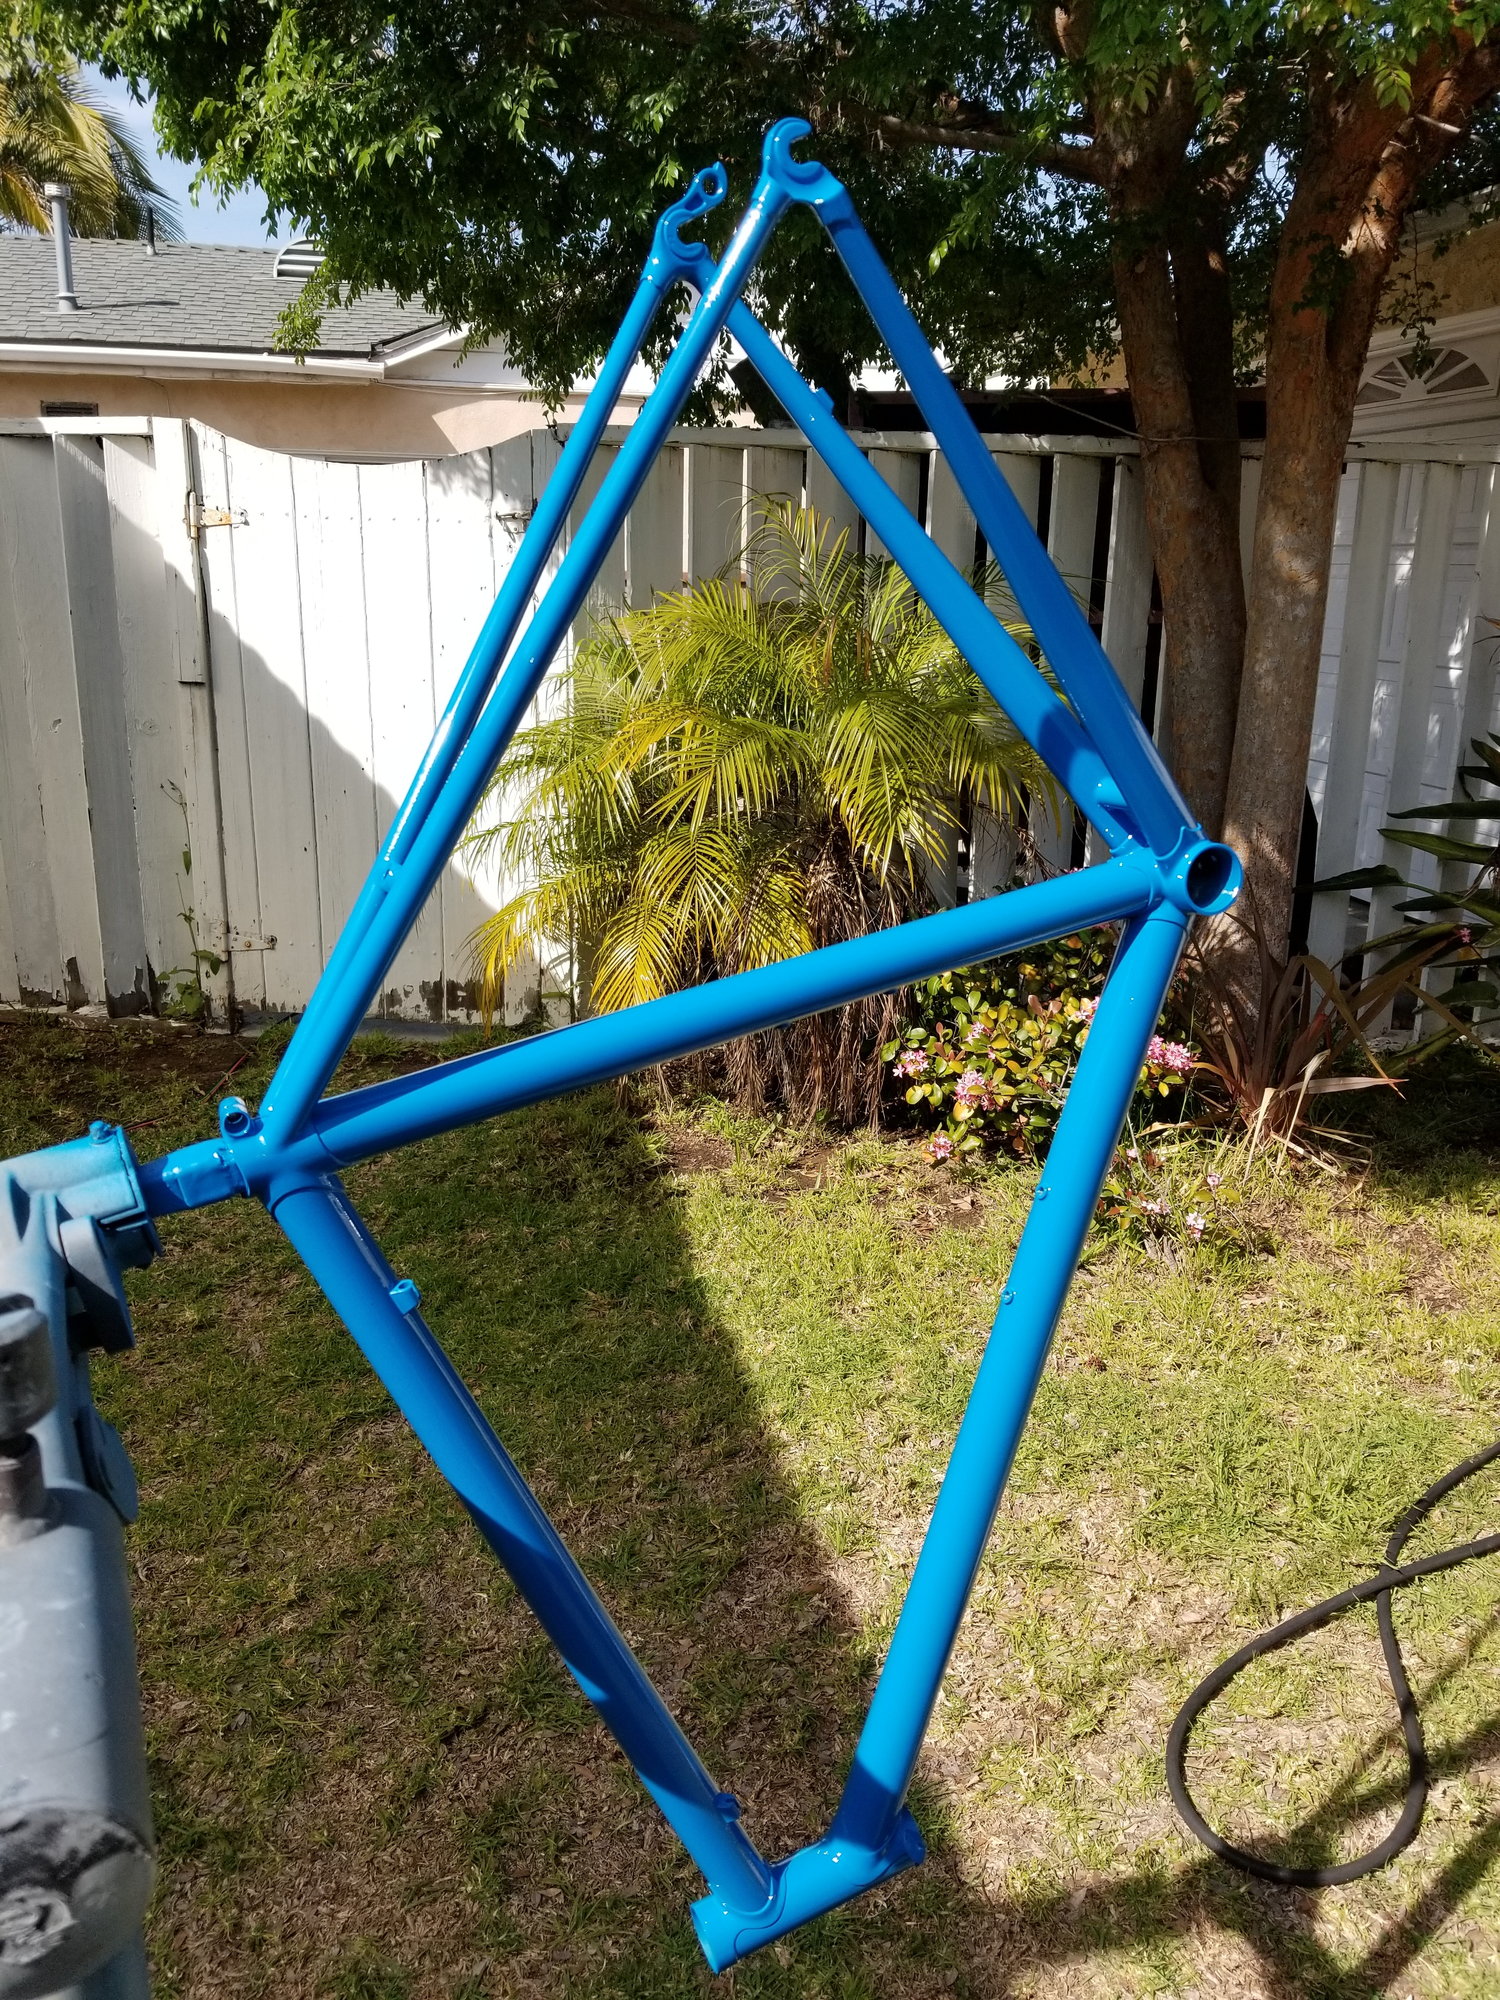
Soaked the frame in phosphoric acid to remove rust down into some of the corrosion pits, applied three coats of epoxy primer, base coat, and then some urethane clear. A bit of a thrash getting the paint on but the frame was starting to rust in the garage and I didn't want that. I've got time now so I'll color sand, add graphics, and then seal everything with some more clear. Color is from some leftover paint from a motorcycle I restored.

Last edited by Nessism; 04-01-19 at 06:18 AM.
04-02-19, 05:26 PM
#12
Senior Member
Very nice resto on the GS100S. Great, durable as heck motor cycle. My friend, Neil, had one. When riding he would burn the rear tire off at stop lights. Dumped it so many times that he stopped fixing the plastic and just let everything hang out. Crashed it at high speed once and wore the crank cover down so that one was able to see inside. That thing just kept on running like a ***** ape. Really good bikes.
Nice color, too.
Nice color, too.
04-02-19, 05:38 PM
#13
Randomhead
Join Date: Aug 2008
Location: Happy Valley, Pennsylvania
Posts: 24,387
Mentioned: 0 Post(s)
Tagged: 0 Thread(s)
Quoted: 4 Post(s)
Liked 3,687 Times
in
2,510 Posts
I take it you're painting outside?
04-02-19, 05:46 PM
#14
Banned.
Thread Starter
Join Date: Jun 2004
Location: Torrance, CA
Posts: 3,061
Bikes: Homebuilt steel
Mentioned: 18 Post(s)
Tagged: 0 Thread(s)
Quoted: 2193 Post(s)
Liked 425 Times
in
337 Posts
Very nice resto on the GS100S. Great, durable as heck motor cycle. My friend, Neil, had one. When riding he would burn the rear tire off at stop lights. Dumped it so many times that he stopped fixing the plastic and just let everything hang out. Crashed it at high speed once and wore the crank cover down so that one was able to see inside. That thing just kept on running like a ***** ape. Really good bikes.
Nice color, too.
Nice color, too.
04-02-19, 05:49 PM
#15
Banned.
Thread Starter
Join Date: Jun 2004
Location: Torrance, CA
Posts: 3,061
Bikes: Homebuilt steel
Mentioned: 18 Post(s)
Tagged: 0 Thread(s)
Quoted: 2193 Post(s)
Liked 425 Times
in
337 Posts
Yes. One advantage of living in So. Calif. Minimal bugs and low humidity. It was nice and warm when I painted. There is something about the smell of paint that attracts flying insects though. There were two small nats that just wouldn't go away. I was afraid one would land in the clear like happened last time I painted.

