


Question about removal of SRAM Cranks from GXP BB
 03-15-24, 01:57 PM
#1
Senior Member
Thread Starter
Join Date: Mar 2013
Location: Southern Ontario, Canada
Posts: 873
Bikes: Too, too many....
Mentioned: 5 Post(s)
Tagged: 0 Thread(s)
Quoted: 125 Post(s)
Likes: 0
Liked 130 Times
in
57 Posts
Question about removal of SRAM Cranks from GXP BB
Yeah. Before I reef on anything I figured I should ask. I have an older VISP that came with an SRAM OMNIUM crank and SRAM GXP bottom bracket.
At this point, i'd like to flush and repack the bearings with fresh grease.
My question is, how do I REMOVE the non-drive side crank arm ?
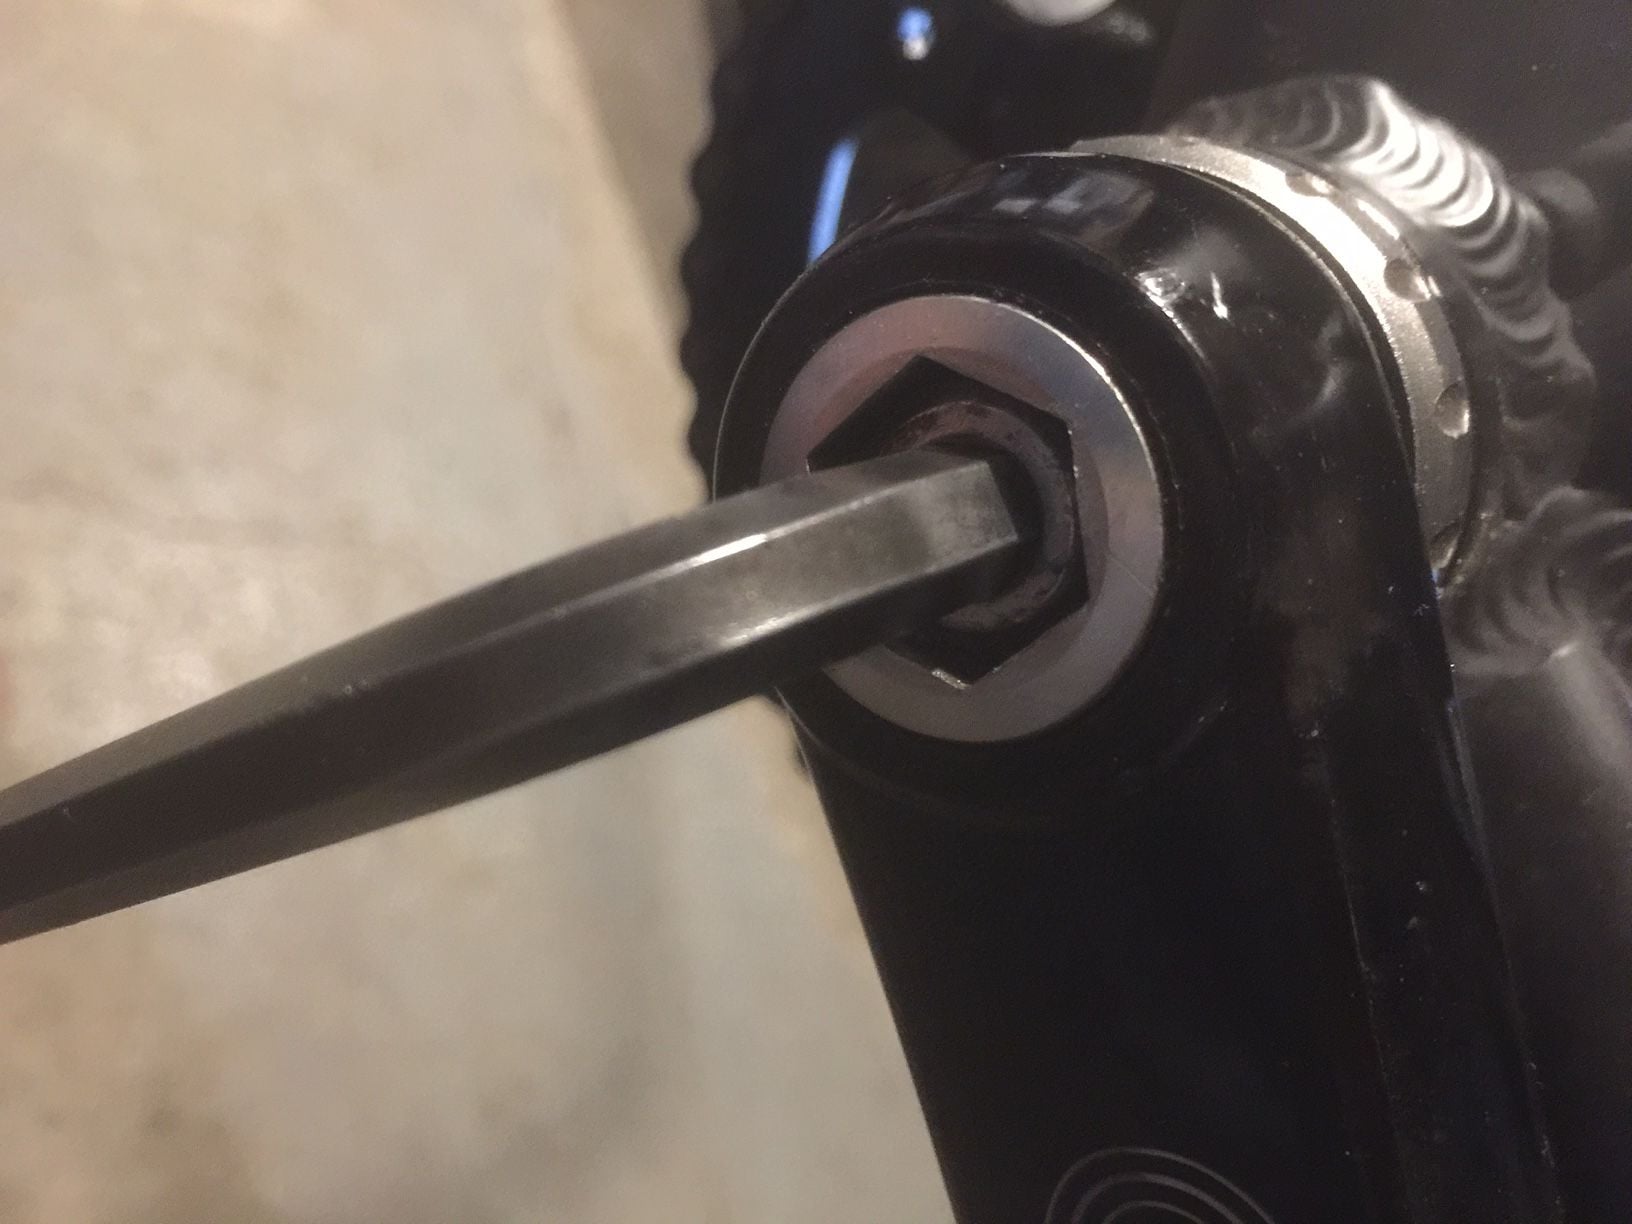
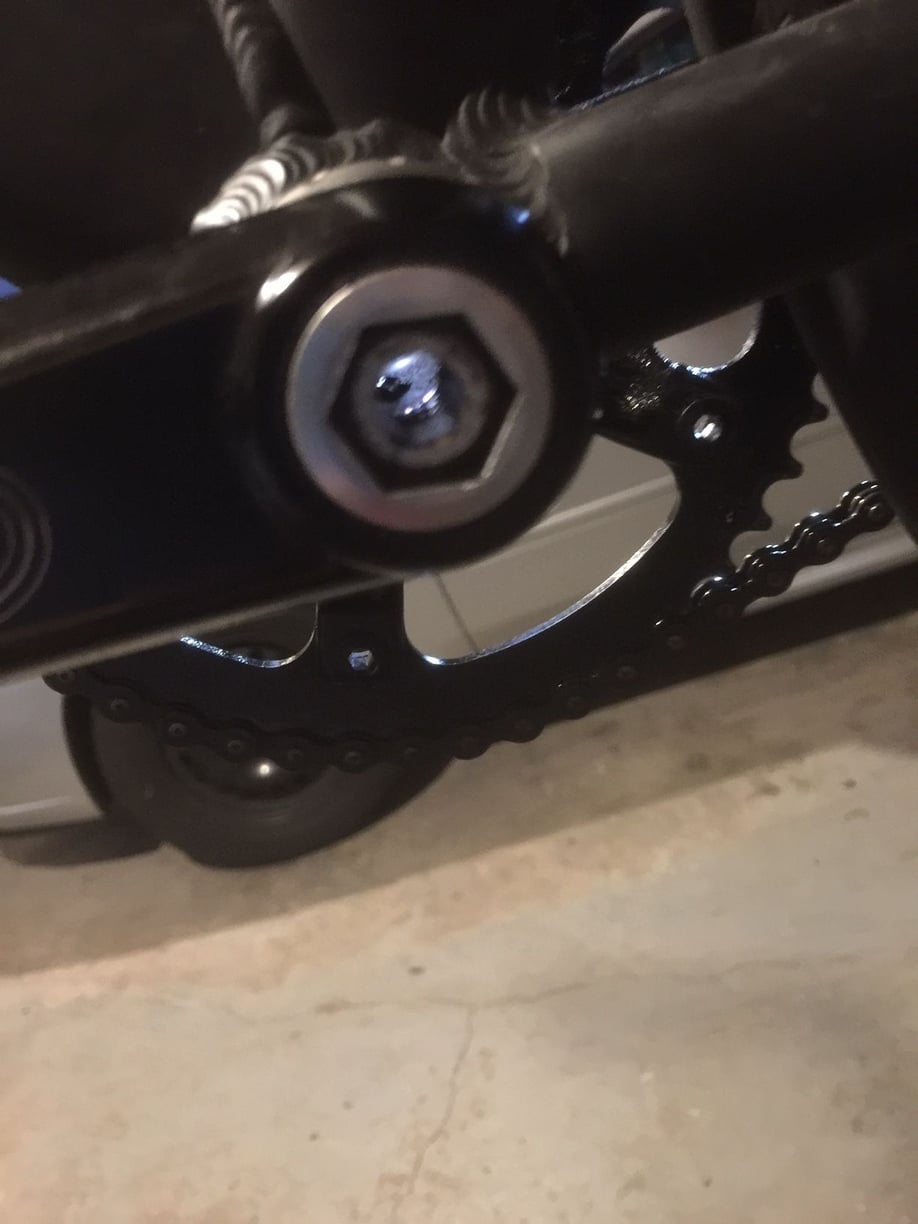
There is an 8mm hex Allen bolt in the end of the hollow crank shaft that loosens about 1.5 threads and then stops.
I have not applied a lot of pressure to undoing it. Is it a jacking bolt ? What is the function of the big chromed insert with the 16mm hex hole ?
Any help would be appreciated.
Binky
At this point, i'd like to flush and repack the bearings with fresh grease.
My question is, how do I REMOVE the non-drive side crank arm ?
There is an 8mm hex Allen bolt in the end of the hollow crank shaft that loosens about 1.5 threads and then stops.
I have not applied a lot of pressure to undoing it. Is it a jacking bolt ? What is the function of the big chromed insert with the 16mm hex hole ?
Any help would be appreciated.
Binky
 03-15-24, 02:39 PM
#2
Senior Member
Thread Starter
Join Date: Mar 2013
Location: Southern Ontario, Canada
Posts: 873
Bikes: Too, too many....
Mentioned: 5 Post(s)
Tagged: 0 Thread(s)
Quoted: 125 Post(s)
Likes: 0
Liked 130 Times
in
57 Posts
Never mind. No problem.
I found a little video (
) that showed me everything I needed to jack the crank arms off and the disassembly, bearing cleaning, lube and re-assembly went perfectly.
Nice bit of machinery.
Binky
I found a little video (
Nice bit of machinery.
Binky
Likes For Binky:
03-15-24, 05:16 PM
#3
Clark W. Griswold
Join Date: Mar 2014
Location: ,location, location
Posts: 13,547
Bikes: Foundry Chilkoot Ti W/Ultegra Di2, Salsa Timberjack Ti, Cinelli Mash Work RandoCross Fun Time Machine, 1x9 XT Parts Hybrid, Co-Motion Cascadia, Specialized Langster, Phil Wood Apple VeloXS Frame (w/DA 7400), R+M Supercharger2 Rohloff, Habanero Ti 26
Mentioned: 54 Post(s)
Tagged: 0 Thread(s)
Quoted: 4361 Post(s)
Liked 4,002 Times
in
2,671 Posts
A useless note to anyone do not use the ball end of a hex wrench to break loose or full tighten. It is fine for in the middle when you are already loose or starting to tighten but you don't want to strip anything.
Likes For veganbikes:
03-16-24, 02:13 AM
#4
Senior Member
Never mind. No problem.
I found a little video (https://www.youtube.com/watch?v=U6gSLoe5BWc) that showed me everything I needed to jack the crank arms off and the disassembly, bearing cleaning, lube and re-assembly went perfectly.
Nice bit of machinery.
Binky
I found a little video (https://www.youtube.com/watch?v=U6gSLoe5BWc) that showed me everything I needed to jack the crank arms off and the disassembly, bearing cleaning, lube and re-assembly went perfectly.
Nice bit of machinery.
Binky
03-16-24, 05:22 AM
#5
Senior Member
Thread Starter
Join Date: Mar 2013
Location: Southern Ontario, Canada
Posts: 873
Bikes: Too, too many....
Mentioned: 5 Post(s)
Tagged: 0 Thread(s)
Quoted: 125 Post(s)
Likes: 0
Liked 130 Times
in
57 Posts
I watched the video up to where he pulls the bearings, then says he's going to replace them. I was curious about what you said about flushing and repacking the bearings, I wanted to see if it was easy to remove the seals without damaging them, flushing the bearings and then adding grease and putting the seals back on. Do tell.
The circlips that hold the plastic seals in are very thin and flexible, so it was very easy to catch the exposed notched end edge with a thin sharp blade (Exacto knife) and remove them.
Likewise the seals themselves. .
Not a interference fit. Once the clips were removed the only thing holding the seals in is the grease. Easy out and easy back in.
Takes less than a minute.
Binky
