


26" Frankenbike gravel build... just because I could.
 08-12-18, 06:31 PM
#1
Senior Member
Thread Starter
Join Date: Sep 2015
Location: Left Coast, Canada
Posts: 5,126
Mentioned: 24 Post(s)
Tagged: 0 Thread(s)
Quoted: 2236 Post(s)
Liked 1,314 Times
in
707 Posts
26" Frankenbike gravel build... just because I could.
I thought this would be a good place to document my current bike rebuild experience because there are not enough 26" frankenbeater bike threads available in this sub forum. Fair warning: If new and shiny and expensive is what you are looking for you have come to the wrong thread my friend 
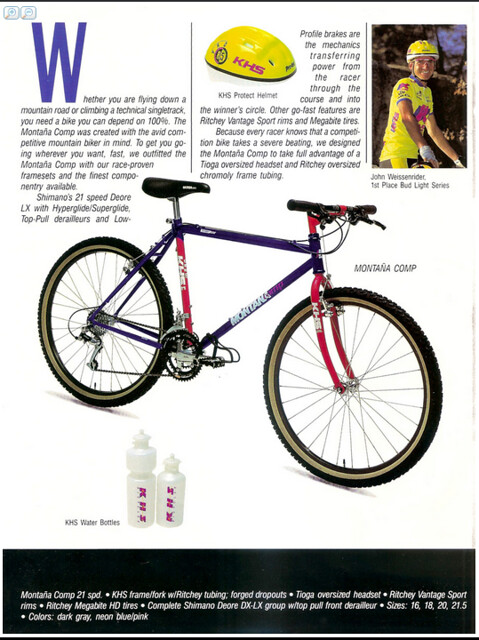
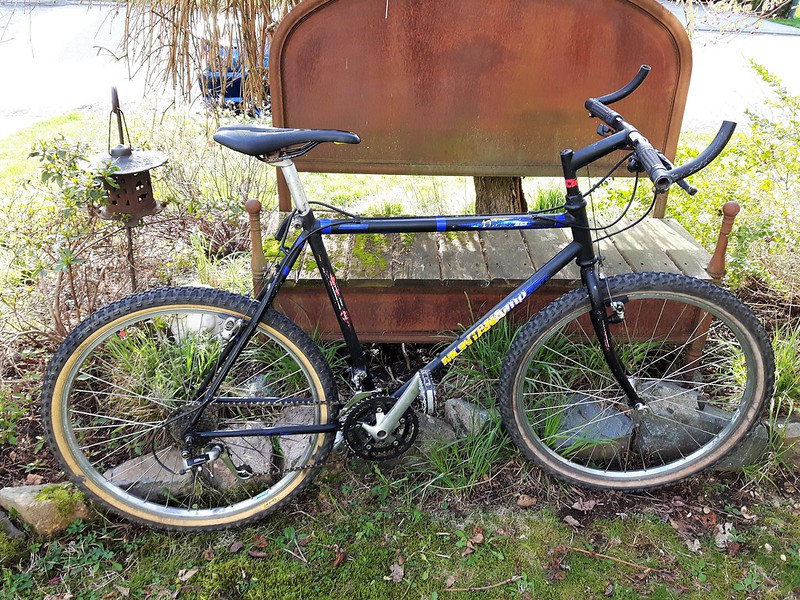
Ok. So a while ago I bought this 26" rigid mtb from a thrift store for $50 basically because it was fairly light, I knew it was Chromoly steel, and the components were pretty good. It had a funky flat black spray bomb paint job and once I got it back to the lab and scraped some of that off I discovered a 1992 era KHS Montana Comp underneath. Here's the catalog sheet about that:
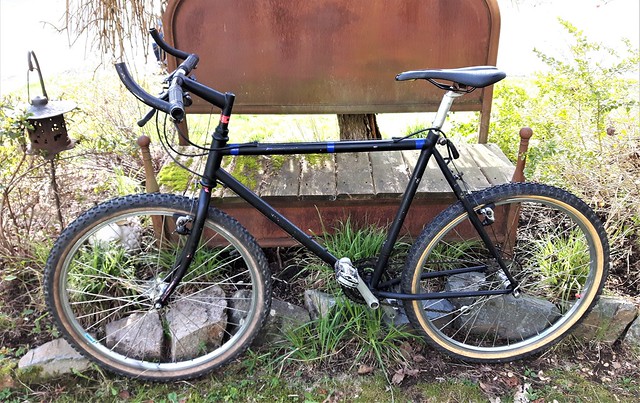
I swapped out the tires and changed the stem and bars for some flipped north roads and rode it around for a while as a gravel bike and found it really zipped along well.
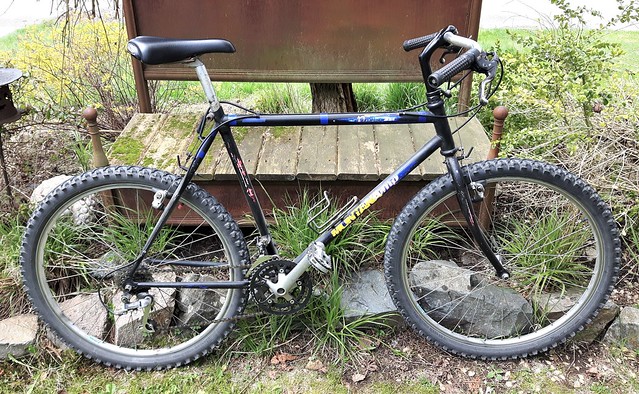
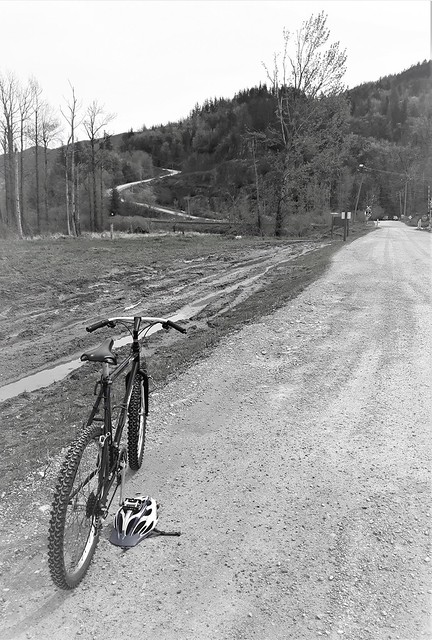
For a while I debated leaving it with the basic ghetto look it had as there was no stress as far as ruining the paint job was concerned. I played around with different hand grips and tires and even fenders but eventually my need to tear things completely apart got the better of me and into the rebuild bin it went.
To be continued...
Ok. So a while ago I bought this 26" rigid mtb from a thrift store for $50 basically because it was fairly light, I knew it was Chromoly steel, and the components were pretty good. It had a funky flat black spray bomb paint job and once I got it back to the lab and scraped some of that off I discovered a 1992 era KHS Montana Comp underneath. Here's the catalog sheet about that:
I swapped out the tires and changed the stem and bars for some flipped north roads and rode it around for a while as a gravel bike and found it really zipped along well.
For a while I debated leaving it with the basic ghetto look it had as there was no stress as far as ruining the paint job was concerned. I played around with different hand grips and tires and even fenders but eventually my need to tear things completely apart got the better of me and into the rebuild bin it went.
To be continued...
 08-12-18, 06:51 PM
#2
Senior Member
Thread Starter
Join Date: Sep 2015
Location: Left Coast, Canada
Posts: 5,126
Mentioned: 24 Post(s)
Tagged: 0 Thread(s)
Quoted: 2236 Post(s)
Liked 1,314 Times
in
707 Posts
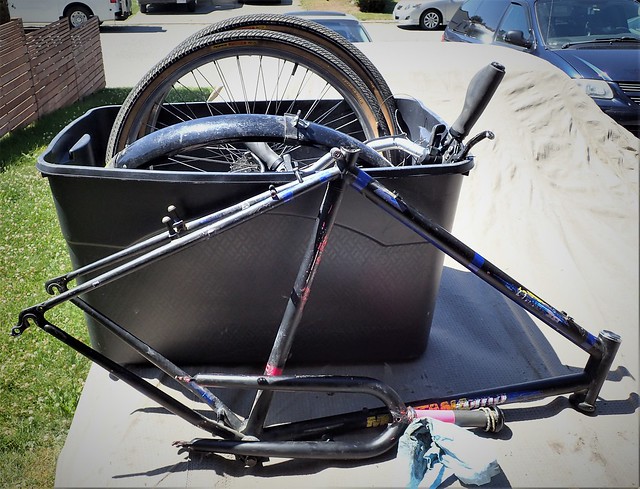
First step was to get the old paints off the frame and forks. For this I like to use furniture stripper and elbow grease. Well I don't like to, but I do it anyways. I got most of the paint off but did not go crazy trying to be perfect because this is really intended to be a bit of a beater bike and flaws may work to its advantage (or maybe I'm lazy).
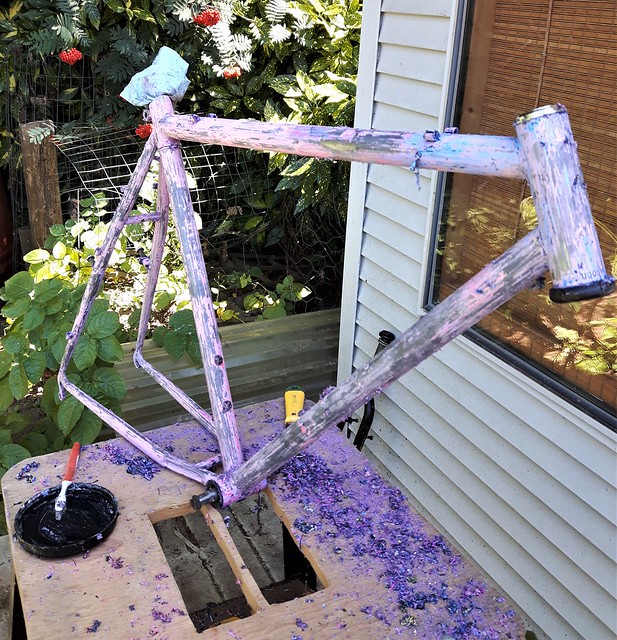
Chemical stripping was followed mechanical stripping by a drill powered wire wheel eventually producing a shiny new (to me) frame. This kept me off the streets and away from trouble for several evenings.
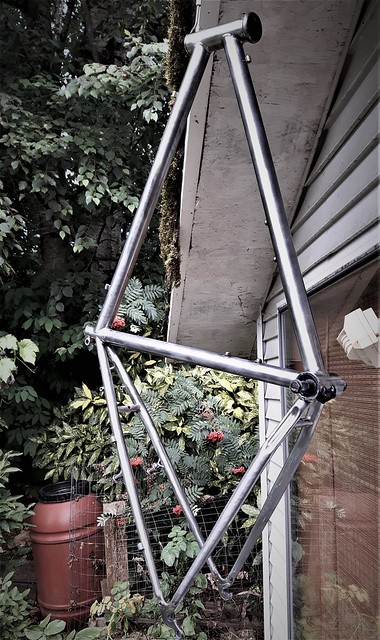
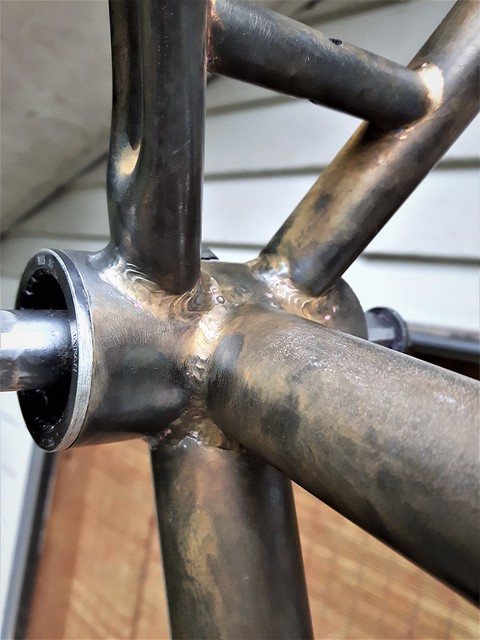
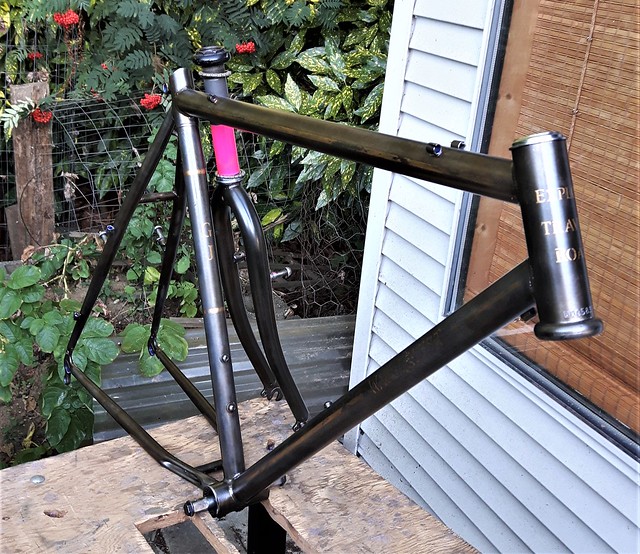
Then I set out to treat frame and forks with Gun Blueing Acid. This could cause quite a thread hijack I know because I said forks and not fork. Irregardless, I have done a couple of frames like this now and really like the way they look. Plus, I find it a bit more interesting than just spray paint.
While rifle barrels usually turn dark blue(ish), the steel of bike frames (or rather the iron content) oxides and after buffing turns a more rich brown with highlights and accents around the brass braising and various defects. It's a fairly organic style which I am hoping turns out to be Faux oldish looking to match the Faux older looking rider.
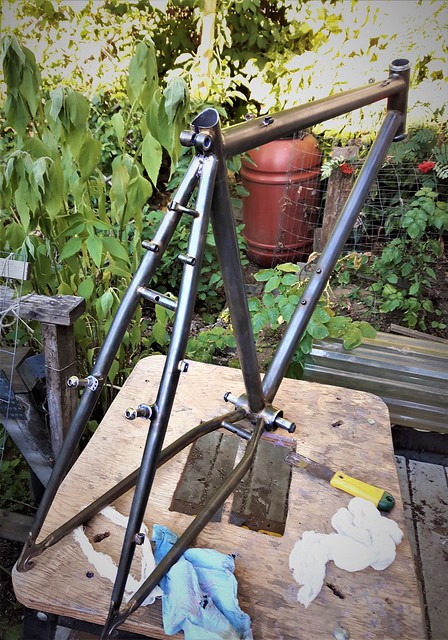
To be continued...
Chemical stripping was followed mechanical stripping by a drill powered wire wheel eventually producing a shiny new (to me) frame. This kept me off the streets and away from trouble for several evenings.
Then I set out to treat frame and forks with Gun Blueing Acid. This could cause quite a thread hijack I know because I said forks and not fork. Irregardless, I have done a couple of frames like this now and really like the way they look. Plus, I find it a bit more interesting than just spray paint.
While rifle barrels usually turn dark blue(ish), the steel of bike frames (or rather the iron content) oxides and after buffing turns a more rich brown with highlights and accents around the brass braising and various defects. It's a fairly organic style which I am hoping turns out to be Faux oldish looking to match the Faux older looking rider.
To be continued...
08-12-18, 06:52 PM
#3

Sunshine

Join Date: Aug 2014
Location: Des Moines, IA
Posts: 16,604
Bikes: '18 class built steel roadbike, '19 Fairlight Secan, '88 Schwinn Premis , Black Mountain Cycles Monstercross V4, '89 Novara Trionfo
Mentioned: 123 Post(s)
Tagged: 0 Thread(s)
Quoted: 10947 Post(s)
Liked 7,473 Times
in
4,181 Posts
Ha, I like that you have a literal bin for the rebuild.
Ritchey tubing and LX/DX components? Nice find.
Ritchey tubing and LX/DX components? Nice find.
08-12-18, 07:04 PM
#4
Banned.
Join Date: Jan 2014
Location: Vegemite Island
Posts: 4,130
Bikes: 2017 Surly Troll with XT Drive Train, 2017 Merida Big Nine XT Edition, 2016 Giant Toughroad SLR 2, 1995 Trek 830
Mentioned: 29 Post(s)
Tagged: 0 Thread(s)
Quoted: 1916 Post(s)
Liked 310 Times
in
218 Posts
Nice thread. 
Looking forward to seeing the finished product and the journey along the way.
Looking forward to seeing the finished product and the journey along the way.
08-12-18, 07:39 PM
#5
Senior Member
Thread Starter
Join Date: Sep 2015
Location: Left Coast, Canada
Posts: 5,126
Mentioned: 24 Post(s)
Tagged: 0 Thread(s)
Quoted: 2236 Post(s)
Liked 1,314 Times
in
707 Posts
Colonel Sanders you are pscykic - It's going to be a Gypsy Journey!
While in a Micheals craft store (don't ask me why I was there) I saw this awesome self adhering stencil kit and decided to add some awesome lettering and pin striping to my bikey.
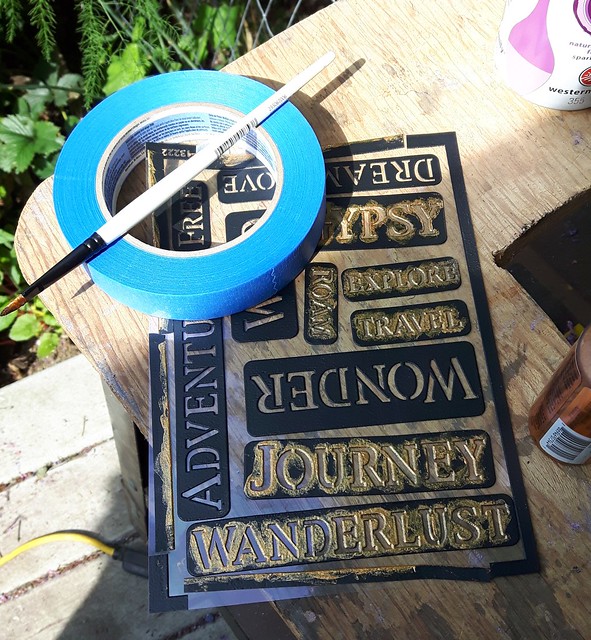
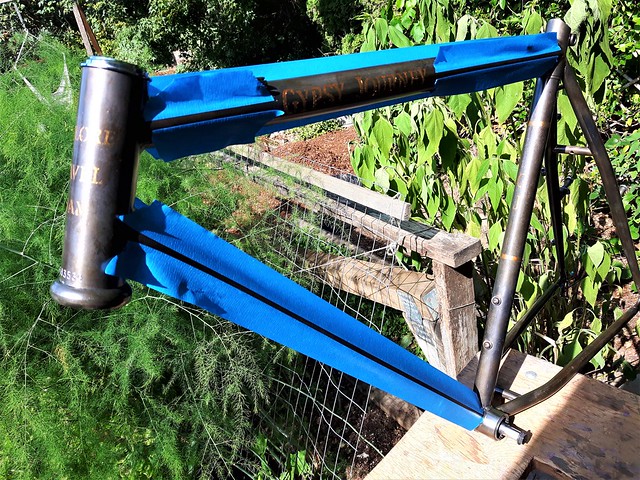
I added the gold paint but found it looked to new and sharp once the stencil was removed.
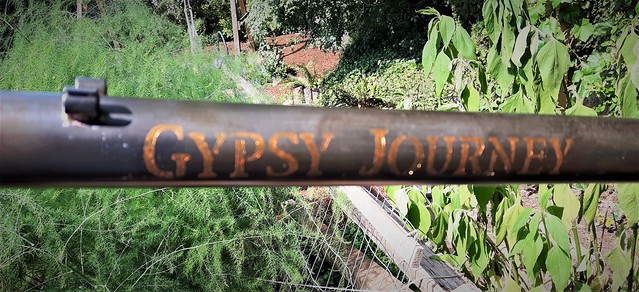
So I then took a bit of paint remover and rubbed part of it back off again.
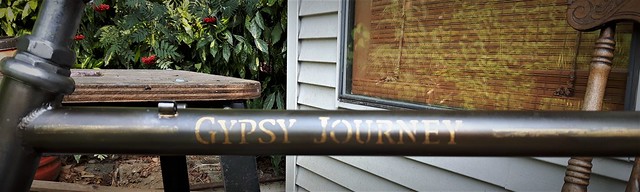
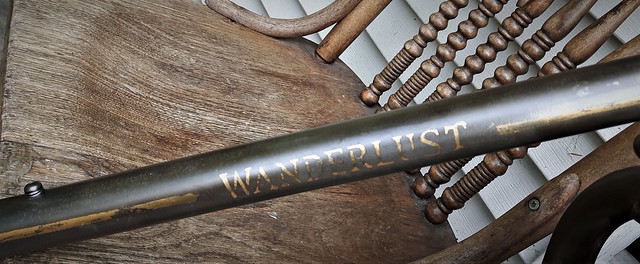
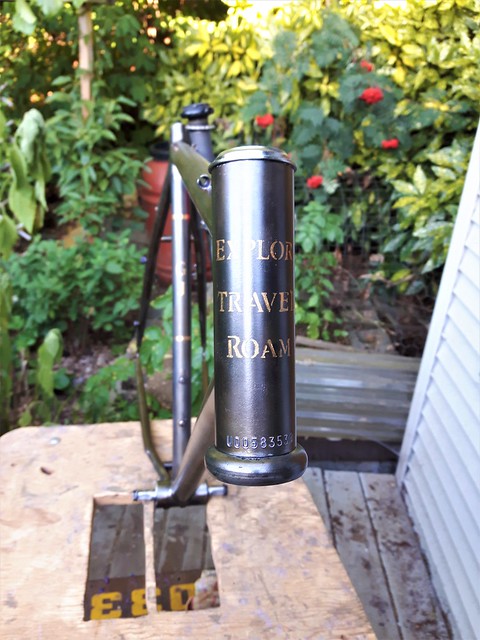
I admit I may have gone a bit overboard on the lettering but I paid for that kit darn it and I was going to get my money's worth!
I'm pretty pleased with how the whole thing turned out. Once the stenciling was done I top coated the frame and forks with a satin clear epoxy. I also use spray lacquer for that sort of thing but in this case I thought epoxy would be more durable.
To be continued...
While in a Micheals craft store (don't ask me why I was there) I saw this awesome self adhering stencil kit and decided to add some awesome lettering and pin striping to my bikey.
I added the gold paint but found it looked to new and sharp once the stencil was removed.
So I then took a bit of paint remover and rubbed part of it back off again.
I admit I may have gone a bit overboard on the lettering but I paid for that kit darn it and I was going to get my money's worth!
I'm pretty pleased with how the whole thing turned out. Once the stenciling was done I top coated the frame and forks with a satin clear epoxy. I also use spray lacquer for that sort of thing but in this case I thought epoxy would be more durable.
To be continued...
Last edited by Happy Feet; 08-12-18 at 07:42 PM.
08-12-18, 08:07 PM
#6
Senior Member
Thread Starter
Join Date: Sep 2015
Location: Left Coast, Canada
Posts: 5,126
Mentioned: 24 Post(s)
Tagged: 0 Thread(s)
Quoted: 2236 Post(s)
Liked 1,314 Times
in
707 Posts
Now the fun part begins.
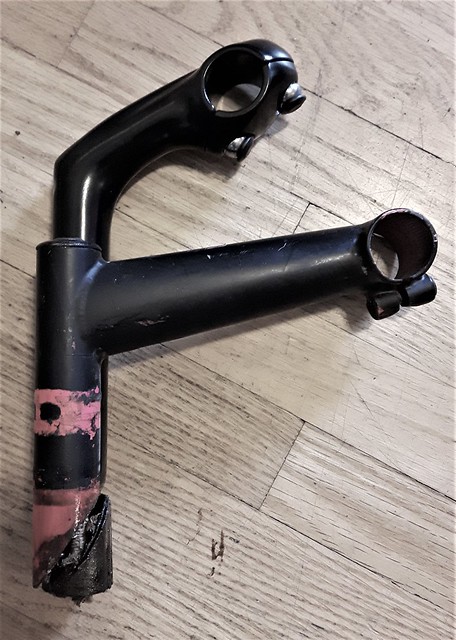
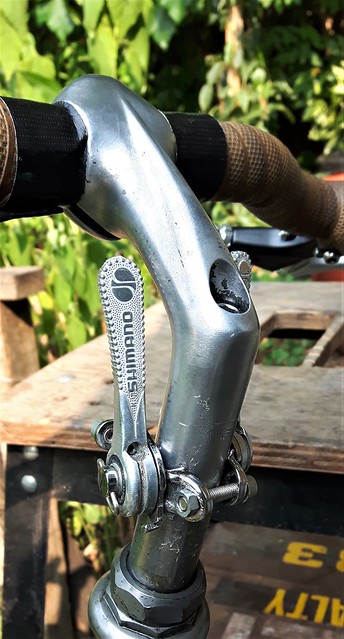
I wanted to keep the north roads bars so I wrapped them with some Brooks Cambium tape I had laying around to match the C17 saddle. The brake/shifters were sticky and sluggish though so I decided to replace those with new brakes and a stem shifter for that special old man appeal. I managed to scratch the hell out of the stem trying to make them fit and now have to buff that out before wiring but it's well worth it for an honest to goodness stem shifter. I will finish the bar tape off with French shellac'd twine instead of duct tape too. Mumm... shellac'd twine... Hope I don't eat any by accident because it's made out of bugs!

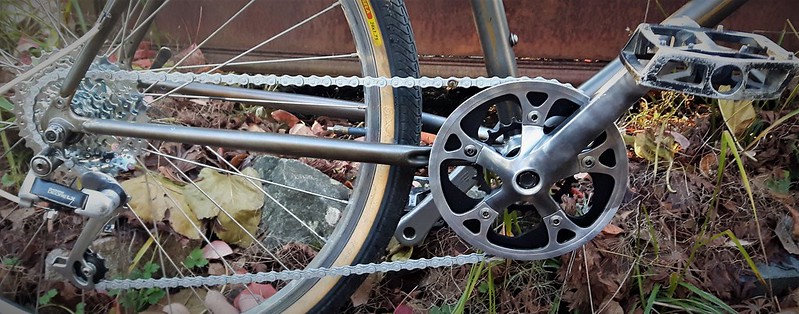
Then it is on to the Drive train.
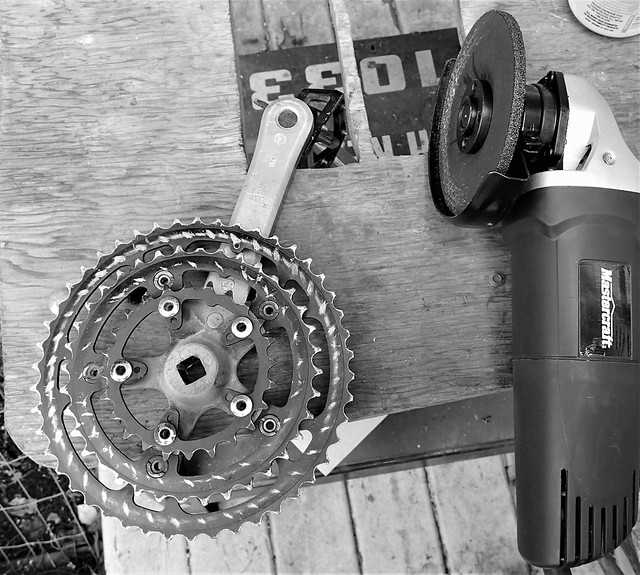
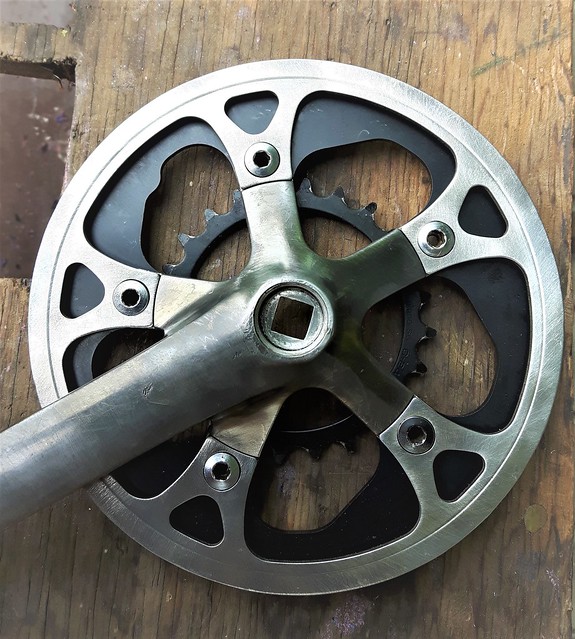
Der bicycle came with a 3x7 24/38/48 crank and 13-28 cassette but I decided to turn that into a 2x7 24 /42 crank with bash guard and swap in a 11- 34 cassette just because. Ok, the teeth on the large and middle crank rings were worn and needed replacing anyway but my version sounds far more edgy I think.
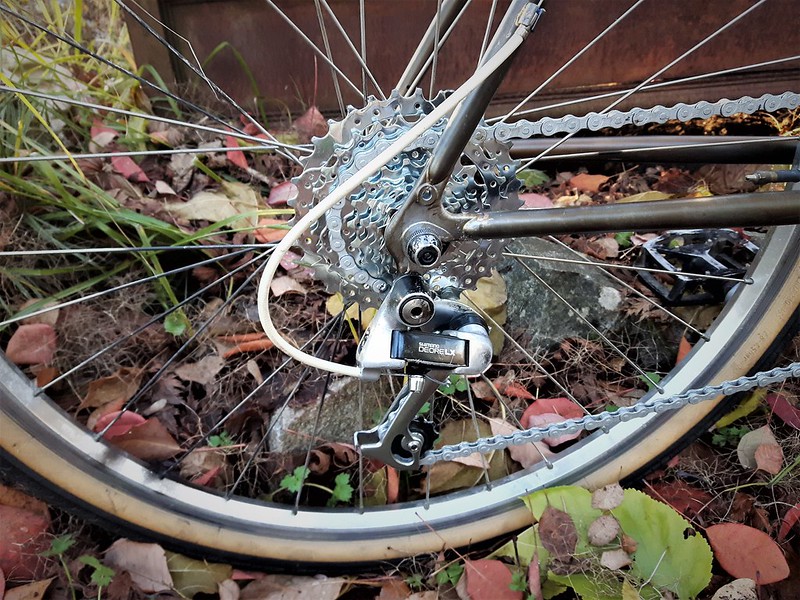
The cassette was pretty straight forward:

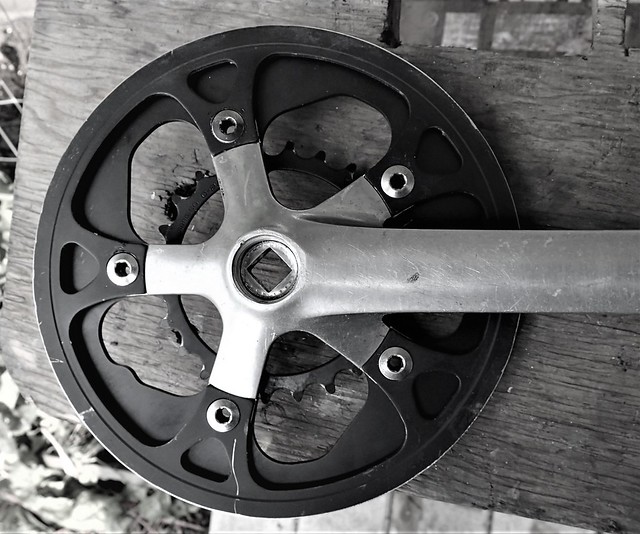
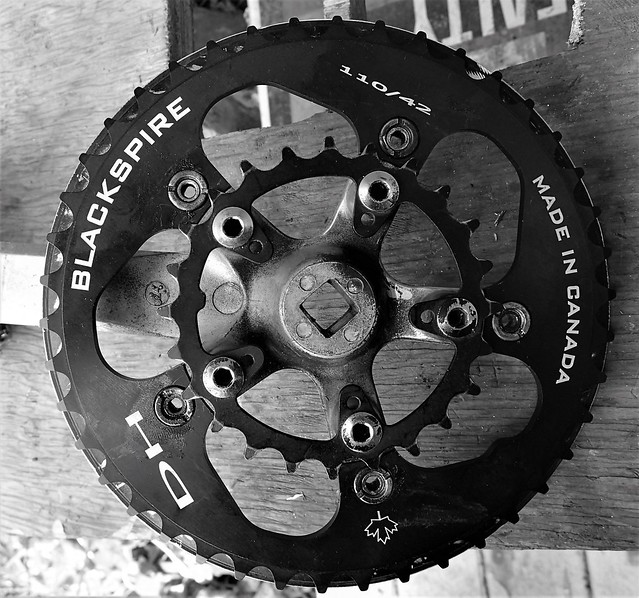
But for the crank I got out the angle grinder and removed the teeth on the outer 48 ring creating the bash guard. Then I replaced the middle ring with a Blackspire 42T I just happened to get on sale (in case my wife is reading ).
).
And that is where I sit now. I'm waiting to see a guy about a set of ivory cable guides and then it will be a simple case of cleaning the derailers, wiring them and the brakes up and setting the chain length.
I currently have some wide platform pedals but probably will buy a platform/clipless combo set so I won't rebuild those and the BB is a cartridge so I'll just use that until it fails. I cleaned and re greased the headset when I put the frame and forks together. I am also not replacing the canti brake pads because they were the best working part of the whole bike when I first rode it and stop just as good as poorly adjusted disc brakes.
Safety is highly overrated.
I wanted to keep the north roads bars so I wrapped them with some Brooks Cambium tape I had laying around to match the C17 saddle. The brake/shifters were sticky and sluggish though so I decided to replace those with new brakes and a stem shifter for that special old man appeal. I managed to scratch the hell out of the stem trying to make them fit and now have to buff that out before wiring but it's well worth it for an honest to goodness stem shifter. I will finish the bar tape off with French shellac'd twine instead of duct tape too. Mumm... shellac'd twine... Hope I don't eat any by accident because it's made out of bugs!
Then it is on to the Drive train.
Der bicycle came with a 3x7 24/38/48 crank and 13-28 cassette but I decided to turn that into a 2x7 24 /42 crank with bash guard and swap in a 11- 34 cassette just because. Ok, the teeth on the large and middle crank rings were worn and needed replacing anyway but my version sounds far more edgy I think.
The cassette was pretty straight forward:
But for the crank I got out the angle grinder and removed the teeth on the outer 48 ring creating the bash guard. Then I replaced the middle ring with a Blackspire 42T I just happened to get on sale (in case my wife is reading
).And that is where I sit now. I'm waiting to see a guy about a set of ivory cable guides and then it will be a simple case of cleaning the derailers, wiring them and the brakes up and setting the chain length.
I currently have some wide platform pedals but probably will buy a platform/clipless combo set so I won't rebuild those and the BB is a cartridge so I'll just use that until it fails. I cleaned and re greased the headset when I put the frame and forks together. I am also not replacing the canti brake pads because they were the best working part of the whole bike when I first rode it and stop just as good as poorly adjusted disc brakes.
Safety is highly overrated.
Last edited by Happy Feet; 08-12-18 at 08:33 PM.
08-13-18, 05:21 PM
#8
Senior Member
Join Date: Sep 2017
Location: Philadelphia
Posts: 106
Bikes: '88 Cannondale ST400, '89 Bianchi Incline, ’88 Bianchi Limited, '87 Schwinn Tempo
Mentioned: 0 Post(s)
Tagged: 0 Thread(s)
Quoted: 43 Post(s)
Liked 19 Times
in
11 Posts
I love seeing such personalized builds like this. Thanks for sharing!
08-15-18, 07:28 PM
#9
Senior Member
Join Date: Dec 2007
Location: NWNJ
Posts: 3,704
Bikes: Road bike is a Carbon Bianchi C2C & Grandis (1980's), Gary Fisher Mt Bike, Trek Tandem & Mongoose SS MTB circa 1992.
Mentioned: 9 Post(s)
Tagged: 0 Thread(s)
Quoted: 722 Post(s)
Liked 353 Times
in
226 Posts
sweet build.
I like the look but I just paid the man $140 and had mine a 1994 mongoose rockadille turned into a lovely looking ride a 2 year project.

I like the look but I just paid the man $140 and had mine a 1994 mongoose rockadille turned into a lovely looking ride a 2 year project.
08-18-18, 03:05 AM
#10
Senior Member

Join Date: Feb 2014
Location: Pasadena, CA
Posts: 4,848
Bikes: Schwinn Varsity
Mentioned: 22 Post(s)
Tagged: 0 Thread(s)
Quoted: 1931 Post(s)
Liked 742 Times
in
422 Posts
That looks good. We used to call those Mountain Bikes, and you could ride them anywhere. Now you need to purchase a gravel bike for gravel roads, an Enduro bike for gnarly trails, an All Mountain bike for mild trails or a cross country bike for...... fire roads.
08-18-18, 03:16 AM
#11
Full Member
 08-18-18, 08:38 PM
#13
Senior Member
Thread Starter
Join Date: Sep 2015
Location: Left Coast, Canada
Posts: 5,126
Mentioned: 24 Post(s)
Tagged: 0 Thread(s)
Quoted: 2236 Post(s)
Liked 1,314 Times
in
707 Posts
For me, wrenching on bikes is a creative outlet and I like to occasionally do something unusual to grow my skill set. Every time I try a new process I learn a bit about it and what works or doesn't. The theme of this build is to take a blank canvas ( as in a bare frame) and rebuild it into something that looks oldish, so a lot of my choices revolve around that as an aesthetic. I actually considered using copper leaf instead of paint but decided to leave that for a another build with nice lugs to highlight instead. As it is I have had to strip perfectly good black adonizing/paint off several parts because they don't look right and probably will do that to the brake levers and chainrings too. For cables I had to scout out some old ivory guides instead of new black ones because they match better etc...
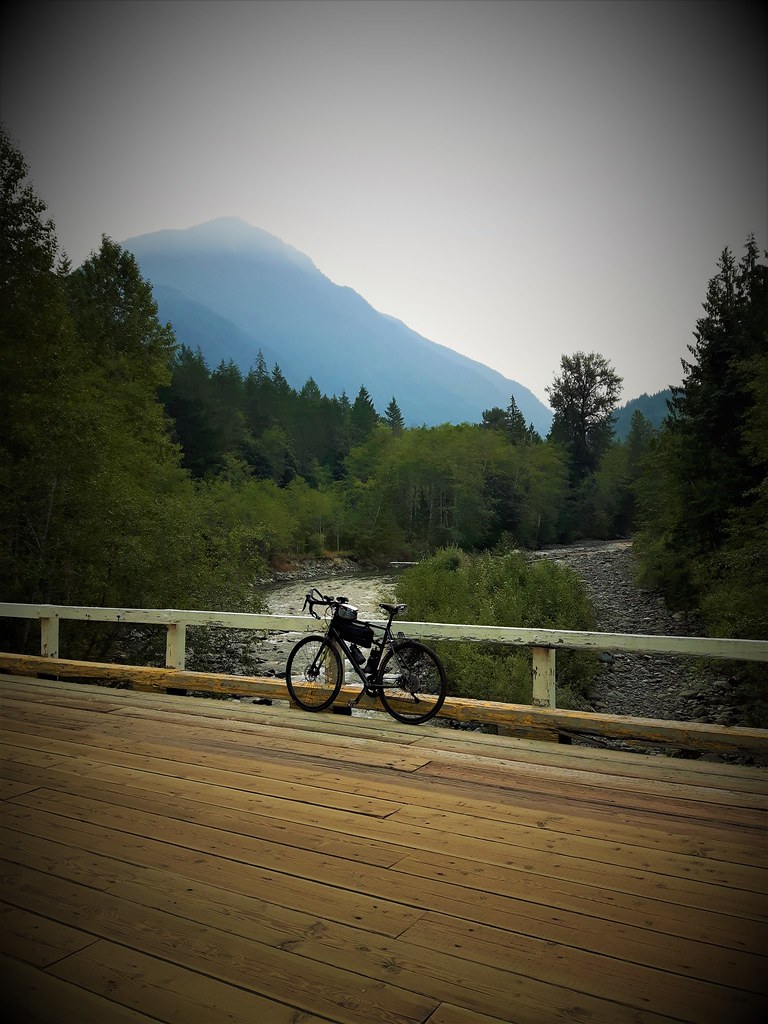
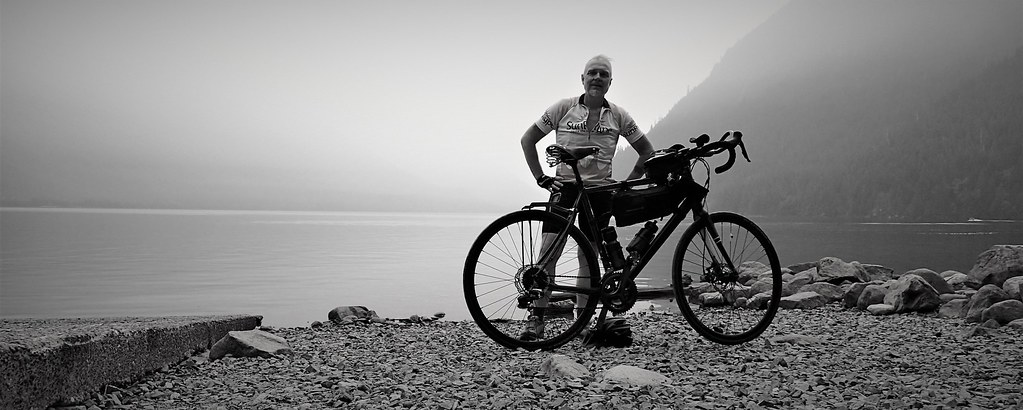
Tomorrow is Sunday, I have those guides and hope to get some more work done. In the meantime I'll leave a quick photo of an 80km ride today I did today up and down the Chilliwack River Valley. Lot's of forest fire smoke:

Last edited by Happy Feet; 08-18-18 at 08:41 PM.
08-19-18, 07:22 PM
#14
Senior Member
Thread Starter
Join Date: Sep 2015
Location: Left Coast, Canada
Posts: 5,126
Mentioned: 24 Post(s)
Tagged: 0 Thread(s)
Quoted: 2236 Post(s)
Liked 1,314 Times
in
707 Posts
So I held some basic black cable guides up to the bike but found the colour didn't jibe with the look I wanted. I had an Ivory flavoured guide and that looked good so off to my local dealer I went. Yes, I have a habit.
Btw; notice the Canadian method of spelling colour and flavour? A completely useless U thrown in for no good reason but I like it just the same.. feels somewhat so fist icated.
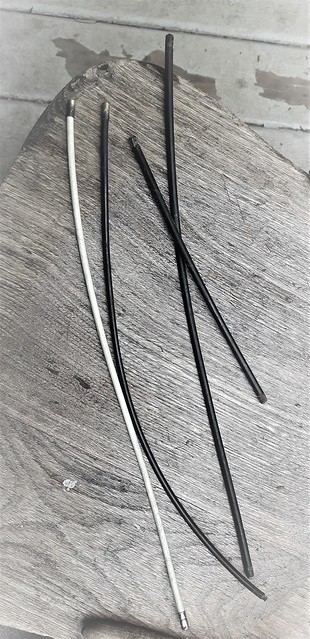
Dao has been a bike mechanic for over 30 years and my go to guy for all things eclectic. One of my pastimes is trying to stump him with an odd request or mechanical problem and one day I hope to do it but he always seems to be able to un-seize the BB or pull a doodad out of a box. And so it was with ivory cable guides. He said he might have something at home and to call back in a couple of days and when I did he handed me a plain unmarked baggie - just like the other kind of dealer but in this one I found the following:
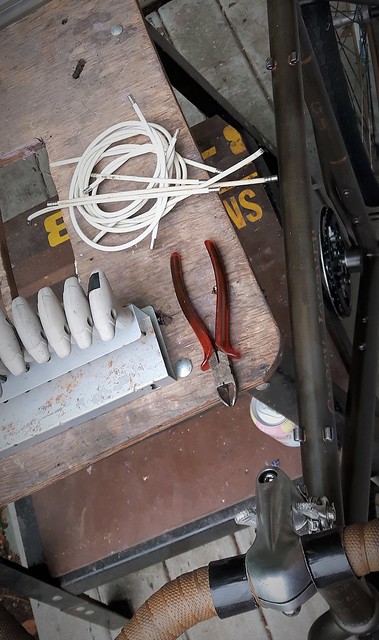
Fortunately I kept the original cable guides so I had a template for measuring and was able to steal the little ferrule ends off them as well.
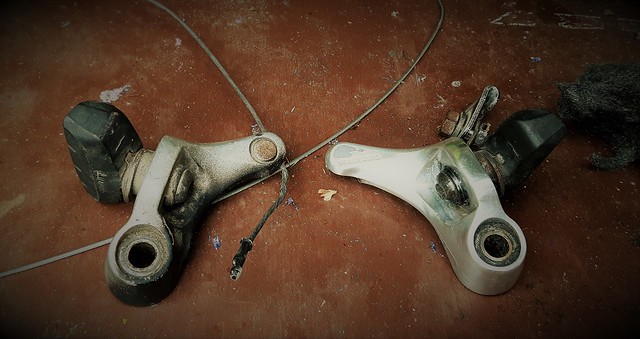
But before that mattered I had to clean up the original canti levers which had undergone an awesome fuglification from their previous owner. To remove the spray paints I used furniture stripper and 00 fine steel wool and a special form of lubricant called elbow grease:
To be continued...
Btw; notice the Canadian method of spelling colour and flavour? A completely useless U thrown in for no good reason but I like it just the same.. feels somewhat so fist icated.
Dao has been a bike mechanic for over 30 years and my go to guy for all things eclectic. One of my pastimes is trying to stump him with an odd request or mechanical problem and one day I hope to do it but he always seems to be able to un-seize the BB or pull a doodad out of a box. And so it was with ivory cable guides. He said he might have something at home and to call back in a couple of days and when I did he handed me a plain unmarked baggie - just like the other kind of dealer but in this one I found the following:
Fortunately I kept the original cable guides so I had a template for measuring and was able to steal the little ferrule ends off them as well.
But before that mattered I had to clean up the original canti levers which had undergone an awesome fuglification from their previous owner. To remove the spray paints I used furniture stripper and 00 fine steel wool and a special form of lubricant called elbow grease:
To be continued...
08-19-18, 07:50 PM
#15
Senior Member
Thread Starter
Join Date: Sep 2015
Location: Left Coast, Canada
Posts: 5,126
Mentioned: 24 Post(s)
Tagged: 0 Thread(s)
Quoted: 2236 Post(s)
Liked 1,314 Times
in
707 Posts
The following is a quick and dirty photo essay on how to install canti lever brakes:
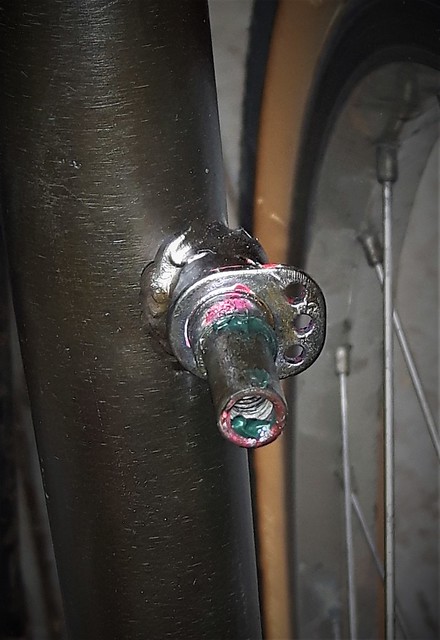
First, this is called the brake post. Take note of the three little holes drilled in the back plate; they will come into play later. They allow me to adjust the tension of the return spring and to start I usually try the middle one. I think this is because Canadians are generally moderate in approach.
Next comes a dust cover. I line the hole in it up with a hole in the back plate and lube the post so the brakes pivot nicley. The dust cover keeps crud out of the lube (hopefully).
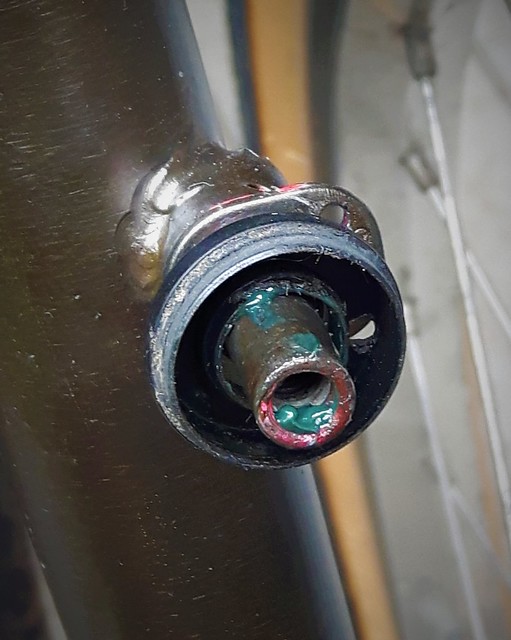
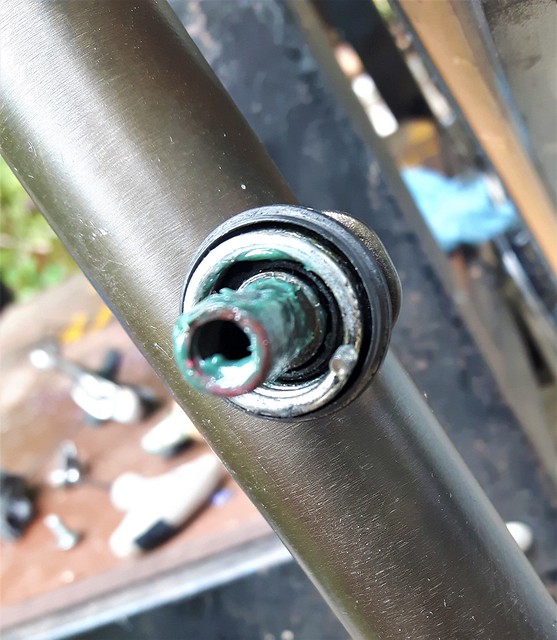
Next is the tension return spring. This keeps the brake pad away from the rim until I apply it by squeezing the hand lever. When I release pressure the pad moves away again because of this spring. Put one pin through the dust cover and one of the holes in the back plate. The forward pin of the spring will fit in a hole in the canti lever.
Now I slip the lever over the post and set the tension spring pin into the little hole drilled in the lever. If the lever doesn't spring away from the rim I say DOH! and check to see if I put the correct spring in as there are left and right sided ones (for each side). If the tension is too sloppy or too tight I use one of the other three holes in the back plate. Insert and tighten the lever retaining bolt.
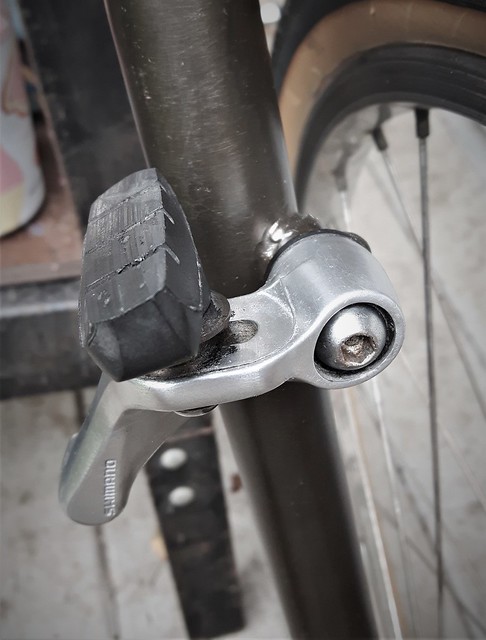
Oh boy, that was easy. Now, I do myself a flavour and hold the canti lever up to the rim and adjust the fit before I wire every thing together and need three hands to squeeze levers and hold wrenches etc...
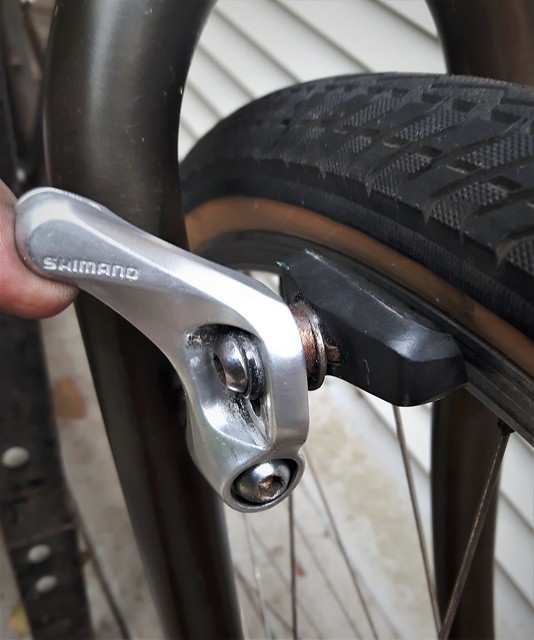
That's it. After that I threaded the cables through the guides, inserted them in the hand levers, routed them and connected them to the canti transverse or link cables. Those are the short bits of wire that join one lever to the other and they often have some sort of quick release feature. Once I find the right spot to set the cable in the retaining nut I disconnect the transverse cable so I'm not trying to tighten the brake cable under tension.
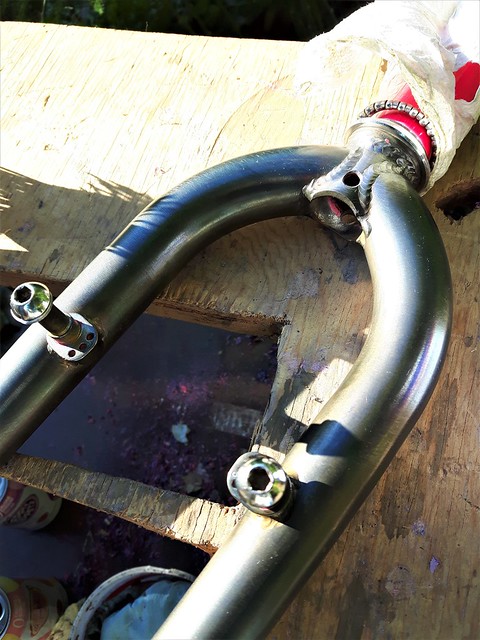
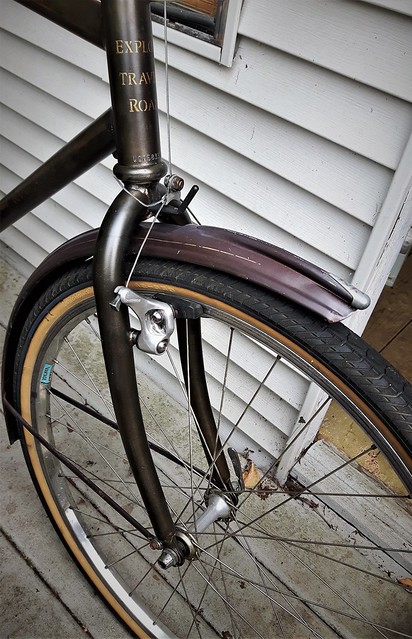
The front brake done. A mysterious fender from a 1970's Raleigh Sport seems to have found its way onto the bike. The brown paint closely matches the gun blueing.
To be continued...
First, this is called the brake post. Take note of the three little holes drilled in the back plate; they will come into play later. They allow me to adjust the tension of the return spring and to start I usually try the middle one. I think this is because Canadians are generally moderate in approach.
Next comes a dust cover. I line the hole in it up with a hole in the back plate and lube the post so the brakes pivot nicley. The dust cover keeps crud out of the lube (hopefully).
Next is the tension return spring. This keeps the brake pad away from the rim until I apply it by squeezing the hand lever. When I release pressure the pad moves away again because of this spring. Put one pin through the dust cover and one of the holes in the back plate. The forward pin of the spring will fit in a hole in the canti lever.
Now I slip the lever over the post and set the tension spring pin into the little hole drilled in the lever. If the lever doesn't spring away from the rim I say DOH! and check to see if I put the correct spring in as there are left and right sided ones (for each side). If the tension is too sloppy or too tight I use one of the other three holes in the back plate. Insert and tighten the lever retaining bolt.
Oh boy, that was easy. Now, I do myself a flavour and hold the canti lever up to the rim and adjust the fit before I wire every thing together and need three hands to squeeze levers and hold wrenches etc...
That's it. After that I threaded the cables through the guides, inserted them in the hand levers, routed them and connected them to the canti transverse or link cables. Those are the short bits of wire that join one lever to the other and they often have some sort of quick release feature. Once I find the right spot to set the cable in the retaining nut I disconnect the transverse cable so I'm not trying to tighten the brake cable under tension.
The front brake done. A mysterious fender from a 1970's Raleigh Sport seems to have found its way onto the bike. The brown paint closely matches the gun blueing.
To be continued...
Last edited by Happy Feet; 08-19-18 at 08:03 PM.
08-19-18, 07:57 PM
#16
Senior Member
Thread Starter
Join Date: Sep 2015
Location: Left Coast, Canada
Posts: 5,126
Mentioned: 24 Post(s)
Tagged: 0 Thread(s)
Quoted: 2236 Post(s)
Liked 1,314 Times
in
707 Posts
I mentioned earlier that I was thinking of removing the black adonizing off the chain rings. I did that for the bash guard but decided to stop there for now and see what it will look like when all the dust of the build has settled.
Before:

After:
Next step, assembling the drive train.
Before:
After:
Next step, assembling the drive train.
11-16-18, 06:52 PM
#17
Senior Member
Thread Starter
Join Date: Sep 2015
Location: Left Coast, Canada
Posts: 5,126
Mentioned: 24 Post(s)
Tagged: 0 Thread(s)
Quoted: 2236 Post(s)
Liked 1,314 Times
in
707 Posts
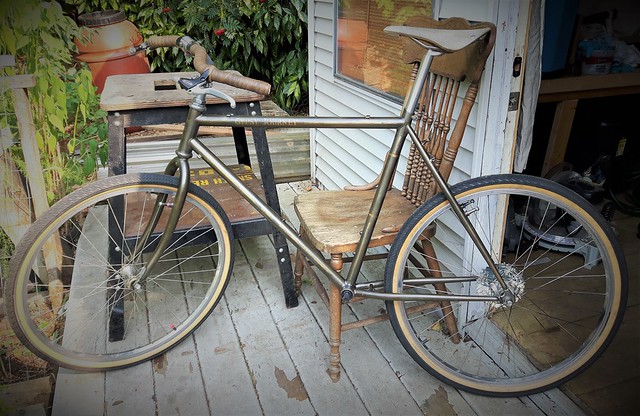
Well, that took some time!
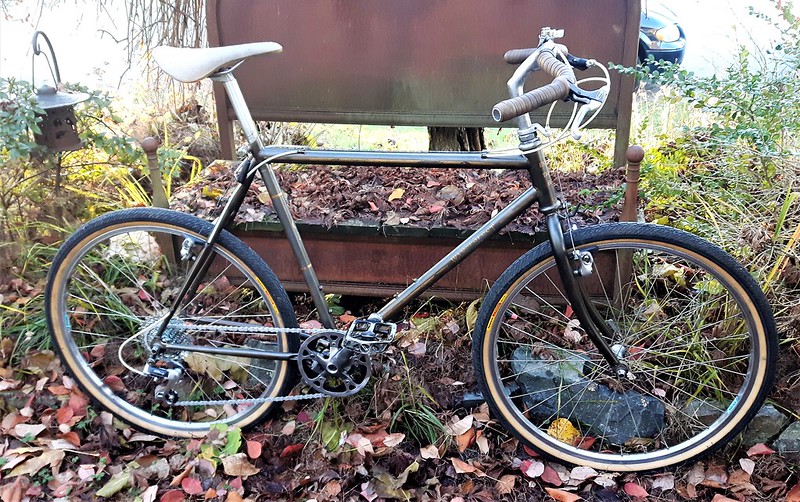
I got sidetracked by a couple of other projects and just returned to this one today. Still have a few doo dads to add and finishing touches such as re wrapping the bar tape ends with shellac'd twine and top coating with BLO but the build is mostly complete. While I originally intended this to be a gravel build I have also become "rinko" curious (don't judge me) and may set it up for that as well, maybe with two wheelsets ie. touring/gravel. Basically, for rinko travel I want it to be very simple and easy to break down into a compact unit - but not while I'm riding it.
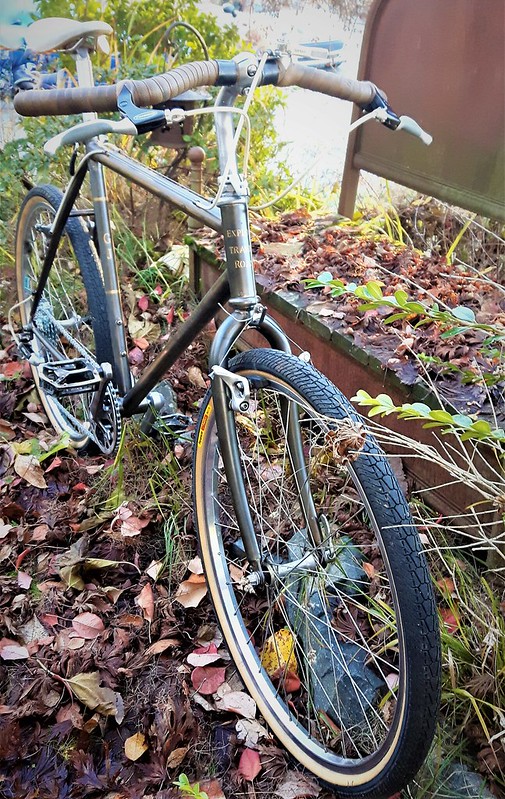
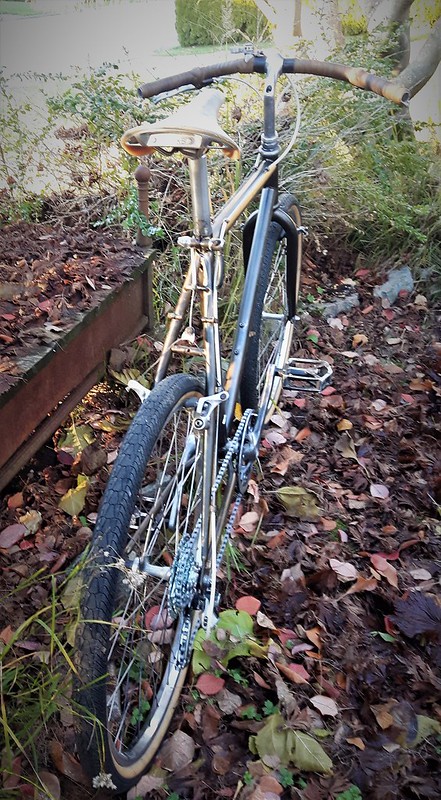
I'm also currently into this minimalist vibe and toyed with the idea of going single speed for a while but in the end decided to just eliminate the FD and go with a 1x7 11/34 drive train. I kept the granny gear up front though and can manually shift into it if I hit any mega hill climbs.
Kept the cockpit simple with a single 1984 Suntour thumbie instead of the stem shifters I started with. I'll prolly remove some of the black on the brake levers and put some corks in the bar ends at some point.

Before:
After:
I got sidetracked by a couple of other projects and just returned to this one today. Still have a few doo dads to add and finishing touches such as re wrapping the bar tape ends with shellac'd twine and top coating with BLO but the build is mostly complete. While I originally intended this to be a gravel build I have also become "rinko" curious (don't judge me) and may set it up for that as well, maybe with two wheelsets ie. touring/gravel. Basically, for rinko travel I want it to be very simple and easy to break down into a compact unit - but not while I'm riding it.
I'm also currently into this minimalist vibe and toyed with the idea of going single speed for a while but in the end decided to just eliminate the FD and go with a 1x7 11/34 drive train. I kept the granny gear up front though and can manually shift into it if I hit any mega hill climbs.
Kept the cockpit simple with a single 1984 Suntour thumbie instead of the stem shifters I started with. I'll prolly remove some of the black on the brake levers and put some corks in the bar ends at some point.
Before:
After:
Last edited by Happy Feet; 11-16-18 at 06:59 PM.
11-17-18, 09:01 AM
#20
WGB
Join Date: Jul 2017
Location: Niagara Region
Posts: 2,912
Bikes: Panasonic PT-4500
Mentioned: 46 Post(s)
Tagged: 0 Thread(s)
Quoted: 1794 Post(s)
Liked 2,328 Times
in
1,375 Posts
Just to be sure, you used "furniture stripper" to remove the paint from the frame and the anodizing on the chainrings (followed by drill powered wire wheel)? Do you mean a stripper for wood? Was there a brand you used?
I have to strip a frame before adding braze-ons and was planning on using steel wool. Since it will be sand blasted then powder coated I don't have to do the whole frame nor do I have to be perfect but very interested in the idea of cleaning anodizing off chainrings because I'm not fan of the look of black ones.
I have to strip a frame before adding braze-ons and was planning on using steel wool. Since it will be sand blasted then powder coated I don't have to do the whole frame nor do I have to be perfect but very interested in the idea of cleaning anodizing off chainrings because I'm not fan of the look of black ones.
11-17-18, 10:25 AM
#21
Senior Member
Thread Starter
Join Date: Sep 2015
Location: Left Coast, Canada
Posts: 5,126
Mentioned: 24 Post(s)
Tagged: 0 Thread(s)
Quoted: 2236 Post(s)
Liked 1,314 Times
in
707 Posts
Yes, I use 1850 stripper in a tin. It comes out like a slimy gel. I paint it on with an old toothbrush, wait a few minutes and then scrape with a paint scraper. Some paint bubbles quickly while others take a couple of coats. Wash after with water. After that I usually use a brass wire wheel to clean the rest off and finish with 00 steel wool. If polished is the look avoid the wire wheel as it may leave scratches.
11-17-18, 02:45 PM
#22
Senior Member
Great build. I just happened to have 5 bikes follow me home this week, and one is a n '80s Rockhopper i was thinking would be a great gravel or drop bar bike. Stem is already like yours. How has the cold blue worked out? I always found it to be a bit fragile and rust prone unless it had a protective oil or silicone layer over it.
11-17-18, 05:19 PM
#23
Senior Member
Thread Starter
Join Date: Sep 2015
Location: Left Coast, Canada
Posts: 5,126
Mentioned: 24 Post(s)
Tagged: 0 Thread(s)
Quoted: 2236 Post(s)
Liked 1,314 Times
in
707 Posts
Looking for a more natural alternative I've just finished a vintage rebuild to experiment with boiled linseed oil as a protective coating and am really happy with that result. I intend to treat this frame with it pretty quick.
11-17-18, 05:42 PM
#24
Senior Member
Join Date: Apr 2014
Posts: 55
Mentioned: 1 Post(s)
Tagged: 0 Thread(s)
Quoted: 15 Post(s)
Likes: 0
Liked 8 Times
in
4 Posts
I'm confused. Your answer re paint removal makes sense. It's what I would have done. However the question included anodizing removal. I don't see paint stripper accomplishing that.
11-17-18, 05:59 PM
#25
Senior Member
Join Date: Apr 2014
Posts: 55
Mentioned: 1 Post(s)
Tagged: 0 Thread(s)
Quoted: 15 Post(s)
Likes: 0
Liked 8 Times
in
4 Posts
By the way, I love this bike. I did a similar build, minus the stripping, of a late 80's Bianchi mtn. bike. I got frustrated trying to do a drop bar conversion, mostly for appearance issues. I ended up flipping some Soma Sparrow bars. Sort of reminds me of the cafe m-cycle look.

