


First do no harm-cleaning a vintage frame without damaging decals
 06-17-17, 03:58 PM
#1
Senior Member
Thread Starter
Join Date: Nov 2015
Location: Lacey, WA
Posts: 1,707
Bikes: Stevenson Custom, Stevenson Custom Tandem, Nishiki Professional
Mentioned: 35 Post(s)
Tagged: 0 Thread(s)
Quoted: 367 Post(s)
Likes: 0
Liked 196 Times
in
128 Posts
First do no harm-cleaning a vintage frame without damaging decals
I am about to clean a vintage frame with some nice intact decals and some damaged decals and I would not want to damage either in the process of cleaning the frame, what do you suggest?
Generally I use Mr. Bubble toilet cleaning foam and am pleased with the results on my modern bike whose decals are under clear coat, but what will clean and not risk damage to the frame decals on this early 80s era vintage frame?
Thanks for you thoughts and advice as to what has worked for you in cleaning a vintage frame without damage to vintage decals.
 06-17-17, 04:40 PM
#2
Senior Member
Join Date: Oct 2015
Location: PDX
Posts: 13,033
Bikes: Merz x 5 + Specialized Merz Allez x 2, Strawberry/Newlands/DiNucci/Ti x3, Gordon, Fuso/Moulton x2, Bornstein, Paisley,1958-74 Paramounts x3, 3rensho, 74 Moto TC, 73-78 Raleigh Pro's x5, Marinoni x2, 1960 Cinelli SC, 1980 Bianchi SC, PX-10 X 2
Mentioned: 267 Post(s)
Tagged: 0 Thread(s)
Quoted: 4510 Post(s)
Liked 6,374 Times
in
3,666 Posts
No expert but very slippery slope here, most decals will not tolerate much cleaning, stickers usually fare better but are also fragile when it comes to this. I would encourage you to take plenty of good pics for reproduction later if necessary as a backstop, then proceed with extreme caution.
I am about to clean a vintage frame with some nice intact decals and some damaged decals and I would not want to damage either in the process of cleaning the frame, what do you suggest?
Generally I use Mr. Bubble toilet cleaning foam and am pleased with the results on my modern bike whose decals are under clear coat, but what will clean and not risk damage to the frame decals on this early 80s era vintage frame?
Thanks for you thoughts and advice as to what has worked for you in cleaning a vintage frame without damage to vintage decals.
Generally I use Mr. Bubble toilet cleaning foam and am pleased with the results on my modern bike whose decals are under clear coat, but what will clean and not risk damage to the frame decals on this early 80s era vintage frame?
Thanks for you thoughts and advice as to what has worked for you in cleaning a vintage frame without damage to vintage decals.
06-17-17, 04:59 PM
#3

Have bike, will travel

Join Date: Feb 2006
Location: Lake Geneva, WI
Posts: 12,284
Bikes: Ridley Helium SLX, Canyon Endurance SL, De Rosa Professional, Eddy Merckx Corsa Extra, Schwinn Paramount (1 painted, 1 chrome), Peugeot PX10, Serotta Nova X, Simoncini Cyclocross Special, Raleigh Roker, Pedal Force CG2 and CX2
Mentioned: 46 Post(s)
Tagged: 0 Thread(s)
Quoted: 910 Post(s)
Liked 288 Times
in
158 Posts
Mild dish soap.
I spray a fine mist of plain water on the bike and wait 5 minutes. the water lifts a significant amount of grime. I then take a soft terry cloth and a few drops of dish soap and wipe down the top-tube and seatstays, these are normally much cleaner than the rest of the bike. With a new, clean cloth, I then clean the head-tube, fork and seat-tube. finally I clean the Bottom Bracket Shell and the chainstays, first with one of the dirtied cloth to remove grease and then with a clean cloth. I then repeat the above process, without soap, just plain water.
Do this multiple times during the first season of riding and most of the superficial grime will be gone without any risk of damaging the decals (unless it's a Pinarello).
__________________
When I ride my bike I feel free and happy and strong. I'm liberated from the usual nonsense of day to day life. Solid, dependable, silent, my bike is my horse, my fighter jet, my island, my friend. Together we will conquer that hill and thereafter the world.
When I ride my bike I feel free and happy and strong. I'm liberated from the usual nonsense of day to day life. Solid, dependable, silent, my bike is my horse, my fighter jet, my island, my friend. Together we will conquer that hill and thereafter the world.
06-17-17, 05:05 PM
#4
Senior Member
Thread Starter
Join Date: Nov 2015
Location: Lacey, WA
Posts: 1,707
Bikes: Stevenson Custom, Stevenson Custom Tandem, Nishiki Professional
Mentioned: 35 Post(s)
Tagged: 0 Thread(s)
Quoted: 367 Post(s)
Likes: 0
Liked 196 Times
in
128 Posts
Thanks you echo my fears, and perhaps the only safe way is just to not clean where the decals are and keep a safe margin around them as I clean off the grime/dust on the frame/fork.
It's going to be a very fun restoration so I just don't want to start off ruining the decals.
It's going to be a very fun restoration so I just don't want to start off ruining the decals.
06-17-17, 06:10 PM
#5
Senior Member
Join Date: Oct 2015
Location: PDX
Posts: 13,033
Bikes: Merz x 5 + Specialized Merz Allez x 2, Strawberry/Newlands/DiNucci/Ti x3, Gordon, Fuso/Moulton x2, Bornstein, Paisley,1958-74 Paramounts x3, 3rensho, 74 Moto TC, 73-78 Raleigh Pro's x5, Marinoni x2, 1960 Cinelli SC, 1980 Bianchi SC, PX-10 X 2
Mentioned: 267 Post(s)
Tagged: 0 Thread(s)
Quoted: 4510 Post(s)
Liked 6,374 Times
in
3,666 Posts
+1, I always consider dish soap as the go to first line cleaner and work up in harshness as the situation warrants/requires especially when trying to preserve whats still there if it is cracked, peeling, lifting or fading.
Simple green, Windex and cleaner wax like Meguiars #2 can be used with care and good results where the finish is in good shape.
Simple green, Windex and cleaner wax like Meguiars #2 can be used with care and good results where the finish is in good shape.
Mild dish soap.
I spray a fine mist of plain water on the bike and wait 5 minutes. the water lifts a significant amount of grime. I then take a soft terry cloth and a few drops of dish soap and wipe down the top-tube and seatstays, these are normally much cleaner than the rest of the bike. With a new, clean cloth, I then clean the head-tube, fork and seat-tube. finally I clean the Bottom Bracket Shell and the chainstays, first with one of the dirtied cloth to remove grease and then with a clean cloth. I then repeat the above process, without soap, just plain water.
Do this multiple times during the first season of riding and most of the superficial grime will be gone without any risk of damaging the decals (unless it's a Pinarello).
I spray a fine mist of plain water on the bike and wait 5 minutes. the water lifts a significant amount of grime. I then take a soft terry cloth and a few drops of dish soap and wipe down the top-tube and seatstays, these are normally much cleaner than the rest of the bike. With a new, clean cloth, I then clean the head-tube, fork and seat-tube. finally I clean the Bottom Bracket Shell and the chainstays, first with one of the dirtied cloth to remove grease and then with a clean cloth. I then repeat the above process, without soap, just plain water.
Do this multiple times during the first season of riding and most of the superficial grime will be gone without any risk of damaging the decals (unless it's a Pinarello).
06-17-17, 07:07 PM
#6

multimodal commuter

Join Date: Nov 2006
Location: NJ, NYC, LI
Posts: 19,808
Bikes: 1940s Fothergill, 1959 Allegro Special, 1963? Claud Butler Olympic Sprint, Lambert 'Clubman', 1974 Fuji "the Ace", 1976 Holdsworth 650b conversion rando bike, 1983 Trek 720 tourer, 1984 Counterpoint Opus II, 1993 Basso Gap, 2010 Downtube 8h, and...
Mentioned: 584 Post(s)
Tagged: 0 Thread(s)
Quoted: 1908 Post(s)
Liked 574 Times
in
339 Posts
What kind of vintage, and what kind of decals? Bike mfgs have used all kinds of decals over the years, some are more fragile than others.
Likes For rhm:
06-17-17, 07:35 PM
#7
Senior Member
Join Date: Oct 2014
Location: Pico Rivera, CA
Posts: 4,182
Bikes: 1983 Basso Gap...2013 Colnago CX-1...2015 Bianchi Intenso
Mentioned: 89 Post(s)
Tagged: 0 Thread(s)
Quoted: 1199 Post(s)
Liked 1,354 Times
in
716 Posts
I use Honest Multi-surface with a cloth...anything else that wont come off I use cotton balls with a sprinkle of acetone careful not to go over the decals. Works for me and haven't seen any signs of paint fading.
06-17-17, 07:36 PM
#8
Senior Member
Thread Starter
Join Date: Nov 2015
Location: Lacey, WA
Posts: 1,707
Bikes: Stevenson Custom, Stevenson Custom Tandem, Nishiki Professional
Mentioned: 35 Post(s)
Tagged: 0 Thread(s)
Quoted: 367 Post(s)
Likes: 0
Liked 196 Times
in
128 Posts
rhm, the bike and decals? It's a Nishiki Cresta and I have just posted pictures of it and most of its decals, the other down tube decal is all there but gouged, in my post for background information, which I have just posted in C&V forum.
06-17-17, 08:29 PM
#9
Senior Member
I am about to clean a vintage frame with some nice intact decals and some damaged decals and I would not want to damage either in the process of cleaning the frame, what do you suggest?
Generally I use Mr. Bubble toilet cleaning foam and am pleased with the results on my modern bike whose decals are under clear coat, but what will clean and not risk damage to the frame decals on this early 80s era vintage frame?
Thanks for you thoughts and advice as to what has worked for you in cleaning a vintage frame without damage to vintage decals.
Generally I use Mr. Bubble toilet cleaning foam and am pleased with the results on my modern bike whose decals are under clear coat, but what will clean and not risk damage to the frame decals on this early 80s era vintage frame?
Thanks for you thoughts and advice as to what has worked for you in cleaning a vintage frame without damage to vintage decals.
06-17-17, 09:09 PM
#10
aka Tom Reingold

Join Date: Jan 2009
Location: New York, NY, and High Falls, NY, USA
Posts: 40,498
Bikes: 1962 Rudge Sports, 1971 Raleigh Super Course, 1971 Raleigh Pro Track, 1974 Raleigh International, 1975 Viscount Fixie, 1982 McLean, 1996 Lemond (Ti), 2002 Burley Zydeco tandem
Mentioned: 511 Post(s)
Tagged: 0 Thread(s)
Quoted: 7346 Post(s)
Liked 2,452 Times
in
1,430 Posts
__________________
Tom Reingold, tom@noglider.com
New York City and High Falls, NY
Blogs: The Experienced Cyclist; noglider's ride blog
�When man invented the bicycle he reached the peak of his attainments.� � Elizabeth West, US author
Please email me rather than PM'ing me. Thanks.
Tom Reingold, tom@noglider.com
New York City and High Falls, NY
Blogs: The Experienced Cyclist; noglider's ride blog
�When man invented the bicycle he reached the peak of his attainments.� � Elizabeth West, US author
Please email me rather than PM'ing me. Thanks.
06-17-17, 09:13 PM
#11
Senior Member
Thread Starter
Join Date: Nov 2015
Location: Lacey, WA
Posts: 1,707
Bikes: Stevenson Custom, Stevenson Custom Tandem, Nishiki Professional
Mentioned: 35 Post(s)
Tagged: 0 Thread(s)
Quoted: 367 Post(s)
Likes: 0
Liked 196 Times
in
128 Posts
My local bike builder who built my Stevenson Custom and Tandem uses it all the time to clean frames. It is pretty mild and does a nice job of removing the dirt, needles road grunge from the bike. Pitch from needles still needs a fingernail to scrape free. But remember these are clear coated and in the case of the Tandem powder coated frames, so I hesitate on older frames, try it first in a neglected section of the frame (bottom of the bottom bracket).
06-17-17, 09:15 PM
#12
Senior Member
Thread Starter
Join Date: Nov 2015
Location: Lacey, WA
Posts: 1,707
Bikes: Stevenson Custom, Stevenson Custom Tandem, Nishiki Professional
Mentioned: 35 Post(s)
Tagged: 0 Thread(s)
Quoted: 367 Post(s)
Likes: 0
Liked 196 Times
in
128 Posts
Grandkids think Mr. Bubble, or any bubble bath, is the best thing since ice cream. Not much changes.
06-17-17, 09:24 PM
#13
Senior Member

Join Date: Mar 2014
Location: City of Angels
Posts: 4,870
Bikes: A few too many
Mentioned: 42 Post(s)
Tagged: 1 Thread(s)
Quoted: 1364 Post(s)
Liked 2,178 Times
in
1,182 Posts
As others mentioned dishwashing liquid ( I use Dawn) in lukewarm water staying away from decals as much as possible.
Near BB where there is a lot of grease I find an infant toothbrush works great at helping to dislodge grime without scratching the paint finish
Remember water slides are very delicate.
Best, Ben
Near BB where there is a lot of grease I find an infant toothbrush works great at helping to dislodge grime without scratching the paint finish
Remember water slides are very delicate.
Best, Ben
__________________
"EVERY PERSON IS GUILTY OF ALL THE GOOD THEY DID NOT DO"
Voltaire
Voice recognition may sometimes create odd spelling and grammatical errors
"EVERY PERSON IS GUILTY OF ALL THE GOOD THEY DID NOT DO"
Voltaire
Voice recognition may sometimes create odd spelling and grammatical errors
06-17-17, 09:50 PM
#14
Senior Member
Thread Starter
Join Date: Nov 2015
Location: Lacey, WA
Posts: 1,707
Bikes: Stevenson Custom, Stevenson Custom Tandem, Nishiki Professional
Mentioned: 35 Post(s)
Tagged: 0 Thread(s)
Quoted: 367 Post(s)
Likes: 0
Liked 196 Times
in
128 Posts
Thanks all for advice. I'll start cleaning this coming week, a full plate so have to fit in the time. Bottom bracket feels like the bearings are caked in grease, we hope, not rust. Will proceed slowly and with care, dish soap, baby tooth brush and time.
06-18-17, 02:35 PM
#15
Senior Member
Thread Starter
Join Date: Nov 2015
Location: Lacey, WA
Posts: 1,707
Bikes: Stevenson Custom, Stevenson Custom Tandem, Nishiki Professional
Mentioned: 35 Post(s)
Tagged: 0 Thread(s)
Quoted: 367 Post(s)
Likes: 0
Liked 196 Times
in
128 Posts
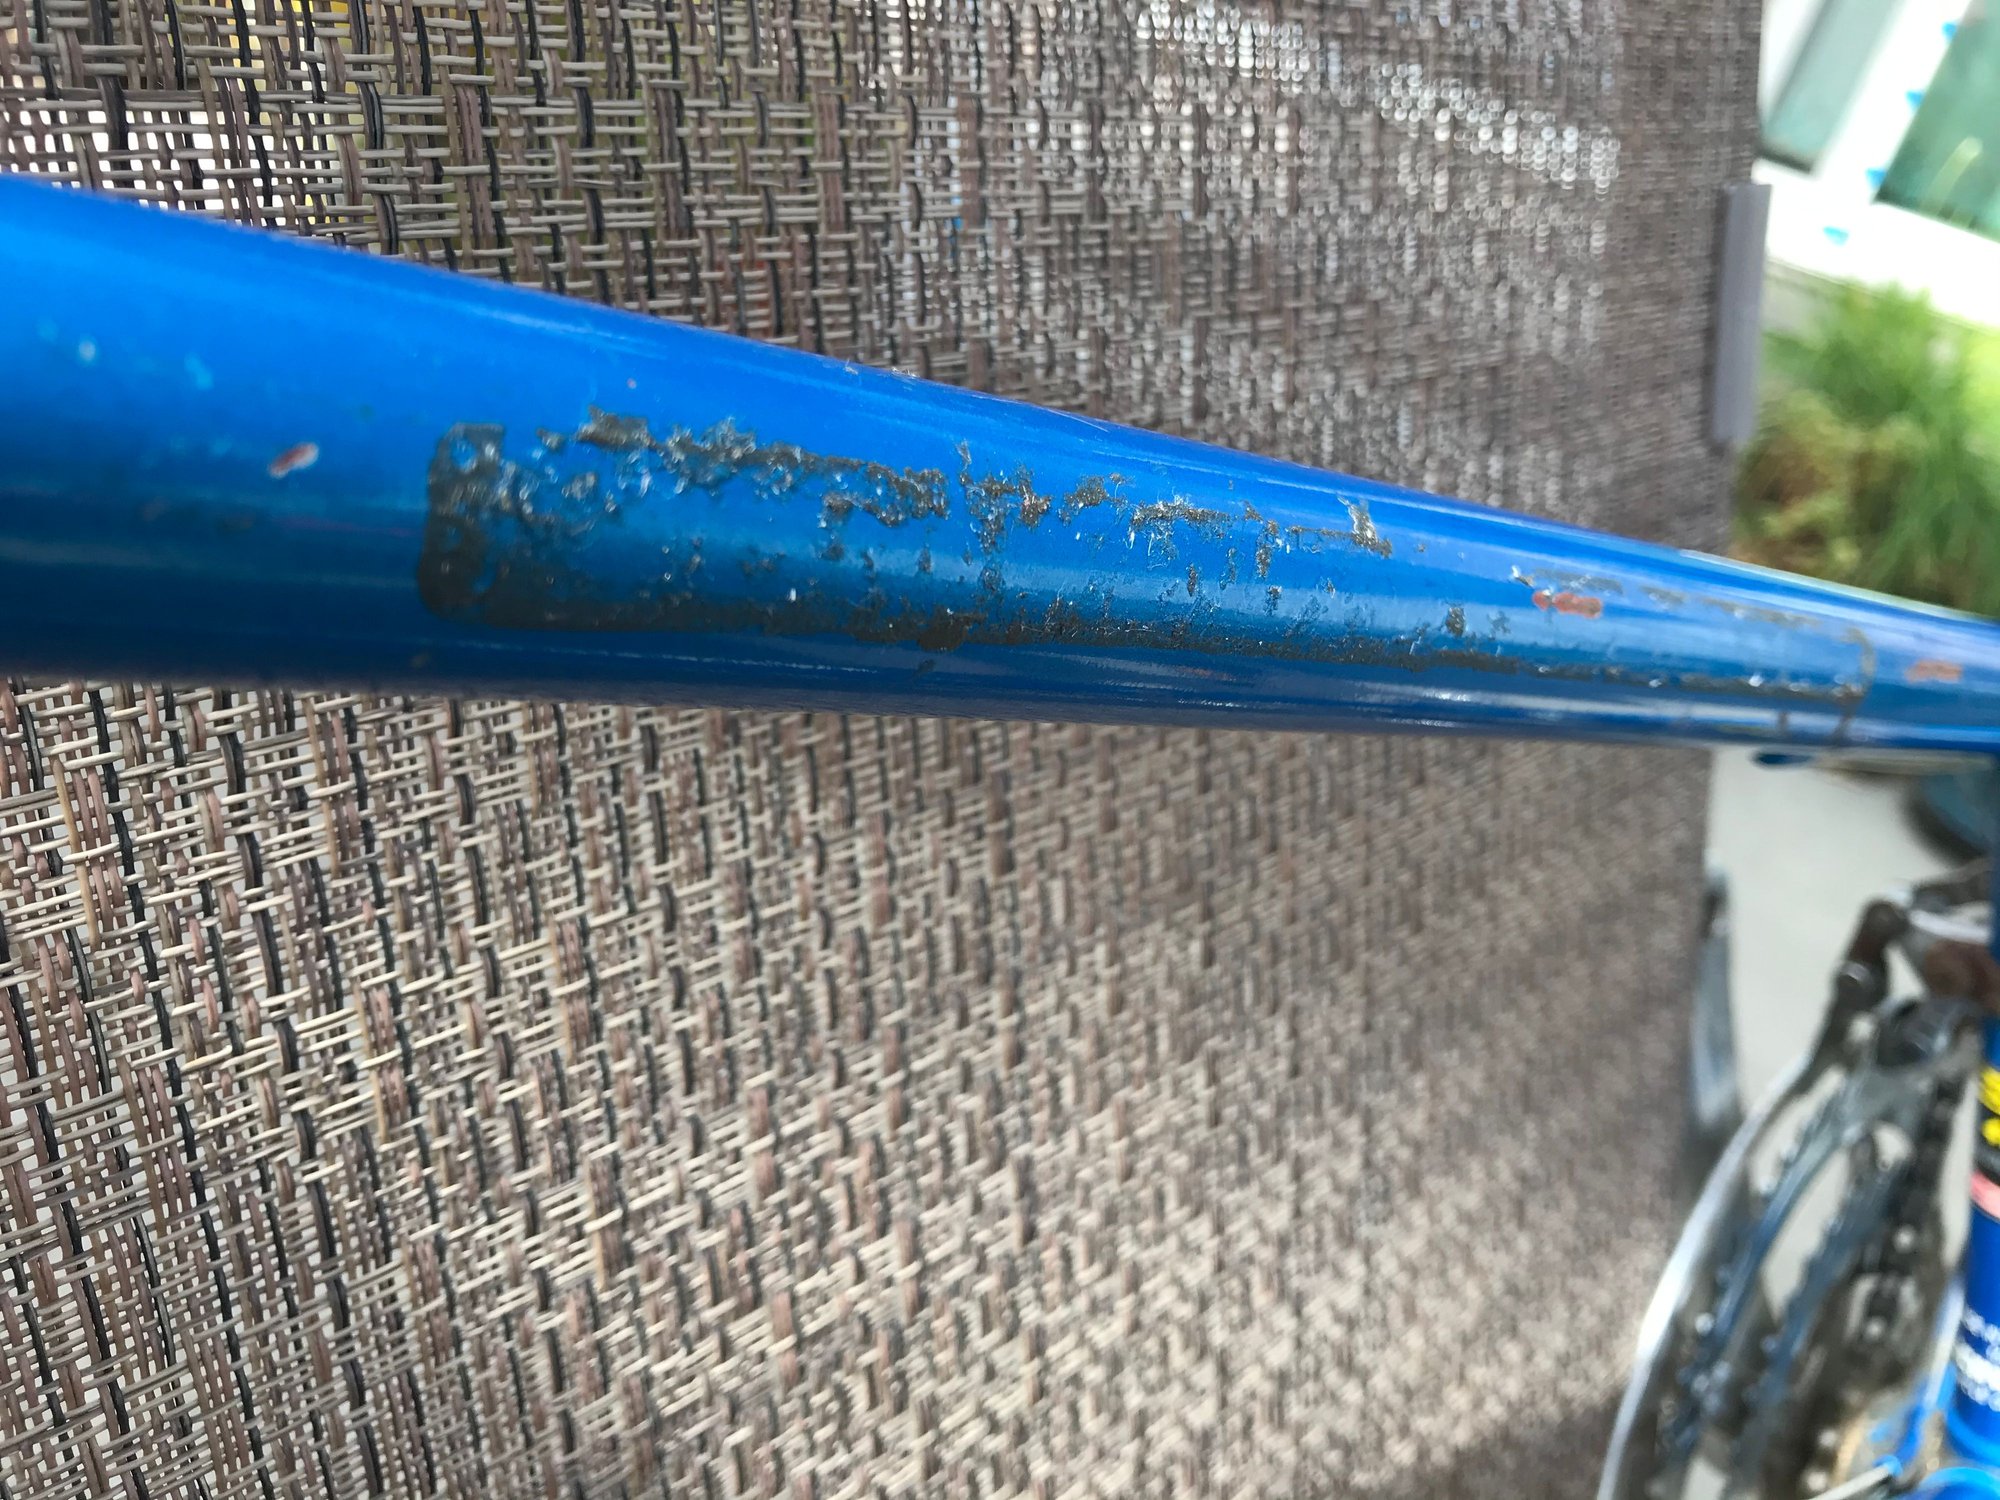
P1060157.JPG
P1060163.JPG
The warm soap and water with dish soap did a fine job of getting all the lose dirt, dust, grime off.
Found out I was out of chain cleaning fluid so I will get some today and then in a mild mixture with a soft tooth brush work off the dried grease on the head tube and bottom bracket.
Tried the bottom bracket with tools, but no budge so I stopped without stripping anything and will soak threads in penetrating oil and then take them over to my frame builder friend who has the gotter dammerung bottom bracket vice which will remove the bottom bracket for inspection without trauma.
06-18-17, 02:38 PM
#16
Senior Member
Thread Starter
Join Date: Nov 2015
Location: Lacey, WA
Posts: 1,707
Bikes: Stevenson Custom, Stevenson Custom Tandem, Nishiki Professional
Mentioned: 35 Post(s)
Tagged: 0 Thread(s)
Quoted: 367 Post(s)
Likes: 0
Liked 196 Times
in
128 Posts
P1060161.JPG
P1060160.JPG
Since this frame fork is going to sit a spell before I begin the rebuild I thought it a good practice to fill all the brazeon/water bottle attachment with freshly greased bolts.
It you look closely at the end of the one long bolt through the rack brazeon you can see at its tip that it chased out some rust that was on the threads which are now coated with grease.
06-18-17, 02:44 PM
#17
Senior Member
Thread Starter
Join Date: Nov 2015
Location: Lacey, WA
Posts: 1,707
Bikes: Stevenson Custom, Stevenson Custom Tandem, Nishiki Professional
Mentioned: 35 Post(s)
Tagged: 0 Thread(s)
Quoted: 367 Post(s)
Likes: 0
Liked 196 Times
in
128 Posts
P1060165.JPG
Once I get the bottom bracket out I will clean off all the old grease with chain cleaner and then spray frame saver inside all frame tubes and fork, a messy job as you always end up with some spraying on you.
I'll also go visit the local auto body supply store which has provided very good matched paint for other vintage bikes and then get out my sets of fine touch up brushes to touch up the many many scratches and gouges, laying down a rust inhibitor before painting. Yes a bit of a spotted dog when done, but that's Ok scruffy old guys enjoy scruffy old bikes, and "ride" is the key word, no hanger queen this.
Then a couple months wait, while other projects get done.
Good time to research how I will rebuild this bike
06-18-17, 09:09 PM
#18
aka Tom Reingold
Join Date: Jan 2009
Location: New York, NY, and High Falls, NY, USA
Posts: 40,498
Bikes: 1962 Rudge Sports, 1971 Raleigh Super Course, 1971 Raleigh Pro Track, 1974 Raleigh International, 1975 Viscount Fixie, 1982 McLean, 1996 Lemond (Ti), 2002 Burley Zydeco tandem
Mentioned: 511 Post(s)
Tagged: 0 Thread(s)
Quoted: 7346 Post(s)
Liked 2,452 Times
in
1,430 Posts
Don't take the fixed cup out (on the drive side) unless you are replacing it. We normally leave that in. We stick a rag on our finger and reach in to clean the cup.
__________________
Tom Reingold, tom@noglider.com
New York City and High Falls, NY
Blogs: The Experienced Cyclist; noglider's ride blog
�When man invented the bicycle he reached the peak of his attainments.� � Elizabeth West, US author
Please email me rather than PM'ing me. Thanks.
Tom Reingold, tom@noglider.com
New York City and High Falls, NY
Blogs: The Experienced Cyclist; noglider's ride blog
�When man invented the bicycle he reached the peak of his attainments.� � Elizabeth West, US author
Please email me rather than PM'ing me. Thanks.
Likes For noglider:
06-18-17, 10:35 PM
#19
Senior Member
Join Date: Apr 2013
Location: Amsterdam
Posts: 1,662
Bikes: 1980 Koga-Miyata Gentsluxe-S, 1998 Eddy Merckx Corsa 01, 1983 Tommasini Racing, 2012 Gulf Western CAAD10, 1980 Univega Gran Premio
Mentioned: 49 Post(s)
Tagged: 0 Thread(s)
Quoted: 600 Post(s)
Likes: 0
Liked 11 Times
in
11 Posts
Mr. Bubble toilet cleaner contains some seriously toxic stuff. I don't believe they can even sell it in Europe. Anything that irritates your eyes and lungs the way it does is not something I want around me, or my bikes.
A solution of mild dish soap and water, misted onto the frame and decals, then gently rinsed off and patted dry, would be the most gentle cleaning I can think of. And probably less harm than leaving whatever crud your bike has picked up from riding. From conversations with a friend who did auto detailing on really high-end cars, one should never just use water and a rag, or just put the soap on the rag and apply it that way. Soap has the amazing property of isolating bits of dirt and such, which are abrasive. Each soap molecule has a hydrophobic head, and hydrophilic tail. The head of the molecule wedges itself into the crevices between the paint and the dirt. As it does that, it wedges them apart, microscopically, and as water molecules get into that newly-created gap, the hydrophobic head of the soap wedges itself further in. Eventually the crud is totally separated from the paint, and surrounded by all these soap molecules (heads on the inside, tails out), which prevent it from reattaching. If you just use water and a wet rag, you're effectively doing a wet sanding to your bike, and just moving the dirt around. Most dirt/crud has an electrostatic charge which will make it want to cling to the bike. Soap breaks that bond.
Cleaners like Mr. Bubbles toilet cleaner create really strong chemical reactions. It's meant for porcelain, which is incredibly hard and resistant to chemicals. It's also designed to continue working for days after it's applied -- kind of the opposite of what I want on my bike. Are you sure you're not thinking of Mr. Bubbles bubble bath soap? Now that might work fine on a bike.
09-10-20, 01:46 PM
#20
Member
Join Date: Aug 2020
Location: Central Virginia
Posts: 40
Bikes: 50 and 51 Raleigh Superbe Sports Tourist, 53 Hercules King Coronation Celebration, 55? Automoto roadster, 68 Raleigh Sports, 76 Zebrakenko Wind, 80 Raleigh Tourist, 82 Trek 720, 87 MCycle custom, 90 Specialized Hardrock
Mentioned: 0 Post(s)
Tagged: 0 Thread(s)
Quoted: 26 Post(s)
Liked 13 Times
in
7 Posts
Helpful suggestions for cleaning around original decals, and for cleaning the decals themselves!
But what about the opposite problem...any thoughts about removing extremely old (probably 40+ years old) reflective tape that a previous owner stuck on the frame and fed era of a 1950s era Raleigh, without damaging the paint? The tape is dry and very well bonded to the paint after so many years, and you can’t just pry up a corner and start peeling. And scraping with any sort of sharp tool likely will damage the paint. Suggestions will be gratefully accepted!
But what about the opposite problem...any thoughts about removing extremely old (probably 40+ years old) reflective tape that a previous owner stuck on the frame and fed era of a 1950s era Raleigh, without damaging the paint? The tape is dry and very well bonded to the paint after so many years, and you can’t just pry up a corner and start peeling. And scraping with any sort of sharp tool likely will damage the paint. Suggestions will be gratefully accepted!
09-10-20, 01:56 PM
#21
Senior Member

Join Date: Feb 2017
Location: Concord, NC
Posts: 699
Bikes: 1984 Bianchi Tipo Corsa, 1985 Cannondale SM600 (24/26)
Mentioned: 8 Post(s)
Tagged: 0 Thread(s)
Quoted: 235 Post(s)
Liked 349 Times
in
190 Posts
Helpful suggestions for cleaning around original decals, and for cleaning the decals themselves!
But what about the opposite problem...any thoughts about removing extremely old (probably 40+ years old) reflective tape that a previous owner stuck on the frame and fed era of a 1950s era Raleigh, without damaging the paint? The tape is dry and very well bonded to the paint after so many years, and you can�t just pry up a corner and start peeling. And scraping with any sort of sharp tool likely will damage the paint. Suggestions will be gratefully accepted!
But what about the opposite problem...any thoughts about removing extremely old (probably 40+ years old) reflective tape that a previous owner stuck on the frame and fed era of a 1950s era Raleigh, without damaging the paint? The tape is dry and very well bonded to the paint after so many years, and you can�t just pry up a corner and start peeling. And scraping with any sort of sharp tool likely will damage the paint. Suggestions will be gratefully accepted!
09-10-20, 02:03 PM
#22
Member
Join Date: Aug 2020
Location: Central Virginia
Posts: 40
Bikes: 50 and 51 Raleigh Superbe Sports Tourist, 53 Hercules King Coronation Celebration, 55? Automoto roadster, 68 Raleigh Sports, 76 Zebrakenko Wind, 80 Raleigh Tourist, 82 Trek 720, 87 MCycle custom, 90 Specialized Hardrock
Mentioned: 0 Post(s)
Tagged: 0 Thread(s)
Quoted: 26 Post(s)
Liked 13 Times
in
7 Posts
Worth a try! Thanks! I’ll report back on how well,it works. 😉
09-10-20, 02:05 PM
#23
Senior Member

Join Date: Aug 2016
Location: Chesterton, Indiana
Posts: 298
Bikes: 1984 Sekai 5000 Superbe, 1987 Raleigh Seneca Mountain Tour, 1984 Schwinn World Sport, 1978 Raleigh Grand Prix, 2021 Handsome She Devil, Mystery Vintage purple road bike
Mentioned: 2 Post(s)
Tagged: 0 Thread(s)
Quoted: 99 Post(s)
Liked 124 Times
in
61 Posts
Helpful suggestions for cleaning around original decals, and for cleaning the decals themselves!
But what about the opposite problem...any thoughts about removing extremely old (probably 40+ years old) reflective tape that a previous owner stuck on the frame and fed era of a 1950s era Raleigh, without damaging the paint? The tape is dry and very well bonded to the paint after so many years, and you can�t just pry up a corner and start peeling. And scraping with any sort of sharp tool likely will damage the paint. Suggestions will be gratefully accepted!
But what about the opposite problem...any thoughts about removing extremely old (probably 40+ years old) reflective tape that a previous owner stuck on the frame and fed era of a 1950s era Raleigh, without damaging the paint? The tape is dry and very well bonded to the paint after so many years, and you can�t just pry up a corner and start peeling. And scraping with any sort of sharp tool likely will damage the paint. Suggestions will be gratefully accepted!
09-10-20, 02:36 PM
#24
Member
Join Date: Aug 2020
Location: Central Virginia
Posts: 40
Bikes: 50 and 51 Raleigh Superbe Sports Tourist, 53 Hercules King Coronation Celebration, 55? Automoto roadster, 68 Raleigh Sports, 76 Zebrakenko Wind, 80 Raleigh Tourist, 82 Trek 720, 87 MCycle custom, 90 Specialized Hardrock
Mentioned: 0 Post(s)
Tagged: 0 Thread(s)
Quoted: 26 Post(s)
Liked 13 Times
in
7 Posts
I will try that as well. Frankly, I’m up for trying anything! The problem is that this tape seems to be plastic or plasticized, and I’m just not sure that anything—soapy water, WD-40, alcohol??—is likely to soak through the tape to get to the adhesive backing. But I’m trying all of these suggestions, with eagerness.
09-10-20, 02:45 PM
#25
Senior Member
Join Date: Aug 2016
Location: Chesterton, Indiana
Posts: 298
Bikes: 1984 Sekai 5000 Superbe, 1987 Raleigh Seneca Mountain Tour, 1984 Schwinn World Sport, 1978 Raleigh Grand Prix, 2021 Handsome She Devil, Mystery Vintage purple road bike
Mentioned: 2 Post(s)
Tagged: 0 Thread(s)
Quoted: 99 Post(s)
Liked 124 Times
in
61 Posts
I will try that as well. Frankly, I�m up for trying anything! The problem is that this tape seems to be plastic or plasticized, and I�m just not sure that anything�soapy water, WD-40, alcohol??�is likely to soak through the tape to get to the adhesive backing. But I�m trying all of these suggestions, with eagerness.
This photo is before I tried to remove the adhesive, you can see how much was there.
Likes For tpadul: