


DIY, budget-friendly panniers
 02-06-20, 04:17 PM
#1
Member
Thread Starter
DIY, budget-friendly panniers
I thought I'd share a budget DIY project. Over the weekend, I put together some permanent bucket panniers. I don't want removable panniers because I would never take them with me unless I knew I needed them. I've been through that. If you remember to pick up some groceries or find something at a rummage sale, you gotta go home and get them. Also, permanent mount and low value materials mean opportunistic thieves aren't interested.
Those yellow kitty litter buckets aren't the right size for a laptop and they stick out a bit too wide. I found Buddeez Charcoal Kaddies to be just the right size with a nice lid that has a smaller opening when needed. I got the smallest size. They were $9 each. I found them on Amazon and, sure enough, there was a review using them as panniers. I then found two Instructables using them but didn't like their mounting methods.
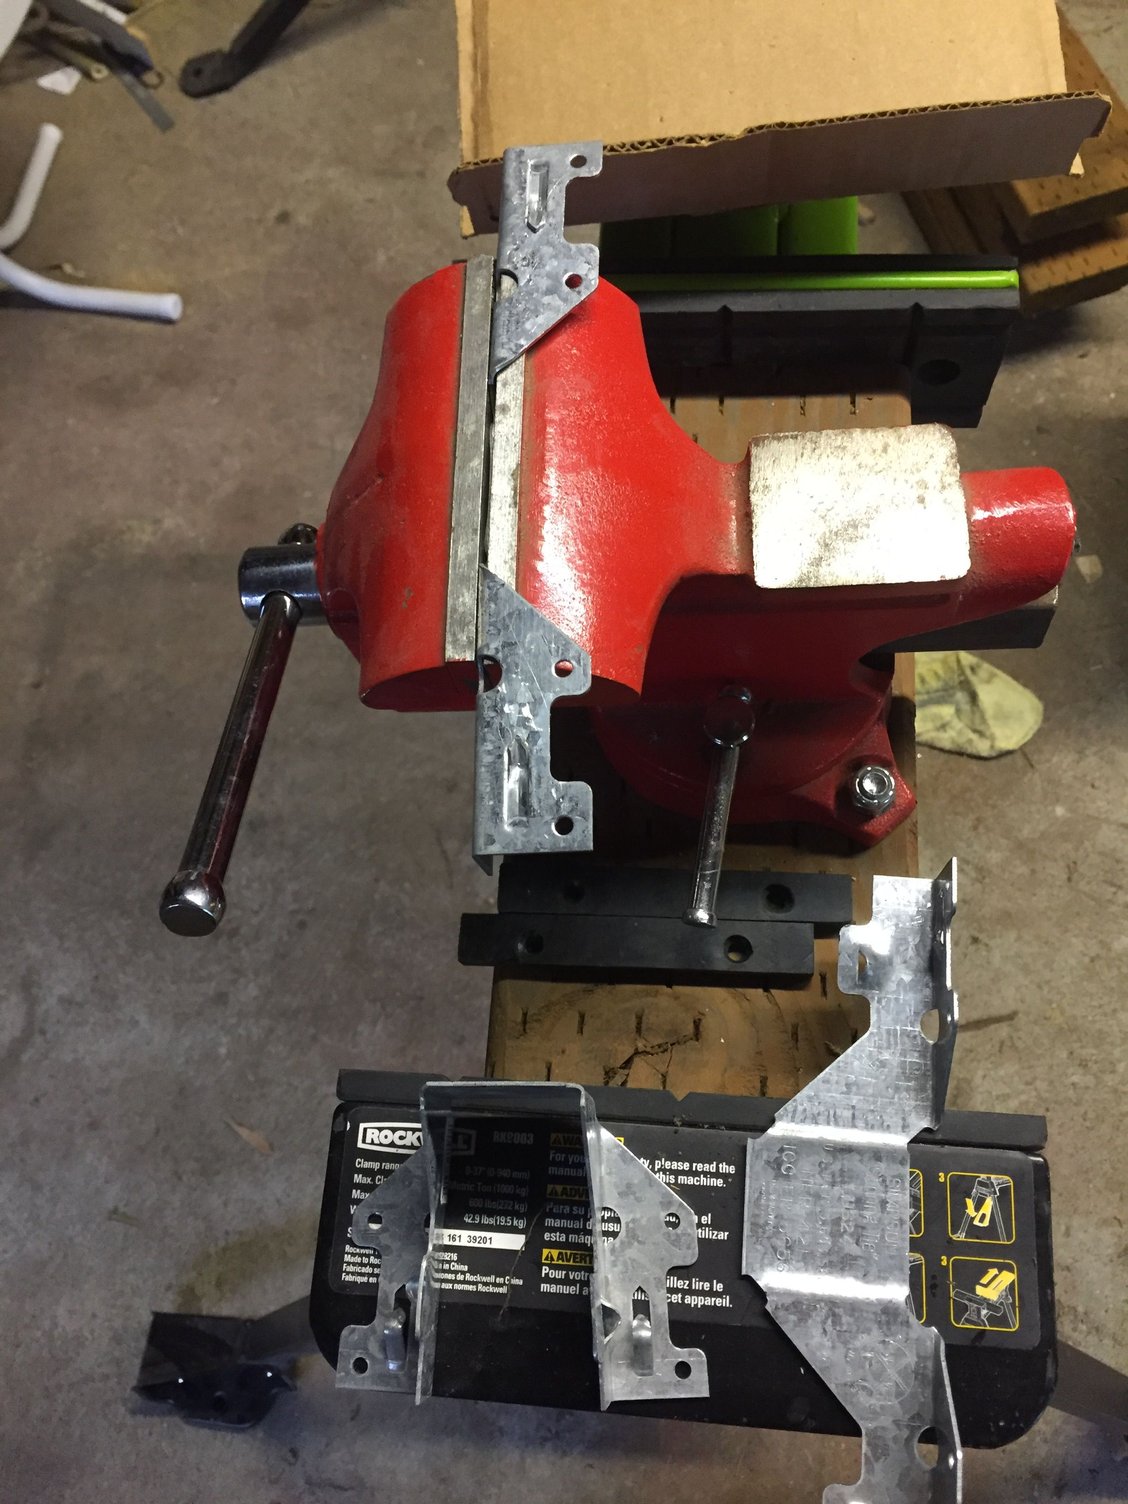
In order to mount these, I used materials that I had left over from other projects. All parts are made of galvanized metal or plastic to withstand the Portland weather. The primary, weight-bearing brackets are joist hangers that I had left over from my deck build. I just flattened them in a vice. No other modification was needed for them as they already had convenient holes for mounting screws, as well as holes for the bailing wire tensioners.
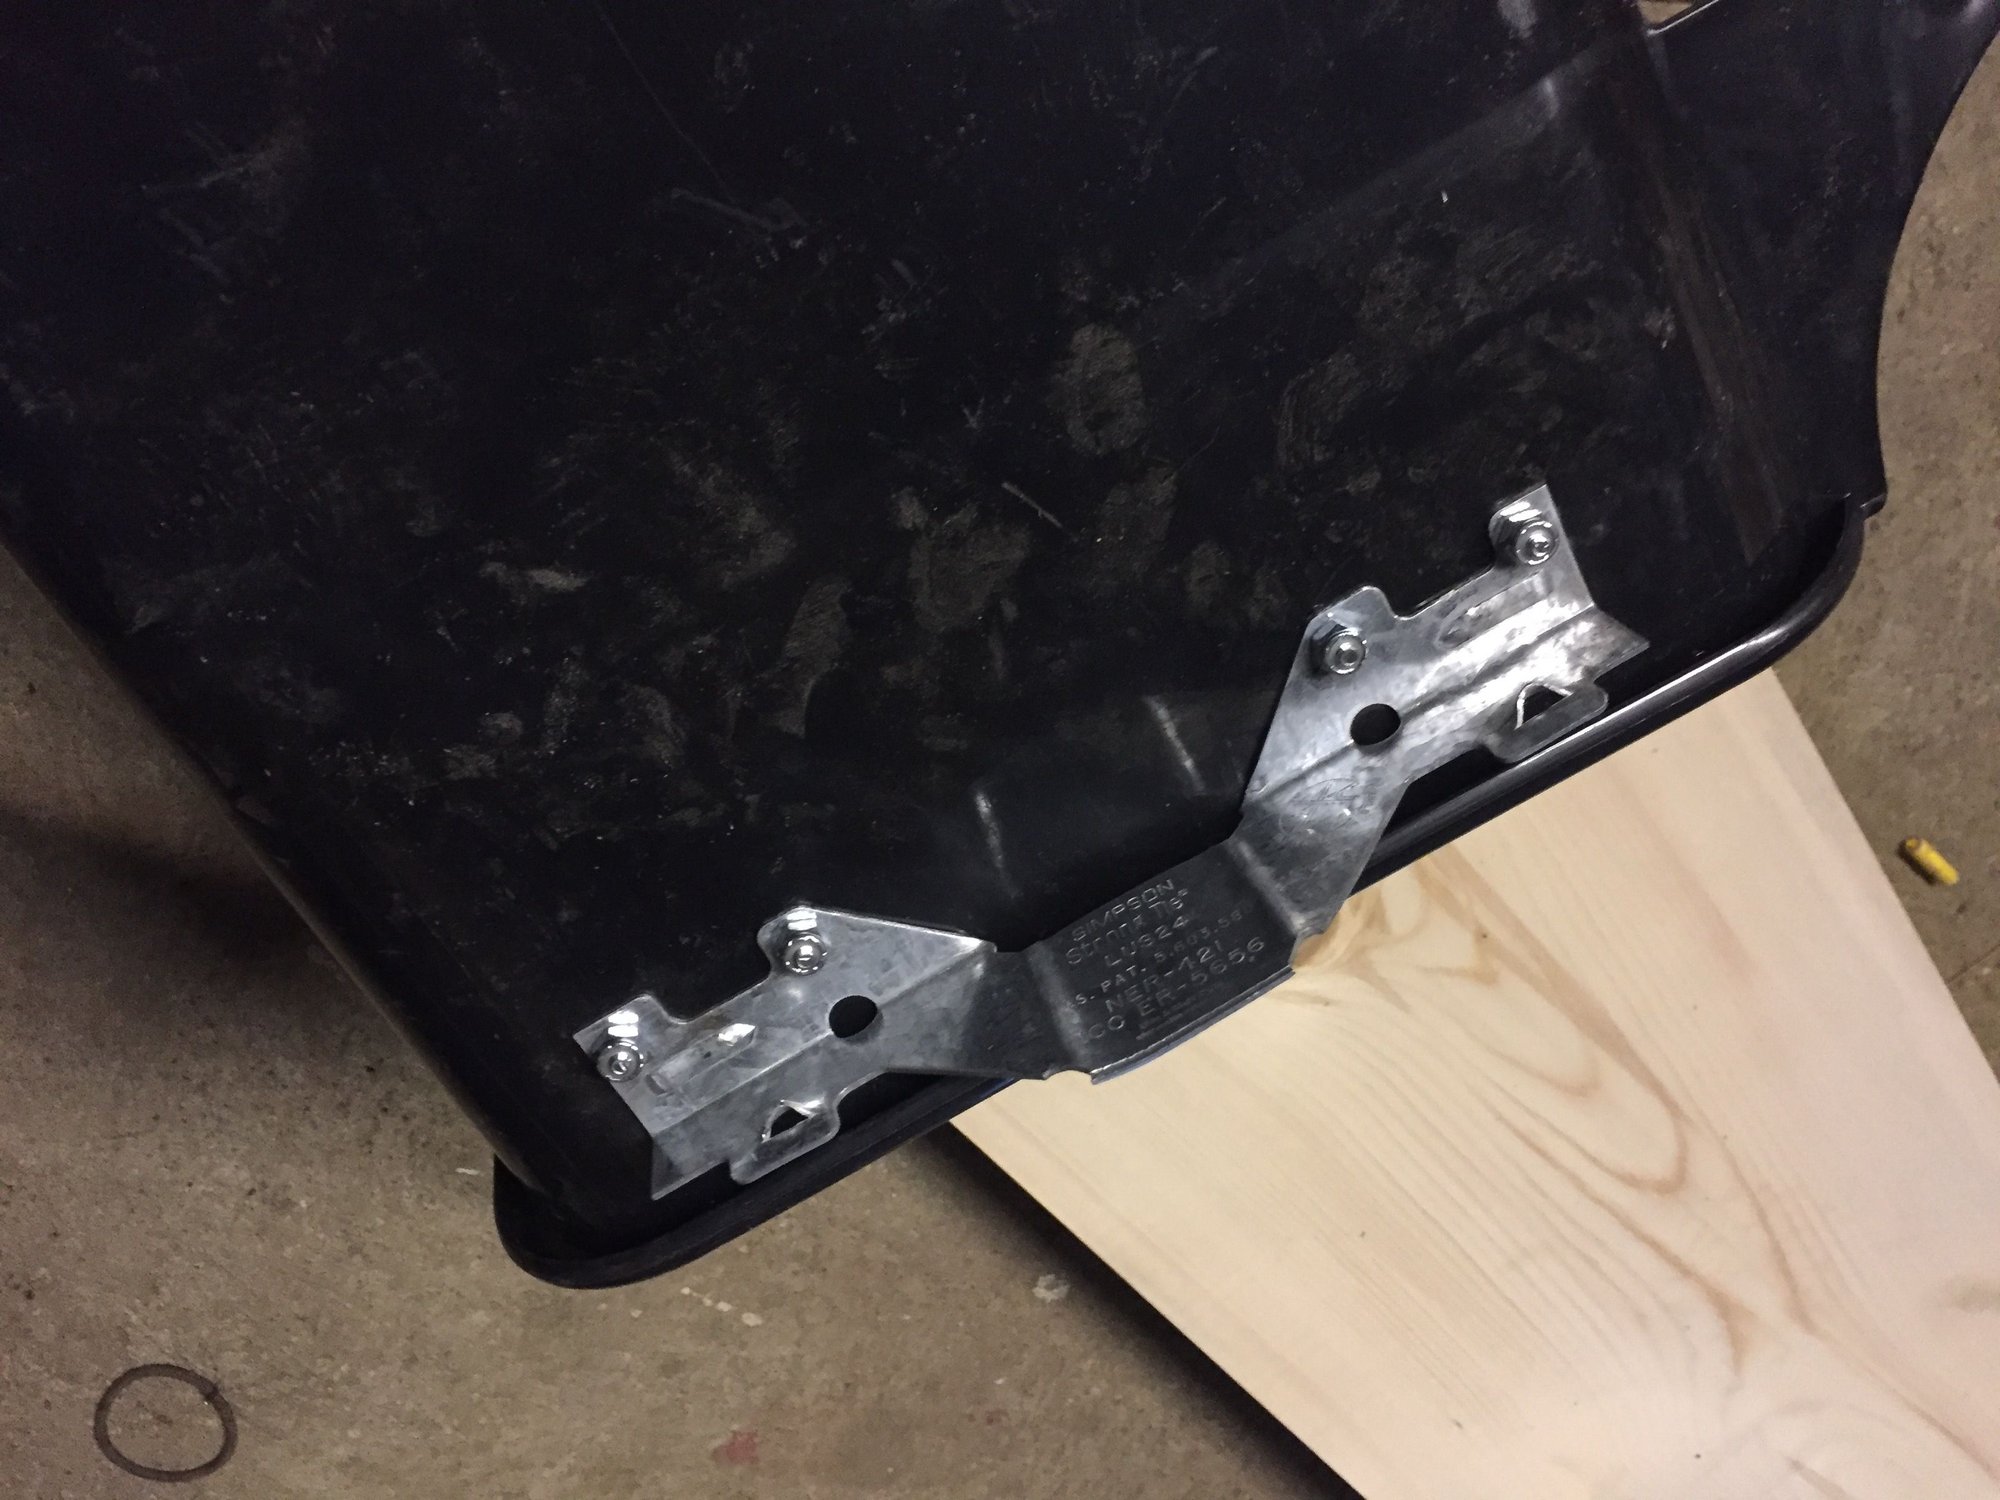
In order avoid acute stress and possible splitting of the bucket around the screws, I flattened out the points on some metal nail guards that I had laying around. If you have to buy these, I think they are about $0.20 each. I used them as big washers to distributed the stress. You can't see this in the photo, but I also used another plate lower in the bucket to keep it snug against the side of the rack. I was going to use turnbuckles to pull the two mounts together on top of the rack but I could not find any that had a span short enough at the local hardware store. Bailing wire is lightweight, rust resistant and just needs a twist with some pliers for a firm hold.

I cut some strips of left-over pond liner to eliminate rattles on the rack and used bailing wire to pull the two racks tight together.
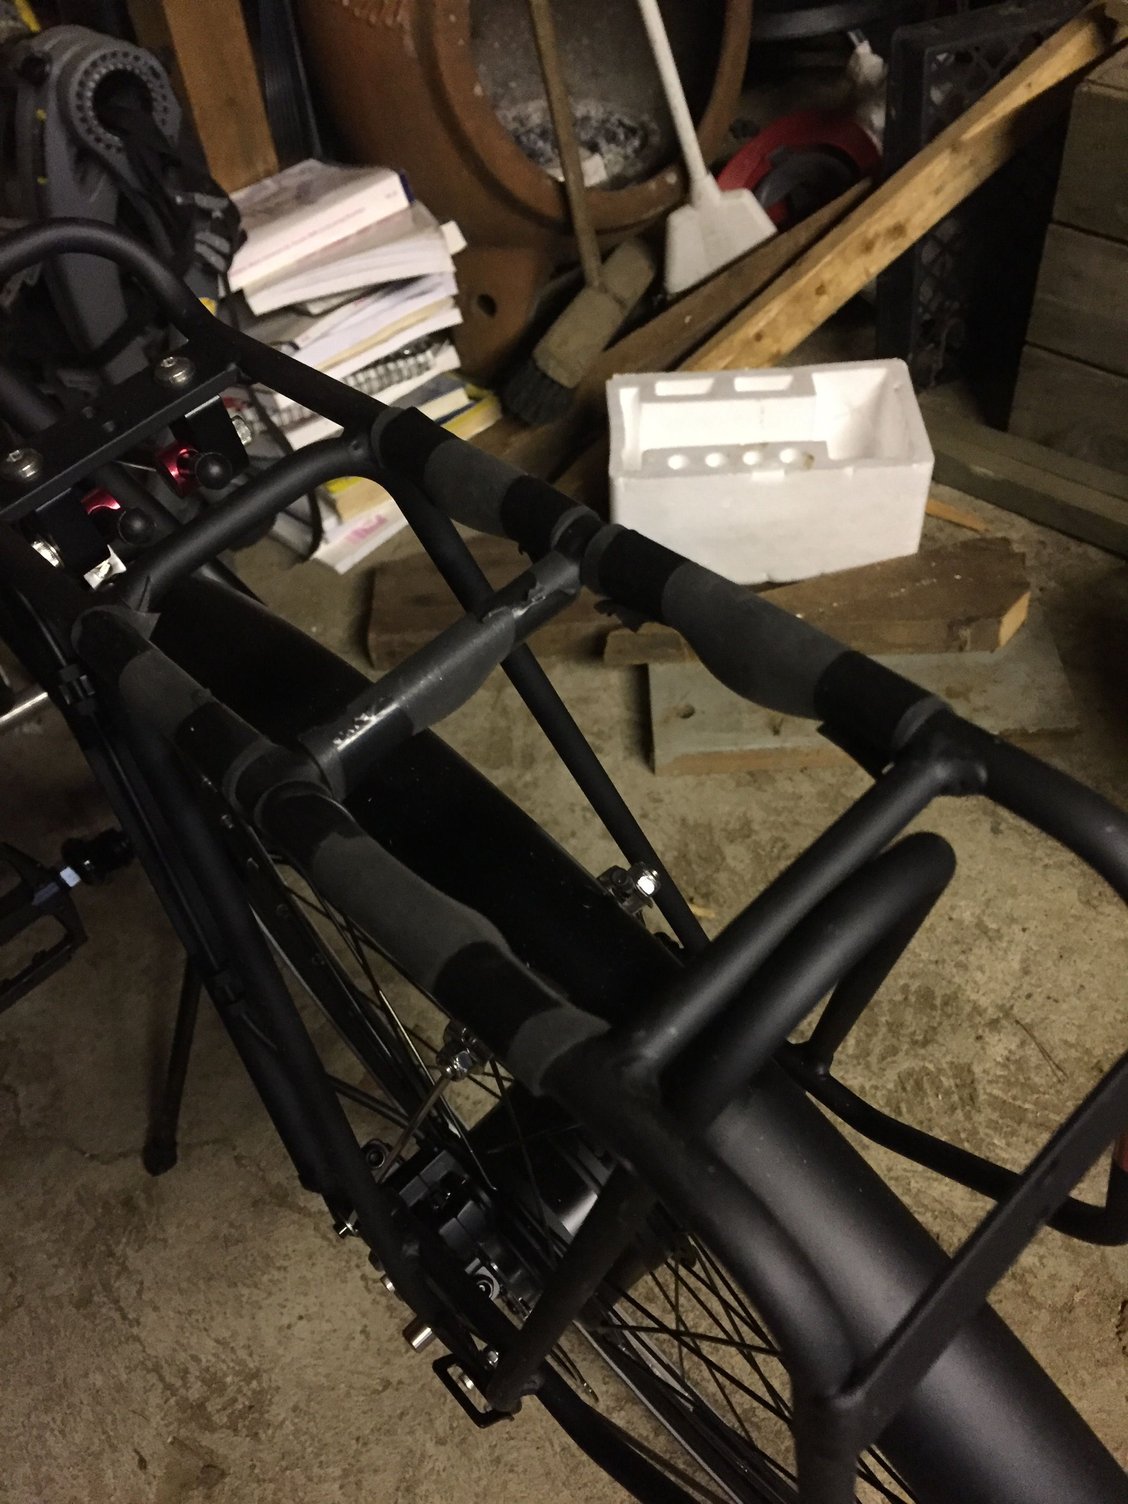

I added some holes to carry my u-lock.
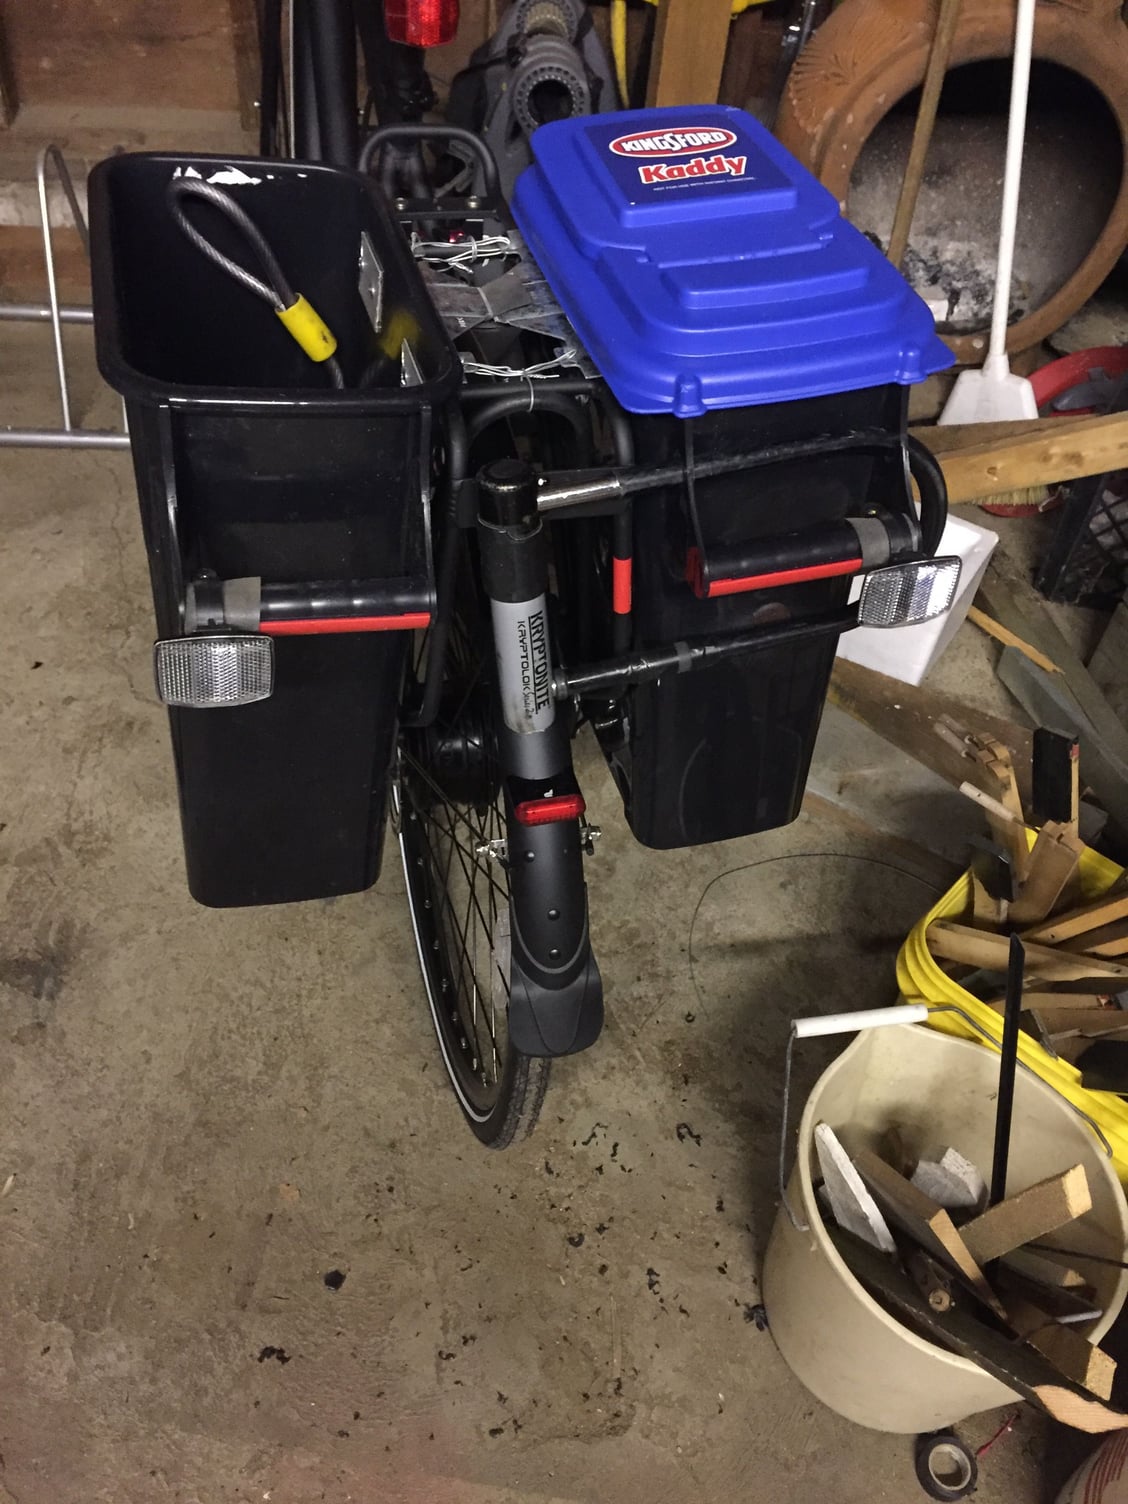

Those yellow kitty litter buckets aren't the right size for a laptop and they stick out a bit too wide. I found Buddeez Charcoal Kaddies to be just the right size with a nice lid that has a smaller opening when needed. I got the smallest size. They were $9 each. I found them on Amazon and, sure enough, there was a review using them as panniers. I then found two Instructables using them but didn't like their mounting methods.
In order to mount these, I used materials that I had left over from other projects. All parts are made of galvanized metal or plastic to withstand the Portland weather. The primary, weight-bearing brackets are joist hangers that I had left over from my deck build. I just flattened them in a vice. No other modification was needed for them as they already had convenient holes for mounting screws, as well as holes for the bailing wire tensioners.
In order avoid acute stress and possible splitting of the bucket around the screws, I flattened out the points on some metal nail guards that I had laying around. If you have to buy these, I think they are about $0.20 each. I used them as big washers to distributed the stress. You can't see this in the photo, but I also used another plate lower in the bucket to keep it snug against the side of the rack. I was going to use turnbuckles to pull the two mounts together on top of the rack but I could not find any that had a span short enough at the local hardware store. Bailing wire is lightweight, rust resistant and just needs a twist with some pliers for a firm hold.
I cut some strips of left-over pond liner to eliminate rattles on the rack and used bailing wire to pull the two racks tight together.
I added some holes to carry my u-lock.
Last edited by PDXCarless; 02-06-20 at 05:05 PM.
 02-11-20, 12:51 PM
#2
Keepin it Wheel

Join Date: Aug 2011
Location: San Diego
Posts: 10,245
Bikes: Surly CrossCheck, Krampus
Mentioned: 0 Post(s)
Tagged: 0 Thread(s)
Quoted: 26 Post(s)
Liked 3,432 Times
in
2,539 Posts
noice! I'm a kitty bucketeer myself, but you are right, laptops are an awkward fit.
Likes For RubeRad:
