


Solution sought for loose Raleigh brake bridge fitting.
 11-20-19, 08:35 PM
#1

Senior Member
Thread Starter

Join Date: Jan 2015
Location: Los Angeles
Posts: 4,701
Bikes: 82 Medici, 2011 Richard Sachs, 2011 Milwaukee Road
Mentioned: 55 Post(s)
Tagged: 0 Thread(s)
Quoted: 1946 Post(s)
Liked 2,008 Times
in
1,107 Posts
Solution sought for loose Raleigh brake bridge fitting.
On my new to me 1978 Raleigh Competition G.S.,
I'm tempted to just remove this thing. A sleeve goes through the bridge. On the outside, there is a disk that seems firmly attached to the sleeve and on the back or inside, the edge is peened over like a rivet. This eyelet-like thing is loose which makes the brake loose. I'm looking for ideas. I already tried a radiused rear spacer and filed some of the inside peened over part in an attempt to firm up the whole assembly and I'm about to file off a little more.

The black spacer is attached to a loose sleeve.

I'm tempted to just remove this thing. A sleeve goes through the bridge. On the outside, there is a disk that seems firmly attached to the sleeve and on the back or inside, the edge is peened over like a rivet. This eyelet-like thing is loose which makes the brake loose. I'm looking for ideas. I already tried a radiused rear spacer and filed some of the inside peened over part in an attempt to firm up the whole assembly and I'm about to file off a little more.
The black spacer is attached to a loose sleeve.
 11-20-19, 09:01 PM
#2
Mr. Anachronism
Join Date: Jan 2013
Location: Somewhere west of Tobie's
Posts: 2,087
Bikes: fillet-brazed Chicago Schwinns, and some other stuff
Mentioned: 29 Post(s)
Tagged: 0 Thread(s)
Quoted: 526 Post(s)
Liked 256 Times
in
165 Posts
I would take the brake caliper off, then use a toothbrush with mineral spirits to clean under the "rivet head". Dry that out with a Q-tip, then repeat with alcohol or lacquer thinner. This should remove any grease or wax under that head. Then push some JB Weld under the head, all the way around, cleaning any visible excess with a Q-tip. Let dry overnight, then reassemble. If there is any JB Weld visible, you can paint over it with black model paint.
__________________
"My only true wisdom is in knowing I have none" -Socrates
"My only true wisdom is in knowing I have none" -Socrates
11-20-19, 09:08 PM
#3
Bike Butcher of Portland

Join Date: Jul 2014
Location: Portland, OR
Posts: 11,633
Bikes: It's complicated.
Mentioned: 1299 Post(s)
Tagged: 0 Thread(s)
Quoted: 4678 Post(s)
Liked 5,793 Times
in
2,280 Posts
Oof, I think I know that issue. Best fix is to whack out the peened bits, braze in a proper sized tube, and clean it up. I'm thinking that would be a lot of work to do that. I have a bunch of these in a couple of different sizes:
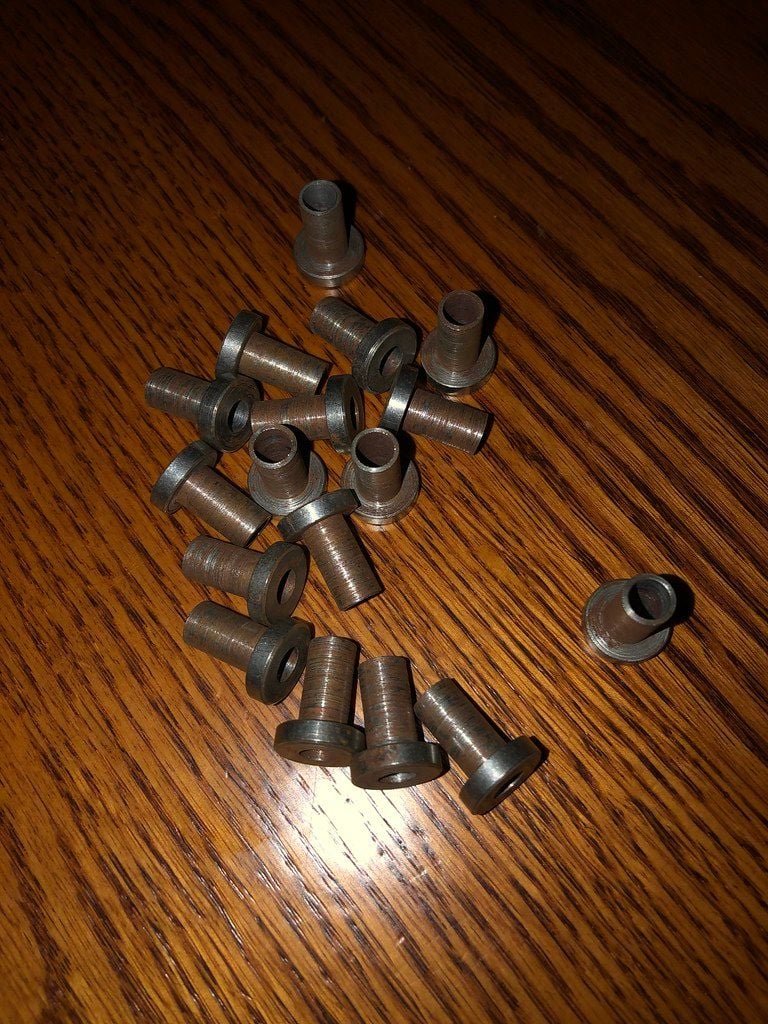
I'm wondering if you could get your bits on, drill out the bridge for a slip fit, and JB weld one of these in? Do you have someone who could braze it in place for a good permanent fix? Glossy black would be pretty easy to touch up.
I'm wondering if you could get your bits on, drill out the bridge for a slip fit, and JB weld one of these in? Do you have someone who could braze it in place for a good permanent fix? Glossy black would be pretty easy to touch up.
__________________
If someone tells you that you have enough bicycles and you don't need any more, stop talking to them. You don't need that kind of negativity in your life.
If someone tells you that you have enough bicycles and you don't need any more, stop talking to them. You don't need that kind of negativity in your life.
11-21-19, 01:34 PM
#4
Senior Member
Thread Starter
Join Date: Jan 2015
Location: Los Angeles
Posts: 4,701
Bikes: 82 Medici, 2011 Richard Sachs, 2011 Milwaukee Road
Mentioned: 55 Post(s)
Tagged: 0 Thread(s)
Quoted: 1946 Post(s)
Liked 2,008 Times
in
1,107 Posts
Two votes for JB Weld. I�ll give that a shot and ask Santa for a small OA kit. I think I can be nice for 1 more month.
11-21-19, 02:04 PM
#5

Se�or Member

Join Date: Oct 2004
Location: Hardy, VA
Posts: 17,923
Bikes: Mostly English - predominantly Raleighs
Mentioned: 70 Post(s)
Tagged: 0 Thread(s)
Quoted: 1491 Post(s)
Liked 1,090 Times
in
638 Posts
I'm not understanding why adding a washer wouldn't work.
__________________
In search of what to search for.
In search of what to search for.
11-21-19, 07:59 PM
#6
Senior Member
Thread Starter
Join Date: Jan 2015
Location: Los Angeles
Posts: 4,701
Bikes: 82 Medici, 2011 Richard Sachs, 2011 Milwaukee Road
Mentioned: 55 Post(s)
Tagged: 0 Thread(s)
Quoted: 1946 Post(s)
Liked 2,008 Times
in
1,107 Posts
What runs through the brake bridge is a piece like in Gugie's picture. And IT is loose. I can tighten the brake up against the "piece" which results in the brake and piece as a unit being loose as they relate to the bridge.
11-21-19, 08:11 PM
#7
www.theheadbadge.com

Join Date: Sep 2005
Location: Southern Florida
Posts: 28,513
Bikes: https://www.theheadbadge.com
Mentioned: 124 Post(s)
Tagged: 0 Thread(s)
Quoted: 2421 Post(s)
Liked 4,388 Times
in
2,092 Posts
Should do the job of keeping the brake from shifting position under load.
-Kurt
__________________


Likes For cudak888:
