


What is the trick to not pinching inner tubes?
 02-07-06, 03:43 PM
#26
Banned.

Join Date: Sep 2005
Location: tartarus
Posts: 1,258
Bikes: MTB's & a Cyclocross
Mentioned: 0 Post(s)
Tagged: 0 Thread(s)
Quoted: 0 Post(s)
Likes: 0
Liked 0 Times
in
0 Posts
Originally Posted by DannoXYZ
If you must use tyre levers, due to combination of tight tyre, oversized rim, thick rim-tape, etc, there's a way to use them without pinching the tube.
1. First, put the tip of the lever on the middle of the braking surface about 1-2" away from the point where the tyre is overlapping the rim-edge.
2. Slide the tyre-lever tip up to the edge of the rim WITHOUT EVER LOSING CONTACT WITH THE RIM. This ensures that you do not catch and pinch the tube between the lever and rim.
3. Then slide the lever sideways under the tyre WITHOUT EVER LOSING CONTACT WITH THE RIM unit it's as close to the overlapping point as possible.
4. Lift up on the lever to pry the tyre over the edge.
5. Pull the lever straight up and out, do not slide it sideways to remove
6. repeat back at #1 until all of tyre is on rim. The difficult part will be the final piece that's not over the rim because it'll be tight and won't sit very far away from the rim. Again, put the tip of the lever on the braking-surface and push down HARD on the lever. Slide it under the tyre WITHOUT EVER LOSING CONTACT WITH THE RIM. Pry over and that's it.
7. pull tire sideways away from rim-edge and inspect ALL THE WAY AROUND to make sure tube is not caught out and pinched between tyre and rim. Repeat for other side of tyre.

 02-07-06, 07:07 PM
#27
Senior Member
Thread Starter
Join Date: Feb 2005
Location: New Zealand
Posts: 117
Bikes: 2004 Giant OCR3, 2003 Giant Upland (mtb)
Mentioned: 0 Post(s)
Tagged: 0 Thread(s)
Quoted: 0 Post(s)
Likes: 0
Liked 0 Times
in
0 Posts
Thanks for all the suggestions. I will go practice before my next ride.
To answer a few questions, I'm riding a Giant OCR3 with standard rims and Conti Gator Skins in 700x25. The irons I have are some basic steel ones. I have considered plastic ones but I stopped in a race a few months back and loaned someone my irons because he broke his plastic ones. As it is I carry two spare tubes in my Camelback along with the irons and a pump. I tried using powder and it seemed to help seat the tube but I don't always use it. I ususally run with the tube inflated to 115-120 psi.
Normally when trying to fix a flat I give the tube enough air to hold it's shape while getting stuffed into the tire which has one bead off the rim. I have been avoiding finishing at the stem but as I see it there should not be much difference if you are able to seat the bead without cramming irons in next to the tube.
Thanks,
Andy
02-07-06, 07:07 PM
#28

You need a new bike

Join Date: Aug 2002
Posts: 5,433
Mentioned: 0 Post(s)
Tagged: 0 Thread(s)
Quoted: 3 Post(s)
Likes: 0
Liked 4 Times
in
3 Posts
Originally Posted by DocRay
you can get cheap metal levers that are not smooth. Overinflation surely does cause flats, guys in my club who ride at 130-140 are always flatting, I haven't had a flat in ~15,000 kms at 120-5 psi.
tubes are not tubes, cheap tubes leak around the stem and will have thin spots from poor QC, cheap tubes often have leaks out of the box. This is just common sense, but I'm always amazed at how many flats some guys accumulate.
tubes are not tubes, cheap tubes leak around the stem and will have thin spots from poor QC, cheap tubes often have leaks out of the box. This is just common sense, but I'm always amazed at how many flats some guys accumulate.
My cheap walmart 26" and 27" tubes have never given me a problem around the valves or failed due to "thin spots". BTW, is there anything cheaper than a walmart tube? I wish they sold 700c tubes. My nashbar/performance 700c tubes also never give me problems. Of course, a piece of glass will flat any tube but I couldn't tell you which of my tires have three-year old Performance tubes and which have six month old Continentals.
02-07-06, 07:50 PM
#29
South Jersey
Join Date: May 2005
Location: Egg Harbor Twp. NJ
Posts: 370
Bikes: Fuji SC Team, Trek STP 400, C-Dale F700, a myriad of old collectable, retired ELF BMXer
Mentioned: 0 Post(s)
Tagged: 0 Thread(s)
Quoted: 1 Post(s)
Likes: 0
Liked 0 Times
in
0 Posts
funny, I ask a question about rebuilding a fork and these so-called 'mechanics' avoid it like the plague. Then someone asks about changing a flat tire and 27 people chime in. Makes me wonder why I even bother asking. funny
02-07-06, 08:07 PM
#30
Senior Member

Join Date: May 2005
Location: Queanbeyan, Australia.
Posts: 4,135
Mentioned: 85 Post(s)
Tagged: 0 Thread(s)
Quoted: 3450 Post(s)
Liked 420 Times
in
289 Posts
Originally Posted by NzAndy
Thanks for all the suggestions. I will go practice before my next ride.
To answer a few questions, I'm riding a Giant OCR3 with standard rims and Conti Gator Skins in 700x25. The irons I have are some basic steel ones. I have considered plastic ones but I stopped in a race a few months back and loaned someone my irons because he broke his plastic ones. As it is I carry two spare tubes in my Camelback along with the irons and a pump. I tried using powder and it seemed to help seat the tube but I don't always use it. I ususally run with the tube inflated to 115-120 psi.
Normally when trying to fix a flat I give the tube enough air to hold it's shape while getting stuffed into the tire which has one bead off the rim. I have been avoiding finishing at the stem but as I see it there should not be much difference if you are able to seat the bead without cramming irons in next to the tube.
Thanks,
Andy
To answer a few questions, I'm riding a Giant OCR3 with standard rims and Conti Gator Skins in 700x25. The irons I have are some basic steel ones. I have considered plastic ones but I stopped in a race a few months back and loaned someone my irons because he broke his plastic ones. As it is I carry two spare tubes in my Camelback along with the irons and a pump. I tried using powder and it seemed to help seat the tube but I don't always use it. I ususally run with the tube inflated to 115-120 psi.
Normally when trying to fix a flat I give the tube enough air to hold it's shape while getting stuffed into the tire which has one bead off the rim. I have been avoiding finishing at the stem but as I see it there should not be much difference if you are able to seat the bead without cramming irons in next to the tube.
Thanks,
Andy
Regards, Anthony
02-07-06, 09:55 PM
#31
Float. Hammer. Jog.

Join Date: Jul 2005
Location: Kansas City, USA
Posts: 113
Bikes: Trek: Pilot 2.1, 6500 Peugeot: Corbier
Mentioned: 0 Post(s)
Tagged: 0 Thread(s)
Quoted: 0 Post(s)
Likes: 0
Liked 0 Times
in
0 Posts
Originally Posted by DannoXYZ
BTW - the vast majority of butyl tubes on the market, like 95% of them are made by IRC or Cheng Shin. Companies like Specialized buy them for $0.25
02-07-06, 10:45 PM
#32
just keep riding
Join Date: Feb 2005
Location: Milledgeville, Georgia
Posts: 13,560
Bikes: 2018 Black Mountain Cycles MCD,2017 Advocate Cycles Seldom Seen Drop Bar, 2017 Niner Jet 9 Alloy, 2015 Zukas custom road, 2003 KHS Milano Tandem, 1986 Nishiki Cadence rigid MTB, 1980ish Fuji S-12S
Mentioned: 15 Post(s)
Tagged: 0 Thread(s)
Quoted: 173 Post(s)
Liked 33 Times
in
22 Posts
Originally Posted by C4Byke
funny, I ask a question about rebuilding a fork and these so-called 'mechanics' avoid it like the plague. Then someone asks about changing a flat tire and 27 people chime in. Makes me wonder why I even bother asking. funny
02-08-06, 03:49 AM
#33
Videre non videri
Join Date: Sep 2004
Location: Gothenburg, Sweden
Posts: 3,208
Bikes: 1 road bike (simple, light), 1 TT bike (could be more aero, could be lighter), 1 all-weather commuter and winter bike, 1 Monark 828E ergometer indoor bike
Mentioned: 0 Post(s)
Tagged: 0 Thread(s)
Quoted: 0 Post(s)
Likes: 0
Liked 4 Times
in
4 Posts
Originally Posted by AnthonyG
If someone is breaking plastic levers then there doing the job incorectly. GET yourself some plastic levers and use technique, not force to do the job.
), it takes pure - and massive - force to be able to get it over.I should perhaps point out that I've replaced tubes on other tyres/rims without any problems at all. I suspect these rims I have are too big or something.
02-08-06, 04:14 AM
#34
Senior Member
Join Date: May 2005
Location: Queanbeyan, Australia.
Posts: 4,135
Mentioned: 85 Post(s)
Tagged: 0 Thread(s)
Quoted: 3450 Post(s)
Liked 420 Times
in
289 Posts
Originally Posted by CdCf
You haven't tried my tyres/rims. With three hands, it would be fairly easy, since that would allow you to move the levers from both directions, but with one hand holding the wheel, and the other pulling the bead over the rim using the plastic iron (that doesn't sound right ), it takes pure - and massive - force to be able to get it over.
I should perhaps point out that I've replaced tubes on other tyres/rims without any problems at all. I suspect these rims I have are too big or something.
), it takes pure - and massive - force to be able to get it over.I should perhaps point out that I've replaced tubes on other tyres/rims without any problems at all. I suspect these rims I have are too big or something.
Regards, Anthony
02-08-06, 04:54 AM
#35
Videre non videri
Join Date: Sep 2004
Location: Gothenburg, Sweden
Posts: 3,208
Bikes: 1 road bike (simple, light), 1 TT bike (could be more aero, could be lighter), 1 all-weather commuter and winter bike, 1 Monark 828E ergometer indoor bike
Mentioned: 0 Post(s)
Tagged: 0 Thread(s)
Quoted: 0 Post(s)
Likes: 0
Liked 4 Times
in
4 Posts
But the thing is, I only have two arms, and one is needed to hold the wheel still!
There's no place I can "anchor" it, like you do. So, that leaves me with only one hand. And that's plenty enough for every other tyre/rim combination I've dealt with, but not the ones I have now.
There's no place I can "anchor" it, like you do. So, that leaves me with only one hand. And that's plenty enough for every other tyre/rim combination I've dealt with, but not the ones I have now.
02-08-06, 10:48 AM
#36
hobby-ist

Join Date: Jun 2005
Location: Chicago, Suburbs
Posts: 357
Bikes: Schwinn WorldSport, Schwinn LeTour, Jamis Crosscountry, Litespeed Saber,
Mentioned: 0 Post(s)
Tagged: 0 Thread(s)
Quoted: 1 Post(s)
Likes: 0
Liked 1 Time
in
1 Post
Originally Posted by CdCf
But the thing is, I only have two arms, and one is needed to hold the wheel still!
There's no place I can "anchor" it, like you do. So, that leaves me with only one hand. And that's plenty enough for every other tyre/rim combination I've dealt with, but not the ones I have now.
There's no place I can "anchor" it, like you do. So, that leaves me with only one hand. And that's plenty enough for every other tyre/rim combination I've dealt with, but not the ones I have now.
Have you seen the park tool "PTS-1" it's sort of a huge pair of pliers, also they make a "TL-10" wich is a gigantic tire iron, check out the web site.
05-23-17, 06:01 AM
#37
Newbie
Join Date: May 2017
Posts: 1
Mentioned: 0 Post(s)
Tagged: 0 Thread(s)
Quoted: 0 Post(s)
Likes: 0
Liked 0 Times
in
0 Posts
Very old thread, but for what it's worth, I tried fitting tubes by partially inflating them and i got about 4 consecutive pinch flats. Very tight 25mm randonneur tyre on a Specialised 'axis' rim. Looked at someone's comment below about making sure tube is totally deflated before installing, and I have just succeeded on the first try. So, personally, I don't think I will partially inflate in future. (Even though this is what one is told to do to specifically avoid a pinch flat).
05-23-17, 11:46 AM
#38

Senior Member

Join Date: Feb 2004
Location: St Peters, Missouri
Posts: 30,225
Bikes: Catrike 559 I own some others but they don't get ridden very much.
Mentioned: 16 Post(s)
Tagged: 0 Thread(s)
Quoted: 1572 Post(s)
Liked 643 Times
in
364 Posts
Lots of interesting and (sometimes) conflicting procedures.
When I have a flat I take the entire tire off of the rim so that I can examine it's inside for the thorn or glass or tiny wire that caused the flat. I put just enough air into my replacement tube to give it shape and insert it into the tire. I put the first bead on the rim. Starting opposite the valve stem I start the second bead onto the rim working in both directions. HERE'S THE TRICK: When it starts getting hard to force the bead over the rim, set the wheel vertically on the ground with the valve stem on the bottom and push the tire downward with both hands. What I'm trying to do is to force both tire beads that are already seated down into the center of the rim. That concentrates all of the slack into the area where I need it.
FWIW, I use a similar process when removing the tire from the rim. I seldom find it necessary to use a tire lever.
__________________
My greatest fear is all of my kids standing around my coffin and talking about "how sensible" dad was.
My greatest fear is all of my kids standing around my coffin and talking about "how sensible" dad was.
05-23-17, 11:58 AM
#39
Senior Member

Join Date: Nov 2014
Location: Eugene, Oregon, USA
Posts: 27,547
Mentioned: 217 Post(s)
Tagged: 0 Thread(s)
Quoted: 18376 Post(s)
Liked 4,511 Times
in
3,353 Posts
I've got one pair of "tubeless ready" rims (RS-10) that are a pain to mount tires on, and pretty much need tools.
I am one to start at the vale and work to the opposite side of the wheel. As you get close to the end, make sure the tube is up inside the rim, rather than hanging out the side of the wheel. If you feel that double layer, tire/tube/rim, then use your fingers to poke the tube up over the side and into the rim before working on it with tools.
Once mounted, here is the point where the RS-10 wheels are nice. They have a wide blue rim tape, and I go around the wheel, both sides and push in the tire to look for the rim tape, all the way around. I know that if I see tape, then the tube isn't pinched, and it is OK to inflate.
05-23-17, 12:31 PM
#40
Keep calm, Cycle on

Join Date: Apr 2014
Location: New England
Posts: 844
Bikes: Pinarello F8, Bianchi ∞, Colnago SS, Niner MTB
Mentioned: 2 Post(s)
Tagged: 0 Thread(s)
Quoted: 117 Post(s)
Likes: 0
Liked 0 Times
in
0 Posts
Slightly inflate the tube (not plump)
Wiggle the tire so the tube is inside the tire,
then try to set the bead of the tire into the rim
inflate the tire to the correct PSI
Edit: Oh my god. This thread was started in 2006??
Wiggle the tire so the tube is inside the tire,
then try to set the bead of the tire into the rim
inflate the tire to the correct PSI
Edit: Oh my god. This thread was started in 2006??
05-23-17, 01:48 PM
#41

Senior Member
Join Date: Sep 2014
Posts: 3,893
Mentioned: 20 Post(s)
Tagged: 0 Thread(s)
Quoted: 1062 Post(s)
Liked 665 Times
in
421 Posts
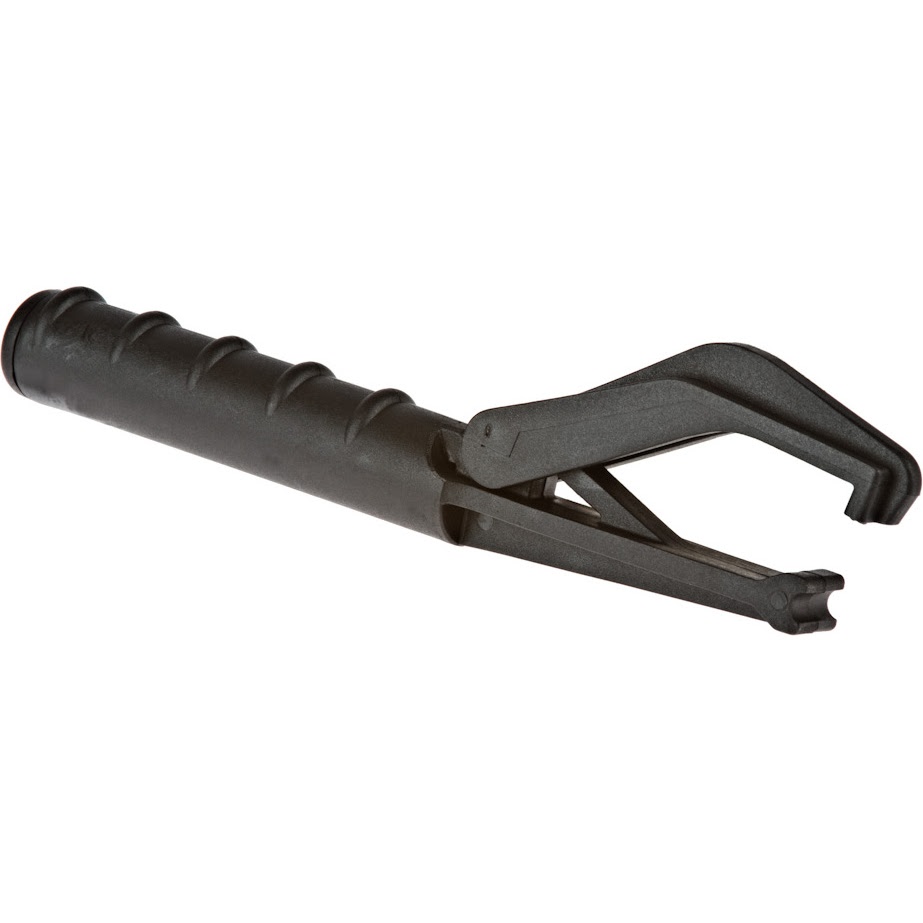
I got a Kool Stop bead jack, recommended by a number of folks here. It seems to help a lot with tight tires. Time will tell if it's really better.
05-23-17, 06:14 PM
#42
Friendship is Magic

Join Date: Nov 2010
Location: Sacramento, CA
Posts: 22,984
Bikes: old ones
Mentioned: 304 Post(s)
Tagged: 0 Thread(s)
Quoted: 26419 Post(s)
Liked 10,380 Times
in
7,208 Posts
They cost something like ten bucks delivered, and open up the world of tight tyre and rim combinations formerly forbidden to mere mortals. Some cranky olde fart will now come along and tell us all how real men don't use a tool like this, because it won't fit in a seat wedge bag, or it doesn't help you get the tyre off, or some other complaint about progress and the younger generation.
I look forward to it with eager anticipation.
 05-23-17, 06:25 PM
#43
Senior Member

Join Date: May 2010
Location: midwest
Posts: 2,528
Bikes: 2018 Roubaix Expert Di2, 2016 Diverge Expert X1
Mentioned: 14 Post(s)
Tagged: 0 Thread(s)
Quoted: 482 Post(s)
Liked 151 Times
in
105 Posts
If it hasn't already been said...
When you get to the point that you can't get it over the rim, then go around the tire, starting opposite where you are stuck, and push the beads of both sides to the center of the rim, working your way up. This puts the bead in the shallowest part of the rim, giving you more slack allowing you to push it over more. Repeat as needed.
When you get to the point that you can't get it over the rim, then go around the tire, starting opposite where you are stuck, and push the beads of both sides to the center of the rim, working your way up. This puts the bead in the shallowest part of the rim, giving you more slack allowing you to push it over more. Repeat as needed.
05-23-17, 06:55 PM
#44
Senior Member

An old shop trick is to use a toe strap to assist in mounting the tire.
Slightly inflate tube.
Put the tube inside the tire.
Start at the valve and seat the whole bottom bead, going around both sides with the hands working the tire onto the rim.
BTW, I sit on a stool with the wheel in my lap. I find that easier.
Starting at the valve again, start seating the top bead.
When you get to those last few difficult inches attach the toe strap around the tire and rim and pull it really tight. I put it to the left of center next to my left hand where the tire comes off the rim. This will hold the bead at that point.
Now, hold the toe strap and start working the bead onto those last few inches.
You can use both hands if needed because the toe strap, if it's tight enough, will hold the tire in the rim at that point.
Inflate tire to around 15 psi and go around both sides of the rim and ensure the tire is seated without the tube showing.
Inflate tire to 40 psi and check again.
Inflate to pressure.
Somebody a few months ago posted a video of a fellow mounting a tire in this manner. If I find it I'll paste in the link.
Here it is. Notice this fellow isn't some young shop hand.....this is old school.
-
Last edited by drlogik; 05-23-17 at 07:10 PM.
05-24-17, 07:11 AM
#45
Senior Member
Join Date: Sep 2014
Posts: 3,893
Mentioned: 20 Post(s)
Tagged: 0 Thread(s)
Quoted: 1062 Post(s)
Liked 665 Times
in
421 Posts
Now the younger generation, don't get me started...
 05-24-17, 12:04 PM
#46
Senior Member
Don't compete - then you can use a trunk bag for the KS Tire Jack, a couple of tubes, arm and leg warmers, a spare jersey, tools, a spare chain, lunch, a bottle of wine ... you know, like a woman's pocketbook.
09-14-18, 09:47 AM
#47
Newbie
Join Date: Sep 2018
Posts: 1
Mentioned: 0 Post(s)
Tagged: 0 Thread(s)
Quoted: 1 Post(s)
Likes: 0
Liked 0 Times
in
0 Posts
Ok. I have struggled with this for a week now. I got my wife an old Schwinn Collegiate sport 10, and was really struggling getting the tire on the rim without ruining the tube, they are super tight. Person I bought it from recommended 26" tires so thats what I got. Tighter than a bastard. ended up ruining 5 pairs of tubes before I realized that levers werent gonna cut it. so i started the tire in the rim and when it got too tight i put the bastard in a bench top vice just before the problem area, just viced the tire not the rim, then I worked it back and forth until bit by bit, the tire seated itself. Tire on, tube fine, no levers used. Lacking a vice you could also use vice grips.
09-14-18, 11:25 AM
#48
Senior Member
Join Date: Feb 2004
Location: St Peters, Missouri
Posts: 30,225
Bikes: Catrike 559 I own some others but they don't get ridden very much.
Mentioned: 16 Post(s)
Tagged: 0 Thread(s)
Quoted: 1572 Post(s)
Liked 643 Times
in
364 Posts
Ok. I have struggled with this for a week now. I got my wife an old Schwinn Collegiate sport 10, and was really struggling getting the tire on the rim without ruining the tube, they are super tight. Person I bought it from recommended 26" tires so thats what I got. Tighter than a bastard. ended up ruining 5 pairs of tubes before I realized that levers werent gonna cut it. so i started the tire in the rim and when it got too tight i put the bastard in a bench top vice just before the problem area, just viced the tire not the rim, then I worked it back and forth until bit by bit, the tire seated itself. Tire on, tube fine, no levers used. Lacking a vice you could also use vice grips.
__________________
My greatest fear is all of my kids standing around my coffin and talking about "how sensible" dad was.
My greatest fear is all of my kids standing around my coffin and talking about "how sensible" dad was.
09-14-18, 12:44 PM
#49
Banned
Ask for a Lesson / demonstration from your local bike shop staff..
It's a Service business..
It's a Service business..
