


Help! pack rat - rear wheel axle problems - cup and cone bearings keep coming loose
 01-09-24, 02:38 AM
#1
Junior Member
Thread Starter
Help! pack rat - rear wheel axle problems - cup and cone bearings keep coming loose
hi, a little help needed (this is driving me nuts)
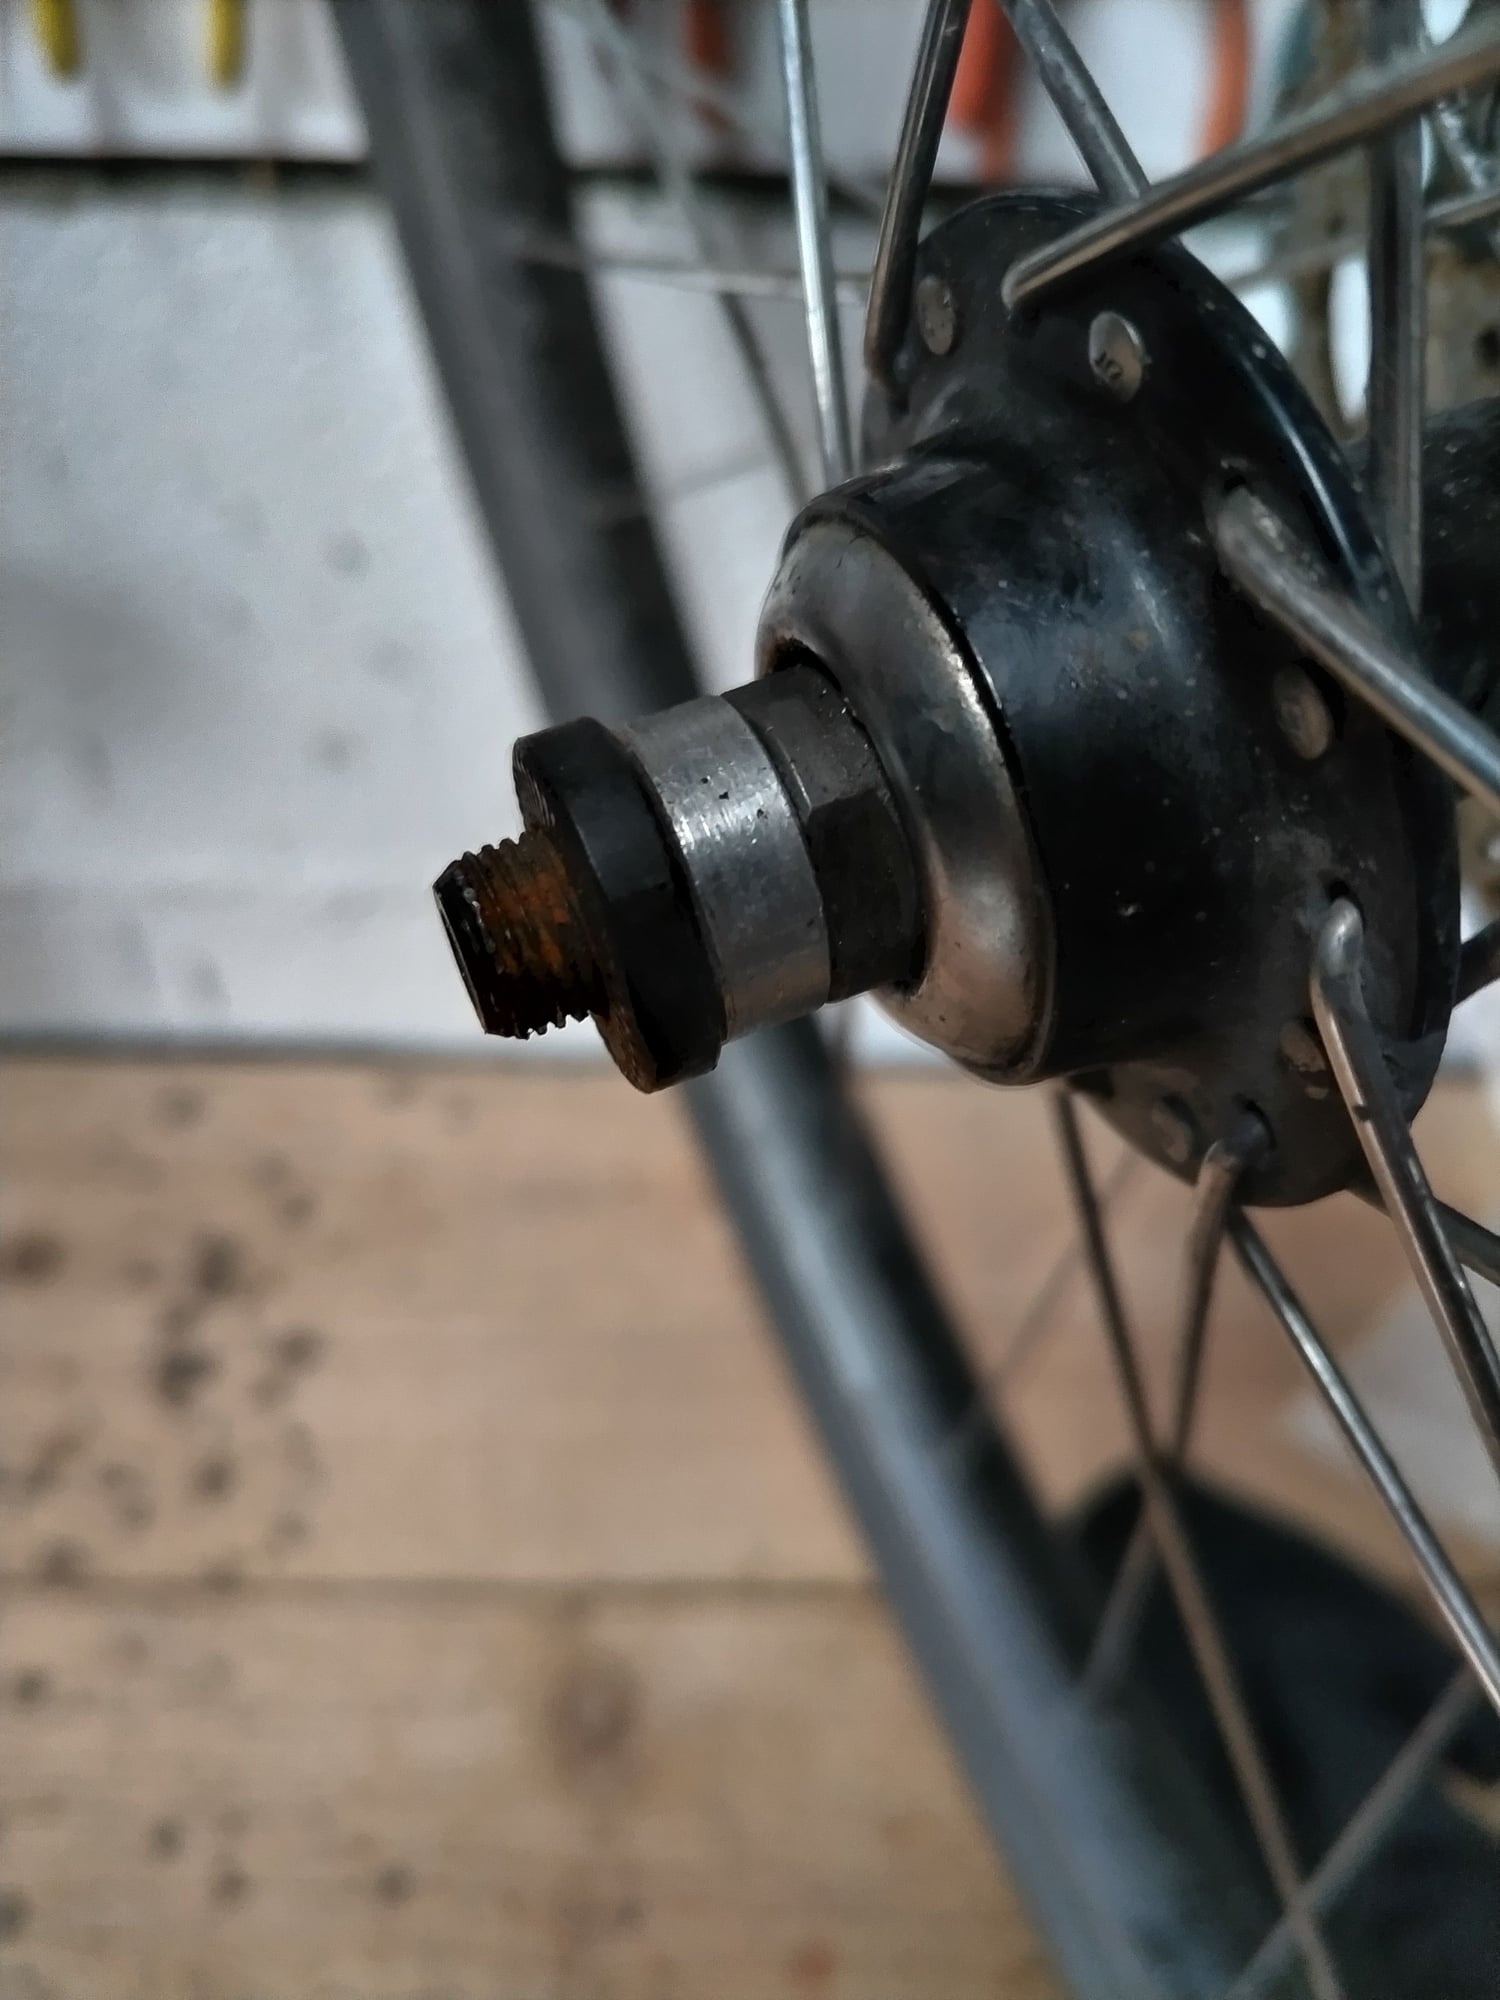
On my surly pack rat the rear wheel regularly develops a bit of a side-to-side wobble (I can move it side-to-side relative to the seat stays, but it's NOT moving in the dropouts, only on the axle), so I remove the wheel, tighten up the nut on the drivetrain side of the axle (pictured below), replace wheel, and ...do that again every few days it seems.....
I'm generally a tad unhappy with the pack rat rear wheel setup, in addition to the above issue I have to crank the QR super tight, basically at the limit of my hand strength (the original skewer broke within a year, maybe from clamping it so hard???) or the axle slips forward under hard pedaling. Surly said the hurdy gurdy would work, or a dual cam skewer, tho I'm not quite sure what one of those is....(google hasn't helped me). Does anyone have any other suggestions?
All this said, no problems on the front end, and it does what it says on the tin: carries a heavy load really well on the rack, perfect for my commute (120km a week).
Here's some photos in case they are useful:
Thanks for any help, this is reaaaallly annoying me now....
 01-09-24, 03:00 AM
#2
Mostly harmless �

Join Date: Nov 2010
Location: Novi Sad
Posts: 4,430
Bikes: Heavy, with friction shifters
Mentioned: 22 Post(s)
Tagged: 0 Thread(s)
Quoted: 1107 Post(s)
Liked 216 Times
in
130 Posts
At the cost of pointing the obvious: you need to tighten the locknuts against the cones (how to service cup-and-cone hubs and adjust bearing preload).
For the QR, make sure you use a high-quality QR with the mechanism inside its "head" ("internal cam mechanism").
Relja
For the QR, make sure you use a high-quality QR with the mechanism inside its "head" ("internal cam mechanism").
Relja
01-09-24, 04:09 AM
#3
Really Old Senior Member

Generally, when we service the bearings, we "over tighten" the DS lock nut because it's less accessible. It looks like yours is loose.
IMO- your best solution is-
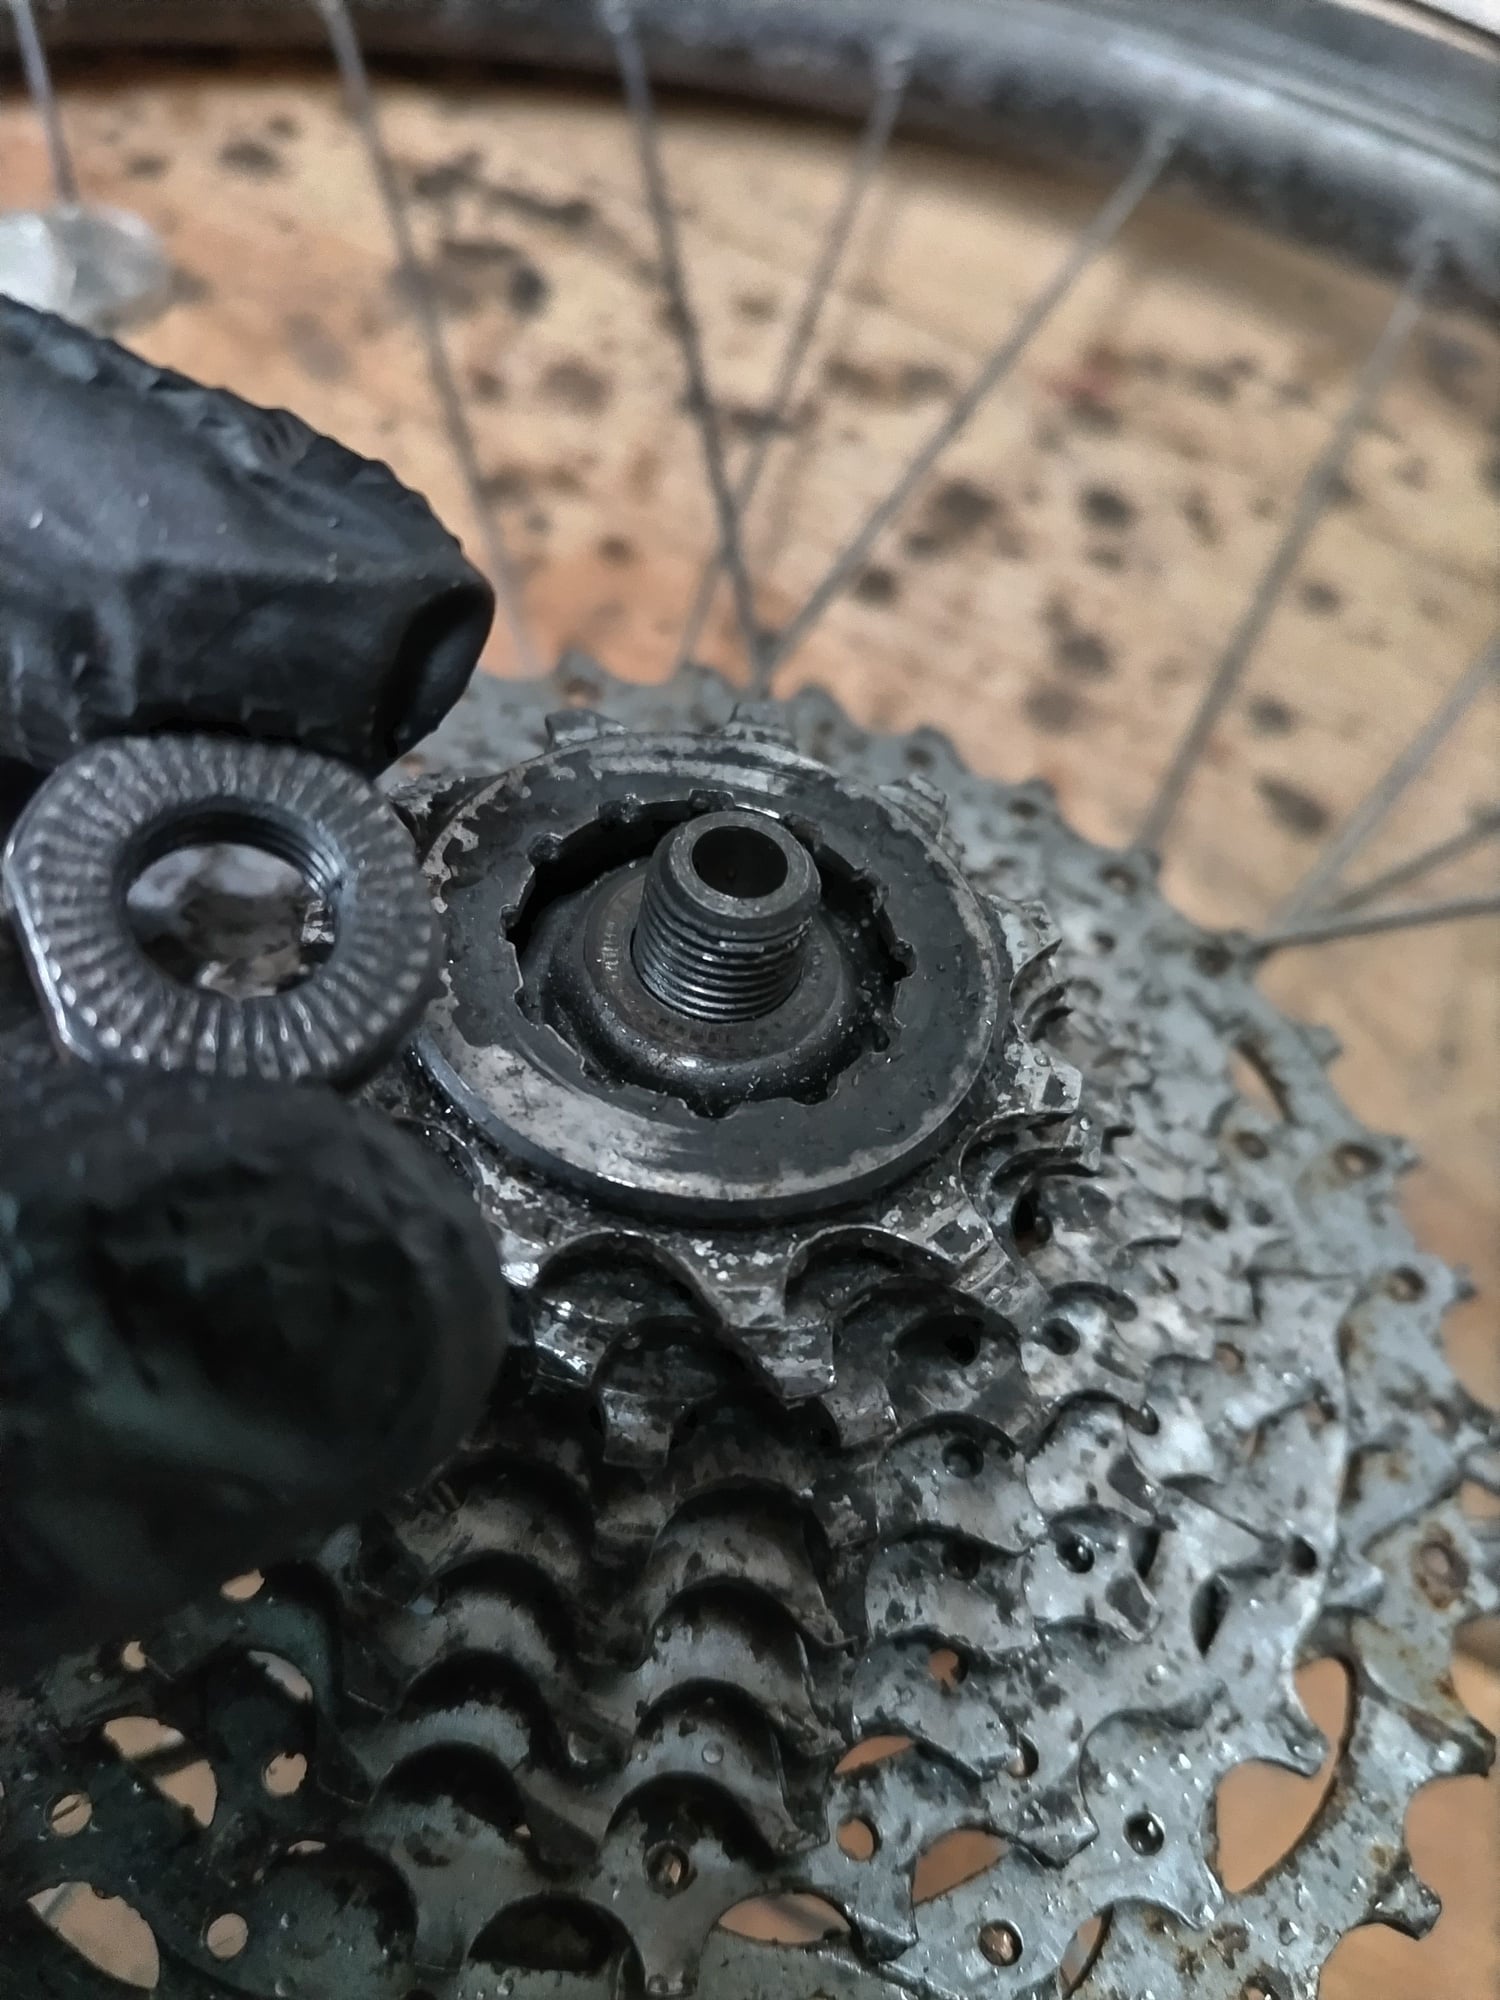
Remove the cassette.
Service/inspect the cones/bearings. Repeated loosening may have damaged the cones/balls.
When reassembling, do you final preload adjustment on the NDS.
IMO- your best solution is-
Remove the cassette.
Service/inspect the cones/bearings. Repeated loosening may have damaged the cones/balls.
When reassembling, do you final preload adjustment on the NDS.
01-09-24, 04:28 AM
#4
Junior Member
Thread Starter
thanks for the replies!
Bikegremlin - great write up and very detailed video, thanks! I basically think that's what I'm doing (tho I love the idea of using spacers, such a pain putting the wheel on and off to test!) but I can give it another go tomorrow morning....
Bill - yeah my DS side seems to come loose, feels like it needs a locknut as well as the NDS side.....I just did an overhaul and regrease last month, I'm no mechanic but it basically looked ok (no obvious damage to the cones or bearings). Tomorrow I'll try tightening the DS side then adjusting on the NDS side (i think I tried that when I did my overhaul, but ....... I've watched bikegremlin's video now so maybe it'll make more sense and I'll do a better job when I try it again....
thanks for the advice, I'll have a look at it again tomorrow...
Likes For eggnoggbubble:
01-09-24, 04:35 AM
#5
Full Member

Join Date: Oct 2022
Location: UK, New Forest
Posts: 269
Bikes: 1980 Gitane sprint,1977 Motob�cane C4, 1977 Carlton Clubman, 1959 Claud Butler European
Mentioned: 2 Post(s)
Tagged: 0 Thread(s)
Quoted: 69 Post(s)
Liked 122 Times
in
78 Posts
As above advice, the only thing I could think to add is replace the spacer with a nut(s) of the same spacing so that you can tighten them against each other, or a drop of Loctite 243 on the outer nut thread, (243 is oil tolerant which is why I recommend this one, but get it as clean as you can).
Or replace the axle and nuts, maybe they are worn or not manufactured to close enough tolerance and are a poor grade?
Or replace the axle and nuts, maybe they are worn or not manufactured to close enough tolerance and are a poor grade?
01-09-24, 07:57 AM
#6
Senior Member
Join Date: Feb 2012
Location: Golden, CO and Tucson, AZ
Posts: 2,837
Bikes: 2012 Specialized Elite Disc, 1983 Trek 520
Mentioned: 13 Post(s)
Tagged: 0 Thread(s)
Quoted: 676 Post(s)
Liked 741 Times
in
430 Posts
In addition to rebuilding the rear axle correctly, and getting a good skewer, be sure the rear dropouts are parallel to each other, and straighten if needed. There's a tool made for that, but an avid DIYer could rig something up. If a dropout is bent, it's difficult to clamp the hub securely.
Likes For andrewclaus:
01-09-24, 08:32 AM
#7

Old fart

Join Date: Nov 2004
Location: Appleton WI
Posts: 24,790
Bikes: Several, mostly not name brands.
Mentioned: 153 Post(s)
Tagged: 0 Thread(s)
Quoted: 3590 Post(s)
Liked 3,401 Times
in
1,935 Posts
Make sure that the threads on the axle, cone, and locknut aren't stripped. And consider getting a closed-cam quick release if the current one is an open cam QR.
01-09-24, 09:53 AM
#8
I'm good to go!
Join Date: Jul 2017
Location: Mississippi
Posts: 14,992
Bikes: Tarmac Disc Comp Di2 - 2020
Mentioned: 51 Post(s)
Tagged: 0 Thread(s)
Quoted: 6196 Post(s)
Liked 4,810 Times
in
3,318 Posts
On every bike I've ever had that used cup and cone bearings. I'd not loosen the locknut of the cone on the drive side. I'd just remove the cone entirely from the other side and then pull the axle out the drive side. With the cassette or freewheel in the way it's sometimes just too difficult on the drive side to tighten those locknuts properly.
It doesn't take much grease to hold all the loose ball bearings in place while you reinstall the axle after cleaning everything. Just be sure you don't have shaky hands and hit a bearing as you insert the axle. And of course the drive side cone and lock nut should already be tight before you do this.
It doesn't take much grease to hold all the loose ball bearings in place while you reinstall the axle after cleaning everything. Just be sure you don't have shaky hands and hit a bearing as you insert the axle. And of course the drive side cone and lock nut should already be tight before you do this.
Likes For Iride01:
01-09-24, 05:52 PM
#9
Senior Member
Join Date: Apr 2009
Location: New Rochelle, NY
Posts: 38,725
Bikes: too many bikes from 1967 10s (5x2)Frejus to a Sumitomo Ti/Chorus aluminum 10s (10x2), plus one non-susp mtn bike I use as my commuter
Mentioned: 140 Post(s)
Tagged: 1 Thread(s)
Quoted: 5792 Post(s)
Liked 2,583 Times
in
1,432 Posts
Pardon any dupes (I didn't read every post)
Keyless bolted cup/cone hubs are especially prone to loosening.
Be sure to tighten lockouts to the max. And be sure BOTH sides are tight. If that doesn't end this, you might consider an adhesive for added reliability.
Keyless bolted cup/cone hubs are especially prone to loosening.
Be sure to tighten lockouts to the max. And be sure BOTH sides are tight. If that doesn't end this, you might consider an adhesive for added reliability.
__________________
FB
Chain-L site
An ounce of diagnosis is worth a pound of cure.
Just because I'm tired of arguing, doesn't mean you're right.
�One accurate measurement is worth a thousand expert opinions� - Adm Grace Murray Hopper - USN
WARNING, I'm from New York. Thin skinned people should maintain safe distance.
FB
Chain-L site
An ounce of diagnosis is worth a pound of cure.
Just because I'm tired of arguing, doesn't mean you're right.
�One accurate measurement is worth a thousand expert opinions� - Adm Grace Murray Hopper - USN
WARNING, I'm from New York. Thin skinned people should maintain safe distance.
01-09-24, 06:09 PM
#10
aged to perfection

Join Date: Jun 2009
Location: PacNW
Posts: 1,817
Bikes: Dinucci Allez 2.0, Richard Sachs, Alex Singer, Serotta, Masi GC, Raleigh Pro Mk.1, Hetchins, etc
Mentioned: 24 Post(s)
Tagged: 0 Thread(s)
Quoted: 839 Post(s)
Liked 1,258 Times
in
663 Posts
have you removed the axle completely, cleaned everything etc ?
What I suspect is that you have a loose nut under the cassette. Take the axle out and tighten the cone and nut on that side, then install and set the NDS cone for minimum play and no drag.
/markp
What I suspect is that you have a loose nut under the cassette. Take the axle out and tighten the cone and nut on that side, then install and set the NDS cone for minimum play and no drag.
/markp
01-09-24, 06:36 PM
#11
Senior Member
Join Date: Oct 2023
Location: New Jersey
Posts: 571
Mentioned: 5 Post(s)
Tagged: 0 Thread(s)
Quoted: 366 Post(s)
Liked 273 Times
in
175 Posts
My limited experience is that there is a bit of an art to these - the process of tightening the locknut against the bearing can create a wee bit of wobble.
01-09-24, 07:57 PM
#12
Junior Member
Thread Starter
thanks for the help everybody, not working until after lunch today so I went out after my morning coffee and had another go at it, I think my key error (pointed out by several people above) is that it was the DS side that was coming loose so that was what I tightened to remove wobble, but it would come loose again.
This time I tightened the DS locknut good and tight, then went over to the NDS side to make all my adjustments. I used bikegremlin's tip of using some spaces (washers taped together to make the same thickness as my dropouts) to test each adjustment, tho in the end I had to make some fine adjustments with the wheel on the bike (QR tightened) to remove wobble with the wheel spinning freely. Which I haven't seen in any videos but it seemed to work... Took me nearly 2 hours but I THINK I've got it dialed: wheel spinning freely but no wobble. (hope it lasts...).
Andrew - thanks for the tip re checking the dropouts are parallel, if they're not they've been out of alignment since I bought the bike, first thing that happened a couple of km from the shop on the day I bought it was the wheel slipped, I had no idea what was going on so just cycled back to the shop and he tightened the QR (with profuse apologies) but it's been an ongoing issue, I might well take it to the shop and ask him to check the alignment...
According to this I have an external clamp QR, I'll go shopping for an internal one
Finally, on an additional happy note, my test ride round the neighborhood took my odometer over the 10,000km mark (in 2.5 years = an average of 76km/week) - kind of happy about that! (during semester I'm riding about 120~150km a week, but less during the school vacations as I mostly work at home)
01-09-24, 08:09 PM
#13
Senior Member
Join Date: Dec 2008
Location: Pioneer Valley
Posts: 1,008
Mentioned: 2 Post(s)
Tagged: 0 Thread(s)
Quoted: 332 Post(s)
Liked 742 Times
in
385 Posts
One point that�s still unclear - are you tightening the locknut against the cone in each side, using a cone wrench and regular wrench simultaneously? If you�re just tightening the locknut without bracing the cone, that could explain both the hub coming loose and the wheel slipping in the dropout. Still a good idea to switch to an internal cam skewer though.
Likes For bboy314:
01-09-24, 11:42 PM
#14
Full Member
Reuse the bearing?! I was taught not to do it at two different shops. One is an LBS (summer job) and the other is my college bike shop (doing school and as basic as it comes). They're cheap and why allow potential problem(s) to fester?
01-11-24, 04:05 AM
#15
Junior Member
Thread Starter
(thinking about this I'm wondering if the inside nut might have moved, I think I considered zip-tie-ing the cone spanner to a spoke to hold the inside nut immobile (or call my wife....) but it seemed to be working with the pliers trick. In the end it seemed to be fine, and I did 30km yesterday and the wheel was fine, but....
...I did another 25 today and when I got home the wobble was back.....frustrating.....guess what I'm doing tomorrow....
kcjc - I had intended to replace the bearings, but when I got into it I realized I didn't know what size they were, do I just measure them and buy something that seems like it's the same size? How wide are tolerances?
EDIT: never mind, I just did a quick amazon search and ordered a set of lots of different sizes ...why didn't I think of this before???
Ordered an internal QR from bluelug yesterday evening and it arrived this evening, damn bluelug are efficient (I'm in japan),
Last edited by eggnoggbubble; 01-11-24 at 04:13 AM. Reason: thoughts occur slowly...
01-11-24, 06:46 AM
#16
Senior Member
Join Date: Feb 2012
Location: Golden, CO and Tucson, AZ
Posts: 2,837
Bikes: 2012 Specialized Elite Disc, 1983 Trek 520
Mentioned: 13 Post(s)
Tagged: 0 Thread(s)
Quoted: 676 Post(s)
Liked 741 Times
in
430 Posts
Have you read Bike Gremlin's tutorial? Pay special attention to Part 7, section b, which talks about fine-tuning. Don't use pliers.
01-11-24, 05:47 PM
#17
Junior Member
Thread Starter
(in my defense: I think it was a GCN video that advised putting the axle in a vice to hold it immobile, I didn't have a vice at the time (but I do now - slowly equiping the tool shed....) but I do remember Bikegremlin accomplished it all without a vice....
BTW thanks for the help everyone, I'm a novice mechanic (if I am any mechanic at all.....) , when I got a new bike and committed to bicycle commuting a couple of years ago I also committed to learning how to work on my bikes, I'm finding it a bit of an uphill struggle at times, I appreciate your patience and detailed help!
Last edited by eggnoggbubble; 01-11-24 at 05:55 PM.
01-11-24, 06:58 PM
#18
Senior Member
Join Date: Dec 2008
Location: Pioneer Valley
Posts: 1,008
Mentioned: 2 Post(s)
Tagged: 0 Thread(s)
Quoted: 332 Post(s)
Liked 742 Times
in
385 Posts
It sounds like you�re going about adjusting bearing preload correctly, but the hub continues to loosen after riding. At this point I�d remove the axle and bearings entirely, clean everything well, and inspect. It�s possible the cup on one side of the hub is cracked or collapsing, or some threads on the axle are damaged. It�d be a good time to look for any bad pitting on the bearing surfaces as well.
01-11-24, 07:27 PM
#19
Junior Member
Thread Starter
thanks, yeah, my method may have been a bit weird but I feel like I got it adjusted correctly and it was riding fine for a day, I'll try to take it apart again over the weekend (tho my bearing kit won't arrive yet, amazon is no bluelug....), I'll post pictures....
01-11-24, 09:53 PM
#20
Senior Member
Join Date: Feb 2012
Location: Golden, CO and Tucson, AZ
Posts: 2,837
Bikes: 2012 Specialized Elite Disc, 1983 Trek 520
Mentioned: 13 Post(s)
Tagged: 0 Thread(s)
Quoted: 676 Post(s)
Liked 741 Times
in
430 Posts
01-12-24, 09:56 AM
#21
Senior Member

Join Date: Feb 2017
Location: Northern Shenandoah Valley
Posts: 4,141
Bikes: More bikes than riders
Mentioned: 36 Post(s)
Tagged: 0 Thread(s)
Quoted: 1446 Post(s)
Liked 762 Times
in
570 Posts
I post all that, not sure if your challenge is not getting the preload right initially, or if you are able to get preload correct but find that it loosens up after riding. I do hope it helps regardless.
01-12-24, 12:28 PM
#22
Senior Member
Join Date: Feb 2012
Location: Golden, CO and Tucson, AZ
Posts: 2,837
Bikes: 2012 Specialized Elite Disc, 1983 Trek 520
Mentioned: 13 Post(s)
Tagged: 0 Thread(s)
Quoted: 676 Post(s)
Liked 741 Times
in
430 Posts
...is to set too much preload with the NDS cone...more than you can set by hand. In other words, tighten that cone maybe 1/8 or 1/4 turn past "perfect." The bearings will likely feel crunchy. Then tighten the NDS locknut as you usually do, which will pull the cone loose some. This will open the preload some and, hopefully, get it back to "perfect." This will likely require some trial and error on your part, to get it just right...
Likes For andrewclaus:
01-12-24, 08:42 PM
#23
Junior Member
Thread Starter
thanks for the extra comments everyone!
I watched the whole of bikegremlin's video (not just the preload bit) last night, and I realized that at 17:01 or so he tightens the DS side cone and locknut pretty tight with two spanners - this is a step I have been missing (I tightened it, but not nearly as tight) so that's my current working theory of what is going wrong, I'm hoping to have a look at it this afternoon.
bikegremlin - by the way it's a great vid - as a novice mechanic, just watching someone work in real time is very valuable, thanks, I subscribed!
andrewclaus and hokiefyd: yes, what you're describing sounds exactly like what was happening, and your method sounds completely rational - I'll give it a go!
Likes For eggnoggbubble:
01-12-24, 09:51 PM
#24
Really Old Senior Member
thanks for the extra comments everyone!
I watched the whole of bikegremlin's video (not just the preload bit) last night, and I realized that at 17:01 or so he tightens the DS side cone and locknut pretty tight with two spanners - this is a step I have been missing (I tightened it, but not nearly as tight) so that's my current working theory of what is going wrong, I'm hoping to have a look at it this afternoon.....!
I watched the whole of bikegremlin's video (not just the preload bit) last night, and I realized that at 17:01 or so he tightens the DS side cone and locknut pretty tight with two spanners - this is a step I have been missing (I tightened it, but not nearly as tight) so that's my current working theory of what is going wrong, I'm hoping to have a look at it this afternoon.....!
01-13-24, 03:44 AM
#25
Really Old Senior Member
When you buy 100's of bearings at a time, they get pretty cheap.
2. You don't have to trust employees who may not have the best judgement of what's good/bad. Besides, if it's iffy, you're going to toss anyway.