


Allez Catastrophé - scrap or salvage?
 06-16-23, 03:50 PM
#1

buy my bikes
Thread Starter

Join Date: Jun 2014
Location: Michigan
Posts: 1,801
Bikes: my very own customized GUNNAR CrossHairs
Mentioned: 19 Post(s)
Tagged: 0 Thread(s)
Quoted: 519 Post(s)
Liked 428 Times
in
249 Posts
Allez Catastrophé - scrap or salvage?
Me again. I’m working on stripping this frame for a rattle can repaint. Then use and abuse as a pavement bike.
My points of concern now the paint is not in the way:
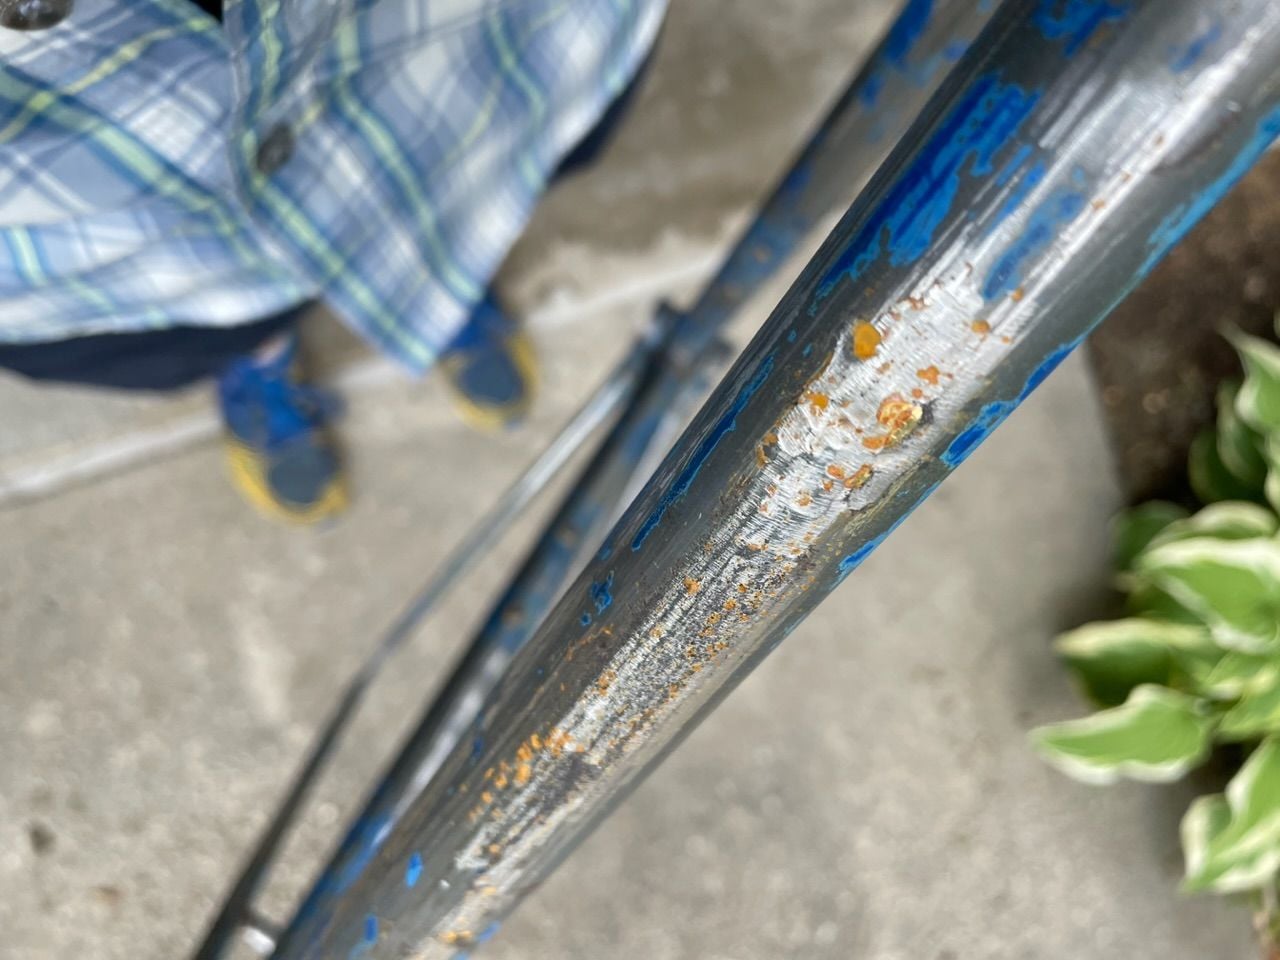
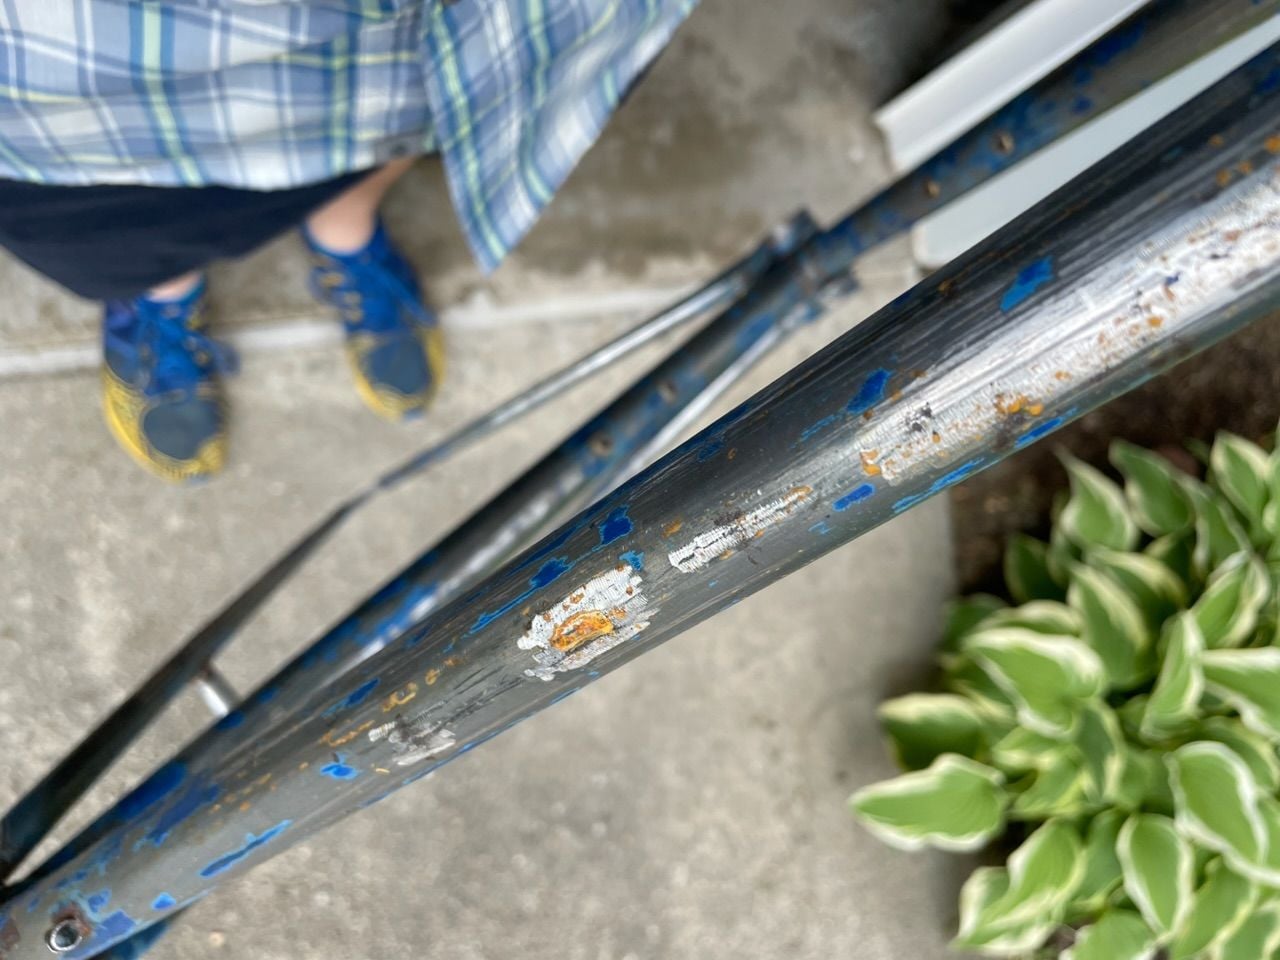
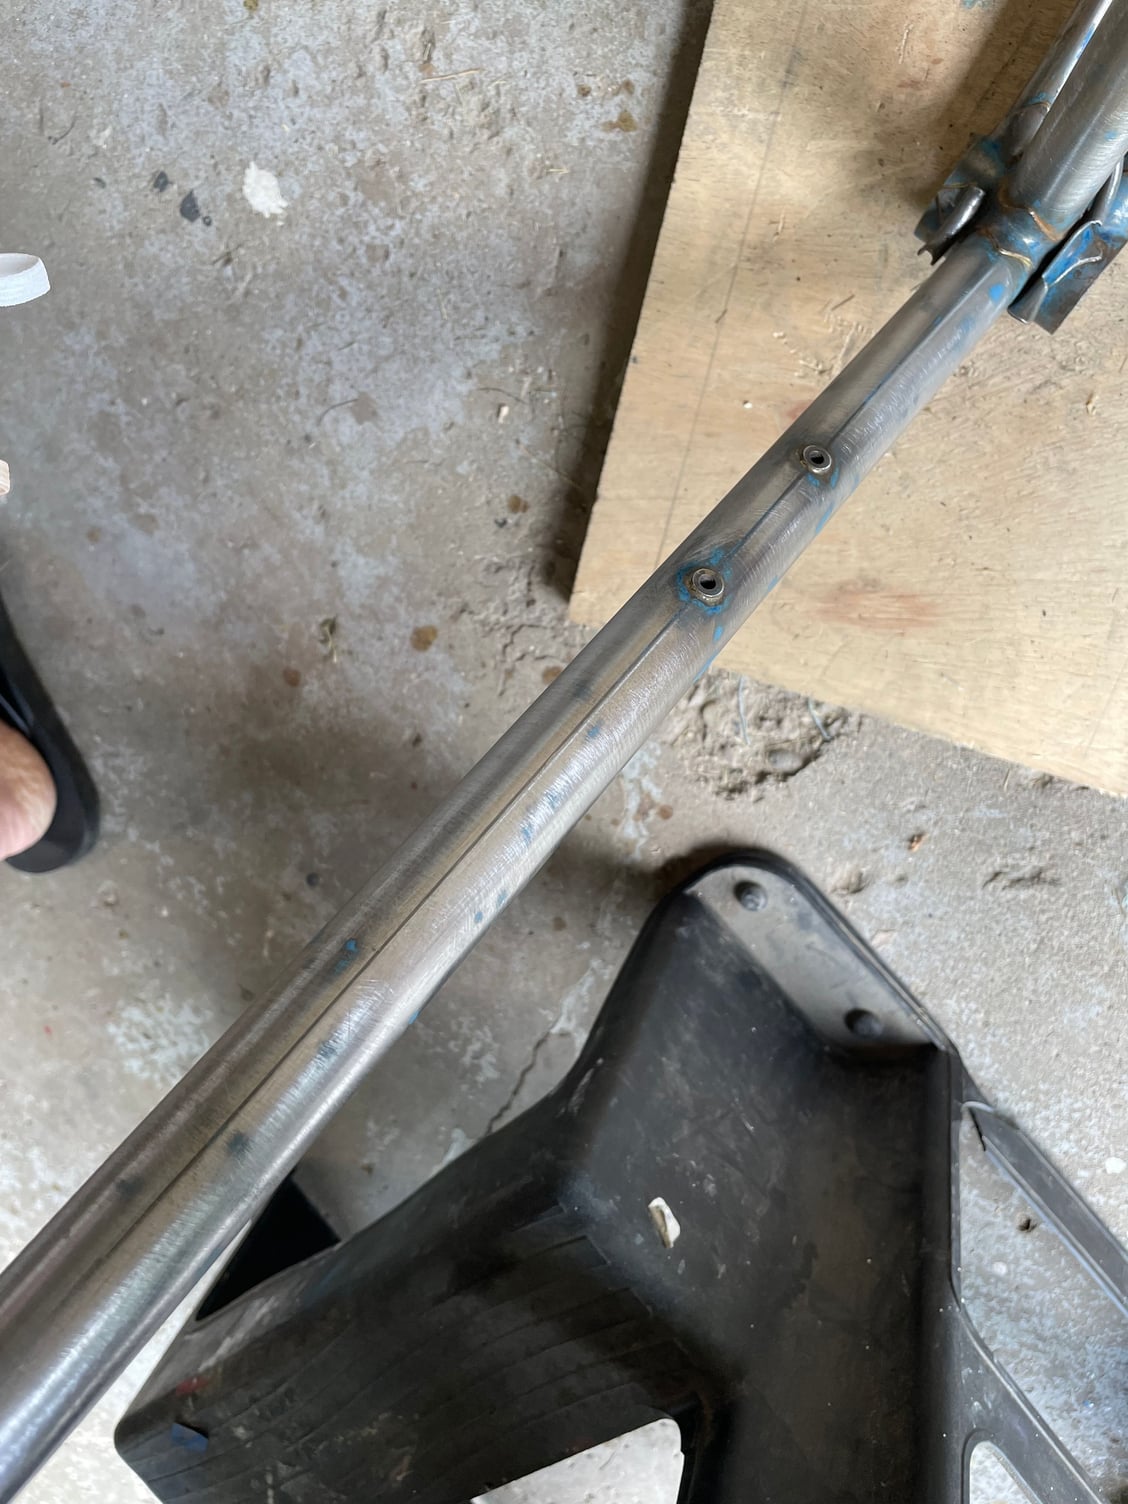
Top tube- my best guess is some one used a file after removing the cable guides. Pitting and corrosion on the bottom of the top tube.
I’m a little nervous about these tool marks.
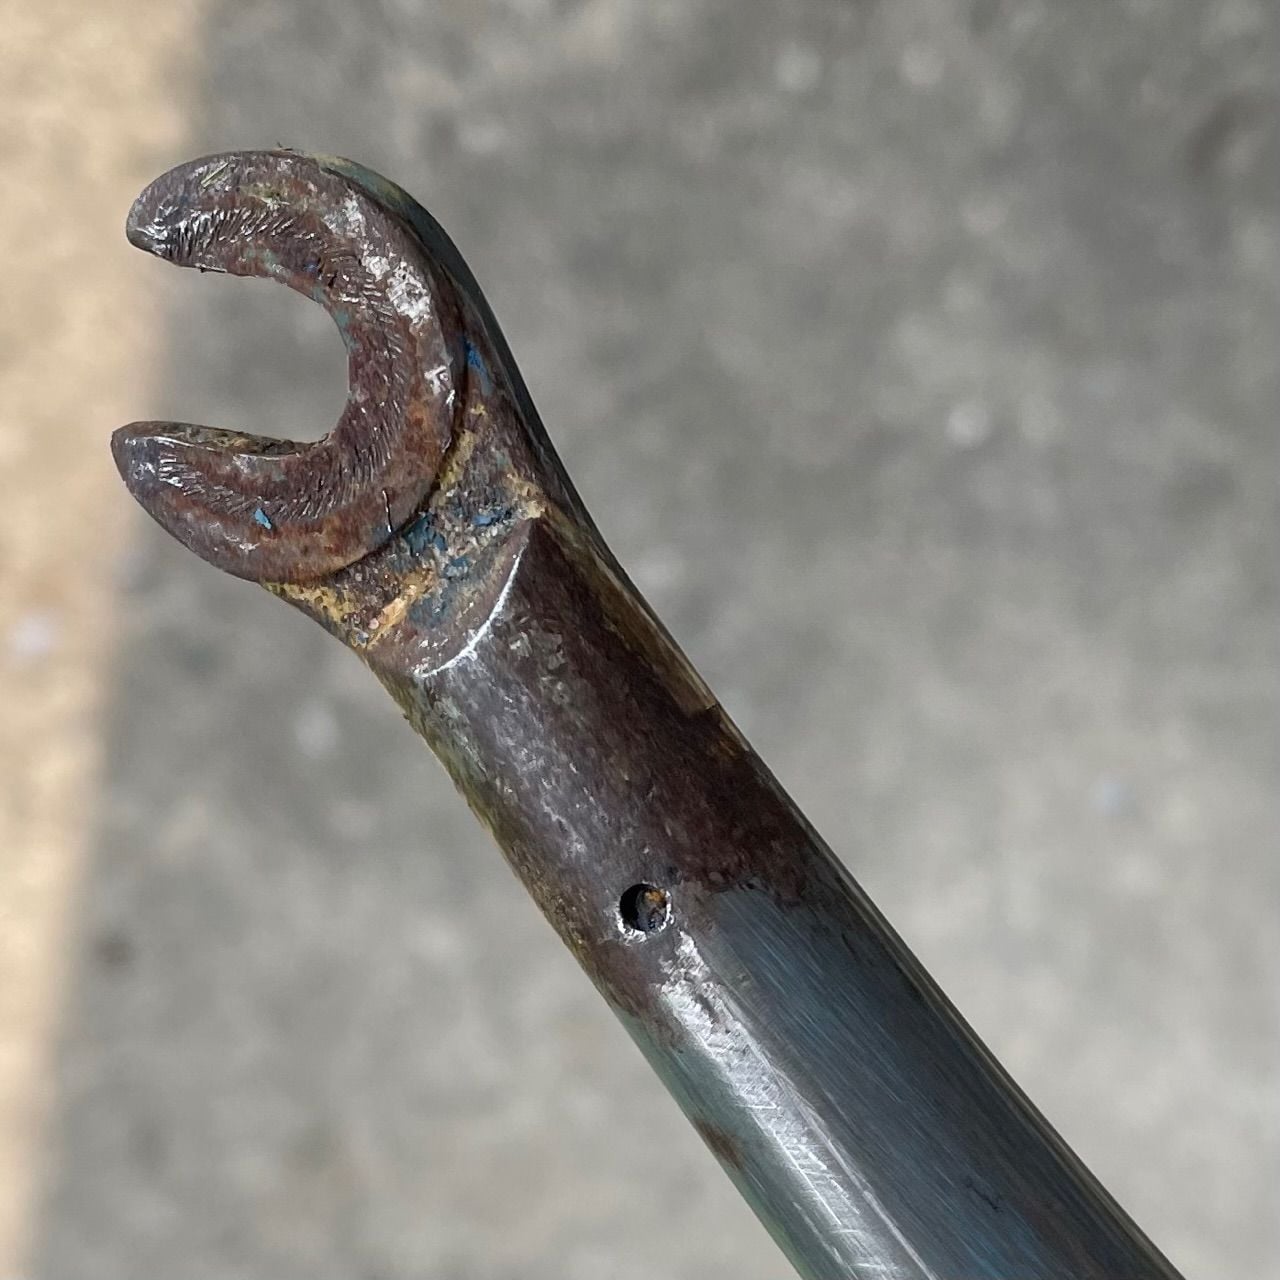
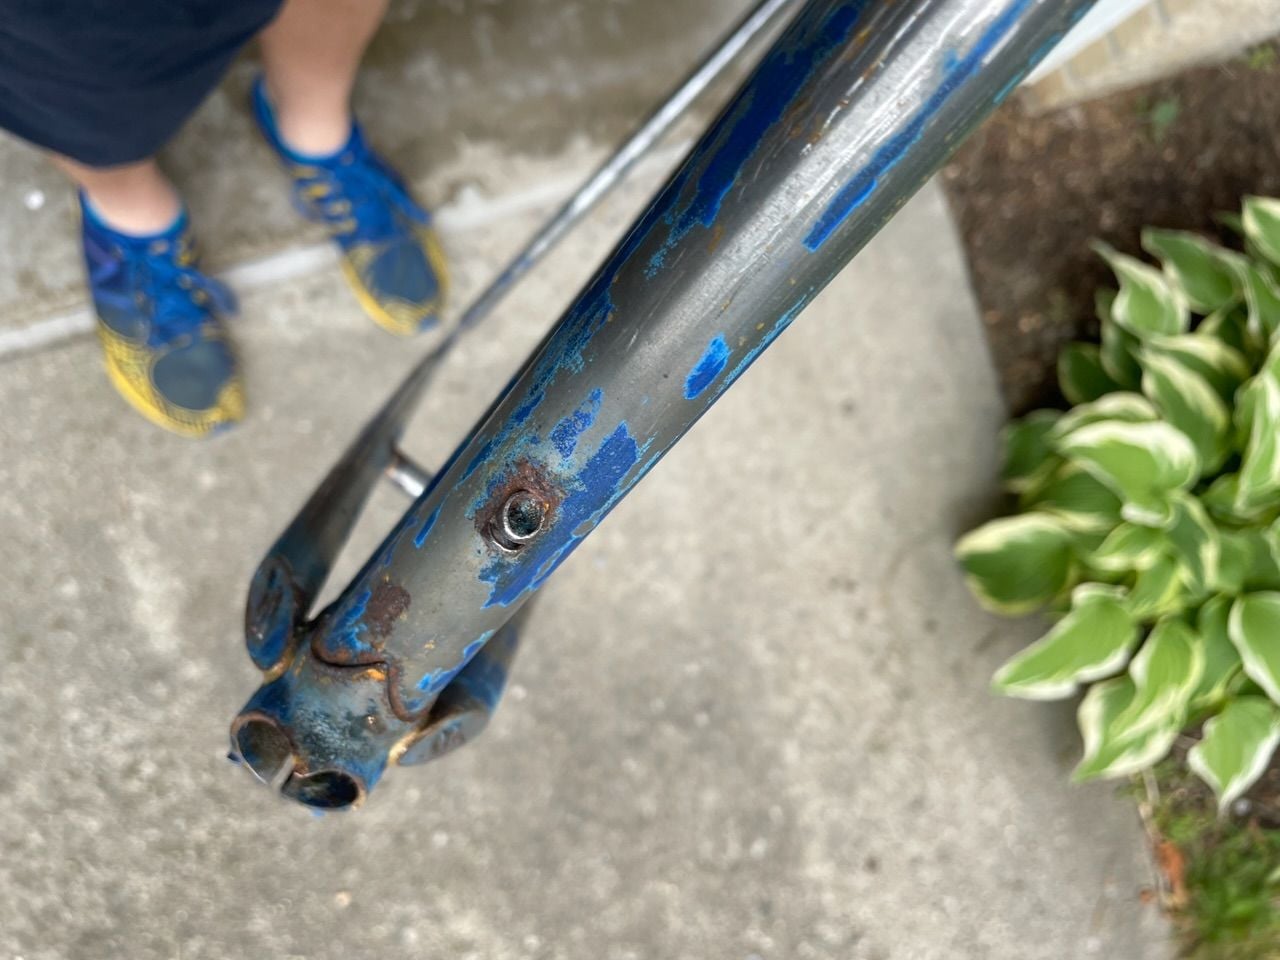
Fork - pitting and corrosion around the drop outs. Is this normal for a heat affected zone?
Or something more worrisome?
If the consensus is scrap, I figure I can use it for brazing practice.
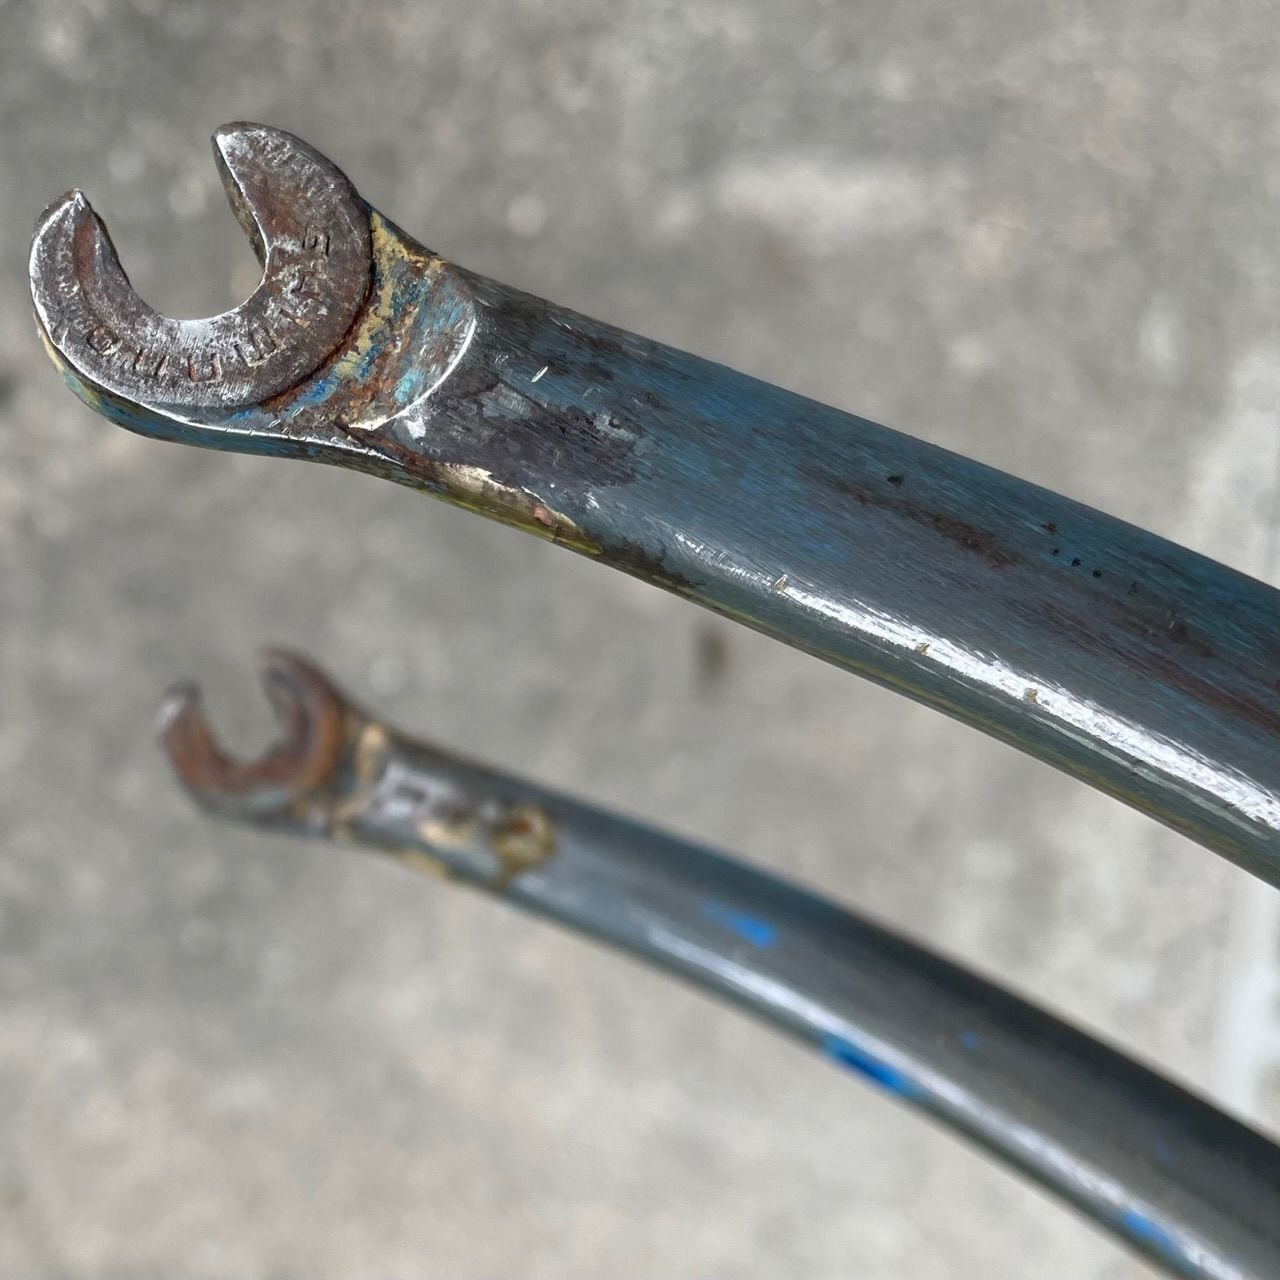
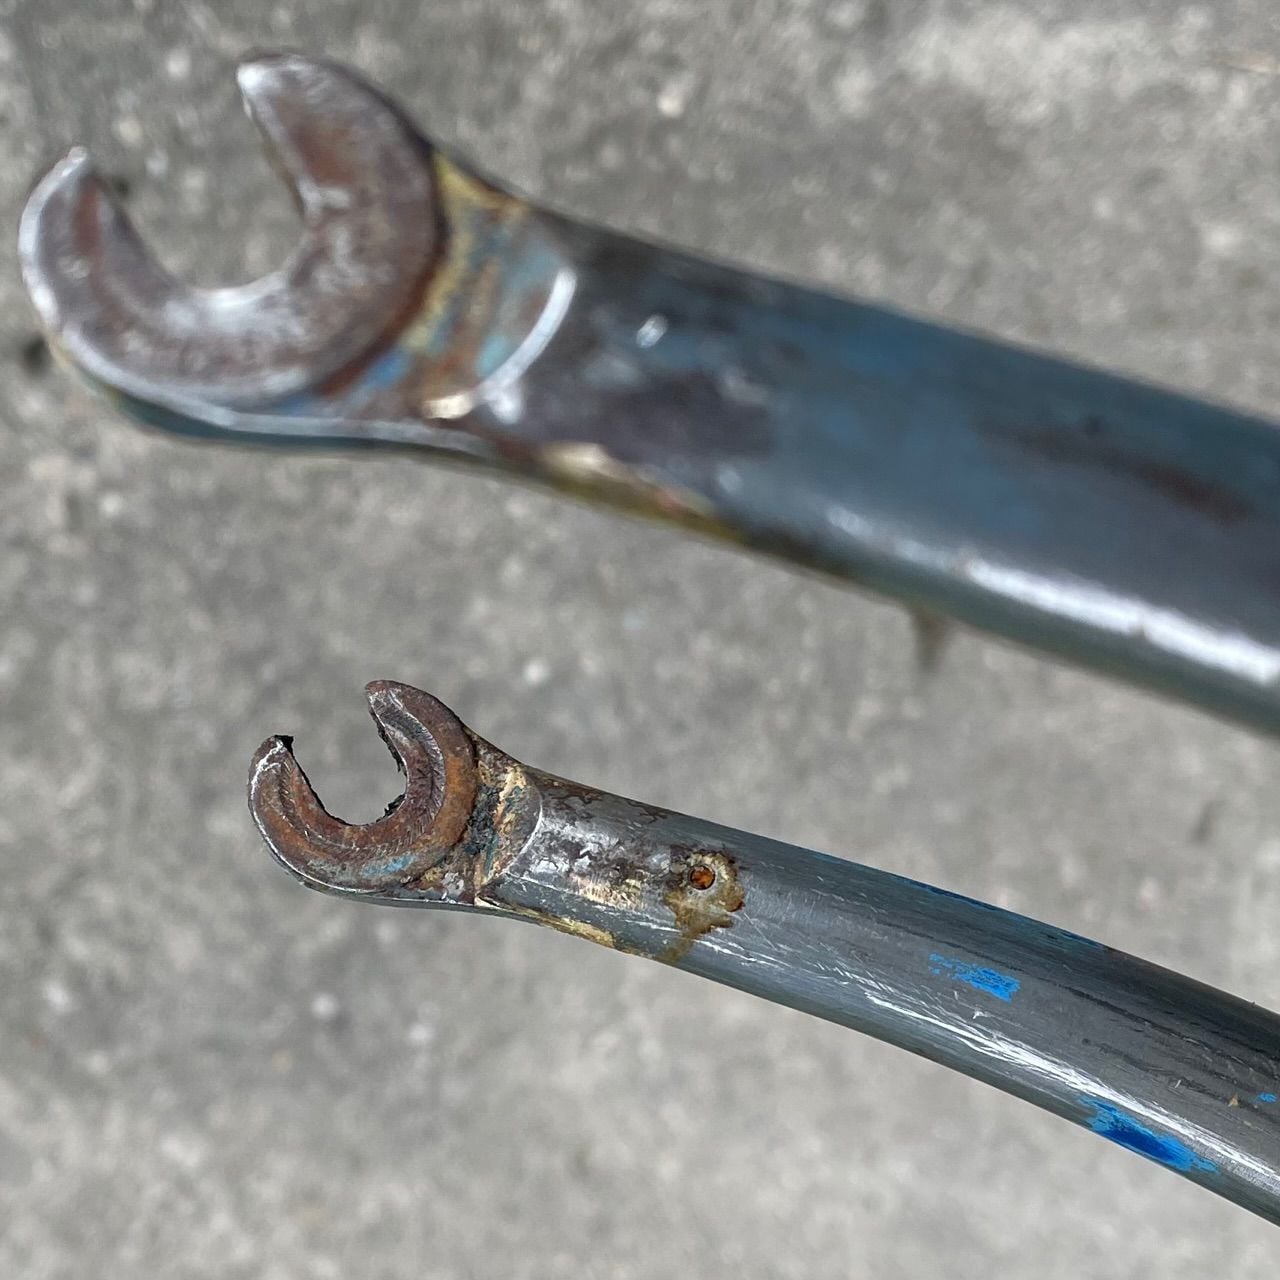
Files marks?
Under top tube.
always appreciate the guidance and warnings and hints I’m headed toward certain doom.
I picked up the bike complete. I should have walked away.
So far- pedals won’t come off the crank arms. Stem had to be sawed and then dissolved in lye. And steel fasteners on the components are a battle.
the ugly details
https://www.bikeforums.net/g/album/28780430
thanks
My points of concern now the paint is not in the way:
Top tube- my best guess is some one used a file after removing the cable guides. Pitting and corrosion on the bottom of the top tube.
I’m a little nervous about these tool marks.
Fork - pitting and corrosion around the drop outs. Is this normal for a heat affected zone?
Or something more worrisome?
If the consensus is scrap, I figure I can use it for brazing practice.
Files marks?
Under top tube.
always appreciate the guidance and warnings and hints I’m headed toward certain doom.
I picked up the bike complete. I should have walked away.
So far- pedals won’t come off the crank arms. Stem had to be sawed and then dissolved in lye. And steel fasteners on the components are a battle.
the ugly details
https://www.bikeforums.net/g/album/28780430
thanks
 06-16-23, 07:14 PM
#2
Senior Member

Join Date: Sep 2009
Location: EagleRiver AK
Posts: 1,306
Mentioned: 0 Post(s)
Tagged: 0 Thread(s)
Quoted: 28 Post(s)
Likes: 0
Liked 60 Times
in
33 Posts
Looks salvageable. They likely used a dremmel or some other overly aggressive grinder wheel to obliterate the top tube guides. Not ideal but the top tube is not very stressed so it will likely be fine. Maybe lightly cleanup the scars with a flat file and sandpaper, just do not try to completely smooth it out and remove even more metal. Fill in any remaining grinder divots with auto body filler or epoxy putty for cosmetics before painting. Fork does not look concerning, remove the rust with oxalic acid or navel jelly and fill any remaining pits for cosmetics .
Likes For GrayJay:
06-17-23, 08:51 PM
#3
buy my bikes
Thread Starter
Join Date: Jun 2014
Location: Michigan
Posts: 1,801
Bikes: my very own customized GUNNAR CrossHairs
Mentioned: 19 Post(s)
Tagged: 0 Thread(s)
Quoted: 519 Post(s)
Liked 428 Times
in
249 Posts
Originally Posted by GrayJay;[url=tel:22925940
22925940]. Fork does not look concerning, remove the rust with oxalic acid or navel jelly and fill any remaining pits for cosmetics .
i picked up a 45% solution from the Lowe’s. Doing my due diligence googling, I read 0.5% solution overnight is recommended.
That seems like the Monty Python joke about making love in a canoe!
So I’ll read a bit more as I continue to clean up the old paint and corrosion.
I found a ding on the top tube as well that needs filling. I’ll either go bondo or try the Spary.Bike puddy.
06-18-23, 07:23 AM
#4


Randomhead
Join Date: Aug 2008
Location: Happy Valley, Pennsylvania
Posts: 24,399
Mentioned: 0 Post(s)
Tagged: 0 Thread(s)
Quoted: 4 Post(s)
Liked 3,699 Times
in
2,519 Posts
I wonder what's going on inside the fork at the vent holes. Maybe someone tried to block them?
07-08-23, 03:21 PM
#5
buy my bikes
Thread Starter
Join Date: Jun 2014
Location: Michigan
Posts: 1,801
Bikes: my very own customized GUNNAR CrossHairs
Mentioned: 19 Post(s)
Tagged: 0 Thread(s)
Quoted: 519 Post(s)
Liked 428 Times
in
249 Posts
Originally Posted by unterhausen;[url=tel:22927086
22927086[/url]]I wonder what's going on inside the fork at the vent holes. Maybe someone tried to block them?
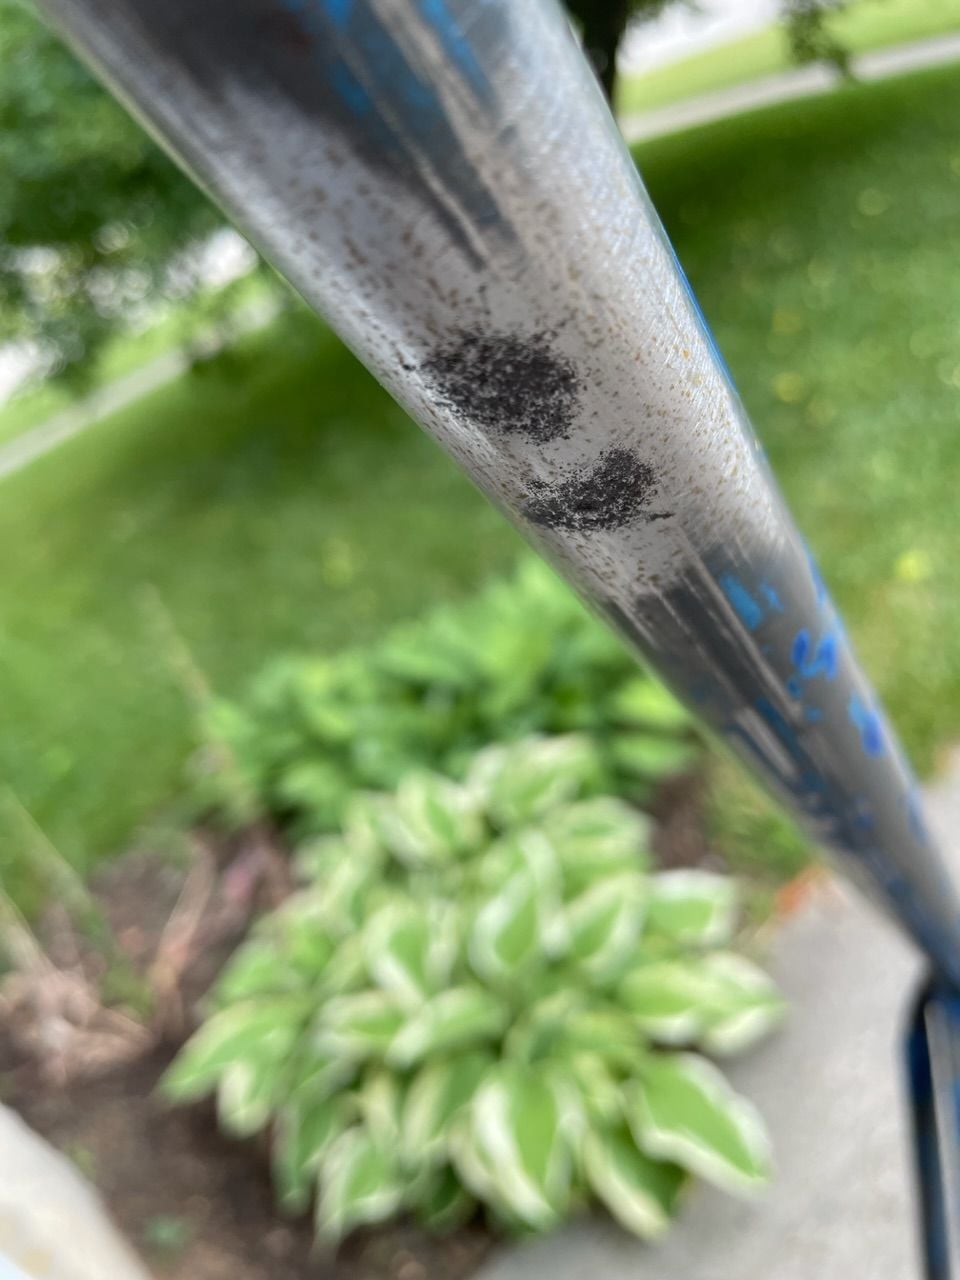
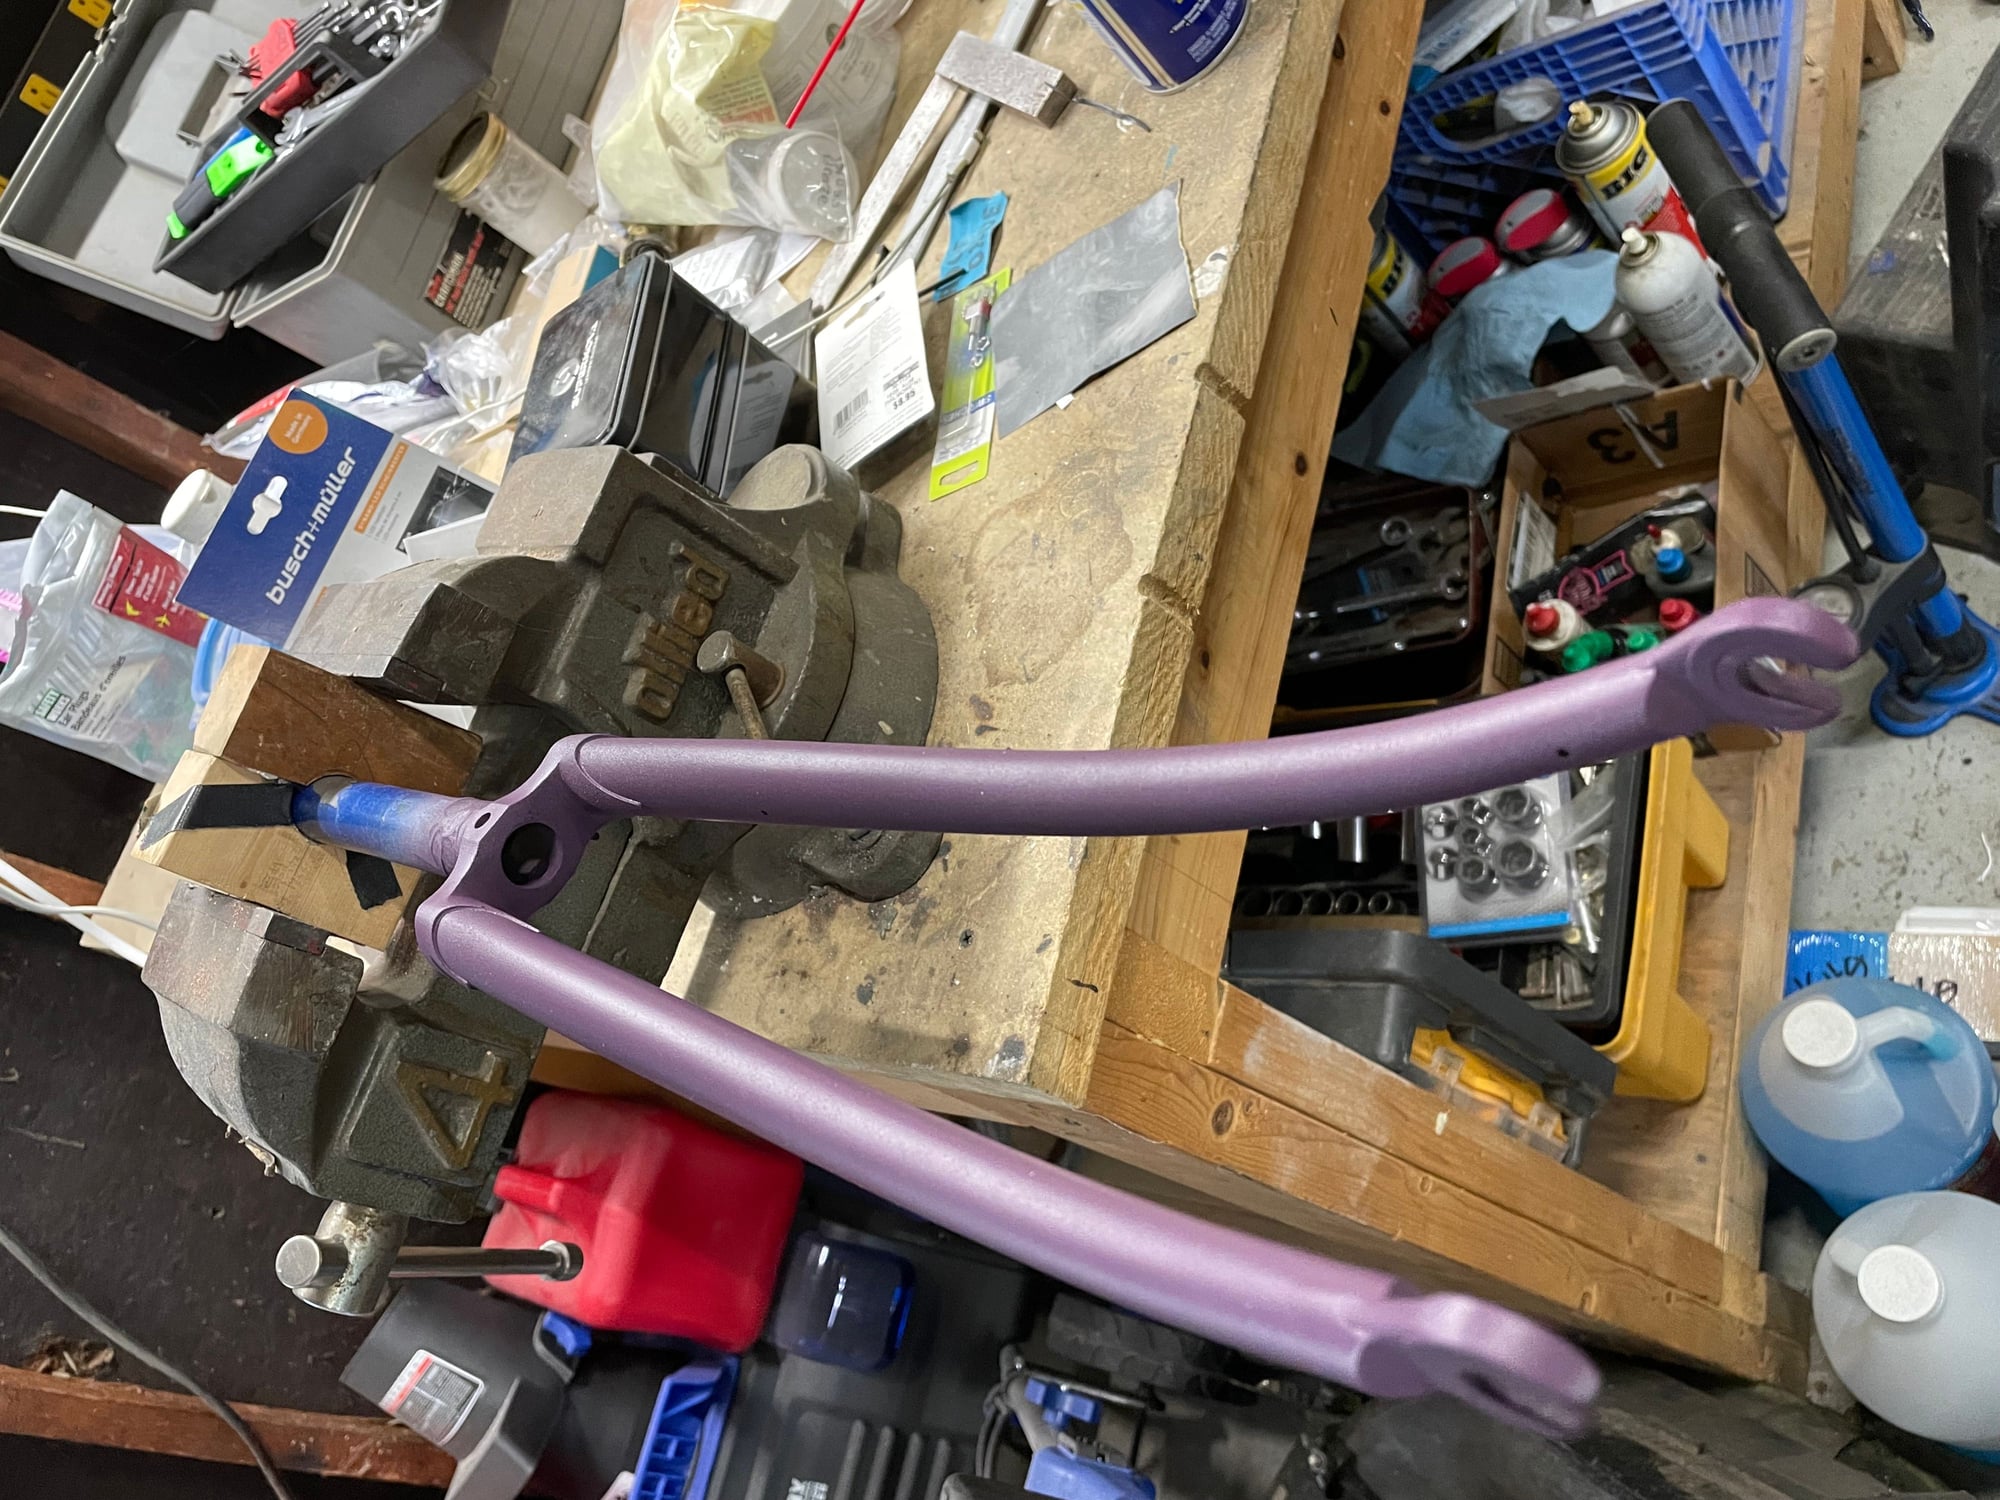
as for the fork - I was using a paint stripper. I think the pic was showing uncleaned up crud.
Cleaned up pic below.
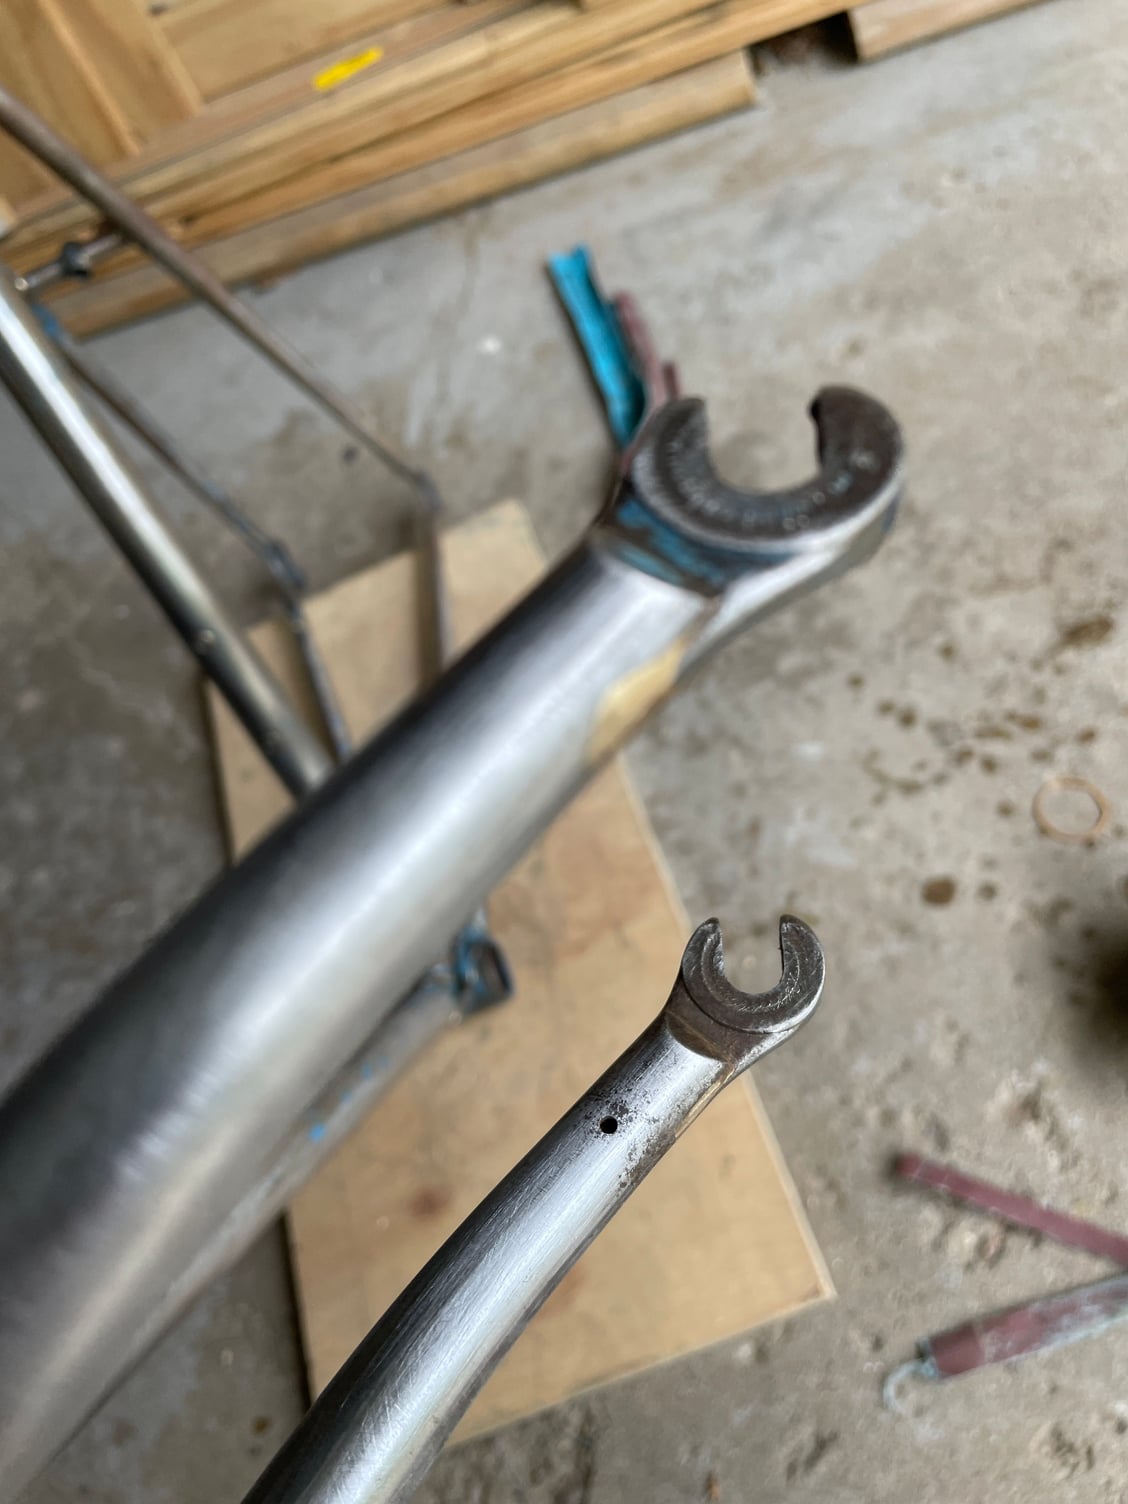
new question- same Allez-
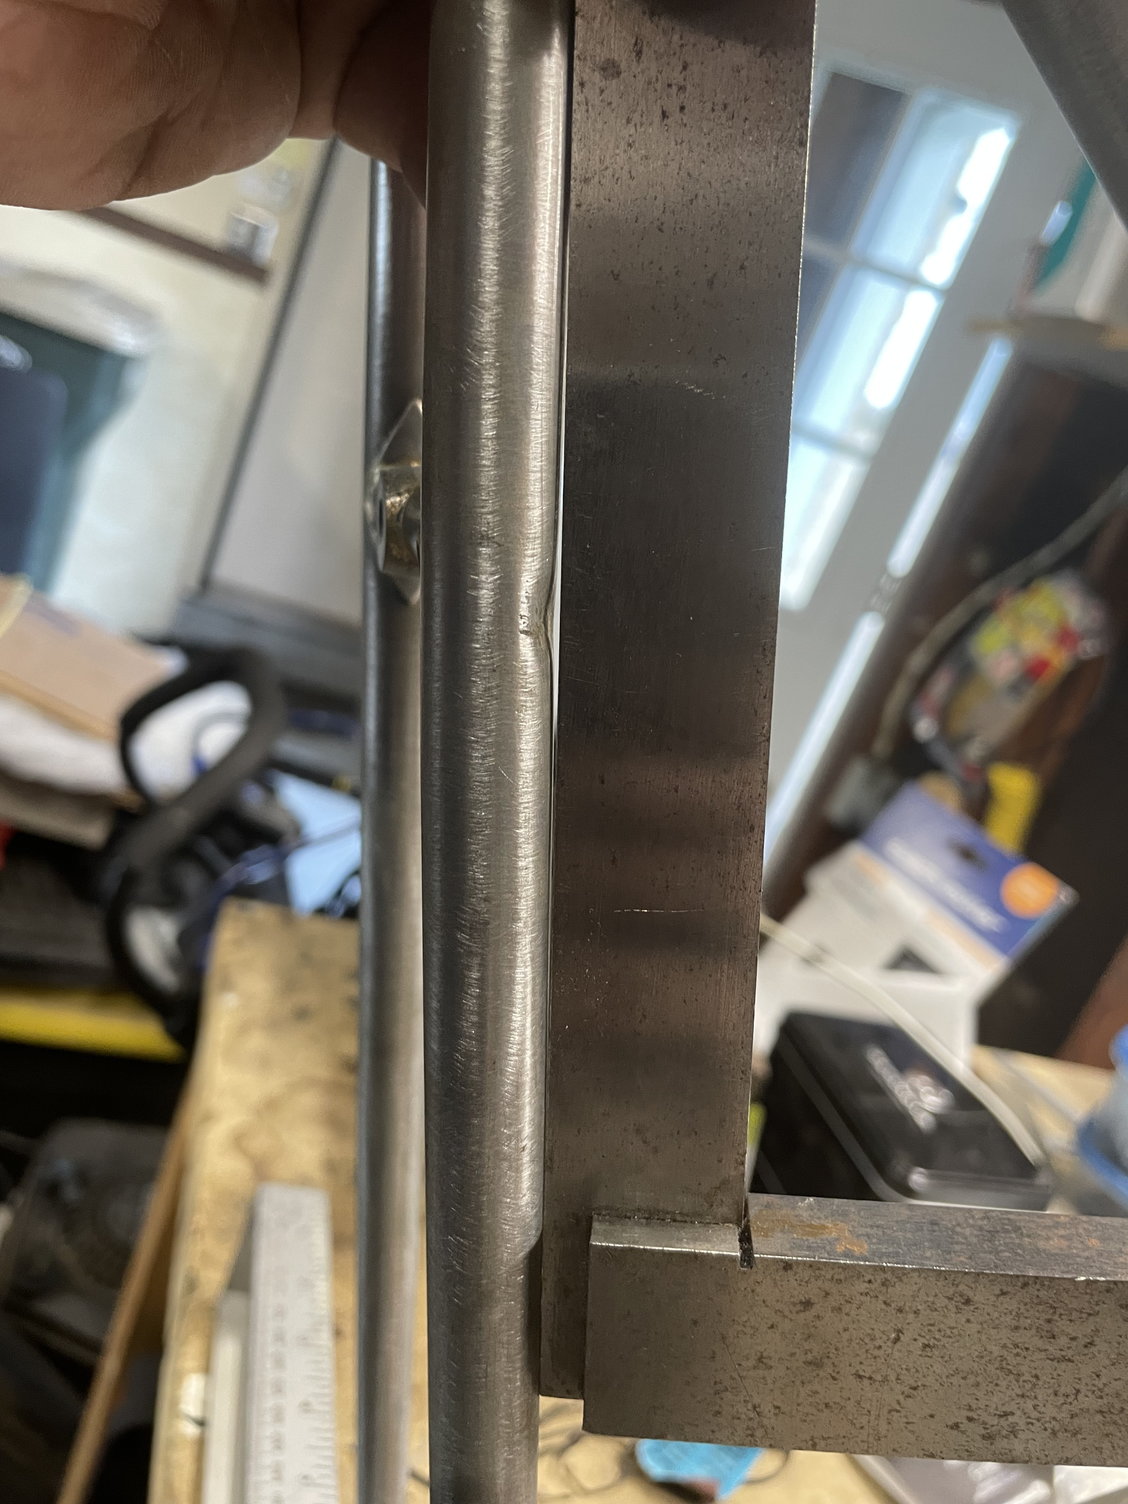
There’s a scribe mark lining up bottle cage bosses and a lug.
— that is just a scribe mark- correct?
second pic below. It’s almost not deep enough to catch a thumb nail.
 07-09-23, 03:06 AM
#6
Senior Member
Join Date: Aug 2007
Location: Evanston, IL
Posts: 5,096
Bikes: many
Mentioned: 63 Post(s)
Tagged: 0 Thread(s)
Quoted: 1446 Post(s)
Liked 1,395 Times
in
762 Posts
It sounds like your Allez tubes were scribed using something more robust. This would make some sense in a production environment where you might mark a large batch of tubes at one time, then set them aside for later processing. If someone else picks up a scribed tube days later, you would want them to identify the centerline without any fuss.
Likes For smontanaro:
07-09-23, 10:10 AM
#7
buy my bikes
Thread Starter
Join Date: Jun 2014
Location: Michigan
Posts: 1,801
Bikes: my very own customized GUNNAR CrossHairs
Mentioned: 19 Post(s)
Tagged: 0 Thread(s)
Quoted: 519 Post(s)
Liked 428 Times
in
249 Posts
Originally Posted by smontanaro;[url=tel:22947993
22947993[/url]]Likely, yes. Doug Fattic taught me that no tube is perfectly straight. You want any tube curvature in the plane of the main triangle. To do that, we rolled the tube so the "bend" was parallel to the surface plate/alignment table, then used a 123 block to scribe a faint (though clearly visible) center line.
It sounds like your Allez tubes were scribed using something more robust. This would make some sense in a production environment where you might mark a large batch of tubes at one time, then set them aside for later processing. If someone else picks up a scribed tube days later, you would want them to identify the centerline without any fuss.
It sounds like your Allez tubes were scribed using something more robust. This would make some sense in a production environment where you might mark a large batch of tubes at one time, then set them aside for later processing. If someone else picks up a scribed tube days later, you would want them to identify the centerline without any fuss.
a couple years ago I used a Peugeot CarboLite (?) frame to learn / practice powder coating.
The fork has seams, and my memory seems to picture seams in the main triangle tubes. It was difficult for me to believe the better Specialized frameset would use a lower grade tube set like the entry level Peugeot. (And the Peugeot didn’t ride bad- it was a pretty cush ride- just on the heavy side)
cheers!
07-11-23, 06:19 PM
#8
buy my bikes
Thread Starter
Join Date: Jun 2014
Location: Michigan
Posts: 1,801
Bikes: my very own customized GUNNAR CrossHairs
Mentioned: 19 Post(s)
Tagged: 0 Thread(s)
Quoted: 519 Post(s)
Liked 428 Times
in
249 Posts
another problem?
As I was getting ready for primer coat, a seat tube ding got me concerned about a bigger problem.
Does this seat stay look bent? Or is this a kink from someone going gonzo to spread the rear triangle?
i check a few other bike I got. My answer: maybe!
my Panasonic seems straight - but also a straight tube. Other frames are perhaps not straight tubes.
Much appreciate the help so far.
ps - attempting to compare the NDS to the DS, the NDS gap is about.0.010in less near the rear drop out. Basically I’m saying not symmetric.
Trying to get the level flush near the top tube.
Last edited by mrv; 07-11-23 at 06:25 PM.
07-11-23, 08:06 PM
#9
Randomhead
Join Date: Aug 2008
Location: Happy Valley, Pennsylvania
Posts: 24,399
Mentioned: 0 Post(s)
Tagged: 0 Thread(s)
Quoted: 4 Post(s)
Liked 3,699 Times
in
2,519 Posts
I don't think that was a scribe. Usually seamed tube is drawn after forming, but maybe they didn't bother with these tubes?
If someone's scribes survive the paint process, they were too deep. I find the warp in the tube and then paint down it with layout fluid and scribe that. There is a tiny scratch in the metal, but the main contrast is with the layout fluid. The main brand name of layout fluid gets caught by the site censor
If someone's scribes survive the paint process, they were too deep. I find the warp in the tube and then paint down it with layout fluid and scribe that. There is a tiny scratch in the metal, but the main contrast is with the layout fluid. The main brand name of layout fluid gets caught by the site censor
Likes For unterhausen:
07-11-23, 08:37 PM
#10
Senior Member
Join Date: Feb 2012
Location: Rochester, NY
Posts: 18,095
Bikes: Stewart S&S coupled sport tourer, Stewart Sunday light, Stewart Commuting, Stewart Touring, Co Motion Tandem, Stewart 3-Spd, Stewart Track, Fuji Finest, Mongoose Tomac ATB, GT Bravado ATB, JCP Folder, Stewart 650B ATB
Mentioned: 0 Post(s)
Tagged: 0 Thread(s)
Quoted: 4210 Post(s)
Liked 3,875 Times
in
2,315 Posts
These seat stays are tapered in their OD. So a straight edge won't fit flush along the full length independent of any actual bends. When one widens a rear end the bowing/bananaing is side to side, with the brake bridge holding that portion at the same width. Sometimes seat stays can be bent from braking forces but these would be in the opposite direction of the photo's suggestion.
My opinion is that a force was applied to the RH stay on it's forward facing side just below the bridge. This caused both a localized dent and the bowing of the stay. Not the usual type of impact but I can envision it. Andy
My opinion is that a force was applied to the RH stay on it's forward facing side just below the bridge. This caused both a localized dent and the bowing of the stay. Not the usual type of impact but I can envision it. Andy
__________________
AndrewRStewart
AndrewRStewart
07-14-23, 03:28 AM
#11
Senior Member
Join Date: Dec 2019
Posts: 957
Mentioned: 3 Post(s)
Tagged: 0 Thread(s)
Quoted: 321 Post(s)
Liked 263 Times
in
212 Posts
These seat stays are tapered in their OD. So a straight edge won't fit flush along the full length independent of any actual bends. When one widens a rear end the bowing/bananaing is side to side, with the brake bridge holding that portion at the same width. Sometimes seat stays can be bent from braking forces but these would be in the opposite direction of the photo's suggestion.
My opinion is that a force was applied to the RH stay on it's forward facing side just below the bridge. This caused both a localized dent and the bowing of the stay. Not the usual type of impact but I can envision it. Andy
My opinion is that a force was applied to the RH stay on it's forward facing side just below the bridge. This caused both a localized dent and the bowing of the stay. Not the usual type of impact but I can envision it. Andy

Likes For guy153:
07-14-23, 04:39 AM
#12
buy my bikes
Thread Starter
Join Date: Jun 2014
Location: Michigan
Posts: 1,801
Bikes: my very own customized GUNNAR CrossHairs
Mentioned: 19 Post(s)
Tagged: 0 Thread(s)
Quoted: 519 Post(s)
Liked 428 Times
in
249 Posts
-- man oh man - my motivation to keep working on this project has tanked......
Likes For mrv:
07-14-23, 08:58 AM
#13
Senior Member
Join Date: Feb 2012
Location: Rochester, NY
Posts: 18,095
Bikes: Stewart S&S coupled sport tourer, Stewart Sunday light, Stewart Commuting, Stewart Touring, Co Motion Tandem, Stewart 3-Spd, Stewart Track, Fuji Finest, Mongoose Tomac ATB, GT Bravado ATB, JCP Folder, Stewart 650B ATB
Mentioned: 0 Post(s)
Tagged: 0 Thread(s)
Quoted: 4210 Post(s)
Liked 3,875 Times
in
2,315 Posts
mrv- When you report back here it would be interesting if you watched or was described the alignment check process the shop used. Andy
__________________
AndrewRStewart
AndrewRStewart
Likes For Andrew R Stewart:
07-15-23, 06:15 PM
#14
buy my bikes
Thread Starter
Join Date: Jun 2014
Location: Michigan
Posts: 1,801
Bikes: my very own customized GUNNAR CrossHairs
Mentioned: 19 Post(s)
Tagged: 0 Thread(s)
Quoted: 519 Post(s)
Liked 428 Times
in
249 Posts
Originally Posted by Andrew R Stewart;[url=tel:22952956
22952956[/url]]mrv- When you report back here it would be interesting if you watched or was described the alignment check process the shop used. Andy
My LBS is deep in repairs at the moment. The owner was unable to squeeze me in.
i might try again Monday when I go to pick up some replacement drive train parts for my 2spd foul weather bike.
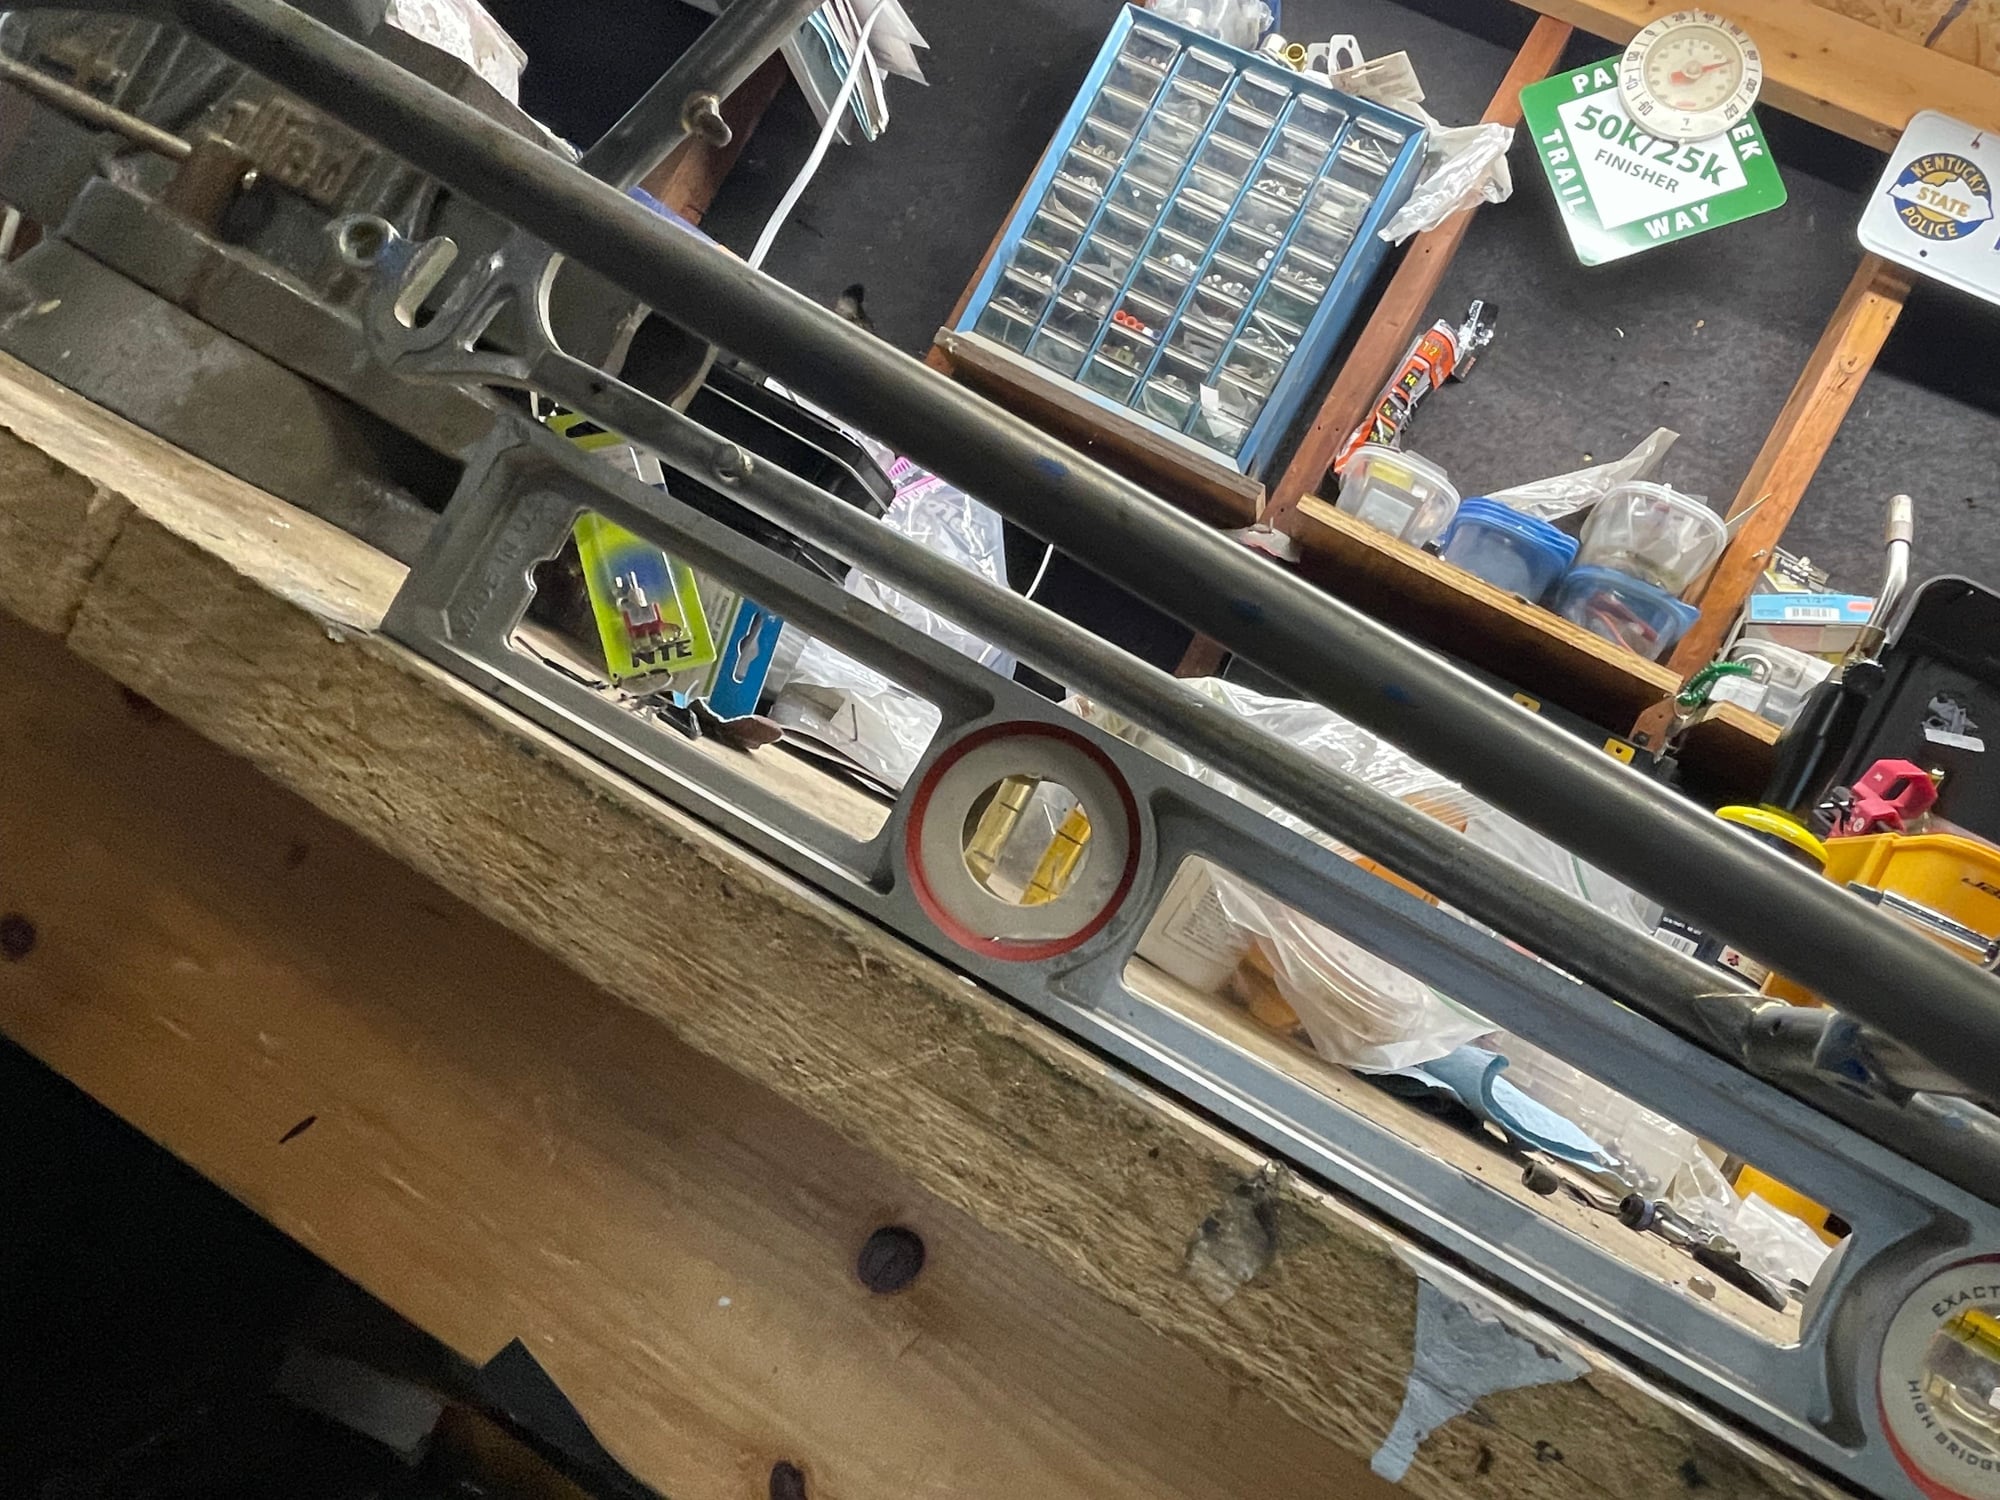
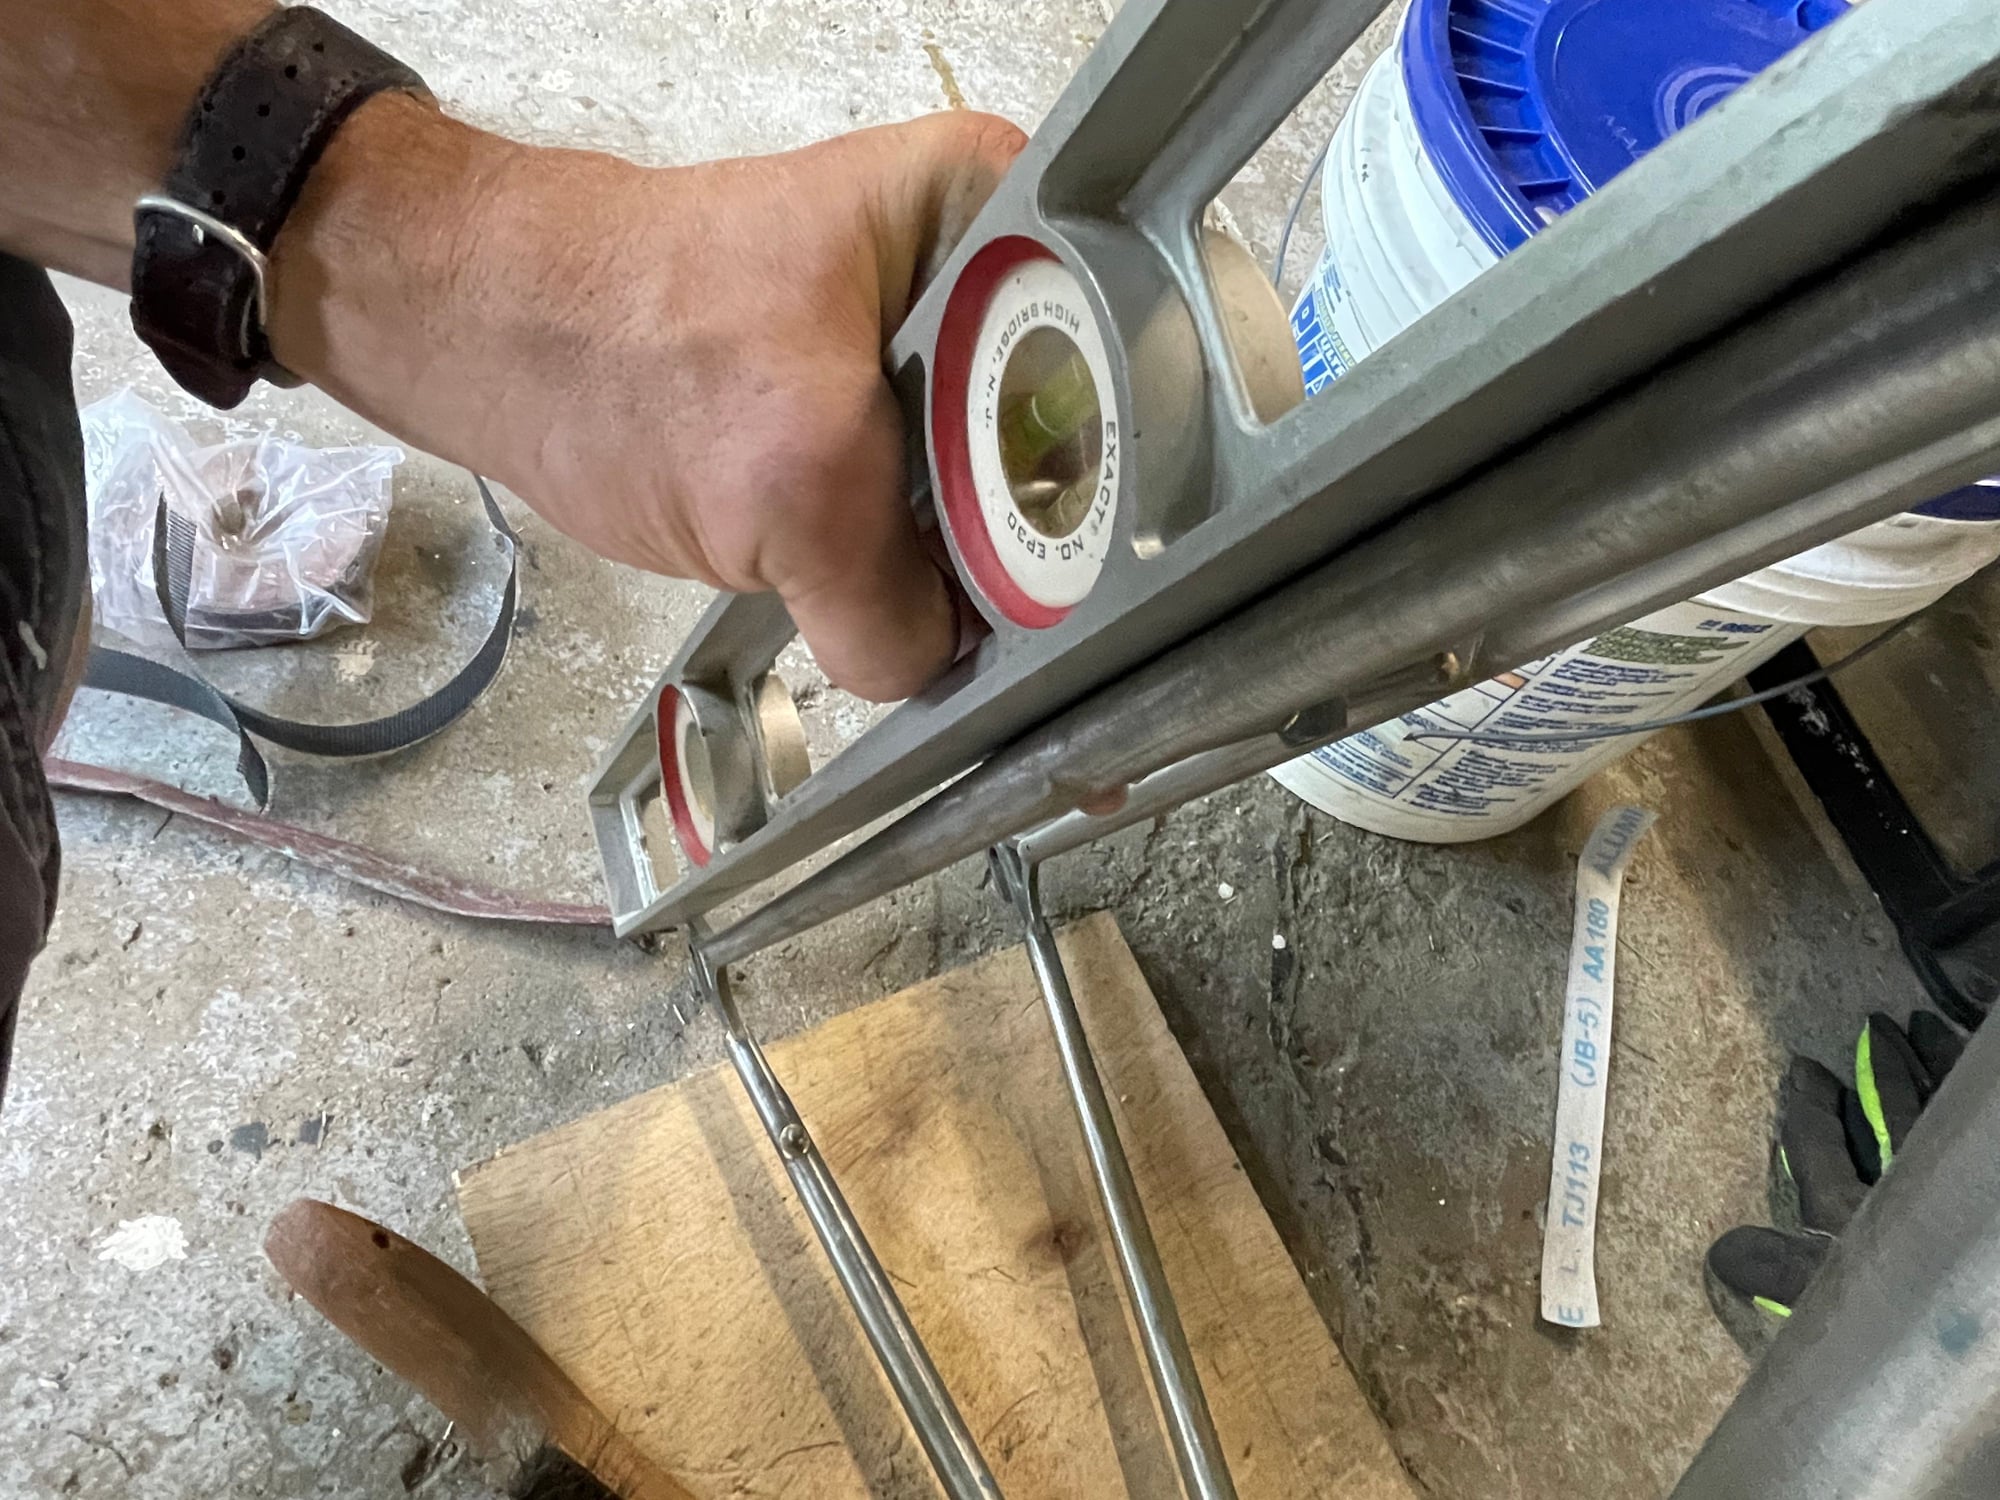
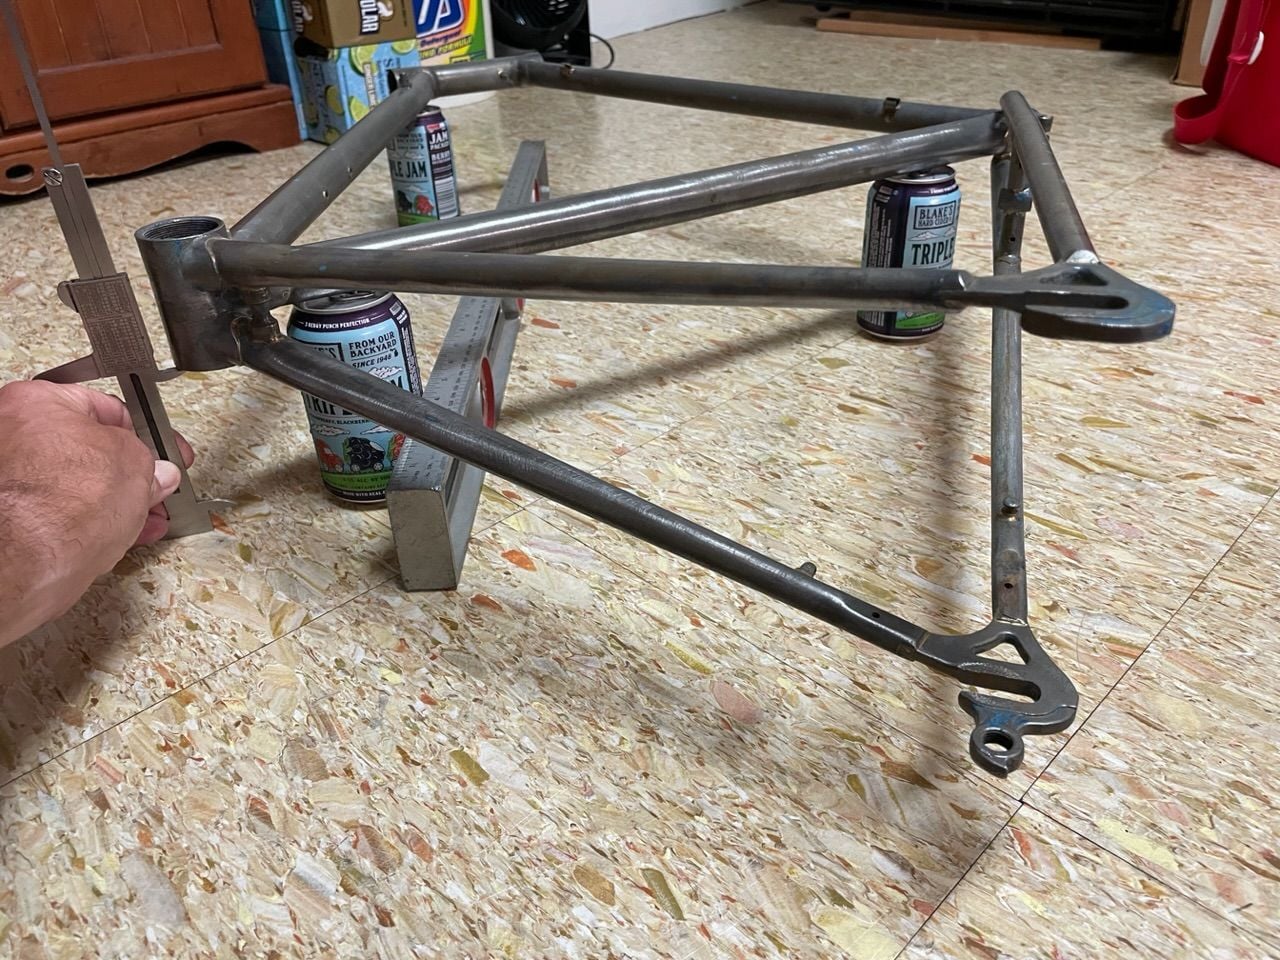
As an initial home assessment I attempted to use the basement floor and 3 things that are the same height- see pic below.
Here’s some measurements as best I can
Dropouts are about 128mm even
Referencing BB to floor, I get less than 1mm difference flipping the bike. So that tells me the BB shell is centered to the DT and ST.
The NDS dropout is 2 to 3 mm closer to the floor than DS.
So bending the DS 2mm should get me back to center for the Dropouts - 126mm.
of course my home problem is moving only the DS. I gotta figure out how to hold the frame.
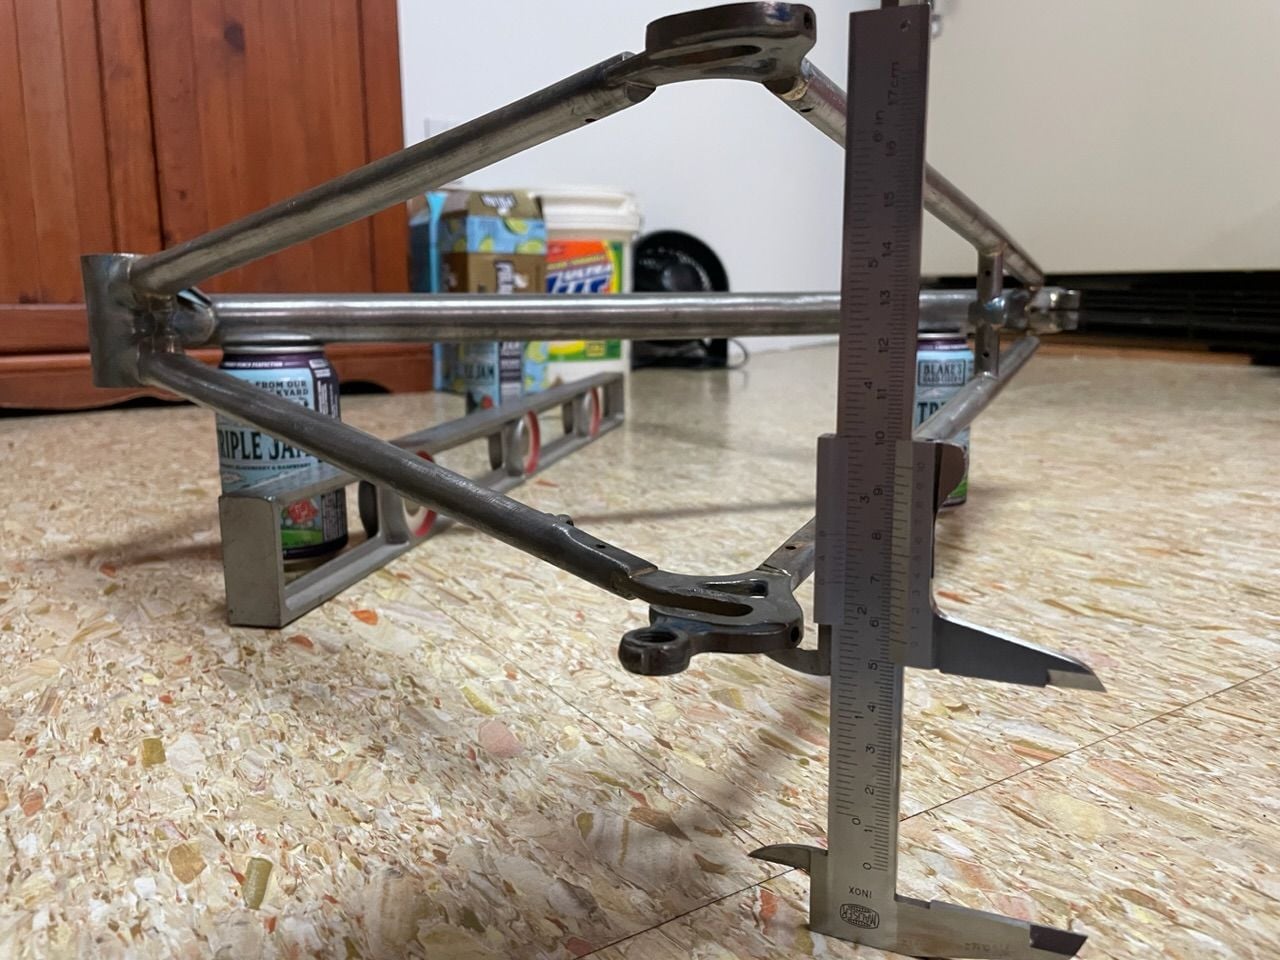
My wife’s jam berry…. My IPAs were pint cans.
Likes For mrv:
07-16-23, 10:06 PM
#15
Senior Member
Join Date: Sep 2009
Location: EagleRiver AK
Posts: 1,306
Mentioned: 0 Post(s)
Tagged: 0 Thread(s)
Quoted: 28 Post(s)
Likes: 0
Liked 60 Times
in
33 Posts
If the front triangle is known as more or less strait, you can take a thin string or fishing line; tie to end to a rear dropout, loop string around headtube and then back to opposite dropout. You can then measure the distance from string to the seat tube on each side and use that to gauge if the offset for the two dropouts are same.
To bring one side back in, hold frame securely at heatube and seattube then push the dropout against floor. Just move dropout position a tiny bit at a time, remeasure between adjustments and try not to overshoot it.
To bring one side back in, hold frame securely at heatube and seattube then push the dropout against floor. Just move dropout position a tiny bit at a time, remeasure between adjustments and try not to overshoot it.
07-17-23, 12:31 AM
#16
Senior Member
Join Date: Dec 2019
Posts: 957
Mentioned: 3 Post(s)
Tagged: 0 Thread(s)
Quoted: 321 Post(s)
Liked 263 Times
in
212 Posts
That alignment looks pretty good. Yes I measure it relative to the HT with string as described, but that can often be off by a few mm on production frames.
07-17-23, 05:57 PM
#17
buy my bikes
Thread Starter
Join Date: Jun 2014
Location: Michigan
Posts: 1,801
Bikes: my very own customized GUNNAR CrossHairs
Mentioned: 19 Post(s)
Tagged: 0 Thread(s)
Quoted: 519 Post(s)
Liked 428 Times
in
249 Posts
give ‘em enough string
I had forgotten about the string theory.
but a couple of RJ bike dude videos got things lined up.
and a 2x3. There’s a 2x4 in the background- but fine tuned with the 2x3….
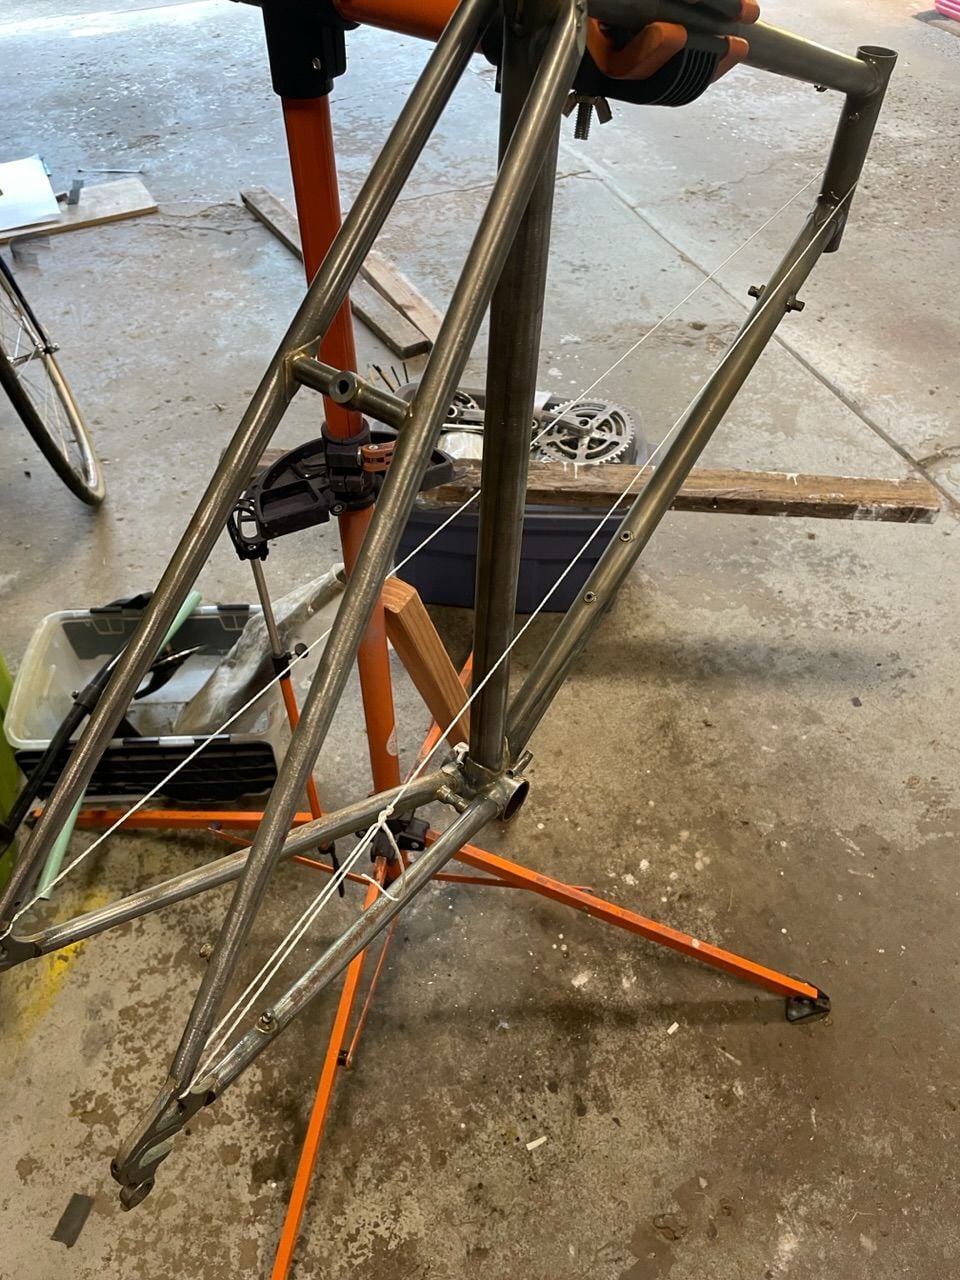
Ok. Hopefully primer tomorrow. Weather has dried up a bit….
but a couple of RJ bike dude videos got things lined up.
and a 2x3. There’s a 2x4 in the background- but fine tuned with the 2x3….
Ok. Hopefully primer tomorrow. Weather has dried up a bit….
07-24-23, 10:39 AM
#19
buy my bikes
Thread Starter
Join Date: Jun 2014
Location: Michigan
Posts: 1,801
Bikes: my very own customized GUNNAR CrossHairs
Mentioned: 19 Post(s)
Tagged: 0 Thread(s)
Quoted: 519 Post(s)
Liked 428 Times
in
249 Posts
the primer is applied. color coat should be this week - weather forecast has no rain. then a long cure time. I'm using Spray.Bike for the primer and top coat. Planning on trying 2K clear gloss.
Likes For mrv:
07-24-23, 03:17 PM
#20
Senior Member
Join Date: Dec 2019
Posts: 957
Mentioned: 3 Post(s)
Tagged: 0 Thread(s)
Quoted: 321 Post(s)
Liked 263 Times
in
212 Posts
using a 1mm increment ruler (like a pocket scale deal), I got the rear drop outs to 126mm and the "string to seat tube" to less than 1mm.
the primer is applied. color coat should be this week - weather forecast has no rain. then a long cure time. I'm using Spray.Bike for the primer and top coat. Planning on trying 2K clear gloss.
the primer is applied. color coat should be this week - weather forecast has no rain. then a long cure time. I'm using Spray.Bike for the primer and top coat. Planning on trying 2K clear gloss.
Likes For guy153:
07-30-23, 07:28 PM
#21
buy my bikes
Thread Starter
Join Date: Jun 2014
Location: Michigan
Posts: 1,801
Bikes: my very own customized GUNNAR CrossHairs
Mentioned: 19 Post(s)
Tagged: 0 Thread(s)
Quoted: 519 Post(s)
Liked 428 Times
in
249 Posts
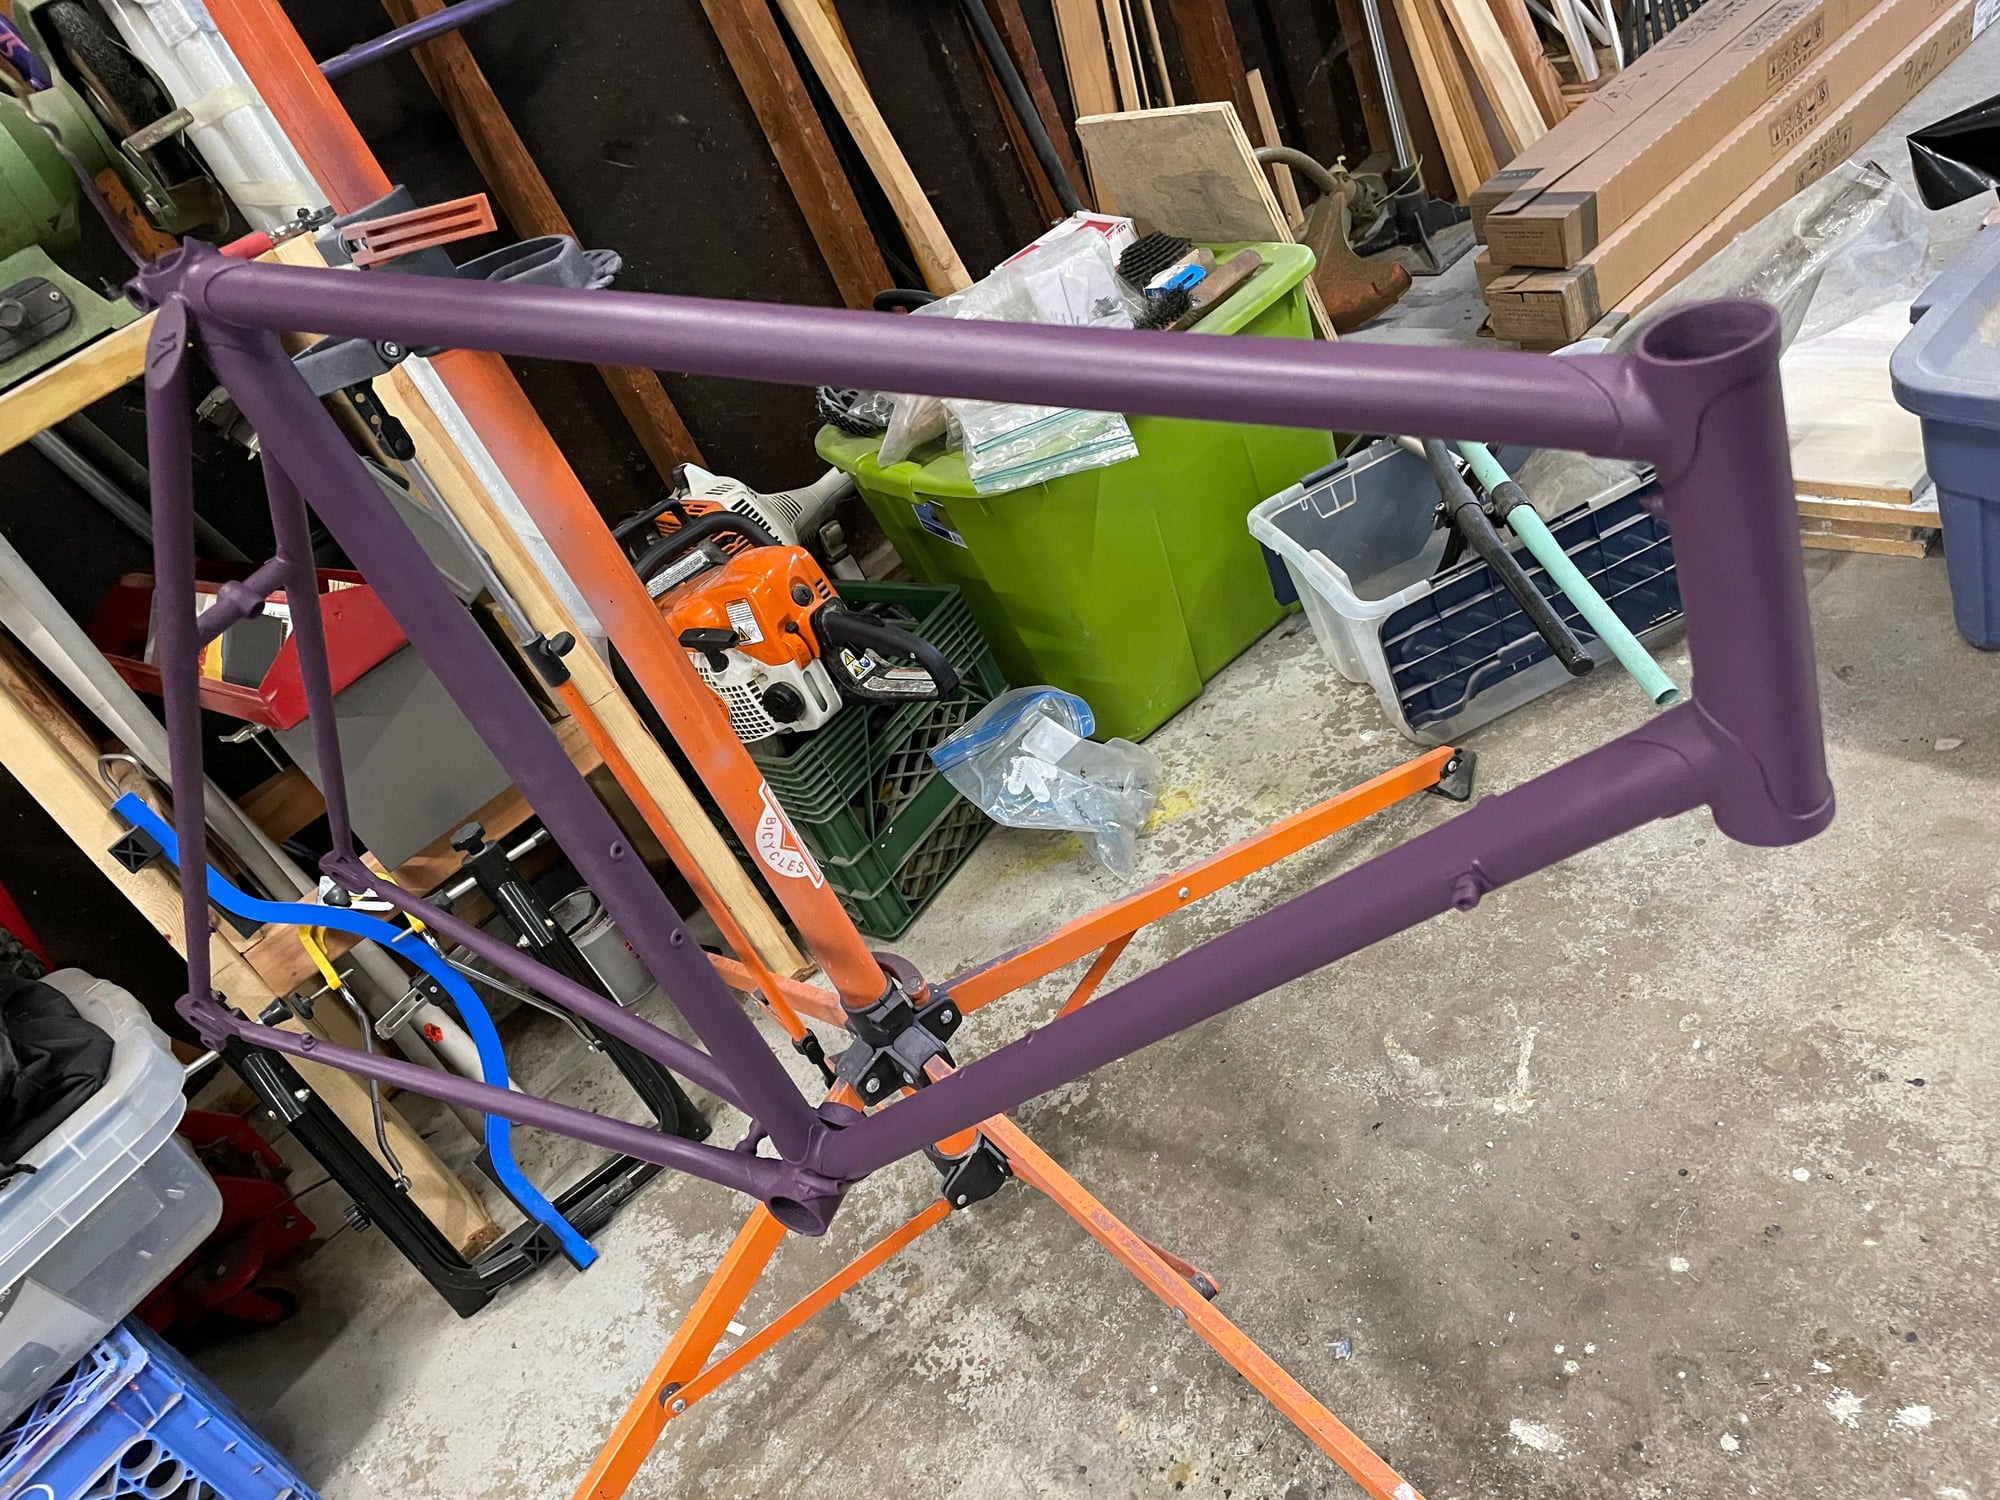
first coat done.
proably I’ll give a very light sanding with some 1000 or 1600 grit paper and look for thin spot in the paint.
then a good long wait for it to room temp cure.
debating if I want any decals or just a white S on the head tube.
Given the provenance, and present road bike market, I can’t imagine it ever being anything more than a $100 CL-Queen….
07-31-23, 03:38 AM
#22
Senior Member
Join Date: Dec 2019
Posts: 957
Mentioned: 3 Post(s)
Tagged: 0 Thread(s)
Quoted: 321 Post(s)
Liked 263 Times
in
212 Posts
Nice! I think I used that shade of purple on my "soft-roader" build. I have fitted the rear mudguard properly since these pictures... I accidentally got the matt 2K clear for this one but it turned out quite nice.
https://www.bikeforums.net/21918187-post419.html
https://www.bikeforums.net/21918187-post419.html
08-05-23, 12:49 AM
#23
The Huffmeister

Join Date: Jul 2008
Location: The Le Grande HQ
Posts: 2,741
Bikes: '79 Trek 938, '86 Jim Merz Allez SE, '90 Miyata 1000, '68 PX-10, '80 PXN-10, '73 Super Course, '87 Guerciotti, '83 Trek 600, '80 Huffy Le Grande
Mentioned: 45 Post(s)
Tagged: 0 Thread(s)
Quoted: 1226 Post(s)
Liked 3,555 Times
in
1,410 Posts
Dude this is a nice bike and you are doing great work! Good on you for saving it. I'm also working on an old, beat Allez. In my mind, its going to be more about the ride than the resale. You've got an extremely nice, high quality bike and it should reward you when done.
Keep at it!
Keep at it!
__________________
There were 135 Confentes, but only one...Huffente!

There were 135 Confentes, but only one...Huffente!
Likes For AdventureManCO:
