


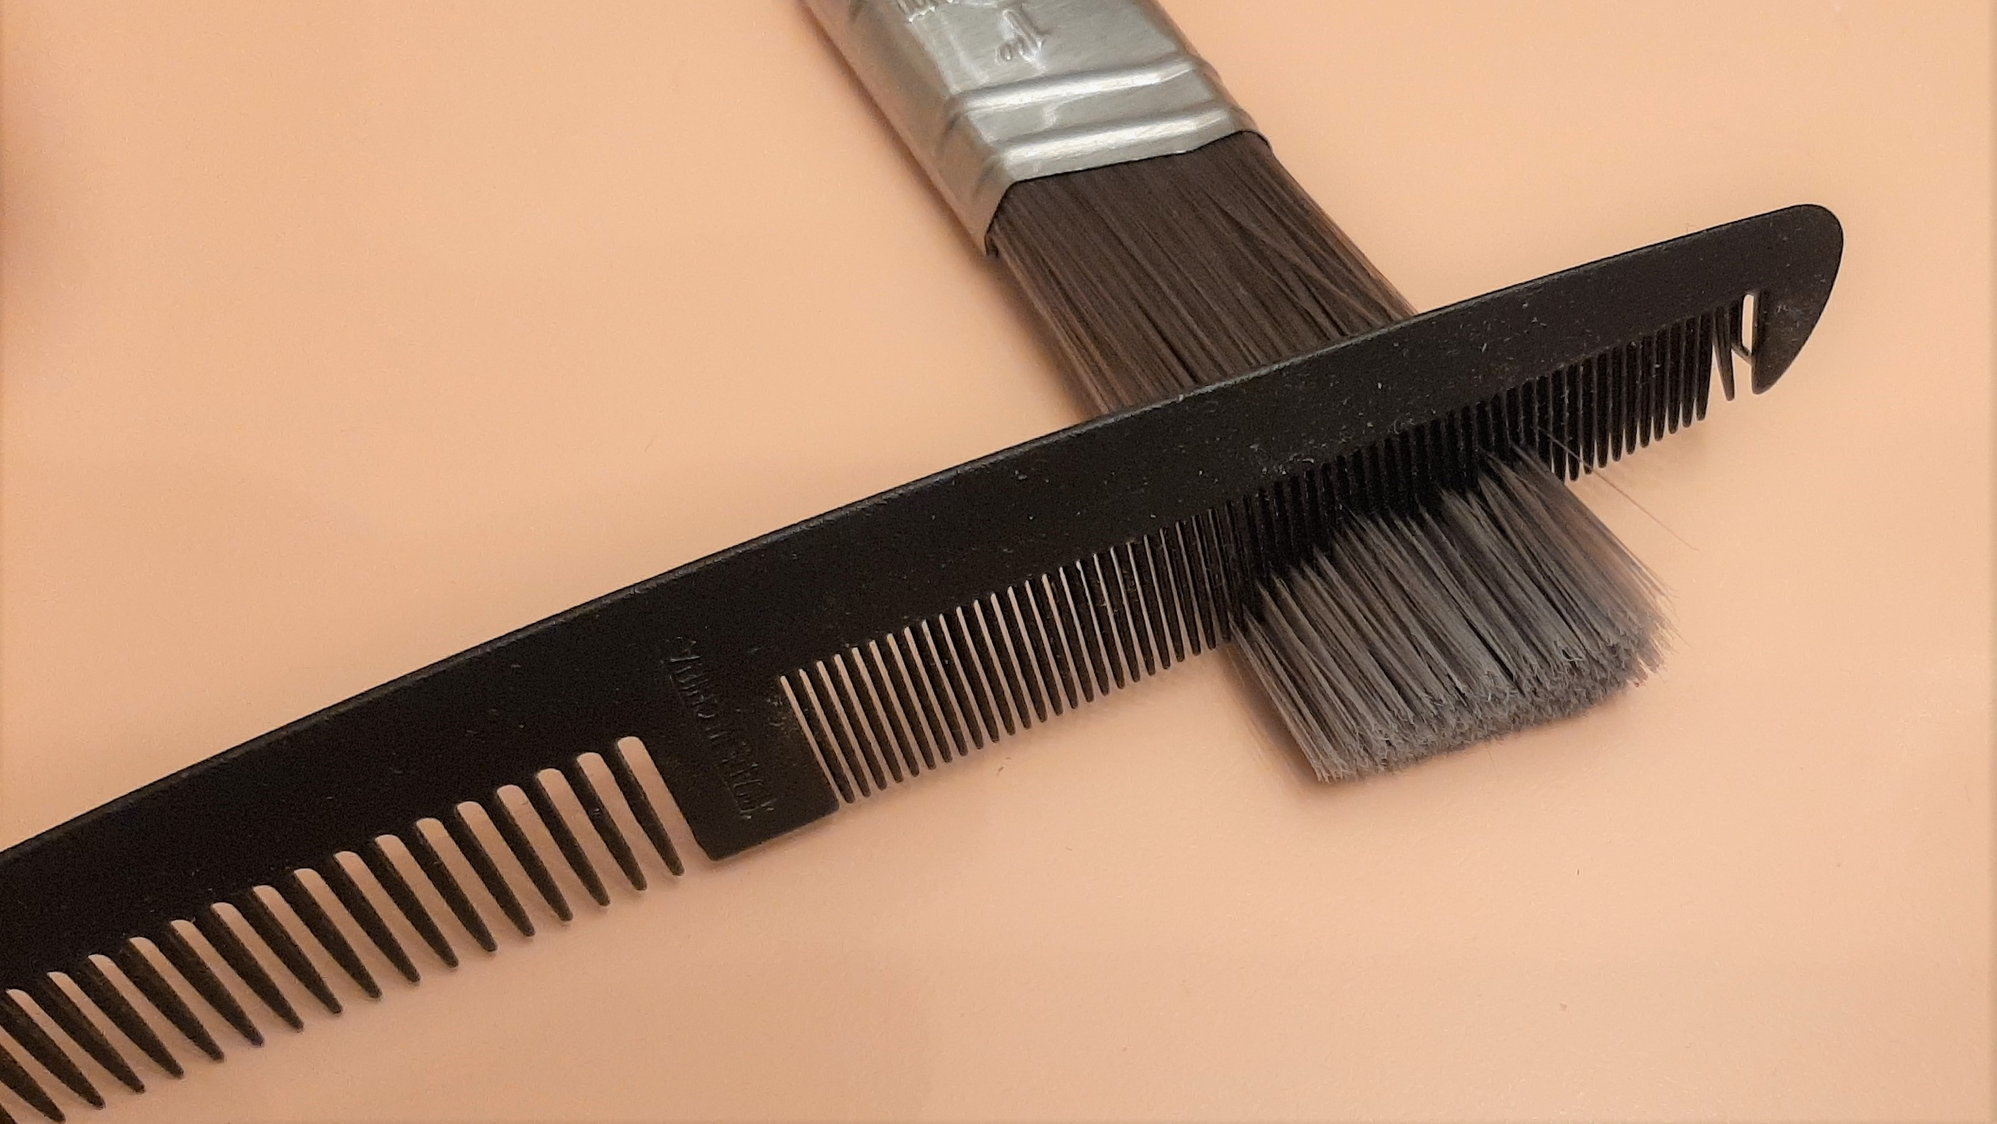
Torpado Paint Brush On Paint Job...
 01-01-21, 05:55 AM
#26

Senior Member
Join Date: Feb 2020
Posts: 2,812
Mentioned: 49 Post(s)
Tagged: 0 Thread(s)
Quoted: 1105 Post(s)
Likes: 0
Liked 1,325 Times
in
782 Posts
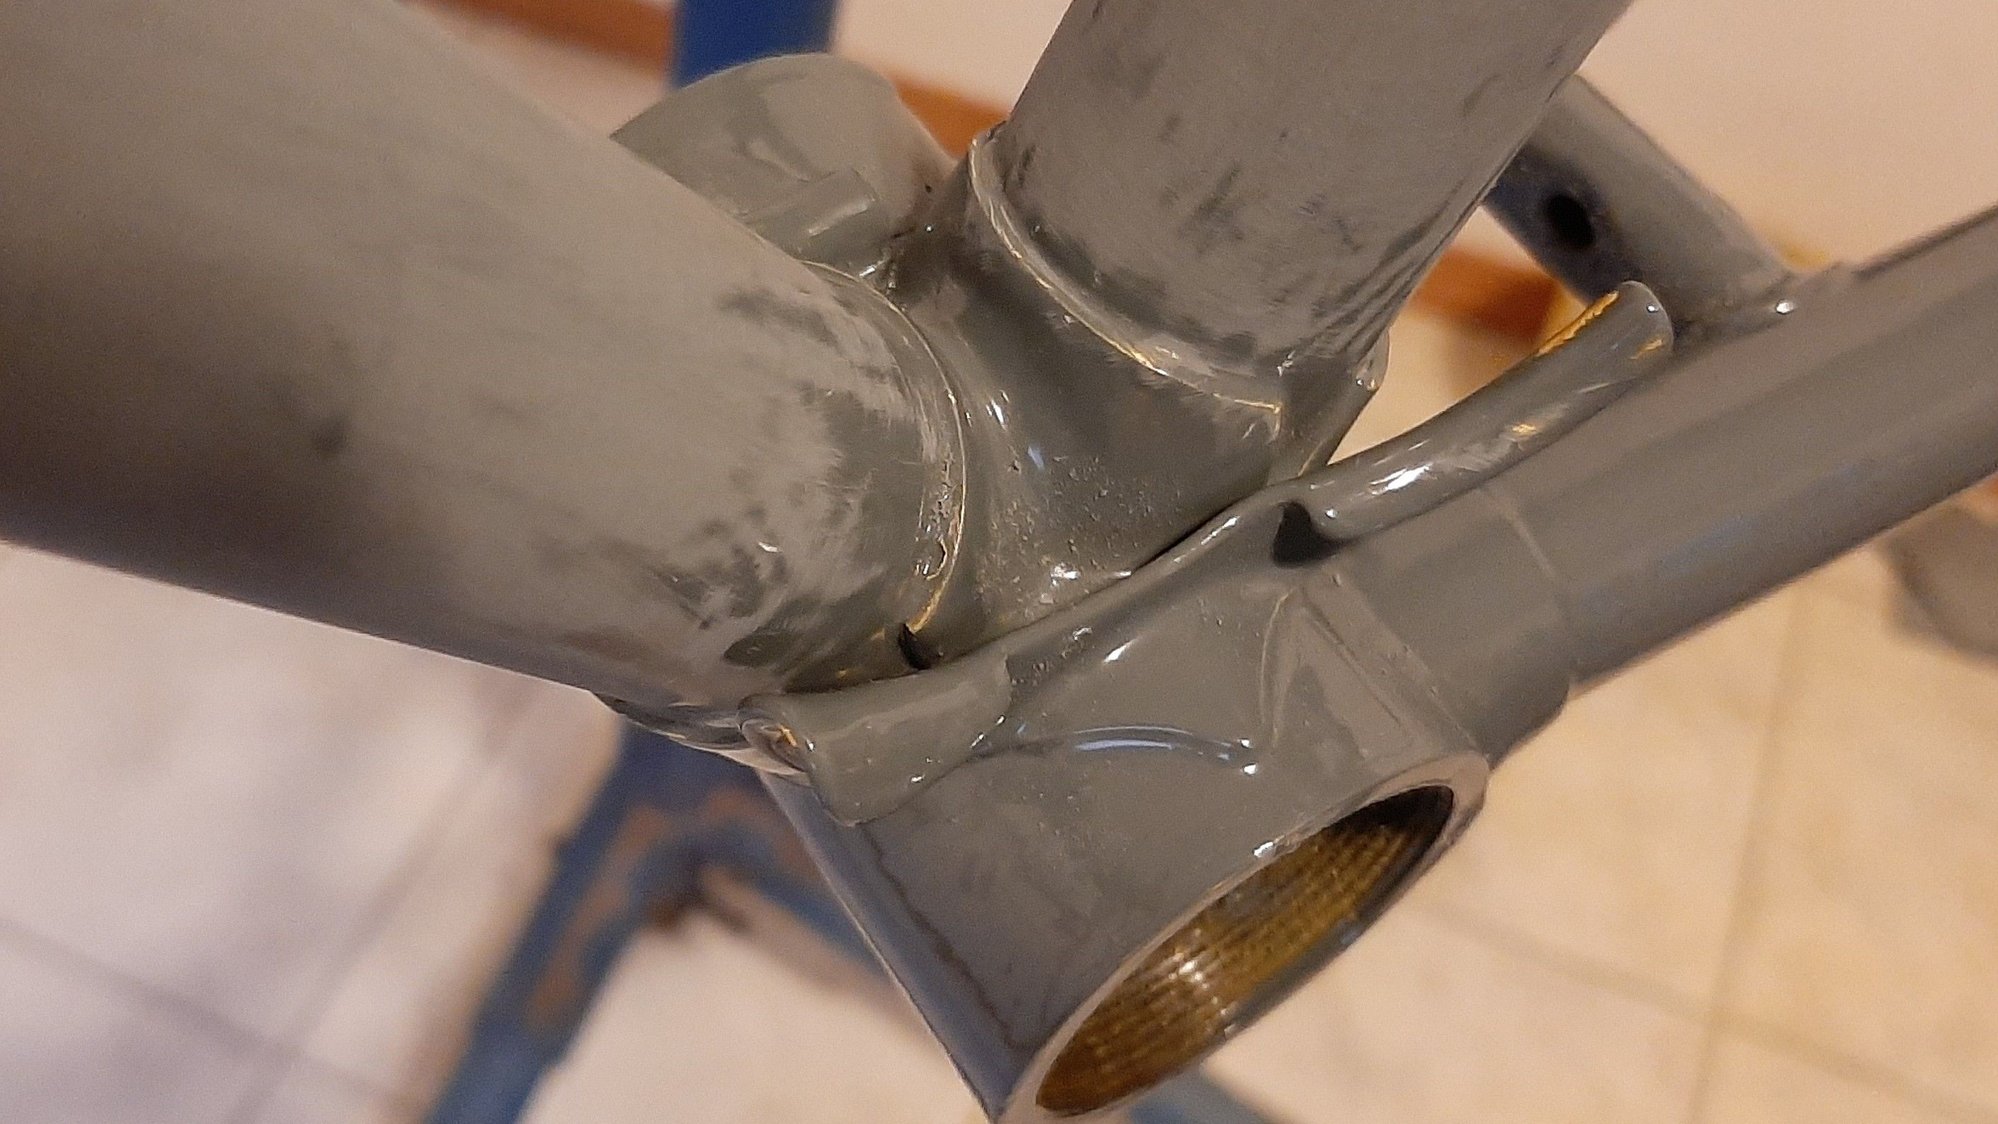
For flaws like that seat lug you can use a safe-back jeweller's file. The real cut-steel ones do a better job than the diamond-dust ones - they cut faster and leave a smoother finish (modulo skill, of course).

 01-04-21, 11:50 AM
#27
Senior Member
Thread Starter

Join Date: Apr 2007
Location: Thunder Bay, Ontario, Canada - burrrrr!
Posts: 11,674
Bikes: 1958 Rabeneick 120D, 1968 Legnano Gran Premio, 196? Torpado Professional, 2000 Marinoni Piuma
Mentioned: 210 Post(s)
Tagged: 0 Thread(s)
Quoted: 1372 Post(s)
Likes: 0
Liked 1,747 Times
in
937 Posts
Ah, starting to look like something...
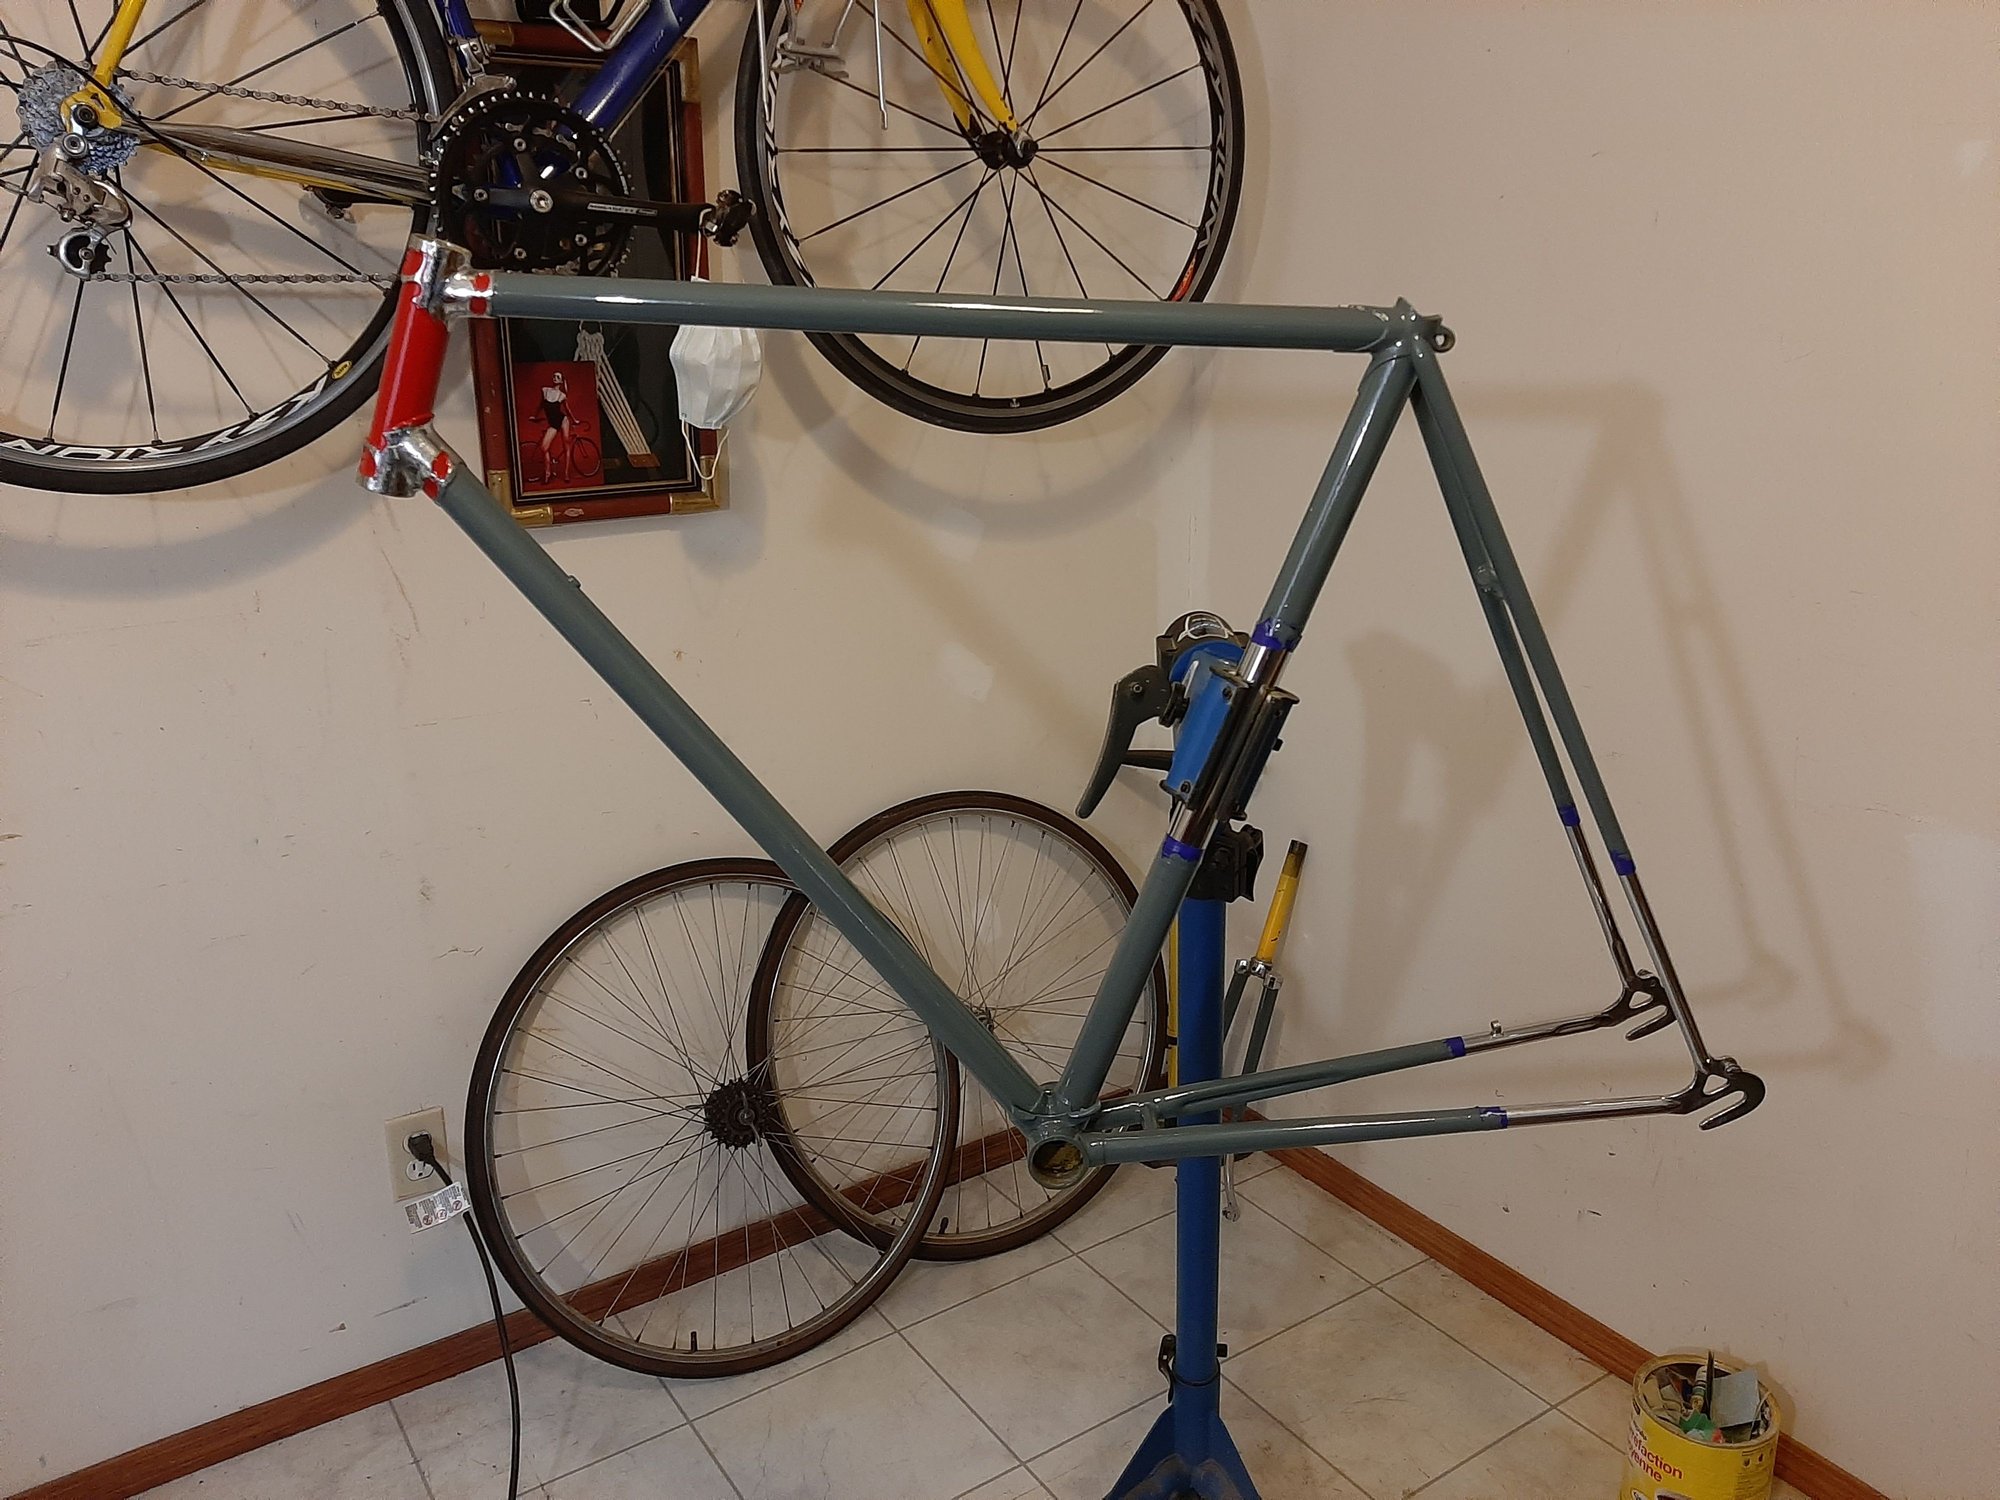
Remember, these old road bicycles were not statements in workmanship excellence, every time...

I do not like to use any chemicals or solvents to strip a frame/fork set. I do use paint thinner during the painting process. And a wee bit of lacquer thinner to clean off soon to be painted chrome plated surfaces. So, without chemical stripping assistance, I filed a small soft blade screwdriver and use it to pick and scrape away at the little places...
Once satisfied that the piece is good to go, I brush on the paint, this time using a much smaller brush. This is the first time I have used liquid latex as a masking medium. Works great with rattle can spray...
But, when brushed on can pick up the latex, if not careful. None the less, I painted right up to the liquid mask edge, trying to not go over or rub the latex too much. Not true eye candy, just yet, but getting closer to art time...

Remember, these old road bicycles were not statements in workmanship excellence, every time...
I do not like to use any chemicals or solvents to strip a frame/fork set. I do use paint thinner during the painting process. And a wee bit of lacquer thinner to clean off soon to be painted chrome plated surfaces. So, without chemical stripping assistance, I filed a small soft blade screwdriver and use it to pick and scrape away at the little places...
Once satisfied that the piece is good to go, I brush on the paint, this time using a much smaller brush. This is the first time I have used liquid latex as a masking medium. Works great with rattle can spray...
But, when brushed on can pick up the latex, if not careful. None the less, I painted right up to the liquid mask edge, trying to not go over or rub the latex too much. Not true eye candy, just yet, but getting closer to art time...
__________________
"98% of the bikes I buy are projects".
"98% of the bikes I buy are projects".
01-04-21, 05:43 PM
#28
Senior Member
Join Date: Feb 2020
Posts: 2,812
Mentioned: 49 Post(s)
Tagged: 0 Thread(s)
Quoted: 1105 Post(s)
Likes: 0
Liked 1,325 Times
in
782 Posts
And they are *really* useful for picking the remains of that seized bolt you just drilled through out of the threads of the hole it was seized in.
01-04-21, 07:10 PM
#29
Senior Member
Thread Starter
Join Date: Apr 2007
Location: Thunder Bay, Ontario, Canada - burrrrr!
Posts: 11,674
Bikes: 1958 Rabeneick 120D, 1968 Legnano Gran Premio, 196? Torpado Professional, 2000 Marinoni Piuma
Mentioned: 210 Post(s)
Tagged: 0 Thread(s)
Quoted: 1372 Post(s)
Likes: 0
Liked 1,747 Times
in
937 Posts
Make friends with your dentist - I did, and would up with a box full of used picks. They are great for cleaning dirt out of bb and rear hub threads, and inner corners of dust-caps, and up inside the top knuckle of rear mechs that don't easily come apart, and the pin holes on freewheel lockrings, and the drain holes in fork blades and stays, and, and, and. With a loupe and a bit of careful prep with a grind stone (and some practice) you can re-touch the engraving on aluminium bits,
__________________
"98% of the bikes I buy are projects".
"98% of the bikes I buy are projects".
01-05-21, 05:54 AM
#30
Senior Member
Join Date: Nov 2013
Location: Near Pottstown, PA: 30 miles NW of Philadelphia
Posts: 2,184
Bikes: 2 Trek Mtn, Cannondale R600 road, 6 vintage road bikes
Mentioned: 83 Post(s)
Tagged: 0 Thread(s)
Quoted: 472 Post(s)
Liked 1,028 Times
in
404 Posts
Randy, two thoughts.
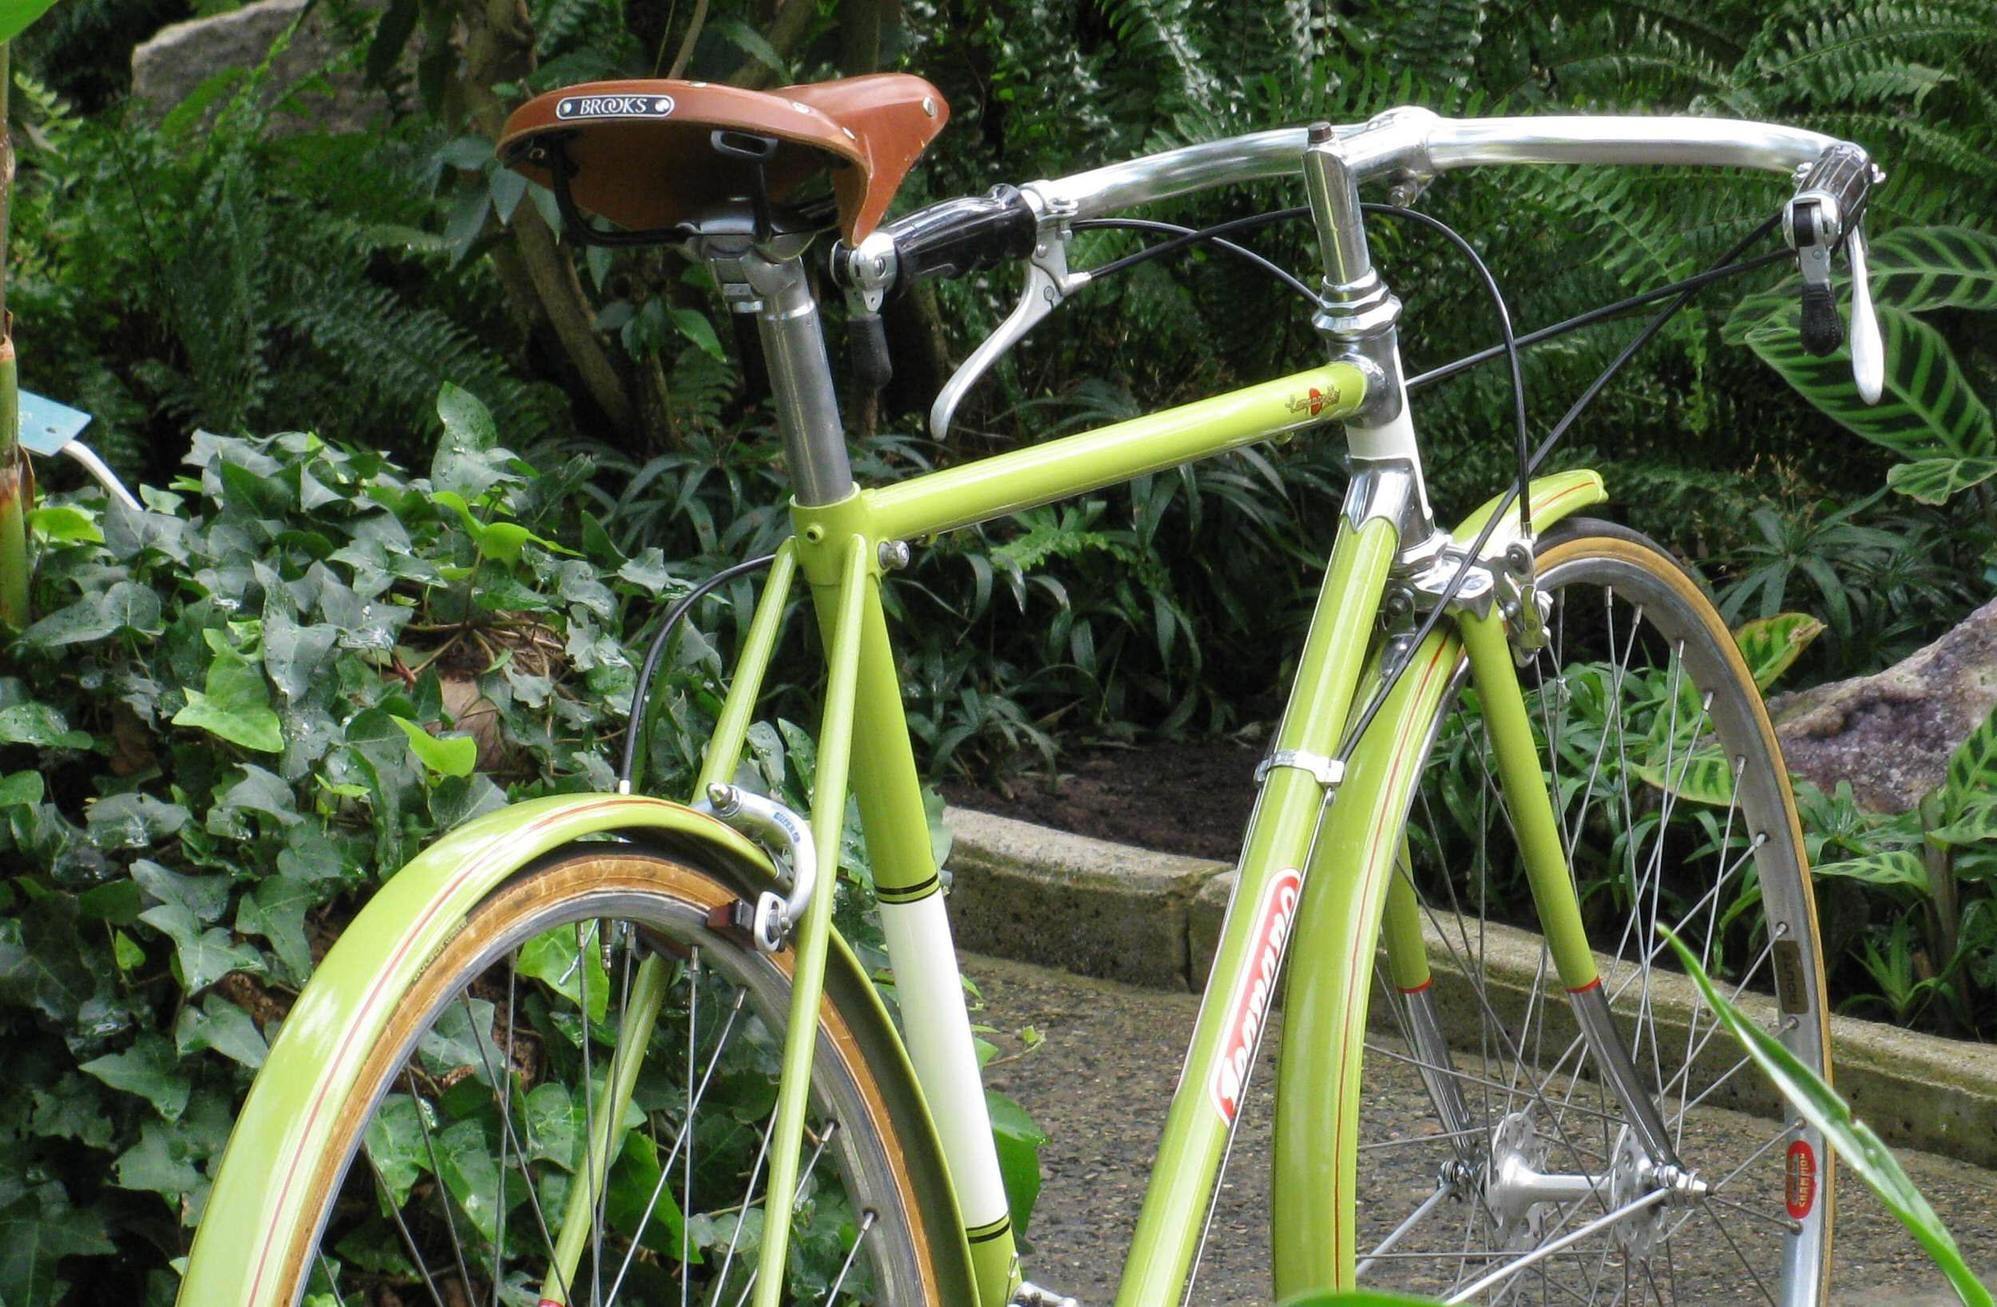
The gray n red approach looks great but, it seems the red needs to be somewhere on the rest of the frame too. Maybe red lug lining on the seat lug or BB shell. My Crescent has a single line pin stripe down each seat stay. Hmmmm.
For scrapers I've found that steel banding straps (like used to strap heavy things to pallets) make good tools. I have a few pieces cut about 4" long. Squared off ends, angled ends and rounded ends. The material seems high carbon and you can control how sharp the edge is with how you file it. I have salvaged banding 3/4" and 1 1/4" wide. Handy for many things. Filed correctly and used low angle they will not damage chrome. You can bend an end a bit if needed but they break easily if bent to 90deg.
01-05-21, 07:21 AM
#31
Senior Member
Thread Starter
Join Date: Apr 2007
Location: Thunder Bay, Ontario, Canada - burrrrr!
Posts: 11,674
Bikes: 1958 Rabeneick 120D, 1968 Legnano Gran Premio, 196? Torpado Professional, 2000 Marinoni Piuma
Mentioned: 210 Post(s)
Tagged: 0 Thread(s)
Quoted: 1372 Post(s)
Likes: 0
Liked 1,747 Times
in
937 Posts
Randy, two thoughts.
The gray n red approach looks great but, it seems the red needs to be somewhere on the rest of the frame too. Maybe red lug lining on the seat lug or BB shell. My Crescent has a single line pin stripe down each seat stay. Hmmmm.
For scrapers I've found that steel banding straps (like used to strap heavy things to pallets) make good tools. I have a few pieces cut about 4" long. Squared off ends, angled ends and rounded ends. The material seems high carbon and you can control how sharp the edge is with how you file it. I have salvaged banding 3/4" and 1 1/4" wide. Handy for many things. Filed correctly and used low angle they will not damage chrome. You can bend an end a bit if needed but they break easily if bent to 90deg.
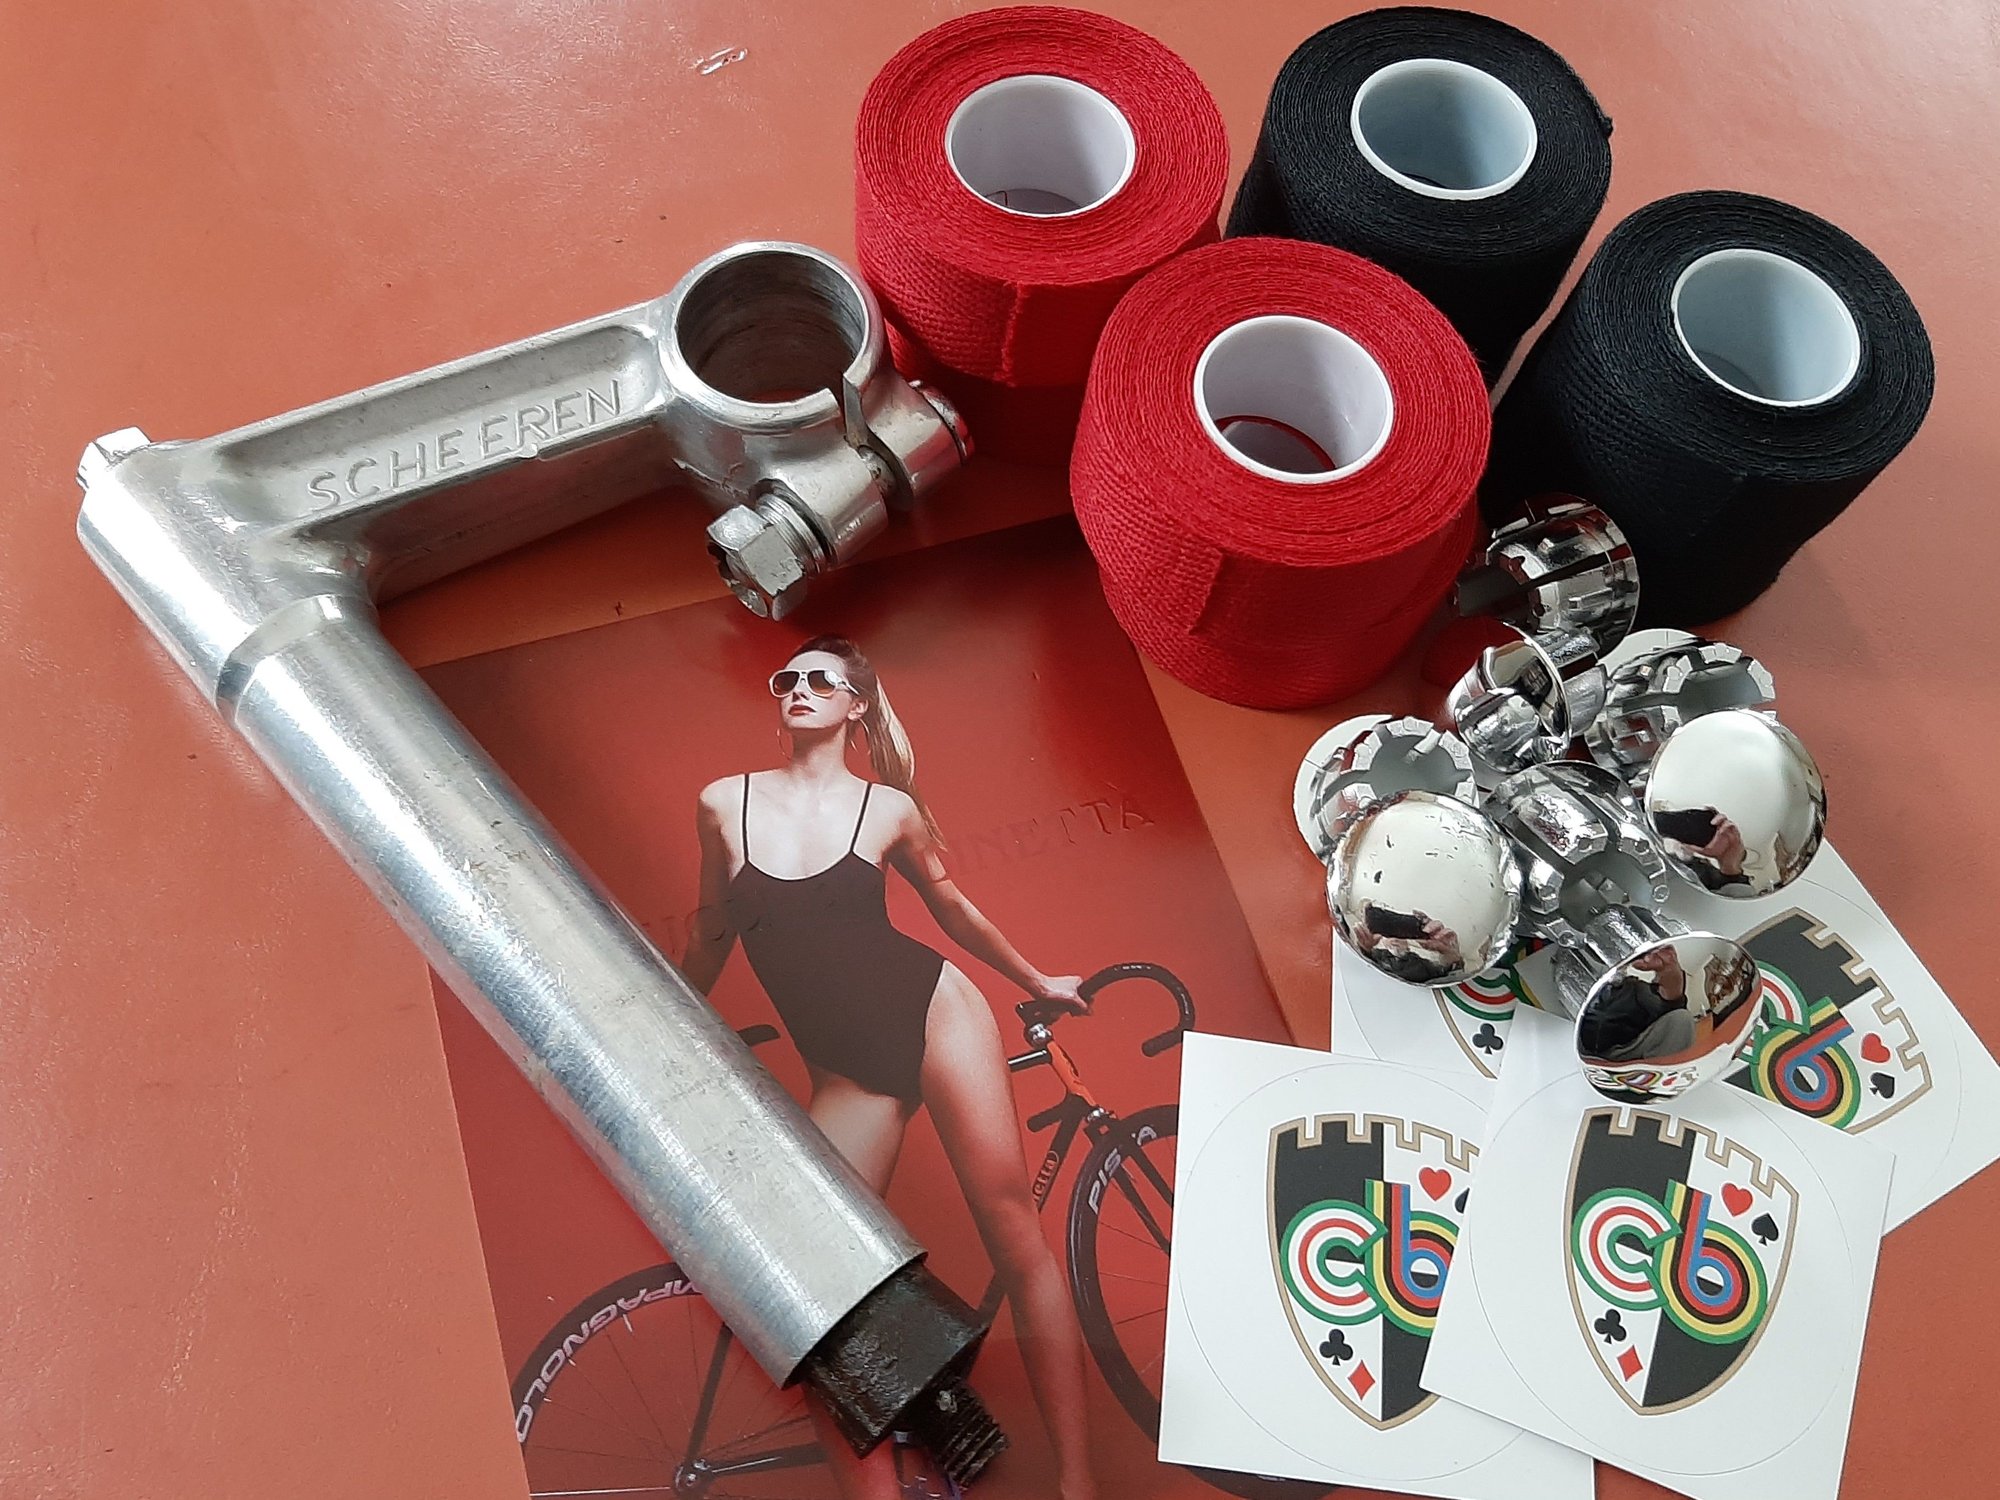
Her is what the taped result looks like. Two narrow red strips run down each side of each fender. The same tape edges the fork and stays socks. The double black tape edges the seat tube panel. Very easy to do...

To that, add this bar tape and there should be enough red to do the trick...
__________________
"98% of the bikes I buy are projects".
"98% of the bikes I buy are projects".
01-07-21, 05:59 PM
#32
Senior Member
Thread Starter
Join Date: Apr 2007
Location: Thunder Bay, Ontario, Canada - burrrrr!
Posts: 11,674
Bikes: 1958 Rabeneick 120D, 1968 Legnano Gran Premio, 196? Torpado Professional, 2000 Marinoni Piuma
Mentioned: 210 Post(s)
Tagged: 0 Thread(s)
Quoted: 1372 Post(s)
Likes: 0
Liked 1,747 Times
in
937 Posts
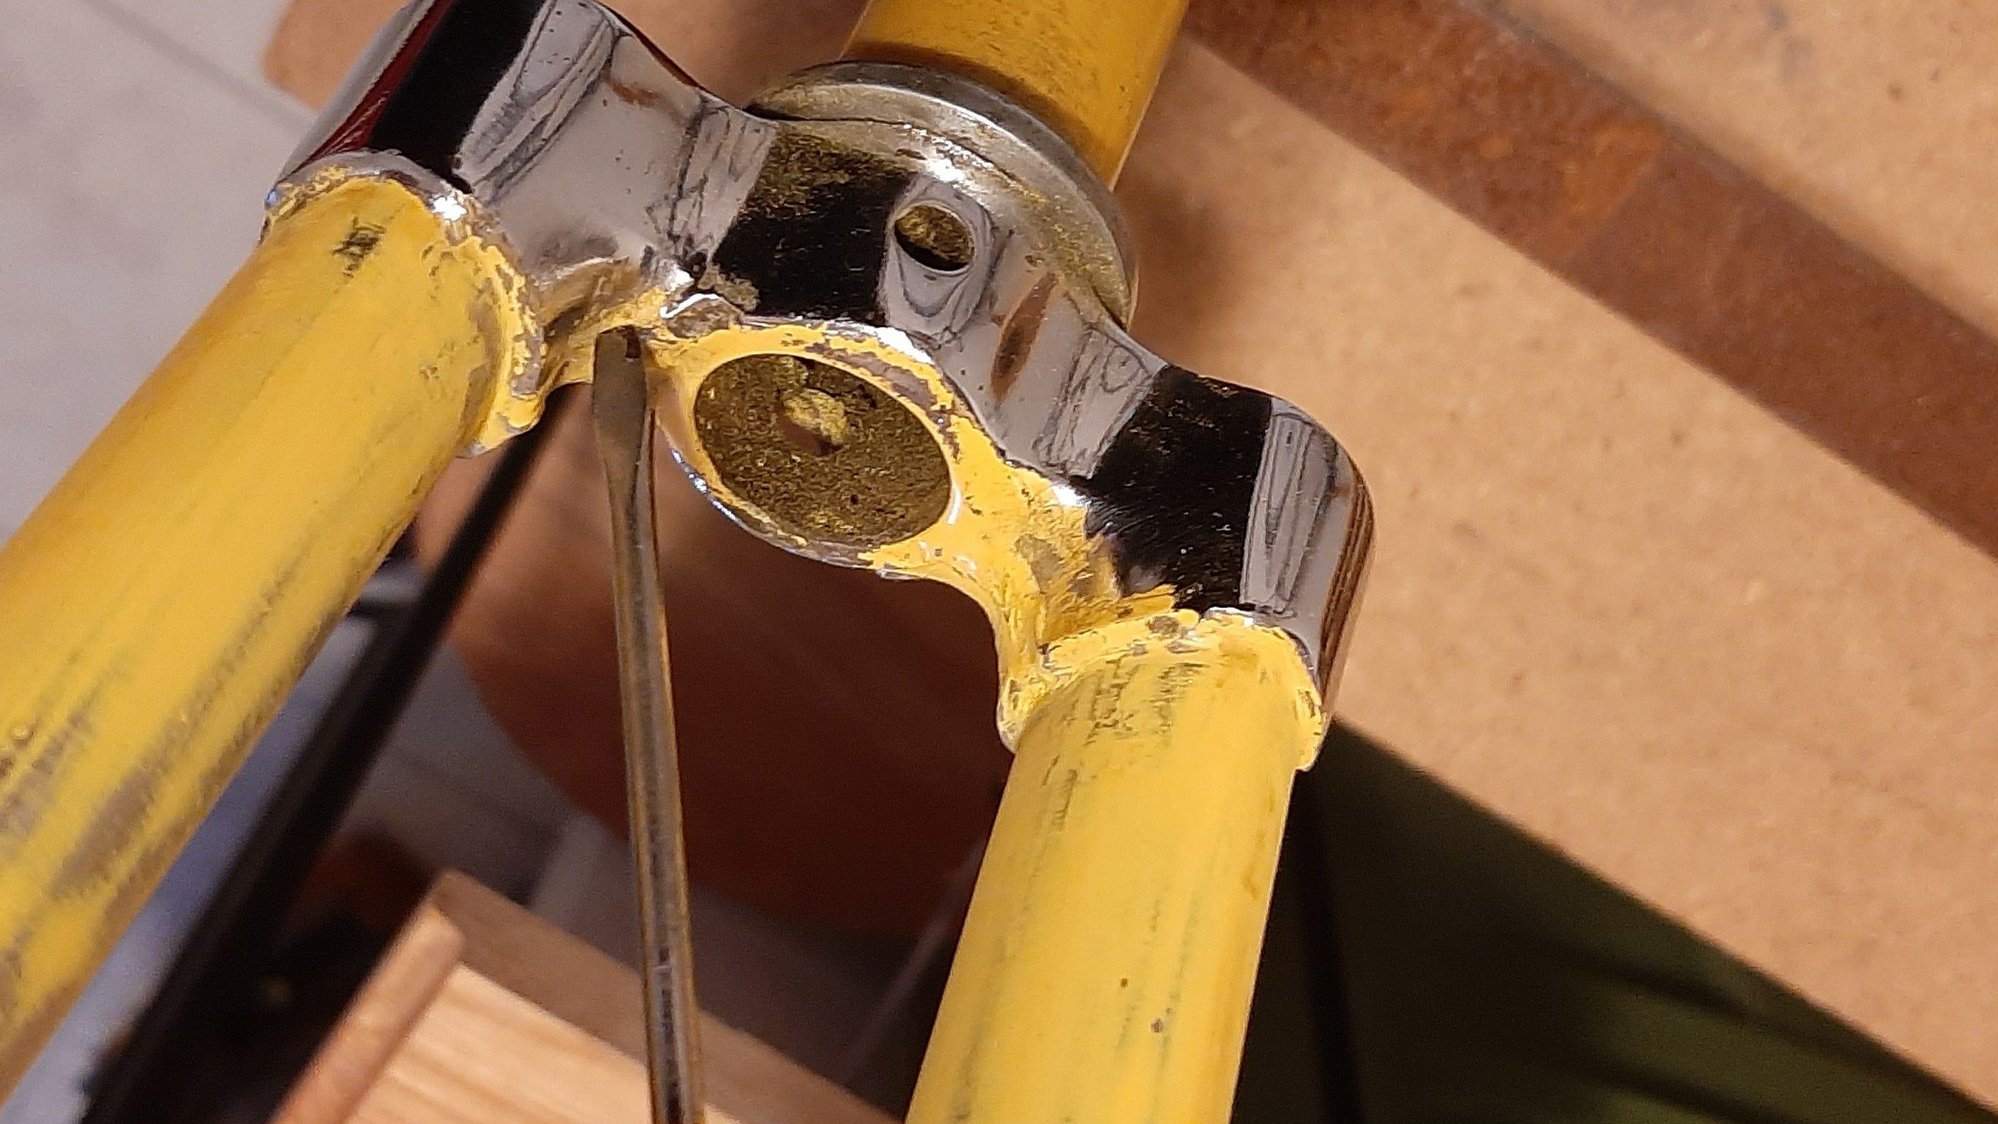
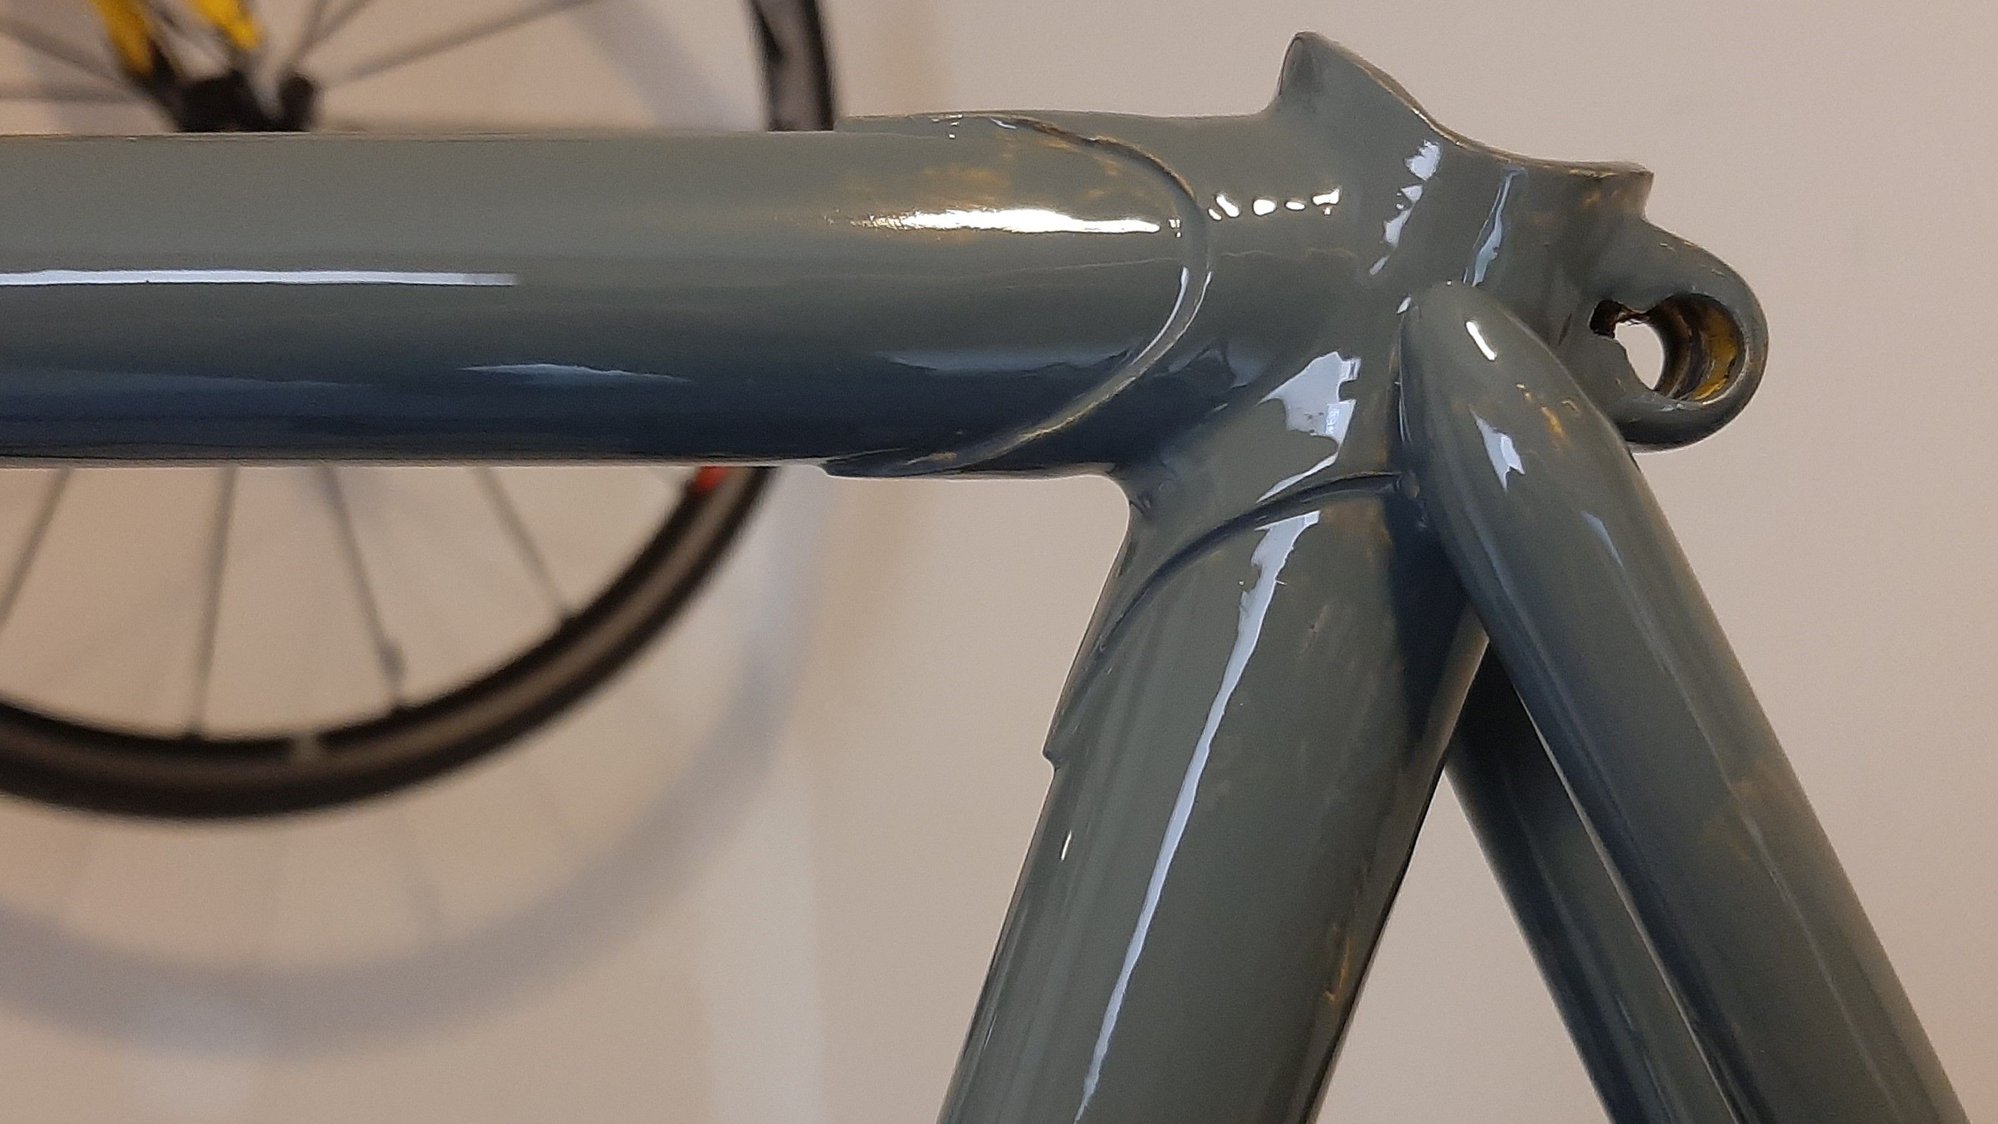
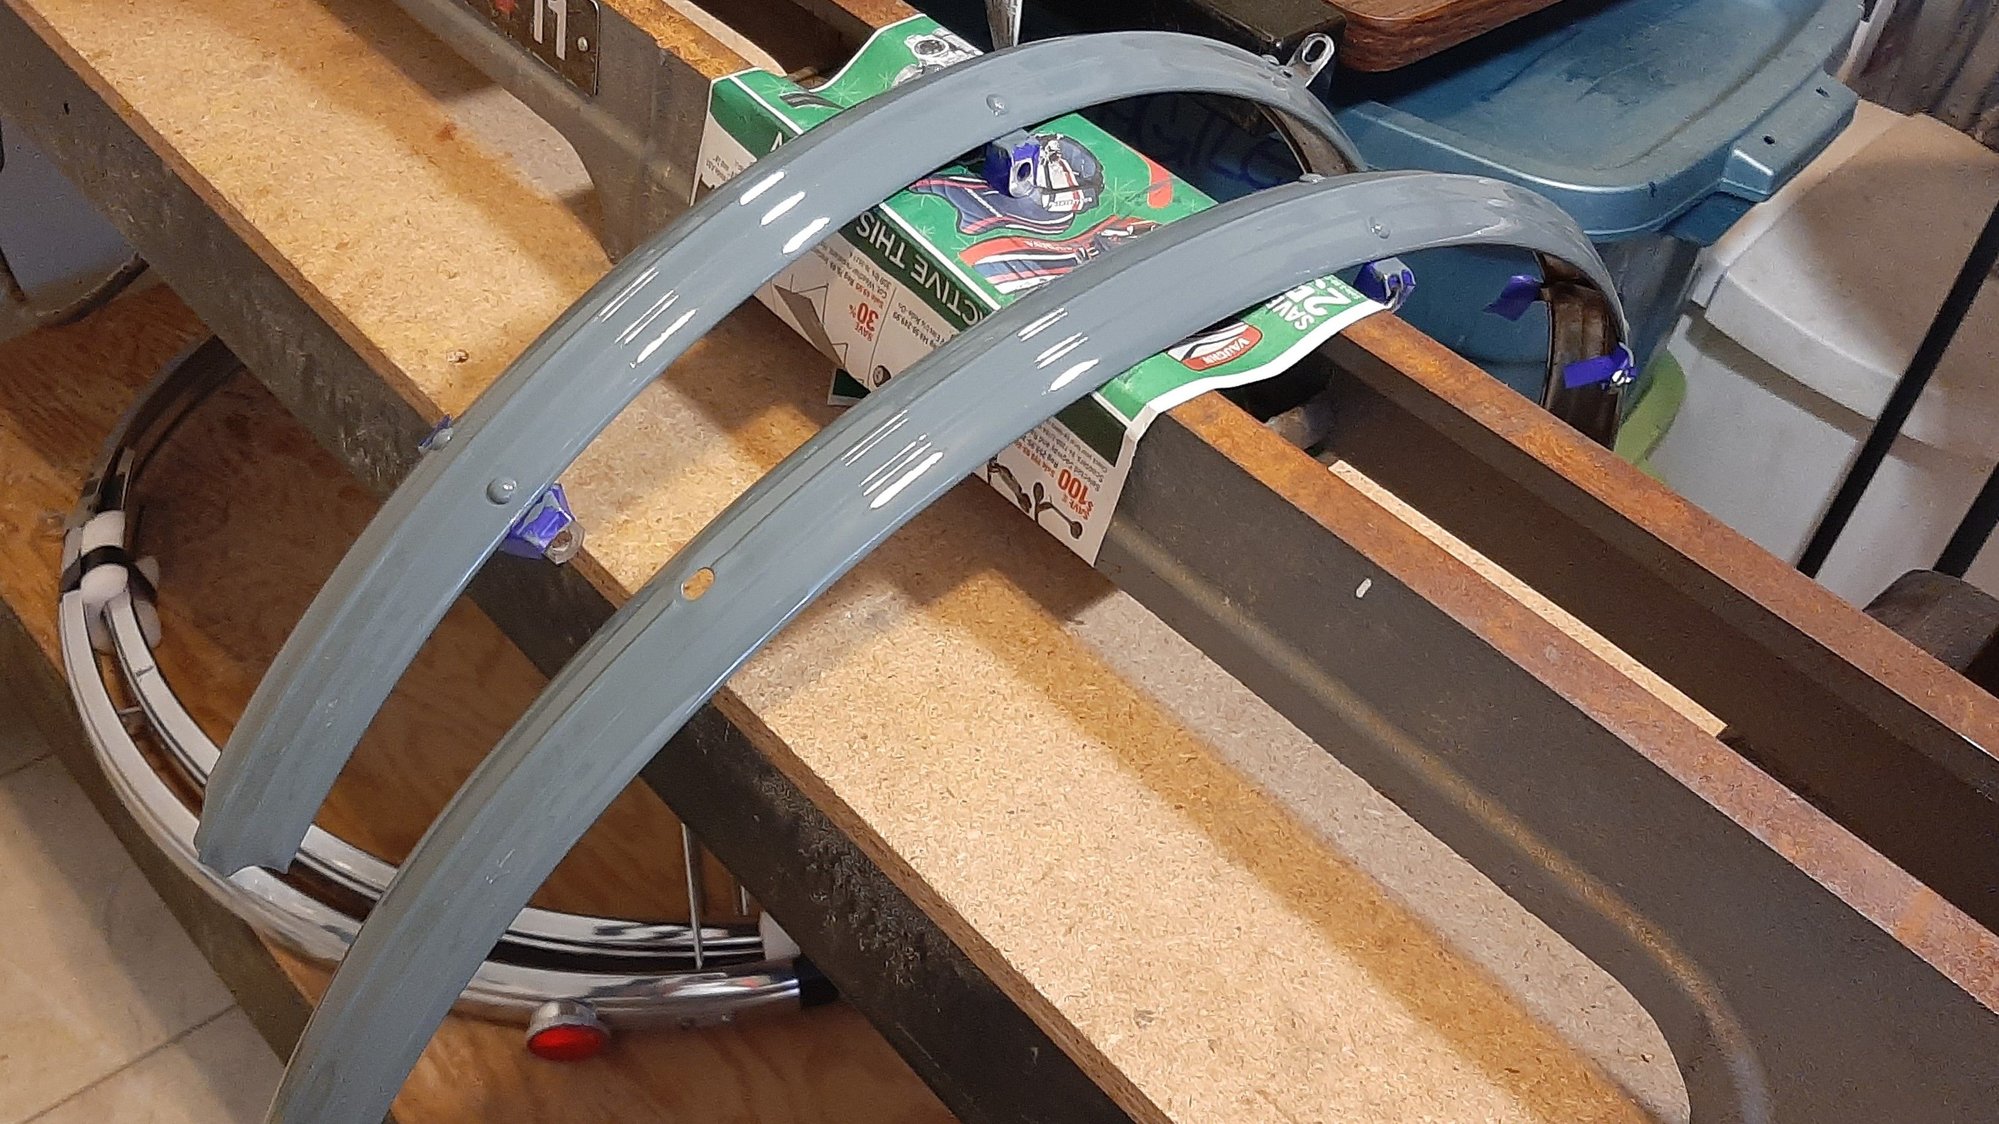
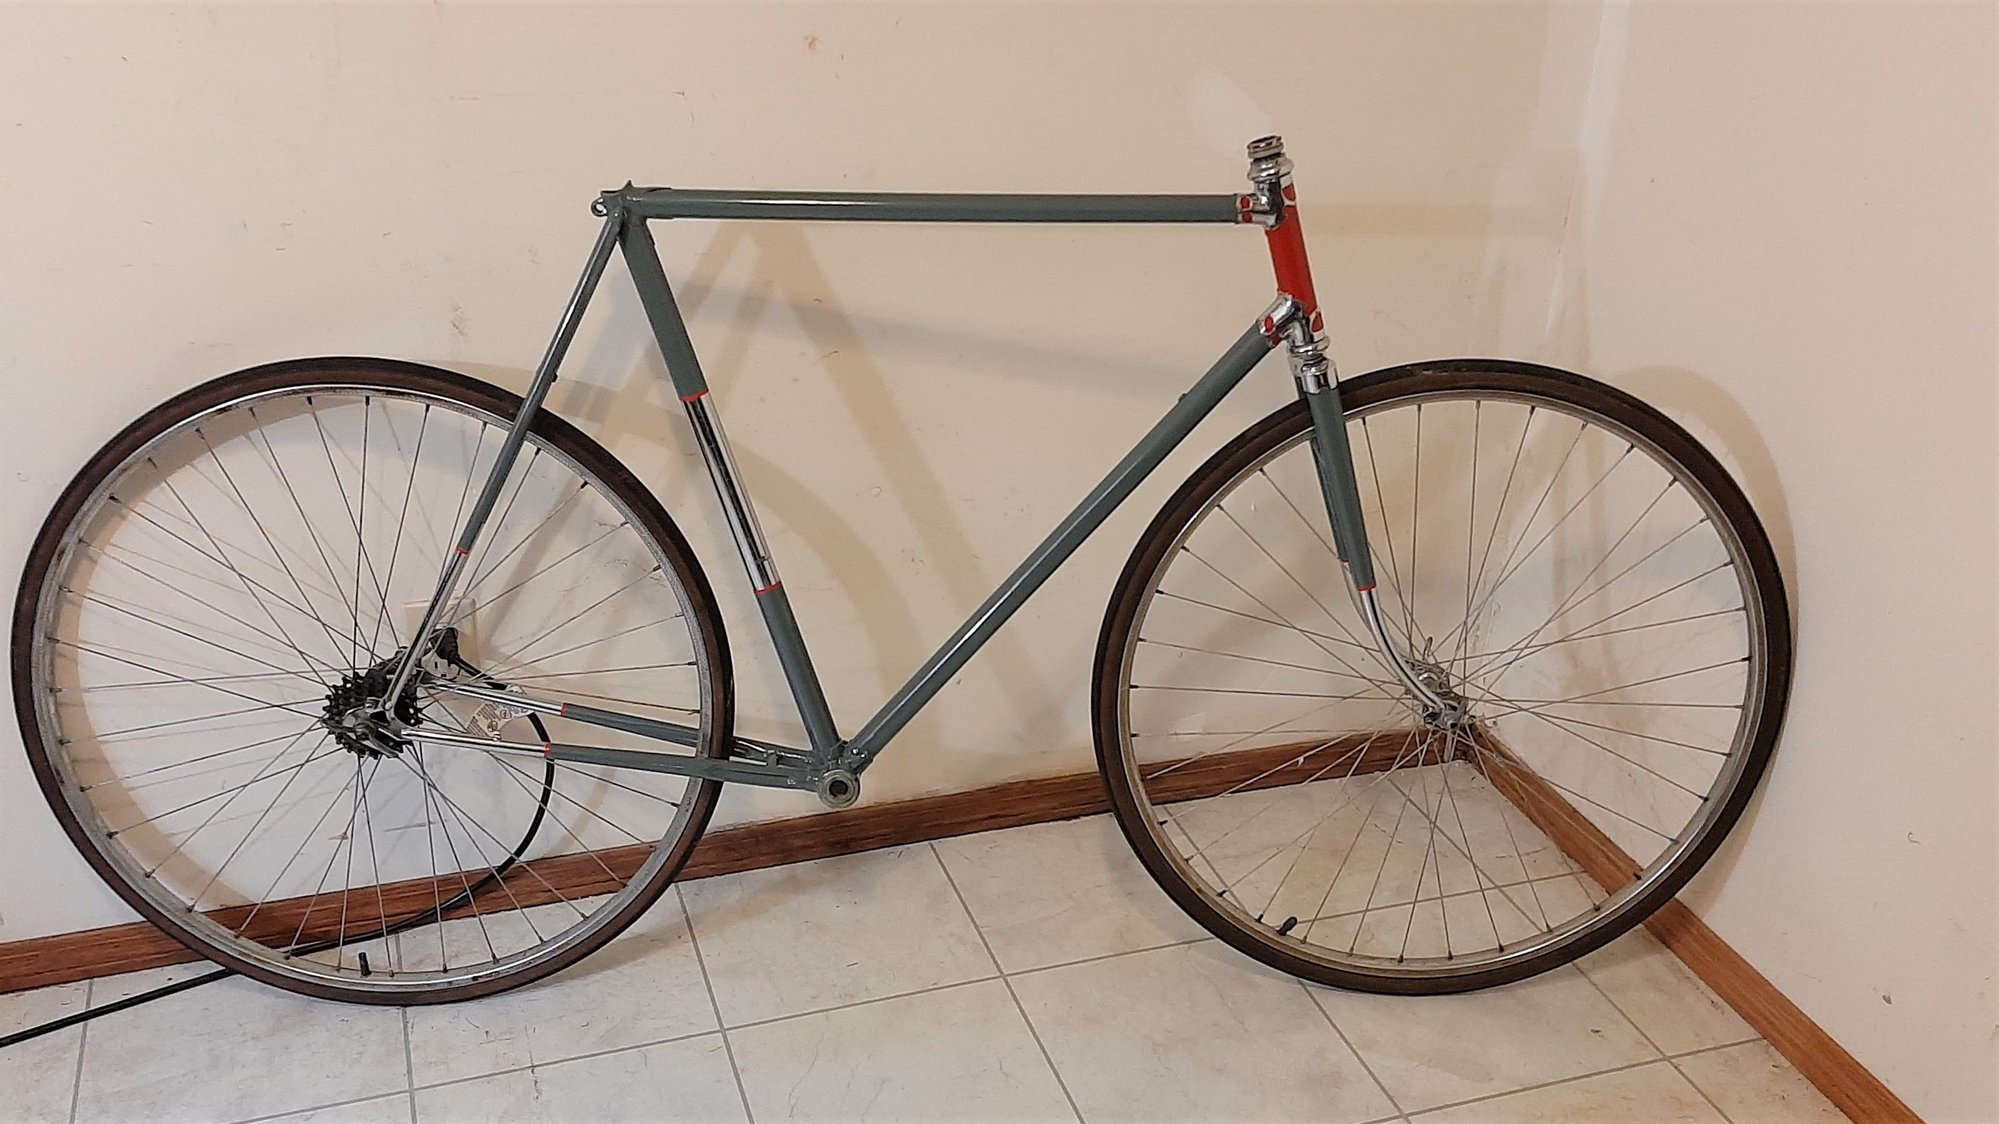
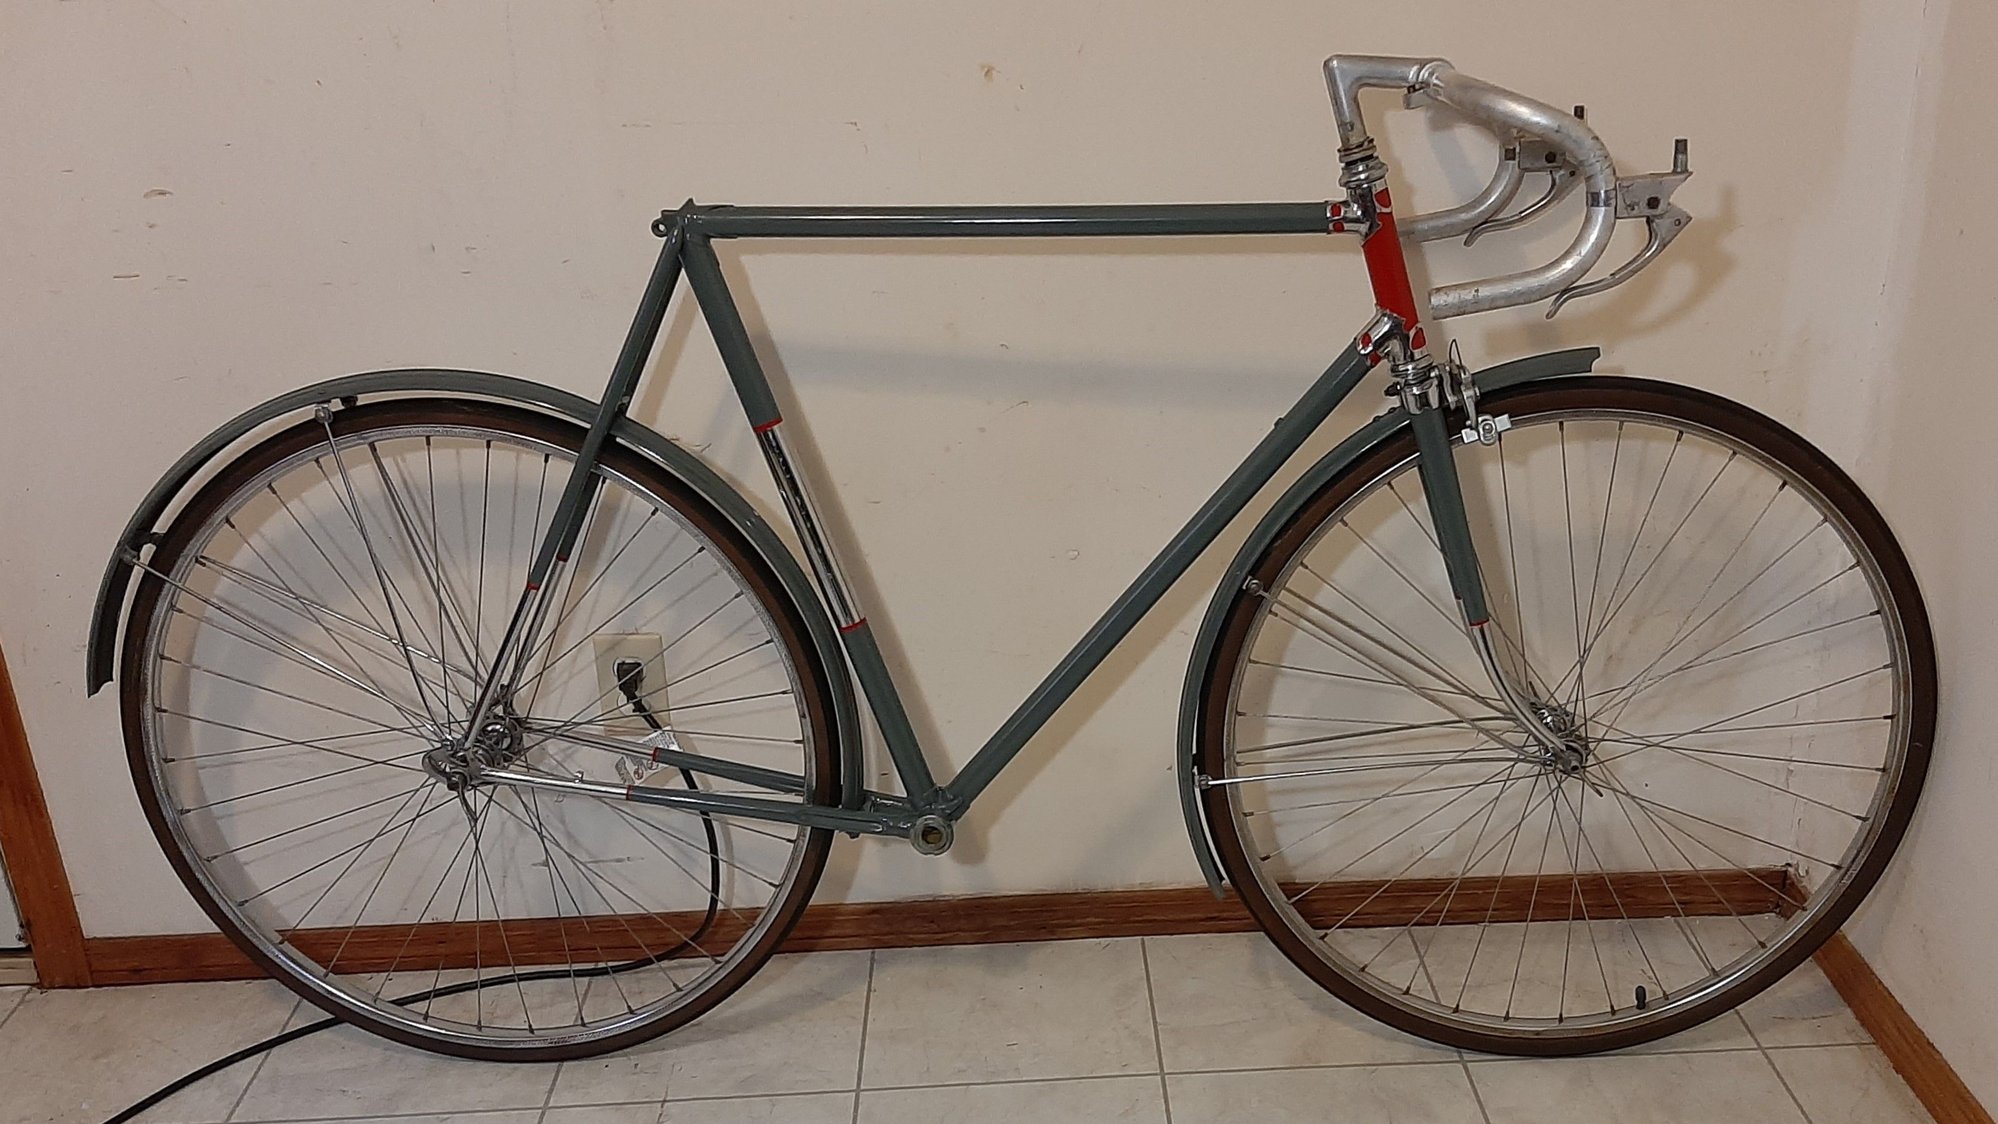
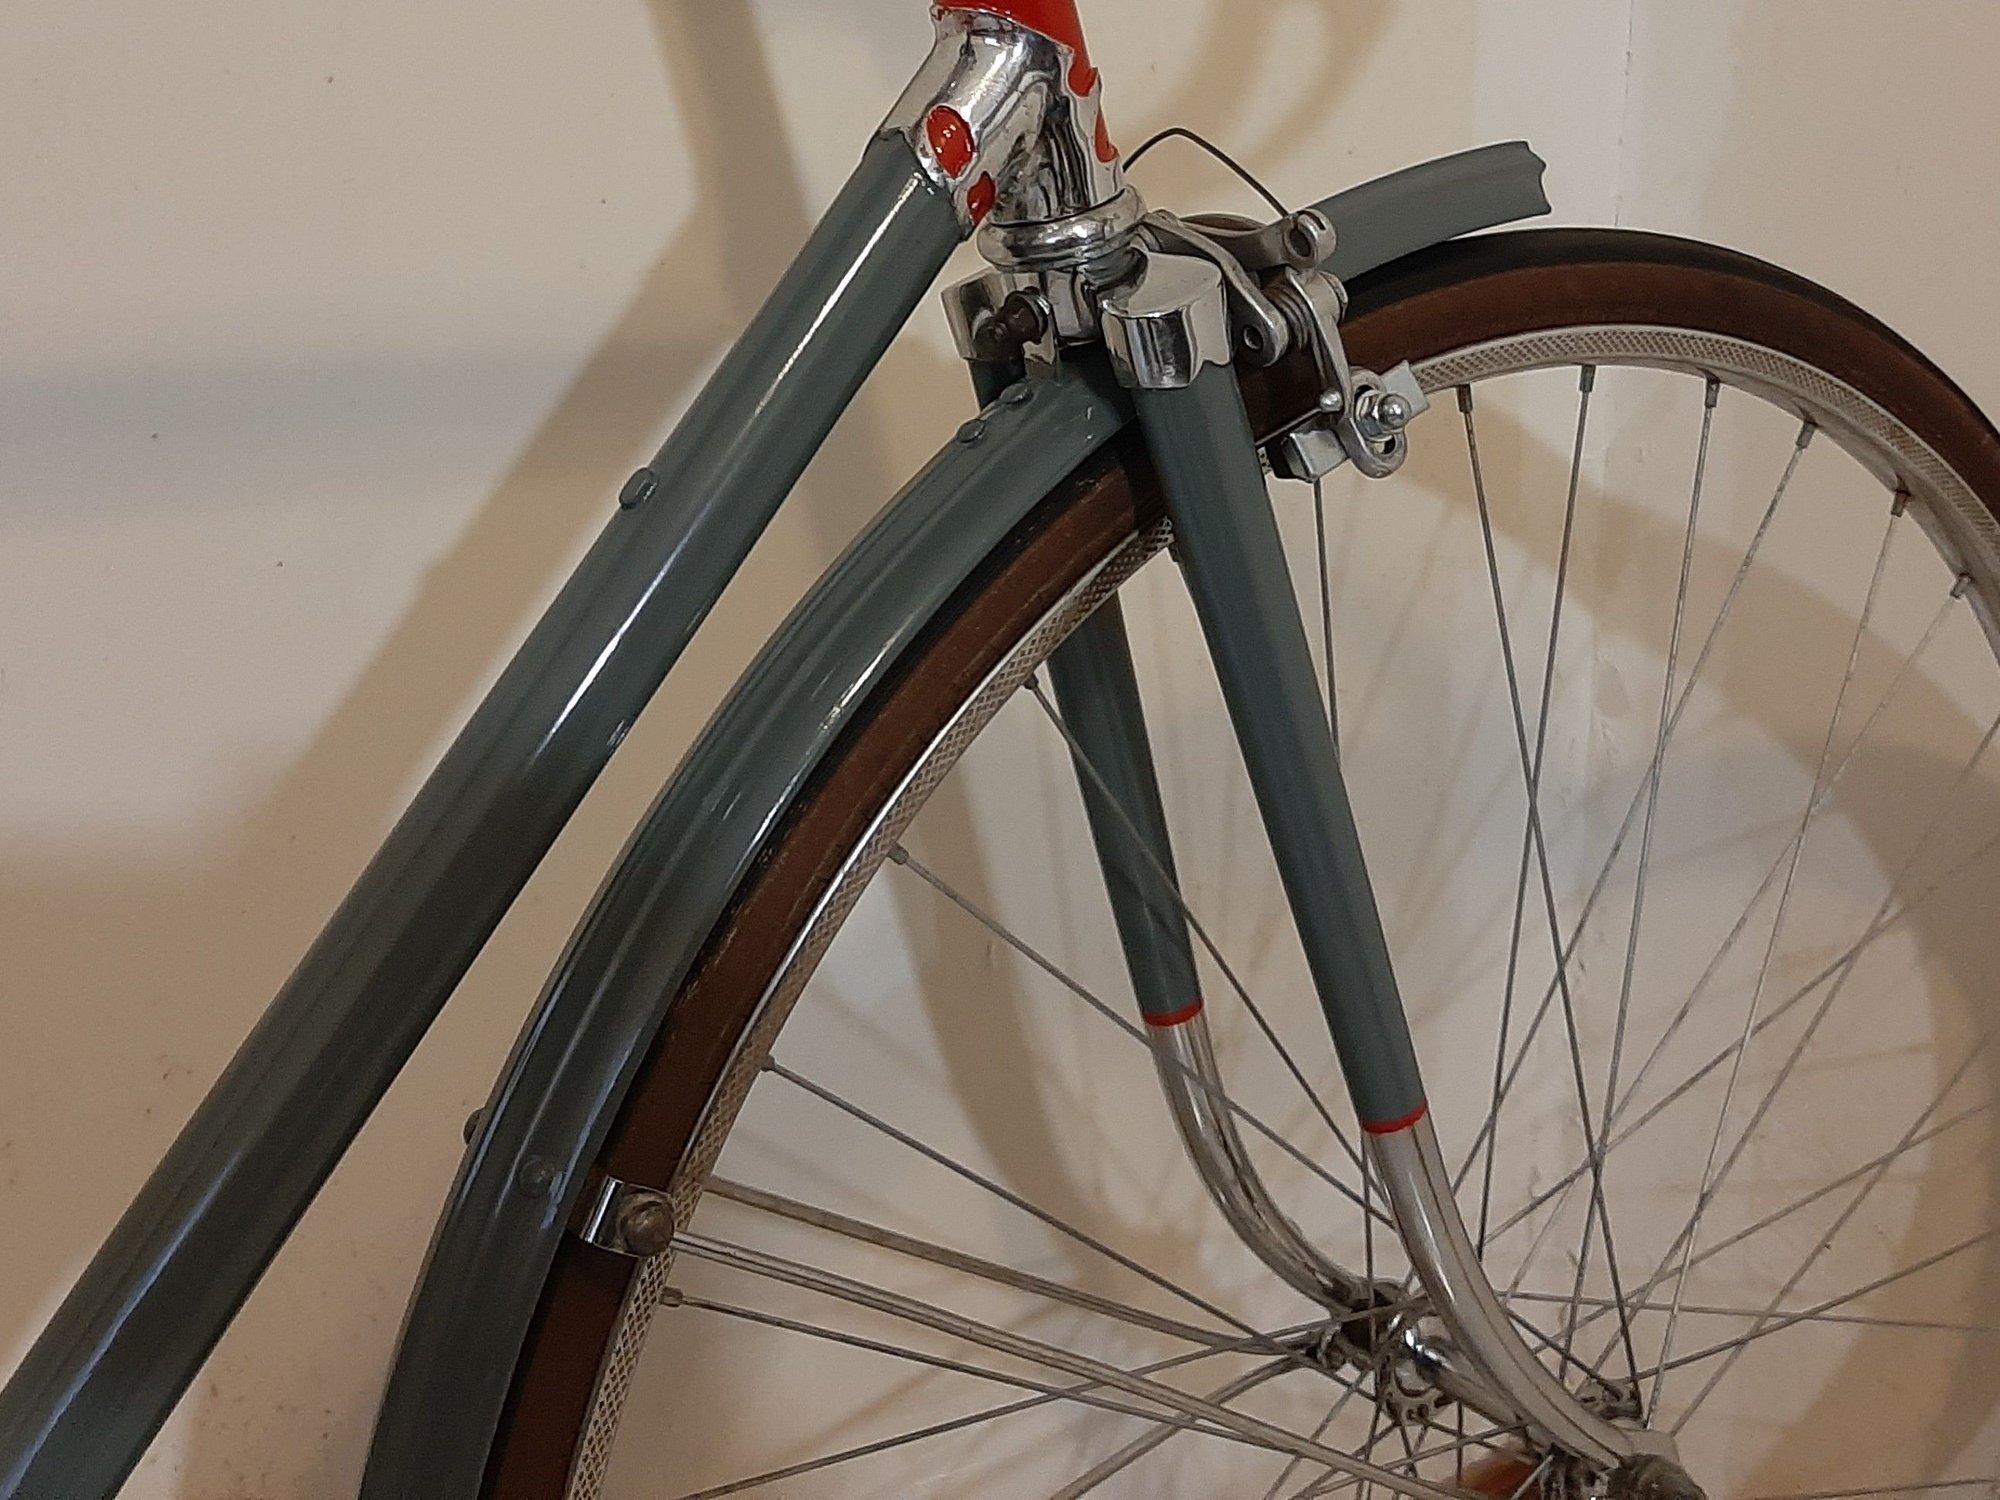
Today, I finished sanding the pitted chrome original fender set. There is no way the chrome will look good, leaving the option to paint wide open. Not sure what color to go with right now - grey or red or a combination. Anyway, a hard to find original Torpado fender set in great shape except for the poor chrome...
The frame and fork were color sanded today, smoothing the less than perfect surface offered by the first two coats. This coat, the final I hope, will be applied thin and with extra care...
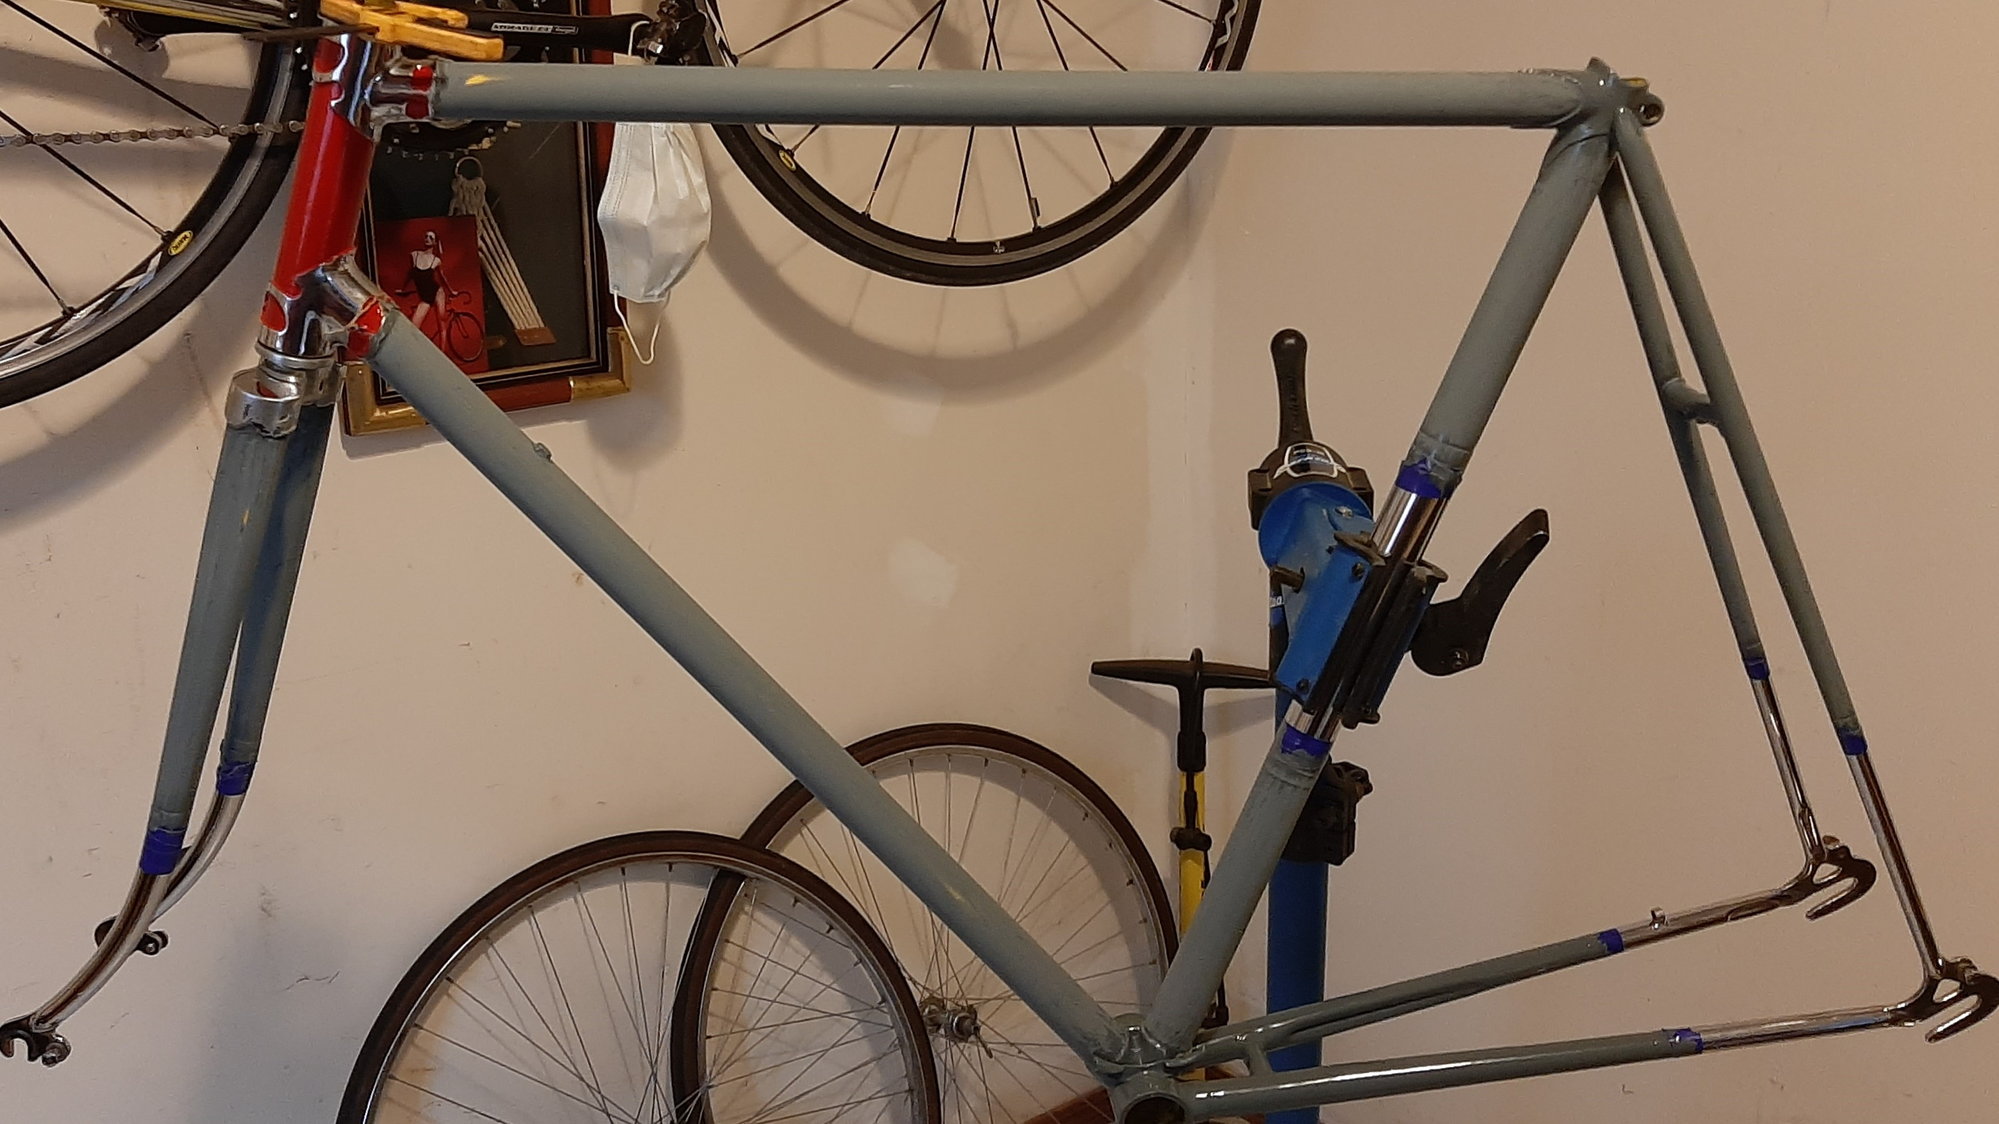
When sanding, go slow and use fine paper (wet and dry, wet is best). As you proceed, you will see shiny spots surrounded by the matt grey sanded finish. These are low spots and need to be blended into the surface. The better the surface, at this point, the nicer the finish will be once done...
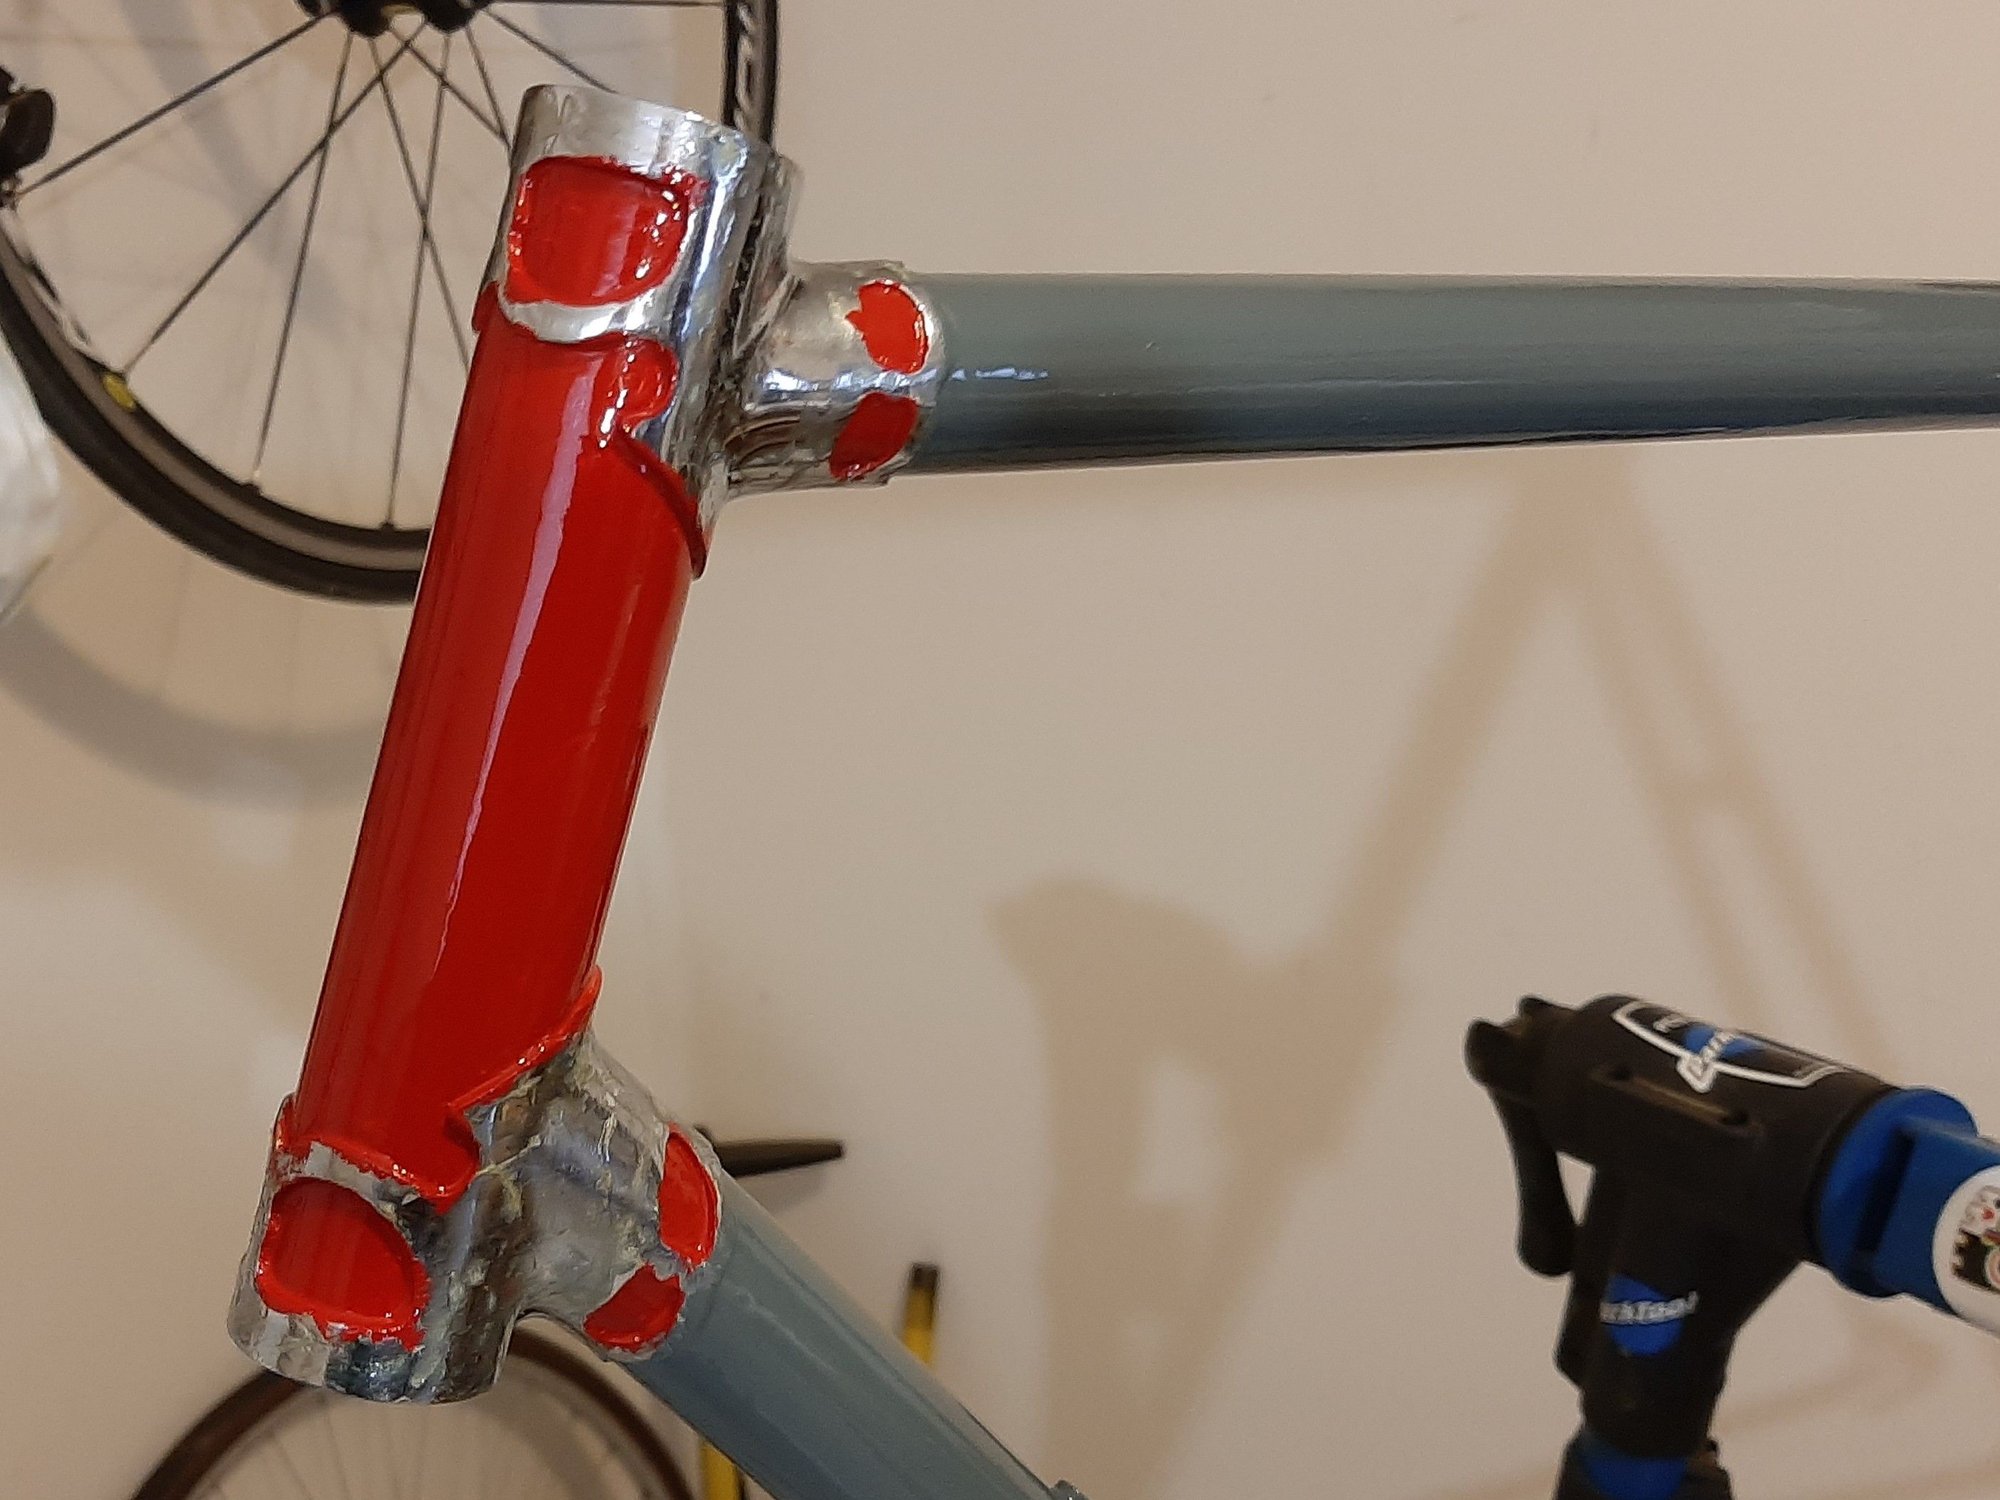
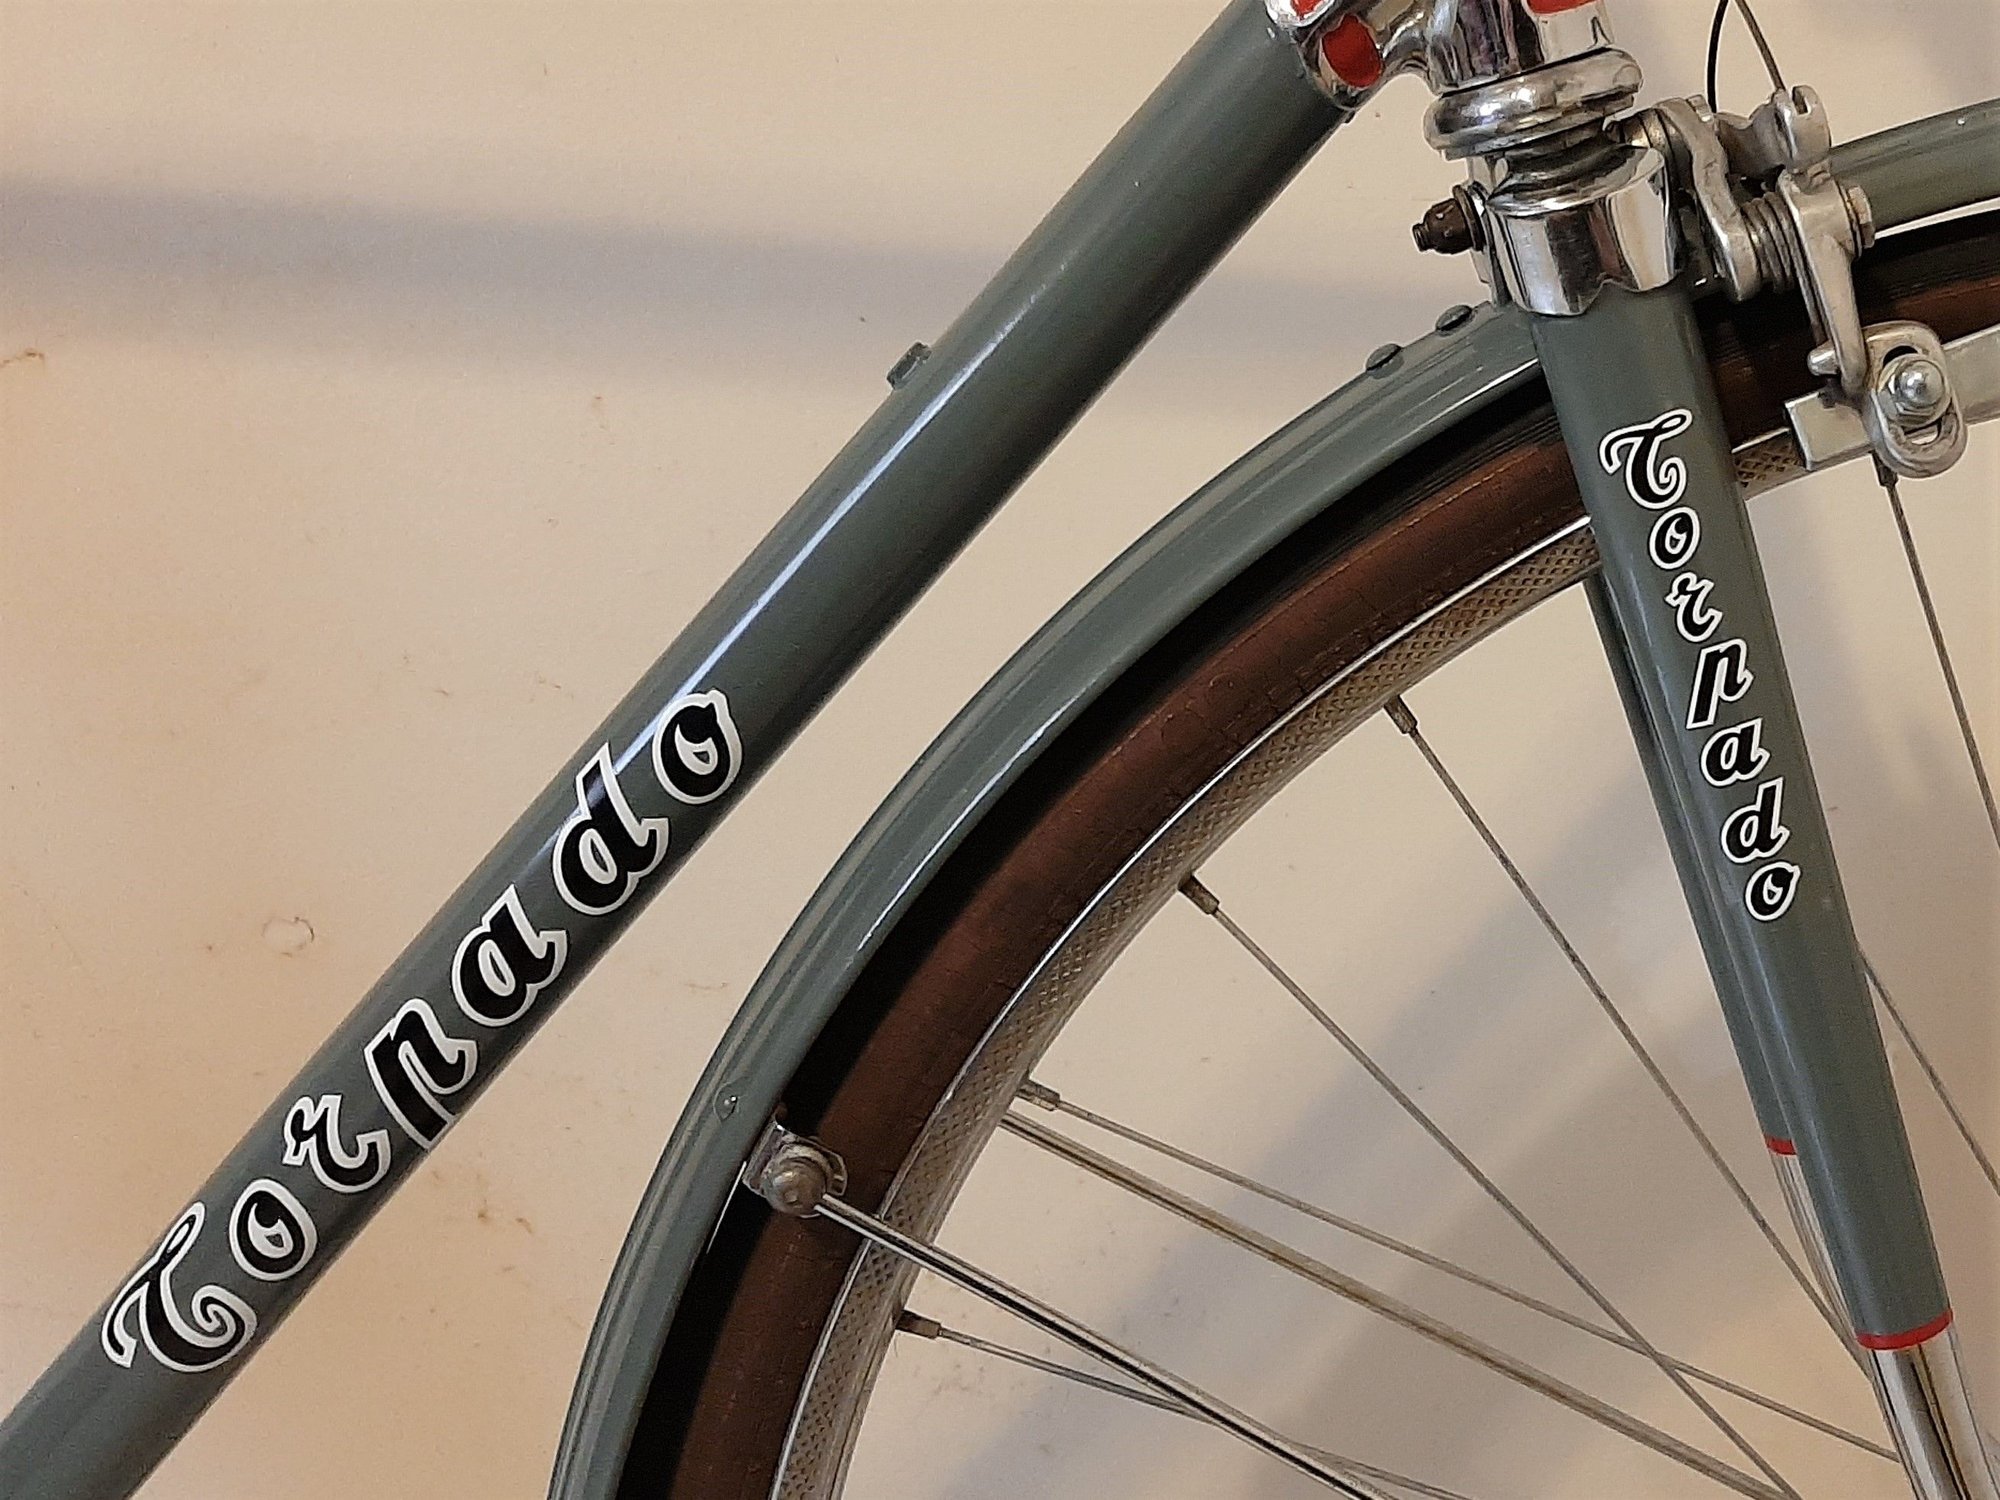
The liquid latex did a decent job of masking the fancy lugs. You can see some of the latex, that I peeled/rubbed off with my finger and finger nail. That is, pretty much, all you need to get not too bad results. Still have a bit more edging to do. Out comes the finger nail again. And, once done, if any touch up is needed, it is very easy to apply.
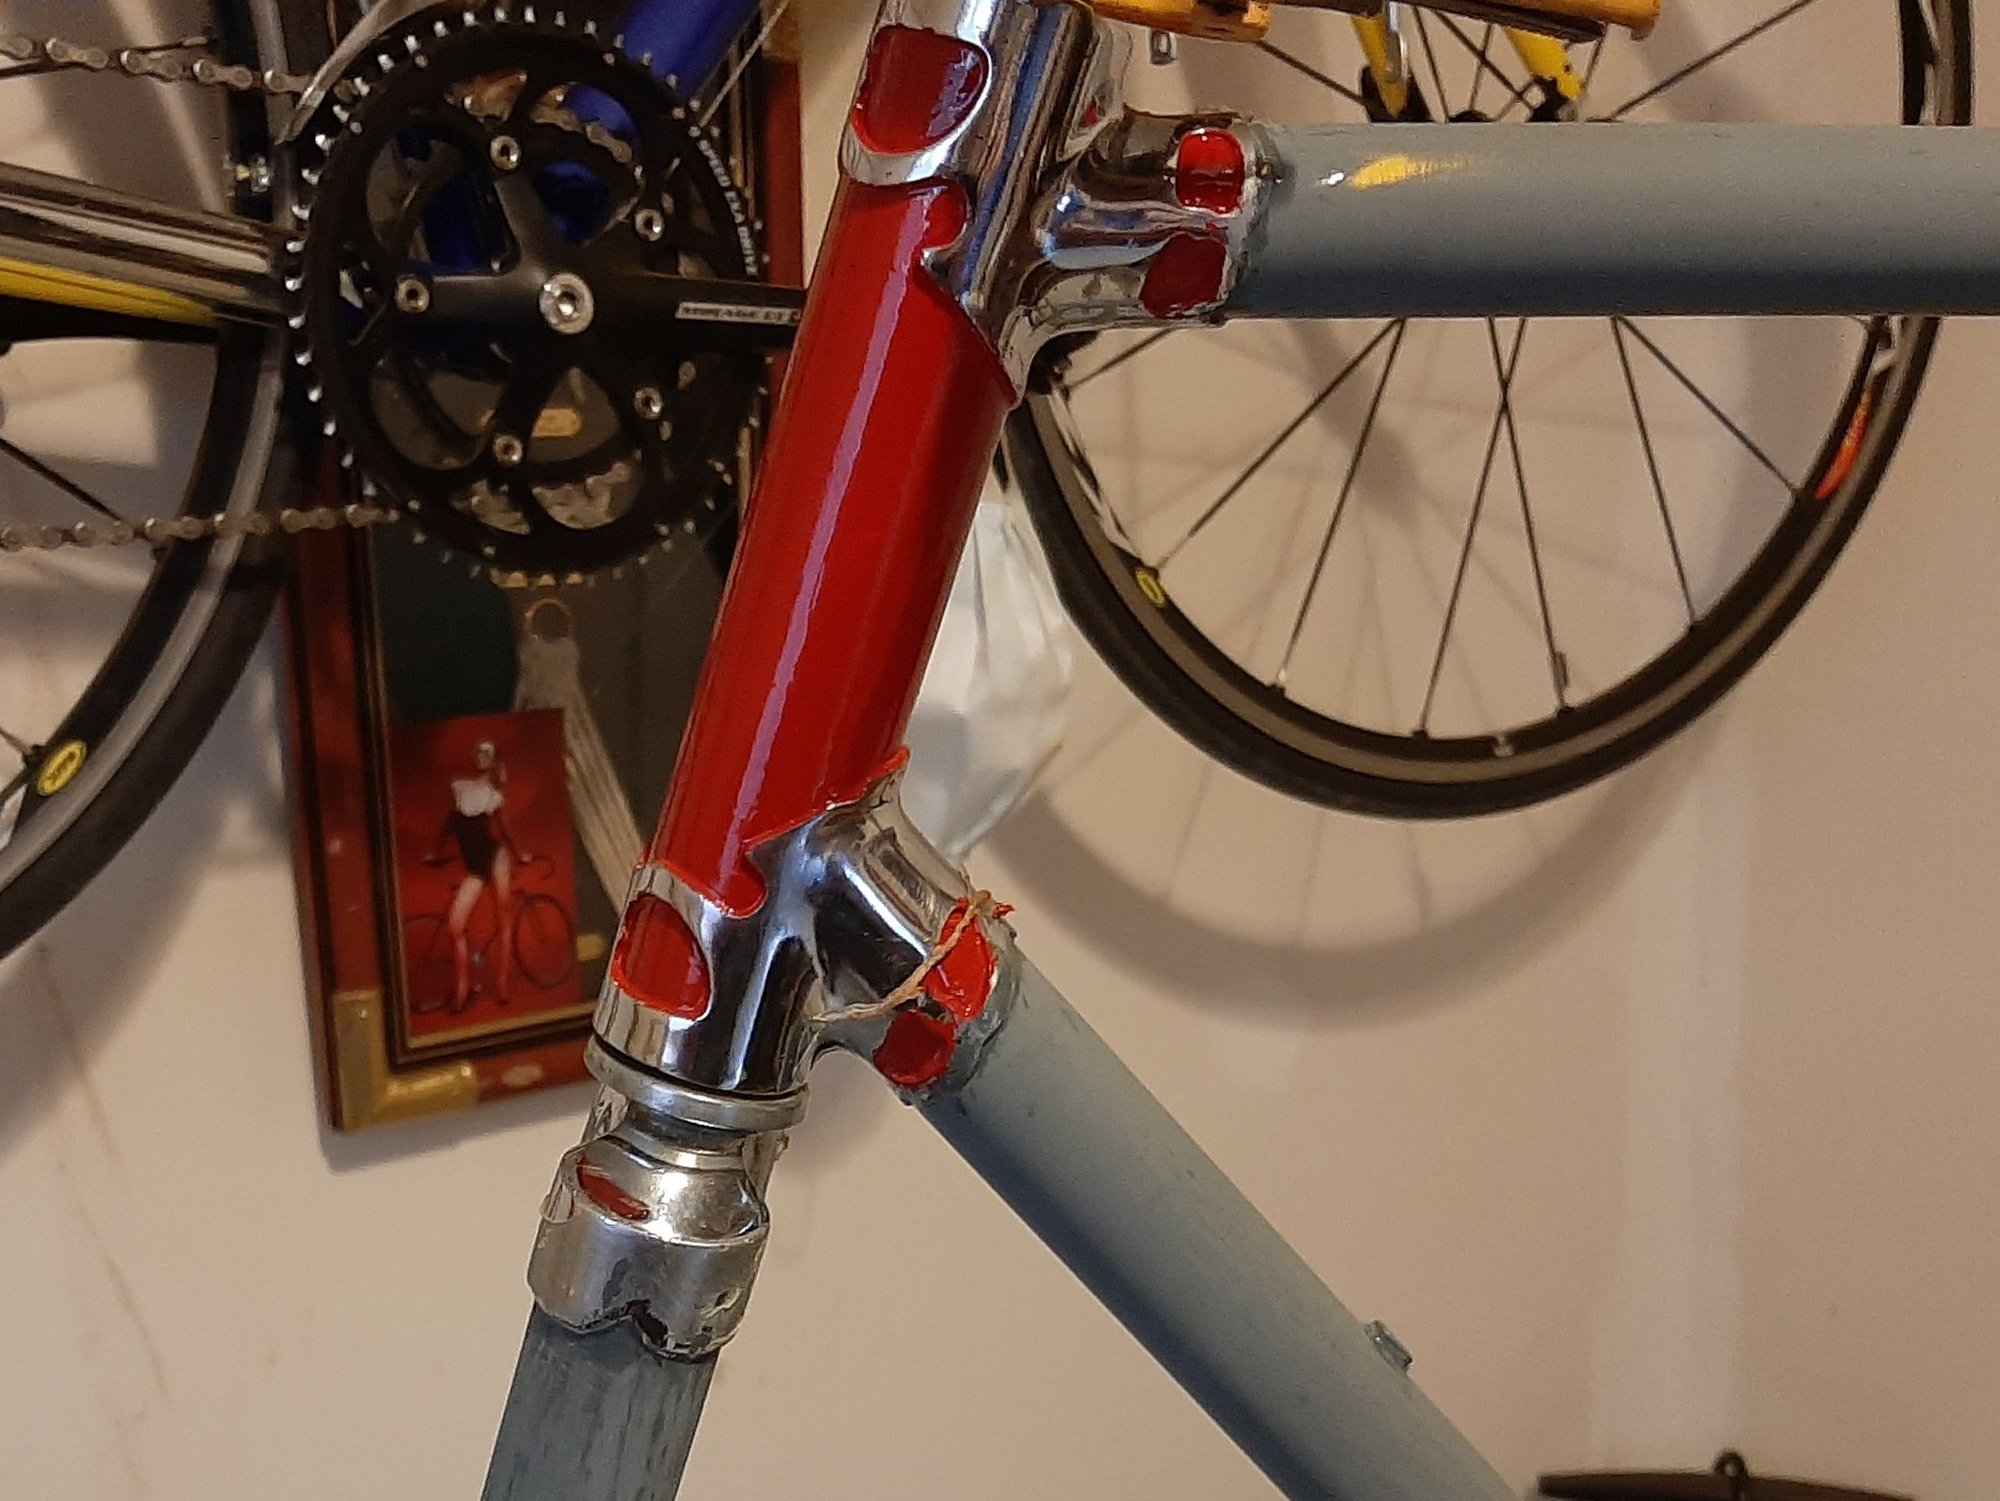
So, with luck, tomorrow will see the frame/fork painted and drying in preparation for art. I will slap the first coat of grey on the fenders. They will get at least two coats, color sanding between them. Then, I will have to decide on one color or two tone fenders for the old Torpado.
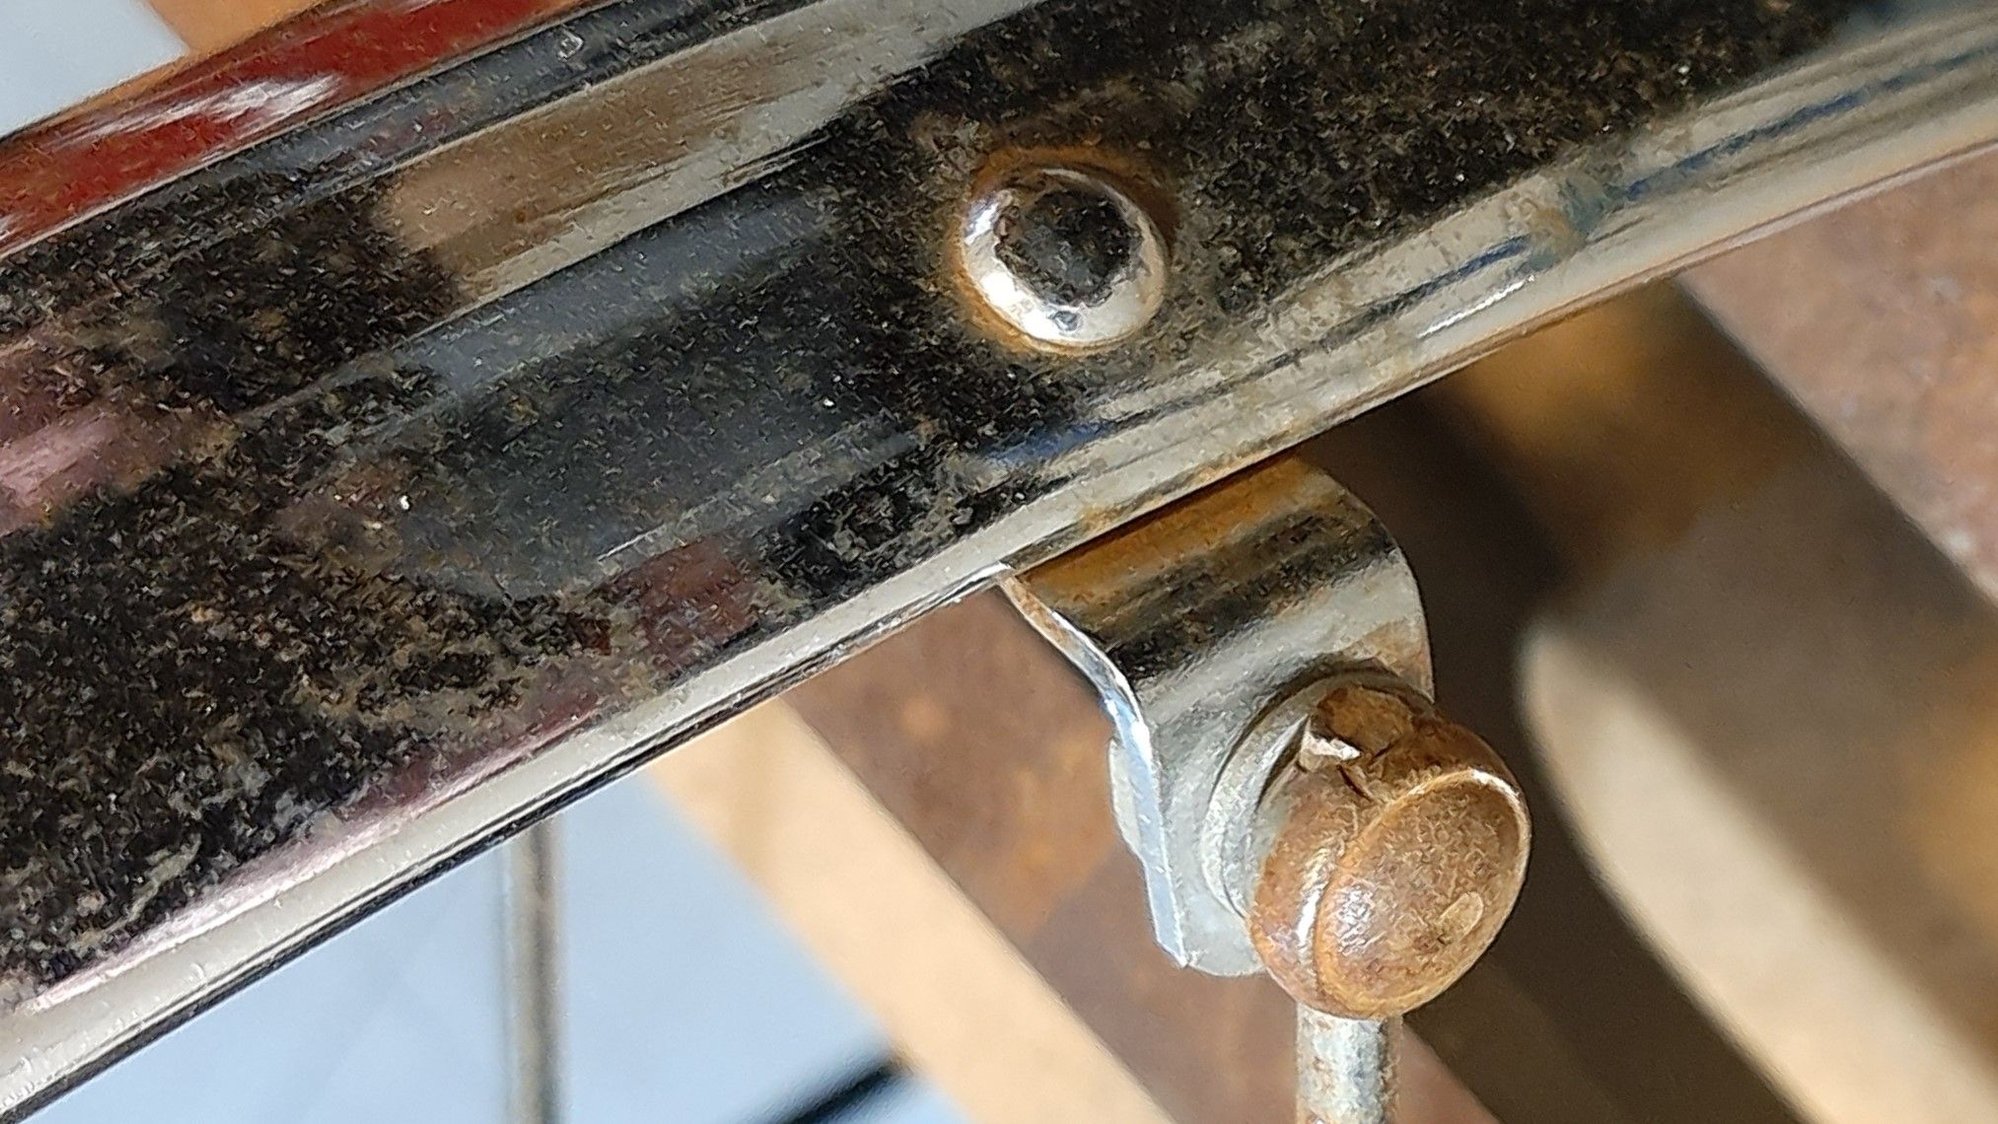
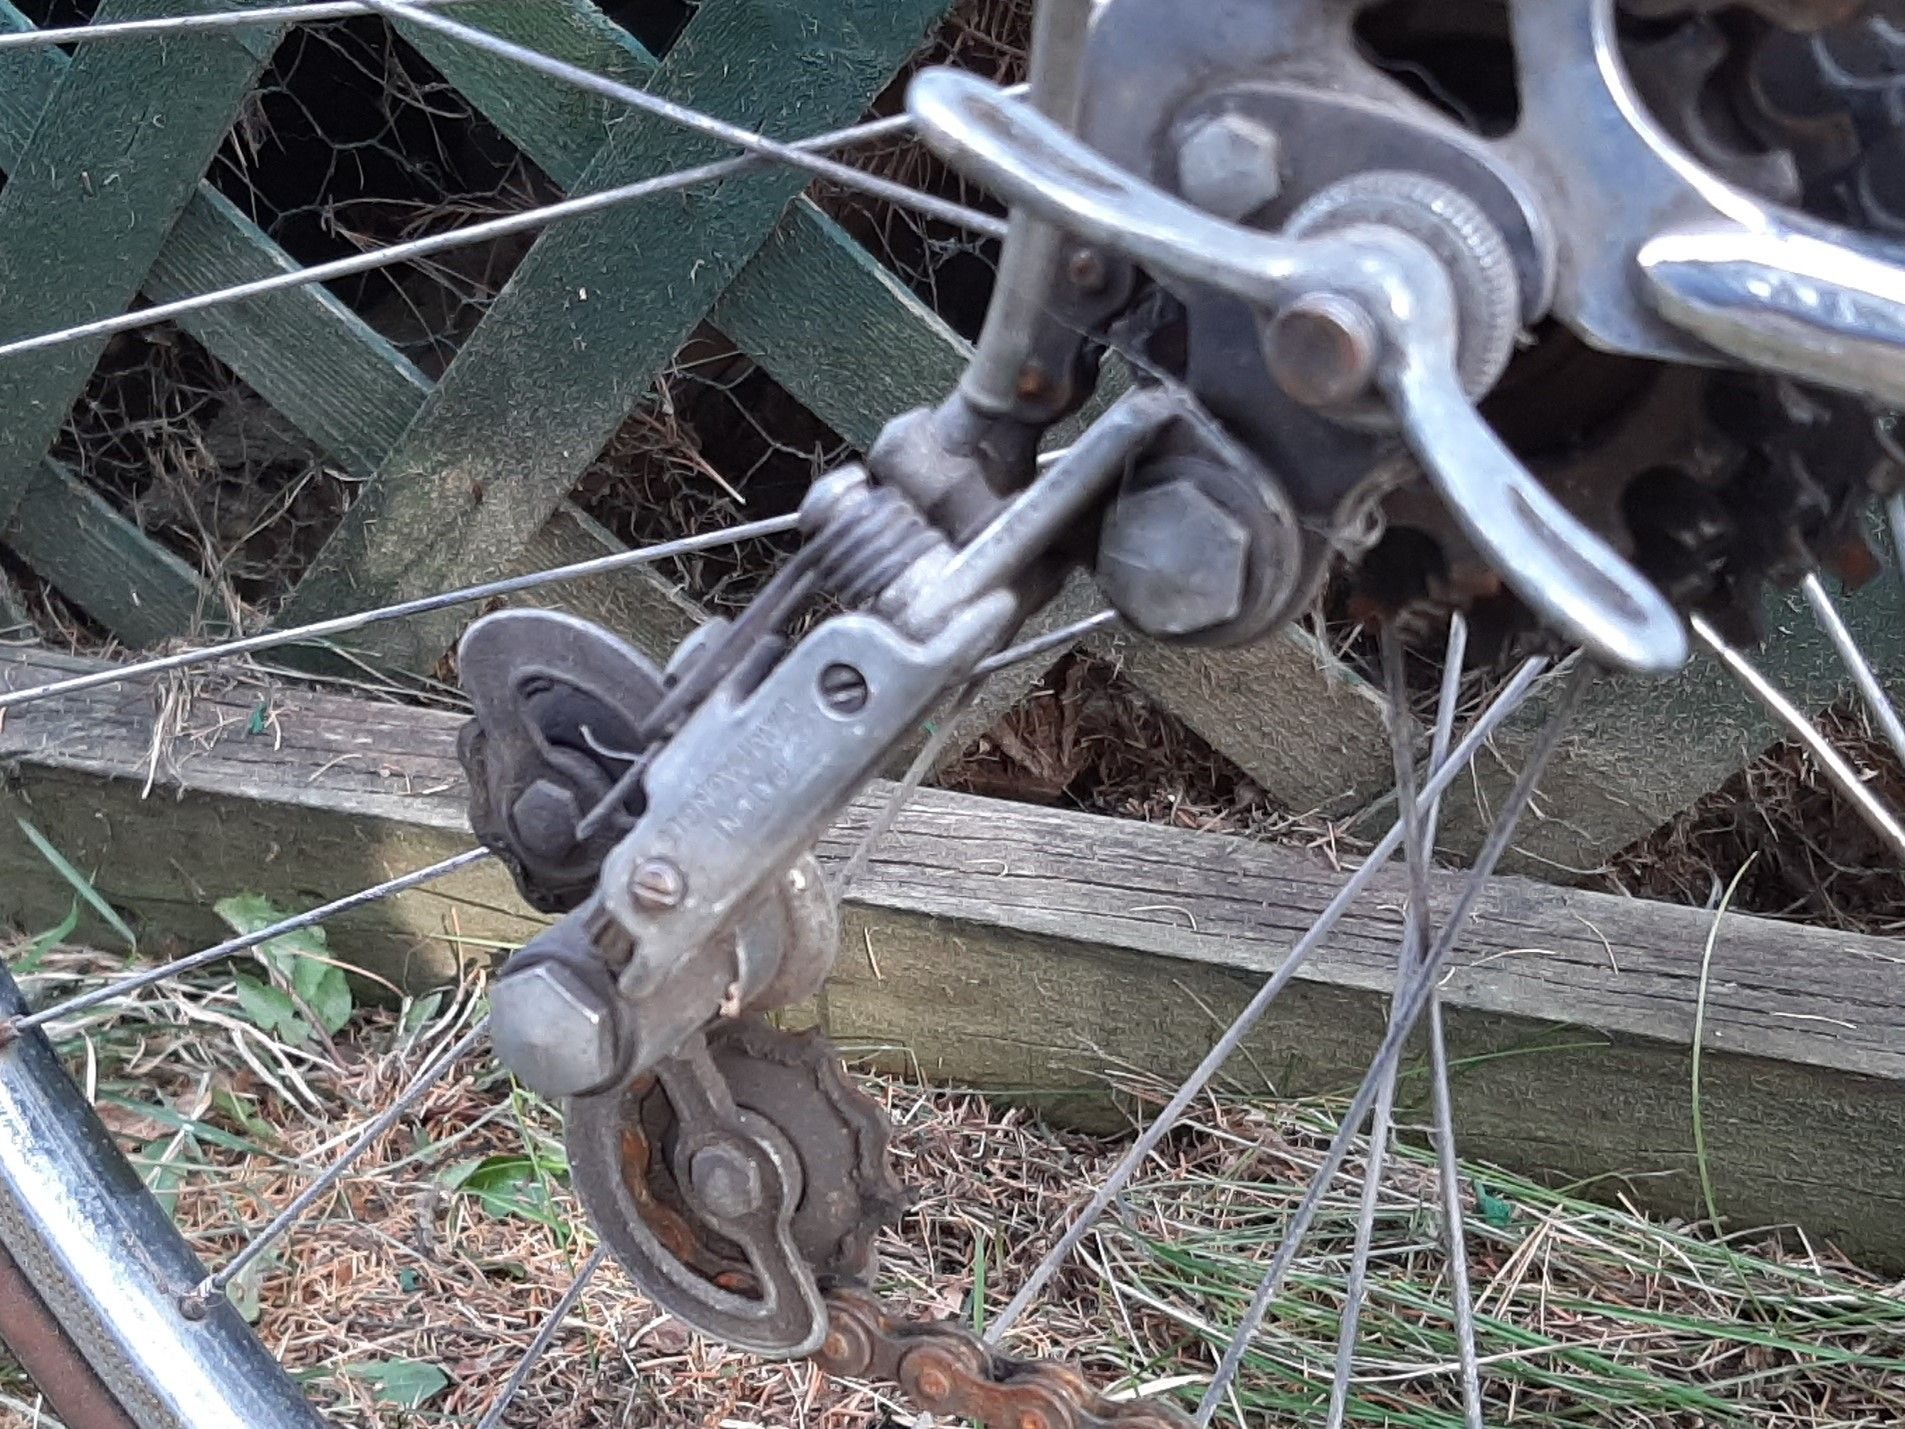
The fender fasteners are very unusual (the first I have gotten my hands on, I think). They will all be cleaned up, along with their matching one piece support struts, and installed sans paint...
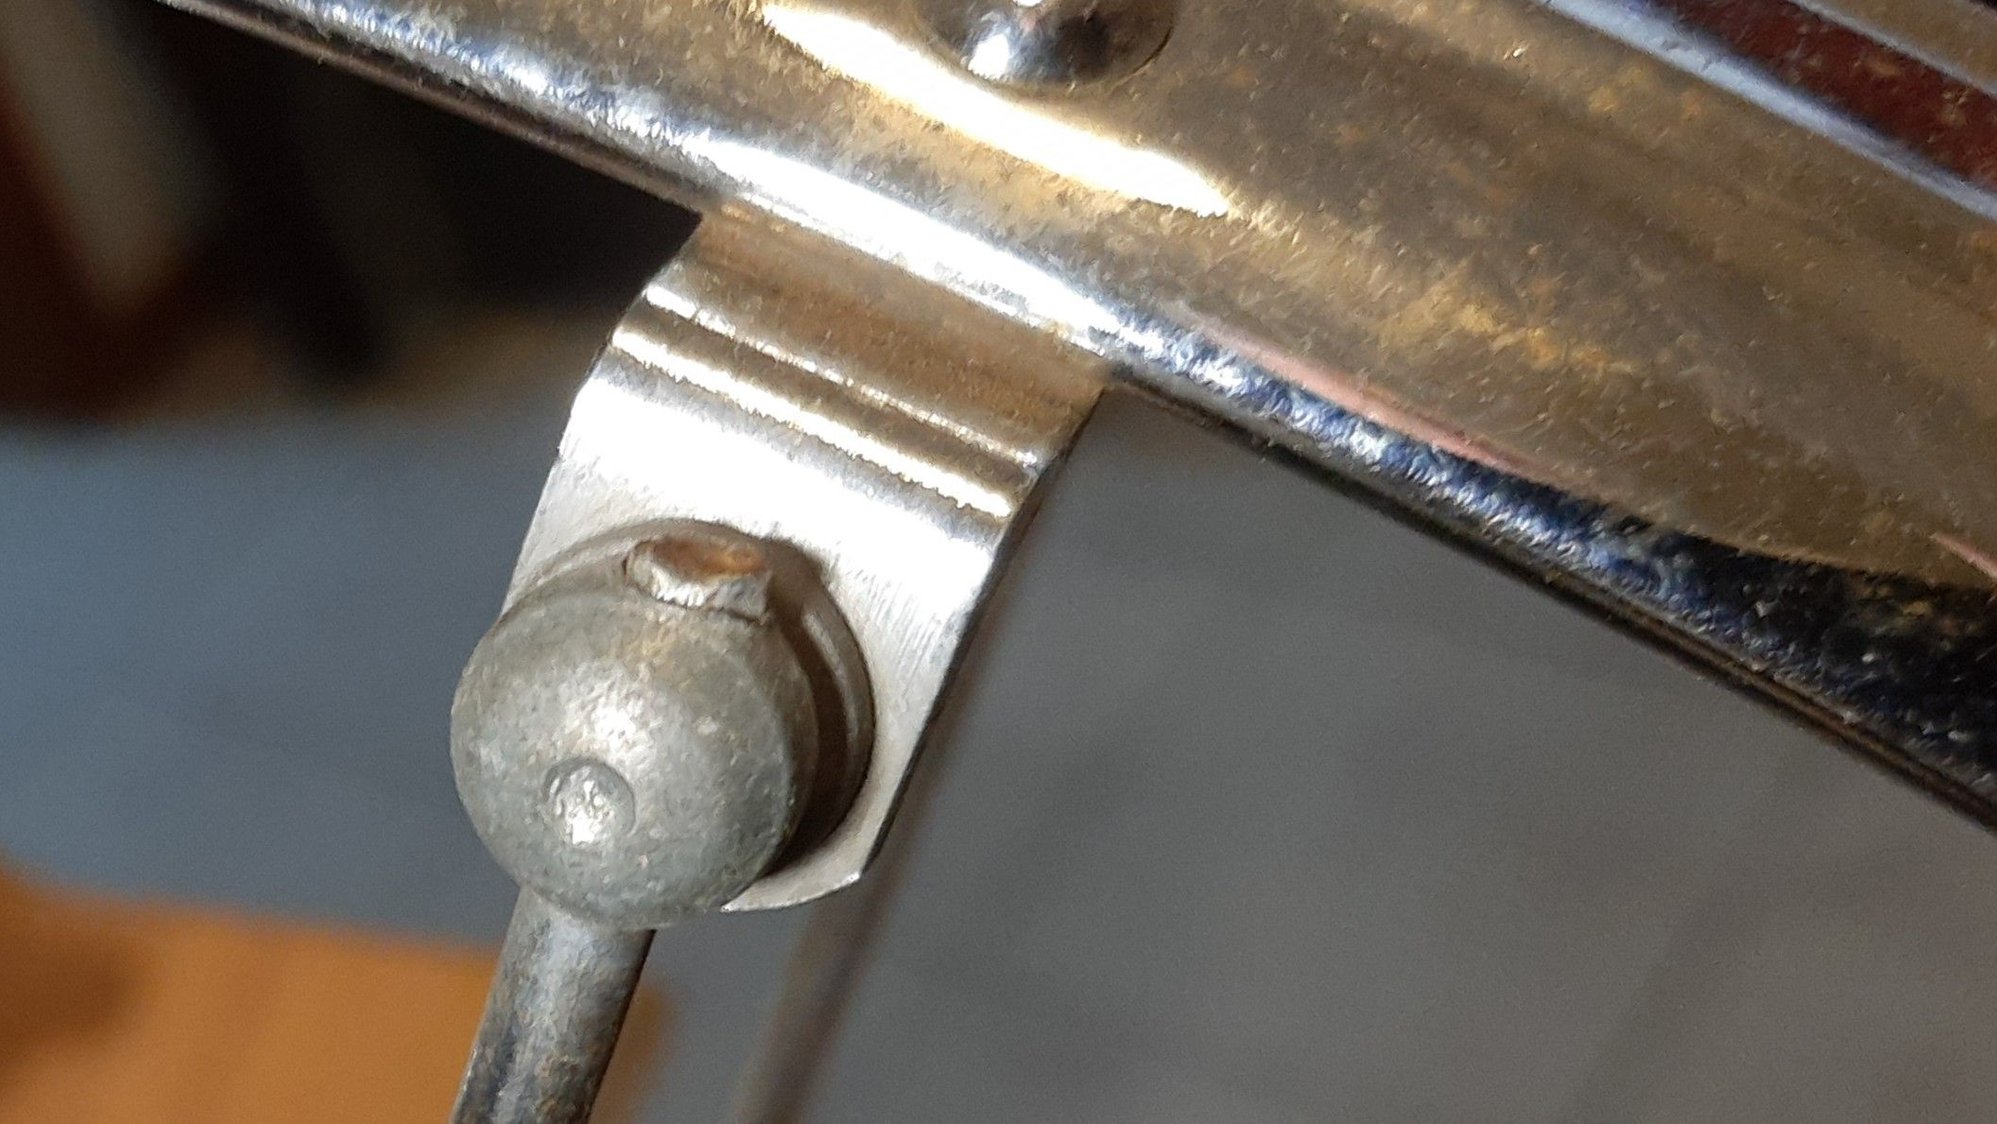
Some require more cleaning than others...
The frame and fork were color sanded today, smoothing the less than perfect surface offered by the first two coats. This coat, the final I hope, will be applied thin and with extra care...
When sanding, go slow and use fine paper (wet and dry, wet is best). As you proceed, you will see shiny spots surrounded by the matt grey sanded finish. These are low spots and need to be blended into the surface. The better the surface, at this point, the nicer the finish will be once done...
The liquid latex did a decent job of masking the fancy lugs. You can see some of the latex, that I peeled/rubbed off with my finger and finger nail. That is, pretty much, all you need to get not too bad results. Still have a bit more edging to do. Out comes the finger nail again. And, once done, if any touch up is needed, it is very easy to apply.
So, with luck, tomorrow will see the frame/fork painted and drying in preparation for art. I will slap the first coat of grey on the fenders. They will get at least two coats, color sanding between them. Then, I will have to decide on one color or two tone fenders for the old Torpado.
The fender fasteners are very unusual (the first I have gotten my hands on, I think). They will all be cleaned up, along with their matching one piece support struts, and installed sans paint...
Some require more cleaning than others...
__________________
"98% of the bikes I buy are projects".
"98% of the bikes I buy are projects".
Likes For randyjawa:
01-09-21, 02:32 AM
#33
Senior Member
Thread Starter
Join Date: Apr 2007
Location: Thunder Bay, Ontario, Canada - burrrrr!
Posts: 11,674
Bikes: 1958 Rabeneick 120D, 1968 Legnano Gran Premio, 196? Torpado Professional, 2000 Marinoni Piuma
Mentioned: 210 Post(s)
Tagged: 0 Thread(s)
Quoted: 1372 Post(s)
Likes: 0
Liked 1,747 Times
in
937 Posts
By now, if I did not know what was happening, I just might say to heck with it. But I learned a long time ago that the quality of one's brush paint work improves with each coat of color applied. Simply put, with each coat applied, your painting skill improves.
The first coat or two does not look great. So, after each coat, color sand. Color sand means, after the paint is dry (say a couple of days in a warm room), use #400 grit wet/dry paper to sand the new painted surfaces. In seconds, as the shine dulls, you will begin to see low spots. Any irregularities in the paint finish will lower the quality of the finish. So, do your best to sand the new paint smooth. You might sand through in places but that is not a big deal. Just apply another coat, let it dry and have a look. Repeat until you are happy with the final result...
As found...
Two coats...
Final coat applied (with greater care)...
Even the fenders get a coat of grey...
Another day and time for art - yahoo..!
__________________
"98% of the bikes I buy are projects".
"98% of the bikes I buy are projects".
01-09-21, 01:12 PM
#34
Senior Member
Thread Starter
Join Date: Apr 2007
Location: Thunder Bay, Ontario, Canada - burrrrr!
Posts: 11,674
Bikes: 1958 Rabeneick 120D, 1968 Legnano Gran Premio, 196? Torpado Professional, 2000 Marinoni Piuma
Mentioned: 210 Post(s)
Tagged: 0 Thread(s)
Quoted: 1372 Post(s)
Likes: 0
Liked 1,747 Times
in
937 Posts
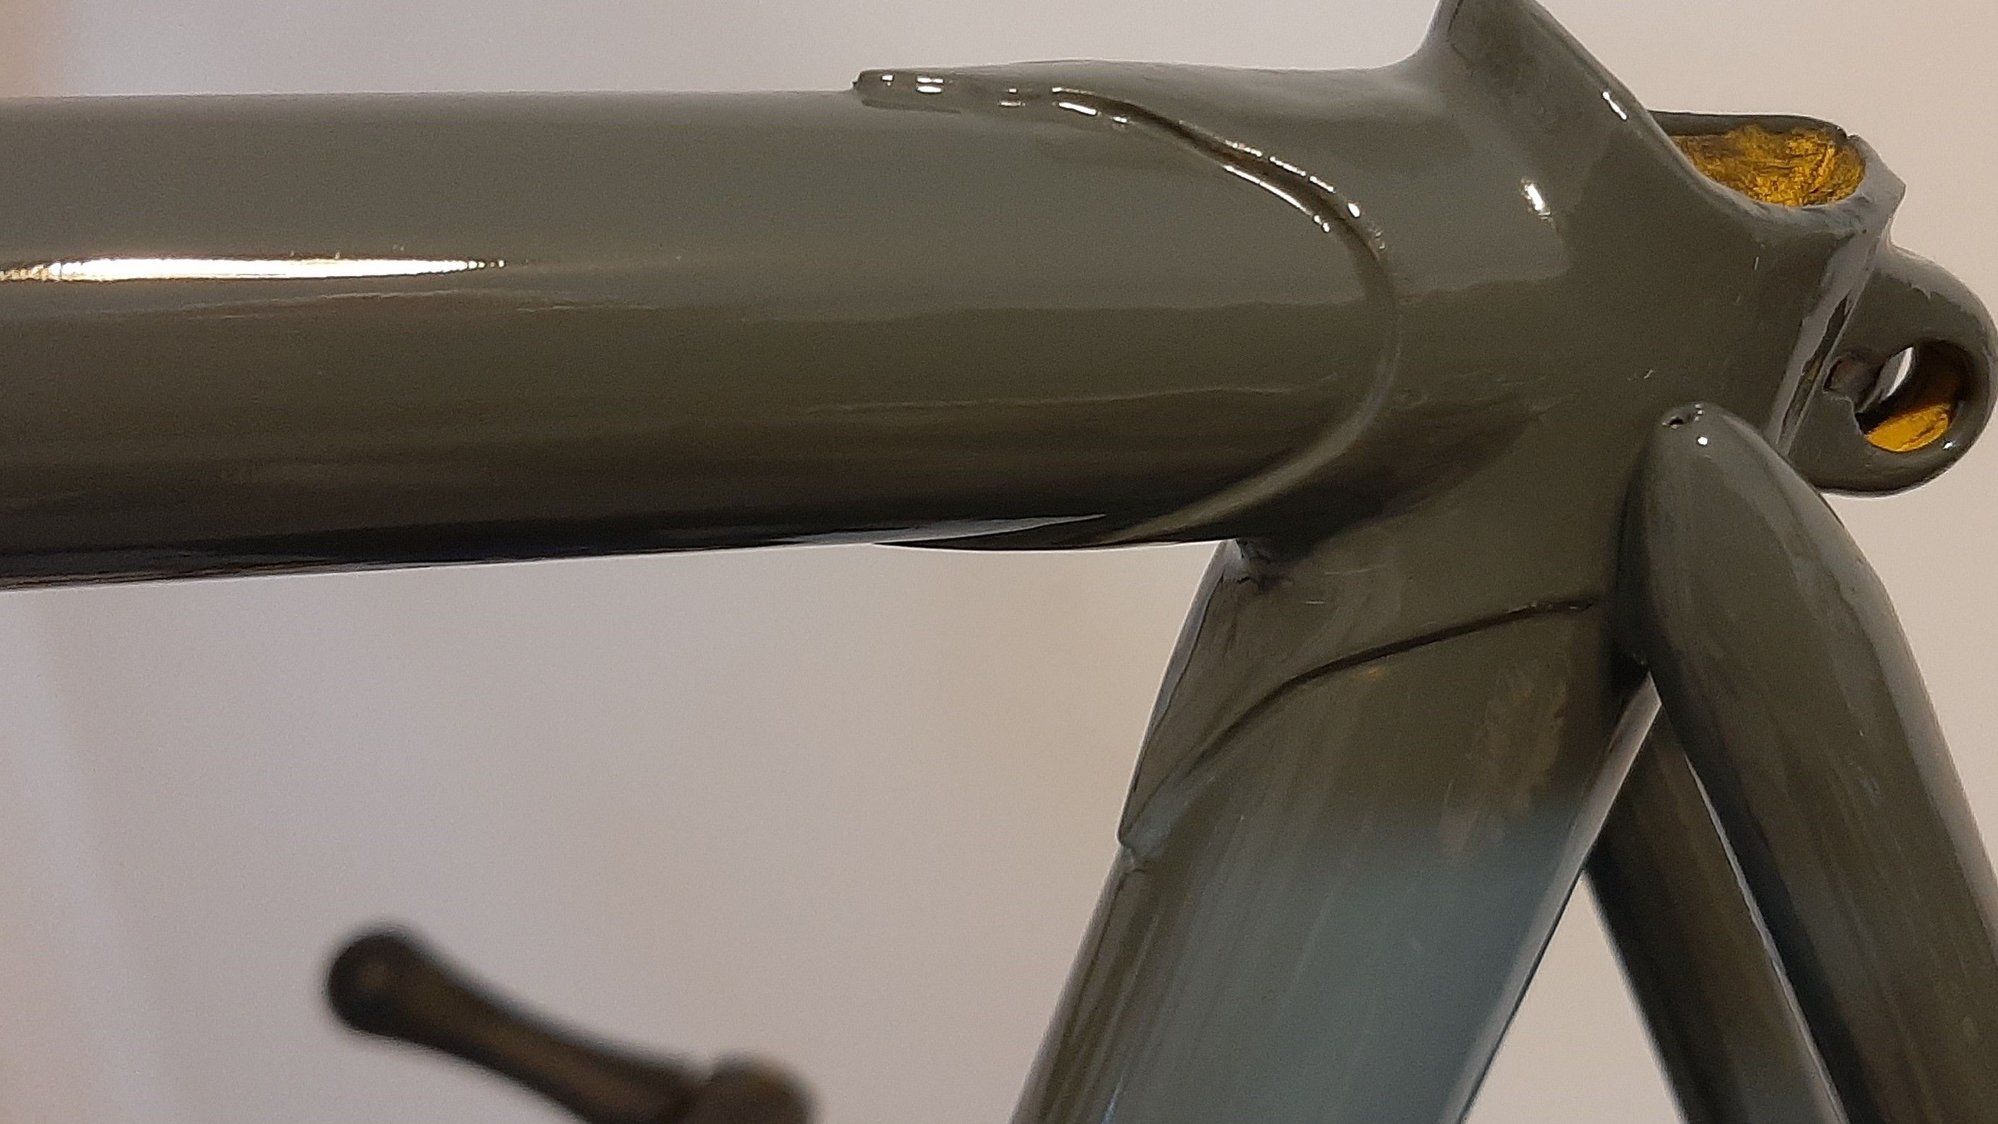
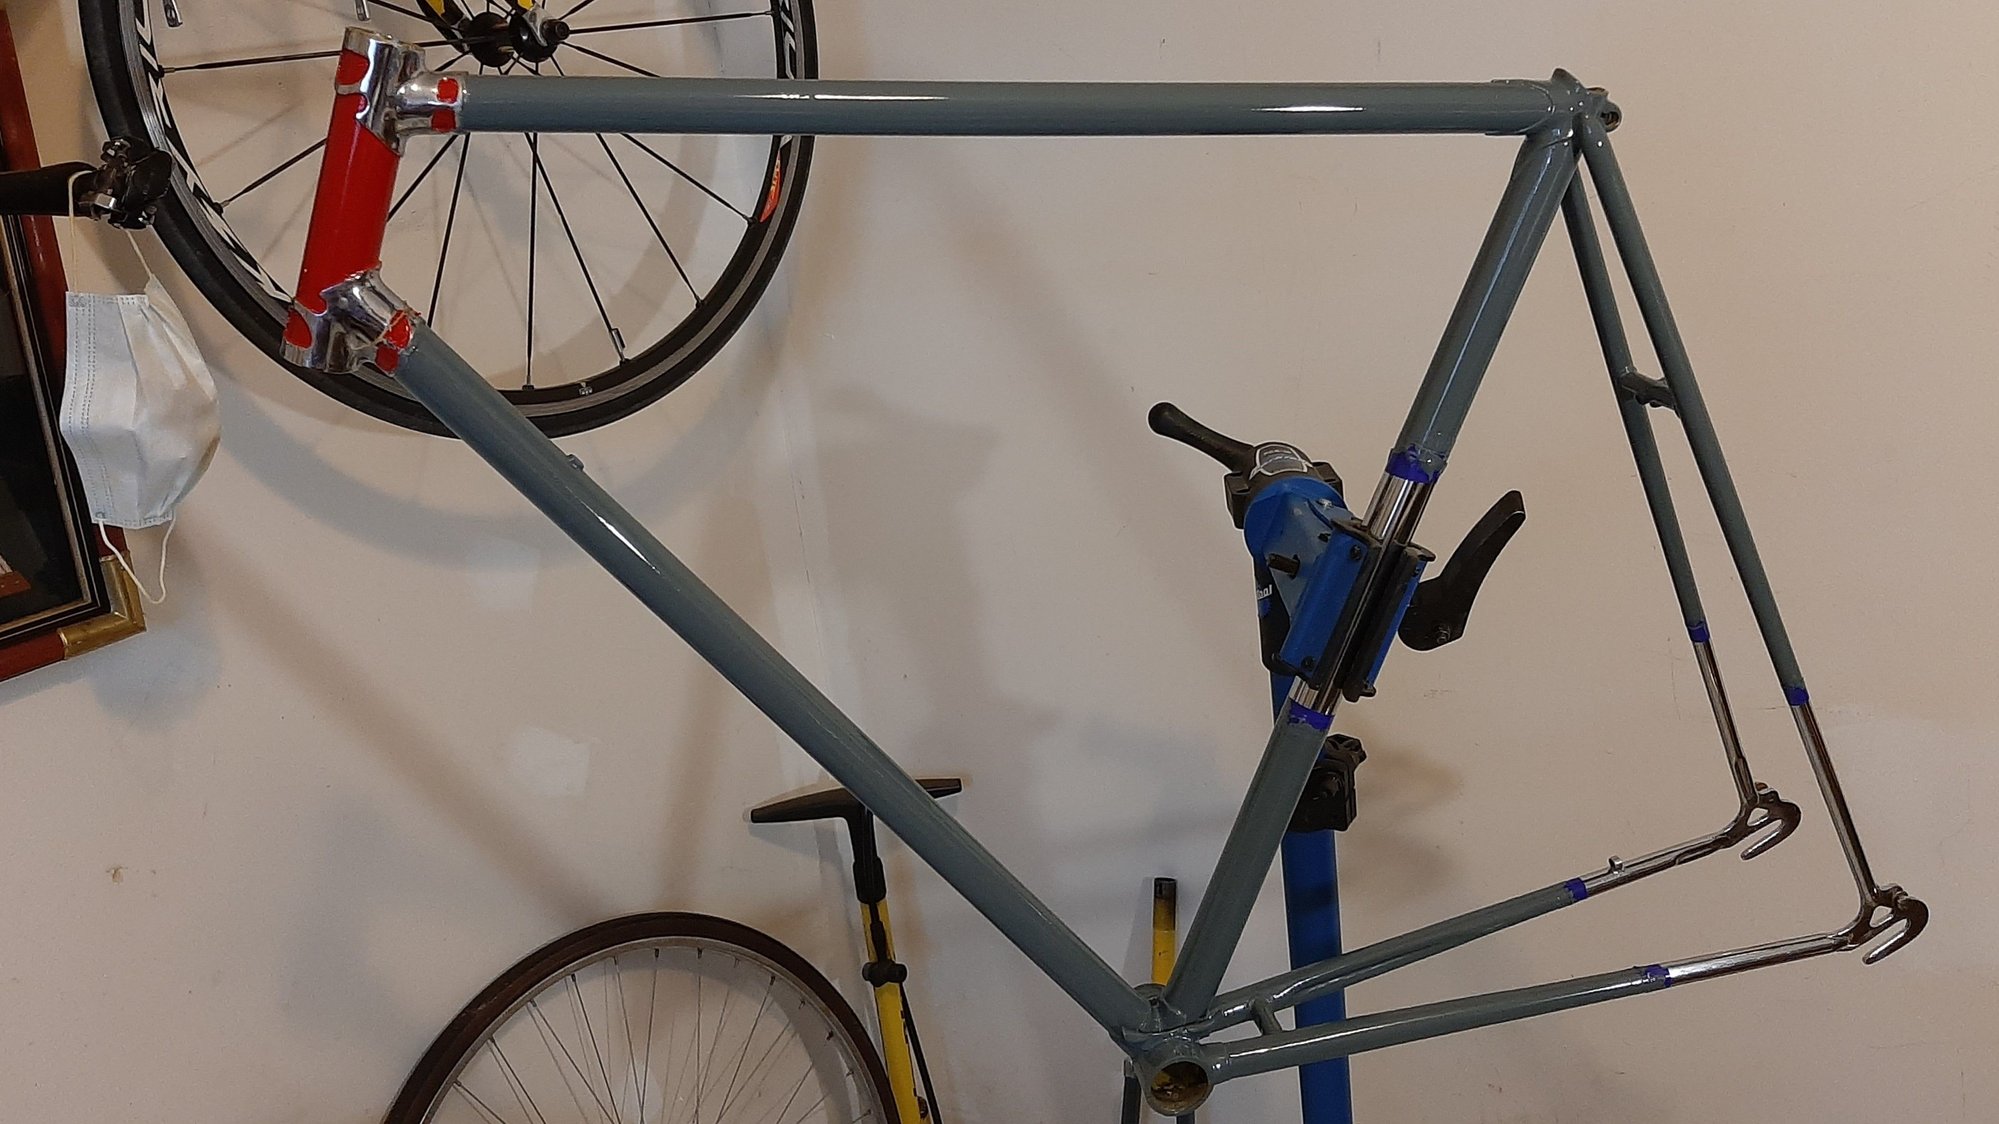
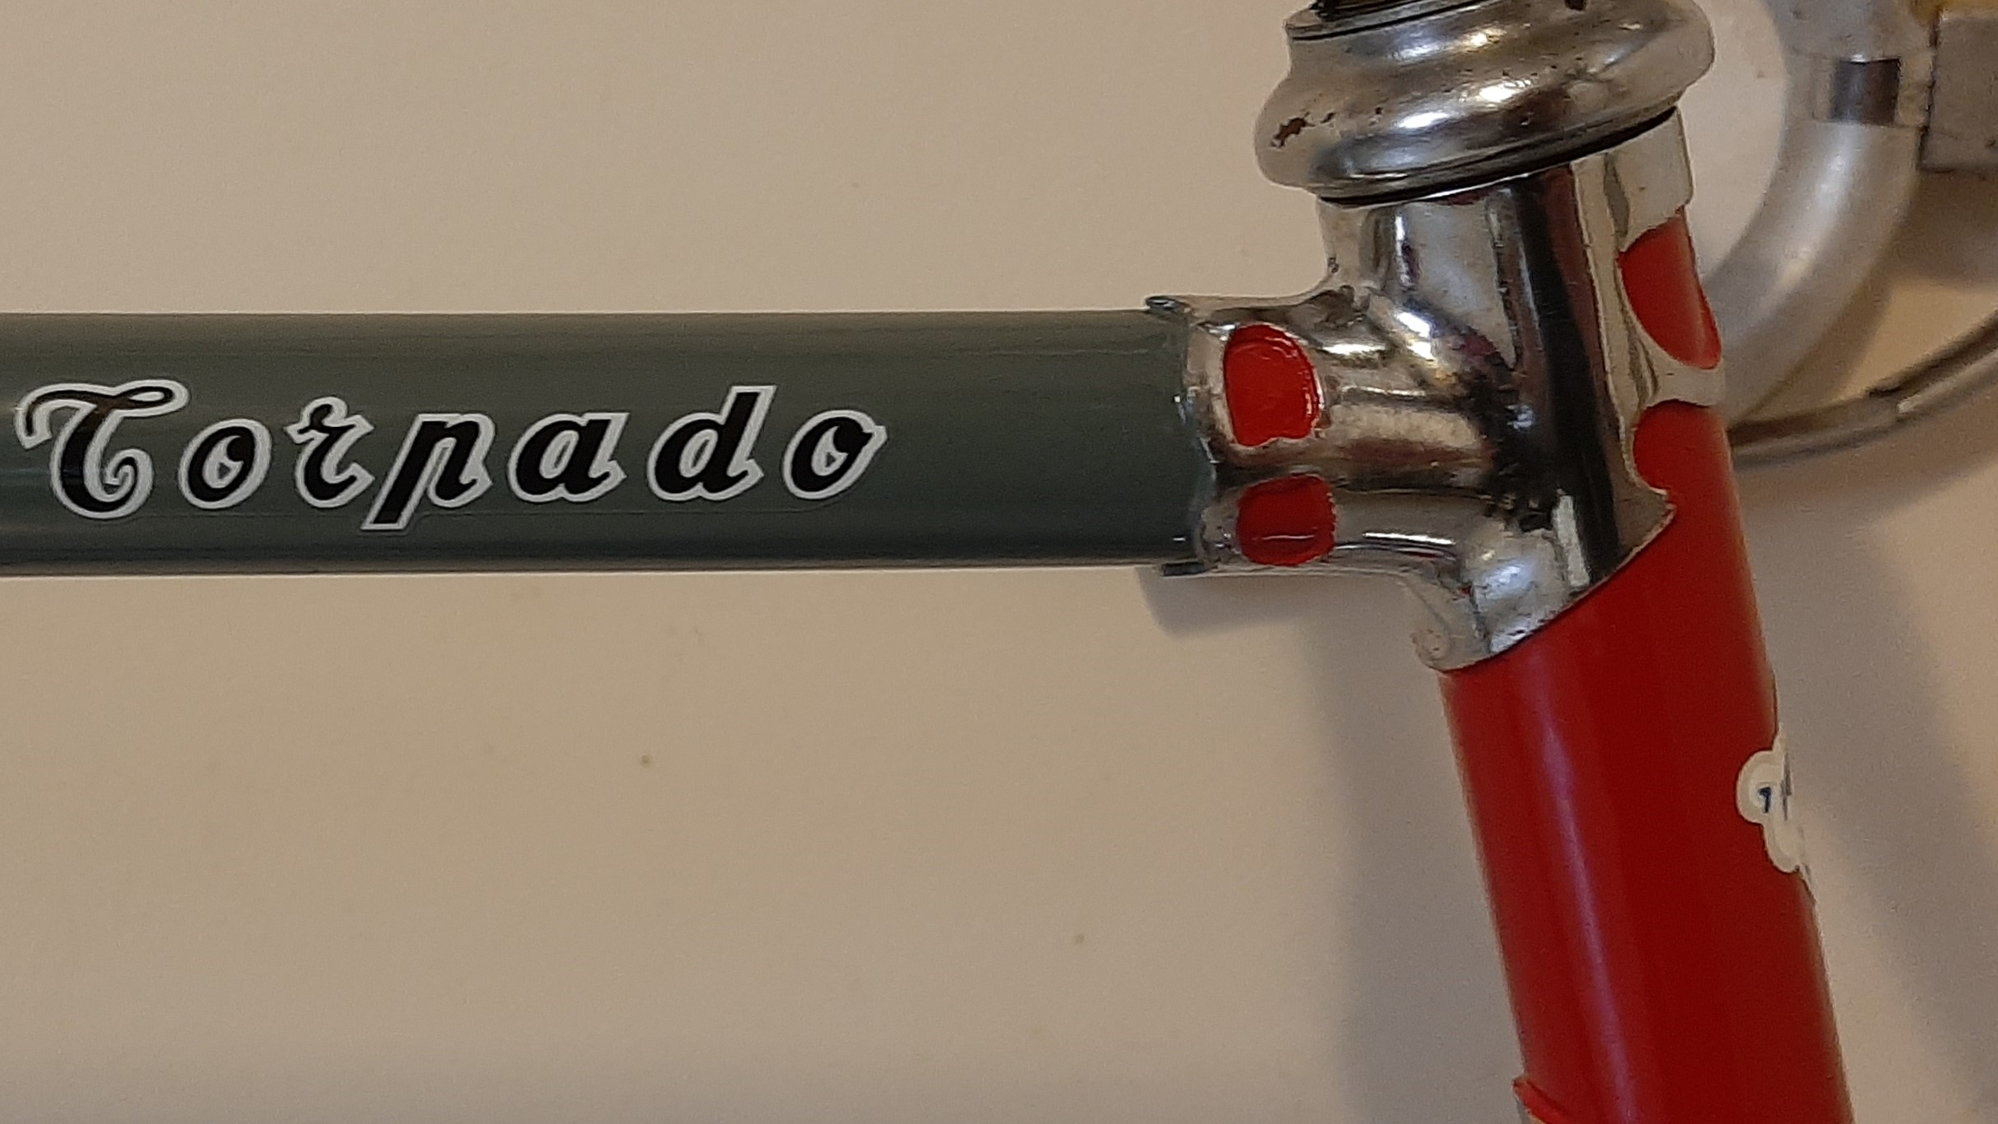
Now, wait for a few days while I clean the components in preparation for assembly. For now, the Torpado frame is looking pretty good. I do have two small spots to touch up but the repair is a snap. The fenders will need another coat, probably tomorrow. Anyway, still some tidying up of the lug work but the effort is beginning to pay off...
Most of the luquid masking material was removed with my thumb nail. I still have some cleaning and edging (not sure what else to call it) to do, but all in all, not a bad home based brushed on paint job. And done in the mud room, at the back of the house, with minimal mess. There was, however, an odor associated with the effort...

I pan to buy some new tape. This stuff looks pretty good but my confidence in the adhesive backing is low (the tape is old - new when I bought it, but old now)...

Most of the luquid masking material was removed with my thumb nail. I still have some cleaning and edging (not sure what else to call it) to do, but all in all, not a bad home based brushed on paint job. And done in the mud room, at the back of the house, with minimal mess. There was, however, an odor associated with the effort...
I pan to buy some new tape. This stuff looks pretty good but my confidence in the adhesive backing is low (the tape is old - new when I bought it, but old now)...
__________________
"98% of the bikes I buy are projects".
"98% of the bikes I buy are projects".
01-09-21, 03:50 PM
#35
Senior Member

Join Date: Sep 2005
Location: Oakland, CA
Posts: 3,265
Bikes: '82 Univega Competizione, '72 Motobecane Grand Record, '83 Mercian KOM Touring, '85 Univega Alpina Uno, '76 Eisentraut Limited
Mentioned: 57 Post(s)
Tagged: 0 Thread(s)
Quoted: 1088 Post(s)
Liked 1,205 Times
in
701 Posts
Wow, that’s looking really nice!
01-09-21, 06:49 PM
#36
Senior Member

Join Date: May 2010
Location: Bastrop Texas
Posts: 4,464
Bikes: Univega, Peu P6, Peu PR-10, Ted Williams, Peu UO-8, Peu UO-18 Mixte, Peu Dolomites
Mentioned: 13 Post(s)
Tagged: 0 Thread(s)
Quoted: 954 Post(s)
Liked 1,619 Times
in
1,039 Posts
Of course you did an excellent prep. Any notes on your drying methods and dry time?
I have hung my frames after painting in a Texas attic after they dry to the touch. I know the paint is fully dry when its hard, tight, and has little smell. I have been very satisfied with Rust-Oleum paint. Especially Rust-Oleum Automotive Engine Enamel.
I have hung my frames after painting in a Texas attic after they dry to the touch. I know the paint is fully dry when its hard, tight, and has little smell. I have been very satisfied with Rust-Oleum paint. Especially Rust-Oleum Automotive Engine Enamel.
__________________
 No matter where you're at... There you are... Δf:=f(1/2)-f(-1/2)
No matter where you're at... There you are... Δf:=f(1/2)-f(-1/2)
01-10-21, 01:05 PM
#37

Stop reading my posts!
Join Date: Sep 2004
Posts: 12,570
Mentioned: 89 Post(s)
Tagged: 0 Thread(s)
Quoted: 1438 Post(s)
Liked 1,053 Times
in
780 Posts
I have done a few "brush" paint jobs on frames and have to really resist the urge to start "rubbing out" before the paint has cured. I followed somebody's advice and made a simple "hot box" of a aluminum-foil lined bicycle box with an incandescent bulb inside and leave it be for about a week. A week might be overkill but that's what worked for me in the "high ambient humidity" of SF Bay Area.
Rubbing out is where all the work and where the pay-off is, even if your brush-work is poor, but smooth brush-work makes for easier/quicker/better rub-out.
And I've always wondered (cause there HAVE been some hints) do you Canadians who can obtain both find ANY difference between Tremclad and Rustoleum? Some have said that Tremclad is better; others that there is NO difference besides brand/label and the volumes (milliliters vs fluid ounces) in the cans: same parent company=same products.
01-10-21, 06:49 PM
#38
Senior Member

Join Date: May 2008
Location: North, Ga.
Posts: 2,401
Bikes: 3Rensho-Aerodynamics, Bernard Hinault Look - 1986 tour winner, Guerciotti, Various Klein's & Panasonic's
Mentioned: 5 Post(s)
Tagged: 0 Thread(s)
Quoted: 159 Post(s)
Liked 375 Times
in
162 Posts
I really applaud the efforts of the original poster.
Excellent job!
How well does the brushed on paint hold up over time?
Excellent job!
How well does the brushed on paint hold up over time?
01-10-21, 06:52 PM
#39
Senior Member
Thread Starter
Join Date: Apr 2007
Location: Thunder Bay, Ontario, Canada - burrrrr!
Posts: 11,674
Bikes: 1958 Rabeneick 120D, 1968 Legnano Gran Premio, 196? Torpado Professional, 2000 Marinoni Piuma
Mentioned: 210 Post(s)
Tagged: 0 Thread(s)
Quoted: 1372 Post(s)
Likes: 0
Liked 1,747 Times
in
937 Posts
I have done a few "brush" paint jobs on frames and have to really resist the urge to start "rubbing out" before the paint has cured. I followed somebody's advice and made a simple "hot box" of a aluminum-foil lined bicycle box with an incandescent bulb inside and leave it be for about a week. A week might be overkill but that's what worked for me in the "high ambient humidity" of SF Bay Area.
Rubbing out is where all the work and where the pay-off is, even if your brush-work is poor, but smooth brush-work makes for easier/quicker/better rub-out.
And I've always wondered (cause there HAVE been some hints) do you Canadians who can obtain both find ANY difference between Tremclad and Rustoleum? Some have said that Tremclad is better; others that there is NO difference besides brand/label and the volumes (milliliters vs fluid ounces) in the cans: same parent company=same products.
Rubbing out is where all the work and where the pay-off is, even if your brush-work is poor, but smooth brush-work makes for easier/quicker/better rub-out.
And I've always wondered (cause there HAVE been some hints) do you Canadians who can obtain both find ANY difference between Tremclad and Rustoleum? Some have said that Tremclad is better; others that there is NO difference besides brand/label and the volumes (milliliters vs fluid ounces) in the cans: same parent company=same products.

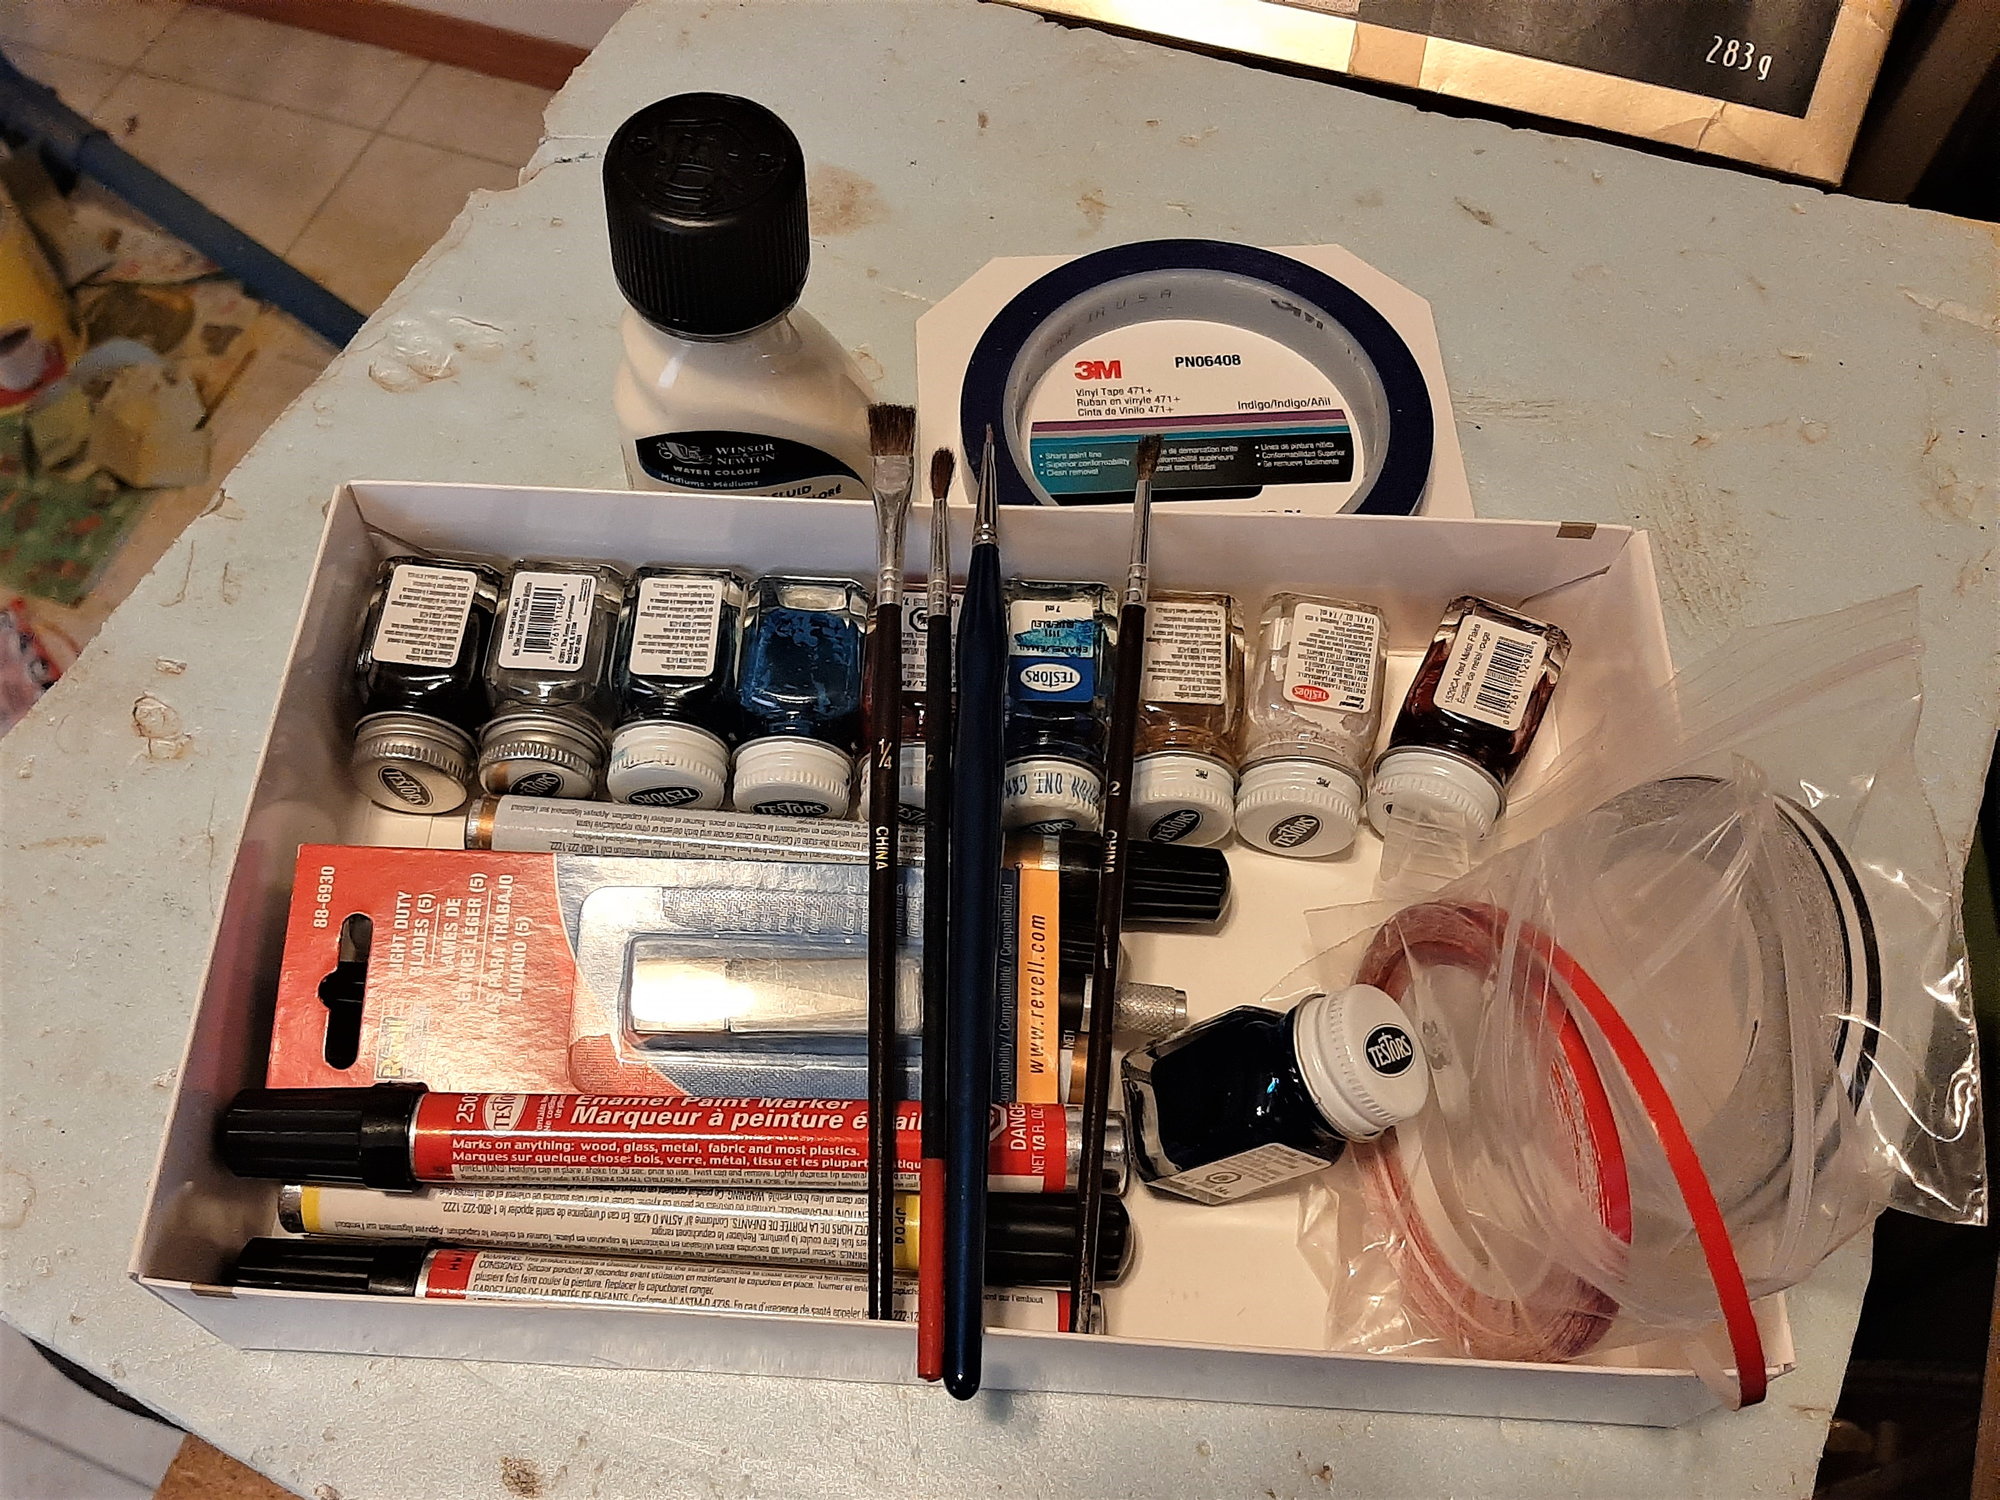
Tremclad on this (brush)...
Rustoleum on this (paint brush)...

Russtoleum on this(rattle can)...
Crylon on this (rattle can)...
Lacquer (rattle can) on this...

And, of course, my present project, Smoke Grey Rustoleum and a decent brush...

__________________
"98% of the bikes I buy are projects".
"98% of the bikes I buy are projects".
Likes For randyjawa:
01-18-21, 02:48 PM
#40
Senior Member
Thread Starter
Join Date: Apr 2007
Location: Thunder Bay, Ontario, Canada - burrrrr!
Posts: 11,674
Bikes: 1958 Rabeneick 120D, 1968 Legnano Gran Premio, 196? Torpado Professional, 2000 Marinoni Piuma
Mentioned: 210 Post(s)
Tagged: 0 Thread(s)
Quoted: 1372 Post(s)
Likes: 0
Liked 1,747 Times
in
937 Posts
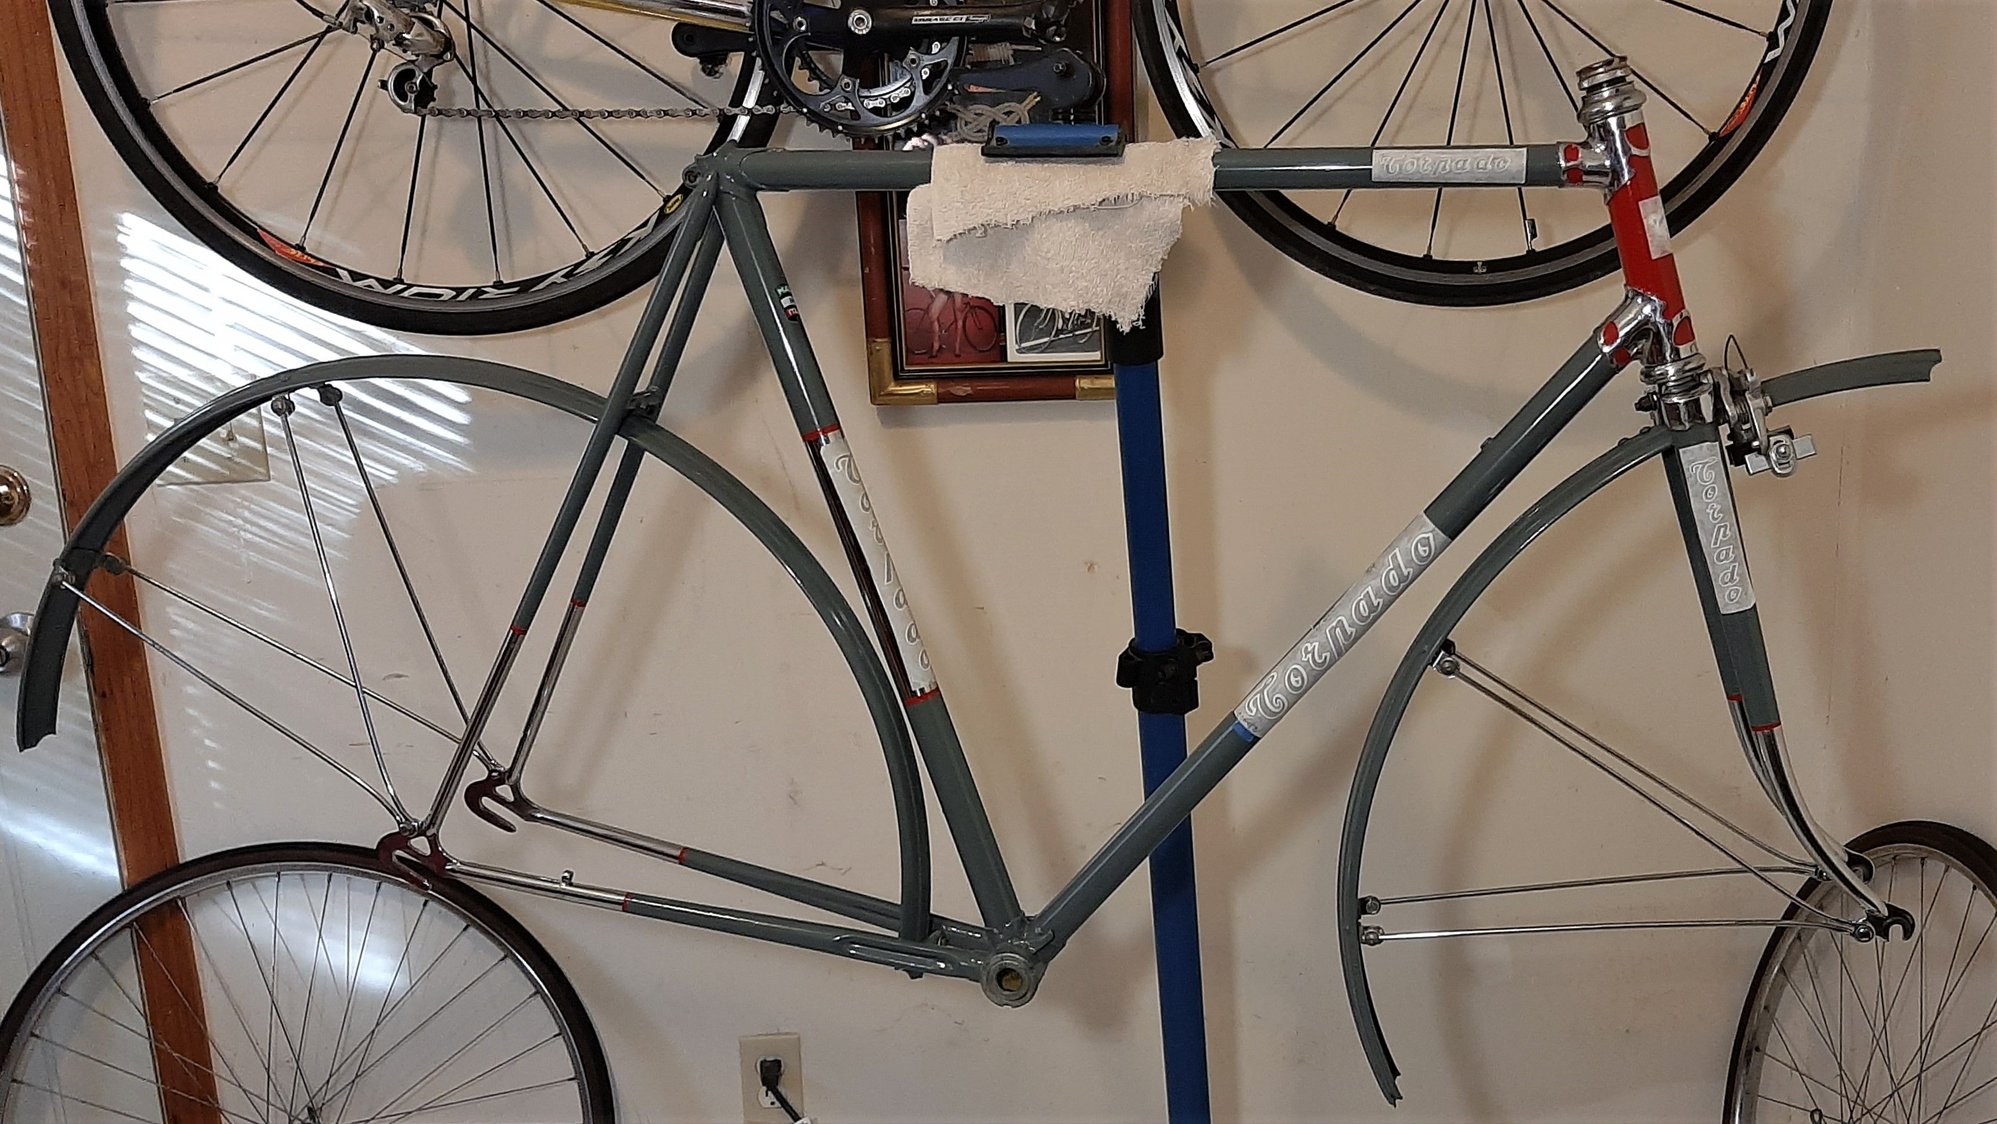
Once sure it all fits, art follows...
__________________
"98% of the bikes I buy are projects".
"98% of the bikes I buy are projects".
01-19-21, 03:08 AM
#42
Senior Member
Thread Starter
Join Date: Apr 2007
Location: Thunder Bay, Ontario, Canada - burrrrr!
Posts: 11,674
Bikes: 1958 Rabeneick 120D, 1968 Legnano Gran Premio, 196? Torpado Professional, 2000 Marinoni Piuma
Mentioned: 210 Post(s)
Tagged: 0 Thread(s)
Quoted: 1372 Post(s)
Likes: 0
Liked 1,747 Times
in
937 Posts

So, the last coat goes on as carefully as I can apply it. If good enough, then I am done. If not, sand and apply another coat.
I did not thin the paint. Rustoleum recommends against it and, to be honest, there was no need to thin the paint. It goes on well and flows to a smooth shiny surface...

I still have some clean up to do and possibly a wee spot of touch up. I have, pretty much, done my last bicycle paint job. Eyes are dim and hands shake too much for fine work. But ya never know. I still have Torpado's top dog, from the same era to restore, and I am gonna give it a shot next Spring - early sixties Torpado Professional...

__________________
"98% of the bikes I buy are projects".
"98% of the bikes I buy are projects".
01-19-21, 08:50 PM
#43
Senior Member
Join Date: Sep 2014
Location: Baton Rouge La
Posts: 1,214
Mentioned: 22 Post(s)
Tagged: 0 Thread(s)
Quoted: 394 Post(s)
Liked 346 Times
in
230 Posts
I do and did color sand the work between coats but did not wet sand the last coat. I could do so but do not intend to do so. I am quite happy with my less than perfect results. Keep in mind, as I mentioned earlier, vintage road bikes were, particularly the entry level steeds, were not mechanical art. In fact they were hastily made, painted and assembled. This is the sort of cosmetic quality one can, often times, expect from a lower tiered vintage road bike...
So, the last coat goes on as carefully as I can apply it. If good enough, then I am done. If not, sand and apply another coat.
I did not thin the paint. Rustoleum recommends against it and, to be honest, there was no need to thin the paint. It goes on well and flows to a smooth shiny surface...
I still have some clean up to do and possibly a wee spot of touch up. I have, pretty much, done my last bicycle paint job. Eyes are dim and hands shake too much for fine work. But ya never know. I still have Torpado's top dog, from the same era to restore, and I am gonna give it a shot next Spring - early sixties Torpado Professional...
01-20-21, 02:50 AM
#44
Senior Member
Thread Starter
Join Date: Apr 2007
Location: Thunder Bay, Ontario, Canada - burrrrr!
Posts: 11,674
Bikes: 1958 Rabeneick 120D, 1968 Legnano Gran Premio, 196? Torpado Professional, 2000 Marinoni Piuma
Mentioned: 210 Post(s)
Tagged: 0 Thread(s)
Quoted: 1372 Post(s)
Likes: 0
Liked 1,747 Times
in
937 Posts
It seems like a more pleasurable process than rattle can.
I built a website, years ago, called MY "TEN SPEEDS" (no longer own it). The purpose of that website was to entertain me, as I built it, and to help others work on their vintage bicycles, without making some of the huge errors that I made when I got started. Painting with a brush was intended to help anyone paint a bike anywhere, with minimal cost and mess. So...
I cannot paint a bike frame, with a rattle can, in the living room or kitchen or bedroom (wife has issues with me doing so). But a brushed on paint job can be done in the living room or kitchen or bedroom with minimal mess, other than odor. To that add that the more effort I put into pursuing excellent results, the better the results get. But, at the end of the day, the Tropado is going to be my Lakeshore Drive junk bike, so perfect paint/art is not an issue with me. Working perfectly (in the mechanical sense) is always a goal, however, that said, I am deviating with this build.
Steel rims will remain along with the lovely old and wonderfully antiquated "wing nuts", even though both are impractical and difficult to use (my hands are shot and I have a tough time getting the wing nuts tight).

__________________
"98% of the bikes I buy are projects".
"98% of the bikes I buy are projects".
01-22-21, 02:59 PM
#45
Senior Member
Thread Starter
Join Date: Apr 2007
Location: Thunder Bay, Ontario, Canada - burrrrr!
Posts: 11,674
Bikes: 1958 Rabeneick 120D, 1968 Legnano Gran Premio, 196? Torpado Professional, 2000 Marinoni Piuma
Mentioned: 210 Post(s)
Tagged: 0 Thread(s)
Quoted: 1372 Post(s)
Likes: 0
Liked 1,747 Times
in
937 Posts
I sweated bullets applying the art. Twenty four hours drying time and then off comes the protective layer. Fingers crossed...
__________________
"98% of the bikes I buy are projects".
"98% of the bikes I buy are projects".
Likes For randyjawa:
01-23-21, 04:49 PM
#47
Senior Member
Thread Starter
Join Date: Apr 2007
Location: Thunder Bay, Ontario, Canada - burrrrr!
Posts: 11,674
Bikes: 1958 Rabeneick 120D, 1968 Legnano Gran Premio, 196? Torpado Professional, 2000 Marinoni Piuma
Mentioned: 210 Post(s)
Tagged: 0 Thread(s)
Quoted: 1372 Post(s)
Likes: 0
Liked 1,747 Times
in
937 Posts
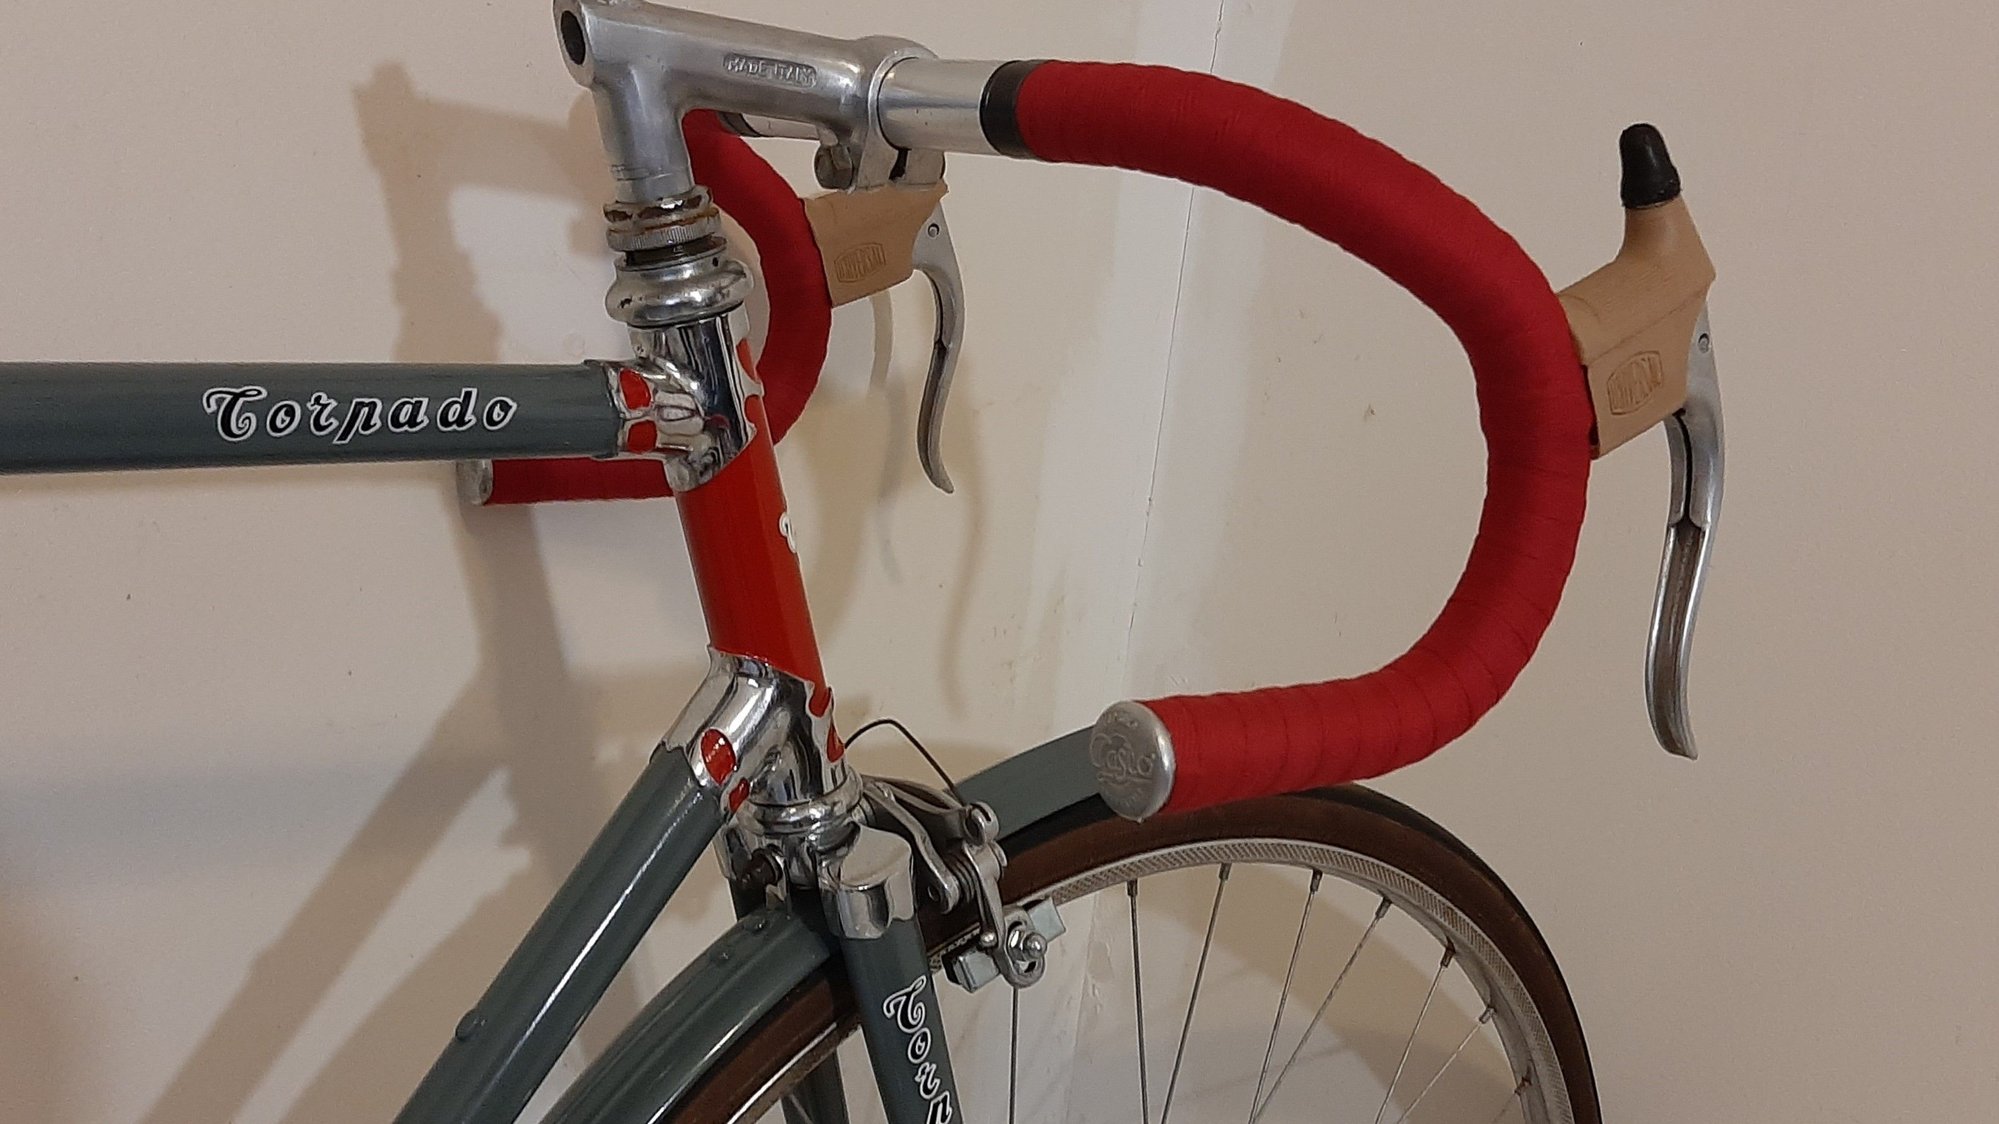
Assembly begins. Not really fussy on the saddle but keeping this one as close to original as I can is the primary goal, next to having fun. Please excuse my poor quality pictures...
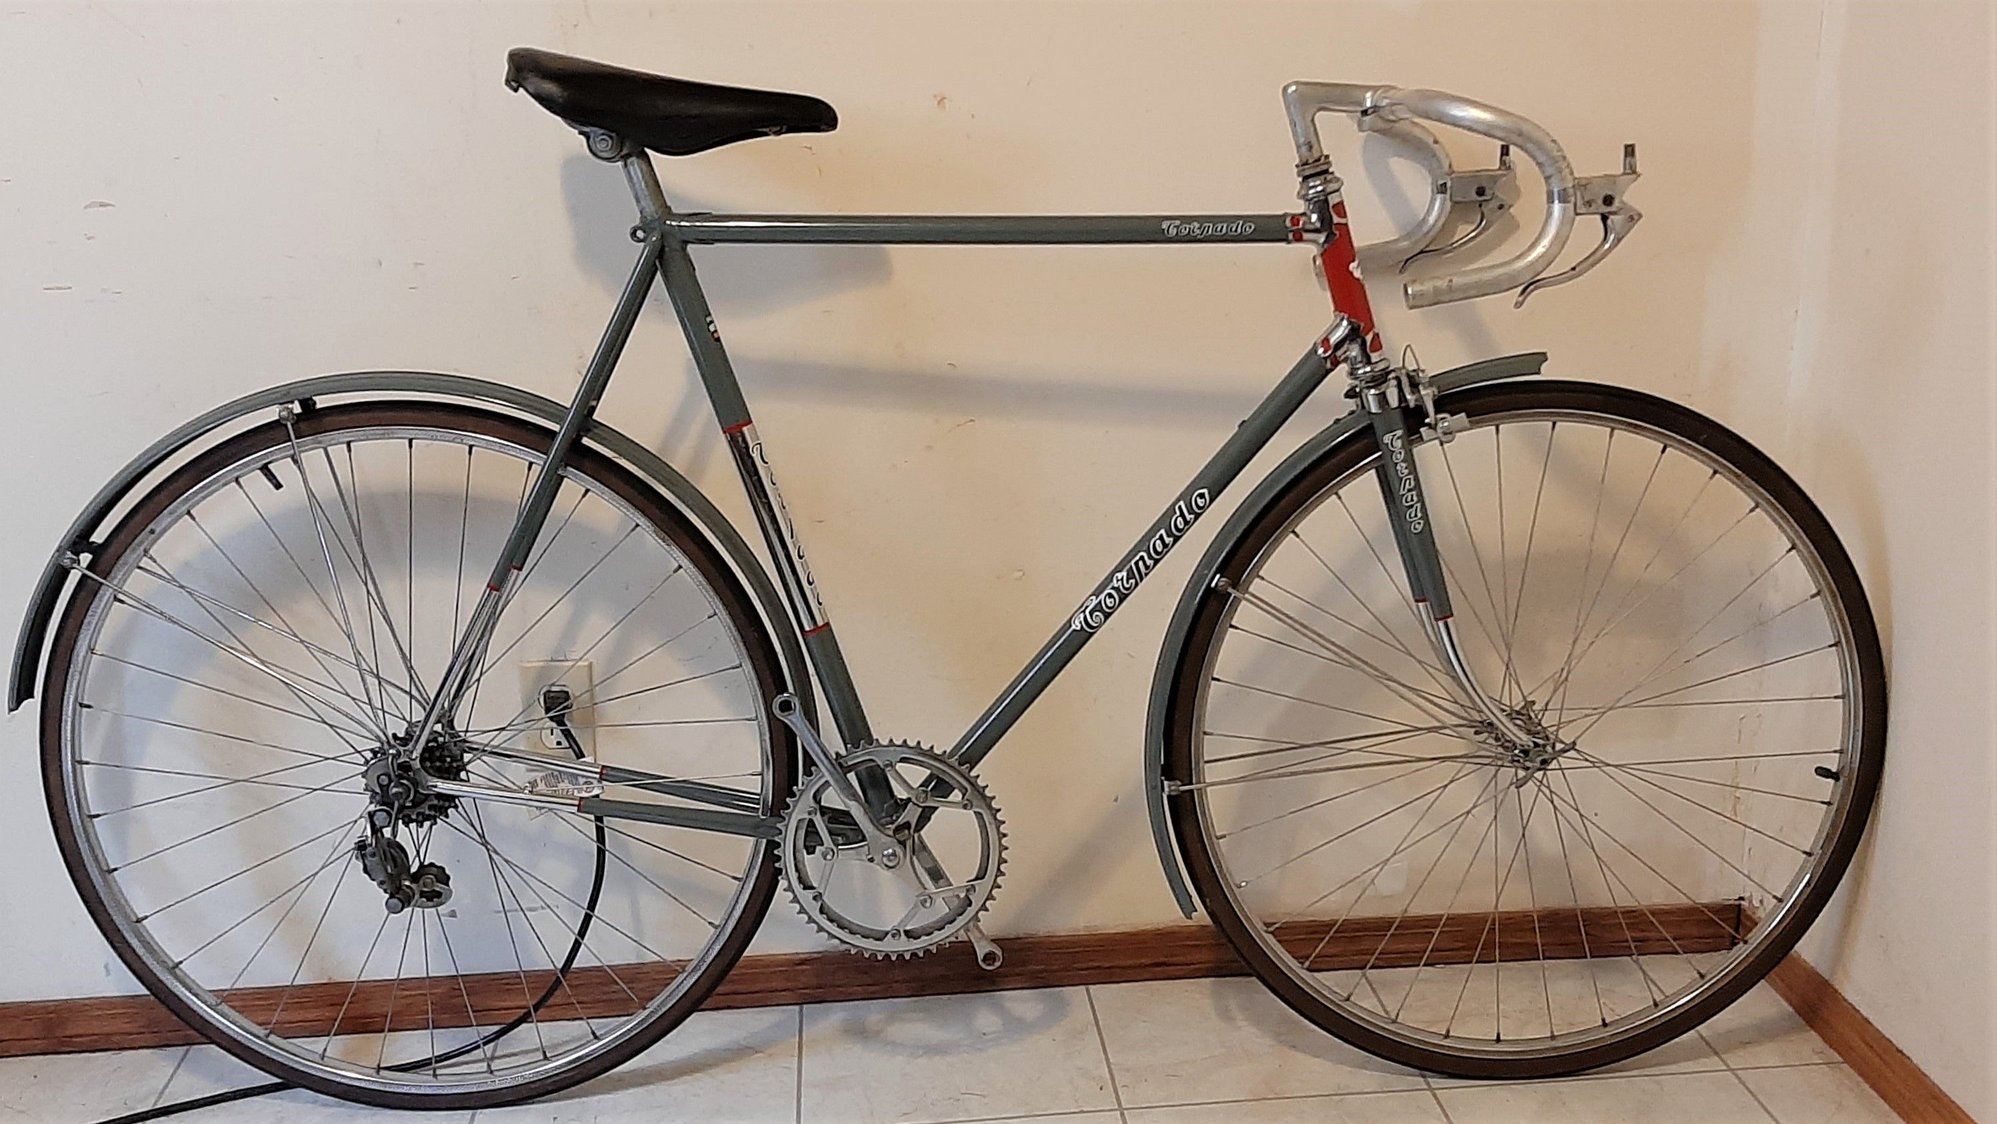
Still a bit of tidying up the paint and chrome but things seem to be working them out

It will look better after the final clean and wax job. For now, I will resist that until April, at the earliest. My gum wall tires (700c x 28 will be here at the end of March). Might also keep my eye open for a decent original head set...
Anyway, hope someone found how to paint an old Torpado with a brush interesting and entertaining.
Still a bit of tidying up the paint and chrome but things seem to be working them out
It will look better after the final clean and wax job. For now, I will resist that until April, at the earliest. My gum wall tires (700c x 28 will be here at the end of March). Might also keep my eye open for a decent original head set...
Anyway, hope someone found how to paint an old Torpado with a brush interesting and entertaining.
__________________
"98% of the bikes I buy are projects".
"98% of the bikes I buy are projects".
01-26-21, 11:17 AM
#49
Senior Member
Thread Starter
Join Date: Apr 2007
Location: Thunder Bay, Ontario, Canada - burrrrr!
Posts: 11,674
Bikes: 1958 Rabeneick 120D, 1968 Legnano Gran Premio, 196? Torpado Professional, 2000 Marinoni Piuma
Mentioned: 210 Post(s)
Tagged: 0 Thread(s)
Quoted: 1372 Post(s)
Likes: 0
Liked 1,747 Times
in
937 Posts
Anyway, though my age is negatively impacting my skill level, these days, a brushed on paint job can look pretty darn good from the street...

__________________
"98% of the bikes I buy are projects".
"98% of the bikes I buy are projects".
01-26-21, 01:00 PM
#50

Forum Moderator

Join Date: Jul 2007
Location: Kalamazoo MI
Posts: 20,626
Bikes: Fuji SL2.1 Carbon Di2 Cannondale Synapse Alloy 4 Trek Checkpoint ALR-5 Viscount Aerospace Pro Colnago Classic Rabobank Schwinn Waterford PMount Raleigh C50 Cromoly Hybrid Legnano Tipo Roma Pista
Mentioned: 58 Post(s)
Tagged: 0 Thread(s)
Quoted: 3084 Post(s)
Liked 6,560 Times
in
3,763 Posts
Looking great Randy. Really nice job.
__________________

