


Circa 1955 Phillips Step Through SA Dyno-Three Hubs with Working Lights! PHOTOS HEAVY
 01-12-15, 09:25 PM
#126
Senior Member

Join Date: Dec 2012
Location: St. Paul, MN
Posts: 1,597
Bikes: Too many 3-speeds, Jones Plus LWB
Mentioned: 12 Post(s)
Tagged: 0 Thread(s)
Quoted: 359 Post(s)
Liked 265 Times
in
119 Posts
If I had to guess I think what is happening is the shell is distorted by being whacked a few times, so the lens no longer fits properly.
 01-12-15, 09:28 PM
#127

Old fart

Join Date: Nov 2004
Location: Appleton WI
Posts: 24,784
Bikes: Several, mostly not name brands.
Mentioned: 153 Post(s)
Tagged: 0 Thread(s)
Quoted: 3587 Post(s)
Liked 3,400 Times
in
1,934 Posts
 01-13-15, 12:47 AM
#128
Senior Member
Thread Starter

I broke the soft metal thumb lever off the original Phillips bell. It was extremely soft and was already bent close to the body of the bell so you couldn't reall pull it with your thumb. I'm in the process of deep cleaning the innards of the bell & will lube and keep the broken piece. Maybe I could somehow weld, solder on a stronger piece of medal down the line. Feel free to offer suggestions.
Question: If I end up with a new 22t cog, do I just use any 1/8" single speed chain?
Question: If I end up with a new 22t cog, do I just use any 1/8" single speed chain?
01-13-15, 01:29 AM
#129
Senior Member
I broke the soft metal thumb lever off the original Phillips bell. It was extremely soft and was already bent close to the body of the bell so you couldn't reall pull it with your thumb. I'm in the process of deep cleaning the innards of the bell & will lube and keep the broken piece. Maybe I could somehow weld, solder on a stronger piece of medal down the line. Feel free to offer suggestions.
Question: If I end up with a new 22t cog, do I just use any 1/8" single speed chain?
Question: If I end up with a new 22t cog, do I just use any 1/8" single speed chain?
01-13-15, 06:25 AM
#130
Senior Member

Join Date: Apr 2009
Location: Detroit
Posts: 10,303
Mentioned: 6 Post(s)
Tagged: 0 Thread(s)
Quoted: 17 Post(s)
Likes: 0
Liked 42 Times
in
33 Posts
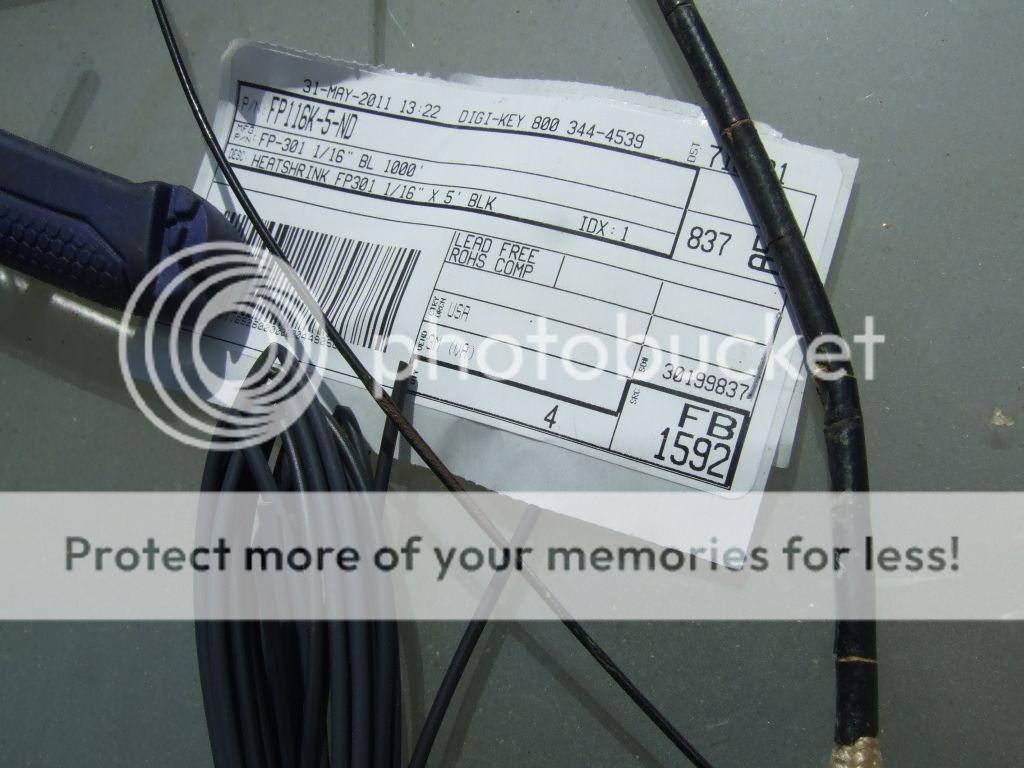
@auchencrow - you had a fabulous thread here: https://www.bikeforums.net/classic-vi...her-cable.html
I've never worked with heat shrink tubing before. What shrink ratio did you get? I see there are things like 2:1, 3"1, etc. That was a fantastic post that I will duplicate some time. Thanks in advance....
I've never worked with heat shrink tubing before. What shrink ratio did you get? I see there are things like 2:1, 3"1, etc. That was a fantastic post that I will duplicate some time. Thanks in advance....
__________________
- Auchen
- Auchen
01-13-15, 07:31 AM
#131
Senior Member
Join Date: Nov 2005
Location: NW Ohio
Posts: 3,418
Bikes: 1984 Miyata 310, 1986 Schwinn Sierra, 2011 Jamis Quest, 1980 Peugeot TH8 Tandem, 1992 Performance Parabola, 1987 Ross Mt. Hood, 1988 Schwinn LeTour, 1988 Trek 400T, 1981 Fuji S12-S LTD, 197? FW Evans
Mentioned: 24 Post(s)
Tagged: 0 Thread(s)
Quoted: 530 Post(s)
Liked 1,004 Times
in
514 Posts
01-13-15, 08:09 AM
#132
Senior Member
Join Date: May 2013
Location: Northern Neck of Virginia
Posts: 316
Bikes: Some Raleighs,some Schwinns and an Azor
Mentioned: 0 Post(s)
Tagged: 0 Thread(s)
Quoted: 0 Post(s)
Likes: 0
Liked 3 Times
in
2 Posts
Going up to a 22t cog will almost certainly require a longer chain. Half links are available so that you can position the wheel to have a perfect fender line. Admit it, you are pretty close to being there. 
01-13-15, 09:23 AM
#133

multimodal commuter

Join Date: Nov 2006
Location: NJ, NYC, LI
Posts: 19,808
Bikes: 1940s Fothergill, 1959 Allegro Special, 1963? Claud Butler Olympic Sprint, Lambert 'Clubman', 1974 Fuji "the Ace", 1976 Holdsworth 650b conversion rando bike, 1983 Trek 720 tourer, 1984 Counterpoint Opus II, 1993 Basso Gap, 2010 Downtube 8h, and...
Mentioned: 584 Post(s)
Tagged: 0 Thread(s)
Quoted: 1908 Post(s)
Liked 574 Times
in
339 Posts
@auchencrow - you had a fabulous thread here: https://www.bikeforums.net/classic-vi...her-cable.html
Is there supposed to be a rubber gasket or something between the glass lens and the ring? Seems like there's space between the two and I see no evidence of any damage to the unit. Also, what is that little tab think sticking out (looks like a triangle) of the lens? Also the silver ring where the lens is situated has a triangular indentation that was made at the factory. What's that for? Thanks.


The triangular indentation, I'm pretty sure, is a dent. The bike probably fell over and the headlight took a hit. You can straighten it a bit, but you can't make it look better (I can support these statements with photographic evidence) and I'd suggest you just live with it.
I don't believe they ever had a gasket. I've opened up a lot of these and have never seen any trace of a gasket of any kind. Those little W-shaped springs hold it all together very nicely, so it doesn't rattle much; and water has lots of ways of getting into the lamp anyway. You'll probably see there's a drain hole in the bottom of the lamp.
Polishing compound (sold in the paint department of car parts stores) will improve that lens considerably. Toothpaste might be almost as good.
Do you have a tail light?
__________________
www.rhmsaddles.com.
www.rhmsaddles.com.
Last edited by rhm; 01-13-15 at 09:26 AM.
01-13-15, 11:13 AM
#134
Senior Member
Right. I needed a half link with my 22T cog on my Superbe to get a nicer fender line and for it to be centered in the dropouts better. It was ~$1
01-13-15, 01:26 PM
#135
Senior Member
Thread Starter
@rhm - here's the rear light. They only made it in about 1953-54-55 this design accd. to catalogs. Also accd. to service manual my model of headlight (Sports model, not Roadster model) did not come with a gasket around the lens. Only the larger Roadster did. Here's the rear light. Yes, everything works. No, the notch on the chrome piece is not a dent. It's on top and obviously tool made. I've seen them on very many SA headlights. Thought there might be a purpose.


01-14-15, 01:25 AM
#136
Senior Member
Thread Starter
UPDATE: Finished. It's been mentioned that perhaps the cotter pin needs to go in further in order to engage more threads on the nut end. If this is the case I'm gonna cry. 
Here's some photos. So far everything rides just fine. I've left 2.5" of stem below the lock nut since there's no "minimum insertion" line. Is that enough? Should I lower the stem a bit? I have also realized that the shifter cable near the handlebars is too short - when handlebars turn far to the left, it pulls on the cable. I tried raising the fulcrum clip, but then I can't get the barrel adjuster screwed onto the chain. I then tried moving the shifter further to the center of the handlebars which just looks stupid. So....I have a replacement (black) cable and some ways to make it look vintage. For now I just won't turn handlebars that far (doesn't affect steering).


Here's some photos. So far everything rides just fine. I've left 2.5" of stem below the lock nut since there's no "minimum insertion" line. Is that enough? Should I lower the stem a bit? I have also realized that the shifter cable near the handlebars is too short - when handlebars turn far to the left, it pulls on the cable. I tried raising the fulcrum clip, but then I can't get the barrel adjuster screwed onto the chain. I then tried moving the shifter further to the center of the handlebars which just looks stupid. So....I have a replacement (black) cable and some ways to make it look vintage. For now I just won't turn handlebars that far (doesn't affect steering).
01-14-15, 04:57 AM
#137
Freewheel Medic

Join Date: Oct 2005
Location: An Island on the Coast of GA!
Posts: 12,882
Bikes: Snazzy* Schwinns, Classy Cannondales & a Super Pro Aero Lotus (* Ed.)
Mentioned: 140 Post(s)
Tagged: 0 Thread(s)
Quoted: 1452 Post(s)
Liked 2,194 Times
in
962 Posts
Well done! You did a great job and when I start in on my Phillips (hopefully next week), you can take credit for inspiring me to start! 
How did it ride and shift? Do you have any experience on a Raleigh Sports? If so did it handle the same? How was the saddle?
How did it ride and shift? Do you have any experience on a Raleigh Sports? If so did it handle the same? How was the saddle?
__________________
Bob
Enjoying the GA coast all year long!
Thanks for visiting my website: www.freewheelspa.com
Bob
Enjoying the GA coast all year long!
Thanks for visiting my website: www.freewheelspa.com
 01-14-15, 03:26 PM
#139
Senior Member
Thread Starter
Hi Pastorbob. I have never ridden a 3 speed or any Raleigh for that matter. Once I tilted the nose up a bit the saddle was very comfortable with no issues. I glued the vinyl where it had pulled away first before I rode it. It shifted fine in the stand and did perfectly on its maiden ride. Very quiet, quick & crisp. The only sound I heard was the shifter when the pawl engaged with the shifter notches. The ride felt smooth and the 46-18 gearing wasn't bad. I didn't ride up any hills though. Our local coop has new SA cogs in various sizes if I want to switch it out. Front brakes are good but rear are nonexistent. May need to bend caliper arms in to toe in brake pads better but they already look toed in so not sure of the problem.
01-14-15, 04:04 PM
#140
aka Tom Reingold

Join Date: Jan 2009
Location: New York, NY, and High Falls, NY, USA
Posts: 40,502
Bikes: 1962 Rudge Sports, 1971 Raleigh Super Course, 1971 Raleigh Pro Track, 1974 Raleigh International, 1975 Viscount Fixie, 1982 McLean, 1996 Lemond (Ti), 2002 Burley Zydeco tandem
Mentioned: 511 Post(s)
Tagged: 0 Thread(s)
Quoted: 7348 Post(s)
Liked 2,462 Times
in
1,433 Posts
Rear brakes on some bikes just never work well. Is the front brake adequate. I rarely use my rear brake on any of my bikes. The front is all you need. The rear is for emergencies or loose surfaces.
My Rudge has a rare 24T cog. It was a gracious gift from @photogravity. I used it when I lived in Maplewood, NJ, which is a hilly place. Now the bike lives at my mother in law's place in Florida, and it waits for me there. I can send it to you next time you're there if you're interested. But first, you have to decide if you want to climb serious hills on that bike. Chances are, you won't.
My Rudge has a rare 24T cog. It was a gracious gift from @photogravity. I used it when I lived in Maplewood, NJ, which is a hilly place. Now the bike lives at my mother in law's place in Florida, and it waits for me there. I can send it to you next time you're there if you're interested. But first, you have to decide if you want to climb serious hills on that bike. Chances are, you won't.
__________________
Tom Reingold, tom@noglider.com
New York City and High Falls, NY
Blogs: The Experienced Cyclist; noglider's ride blog
�When man invented the bicycle he reached the peak of his attainments.� � Elizabeth West, US author
Please email me rather than PM'ing me. Thanks.
Tom Reingold, tom@noglider.com
New York City and High Falls, NY
Blogs: The Experienced Cyclist; noglider's ride blog
�When man invented the bicycle he reached the peak of his attainments.� � Elizabeth West, US author
Please email me rather than PM'ing me. Thanks.
01-14-15, 04:41 PM
#141
multimodal commuter
Join Date: Nov 2006
Location: NJ, NYC, LI
Posts: 19,808
Bikes: 1940s Fothergill, 1959 Allegro Special, 1963? Claud Butler Olympic Sprint, Lambert 'Clubman', 1974 Fuji "the Ace", 1976 Holdsworth 650b conversion rando bike, 1983 Trek 720 tourer, 1984 Counterpoint Opus II, 1993 Basso Gap, 2010 Downtube 8h, and...
Mentioned: 584 Post(s)
Tagged: 0 Thread(s)
Quoted: 1908 Post(s)
Liked 574 Times
in
339 Posts
Until you get a longer cable, I'd suggest you lower the handlebar a little. In fact I'd probably lower it and leave it lowered, not bother with a longer cable.
__________________
www.rhmsaddles.com.
www.rhmsaddles.com.
01-14-15, 04:50 PM
#142
Senior Member
Join Date: Mar 2013
Location: Maryland
Posts: 3,799
Bikes: Lots of English 3-speeds, a couple of old road bikes, 3 mountain bikes, 1 hybrid, and a couple of mash-ups
Mentioned: 53 Post(s)
Tagged: 0 Thread(s)
Quoted: 887 Post(s)
Liked 335 Times
in
225 Posts
UPDATE: Finished. It's been mentioned that perhaps the cotter pin needs to go in further in order to engage more threads on the nut end. If this is the case I'm gonna cry.
Here's some photos. So far everything rides just fine. I've left 2.5" of stem below the lock nut since there's no "minimum insertion" line. Is that enough? Should I lower the stem a bit? I have also realized that the shifter cable near the handlebars is too short - when handlebars turn far to the left, it pulls on the cable. I tried raising the fulcrum clip, but then I can't get the barrel adjuster screwed onto the chain. I then tried moving the shifter further to the center of the handlebars which just looks stupid. So....I have a replacement (black) cable and some ways to make it look vintage. For now I just won't turn handlebars that far (doesn't affect steering).
Here's some photos. So far everything rides just fine. I've left 2.5" of stem below the lock nut since there's no "minimum insertion" line. Is that enough? Should I lower the stem a bit? I have also realized that the shifter cable near the handlebars is too short - when handlebars turn far to the left, it pulls on the cable. I tried raising the fulcrum clip, but then I can't get the barrel adjuster screwed onto the chain. I then tried moving the shifter further to the center of the handlebars which just looks stupid. So....I have a replacement (black) cable and some ways to make it look vintage. For now I just won't turn handlebars that far (doesn't affect steering).
For now I just won't turn handlebars that far (doesn't affect steering).
VV - Just don't be doing figure 8's on the street.
 Really though, if the steering is OK for everyday use, don't sweat it. I would take a look back in the thread and try to build a custom shifter cable (where did I put that now, darn it).
You've done a lot in a few days, all I've done with my new purchase is take assessments so far.
01-14-15, 08:34 PM
#143
Senior Member
Thread Starter
I went ahead and lowered the handlebars .75" and cable is much improved. I think it could be wise to order some good quality new cotters & file. Things seem to fit alright, but the original cotter pins were filed further than current.
Interesting note. The brake levers take road brake cables, not mountain. In fact it takes a smaller type road end. The modern ones work, but don't seat in the receiving piece as far as the old ones did.
Interesting note. The brake levers take road brake cables, not mountain. In fact it takes a smaller type road end. The modern ones work, but don't seat in the receiving piece as far as the old ones did.
01-14-15, 10:07 PM
#144
Banned
Join Date: Aug 2013
Posts: 6,480
Mentioned: 93 Post(s)
Tagged: 0 Thread(s)
Quoted: 1361 Post(s)
Likes: 0
Liked 423 Times
in
282 Posts
Great work
I like the coloring and aged headlamp lens. All about character. (Someday I hope to have answer why the French used yellow lens.)
About the ringer fiasco..... perhaps purchase a cheapo brand new metal (like Bell brand $4) and simply swap the shell.
I like the coloring and aged headlamp lens. All about character. (Someday I hope to have answer why the French used yellow lens.)
About the ringer fiasco..... perhaps purchase a cheapo brand new metal (like Bell brand $4) and simply swap the shell.
01-15-15, 08:32 AM
#145
Senior Member
Join Date: Dec 2012
Location: St. Paul, MN
Posts: 1,597
Bikes: Too many 3-speeds, Jones Plus LWB
Mentioned: 12 Post(s)
Tagged: 0 Thread(s)
Quoted: 359 Post(s)
Liked 265 Times
in
119 Posts
Because the metal will be raw, make sure you apply a very light film of grease to reduce corrosion.
 01-17-15, 12:18 AM
#147
Senior Member
Thread Starter
UPDATE:
I went for a 9 mile shake out ride today. It was sunny & 53 degrees out. My front brakes were reasonable, but the rear were non existent, despite new cables (kept old housing & squeezed tons of Tri-Flow inside), Kool Stop pads, clean rims, good adjustment, etc. I also needed to move the saddle back. So I removed the old style seat post clamp, cleaned with a brush & citrus degreaser, then into the heated ultrasonic cleaner. When I reassembled I turned the assembly around so that the bulk of the assembly was behind the seat post, allowing me to move the saddle back more. I went ahead and removed the old brake housing and replaced with new black Jagwire housing with silver ferrules as the originals had silver. My brakes, especially the rear are 80% improved - seriously! Interesting how black housing visually disappears. My eyes focus on the bike - not the lighter colored housing that was on it. I will also replace the shift cable with new black (waiting for another part).
I stopped at my LBS & a mechanic pointed out that my handlebars are bent on the left side. The angle of the curve on the left is much sharper than on the right. That explained why my wrists felt "funny" and not symmetric. Here's the photo:

I've got my eyes open for some like this with the obsolete British 23.8 clamp size. I realize I could get a different stem & have more bar options, but want to keep the bike as original as possible.
When I repacked the front hubs I noted that both cones had some area of slight pitting, but since I had nothing else I used the original cones. I bought 2 NOS front Phillips axles with cones and mounting nuts. No guarantee that the new cones would match, but, in fact, was almost a perfect match, so yesterday I replaced the entire axle with new cones.


With the SA shift cable, I will use the normal end to attach to the shifter, then at the far end where the metal sleeve attaches, I will not use the nut/bolt attachment that comes with modern SA shifter cable replacement, but instead use JB Weld and 3/23" brass tubing fastened to the end, which will hold on the metal sleeve more elegantly than a nut/bolt. It will essentially look like a cable crimp at that end of the cable, but you won't see it because of the sleeve. In addition, I've ordered 1/16" clear, flexible heat shrink tubing for the part of the shifter cable from the fulcrum sleeve down to the metal sleeve. The original setup has this cable covered in a tight plastic coating/tubing, but it's yellowed & is cracking in spots.

The lens assembly portion of the headlight is supposed to have a little bolt with a nut holding it to the main body of the headlight, however that nut/bolt has been lost and prior owner used a wire to hold them together. The threading on the receiving part of the headlight for this bolt has WHITWORTH threading, so I cannot use either the metric or standard nuts/bolt I bought for the job. I was going to buy a tap today to tap out the threads to metric, but the hardware salesman suggested just using the stainless steel bolt I bought and forcing it - it may cut the threads for me. Worse case scenario, it would strip the threads and I wouldn't be any worse for wear. Best case scenario is that it works. Thoughts? The headlight body where the threads are is steel (at least a magnet sticks).
I've ordered my 22T SA cog and it will be here on Monday. I'll also need to buy a new 1/8" ss chain. Will likely go with KMC, unless there is overwhelming support for something else. Recommendations?
Thanks.
I went for a 9 mile shake out ride today. It was sunny & 53 degrees out. My front brakes were reasonable, but the rear were non existent, despite new cables (kept old housing & squeezed tons of Tri-Flow inside), Kool Stop pads, clean rims, good adjustment, etc. I also needed to move the saddle back. So I removed the old style seat post clamp, cleaned with a brush & citrus degreaser, then into the heated ultrasonic cleaner. When I reassembled I turned the assembly around so that the bulk of the assembly was behind the seat post, allowing me to move the saddle back more. I went ahead and removed the old brake housing and replaced with new black Jagwire housing with silver ferrules as the originals had silver. My brakes, especially the rear are 80% improved - seriously! Interesting how black housing visually disappears. My eyes focus on the bike - not the lighter colored housing that was on it. I will also replace the shift cable with new black (waiting for another part).
I stopped at my LBS & a mechanic pointed out that my handlebars are bent on the left side. The angle of the curve on the left is much sharper than on the right. That explained why my wrists felt "funny" and not symmetric. Here's the photo:
I've got my eyes open for some like this with the obsolete British 23.8 clamp size. I realize I could get a different stem & have more bar options, but want to keep the bike as original as possible.
When I repacked the front hubs I noted that both cones had some area of slight pitting, but since I had nothing else I used the original cones. I bought 2 NOS front Phillips axles with cones and mounting nuts. No guarantee that the new cones would match, but, in fact, was almost a perfect match, so yesterday I replaced the entire axle with new cones.
With the SA shift cable, I will use the normal end to attach to the shifter, then at the far end where the metal sleeve attaches, I will not use the nut/bolt attachment that comes with modern SA shifter cable replacement, but instead use JB Weld and 3/23" brass tubing fastened to the end, which will hold on the metal sleeve more elegantly than a nut/bolt. It will essentially look like a cable crimp at that end of the cable, but you won't see it because of the sleeve. In addition, I've ordered 1/16" clear, flexible heat shrink tubing for the part of the shifter cable from the fulcrum sleeve down to the metal sleeve. The original setup has this cable covered in a tight plastic coating/tubing, but it's yellowed & is cracking in spots.
The lens assembly portion of the headlight is supposed to have a little bolt with a nut holding it to the main body of the headlight, however that nut/bolt has been lost and prior owner used a wire to hold them together. The threading on the receiving part of the headlight for this bolt has WHITWORTH threading, so I cannot use either the metric or standard nuts/bolt I bought for the job. I was going to buy a tap today to tap out the threads to metric, but the hardware salesman suggested just using the stainless steel bolt I bought and forcing it - it may cut the threads for me. Worse case scenario, it would strip the threads and I wouldn't be any worse for wear. Best case scenario is that it works. Thoughts? The headlight body where the threads are is steel (at least a magnet sticks).
I've ordered my 22T SA cog and it will be here on Monday. I'll also need to buy a new 1/8" ss chain. Will likely go with KMC, unless there is overwhelming support for something else. Recommendations?
Thanks.
01-17-15, 06:33 AM
#148
Senior Member
Join Date: Jan 2007
Location: Ontario
Posts: 2,648
Mentioned: 16 Post(s)
Tagged: 0 Thread(s)
Quoted: 478 Post(s)
Liked 634 Times
in
336 Posts
Two comments and a question:
1. For the handlebars, you could bring things closer to symmetric by bending the bars back. They are steel after all. You can try a long pipe for leverage. It will not be easy but it might make you more comfortable while you wait for replacement bars to show up.
2. On the seat, I had to do that too but have realized over time that the riding position on these bikes is meant to be a little closer to the bars than you might be used to. I'm not suggesting changing anything but give yourself some time to get accustomed to the way the bike feels - you might find yourself moving the seat forward again.
3. How confident are you with JB Weld holding the sleeve? Do you have someone who has tried it and finds it acceptable for the sift cable? On my to-do list is to fix up one of my older cables (I DID use the more modern attachment temporarily) but was going to solder the tube in place. I LOVE JB Weld but wasn't sure about it for something like this.
Keep the reports coming.....I put larger sprockets on the back of all of the family 3-speeds and our collective knees have been thankful. Its not like the 18T was bad, but the larger sprockets just made the bikes more relaxing to ride.
01-17-15, 08:38 AM
#149
Senior Member
Join Date: Dec 2012
Location: St. Paul, MN
Posts: 1,597
Bikes: Too many 3-speeds, Jones Plus LWB
Mentioned: 12 Post(s)
Tagged: 0 Thread(s)
Quoted: 359 Post(s)
Liked 265 Times
in
119 Posts
I just built up a shift cable for another project. I didn't have to use JB weld- just got a regular shift cable and cut off the end. Then I used the little end bit that is often used on the end of shifter cables to keep them from fraying. I nicked the end off of it so it was a metal sleeve. I put it on the cable. I used a large blunt screwdriver and gave the assembly a couple of whacks to swage it on- and now I have a cable end. I had to sand it a little to fit the adjuster sleeve but it worked out OK.
01-17-15, 09:34 AM
#150
Senior Member
Join Date: Feb 2014
Location: Southern Ontario
Posts: 1,883
Mentioned: 5 Post(s)
Tagged: 0 Thread(s)
Quoted: 263 Post(s)
Likes: 0
Liked 9 Times
in
8 Posts
I just made a shifter cable last night. Used some brass tube from the hobby shop and a normal shift cable like suggested here on the forum. Crimped the tubing twice and seems to be solid. Put all the hardware and ends on then crimped the other end. Had to touch up the bulges of the crimp a bit with a file to fit the threaded tube end. Everything works fine and seems solid. Was going to try adding a touch of solder but doesn't seem to need it. Looks just the same as the factory cable.