


Installing a tire Instruction Mr. Beanz Style (Clyde exclusive)
 03-04-13, 06:32 PM
#1
Banned.
Thread Starter

Join Date: Dec 2005
Location: Upland Ca
Posts: 19,895
Bikes: Lemond Chambery/Cannondale R-900/Trek 8000 MTB/Burley Duet tandem
Mentioned: 0 Post(s)
Tagged: 0 Thread(s)
Quoted: 0 Post(s)
Likes: 0
Liked 4 Times
in
3 Posts
Installing a tire Instruction Mr. Beanz Style (Clyde exclusive)
After I deleted most of my videos last year Goldfinch pointed out that I had deleted the instructional videos I had as well. With all the tire exploding talk I figured I'd show how I install my tires. I don't have much trouble with tires rolling up while trying to install them. A big complaint I've read many times. No problem with pinched tubes either. Although pretty basic, maybe it'sll help the new guy who had never thought or known much about the little details.
Having a hard time with folding tires rolling up creating problems for some experienced riders puzzles me, but I guess it happens.
Having a hard time with folding tires rolling up creating problems for some experienced riders puzzles me, but I guess it happens.
 03-04-13, 06:45 PM
#2
SuperGimp


Checking that little line is a nice touch too btw. I found two problems that way Thursday.
03-04-13, 06:51 PM
#3
Banned.
Thread Starter
Join Date: Dec 2005
Location: Upland Ca
Posts: 19,895
Bikes: Lemond Chambery/Cannondale R-900/Trek 8000 MTB/Burley Duet tandem
Mentioned: 0 Post(s)
Tagged: 0 Thread(s)
Quoted: 0 Post(s)
Likes: 0
Liked 4 Times
in
3 Posts

He wouldn't have made it to the bottom of a 40! I had to show him some tough love, I called him a bunch of bad names them fixed it myself. I don't want to see anybody slide on their face t 40 mph. OK, maybe a couple of people but not a friend.
 03-04-13, 07:20 PM
#4
Senior Member

Join Date: Apr 2010
Location: SoCal
Posts: 3,078
Bikes: Roubaix SL4 Expert , Cervelo S2
Mentioned: 1 Post(s)
Tagged: 0 Thread(s)
Quoted: 85 Post(s)
Likes: 0
Liked 1 Time
in
1 Post
I do it the same way, tire over rim, followed by tube but then I put maybe 10psi in the tube (so it's firm to the touch) and use a Pedro's tire lever to get the tire on using my fingers only by the valve to avoid snagging the tube in that area. As far as the bulges, I stop at about 30psi and give the tire a good once-over to check for bulges then completely inflate. I figure if you pump it up to full pressure with a bulge there's a greater risk of the tire blowing off the rim (which has happened to me BTW and is not fun.)
Last edited by Dunbar; 03-04-13 at 07:23 PM.
03-04-13, 07:37 PM
#5
SuperGimp
 03-04-13, 07:48 PM
#6
Senior Member
I learned how to change a tire from your original video. Now, I have changed too many tires! Thanks though Beanz, you do a nice job with the instructions.
Another one you should add is taking off an putting on the rear wheel without getting all messed up with the chain.
Another one you should add is taking off an putting on the rear wheel without getting all messed up with the chain.
Last edited by goldfinch; 03-04-13 at 07:57 PM.
03-04-13, 08:01 PM
#7
Curmudgeon

Join Date: Aug 2005
Location: Nausea, New Hamster
Posts: 1,572
Bikes: (see https://wildavis.smugmug.com/Bikes) Bianchi Veloce (2005), Nishiki Cascade (1992), Schwinn Super Sport (1983)
Mentioned: 0 Post(s)
Tagged: 0 Thread(s)
Quoted: 0 Post(s)
Likes: 0
Liked 4 Times
in
4 Posts
03-04-13, 09:20 PM
#8
Just Keep Pedaling

Join Date: Mar 2012
Location: Lakewood, CA
Posts: 3,355
Bikes: 99 Schwinn Mesa GS MTB, 15 Trek Domane 5.9 Dura-Ace, 17 Trek Emonda SL6 Pro & 18 Bianchi Vigorelli
Mentioned: 30 Post(s)
Tagged: 0 Thread(s)
Quoted: 251 Post(s)
Likes: 0
Liked 67 Times
in
34 Posts
Installing a tire Instruction Mr. Beanz Style (Clyde exclusive)
I have had zero issues with pinching tube when either installing new tires or changing out a puncture flat.
Haven't watched video yet but plan to.
I just recently installed new conti gp4000s tires and new tubes and have put 200+ mileson the set w/o issue.
I use the new Crank Bros Speedier lever and WOW makes getting that last bit of tire onto rim a piece of cake!
Haven't watched video yet but plan to.
I just recently installed new conti gp4000s tires and new tubes and have put 200+ mileson the set w/o issue.
I use the new Crank Bros Speedier lever and WOW makes getting that last bit of tire onto rim a piece of cake!
03-04-13, 10:15 PM
#9
Banned.
Thread Starter
Join Date: Dec 2005
Location: Upland Ca
Posts: 19,895
Bikes: Lemond Chambery/Cannondale R-900/Trek 8000 MTB/Burley Duet tandem
Mentioned: 0 Post(s)
Tagged: 0 Thread(s)
Quoted: 0 Post(s)
Likes: 0
Liked 4 Times
in
3 Posts
I do it the same way, tire over rim, followed by tube but then I put maybe 10psi in the tube (so it's firm to the touch) and use a Pedro's tire lever to get the tire on using my fingers only by the valve to avoid snagging the tube in that area. As far as the bulges, I stop at about 30psi and give the tire a good once-over to check for bulges then completely inflate. I figure if you pump it up to full pressure with a bulge there's a greater risk of the tire blowing off the rim (which has happened to me BTW and is not fun.)
03-04-13, 10:17 PM
#10
Banned.
Thread Starter
Join Date: Dec 2005
Location: Upland Ca
Posts: 19,895
Bikes: Lemond Chambery/Cannondale R-900/Trek 8000 MTB/Burley Duet tandem
Mentioned: 0 Post(s)
Tagged: 0 Thread(s)
Quoted: 0 Post(s)
Likes: 0
Liked 4 Times
in
3 Posts
I learned how to change a tire from your original video. Now, I have changed too many tires! Thanks though Beanz, you do a nice job with the instructions.
Another one you should add is taking off an putting on the rear wheel without getting all messed up with the chain.
Another one you should add is taking off an putting on the rear wheel without getting all messed up with the chain.
I'll have to remake that one when I get time.
Funny you mention doing too many tires. I have friends and other riders that will ride down to the coast and ask for mechanical favors. Derailleur adjustments, wheel truing, brake asdjustments, Heck just two weeks ago I ws at a park for a water stop. One dude started trying to rap with some chick there. I stood back and watched as the topic of rubbing brakes came up. He tried to play hero and ended up the zero!:roflamo2:
I didn't want to get involved but he and some other guy ended up making her bike more dangerous than it was. So I ened up doing a front and rear brake and cable adjustment for her.
Bike mechanics are actually pretty easy and a good thing to know as you've found out. Heck, every so often I post a story about helping some poor soul.
Like this dude. Why is he smiling? He picked up his bike from the shop. The rear shifting was a total mess. He was going to call for a ride home. He asked if an one of us knew anything about the rear derailleur. I had seen them working on the bike but thought they knew what they were doing. The sho didn't !
I ended up settng up everything on the rear der, cable, limit screws in about 3 or 4 minutes. I explained the system to him and he had no problem understanding for future adjustments. Although I don't hink he'd need any. Bike was sweet when he left but I think the big smile was because he didn't have to call his wife for a ride.

Last edited by Mr. Beanz; 03-04-13 at 10:32 PM.
03-04-13, 10:37 PM
#13
Banned.
Thread Starter
Join Date: Dec 2005
Location: Upland Ca
Posts: 19,895
Bikes: Lemond Chambery/Cannondale R-900/Trek 8000 MTB/Burley Duet tandem
Mentioned: 0 Post(s)
Tagged: 0 Thread(s)
Quoted: 0 Post(s)
Likes: 0
Liked 4 Times
in
3 Posts
I have had zero issues with pinching tube when either installing new tires or changing out a puncture flat.
Haven't watched video yet but plan to.
I just recently installed new conti gp4000s tires and new tubes and have put 200+ mileson the set w/o issue.
I use the new Crank Bros Speedier lever and WOW makes getting that last bit of tire onto rim a piece of cake!
Haven't watched video yet but plan to.
I just recently installed new conti gp4000s tires and new tubes and have put 200+ mileson the set w/o issue.
I use the new Crank Bros Speedier lever and WOW makes getting that last bit of tire onto rim a piece of cake!
Then make your own video!
........
That is a good point though. Some people think they know but don't. You for example might realize you have to check certain things, mechanically makes sense whereas another may have no idea and may never think of certain little things that make a difference.
I've seen a couple of things that have made me say, oh, duhh!
 03-05-13, 01:43 AM
#15
Senior Member
Join Date: Mar 2005
Location: NY state
Posts: 1,311
Bikes: See Signature...
Mentioned: 0 Post(s)
Tagged: 0 Thread(s)
Quoted: 9 Post(s)
Likes: 0
Liked 0 Times
in
0 Posts
I'll start by saying I install tubes/tires on a carpeted surface.
When I get around to that last little bit of tire not on the rim, what I find helps is I will hold it as you were in the video, with the bead being seated away from me, and the unseated section facing up. wrap fingertips around bead area, curling palms around the top of the tire. Push the rim down at an arc away from you and pull the bead up. Even the most stubborn (folding bead) tires snap right on using this method.
I like your way of going around the tire with low pressure checking to make sure the tube is not pinched, and also helping seat the bead at the same time. I will remember that!
03-05-13, 02:01 AM
#16
Senior Member

Join Date: Jan 2013
Location: Adelaide, Australia
Posts: 117
Bikes: 2013 Reid Aquila, 2013 Reid X126
Mentioned: 0 Post(s)
Tagged: 0 Thread(s)
Quoted: 0 Post(s)
Likes: 0
Liked 0 Times
in
0 Posts
Thank you for posting the video, I haven't had to change one yet but will now know how to do it properly
03-05-13, 08:58 AM
#17
Senior Member
Join Date: Mar 2005
Location: NY state
Posts: 1,311
Bikes: See Signature...
Mentioned: 0 Post(s)
Tagged: 0 Thread(s)
Quoted: 9 Post(s)
Likes: 0
Liked 0 Times
in
0 Posts
 03-05-13, 09:20 AM
#18
Senior Member
Join Date: Dec 2012
Location: Wylie, Texas
Posts: 198
Bikes: Specialized Expedition Sport
Mentioned: 0 Post(s)
Tagged: 0 Thread(s)
Quoted: 0 Post(s)
Likes: 0
Liked 0 Times
in
0 Posts
Love the video. It makes me feel more comfortable for replacing the tube when I get a flat.
03-05-13, 09:37 AM
#19

The Left Coast, USA

Can you do one on how to replace the tube without removing the wheel from the frame?
03-05-13, 09:51 AM
#20
Banned.
Thread Starter
Join Date: Dec 2005
Location: Upland Ca
Posts: 19,895
Bikes: Lemond Chambery/Cannondale R-900/Trek 8000 MTB/Burley Duet tandem
Mentioned: 0 Post(s)
Tagged: 0 Thread(s)
Quoted: 0 Post(s)
Likes: 0
Liked 4 Times
in
3 Posts
I've been on too many rides and centuries where riders take short cuts thinking they removed the debris then 1/4 mile later we're stopped again. 5 minute repair now or 4 minutes then and then 4 again 1/4 mile later.
One of the good things about carrying a pump vs CO2. I've lent my pump out a hundred times to riders taking short cuts. After the second try with CO2, you're eshcrewed!
03-05-13, 09:57 AM
#21
Senior Member

Nice touch on checking the 'witness' line. A lot of folks never do that.
03-05-13, 10:17 AM
#22

Senior Member

Join Date: Jul 2006
Location: San Jose (Willow Glen) Ca
Posts: 9,847
Bikes: Kirk Custom JK Special, '84 Team Miyata,(dura ace old school) 80?? SR Semi-Pro 600 Arabesque
Mentioned: 106 Post(s)
Tagged: 0 Thread(s)
Quoted: 2338 Post(s)
Liked 2,827 Times
in
1,543 Posts
A good thing to remember....if a new tire is a bear to get on it will be a bear to get off. In those cases, I practice removing the tire like i would for a flat fix and making sure I have the right levers with me on the road (some tires/rim combos require that I carry steel levers). I also just bought a tire jack because of a particularly hard to install tire. ymmv
__________________
Life is too short not to ride the best bike you have, as much as you can
(looking for Torpado Super light frame/fork or for Raleigh International frame fork 58cm)
Life is too short not to ride the best bike you have, as much as you can
(looking for Torpado Super light frame/fork or for Raleigh International frame fork 58cm)
03-05-13, 10:29 AM
#23
Banned.
Thread Starter
Join Date: Dec 2005
Location: Upland Ca
Posts: 19,895
Bikes: Lemond Chambery/Cannondale R-900/Trek 8000 MTB/Burley Duet tandem
Mentioned: 0 Post(s)
Tagged: 0 Thread(s)
Quoted: 0 Post(s)
Likes: 0
Liked 4 Times
in
3 Posts
A good thing to remember....if a new tire is a bear to get on it will be a bear to get off. In those cases, I practice removing the tire like i would for a flat fix and making sure I have the right levers with me on the road (some tires/rim combos require that I carry steel levers). I also just bought a tire jack because of a particularly hard to install tire. ymmv
I have only had one tire that was difficult to remove, MTB Bontrager rim and Panaracer tire. I swapped out the rims so it is now much easier to deal with. I can remove most my roadie tires without levers but again, you never know so I carry them. As far as tube, I cary two frsh spares (new no patches). If I puncture, I make the swap on the road, then repair the puncture at home with a patch. Then I replace the new tube back into the seat pack so that I always have two new tubes as replacements on the road.
This also allows to let the patch to sit overnight verifying it was a sucess before taking the bike back on the road.
I've had ride partners pull out spares with a patch, done the repair only to find that 1/4 mile down the road, the patch sucked!
Another 10 minutes hoping his "other" patched tube works.I do this as I was once fooled into thinking there was only one hole.
03-05-13, 11:04 AM
#24
Just Keep Pedaling
Join Date: Mar 2012
Location: Lakewood, CA
Posts: 3,355
Bikes: 99 Schwinn Mesa GS MTB, 15 Trek Domane 5.9 Dura-Ace, 17 Trek Emonda SL6 Pro & 18 Bianchi Vigorelli
Mentioned: 30 Post(s)
Tagged: 0 Thread(s)
Quoted: 251 Post(s)
Likes: 0
Liked 67 Times
in
34 Posts
Then make your own video! ........
That is a good point though. Some people think they know but don't. You for example might realize you have to check certain things, mechanically makes sense whereas another may have no idea and may never think of certain little things that make a difference.
I've seen a couple of things that have made me say, oh, duhh!
........ That is a good point though. Some people think they know but don't. You for example might realize you have to check certain things, mechanically makes sense whereas another may have no idea and may never think of certain little things that make a difference.
I've seen a couple of things that have made me say, oh, duhh!
my recent installation of new tires I did what you did with label, seated one side of bead on wheel, get air in tube by mouth, seat barely inflated tube starting with stem...then work second side of tire bead onto rim. Partially inflated and check for bulges along bead....then fully inflated tire.
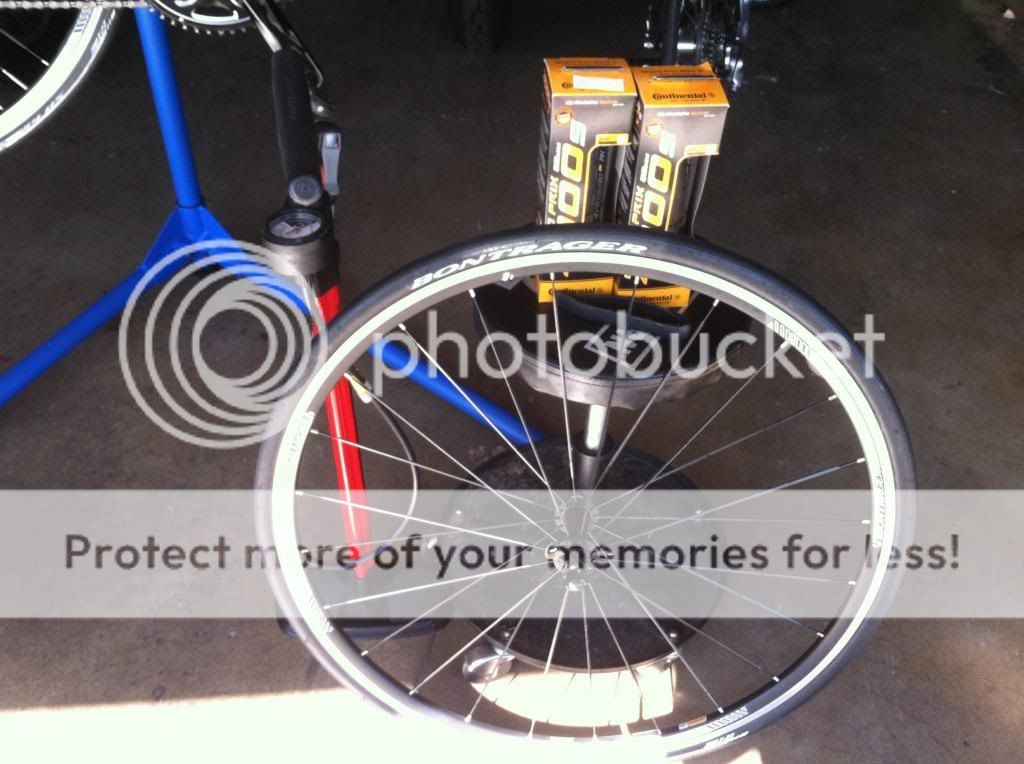
After:
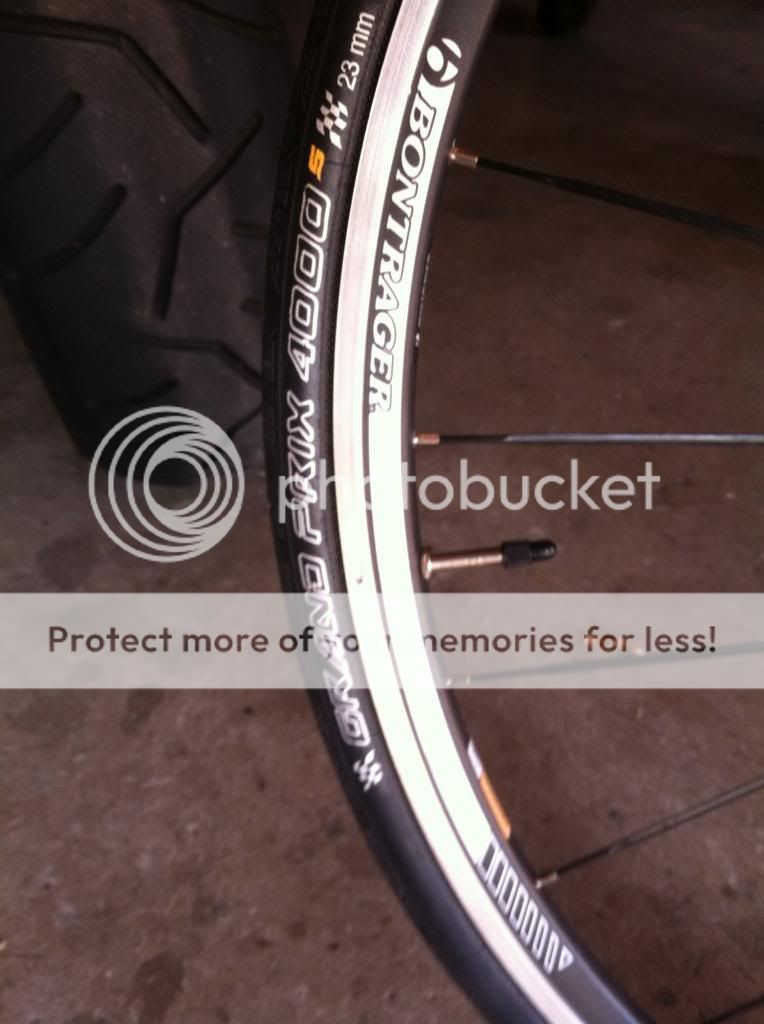
I learned to check the "witness line" in your video which is excellent tip. Your video is clear and easy to follow and duplicate. Should be stickied here IMHO.
Agree with GF about showing rear wheel off/on technique with chain and such.
Truly Beanz you are a treasure chest of practical and fun cycling knowledge
thanks!
Last edited by Beachgrad05; 03-05-13 at 11:25 AM. Reason: Added pic
03-05-13, 11:19 AM
#25
Just Keep Pedaling
Join Date: Mar 2012
Location: Lakewood, CA
Posts: 3,355
Bikes: 99 Schwinn Mesa GS MTB, 15 Trek Domane 5.9 Dura-Ace, 17 Trek Emonda SL6 Pro & 18 Bianchi Vigorelli
Mentioned: 30 Post(s)
Tagged: 0 Thread(s)
Quoted: 251 Post(s)
Likes: 0
Liked 67 Times
in
34 Posts
I had never changed a flat bicycle tire in my life. I had spare tube, tire levers, CO2 and my smart phone. I got the wheel off (with my chain in wrong spot...mistake I won't repeat). THEN I located a video on YouTube on how to change a flat on rear wheel. Watched that and used that to get new tube installed and wheel back on bike.
Being new to CO2 I did not KNOW to use entire cartridge. So was not fully inflated. I did not have floor pump at home so I chanced it and figured why not see if Performance Bikes is open...so I hopped on SGRT at Del Amo...rode south to Carson (one street) and rode thru town center (Walmart was open..so gave me hope that PB might be open). They WERE! They had floor pumps by front door for cyclists to use. So fully inflated tire. And picked up Topeak Road Morph frame pump with gauge....and continued on my ride and did 19.5 miles with 18.5 after flat.
I was proud of myself for successfully changing the flat and getting my ride in.