


Rockhopper bottom bracket cable-guide screw blockage
 02-15-21, 10:55 PM
#1
Keepin it Wheel
Thread Starter

Join Date: Aug 2011
Location: San Diego
Posts: 10,245
Bikes: Surly CrossCheck, Krampus
Mentioned: 0 Post(s)
Tagged: 0 Thread(s)
Quoted: 26 Post(s)
Liked 3,433 Times
in
2,540 Posts
Rockhopper bottom bracket cable-guide screw blockage
Hey all,
Found (most of) a Rockhopper in the trash, workin on cleaning it up, getting it rolling again. It had no crankset or bottom bracket in the shell. I have a couple cartridge BB laying around (octalink, UN-55), and the standard threading seems ok, but there's a HUGE obstacle where the cable guide screw comes into the shell -- as well as extra metal there to hold the screw. Pic:
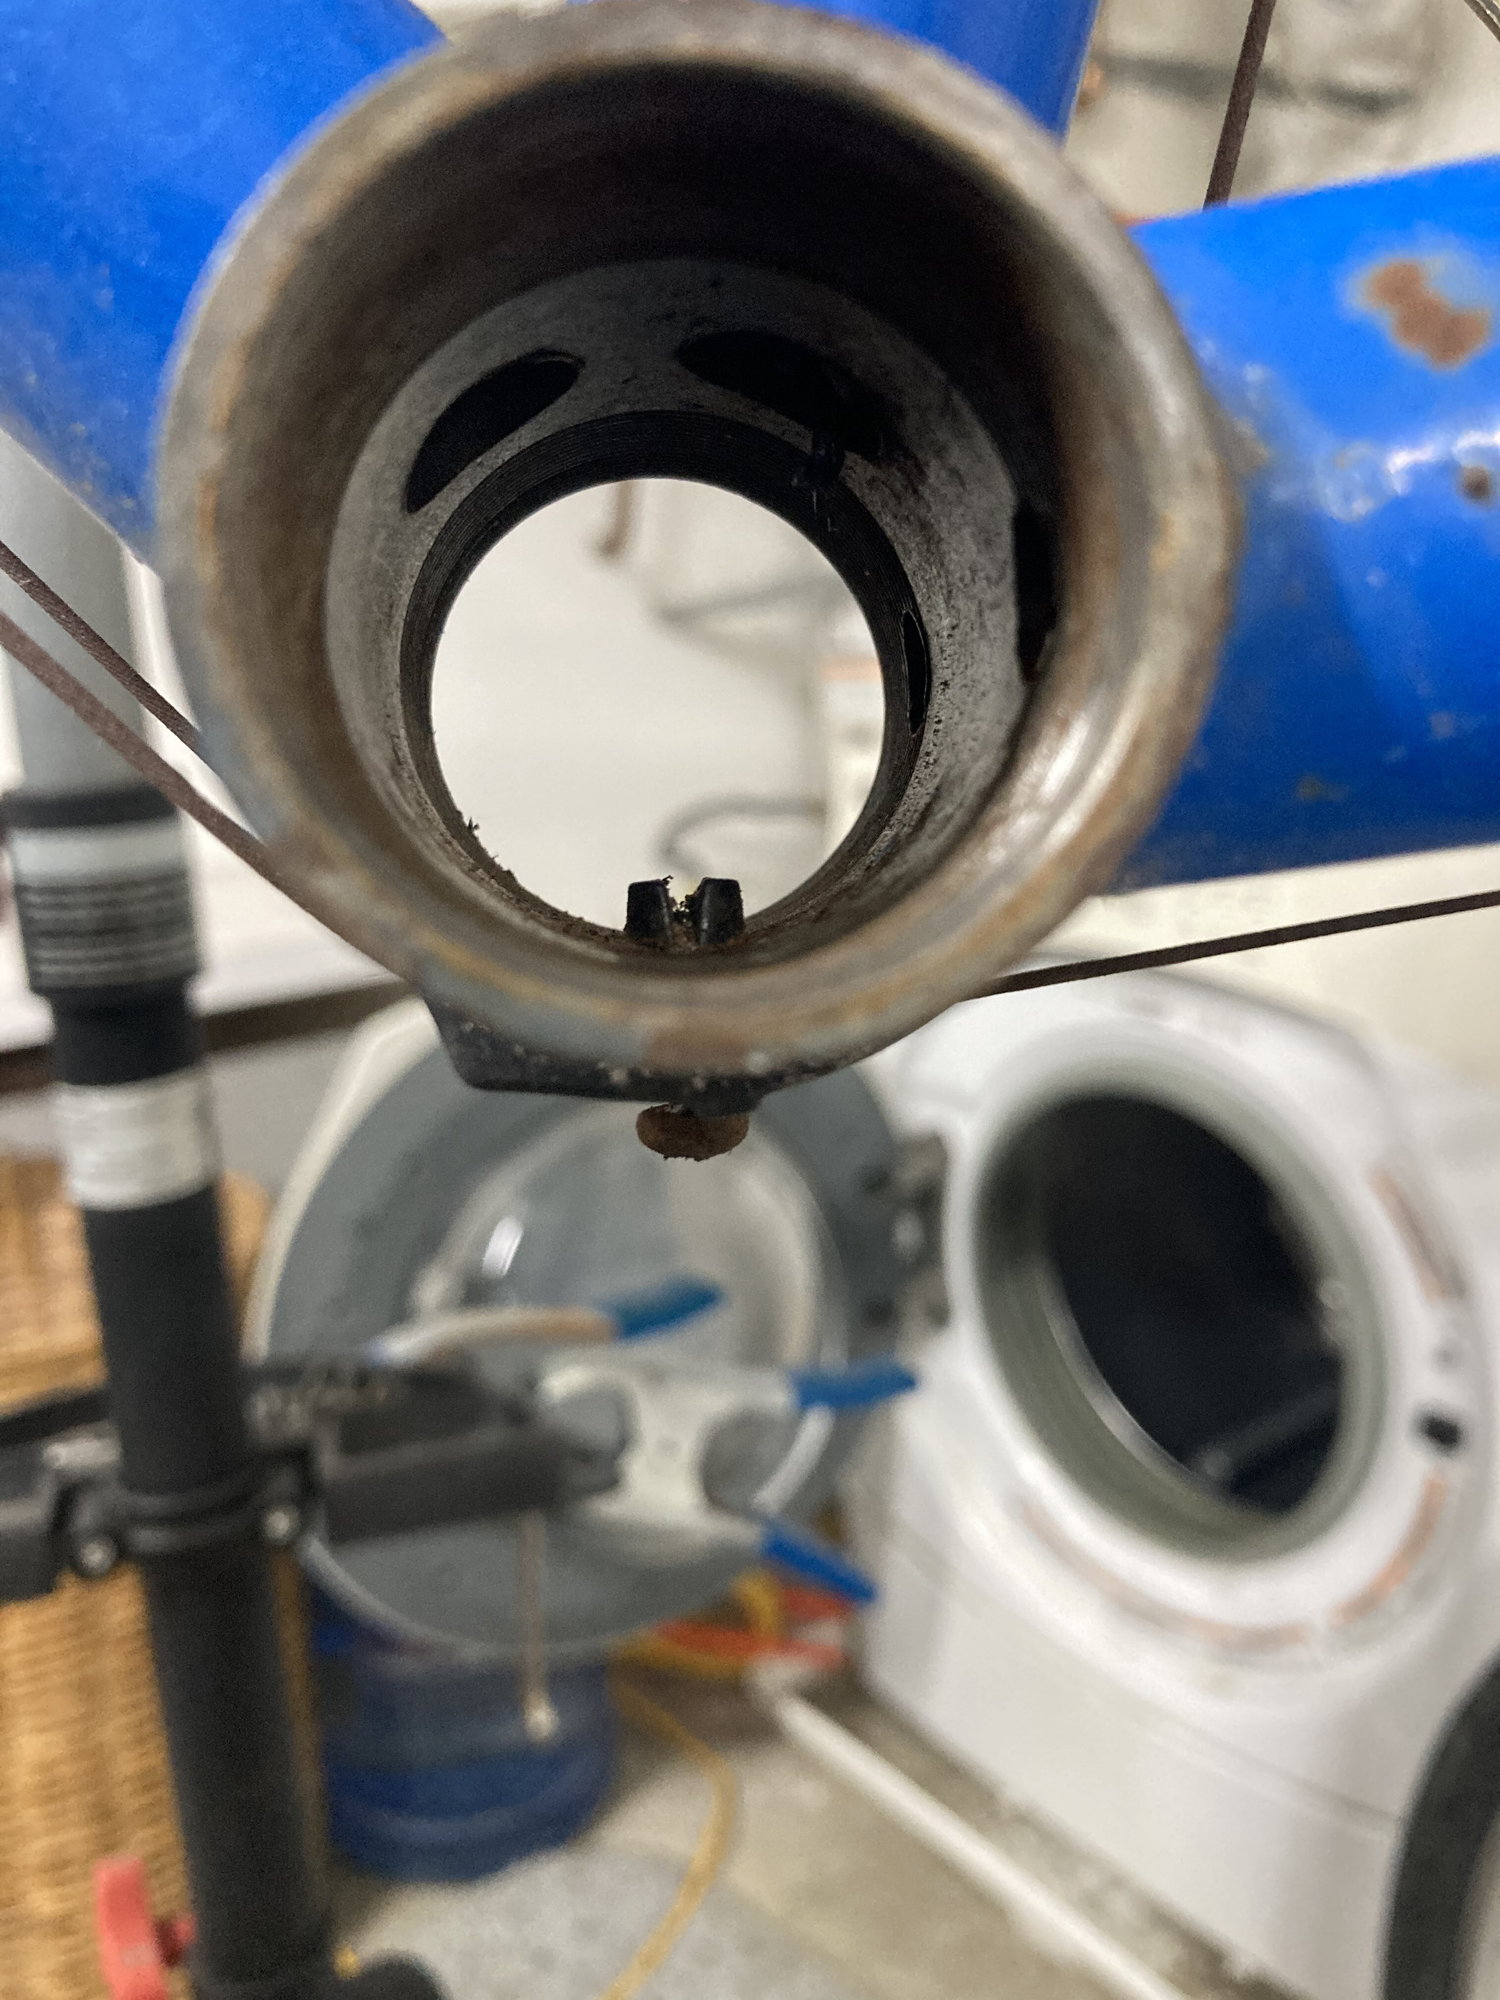
Got started filing it down, but it's gonna take a while. What kind of BB is supposed to go in there?
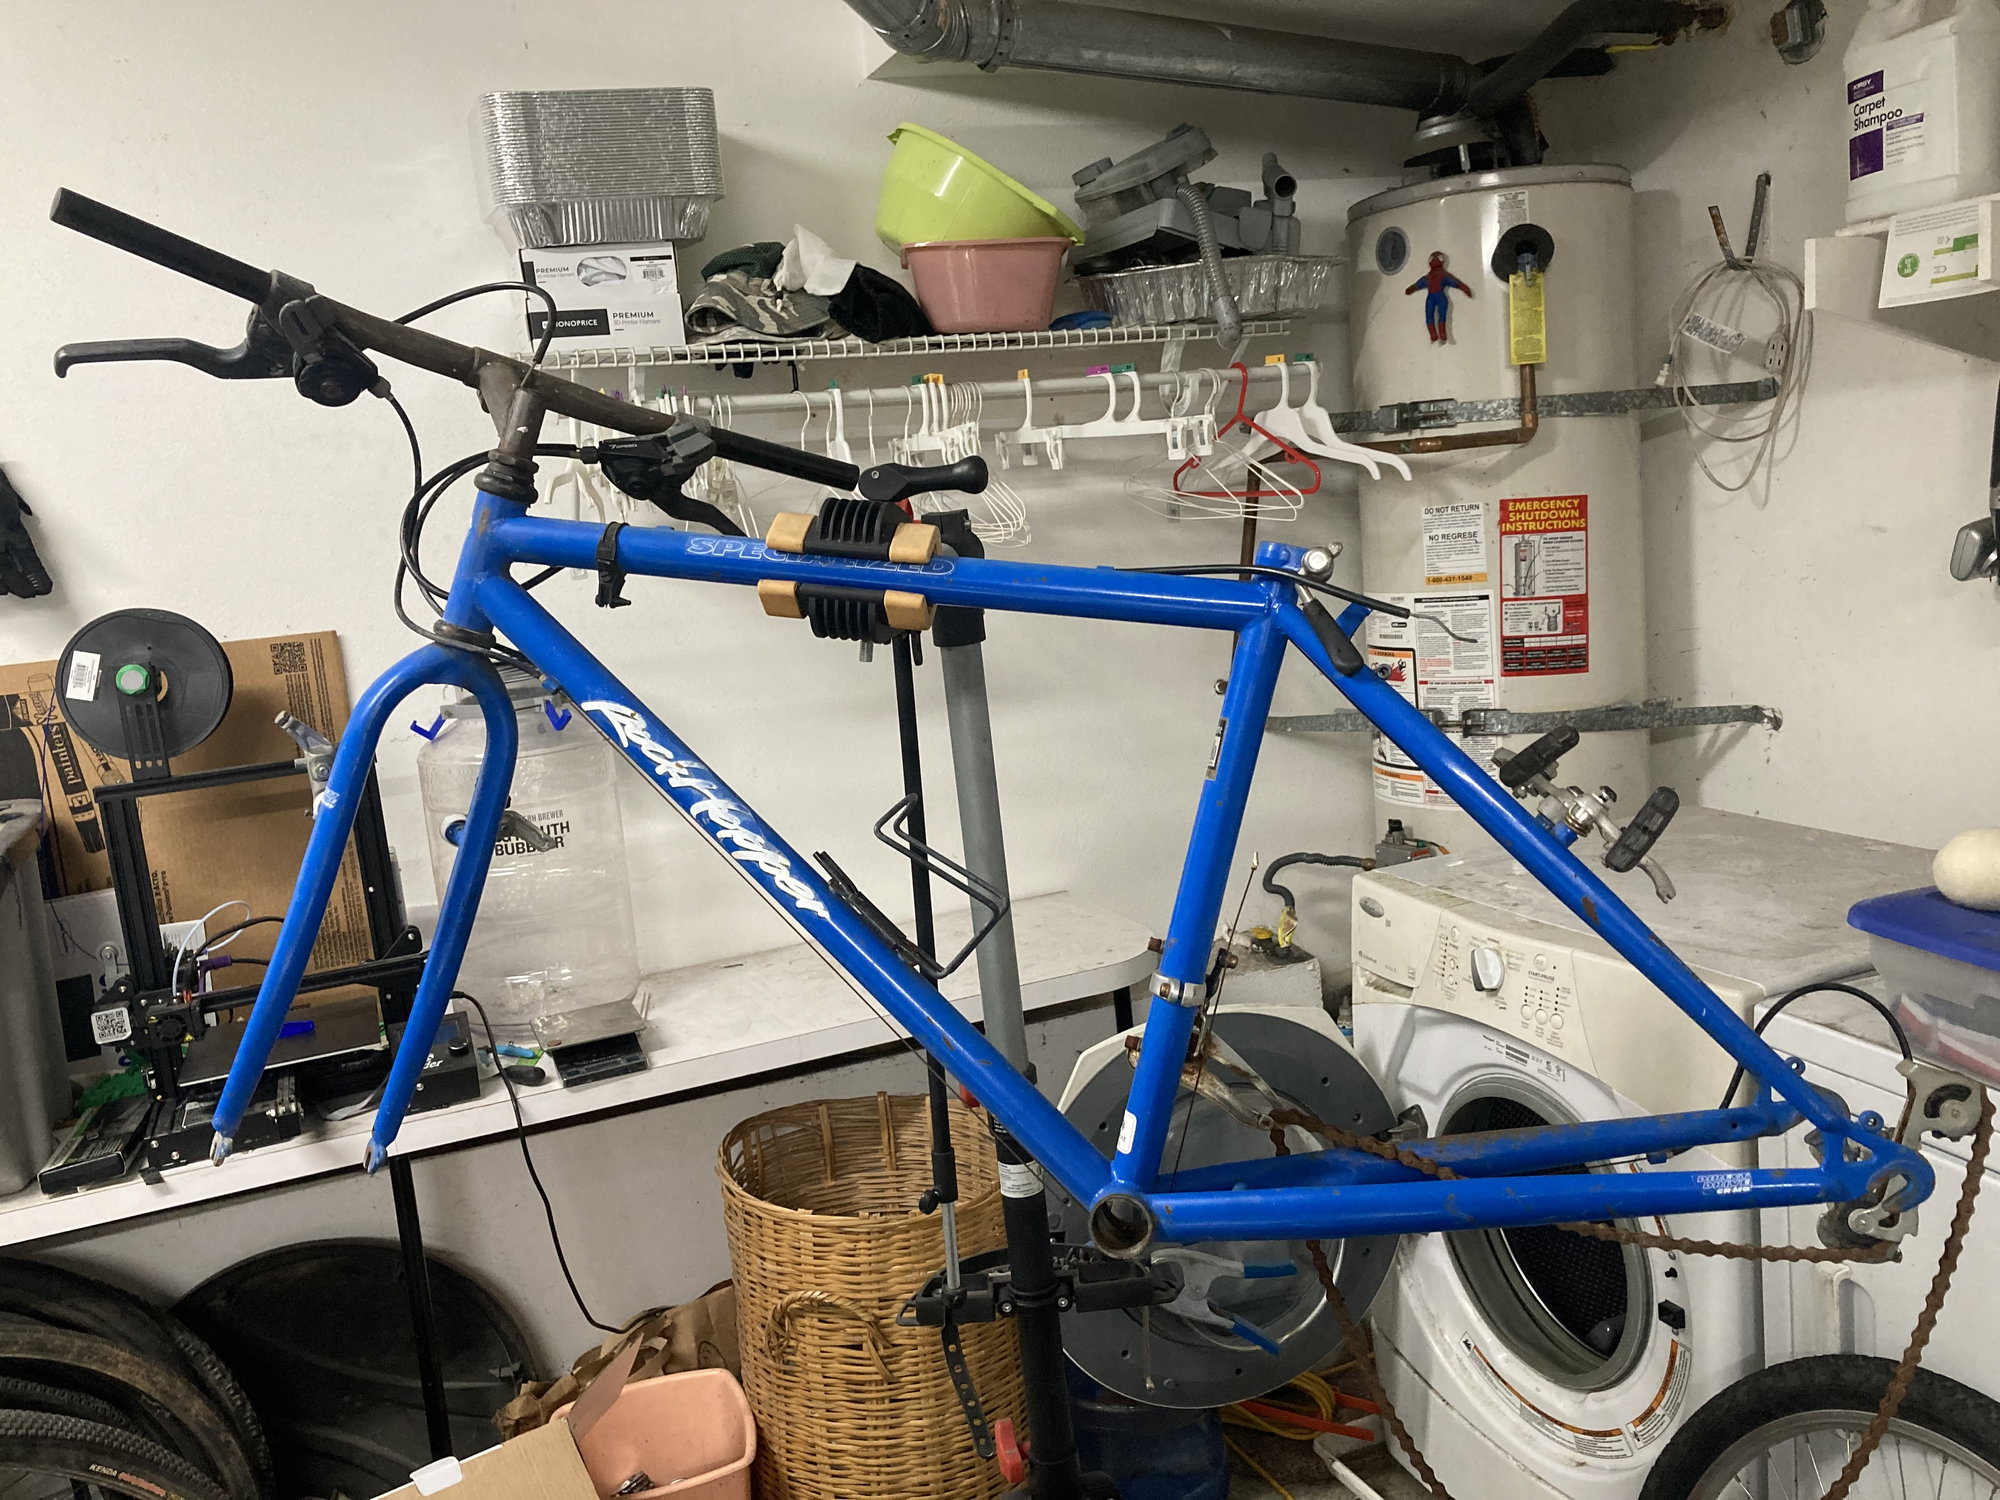
Here's a picture of the full bike:
Found (most of) a Rockhopper in the trash, workin on cleaning it up, getting it rolling again. It had no crankset or bottom bracket in the shell. I have a couple cartridge BB laying around (octalink, UN-55), and the standard threading seems ok, but there's a HUGE obstacle where the cable guide screw comes into the shell -- as well as extra metal there to hold the screw. Pic:
Got started filing it down, but it's gonna take a while. What kind of BB is supposed to go in there?
Here's a picture of the full bike:
 02-15-21, 11:45 PM
#2
Junior Member
Traditional 3 piece BB slides right by-most likely what came out. One can remove the offending screw/bolt and cable guide, install cartridge BB and re install said cable guide and securing fastener. Power tools and threads can be a bad mix on this task.
Likes For Ross200:

 02-16-21, 04:24 AM
#4

Senior Member

Join Date: Feb 2004
Location: St Peters, Missouri
Posts: 30,225
Bikes: Catrike 559 I own some others but they don't get ridden very much.
Mentioned: 16 Post(s)
Tagged: 0 Thread(s)
Quoted: 1572 Post(s)
Liked 643 Times
in
364 Posts
A steel frame Rpckhopper. What a great find! Probably 25 years old.
I'm thinking that bike pre-dates cartridge bottom brackets so the separate spindle would miss that fastener. It's probably part of the under the bottom bracket cable guide. If It was my bike I'd see if I could pinch those two little ears together and push the BB guide out. Then I'd cut off the ears and hold the cable guide in place with a dab of 3M Badge and Trim cement (AutoZone has it). Now you can use a semi-modern bottom bracket. Oh - before you sbuy a bottom bracket, be sure to measure the shell width. It's probably 73mm but I wouldn't be surprised if it turned out to be only 68mm. I'd check the dropout spacing too.
I'm thinking that bike pre-dates cartridge bottom brackets so the separate spindle would miss that fastener. It's probably part of the under the bottom bracket cable guide. If It was my bike I'd see if I could pinch those two little ears together and push the BB guide out. Then I'd cut off the ears and hold the cable guide in place with a dab of 3M Badge and Trim cement (AutoZone has it). Now you can use a semi-modern bottom bracket. Oh - before you sbuy a bottom bracket, be sure to measure the shell width. It's probably 73mm but I wouldn't be surprised if it turned out to be only 68mm. I'd check the dropout spacing too.
__________________
My greatest fear is all of my kids standing around my coffin and talking about "how sensible" dad was.
My greatest fear is all of my kids standing around my coffin and talking about "how sensible" dad was.
02-16-21, 04:52 AM
#5
Senior Member
Join Date: Jul 2014
Posts: 1,490
Mentioned: 2 Post(s)
Tagged: 0 Thread(s)
Quoted: 1083 Post(s)
Liked 687 Times
in
441 Posts
I have a '93 and a '95 Rockhopper with the same BB, and I have UN55s in both of them. It's been a while but I don't remember either of them being a problem.
02-16-21, 09:52 AM
#6
Keepin it Wheel
Thread Starter
Join Date: Aug 2011
Location: San Diego
Posts: 10,245
Bikes: Surly CrossCheck, Krampus
Mentioned: 0 Post(s)
Tagged: 0 Thread(s)
Quoted: 26 Post(s)
Liked 3,433 Times
in
2,540 Posts
I'm thinking that bike pre-dates cartridge bottom brackets so the separate spindle would miss that fastener. It's probably part of the under the bottom bracket cable guide. If It was my bike I'd see if I could pinch those two little ears together and push the BB guide out. Then I'd cut off the ears and hold the cable guide in place with a dab of 3M Badge and Trim cement (AutoZone has it). Now you can use a semi-modern bottom bracket.
Pinching the ears together, that's an idea, maybe flexing them back and forth enough will just break them off, and then as you say, just cement the cable guide in place, it's not that critical of a part.
Or should I look for an old 3-piece caged-bearing BB with a narrower spindle?
02-16-21, 10:04 AM
#7
Senior Member
Join Date: Jan 2009
Location: San Diego, CA
Posts: 3,674
Mentioned: 10 Post(s)
Tagged: 0 Thread(s)
Quoted: 838 Post(s)
Liked 1,061 Times
in
745 Posts
Are you sure that the protrusion is steel? It kinda looks like a removable threaded plastic push pin. You'll find out when pinching the ears together.
02-16-21, 10:04 AM
#8
Senior Member
Join Date: Mar 2019
Posts: 1,606
Mentioned: 8 Post(s)
Tagged: 0 Thread(s)
Quoted: 581 Post(s)
Liked 921 Times
in
518 Posts
It is likely the plastic piece is a 'clip' part of the cable guide. It is possible it does not require a screw at all. If the plastic sticks through enough to interfere with the BB, you can break off or drill through the cable guide to remove the clip and just use a screw. NB, throw away that rusty MF'n screw someone found in grandpa's toolbox. The hole in the BB shell of the frame is very probably M5 threaded and a water bottle bolt will thread in and hold the cable guide tightly.
If the screw is sticking out so much it interferes with a BB, cut it, dear Liza, CUT IT. It's not rocket surgery.
If the screw is sticking out so much it interferes with a BB, cut it, dear Liza, CUT IT. It's not rocket surgery.
Likes For ClydeClydeson:
02-16-21, 10:14 AM
#9
Keepin it Wheel
Thread Starter
Join Date: Aug 2011
Location: San Diego
Posts: 10,245
Bikes: Surly CrossCheck, Krampus
Mentioned: 0 Post(s)
Tagged: 0 Thread(s)
Quoted: 26 Post(s)
Liked 3,433 Times
in
2,540 Posts
Hmmm, it seems to be filing down like metal, but if it turns out to be just a clip part of the guide, that would be great!
02-16-21, 10:47 AM
#10
Mad bike riding scientist

Join Date: Nov 2004
Location: Denver, CO
Posts: 27,363
Bikes: Some silver ones, a red one, a black and orange one, and a few titanium ones
Mentioned: 152 Post(s)
Tagged: 1 Thread(s)
Quoted: 6219 Post(s)
Liked 4,218 Times
in
2,365 Posts
You could also clip off the ears of the cable guide and use a slightly larger sheet metal screw. The screw would screw into the metal of the bottom bracket shell. This is a common way to hold the cable guide on the shell. Again, you will probably have to file the screw down to fit.
Lubricate the screw, by the way.
__________________
Stuart Black
Plan Epsilon Around Lake Michigan in the era of Covid
Old School�When It Wasn�t Ancient bikepacking
Gold Fever Three days of dirt in Colorado
Pokin' around the Poconos A cold ride around Lake Erie
Dinosaurs in Colorado A mountain bike guide to the Purgatory Canyon dinosaur trackway
Solo Without Pie. The search for pie in the Midwest.
Picking the Scablands. Washington and Oregon, 2005. Pie and spiders on the Columbia River!
02-16-21, 10:58 AM
#11
Senior Member
Join Date: Jul 2013
Location: Nor-Cal
Posts: 3,767
Bikes: lots
Mentioned: 7 Post(s)
Tagged: 0 Thread(s)
Quoted: 1958 Post(s)
Liked 2,932 Times
in
1,489 Posts
Jesus, just remove the cable guide, install the bb and then put the cable guide back on. Maybe you shouldn't be trying to tackle something this complicated. 
02-16-21, 11:02 AM
#12
Keepin it Wheel
Thread Starter
Join Date: Aug 2011
Location: San Diego
Posts: 10,245
Bikes: Surly CrossCheck, Krampus
Mentioned: 0 Post(s)
Tagged: 0 Thread(s)
Quoted: 26 Post(s)
Liked 3,433 Times
in
2,540 Posts
'just remove the cable guide' -- if I thought/realized those were just plastic clips sticking in, I would have done that already. It seemed like a metal collar to receive the screw.
02-16-21, 11:04 AM
#13
Senior Member
Join Date: Jul 2013
Location: Nor-Cal
Posts: 3,767
Bikes: lots
Mentioned: 7 Post(s)
Tagged: 0 Thread(s)
Quoted: 1958 Post(s)
Liked 2,932 Times
in
1,489 Posts
It should be pretty dang obvious that they're plastic and part of the guide, and the the split is there so it can be installed/removed.
02-16-21, 02:59 PM
#14
Mad bike riding scientist
Join Date: Nov 2004
Location: Denver, CO
Posts: 27,363
Bikes: Some silver ones, a red one, a black and orange one, and a few titanium ones
Mentioned: 152 Post(s)
Tagged: 1 Thread(s)
Quoted: 6219 Post(s)
Liked 4,218 Times
in
2,365 Posts

Once off, I’d proceed like I suggested above. Most newer designs don’t have the “ears” at all and just fit on the outside of the shell and are held in place with a screw.
__________________
Stuart Black
Plan Epsilon Around Lake Michigan in the era of Covid
Old School�When It Wasn�t Ancient bikepacking
Gold Fever Three days of dirt in Colorado
Pokin' around the Poconos A cold ride around Lake Erie
Dinosaurs in Colorado A mountain bike guide to the Purgatory Canyon dinosaur trackway
Solo Without Pie. The search for pie in the Midwest.
Picking the Scablands. Washington and Oregon, 2005. Pie and spiders on the Columbia River!
Stuart Black
Plan Epsilon Around Lake Michigan in the era of Covid
Old School�When It Wasn�t Ancient bikepacking
Gold Fever Three days of dirt in Colorado
Pokin' around the Poconos A cold ride around Lake Erie
Dinosaurs in Colorado A mountain bike guide to the Purgatory Canyon dinosaur trackway
Solo Without Pie. The search for pie in the Midwest.
Picking the Scablands. Washington and Oregon, 2005. Pie and spiders on the Columbia River!
Last edited by cyccommute; 02-16-21 at 03:54 PM.
Likes For cyccommute:
02-16-21, 04:00 PM
#15
Keepin it Wheel
Thread Starter
Join Date: Aug 2011
Location: San Diego
Posts: 10,245
Bikes: Surly CrossCheck, Krampus
Mentioned: 0 Post(s)
Tagged: 0 Thread(s)
Quoted: 26 Post(s)
Liked 3,433 Times
in
2,540 Posts
awesome, thx. I'm sure that will get me where I need to go
12-17-22, 02:15 PM
#16
Keepin it Wheel
Thread Starter
Join Date: Aug 2011
Location: San Diego
Posts: 10,245
Bikes: Surly CrossCheck, Krampus
Mentioned: 0 Post(s)
Tagged: 0 Thread(s)
Quoted: 26 Post(s)
Liked 3,433 Times
in
2,540 Posts
Did some updates on the stumpjumper today, thought I'd post a pic:

Tires (and whole front wheel actually) taken from a Huffy rejected from my work's Christmas bikes-for-kids drive, for having a fork welded together wrong so the dropouts are like 30-40deg off from straight forward.
I put that wheel on the front, not just the tire, because the previous wheel had a trouble with a burr or something on the valve hole ruining tubes.
I could probably have put the back wheel on the back to make a better match (7sp still), but it's a disc rim with decorative grooves, I wanted at least one wheel to have a proper brake track.
New pedals: Stolen/Thermalite in white
12-17-22, 02:22 PM
#17
Keepin it Wheel
Thread Starter
Join Date: Aug 2011
Location: San Diego
Posts: 10,245
Bikes: Surly CrossCheck, Krampus
Mentioned: 0 Post(s)
Tagged: 0 Thread(s)
Quoted: 26 Post(s)
Liked 3,433 Times
in
2,540 Posts
Question:
That vintage 7sp shifter is really mushy and difficult to operate.
There is a 7sp shifter on the donor bike I could switch to.
Are all 7sp shifters going to be the same cable pull? Should it be a simple drop-in?
That vintage 7sp shifter is really mushy and difficult to operate.
There is a 7sp shifter on the donor bike I could switch to.
Are all 7sp shifters going to be the same cable pull? Should it be a simple drop-in?
12-18-22, 08:15 AM
#18
Senior Member
Join Date: Oct 2022
Posts: 1,378
Bikes: a couple
Mentioned: 15 Post(s)
Tagged: 0 Thread(s)
Quoted: 563 Post(s)
Liked 863 Times
in
456 Posts
Did some updates on the stumpjumper today, thought I'd post a pic:
Tires (and whole front wheel actually) taken from a Huffy rejected from my work's Christmas bikes-for-kids drive, for having a fork welded together wrong so the dropouts are like 30-40deg off from straight forward.
I put that wheel on the front, not just the tire, because the previous wheel had a trouble with a burr or something on the valve hole ruining tubes.
I could probably have put the back wheel on the back to make a better match (7sp still), but it's a disc rim with decorative grooves, I wanted at least one wheel to have a proper brake track.
New pedals: Stolen/Thermalite in white
The grooves in the brake track are wear indicators on that front wheel. It was designed to be used on a disk or rim brake bicycle.
The obstacle in the BB is supposed to be cleared by the bb axle, if you use a cartridge bb you have to modify it by removing the screw and part of the plastic.
My 1990 rockhopper is converted to cartridge bb.
Last edited by Schweinhund; 12-18-22 at 08:27 AM. Reason: Someone said stumpy, it's not.
12-18-22, 08:25 AM
#19
Senior Member
Join Date: Oct 2022
Posts: 1,378
Bikes: a couple
Mentioned: 15 Post(s)
Tagged: 0 Thread(s)
Quoted: 563 Post(s)
Liked 863 Times
in
456 Posts
That's a 1995 Rockhopper, not a stumpy Who said it was a stumpy???
12-18-22, 09:34 AM
#20
Senior Member

Join Date: Aug 2015
Posts: 3,301
Mentioned: 39 Post(s)
Tagged: 0 Thread(s)
Quoted: 1143 Post(s)
Liked 1,740 Times
in
961 Posts
Have tied flushing the shifters with solvent? That should clean up the actions.
Looks like Shimano, Shimano 7 speed sis will be compatible with any Shimano 7 sis.
Looks like Shimano, Shimano 7 speed sis will be compatible with any Shimano 7 sis.
 12-18-22, 09:52 AM
#21
Senior Member
Join Date: Oct 2022
Posts: 1,378
Bikes: a couple
Mentioned: 15 Post(s)
Tagged: 0 Thread(s)
Quoted: 563 Post(s)
Liked 863 Times
in
456 Posts
It's a combo of a 1990 'hopper f/f and other parts pulled from a 1991 stumpy (strong arm cranks, wheels)
12-18-22, 10:45 AM
#22
Keepin it Wheel
Thread Starter
Join Date: Aug 2011
Location: San Diego
Posts: 10,245
Bikes: Surly CrossCheck, Krampus
Mentioned: 0 Post(s)
Tagged: 0 Thread(s)
Quoted: 26 Post(s)
Liked 3,433 Times
in
2,540 Posts
The plastic cable guide got cleared up before, I should have realized from the pic where it is easier to see than when I was just looking with my old eyesballs.
The shifter is not original, most of the parts swiped from some other bike. I haven't tried solvent, not sure if I'll try that or just swap the shifter.
Good to know about that brake track is ok for rim braking! I might just swap that other rear wheel on so they match. It already has a 7sp on it
12-18-22, 11:56 AM
#23
Senior Member

Join Date: Feb 2022
Location: GMT-5
Posts: 939
Mentioned: 1 Post(s)
Tagged: 0 Thread(s)
Quoted: 540 Post(s)
Liked 416 Times
in
274 Posts
Ideal would be to remove and completely disassenble the shifter and rebuild it.
