


Seized rotor bolts
 12-17-23, 04:14 PM
#1
Junior Member
Thread Starter
Join Date: Aug 2013
Posts: 113
Mentioned: 1 Post(s)
Tagged: 0 Thread(s)
Quoted: 53 Post(s)
Likes: 0
Liked 5 Times
in
5 Posts
Seized rotor bolts
Ugh . . Removing a 6-bolt rotor. Bolts were stuck. Sprayed with PB Blaster, and 4 of them came out. The other two rounded.
I realize now I should have slotted them with the Dremel, but I drilled them out to remove the rotor. Now the studs are still in the hub. I can’t get them with the vice-grips — not enough of the bolt is above the surface. And I don’t want to use the dremel now for the same reason.
What’s next? I sprayed with more PB Blaster in the meantime. I’m thinking a reverse drill bit and extractor is the next thing to try. Any other suggestions?
 12-17-23, 04:50 PM
#2
Senior Member
Join Date: Jan 2009
Location: San Diego, CA
Posts: 3,677
Mentioned: 10 Post(s)
Tagged: 0 Thread(s)
Quoted: 839 Post(s)
Liked 1,064 Times
in
747 Posts
If you have the right sized reverse bit than try that first and if no luck try the extractor bits. A regular bit with extractors will also work fine. Let the PB Blaster do it's thing for at least a couple days if the drill/extractors don't work at first. If you happen to have a mini-butane torch try heating up just the bolt a little or a soldering iron on the bolt can help too.
12-17-23, 05:02 PM
#3
Junior Member
Thread Starter
Join Date: Aug 2013
Posts: 113
Mentioned: 1 Post(s)
Tagged: 0 Thread(s)
Quoted: 53 Post(s)
Likes: 0
Liked 5 Times
in
5 Posts
If you have the right sized reverse bit than try that first and if no luck try the extractor bits. A regular bit with extractors will also work fine. Let the PB Blaster do it's thing for at least a couple days if the drill/extractors don't work at first. If you happen to have a mini-butane torch try heating up just the bolt a little or a soldering iron on the bolt can help too.
And somewhere I have a mini-torch from my golf club-building days. Thanks for that suggestion.
Likes For sfh:
12-17-23, 10:21 PM
#4
Senior Member

Join Date: Feb 2022
Location: GMT-5
Posts: 940
Mentioned: 1 Post(s)
Tagged: 0 Thread(s)
Quoted: 540 Post(s)
Liked 416 Times
in
274 Posts
Please do keep us posted on this, because as far as I am concerned, there is no hope for this short of drilling them through and retapping to the next size up.
The OP messed up when they knew they should have slotted the screws, but didn't do so. Not sure why this happened. I do this successfully all the time with water bottle cage bolts. These are the bolts that are the most exposed to water from above.
Pen oil almost never works on anything that seized up. Heat is your friend here, and a burned piece that can be unfastened is much better than unscathed broken bolts.
12-18-23, 12:17 AM
#5

Senior Member

Join Date: May 2010
Location: Bastrop Texas
Posts: 4,486
Bikes: Univega, Peu P6, Peu PR-10, Ted Williams, Peu UO-8, Peu UO-18 Mixte, Peu Dolomites
Mentioned: 13 Post(s)
Tagged: 0 Thread(s)
Quoted: 969 Post(s)
Liked 1,632 Times
in
1,048 Posts
After letting the PB Blaster sit a few days if it still won't budge then try freezing before heat. I have had much better luck freezing then with heat. Try some "CRC Freez Off". If you can't get a can easy then use a can of Dust Off used for air blasting computer key boards. They usually have Triflorethane in them. Just hold the can upside down and spray your parts.
__________________
 No matter where you're at... There you are... Δf:=f(1/2)-f(-1/2)
No matter where you're at... There you are... Δf:=f(1/2)-f(-1/2)
Likes For zandoval:
12-18-23, 02:16 AM
#6
Mostly harmless ™

Join Date: Nov 2010
Location: Novi Sad
Posts: 4,430
Bikes: Heavy, with friction shifters
Mentioned: 22 Post(s)
Tagged: 0 Thread(s)
Quoted: 1107 Post(s)
Liked 216 Times
in
130 Posts
After letting the PB Blaster sit a few days if it still won't budge then try freezing before heat. I have had much better luck freezing then with heat. Try some "CRC Freez Off". If you can't get a can easy then use a can of Dust Off used for air blasting computer key boards. They usually have Triflorethane in them. Just hold the can upside down and spray your parts.
However, right before trying to unscrew, it is important to consider the materials.
I presume that the hub is made of aluminium, and the bolts are made of steel.
So, if you heat it up, aluminium will expand faster and more than steel.
If you cool it, you get the opposite effect - so it might make things worse, more difficult.
Relja
Likes For Bike Gremlin:
12-18-23, 04:05 AM
#7
Senior Member
Join Date: Apr 2019
Location: UK
Posts: 1,404
Mentioned: 3 Post(s)
Tagged: 0 Thread(s)
Quoted: 682 Post(s)
Liked 453 Times
in
338 Posts
If you use a reverse bit, try drilling a tiny hole in the centre of the bolt to give it some purchase. On a steel bolt, this is easier said than done.
12-18-23, 07:19 AM
#8
Generally bewildered

Join Date: Aug 2015
Location: Eastern PA, USA
Posts: 3,037
Bikes: 2014 Trek Domane 6.9, 1999 LeMond Zurich, 1978 Schwinn Superior
Mentioned: 20 Post(s)
Tagged: 0 Thread(s)
Quoted: 1152 Post(s)
Liked 341 Times
in
251 Posts
In machine shop work, the first step after Kroil or PB Blaster is usually heat, using a rosebud tip an an oxyacetylene torch. Here, you could use a home depot propane tank and torch tip. But one needs to be judicious and not overheat. If you're not comfortable with a torch, amd possibly ruining the temper of the hub, don't do this. Or find someone who will do this for you (machine shop).
Using a left hand drill could work. But you need to start the hole in the center. You COULD grind the remaining stud flat if there's any protuberance, and then use a center punch, and then a small starter drill, and then put the LH drill in and try it. When center-punching support the arm on the hub with the stud in it. That is, don't just whack the stud with a center punch. Support the hub arm. So put a piece of steel stock in a strong vice, rest the arm with the stud on that, and whack it. The goal is for the shock to be taken by only the stud, and the piece of steel stock, so as to not induce a lot of shock stress on the hub arm.
Frankly, though, this is not a task I'd relish doing with a hand-held drill. I'd much prefer to fixture (hold) the hub rigidly using a mill. First use the mill and an end mill bit to flatten the surface. Then a small center drill. Then the LH bit.
I think you may find that "drilling it out the next size larger " is not easy. The bolt is steel and will shoot your dirll bit into the aluminum hub without warning. My same though applies: if you can fixture the hub on the table of a mill, you will have some control over the hole location. One thought: if your bolts are titanium, they will work harden and you will not get them out with normal drills. You'll need carbide bits.
I never had luck with extractors. All of the problems with LH bits above you have with extractors and they've rarely worked for me.
The last resort I can think of for salvaging the hub would be wire EDM (electrical discharge machining). It will certainly work, but it may be expensive. Find a machine shop. Might be cheaper to buy a new hub.
If you do salvage the hub, the lesson here is to use lots of anti-sieze on the new bolts!
These are through-holes, correct? Any chance that you can access the bolt from the back with a right-hand drill?
Some ideas anyway.
Last edited by WizardOfBoz; 12-18-23 at 07:23 AM.
Likes For WizardOfBoz:
12-18-23, 02:38 PM
#10
Generally bewildered
Join Date: Aug 2015
Location: Eastern PA, USA
Posts: 3,037
Bikes: 2014 Trek Domane 6.9, 1999 LeMond Zurich, 1978 Schwinn Superior
Mentioned: 20 Post(s)
Tagged: 0 Thread(s)
Quoted: 1152 Post(s)
Liked 341 Times
in
251 Posts
I think a mill (or milling machine) is called the same in the UK. It's like a drill press on steroids. Very rigid. Has a table underneath the chuck that holds a tool (an endmill, a facing mill etc). So that one can move the workpiece sideways and back and forth to cut slots. Here's a used one. It has a face mill mounted in the arbor (for smoothing surfaces as the move side to side or back and forth). But if you put a drill bit in it, and mount a workpiece securley underneath it, the milling machine will drill the hole pretty much exactly where you set it up. The rigidity of the machine minimizes the bit wandering.
Adcock-Shipley and Textron used to build mills in the UK. The most prevalant brand of mills from long ago were Bridgeport machines and hence milling machines are often called "Bridgeports". Here is a pic of a pretty heavy duty mill made by Cincinnati back in the day:
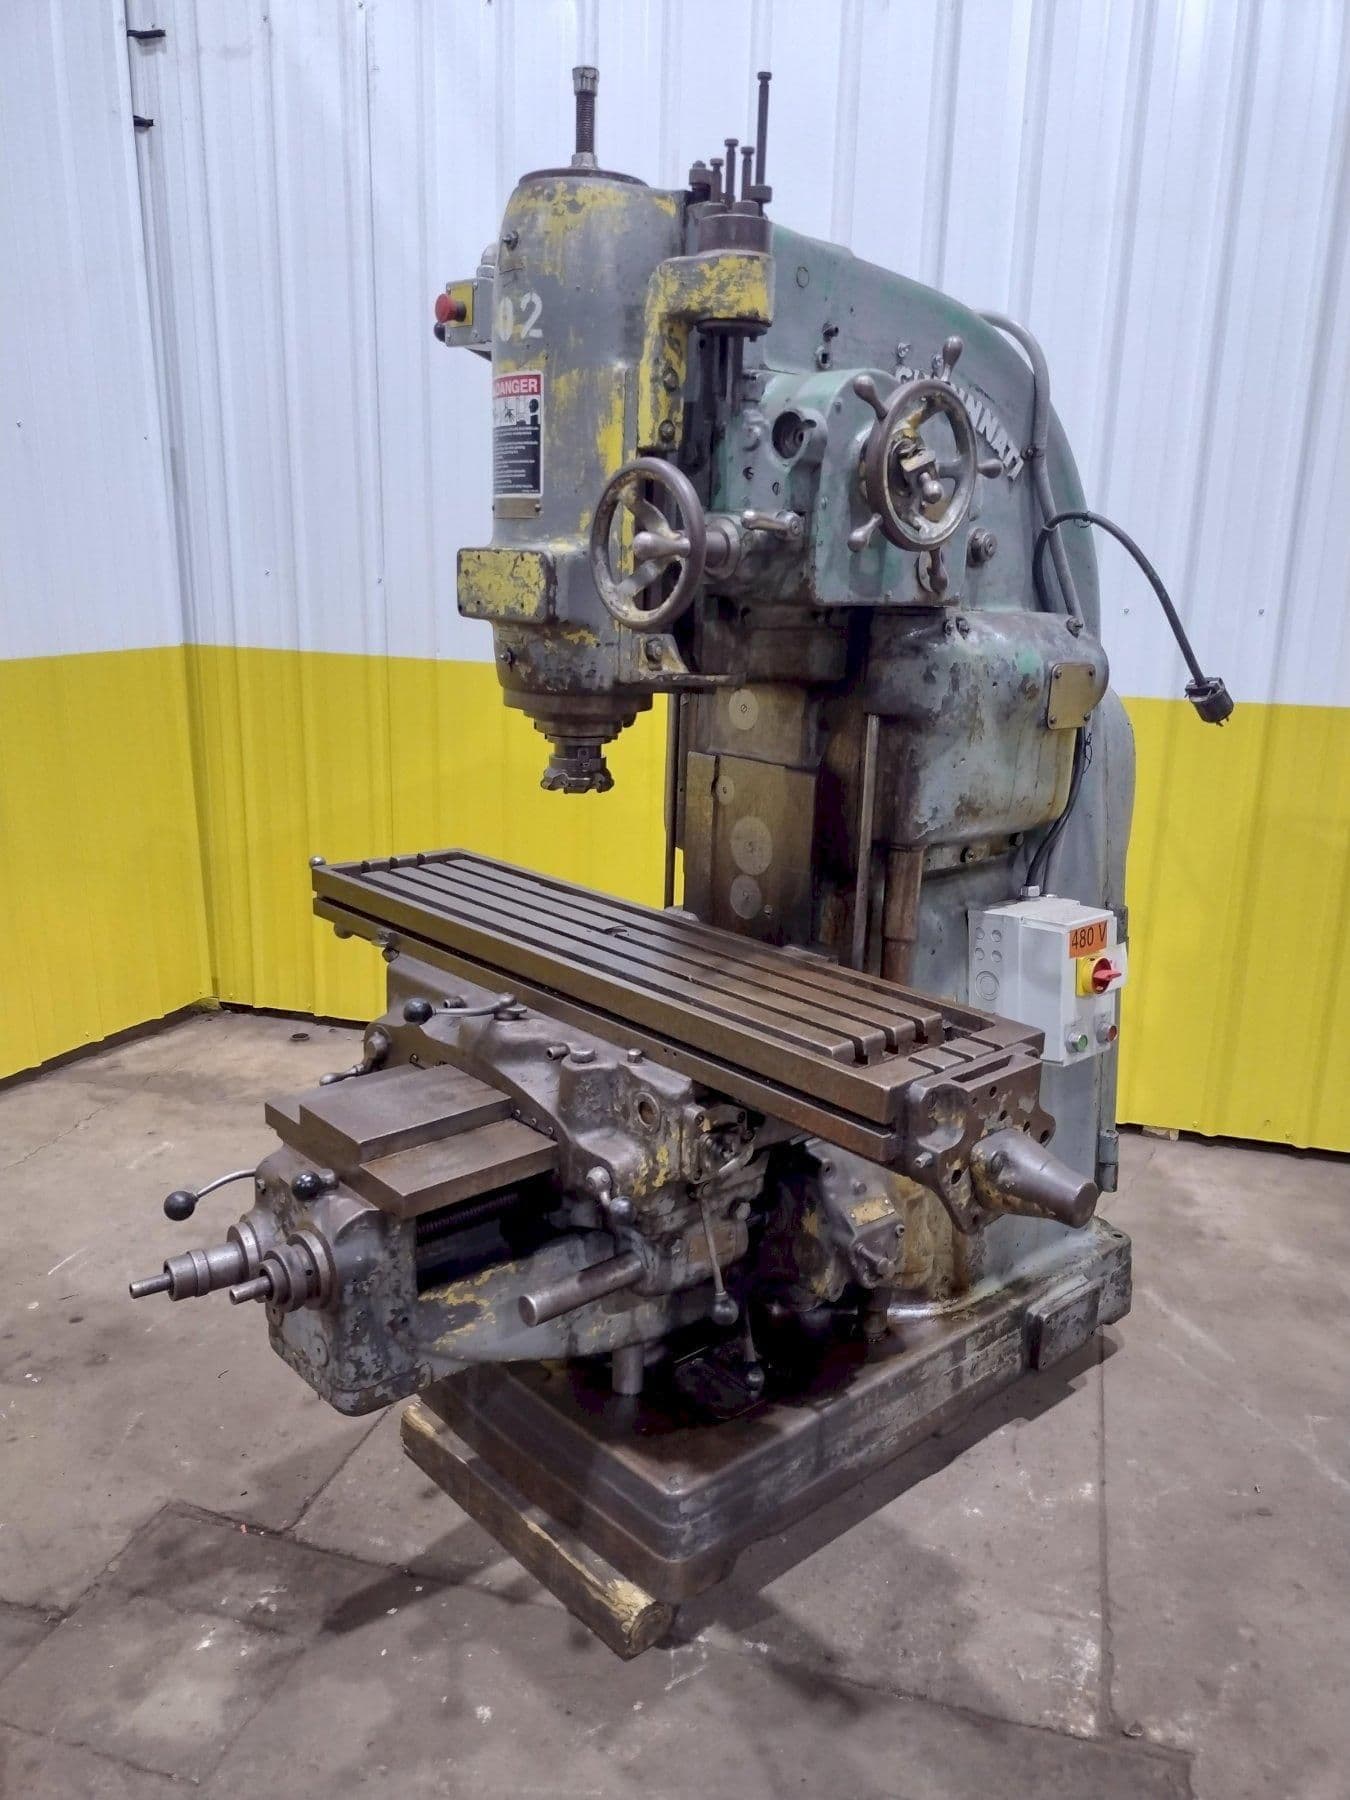
Adcock-Shipley and Textron used to build mills in the UK. The most prevalant brand of mills from long ago were Bridgeport machines and hence milling machines are often called "Bridgeports". Here is a pic of a pretty heavy duty mill made by Cincinnati back in the day:
Likes For WizardOfBoz:
12-18-23, 02:40 PM
#11
Senior Member
Join Date: Jan 2010
Location: se MIch.
Posts: 2,313
Bikes: 1938 claud butler,1983 Basso,teledyne titan,teocali super,nrs,1993 stumpjumper fsr,Paramountain,Paramount Buell(sold),4 banger,Zaskar LE,Colnago Master Ibex MTB,1987ish,.etc....
Mentioned: 7 Post(s)
Tagged: 0 Thread(s)
Quoted: 804 Post(s)
Liked 2,987 Times
in
1,500 Posts
carbide drill bits/
as mentioned will make a pilot hole mucho easier.heat gun if no mini torch works well also.
 12-18-23, 02:59 PM
#12
Senior Member
One option is just ignore it and run 4 bolts, as long as the two broken ones aren't beside each other it won't cause a problem. One of the old weight weeny tricks was just to run 3. I ran 5 for years after one of the mounting holes on my hub broke.
Drill them out and install helicoils. Lazy half assed option, drill them out and run a bolt all the way through the hole and put a bolt on it.
Drill them out and install helicoils. Lazy half assed option, drill them out and run a bolt all the way through the hole and put a bolt on it.
Last edited by Canker; 12-18-23 at 03:02 PM.
12-18-23, 04:05 PM
#13
Senior Member
Join Date: May 2010
Location: Bastrop Texas
Posts: 4,486
Bikes: Univega, Peu P6, Peu PR-10, Ted Williams, Peu UO-8, Peu UO-18 Mixte, Peu Dolomites
Mentioned: 13 Post(s)
Tagged: 0 Thread(s)
Quoted: 969 Post(s)
Liked 1,632 Times
in
1,048 Posts
WOW... I want one. Honey... Can I put it in the kitchen?
No, really, nice machine... Thanks for the pic...
Do note that there are Mathematicians, Engineers, and Machinists. Good Machinists are touched by God...

No, really, nice machine... Thanks for the pic...
Do note that there are Mathematicians, Engineers, and Machinists. Good Machinists are touched by God...
__________________
No matter where you're at... There you are... Δf:=f(1/2)-f(-1/2)
No matter where you're at... There you are... Δf:=f(1/2)-f(-1/2)Last edited by zandoval; 12-18-23 at 04:08 PM.
Likes For zandoval:
12-19-23, 07:27 AM
#14
Generally bewildered
Join Date: Aug 2015
Location: Eastern PA, USA
Posts: 3,037
Bikes: 2014 Trek Domane 6.9, 1999 LeMond Zurich, 1978 Schwinn Superior
Mentioned: 20 Post(s)
Tagged: 0 Thread(s)
Quoted: 1152 Post(s)
Liked 341 Times
in
251 Posts
I want one too, but putting in a three phase 575V 60 amp service is a big discouragement.
Likes For WizardOfBoz:
12-19-23, 08:00 AM
#15
Senior Member
Join Date: Feb 2022
Location: GMT-5
Posts: 940
Mentioned: 1 Post(s)
Tagged: 0 Thread(s)
Quoted: 540 Post(s)
Liked 416 Times
in
274 Posts
This thread really is a good example of "think hard before you dig yourself a deeper hole".
I remember my newbie days when I would try to hammer in a seized seatpost, just to get it to unseize with hopes you can twist it out after.
I remember my newbie days when I would try to hammer in a seized seatpost, just to get it to unseize with hopes you can twist it out after.
Likes For soyabean:
12-19-23, 09:23 AM
#16
I am potato.

Join Date: Jun 2015
Location: Pacific Northwest
Posts: 3,116
Bikes: Only precision built, custom high performance elitist machines of the highest caliber. 🍆
Mentioned: 29 Post(s)
Tagged: 0 Thread(s)
Quoted: 1790 Post(s)
Liked 1,631 Times
in
934 Posts
One solid option wouldv'e been to install the wrench and give it a good percussive rap with a hammer to break the friction at the first sign of trouble.
Now with the head removed, a hit on the bolt with a punch to dislodge the friction/corrosion/bond on the upper thread surface of the bolt hole is the next best option. Then perhaps twisting the bolt by the threads from the backside if accessible.
Torx bits are a superior design against round-out. Always remember to try with the next larger size first to ensure you get the proper size wrench. And use sharp tools in good condition.
I secure rotors with torx bolts, copious amounts of blue loctite and torqued at 5nm. Which, because the Loctite sort of acts like a lube, comes very close to 7nm required of a dry installed bolt. If you torqued to 7nm dry, it stands to reason that even if you didn't over torque you may still have galvanic corrosion in the interface that lube or thread locker would have never let moisture in to initiate.
Good luck.
Also the "drill out the threads and use a nut/bolt combo in that hole," as suggested above is a reasonable permanent fix. All machinery designed for regular service over long service life has replaceable hardware as a matter of design. Bicycle hubs should be designed this way. If not for the shop labor component dealing with fiddly small hardware and risk of rotor contamination by service techs grubby hands, they probably would be.
Last edited by base2; 12-19-23 at 09:32 AM.

Likes For Bald Paul:
12-20-23, 09:15 PM
#18
Senior Member
Join Date: Jan 2007
Location: Eastern VA
Posts: 1,727
Bikes: 2022 Fuel EX 8, 2021 Domane SL6, Black Beta (Nashbar frame), 2004 Trek 1000C for the trainer
Mentioned: 1 Post(s)
Tagged: 0 Thread(s)
Quoted: 272 Post(s)
Liked 448 Times
in
267 Posts
PB and Kriol are good but also try a 50:50 mix of acetone and transmission fluid.
Likes For biker128pedal:
12-21-23, 12:36 PM
#19
Generally bewildered
Join Date: Aug 2015
Location: Eastern PA, USA
Posts: 3,037
Bikes: 2014 Trek Domane 6.9, 1999 LeMond Zurich, 1978 Schwinn Superior
Mentioned: 20 Post(s)
Tagged: 0 Thread(s)
Quoted: 1152 Post(s)
Liked 341 Times
in
251 Posts
Yes! All you need is ten 42lb bags of flour, ....., a custom 600 quart bowl, and about 420 baking pans and a VERY large oven. Plus the rewired electric service...
BTW, your strategy is a good one. We had a leak under the kitchen sink at my house. Caused the shelving underneath to sag and decay. My wife wanted it fixed. I dithered. One day she said "You know, to get that done, you probably need a SawzAll or something"....
"Why... yes. Yes, dear, I believe I do".
I had a new 3/4 inch marine plywood shelf covered by flooring linoleum installed the next day.
And I have a Sawzall!
Likes For WizardOfBoz:
12-21-23, 02:25 PM
#20
Senior Member
Join Date: Apr 2016
Posts: 1,242
Mentioned: 3 Post(s)
Tagged: 0 Thread(s)
Quoted: 504 Post(s)
Liked 436 Times
in
335 Posts
Ugh . . Removing a 6-bolt rotor. Bolts were stuck. Sprayed with PB Blaster, and 4 of them came out. The other two rounded.
I realize now I should have slotted them with the Dremel, but I drilled them out to remove the rotor. Now the studs are still in the hub. I can’t get them with the vice-grips — not enough of the bolt is above the surface. And I don’t want to use the dremel now for the same reason.
What’s next? I sprayed with more PB Blaster in the meantime. I’m thinking a reverse drill bit and extractor is the next thing to try. Any other suggestions?
I realize now I should have slotted them with the Dremel, but I drilled them out to remove the rotor. Now the studs are still in the hub. I can’t get them with the vice-grips — not enough of the bolt is above the surface. And I don’t want to use the dremel now for the same reason.
What’s next? I sprayed with more PB Blaster in the meantime. I’m thinking a reverse drill bit and extractor is the next thing to try. Any other suggestions?
Otherwise if you have no luck with a 4mm left handed drill, drill it out with a 5mm drill, and then fit a thread insert (Helicoil or similar, they will specify the exact drill size to use).
12-24-23, 06:52 PM
#21
Junior Member
Thread Starter
Join Date: Aug 2013
Posts: 113
Mentioned: 1 Post(s)
Tagged: 0 Thread(s)
Quoted: 53 Post(s)
Likes: 0
Liked 5 Times
in
5 Posts
Thankfully, this isn’t urgent. The goal was to swap the rotors to another wheel set, and I have the rotor removed. But I want to have the old wheel in good condition so I can re-use or sell it.
One option is just ignore it and run 4 bolts, as long as the two broken ones aren't beside each other it won't cause a problem. One of the old weight weeny tricks was just to run 3. I ran 5 for years after one of the mounting holes on my hub broke.
Drill them out and install helicoils. Lazy half assed option, drill them out and run a bolt all the way through the hole and put a bolt on it.
Drill them out and install helicoils. Lazy half assed option, drill them out and run a bolt all the way through the hole and put a bolt on it.
12-24-23, 07:03 PM
#22
Junior Member
Thread Starter
Join Date: Aug 2013
Posts: 113
Mentioned: 1 Post(s)
Tagged: 0 Thread(s)
Quoted: 53 Post(s)
Likes: 0
Liked 5 Times
in
5 Posts
Traveling for the holidays, but I’ll post when I get back to make another run at these. I’m optimistic but cautiously so. Initially, I couldn’t move any of these bolts. I sprayed PB Blaster before I ruined all 6 of them. And 4 of them moved pretty easily after. So maybe a reverse drill can get them, but I appreciate the important of drilling in the center.
Yeah, no question I screwed up drilling them out before slotting. Really I screwed up not starting with PB Blaster because I bet all 6 would have come out. I’ll find out when I do the other wheel. I’m definitely a novice at this, and I’ve no shame in a lesson learned.
Yeah, no question I screwed up drilling them out before slotting. Really I screwed up not starting with PB Blaster because I bet all 6 would have come out. I’ll find out when I do the other wheel. I’m definitely a novice at this, and I’ve no shame in a lesson learned.
Please do keep us posted on this, because as far as I am concerned, there is no hope for this short of drilling them through and retapping to the next size up.
The OP messed up when they knew they should have slotted the screws, but didn't do so. Not sure why this happened. I do this successfully all the time with water bottle cage bolts. These are the bolts that are the most exposed to water from above.
Pen oil almost never works on anything that seized up. Heat is your friend here, and a burned piece that can be unfastened is much better than unscathed broken bolts.
The OP messed up when they knew they should have slotted the screws, but didn't do so. Not sure why this happened. I do this successfully all the time with water bottle cage bolts. These are the bolts that are the most exposed to water from above.
Pen oil almost never works on anything that seized up. Heat is your friend here, and a burned piece that can be unfastened is much better than unscathed broken bolts.
12-24-23, 07:14 PM
#23
Happy With My Bikes

Join Date: Sep 2020
Location: Oklahoma
Posts: 2,187
Bikes: Hi-Ten bike boomers, a Trek Domane and some projects
Mentioned: 2 Post(s)
Tagged: 0 Thread(s)
Quoted: 884 Post(s)
Liked 2,308 Times
in
1,118 Posts
__________________
"It is the unknown around the corner that turns my wheels." -- Heinz Stücke
"It is the unknown around the corner that turns my wheels." -- Heinz Stücke
12-24-23, 07:21 PM
#24
Junior Member
Thread Starter
Join Date: Aug 2013
Posts: 113
Mentioned: 1 Post(s)
Tagged: 0 Thread(s)
Quoted: 53 Post(s)
Likes: 0
Liked 5 Times
in
5 Posts
The smallest LH bit I have is 1/8”. Is the suggestion to use an even smaller bit (like 1/16”) for a pilot. I only have that in RH, but it should serve as a fine pilot hole.
12-24-23, 07:28 PM
#25
Happy With My Bikes
Join Date: Sep 2020
Location: Oklahoma
Posts: 2,187
Bikes: Hi-Ten bike boomers, a Trek Domane and some projects
Mentioned: 2 Post(s)
Tagged: 0 Thread(s)
Quoted: 884 Post(s)
Liked 2,308 Times
in
1,118 Posts
RH or LH doesn't matter for the pilot. And the pilot does not need to go all the way through. Although if you do have enough material on the sides that you can drill through without getting into the threads, that will help with the warming and cooling cycles should you need to do that or it will give you the option of using a screw extractor.
Some pictures would help us to see that we are indeed actually giving you god ideas.
Some pictures would help us to see that we are indeed actually giving you god ideas.
__________________
"It is the unknown around the corner that turns my wheels." -- Heinz Stücke
"It is the unknown around the corner that turns my wheels." -- Heinz Stücke