


Adding grease fitting, pros/cons?
 04-22-18, 10:15 AM
#1
Newbie
Thread Starter
Join Date: Apr 2018
Posts: 2
Mentioned: 0 Post(s)
Tagged: 0 Thread(s)
Quoted: 1 Post(s)
Likes: 0
Liked 0 Times
in
0 Posts
Adding grease fitting, pros/cons?
In my plant, we have Schwinn Heavy Duty bikes. Some are decades old, some new. The bikes rarely get full maintenance done. Usually only what someone volunteers to do on their own. I am considering adding a grease fitting to the bottom bracket to keep the pedal bearings greased rather than breaking it down and cleaning/repacking semi-annually or riding around til the bearings grind up. My research on the topic wasn't clear if this is a good or bad idea. Anyone knowledgeable have advice on the idea?
 04-22-18, 11:13 AM
#2

Senior Member
Join Date: Apr 2011
Posts: 7,064
Mentioned: 41 Post(s)
Tagged: 0 Thread(s)
Quoted: 4408 Post(s)
Liked 1,561 Times
in
1,024 Posts
It's a fine idea, but are there parts available for that model BB so the grease goes where it is supposed to?
04-22-18, 12:38 PM
#3
Banned
one problem is there needs to be a closed tube, and then out thru the bearings is the only path the grease can flow,
not up, into the frame tubes, 2 chain stays and the seat and down tubes..
so srep 1) add a liner tube between the bearing cups..
I expect you have a one piece crank. so not much sealing from the outside..
actual pedals for those kind of bikes are cheap, get the plastic ones and the plastic as a bushing takes care of itself or you throw it away.
If the have ball bearings , lay the bike down and squirt some oil around the inside race, axle end of the pedal ..
taking the left pedal off pulling the crank dropping the bearings in grease to get more on them, or just putting greased new ones in and putting it back together
should only take 30 minutes , a tiny bit more, if the chain-guard has to come off the front end. to get the crank out..
you doing it there, while clocked in you would get paid, Yes?
..
04-22-18, 01:44 PM
#4
Newbie
Thread Starter
Join Date: Apr 2018
Posts: 2
Mentioned: 0 Post(s)
Tagged: 0 Thread(s)
Quoted: 1 Post(s)
Likes: 0
Liked 0 Times
in
0 Posts
On the clock
Yep, all time at work is paid. Just limited on tools and a work space. I was hoping to just tap a hole and thread in a fitting but without knowing if the tube are closed off, it could be a recipe for disaster. Guess I'll have to dig into it at least once. Plug or block the tube holes (if open) then add a fitting and reassemble. I'll pick up a lock and chain in case my hard work turns out worth safeguarding.
04-22-18, 01:49 PM
#5
Senior Member
Join Date: Apr 2011
Posts: 7,064
Mentioned: 41 Post(s)
Tagged: 0 Thread(s)
Quoted: 4408 Post(s)
Liked 1,561 Times
in
1,024 Posts
Yep, all time at work is paid. Just limited on tools and a work space. I was hoping to just tap a hole and thread in a fitting but without knowing if the tube are closed off, it could be a recipe for disaster. Guess I'll have to dig into it at least once. Plug or block the tube holes (if open) then add a fitting and reassemble. I'll pick up a lock and chain in case my hard work turns out worth safeguarding.
Grease injector BBs, pedals and hubs have always been specially engineered for them rather than an afterthought.
I don't think you'll benefit from doing this.
04-22-18, 04:40 PM
#6
Senior Member

Join Date: Nov 2014
Location: Eugene, Oregon, USA
Posts: 27,547
Mentioned: 217 Post(s)
Tagged: 0 Thread(s)
Quoted: 18376 Post(s)
Liked 4,511 Times
in
3,353 Posts
I would think it depends on the shell. Some bottom bracket shells have holes into other cavities, some don't. I suppose brazed components often have extra holes, welded parts often are closed.
You will end up using a ton of grease to fill up the whole bottom bracket shell, but once filled, you can just add a little more periodically. Friction will be increased slightly by having grease around the entire length of the spindle.
There are quite a few really old bikes with zerks, but for some reason they stopped putting them on. Make sure you don't break your zerk.
 04-22-18, 04:48 PM
#7
Senior Member
Join Date: Apr 2011
Posts: 7,064
Mentioned: 41 Post(s)
Tagged: 0 Thread(s)
Quoted: 4408 Post(s)
Liked 1,561 Times
in
1,024 Posts
I would think it depends on the shell. Some bottom bracket shells have holes into other cavities, some don't. I suppose brazed components often have extra holes, welded parts often are closed.
You will end up using a ton of grease to fill up the whole bottom bracket shell, but once filled, you can just add a little more periodically. Friction will be increased slightly by having grease around the entire length of the spindle.
There are quite a few really old bikes with zerks, but for some reason they stopped putting them on. Make sure you don't break your zerk.
You will end up using a ton of grease to fill up the whole bottom bracket shell, but once filled, you can just add a little more periodically. Friction will be increased slightly by having grease around the entire length of the spindle.
There are quite a few really old bikes with zerks, but for some reason they stopped putting them on. Make sure you don't break your zerk.
That's why real grease guard BBs have those extra rubber seals on the inside of the cups - so the grease coming out of the holes on the axle goes into the bearings instead of around them:

Last edited by Kontact; 04-22-18 at 04:53 PM.
04-22-18, 05:06 PM
#8
Senior Member
Join Date: Nov 2014
Location: Eugene, Oregon, USA
Posts: 27,547
Mentioned: 217 Post(s)
Tagged: 0 Thread(s)
Quoted: 18376 Post(s)
Liked 4,511 Times
in
3,353 Posts
No matter how much grease comes out around the spindle, that doesn't mean you have actually forced fresh grease around the balls - the only place that matters.
That's why real grease guard BBs have those extra rubber seals on the inside of the cups - so the grease coming out of the holes on the axle goes into the bearings instead of around them:
That's why real grease guard BBs have those extra rubber seals on the inside of the cups - so the grease coming out of the holes on the axle goes into the bearings instead of around them:
You'll have troubles keeping the grease between inner and outer seals in the photo above. Better to just fill the entire BB.
Cages have a bad habit of trapping nasty goop, so perhaps loose bearings would self-clean better. That second "grease guard" seal may help with packing loose bearings into the BB, but shouldn't be necessary.
04-23-18, 02:22 PM
#9
Passista
Join Date: Jul 2005
Posts: 7,598
Bikes: 1998 Pinarello Asolo, 1992 KHS Monta�a pro, 1980 Raleigh DL-1, IGH Hybrid, IGH Utility
Mentioned: 5 Post(s)
Tagged: 0 Thread(s)
Quoted: 867 Post(s)
Liked 721 Times
in
396 Posts
Some old bikes used to have oil rather than grease ports at the BB and hubs, it worked OK if you didn't mind putting a few drops in every now and then.
04-23-18, 02:25 PM
#10
Senior Member
Join Date: Apr 2011
Posts: 7,064
Mentioned: 41 Post(s)
Tagged: 0 Thread(s)
Quoted: 4408 Post(s)
Liked 1,561 Times
in
1,024 Posts
Some of that was intended for racing, where an oiled hub was lower friction than greased and would have enough lubrication to last the day's stage. Not so much for regular use.
04-23-18, 02:43 PM
#11
Passista
Join Date: Jul 2005
Posts: 7,598
Bikes: 1998 Pinarello Asolo, 1992 KHS Monta�a pro, 1980 Raleigh DL-1, IGH Hybrid, IGH Utility
Mentioned: 5 Post(s)
Tagged: 0 Thread(s)
Quoted: 867 Post(s)
Liked 721 Times
in
396 Posts
Yes many were intended for regular use like this English 3-speed.
Last edited by Reynolds; 04-23-18 at 02:47 PM.
04-23-18, 02:47 PM
#12
Senior Member
Join Date: Apr 2011
Posts: 7,064
Mentioned: 41 Post(s)
Tagged: 0 Thread(s)
Quoted: 4408 Post(s)
Liked 1,561 Times
in
1,024 Posts
04-23-18, 05:08 PM
#13
Senior Member
I'm not sure that closing off the bottom of the seat tube, down tube, and stays would be a good idea. Seems that if any moisture were to get into the tubes that it would be trapped.
edit: Do these bikes have Ashtabula cranks? I'm not a big fan, but servicing the BB on those things is pretty fast and easy, as long as the proper threading is recognized.
04-23-18, 05:20 PM
#14
Bicyclist, ex racer
Join Date: Mar 2009
Location: San Diego
Posts: 38
Bikes: 2 Equipes , Turbo. 91 Miyata Team 1000, 710, 610, 210, 110, canti mixte . Santana very early
Mentioned: 0 Post(s)
Tagged: 0 Thread(s)
Quoted: 9 Post(s)
Likes: 0
Liked 0 Times
in
0 Posts
i always kinda liked the smooth feel of a non heavily sealed bottom bracket. The Dura Ace PD 6400 bottom bracket comes to mind as one of the finest. It never seemed to get contaminated unless really abused. Something about a loose ball bottom bracket. No end slop after you ride a bit, no shell crushing the bearing from paint in the threads, and stainless steel on high njs grade cups...ohhh a few of you might know what I mean-otherwise just another bicycle freak. You should see what nice fork Legs do to me!
04-23-18, 05:21 PM
#15
Bicyclist, ex racer
Join Date: Mar 2009
Location: San Diego
Posts: 38
Bikes: 2 Equipes , Turbo. 91 Miyata Team 1000, 710, 610, 210, 110, canti mixte . Santana very early
Mentioned: 0 Post(s)
Tagged: 0 Thread(s)
Quoted: 9 Post(s)
Likes: 0
Liked 0 Times
in
0 Posts
hey I have one of those!
04-24-18, 09:04 AM
#16
Banned
And with much of British machinery , you park it where you can clean up the oil leaking out , under it.
when it stops leaking you worry that its out of oil..
04-24-18, 02:21 PM
#17
Passista
Join Date: Jul 2005
Posts: 7,598
Bikes: 1998 Pinarello Asolo, 1992 KHS Monta�a pro, 1980 Raleigh DL-1, IGH Hybrid, IGH Utility
Mentioned: 5 Post(s)
Tagged: 0 Thread(s)
Quoted: 867 Post(s)
Liked 721 Times
in
396 Posts
You don't need that much oil... if you add the right amount you should get only some oily dust stuck around the cups that you wipe out with a rag.
04-26-18, 02:05 PM
#19
Senior Member
Join Date: Jul 2009
Posts: 786
Mentioned: 14 Post(s)
Tagged: 0 Thread(s)
Quoted: 384 Post(s)
Likes: 0
Liked 6 Times
in
6 Posts
As for a bottom bracket, I don't know. Remove the seatpost and pump grease until it comes out the top?
I'm not sure that closing off the bottom of the seat tube, down tube, and stays would be a good idea. Seems that if any moisture were to get into the tubes that it would be trapped.
I'm not sure that closing off the bottom of the seat tube, down tube, and stays would be a good idea. Seems that if any moisture were to get into the tubes that it would be trapped.
Sounds like these bikes rarely if ever go outside. Contamination is probably not a huge problem unless you work at a sandblasting facility, or a cement factory. The oil ports on BBs allow you to spiff up the grease in the bearings. Tip the bike to one side, drip a few drops of oil in and move the crank around a few times to distribute it. Repeat for the other side. Same process with hubs. Very little oil is needed, but you need to get it evenly spread.
Of course you can do the same thing from the outside. But with three-piece cranks, the cups face inwards, so they'll catch the oil coming from an inboard port better. For non-sealed headsets, turn the bike upside down and drip into the gap.
With Ashtabula/one-piece cranks, you would have to drip from the outside, as the cups face outward, not inward like three-piece cranks.
04-27-18, 04:38 PM
#20
Senior Member

Join Date: Feb 2014
Location: Pasadena, CA
Posts: 4,848
Bikes: Schwinn Varsity
Mentioned: 22 Post(s)
Tagged: 0 Thread(s)
Quoted: 1931 Post(s)
Liked 742 Times
in
422 Posts
LOL, that's funny. I guess you must have ridden British. If they don't leak there is something wrong.
We had a 59 tri T110, rebuilt motor and trans sitting in a bare frame in the corner of our shop for a couple of years. One day there was oil under it.
We concluded British motorcycles make oil by themselves.
04-29-18, 06:43 AM
#21
Senior Member

Join Date: Jul 2010
Location: Stephenville TX
Posts: 3,697
Bikes: 2010 Trek 7100
Mentioned: 6 Post(s)
Tagged: 0 Thread(s)
Quoted: 697 Post(s)
Likes: 0
Liked 3 Times
in
3 Posts
As opposed to running down into the BB shell and rusting it out instead? How about just making sure there's no path for water to get into them?
05-05-18, 04:23 AM
#22
Full Member
Join Date: Jun 2009
Location: Norwich, Norfolk. UK
Posts: 316
Bikes: 2006 Falcon Explorer Hybrid, 2008 Landrover Visalia Crossover, 2010 Cargo Cycles Senton, 2010 Cargo Cycles Capability, and a 2001 AVD quad pedi-van, 1980 Peugeot Carbolite 10sp racer
Mentioned: 2 Post(s)
Tagged: 0 Thread(s)
Quoted: 21 Post(s)
Liked 24 Times
in
7 Posts
This is a relatively simple task for someone with basic metalworking/engineering skills.
It is a job that I do 2 or 3 times each month for customers and have done for 22 years now, so I've done it several hundred times.
To seal the tube weld junctions inside the bottom bracket shell I use the "top hat" plastic caps that are supplied with hydraulic hoses. These are considered rubbish at engineering companies and are easily available just about everywhere across the world, even eBay.
There is often some variation in the sizes and shape of the tubes used for the stays, seat and frame tubes across the various manufacturers so occasionally I may have to warm up a plastic cap to make it soft enough to push in and fit. These plastic caps seal the frame tubes and prevent grease pumping up and along them keeping the grease in just the bottom bracket shell. It often pays to remove the seat post and to coat the inside of the seat tube with a light smear of petroleum jelly, WD40 or spray silicone lube before reinstalling. You can then seal the top of the seat post (directly under the saddle) with a hydraulic pipe plastic cap to stop rain water or road spray getting into the seat tube and then corroding the bottom of the seat post to the seat tube.
I prefer to install 1/8" NPT/Gas threaded concave grease nipples positioned exactly half way across the bottom bracket and away from any frame number stampings: any accessible point on the circumference of the shell but half way across it
Use a centre dot punch to mark the hole.
Use a 4mm drill to pilot and then open up with an 8.5mm drill to provide the correct tapping size.
Careful tap the new threads and then thoroughly clean out the bottom bracket to ensure all drillings and swarf are removed.
Install the grease nipple using a little threadlock if you have it.
Reassemble and adjust the bottom bracket as you would normally, but before you do, remove the ball bearings from the pressed steel cages and throw these away before installing the balls back in the races and add one or more balls to each race to fill the gap left by the removal of the cage..... Every problem that I have personally experienced with a bottom bracket has been the ball cages collapsing and jamming the crank solid forcing me to push the bike home; once having to walk over 22 miles home on a public holiday in the days before mobile phones!
Then pump in the grease whilst slowly rotating the cranks until it just shows at the outside of the seals. The seals supplied with most bicycle bottom bracket kits are usually low quality so maintaining a positive grease pressure inside the bottom bracket shell will prevent water ingress or moisture commuting across the seal interface.
One or two pumps once a month of an agricultural grade multi-purpose EP2 Lithium or Calcium based NGLI2 grease is perfect and economical to use; this grease is readily available in both standard and mini cartridge size refills. I like to use a specific "push to pump" 8oz mini grease gun which works perfectly with conical grease nipples and this grease gun I keep exclusively for lubricating modified bottom brackets.
As for the longevity of a regular greased bottom bracket; my current favourite bicycle is a Falcon Explorer hybrid that I bought new 12 years ago and within the first week of owning it I had included this grease nipple modification........... that was almost 50,000 miles ago of which about 15,000 have been trailer towing miles and I am still riding on the original factory fitted bottom bracket componentry albeit with an installed grease nipple and sort of almost regularish lubing as these days I only give it a pump or two of grease every 3 or 4 months if I remember..... so do as I say and not as I do.

Plastic hydraulic hose caps. The red ones top left are the type I use.

Threaded conical grease nipple.
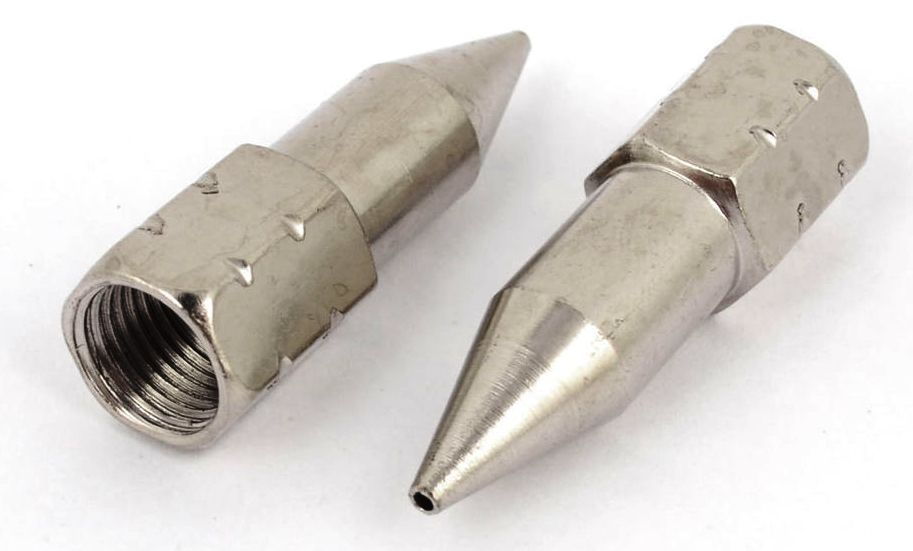
Conical grease gun tip

8oz mini grease gun
It is a job that I do 2 or 3 times each month for customers and have done for 22 years now, so I've done it several hundred times.
To seal the tube weld junctions inside the bottom bracket shell I use the "top hat" plastic caps that are supplied with hydraulic hoses. These are considered rubbish at engineering companies and are easily available just about everywhere across the world, even eBay.
There is often some variation in the sizes and shape of the tubes used for the stays, seat and frame tubes across the various manufacturers so occasionally I may have to warm up a plastic cap to make it soft enough to push in and fit. These plastic caps seal the frame tubes and prevent grease pumping up and along them keeping the grease in just the bottom bracket shell. It often pays to remove the seat post and to coat the inside of the seat tube with a light smear of petroleum jelly, WD40 or spray silicone lube before reinstalling. You can then seal the top of the seat post (directly under the saddle) with a hydraulic pipe plastic cap to stop rain water or road spray getting into the seat tube and then corroding the bottom of the seat post to the seat tube.
I prefer to install 1/8" NPT/Gas threaded concave grease nipples positioned exactly half way across the bottom bracket and away from any frame number stampings: any accessible point on the circumference of the shell but half way across it
Use a centre dot punch to mark the hole.
Use a 4mm drill to pilot and then open up with an 8.5mm drill to provide the correct tapping size.
Careful tap the new threads and then thoroughly clean out the bottom bracket to ensure all drillings and swarf are removed.
Install the grease nipple using a little threadlock if you have it.
Reassemble and adjust the bottom bracket as you would normally, but before you do, remove the ball bearings from the pressed steel cages and throw these away before installing the balls back in the races and add one or more balls to each race to fill the gap left by the removal of the cage..... Every problem that I have personally experienced with a bottom bracket has been the ball cages collapsing and jamming the crank solid forcing me to push the bike home; once having to walk over 22 miles home on a public holiday in the days before mobile phones!
Then pump in the grease whilst slowly rotating the cranks until it just shows at the outside of the seals. The seals supplied with most bicycle bottom bracket kits are usually low quality so maintaining a positive grease pressure inside the bottom bracket shell will prevent water ingress or moisture commuting across the seal interface.
One or two pumps once a month of an agricultural grade multi-purpose EP2 Lithium or Calcium based NGLI2 grease is perfect and economical to use; this grease is readily available in both standard and mini cartridge size refills. I like to use a specific "push to pump" 8oz mini grease gun which works perfectly with conical grease nipples and this grease gun I keep exclusively for lubricating modified bottom brackets.
As for the longevity of a regular greased bottom bracket; my current favourite bicycle is a Falcon Explorer hybrid that I bought new 12 years ago and within the first week of owning it I had included this grease nipple modification........... that was almost 50,000 miles ago of which about 15,000 have been trailer towing miles and I am still riding on the original factory fitted bottom bracket componentry albeit with an installed grease nipple and sort of almost regularish lubing as these days I only give it a pump or two of grease every 3 or 4 months if I remember..... so do as I say and not as I do.
Plastic hydraulic hose caps. The red ones top left are the type I use.
Threaded conical grease nipple.
Conical grease gun tip
8oz mini grease gun
Last edited by Gareth; 06-02-18 at 05:52 AM.
