New 2019 Motobecane Whipshot Ti from bikes direct.
#1
Junior Member
Thread Starter
Join Date: Jun 2018
Posts: 20
Mentioned: 0 Post(s)
Tagged: 0 Thread(s)
Quoted: 7 Post(s)
Likes: 0
Liked 0 Times
in
0 Posts
New 2019 Motobecane Whipshot Ti from bikes direct.
Just bought the Ti Whipshot from bikes direct. I would love to post pictures. But I can't at the moment. So far I love the bike. It's so beautiful. It's like a 4 Runner of bicycles. It's got mounts, Sram Force 1 groupset. Ritchey seatpost and handlebar stuff. Such a gorgeous bike. I have no complaints. whatsoever. I would like to hear anything from the people who are interested in a bikes direct bike or a Titanium frame in general. I did two years of research before spending this kind of money on a bicycle. So if you have any questions, please ask. Cheers
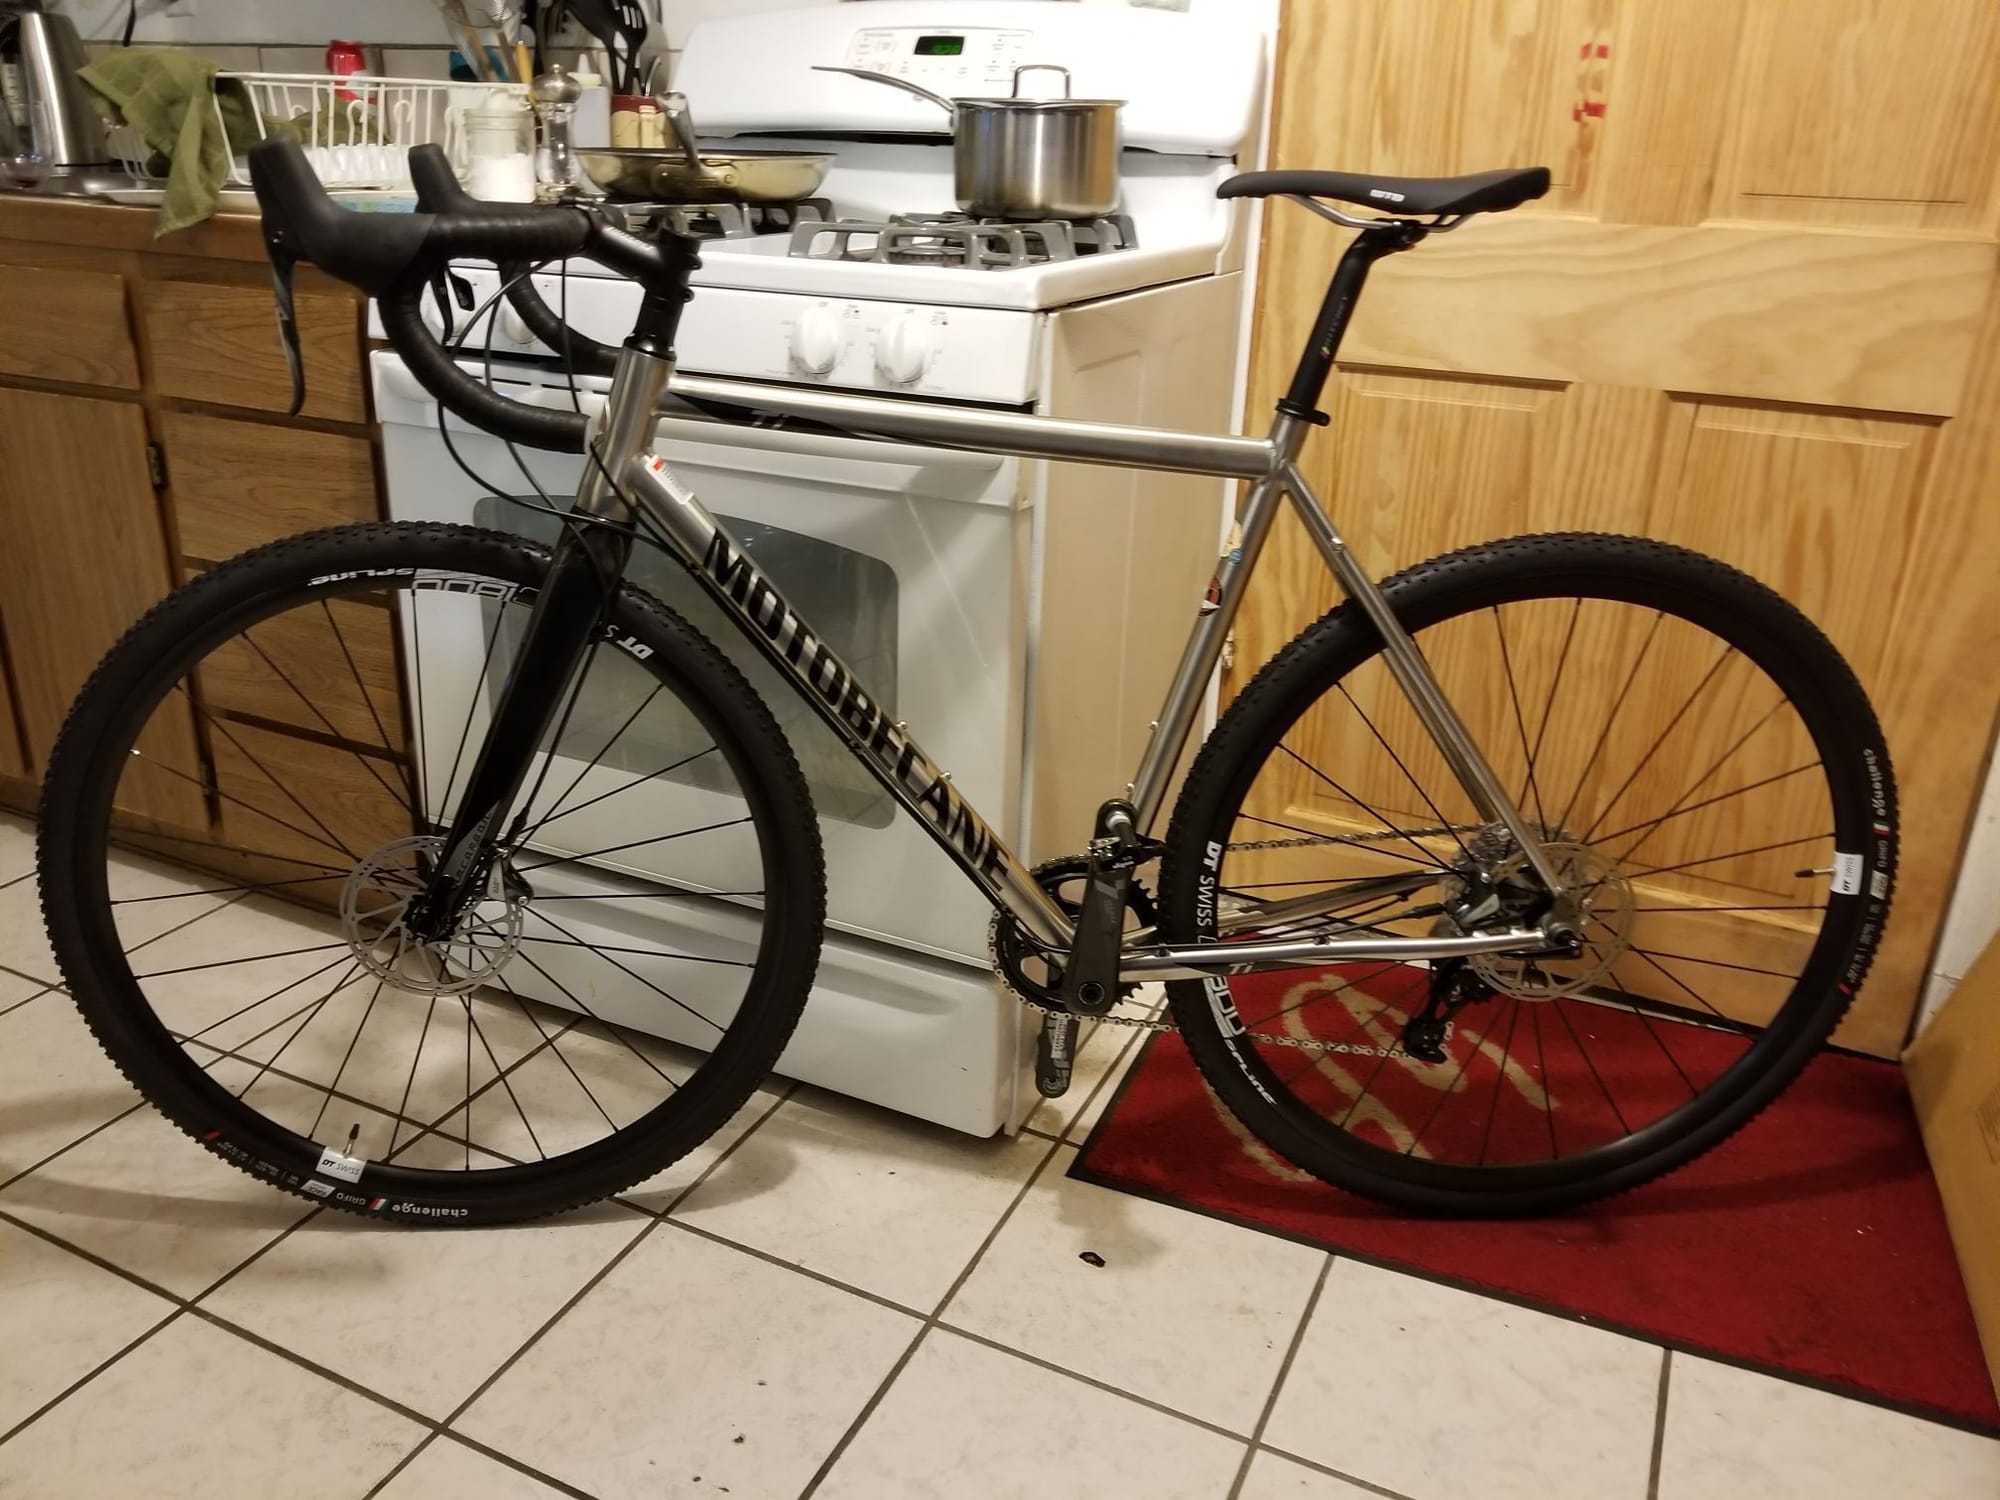

Last edited by Bicycho415; 11-30-18 at 12:32 AM.
#2
Junior Member
Thread Starter
Join Date: Jun 2018
Posts: 20
Mentioned: 0 Post(s)
Tagged: 0 Thread(s)
Quoted: 7 Post(s)
Likes: 0
Liked 0 Times
in
0 Posts
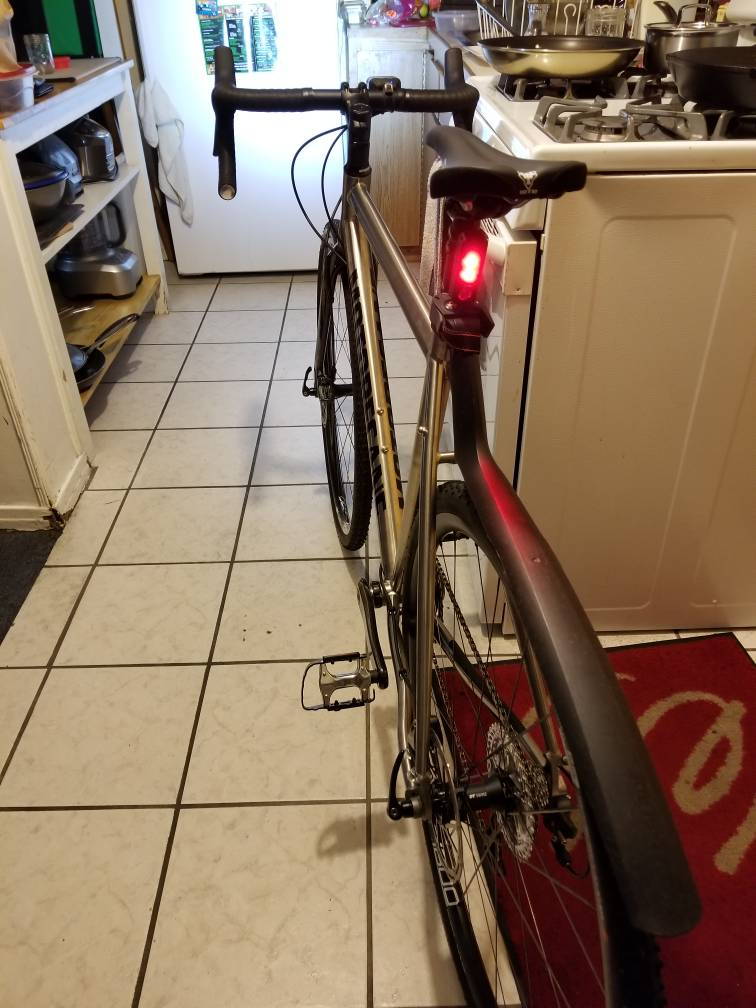
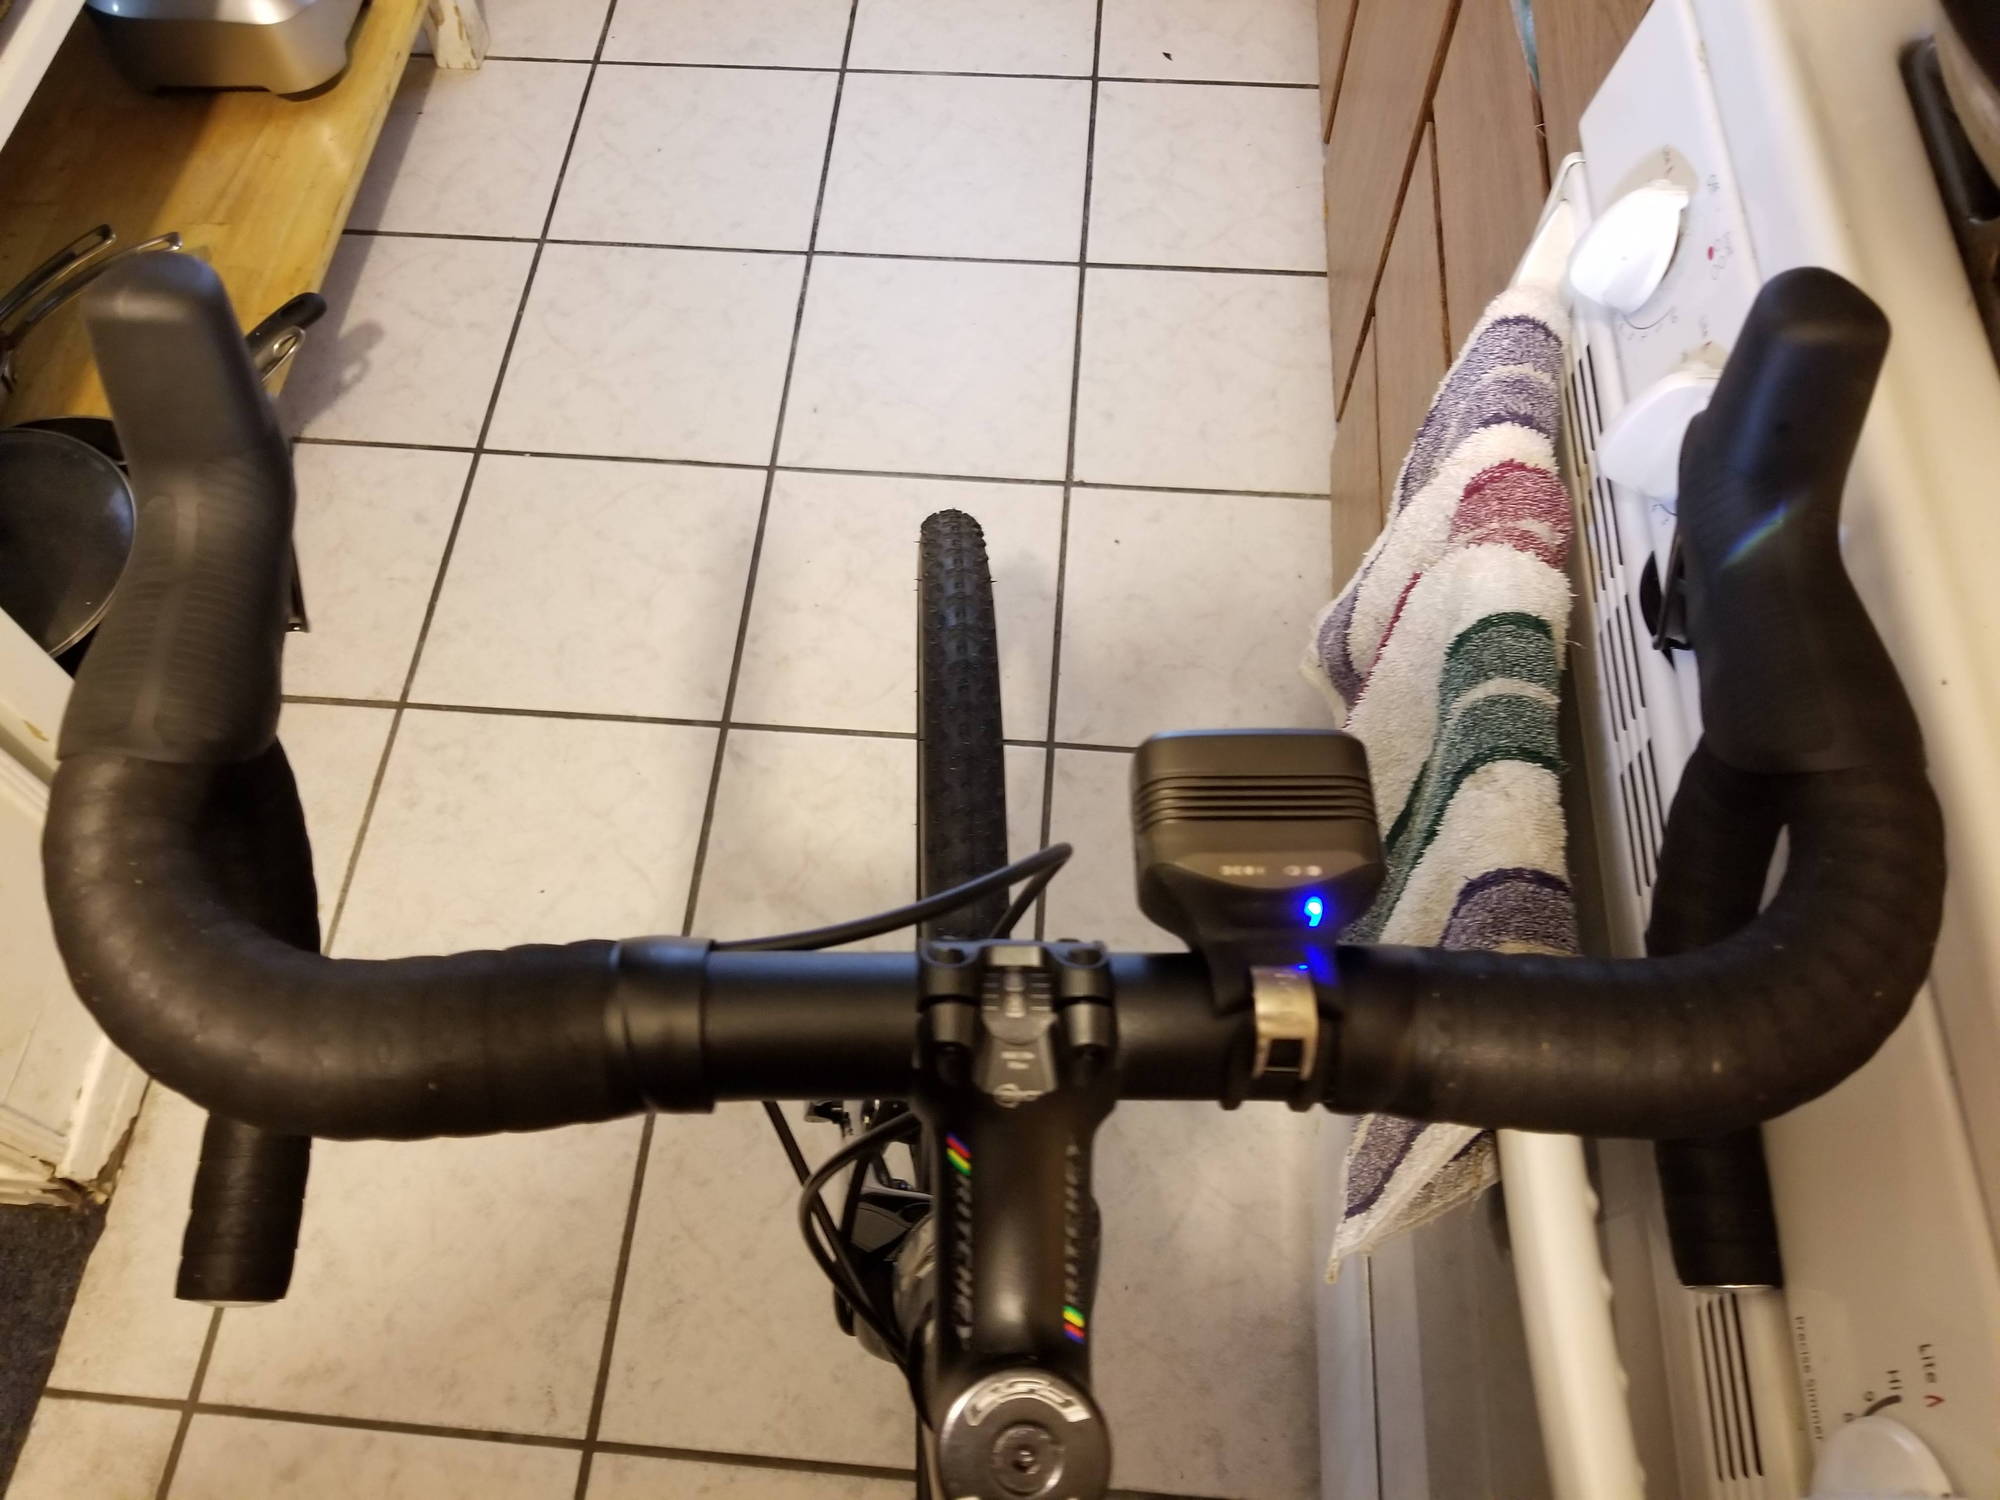
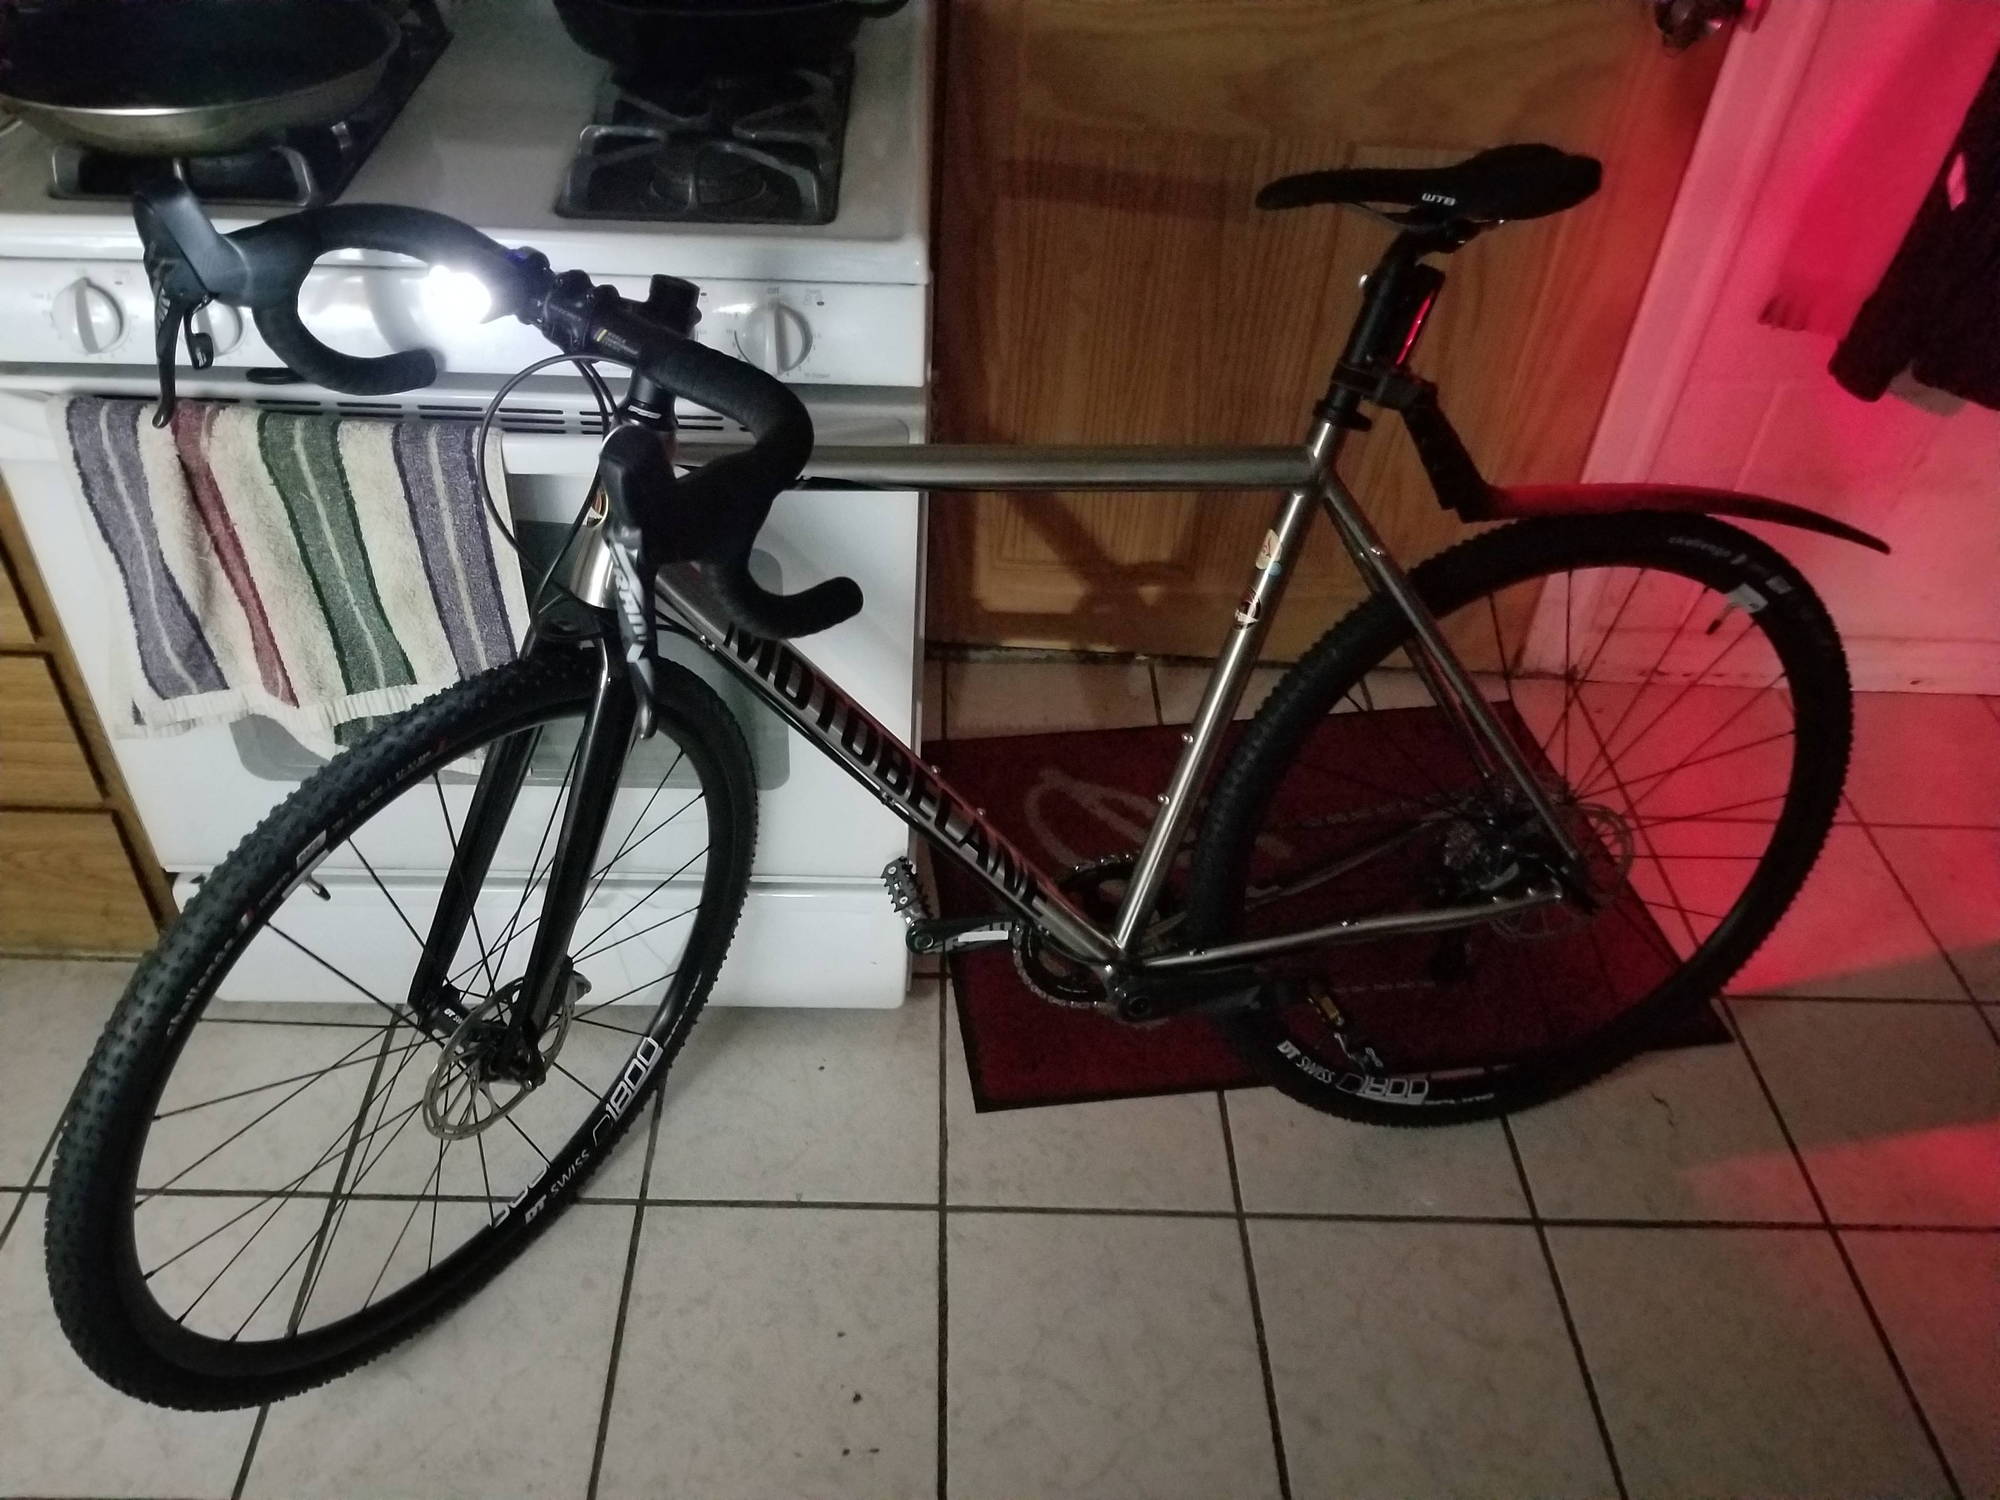
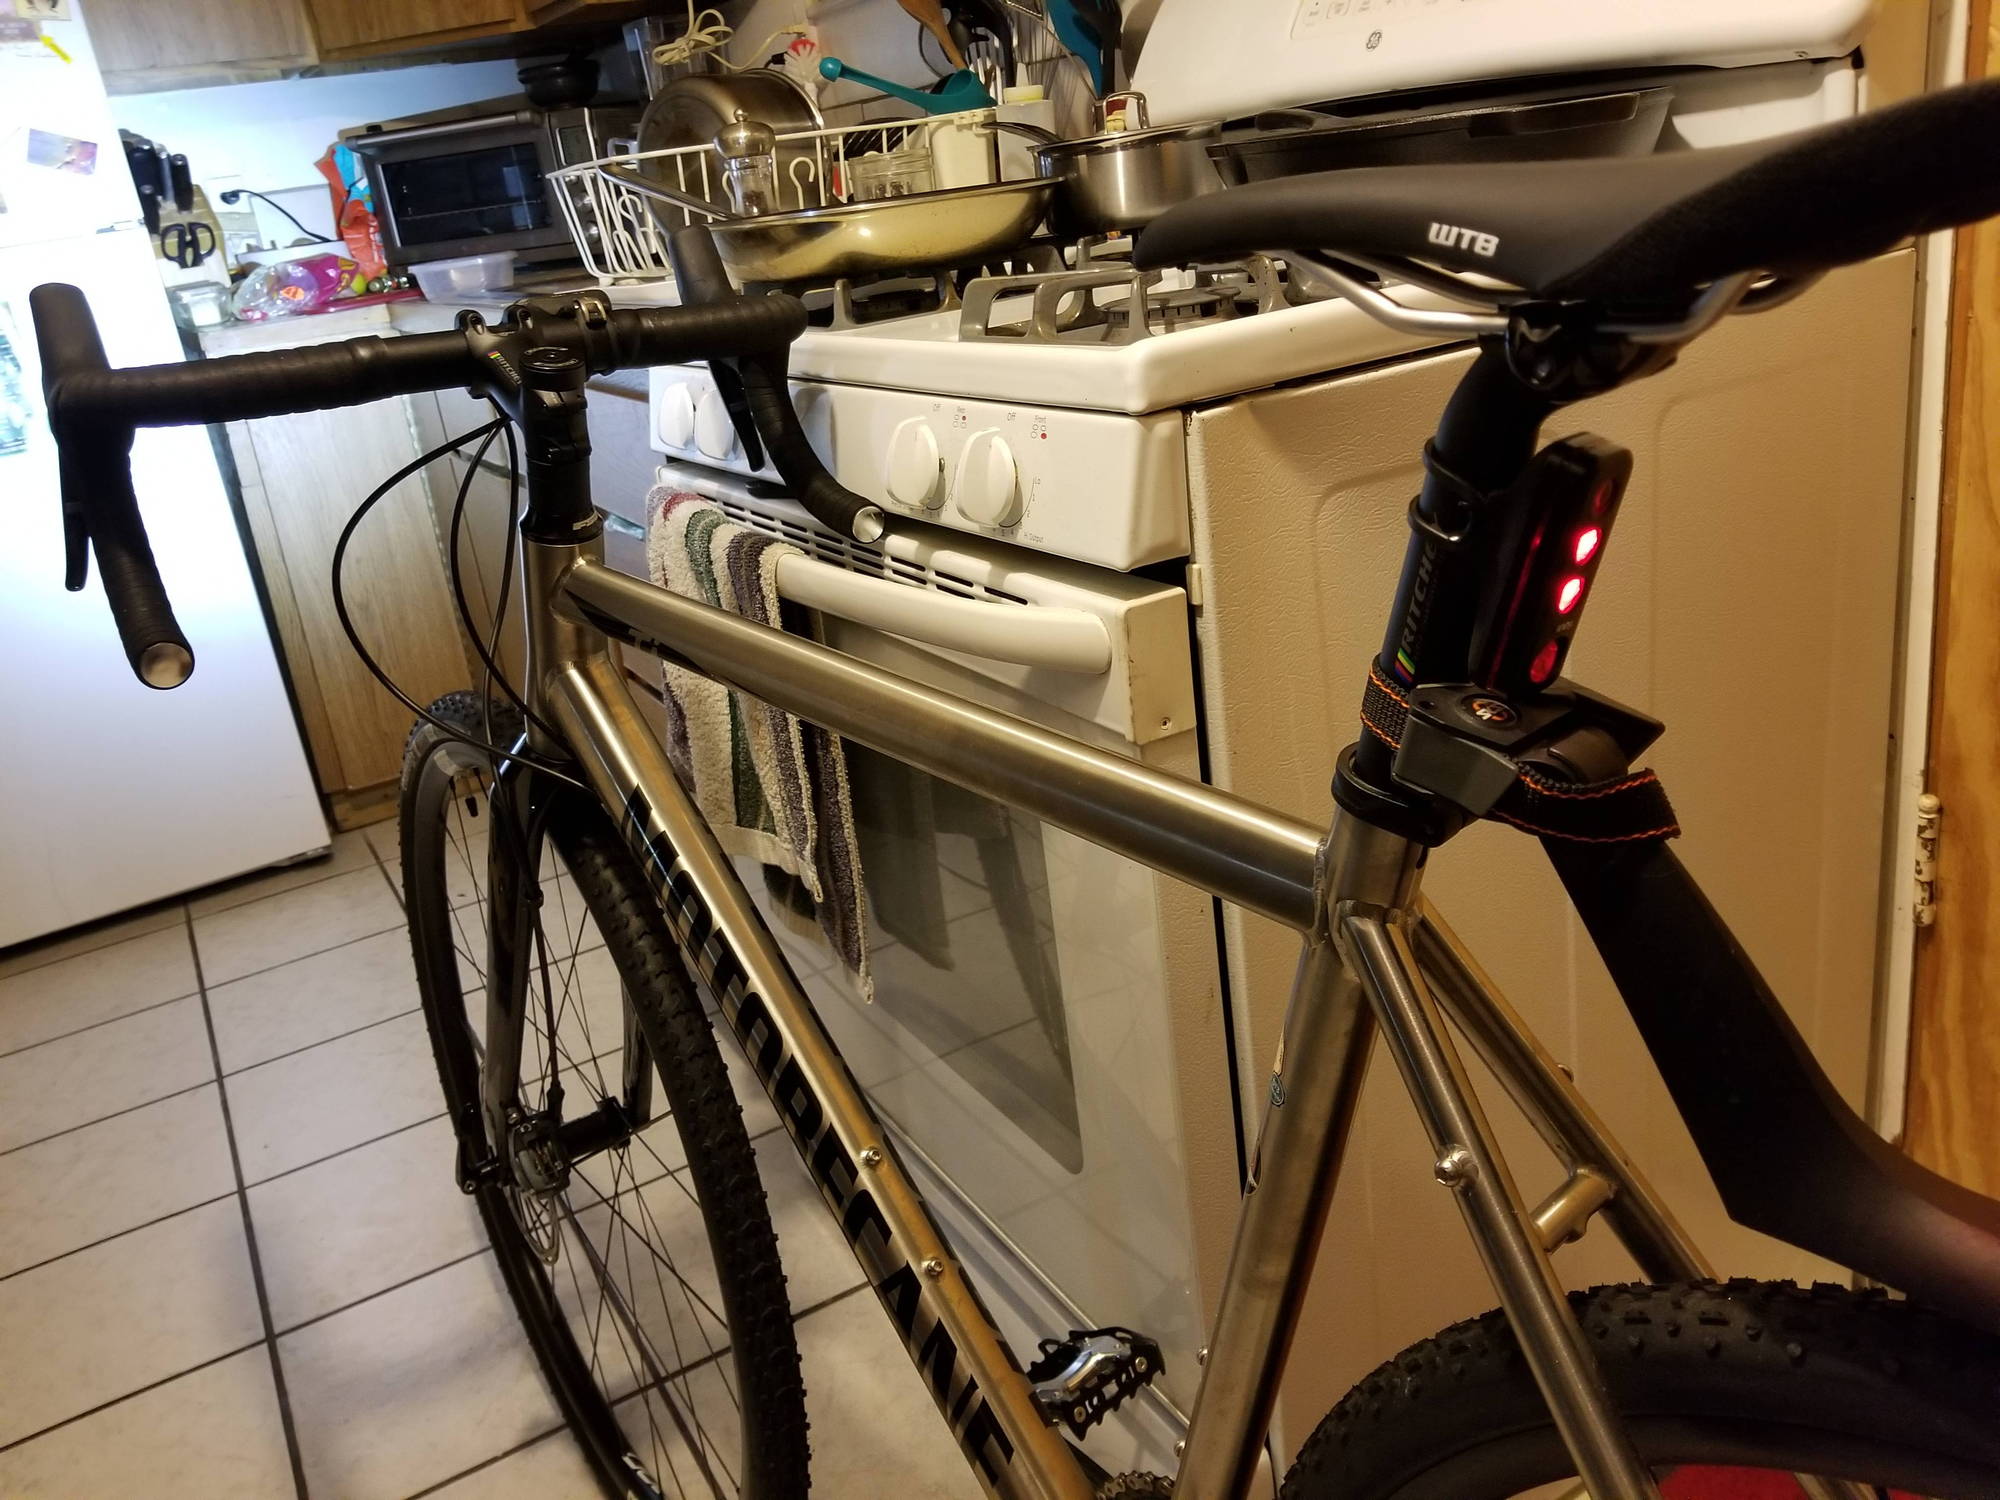
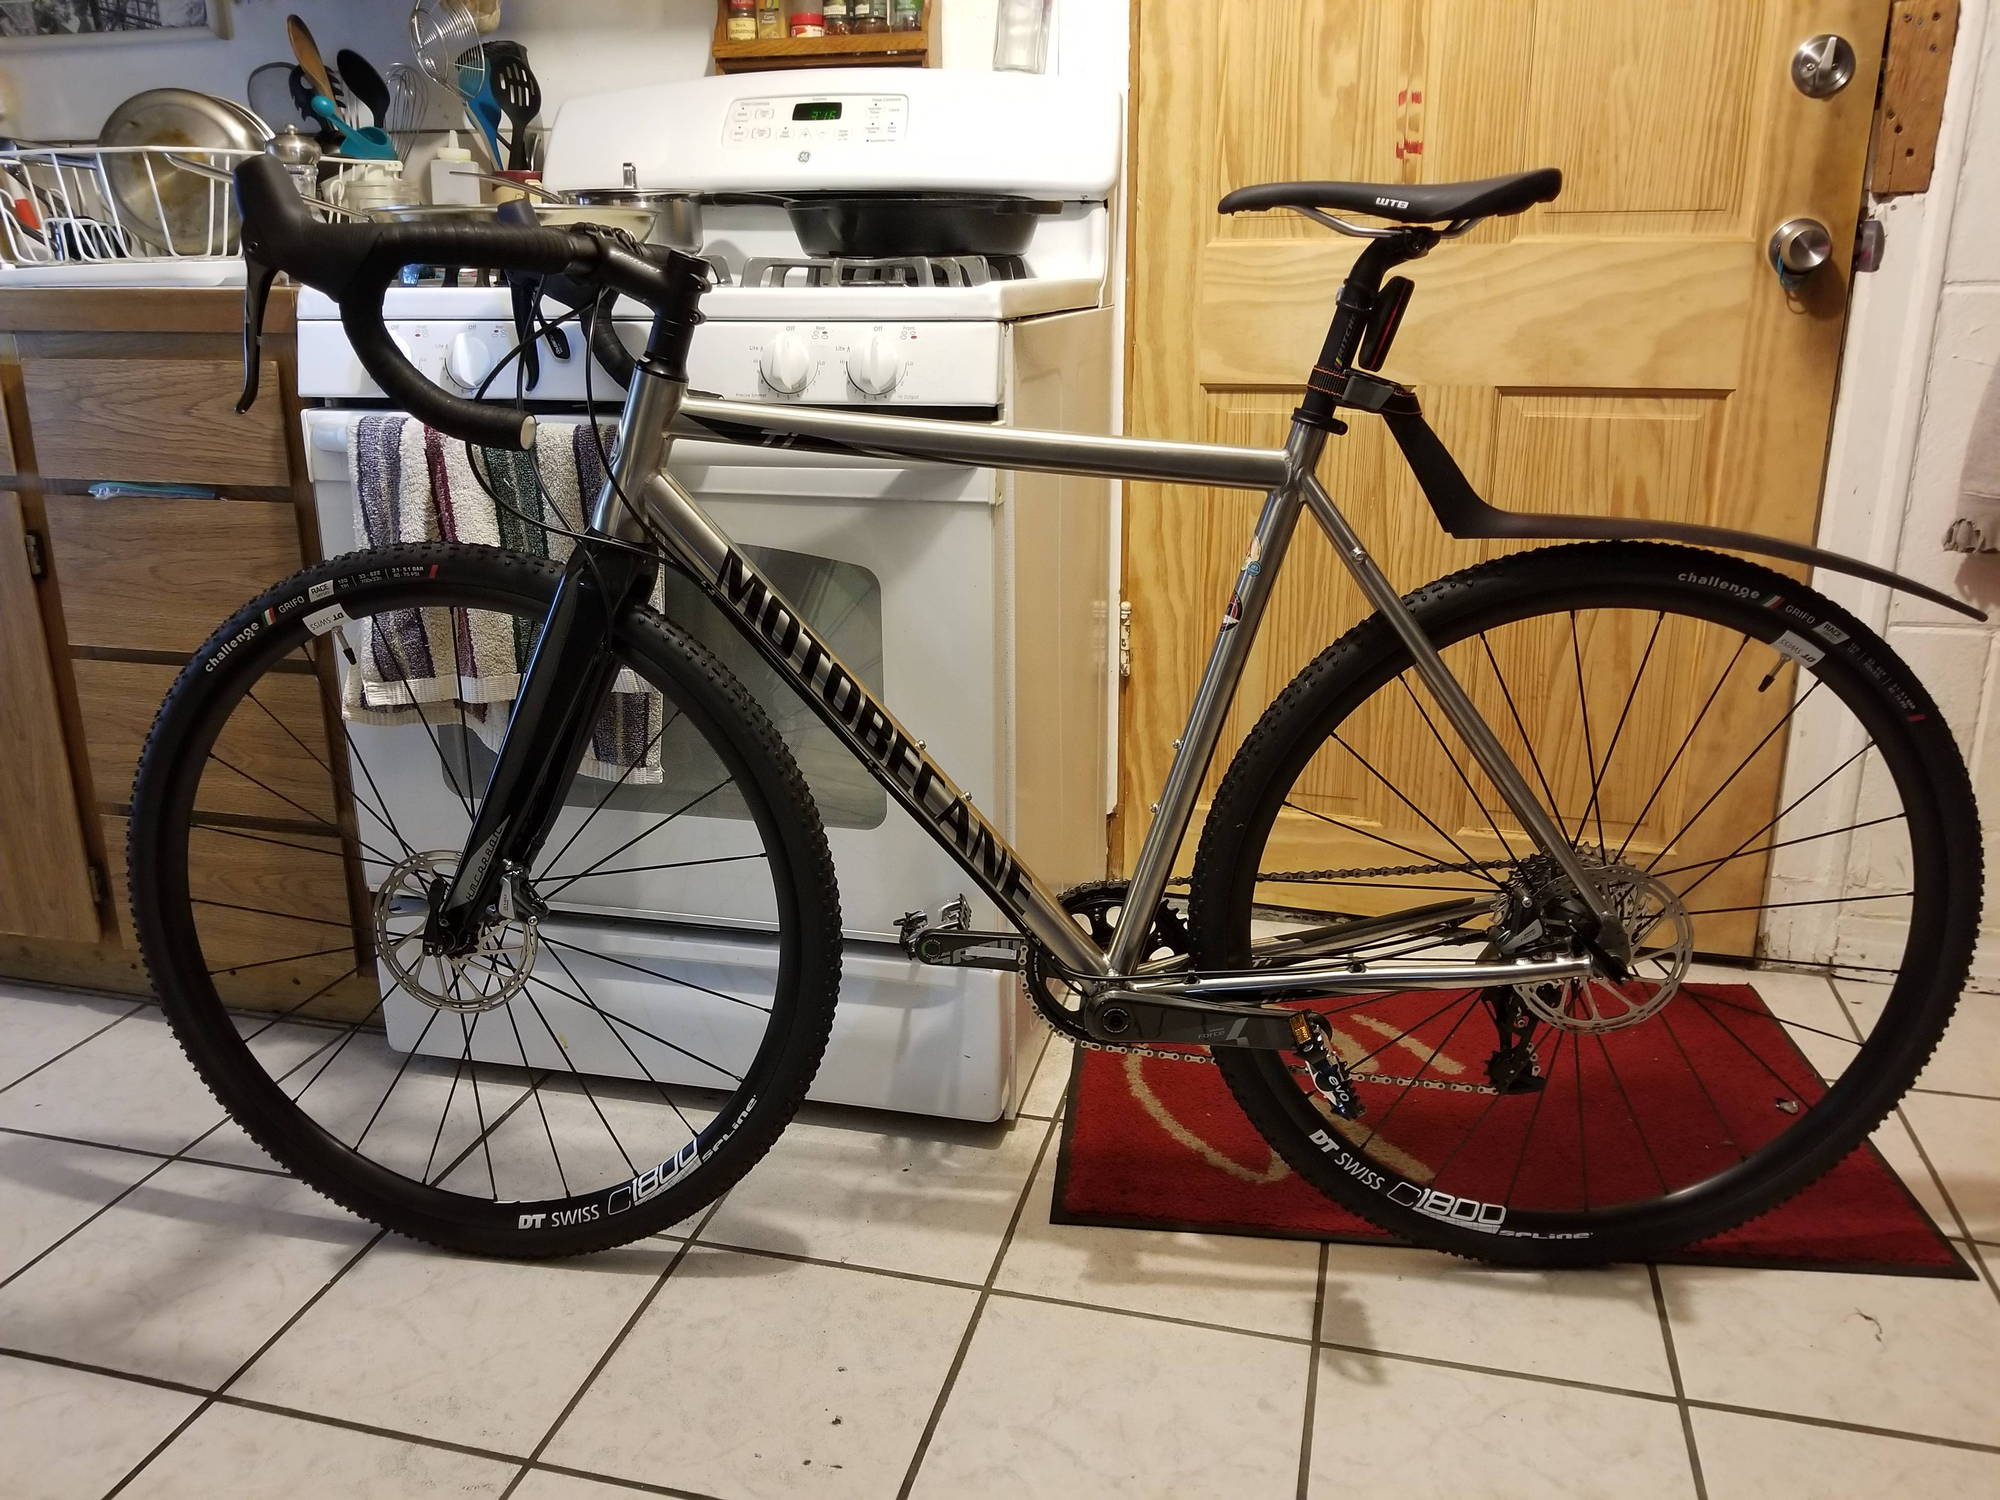
The cables are a little long from the factory. I have yet the desire to deal with dot fluid and snippers at the moment. Had a LBS look over my hand in the work. Needed the derailleur worked on as I can't stand doing it myself. The used lock tight on many bolts and tightened everything to spec for torque. Pushed her through a lot of rain so far in San Francisco this week. I would like to get some fenders put on for the rest of the rainy season.
This is my current setup for the weather and night riding. I really like the low profile design of knog lights. Looking into SKS fenders Bluemels for the rain.
Last edited by Bicycho415; 11-30-18 at 12:32 AM.
#3
Senior Member
It's not like it will cause any problems, but I'm pretty sure they did on your bike just what they did on mine: left the brake hoses at full length. (The derailleur cable and housing was fine.)
If you aren't comfortable adjusting a RD, then I do NOT recommend you try to shorten and re-bleed your brakes. It's not rocket science, but it is definitely more involved than adjusting a derailleur, and since you are dealing with toxic DOT 5.1 fluid, you don't have as much margin for error.
Attached are a couple of pics of my wife's bike, after I did the following: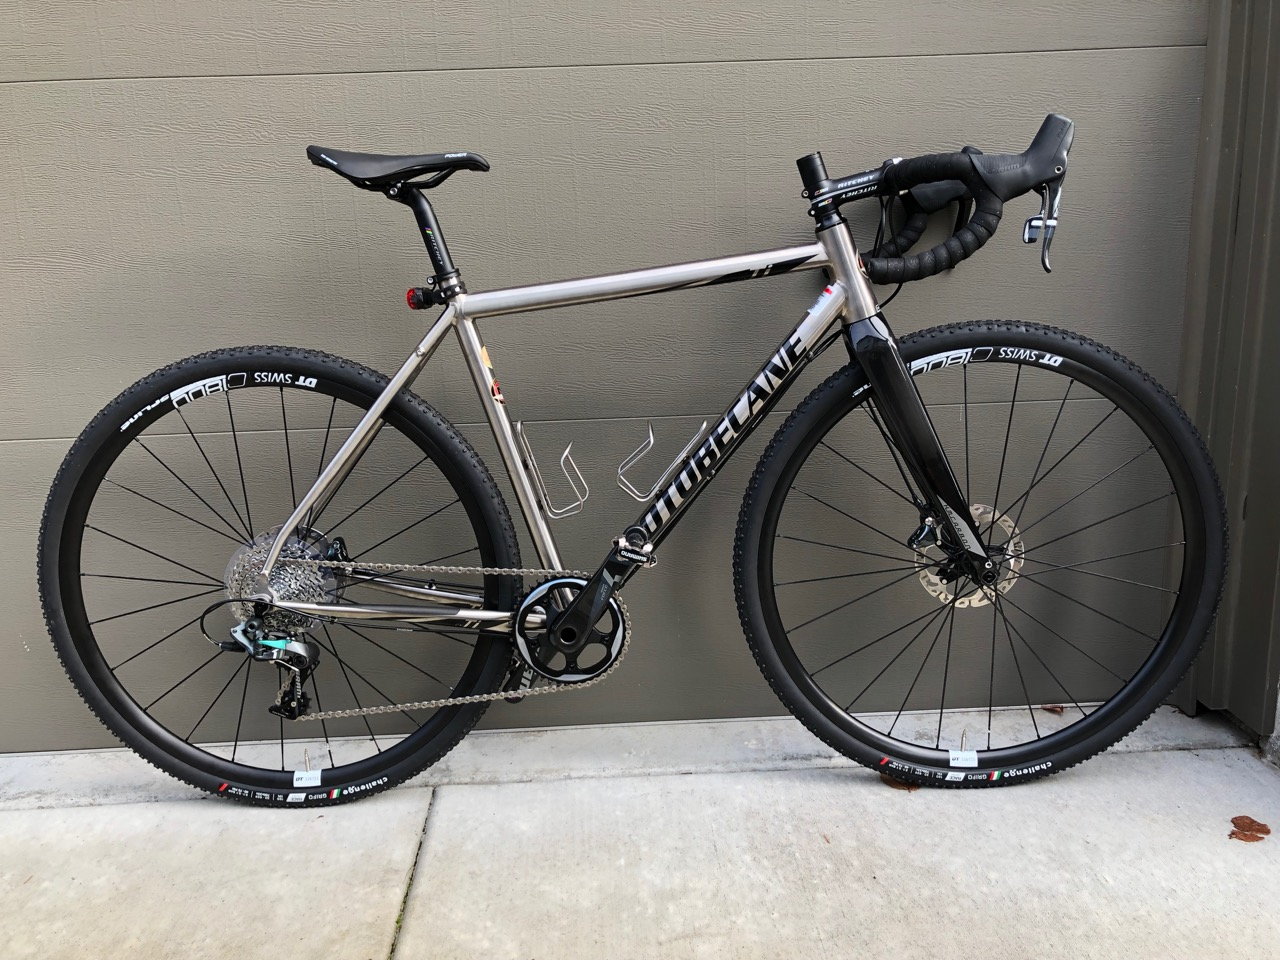
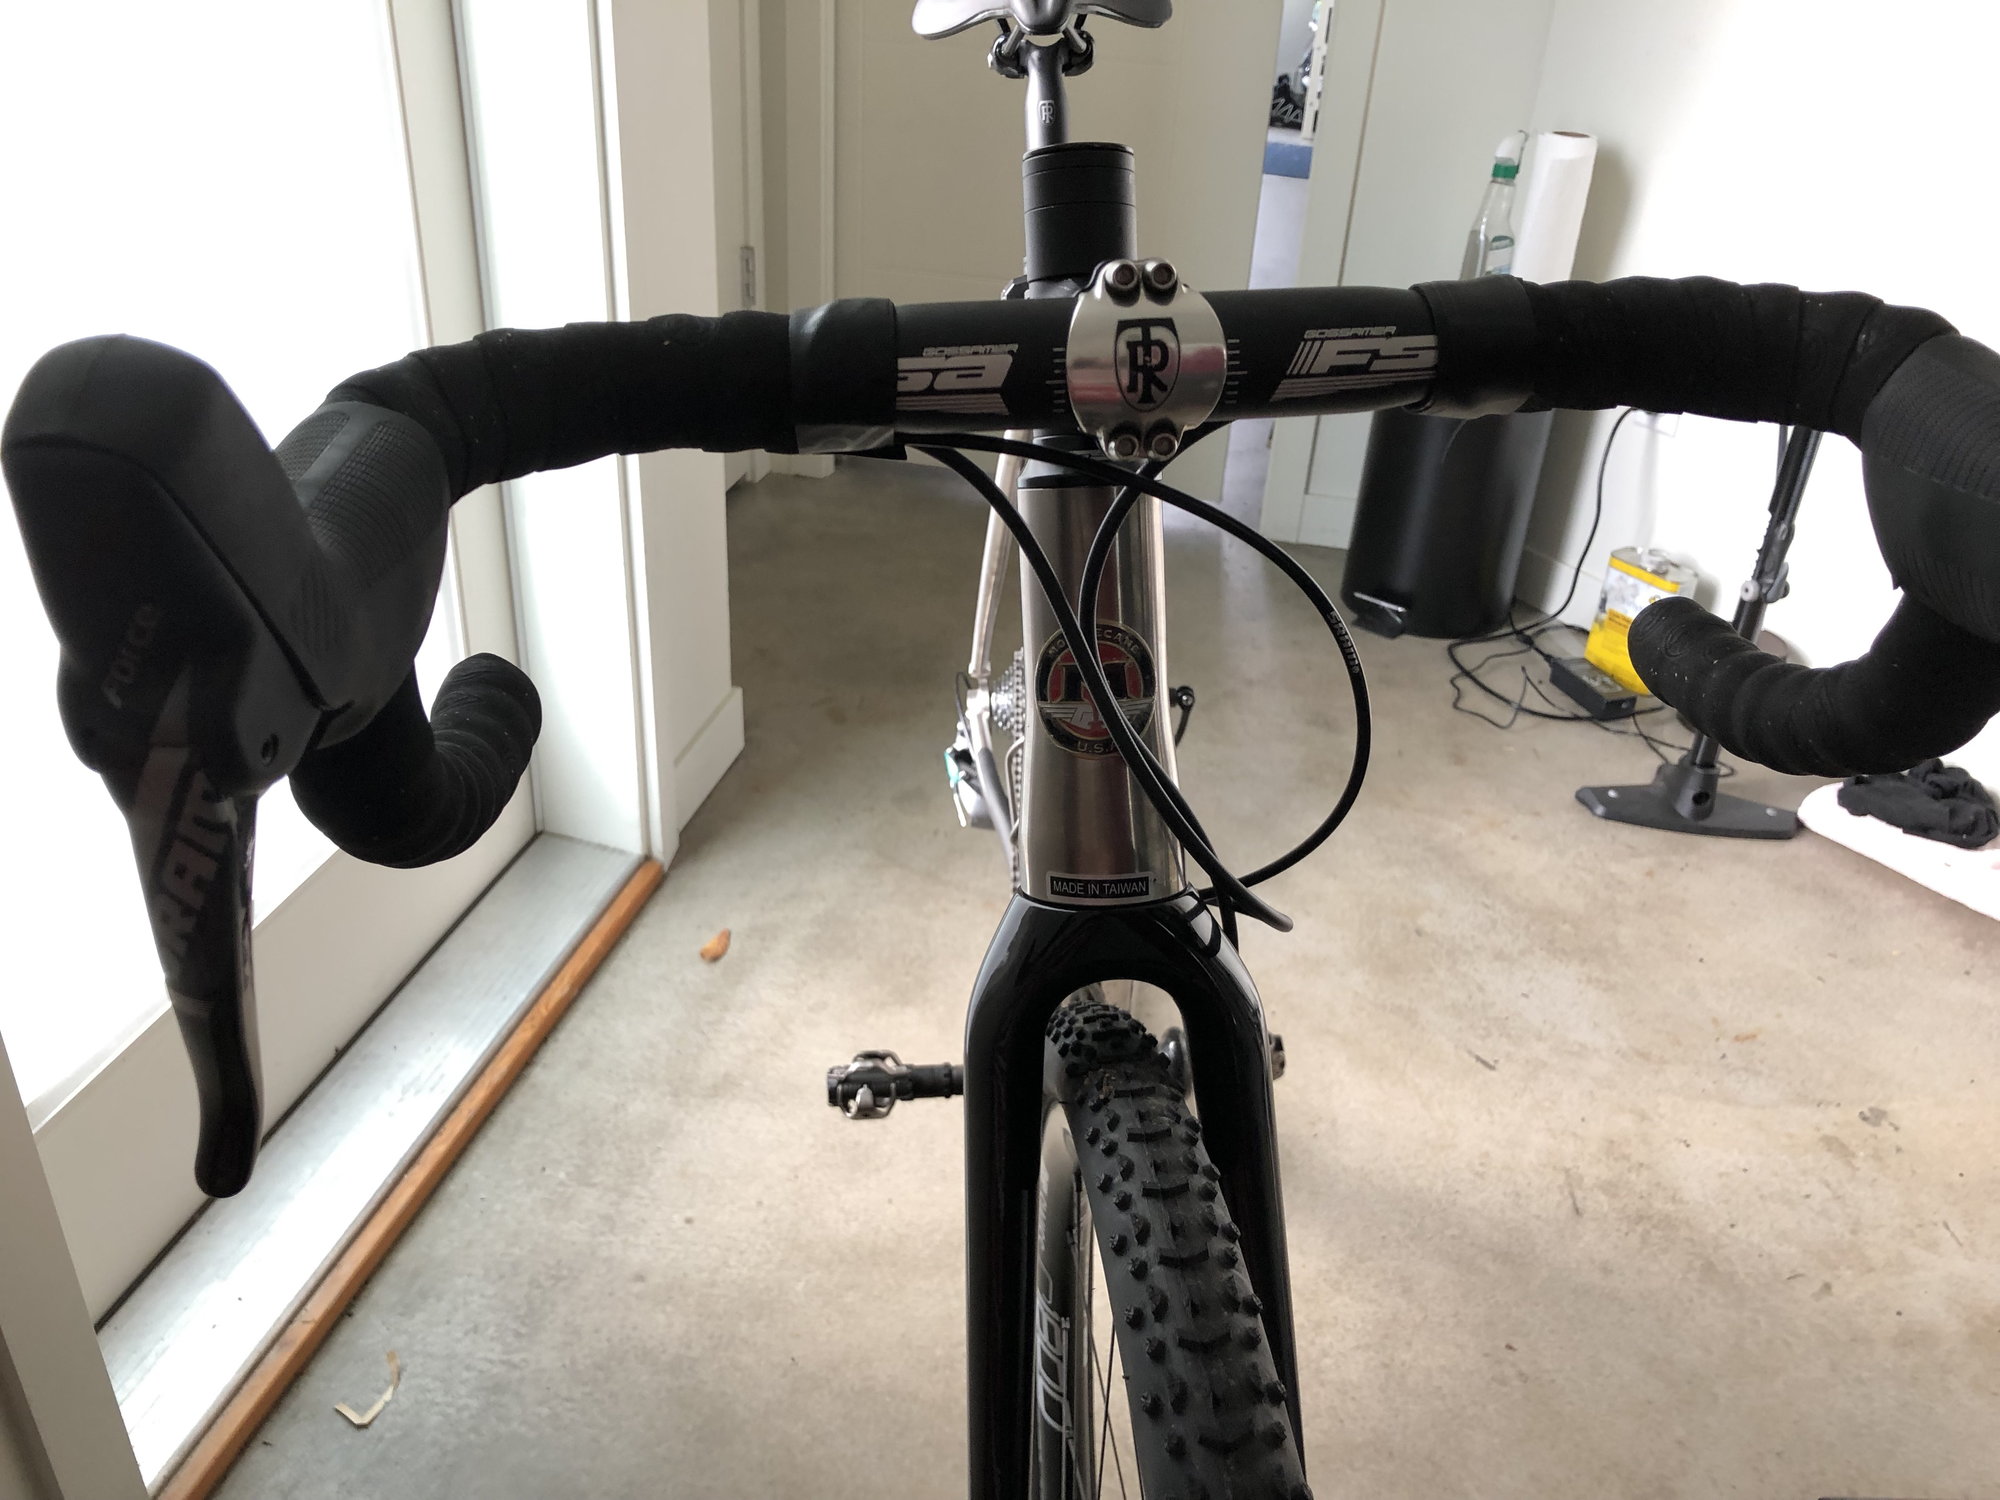
- Replaced the 6-bolt rotors with proper center-lock rotors (the wheels have center-lock hubs)
- Replaced the defective SRAM brake retaining springs with the proper ones
- Replaced the bars and stem with ones that dialed-in my wife's fit
- Replaced the pedals and saddle
- shortened the brake hoses and rebled the system


#4
Occam's Rotor
Join Date: Jul 2013
Posts: 7,248
Mentioned: 61 Post(s)
Tagged: 0 Thread(s)
Quoted: 2366 Post(s)
Liked 2,331 Times
in
1,164 Posts
How are the welds?
#5
Senior Member
I'm no expert, but they look excellent to me.
If you look at the third picture I posted (above), you get a pretty good shot of the welds of both the top tube and the down tube into the head tube. The work around the bottom bracket (lots of welding) looks particularly clean to me.
I did a bit of reading before purchase, and many people vouched for the quality of the frame-maker, which is Ora, in Taiwan. I also couldn't find any reports of problems with Ora Ti frames.
I'm not claiming it's the same quality as a custom-built frame, or a Moots or a Seven. But I've looked at Lynskeys up close, and if anything the Ora looks better. Given that the groupset on the bike retails for over $1,000, the wheelset retails for over $500, and the Ritchey finishing kit retails for a few hundred more....it's hard to complain. The Ti frame and the full carbon fork are almost included for free.
Of course, as I reported above, in my case I spent more time getting this bike set up than I have on complete, groud-up builds in the past. That's because the defective/wrong brake pad spring took me hours and hours and hours to sort out.
#6
Occam's Rotor
Join Date: Jul 2013
Posts: 7,248
Mentioned: 61 Post(s)
Tagged: 0 Thread(s)
Quoted: 2366 Post(s)
Liked 2,331 Times
in
1,164 Posts
#7
Senior Member
Background – I'm a pretty decent amateur mechanic, but I'm still an amateur; I do all my own wrenching and have built half a dozen bikes from the frame up, and dealt with Shimano hydro brakes a few times, but not SRAM.
1. Setting up bike and COULD NOT for the life of me get the caliper to center on the rotor. This is always fiddly, but it seemed impossible.
2. When I finally did appear to get the caliper centered on the rotor, with no rub, all it would take to mess this up is to let the wheel bounce a few inches off the shop floor (or hit any small bump on the road). At that point the rotor would appear to hit the brake pad retaining spring. There was NO WAY to correct. I thought it might be a problem with the rotors, or for the frame and caliper specs, or...
3. The brad pads and retaining spring were brand new, of course, and they looked fine.
4. But not knowing what else to try, I bought a new set of SRAM road pads and put them in. Problem solved.
It turns out the problem was the brake pad spring. The one that came with the new bike was too narrow at the top and too loose as a spring. It didn't press the pads back far enough, making it almost impossible to center the caliper on the rotor. And even when the caliper was centered, it would slide down and hit the rotor directly.
The spring with the new pads looked almost the same, but it was different: it didn't narrow above the pads the way the original did, and it had FAR more spring. Put the new pads in and it was immediately obvious that I had way more room to center the caliper. On the old spring the spring would slide up and down above and below the pads. On the new spring, the pads and spring float together as one unit, and the rotor never hits the spring.
With hindsight, it was easy to see that I had the wrong spring. But in the process, it was not at all obvious that that was the problem. The old spring and the new looked almost identical.
#8
Occam's Rotor
Join Date: Jul 2013
Posts: 7,248
Mentioned: 61 Post(s)
Tagged: 0 Thread(s)
Quoted: 2366 Post(s)
Liked 2,331 Times
in
1,164 Posts
Thanks!
I'll take a look at ours, which are now in a box. On my kid's mountain bike (Canyon), we wound up replacing the entire brakesets (with XT).
I'll take a look at ours, which are now in a box. On my kid's mountain bike (Canyon), we wound up replacing the entire brakesets (with XT).
#9
Junior Member
Thread Starter
Join Date: Jun 2018
Posts: 20
Mentioned: 0 Post(s)
Tagged: 0 Thread(s)
Quoted: 7 Post(s)
Likes: 0
Liked 0 Times
in
0 Posts
It was a thread in the "wrenching" section of that other message board. But the summary of it goes like this:
Background – I'm a pretty decent amateur mechanic, but I'm still an amateur; I do all my own wrenching and have built half a dozen bikes from the frame up, and dealt with Shimano hydro brakes a few times, but not SRAM.
1. Setting up bike and COULD NOT for the life of me get the caliper to center on the rotor. This is always fiddly, but it seemed impossible.
2. When I finally did appear to get the caliper centered on the rotor, with no rub, all it would take to mess this up is to let the wheel bounce a few inches off the shop floor (or hit any small bump on the road). At that point the rotor would appear to hit the brake pad retaining spring. There was NO WAY to correct. I thought it might be a problem with the rotors, or for the frame and caliper specs, or...
3. The brad pads and retaining spring were brand new, of course, and they looked fine.
4. But not knowing what else to try, I bought a new set of SRAM road pads and put them in. Problem solved.
It turns out the problem was the brake pad spring. The one that came with the new bike was too narrow at the top and too loose as a spring. It didn't press the pads back far enough, making it almost impossible to center the caliper on the rotor. And even when the caliper was centered, it would slide down and hit the rotor directly.
The spring with the new pads looked almost the same, but it was different: it didn't narrow above the pads the way the original did, and it had FAR more spring. Put the new pads in and it was immediately obvious that I had way more room to center the caliper. On the old spring the spring would slide up and down above and below the pads. On the new spring, the pads and spring float together as one unit, and the rotor never hits the spring.
With hindsight, it was easy to see that I had the wrong spring. But in the process, it was not at all obvious that that was the problem. The old spring and the new looked almost identical.
I waited 2 years for this spec and I got it for a steal. Bike direct knocked this one out of the park. I understand not everyone will be able to afford even $1948, but knowing that the components of this bicycle and it's mark on the industry, there is no doubt in my mind that anyone spending the 2399.99 on the bike after the black Friday special, is still getting an amazing deal.
#10
Senior Member
I agree completely.
I ran into the brake pad spring issue on the bike I bought for my wife. But after I finally got it all set up and she put 100 miles on it, I went ahead and bought a second one for me. It’s an amazing deal.
And I basically chalk the brake pad spring thing to bad luck. It would have been a $40 fix if I had known about it beforehand.
For me the total price of the bike was slightly higher as I spent: $40 for new pads, $72 for new rotors, and $25 for a new chain. That still brings my grand total to under $2100! I have no regrets.
#12
Junior Member
Thread Starter
Join Date: Jun 2018
Posts: 20
Mentioned: 0 Post(s)
Tagged: 0 Thread(s)
Quoted: 7 Post(s)
Likes: 0
Liked 0 Times
in
0 Posts
It's not like it will cause any problems, but I'm pretty sure they did on your bike just what they did on mine: left the brake hoses at full length. (The derailleur cable and housing was fine.)
If you aren't comfortable adjusting a RD, then I do NOT recommend you try to shorten and re-bleed your brakes. It's not rocket science, but it is definitely more involved than adjusting a derailleur, and since you are dealing with toxic DOT 5.1 fluid, you don't have as much margin for error.
Attached are a couple of pics of my wife's bike, after I did the following:


If you aren't comfortable adjusting a RD, then I do NOT recommend you try to shorten and re-bleed your brakes. It's not rocket science, but it is definitely more involved than adjusting a derailleur, and since you are dealing with toxic DOT 5.1 fluid, you don't have as much margin for error.
Attached are a couple of pics of my wife's bike, after I did the following:
- Replaced the 6-bolt rotors with proper center-lock rotors (the wheels have center-lock hubs)
- Replaced the defective SRAM brake retaining springs with the proper ones
- Replaced the bars and stem with ones that dialed-in my wife's fit
- Replaced the pedals and saddle
- shortened the brake hoses and rebled the system


Here's in interesting link on tire width and a beautiful insight in the importance of tire width. I agree with you that the frame could maybe fit a 40 or up to a 42 possibly. I did measure the tire that comes with the bike, the challenge tires. They measure in at 35mm width actually. So pushing a 44 might actually be doable but you wouldn't know until you tried. That's what my LBS said to me as well. 9mm isn't that much depending on how the tire is dispersed on the rim.
https://janheine.wordpress.com/2013/...limeters-make/
#13
Junior Member
Thread Starter
Join Date: Jun 2018
Posts: 20
Mentioned: 0 Post(s)
Tagged: 0 Thread(s)
Quoted: 7 Post(s)
Likes: 0
Liked 0 Times
in
0 Posts
I agree the decal is fugly but in a very odd way. It's kind of growing on me. But it'll go eventually. I wish they would work out there decal issue. the one on the Le Champion in pinstriped more subtle text.
#14
Junior Member
Join Date: Dec 2017
Posts: 16
Mentioned: 1 Post(s)
Tagged: 0 Thread(s)
Quoted: 7 Post(s)
Likes: 0
Liked 1 Time
in
1 Post
Thinking about buying one, maybe two of these. I want to mount full fenders to them. Is there a pre-formed fork hole at the top center? looks like there are threaded holes in the fork dropouts for fender brace install.
The rear seat stays, seat stay bridge, and rear dropouts look fully formed for fenders.
Thanks in advance.
The rear seat stays, seat stay bridge, and rear dropouts look fully formed for fenders.
Thanks in advance.
#15
Life Feeds On Life
Join Date: Jan 2018
Location: Hondo,Texas
Posts: 2,143
Bikes: Too many Motobecanes
Mentioned: 11 Post(s)
Tagged: 0 Thread(s)
Quoted: 4405 Post(s)
Liked 4,520 Times
in
3,022 Posts
I have a Motobecane Omni Strada Pro 2017-2018 similar to the Whipshot but is aluminum it has been a good bike. Maybe in the future I will get a titanium bike I bet the ride is smooth being on steel.
#18
Junior Member
Join Date: Dec 2017
Posts: 16
Mentioned: 1 Post(s)
Tagged: 0 Thread(s)
Quoted: 7 Post(s)
Likes: 0
Liked 1 Time
in
1 Post
can't post youtube video because I have less than ten posts. however, just add https
www.youtube.com/watch?v=T7NcPYjZ_gk
fenders fitted, decal removed. ordering two. one for me, one for GF. Will be nice day tour bikes.
www.youtube.com/watch?v=T7NcPYjZ_gk
fenders fitted, decal removed. ordering two. one for me, one for GF. Will be nice day tour bikes.
#20
Senior Member
Thinking about buying one, maybe two of these. I want to mount full fenders to them. Is there a pre-formed fork hole at the top center? looks like there are threaded holes in the fork dropouts for fender brace install.
The rear seat stays, seat stay bridge, and rear dropouts look fully formed for fenders.
Thanks in advance.
The rear seat stays, seat stay bridge, and rear dropouts look fully formed for fenders.
Thanks in advance.
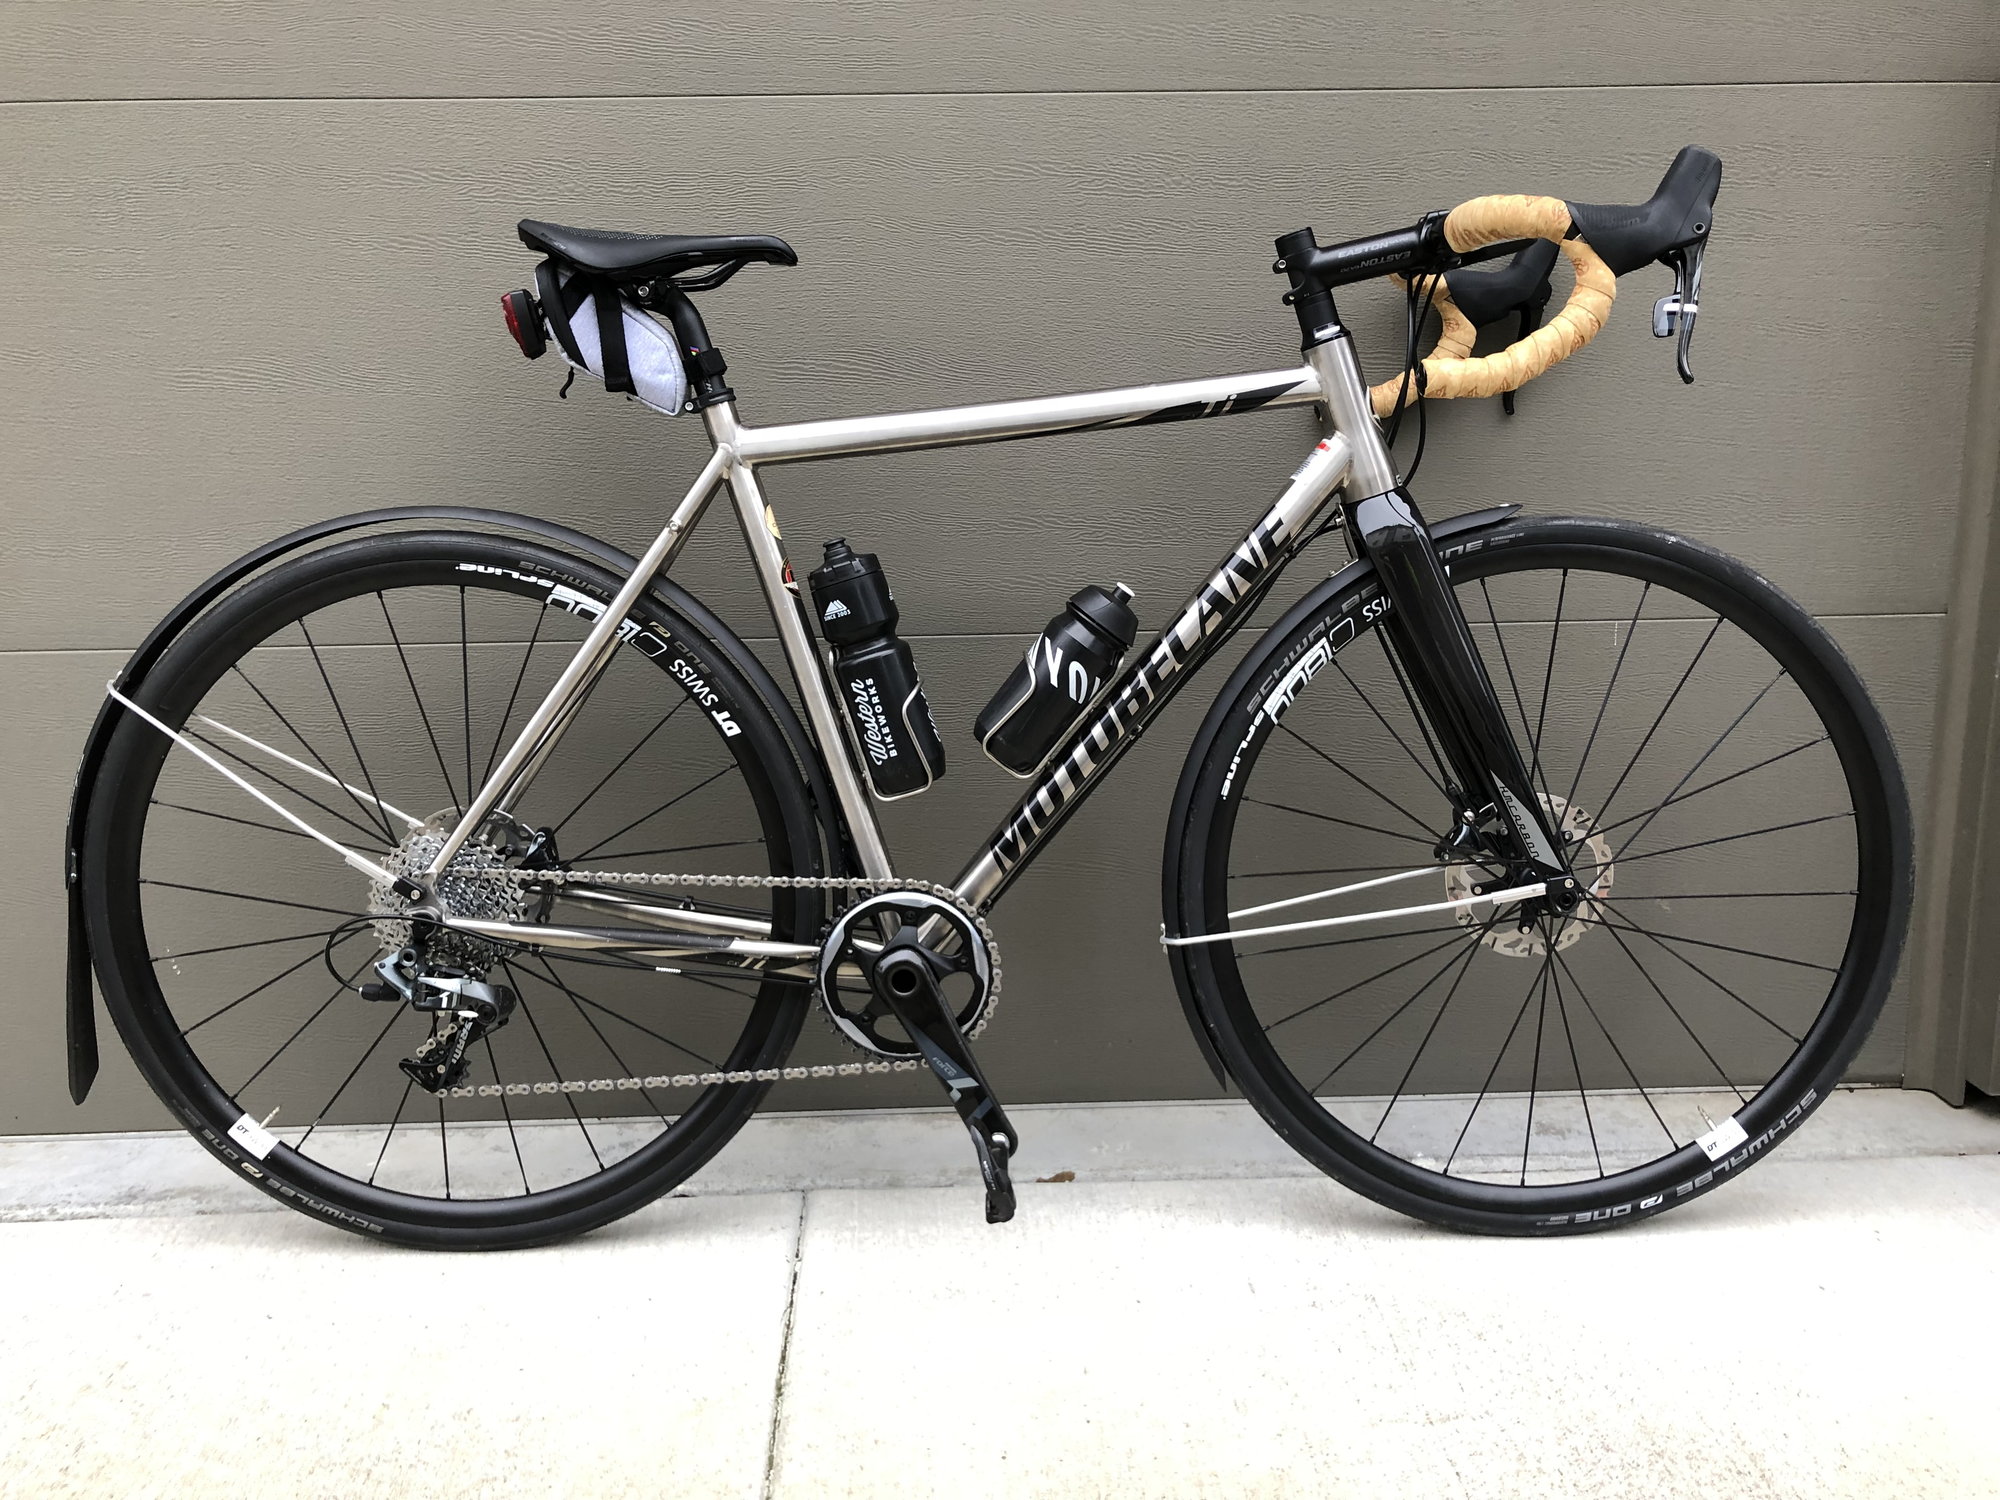
Seat stay hole hole points down at fender so fender needs to be drilled (rather than using a bracket for a brake bridge). Fender install is very clean and straightforward—
#21
Junior Member
Join Date: Dec 2017
Posts: 16
Mentioned: 1 Post(s)
Tagged: 0 Thread(s)
Quoted: 7 Post(s)
Likes: 0
Liked 1 Time
in
1 Post
Hole for fender is on the rear of the fork. I needed a slightly longer hanger for the front fender.
Seat stay hole hole points down at fender so fender needs to be drilled (rather than using a bracket for a brake bridge). Fender install is very clean and straightforward—
Seat stay hole hole points down at fender so fender needs to be drilled (rather than using a bracket for a brake bridge). Fender install is very clean and straightforward—
Appreciate it brother. I ordered one for my GF in size 55cm shortly after I found the youtube video. Sadly the 58cm is sold out for me. It's probably for the best, I don't need it. Looking forward to putting a flat carbon bar (1" rise) with xt brakes and shifter to convert it into a cafe bicycle for her. Going to try to use stylish dark wood fenders with 650b carbon wheels, but will wait till the bike comes in so I can fit the wheels and see how much fender clearance I have to work with.
#22
Junior Member
Join Date: Dec 2017
Posts: 16
Mentioned: 1 Post(s)
Tagged: 0 Thread(s)
Quoted: 7 Post(s)
Likes: 0
Liked 1 Time
in
1 Post
I'll let you know what the max tire I can fit on 650b's once my sample comes in. sounds like you're adding 3mm, so i'm guessing 45's. But I don't want to cut it too close to allow for wheel out of true tolerance etc. Nice to have a good gap there just in case you're out riding and things go wrong that you can't fix trail-side.
#23
Junior Member
Join Date: Jul 2004
Location: milwaukee, wi
Posts: 23
Bikes: Trek SingleTrack 950, Micargi M1000
Mentioned: 0 Post(s)
Tagged: 0 Thread(s)
Quoted: 7 Post(s)
Likes: 0
Liked 0 Times
in
0 Posts
Hole for fender is on the rear of the fork. I needed a slightly longer hanger for the front fender.
Seat stay hole hole points down at fender so fender needs to be drilled (rather than using a bracket for a brake bridge). Fender install is very clean and straightforward—

#24
Senior Member
They are Portland Design Works fenders in their "Road Plus" size. The fenders are 37mm wide and PDW says they can be used with tires up to 30mm. I'm running a 28mm tire that probably measures closer to 30 on the wide DT Swiss rims. The fenders were easy to install, are really solid, and provide fantastic coverage – no complaints at all from the person on my wheel in a wet group ride. As I mentioned above: I needed a longer hanger for the front fender (which I ordered from PDW), and I had to drill the rear fender at the seat-stay bridge. All the connections are direct thread-in and seem really really solid. I used double leather washers at the seat-stay and chain-stay, and if I was doing it over again I probably would have put lock-tite on those bolts, as I've had to retighten them after some relentless chip seal and the leather washers wearing in a bit.
#25
Junior Member
Join Date: Jul 2004
Location: milwaukee, wi
Posts: 23
Bikes: Trek SingleTrack 950, Micargi M1000
Mentioned: 0 Post(s)
Tagged: 0 Thread(s)
Quoted: 7 Post(s)
Likes: 0
Liked 0 Times
in
0 Posts
Thanks.
I've got a set of roadracer mk3 fenders and they're just not sturdy enough for my riding.
Seems almost like you'd want the "city" fenders though, no? Being able to go up to a 35 for winter riding would be ideal.
I've got a set of roadracer mk3 fenders and they're just not sturdy enough for my riding.
Seems almost like you'd want the "city" fenders though, no? Being able to go up to a 35 for winter riding would be ideal.


