


Rust Help: 3RENSHO
 01-22-21, 02:56 PM
#26
Newbie
Thread Starter
Join Date: Aug 2014
Location: Washington, DC
Posts: 63
Bikes: 82 De Rosa Sammontana, 82 3Rensho Aero, 83 Bianchi Specialissima X3, 89 De Rosa Professional, 90s De Rosa Primato, 99 Colnago Mapei Master X-Light
Mentioned: 3 Post(s)
Tagged: 0 Thread(s)
Quoted: 19 Post(s)
Liked 29 Times
in
11 Posts
jjhabbs Same here. It's why I scooped it up even if it's slightly small - - 56 seat tube (need 57-58). I was surprised to see the rust on that bb when it arrived. Definitely disappointing but I'm not opposed to a project.
 01-22-21, 03:08 PM
#27

PM me your cotters

Join Date: Jun 2015
Location: ATL
Posts: 3,241
Mentioned: 80 Post(s)
Tagged: 0 Thread(s)
Quoted: 1137 Post(s)
Liked 590 Times
in
422 Posts
francophile I just saw your Pinarello thread. Why do you recommend OA over evapo in this situation? Is it because that area is so difficult to access? Btw - did the evaporust have any affect on the paint? I know the bottle says it doesn't but wasn't sure how true that was.
This is my take, take it or leave it.
Gels are great, can get into nooks and crannies. However, it's probably not the best idea to put an acidic jelly product like Naval Jelly into a tight nook, not only from the difficulty-of-application point of view, but also from the removal perspective. Clearing acid out of a nook may take extra effort, with any acidic product you should follow with a neutralizer after, so there's extra effort to be done.
Evaporust can be used, but making a bath of it - although you can re-use it - isn't cheap. The gel, I agree with above, isn't as effective IMO. While you could potentially wrap it with a dampened paper towel and surround in plastic wrap to avoid evaporation, it won't get in the nooks, so the only way to effectively contact the problem area is using a bath.
So, if you're stuck giving a bath, OA is inexpensive, not nearly as harsh as Naval Jelly, and it's super easy to make a a batch up. You could easily make a bath large enough to drop the BB shell area into, let it soak overnight, then make a baking soda bath to soak for neutralization. After, mix both baths together to neutralize the acid bath and dispose accordingly.
Once done, prep the area, proceed with using a baremetal primer/sealer and/or converter application, then top that with paint within the correct recoat or cure window. Remember, topcoats can change in luster or color depending on whether the base sealer/primer/converter is dark or light in color. This is more true with candies than anything, but can hold true with other topcoats as well.
EDIT: I should wrap this up with a comment: All three products listed above are paint-safe. Naval Jelly will ruin paint if left on for too long, the product recommends 10 minutes. OA can be left on for hours, maybe even days, it all depends on how much you dilute the granules when dissolved. Evaporust instructions say to limit exposure to X# of hours, but I've left stuff in it for more than 2 days with no ill effects, however its effectiveness seems to slope off after 6-12 hours, IME. Again, going back to the above, "know what you're working with". Acids are a great tool, especially ones like OA which come in powder/granule form and you can control the acidity. Always read the label and consider consulting BF and/or YouTube to get some experienced viewpoints or see it in action.
__________________
███████████████
███████████████
Last edited by francophile; 02-12-21 at 12:44 PM.
01-22-21, 03:12 PM
#28
Senior Member

Join Date: Aug 2009
Location: Berkeley, CA
Posts: 7,238
Bikes: '72 Cilo Pacer, '72 Gitane Gran Tourisme, '72 Peugeot PX10, '73 Speedwell Ti, '74 Peugeot UE-8, '75 Peugeot PR-10L, '80 Colnago Super, '85 De Rosa Pro, '86 Look Equipe 753, '86 Look KG86, '89 Parkpre Team, '90 Parkpre Team MTB, '90 Merlin
Mentioned: 87 Post(s)
Tagged: 0 Thread(s)
Quoted: 830 Post(s)
Liked 2,123 Times
in
554 Posts
Guys - thank you for the great feedback. Work has been crazy otherwise I would have had some follow-up questions. I'll absorb these recommendations. I live in Washington, DC so i'll see if they're any good auto body paint suppliers that could match the paint. To start, I may try building a little dam with clay and put evapo rust in there with a medicine dropper. I definitely want to get this right.
gaucho777 What do you mean "neutralize with baking soda"? Is this a step necessary with evapo-rust as well? merziac Here's a quick pic of the bike in question
gaucho777 What do you mean "neutralize with baking soda"? Is this a step necessary with evapo-rust as well? merziac Here's a quick pic of the bike in question
Further reading: https://www.bikeforums.net/classic-v...alic-acid.html
01-22-21, 03:47 PM
#29
Senior Member
Join Date: Sep 2017
Location: Eastern Shore, MD
Posts: 2,107
Bikes: Road ready: 1993 Koga Miyata City Liner Touring Hybrid, 1989 Centurion Sport DLX, "I Blame GP" Bridgestone CB-1. Projects: Yea, I got a problem....
Mentioned: 24 Post(s)
Tagged: 0 Thread(s)
Quoted: 753 Post(s)
Liked 737 Times
in
422 Posts


Likes For bark_eater:
02-11-21, 07:50 PM
#30
CL Addict

Join Date: Oct 2007
Location: Evanston, IL
Posts: 1,067
Bikes: '50s Leon Cattrysse - late 50s Raleigh Lenton Sports - 1960/61 Raleigh Lenton Grand Prix - '72 Canadian Tire Company Supercycle - '74 Raleigh International - '83 Nishiki Cresta - '84 Centurion Turbo - '86 v. Herwerden (Chesini) - '87 Specialized Sirr
Mentioned: 3 Post(s)
Tagged: 0 Thread(s)
Quoted: 85 Post(s)
Liked 96 Times
in
59 Posts
DCilliams, have you had a change to deal with the rust issue?
I have a similar issue with my Nishiki Cresta. I bought the frame knowing it had this problem. It�s time for me too to do something about it.
That�s why this thread is so interesting to me.
Since my bike is not a show bike but more of a work horse I�m not too worried about the paint. I�m more concerned about the integrity of the frame. After its all set and done I�ll be installing fenders to protect the frame.
I also am considering frame safer.
__________________
02-15-21, 04:21 PM
#31
Newbie
Thread Starter
Join Date: Aug 2014
Location: Washington, DC
Posts: 63
Bikes: 82 De Rosa Sammontana, 82 3Rensho Aero, 83 Bianchi Specialissima X3, 89 De Rosa Professional, 90s De Rosa Primato, 99 Colnago Mapei Master X-Light
Mentioned: 3 Post(s)
Tagged: 0 Thread(s)
Quoted: 19 Post(s)
Liked 29 Times
in
11 Posts
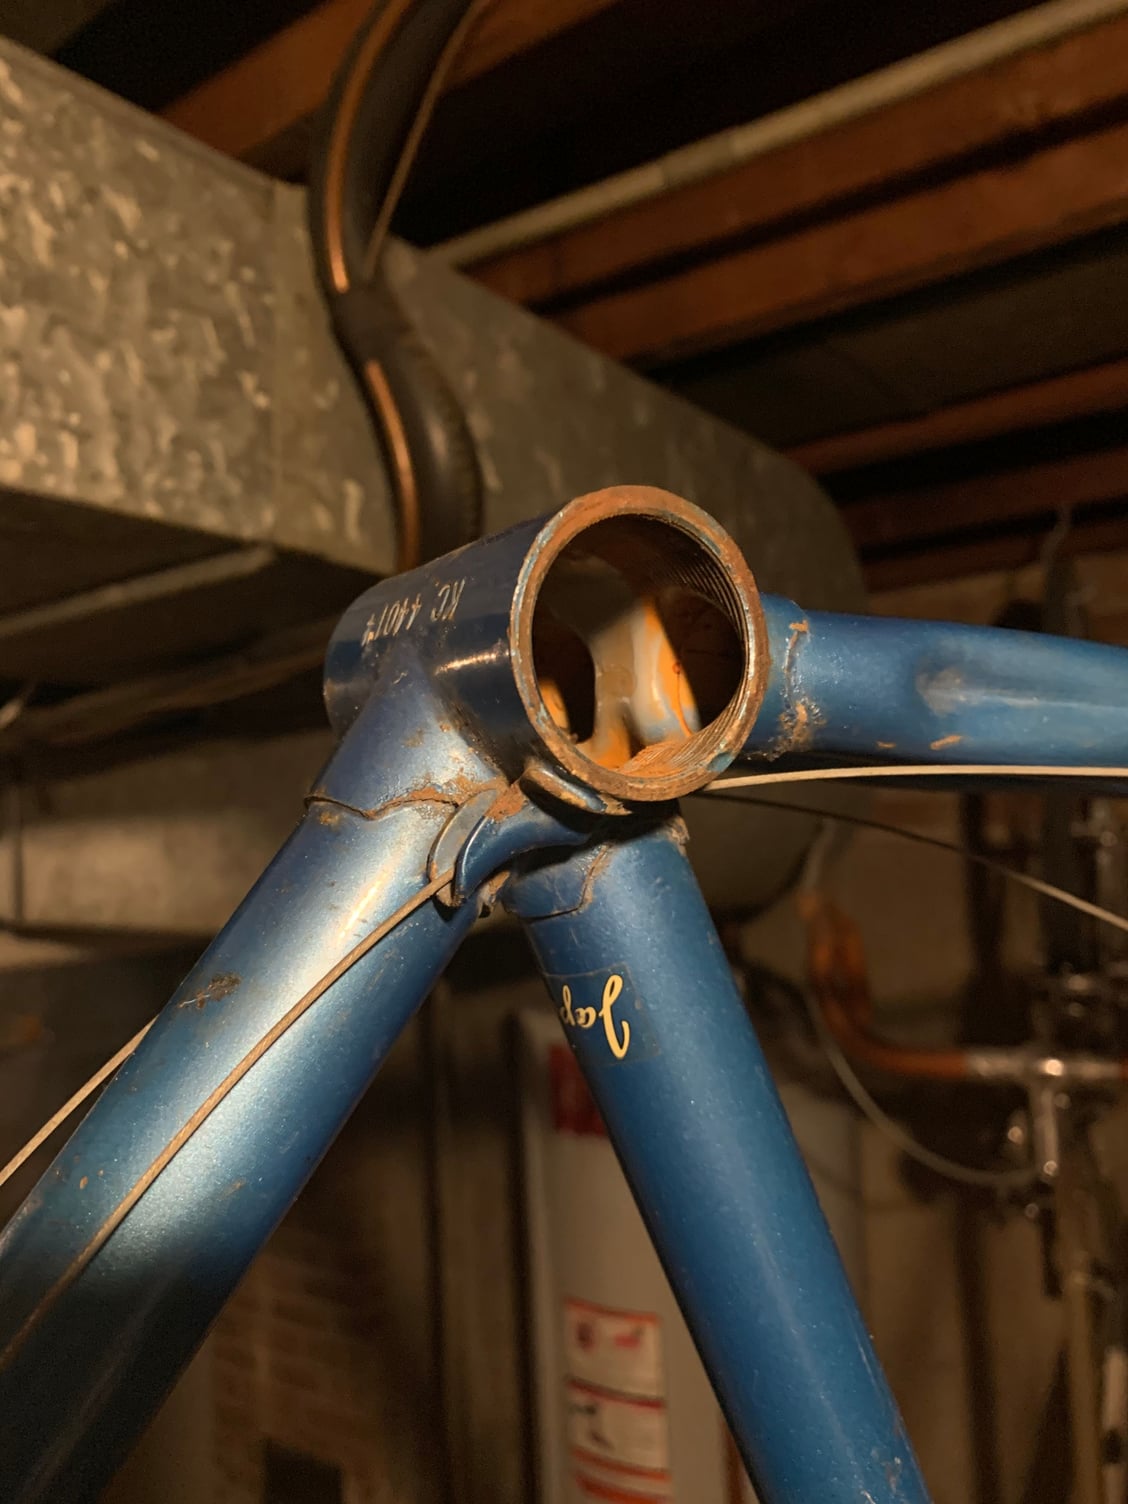
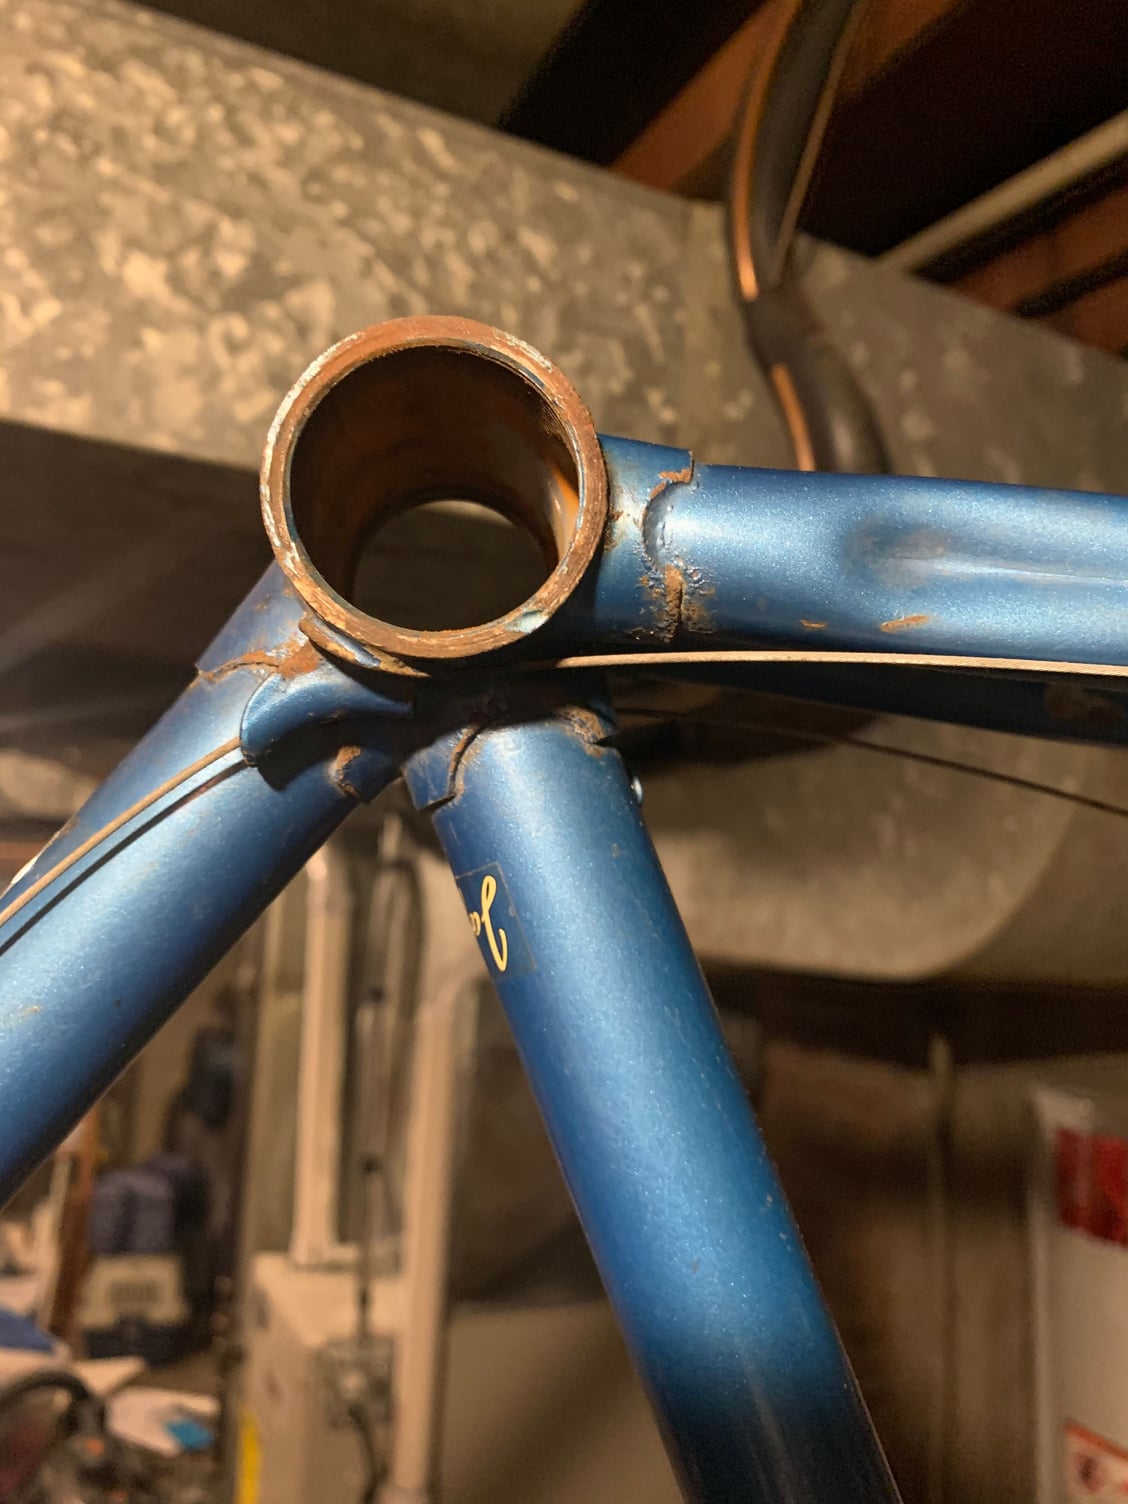
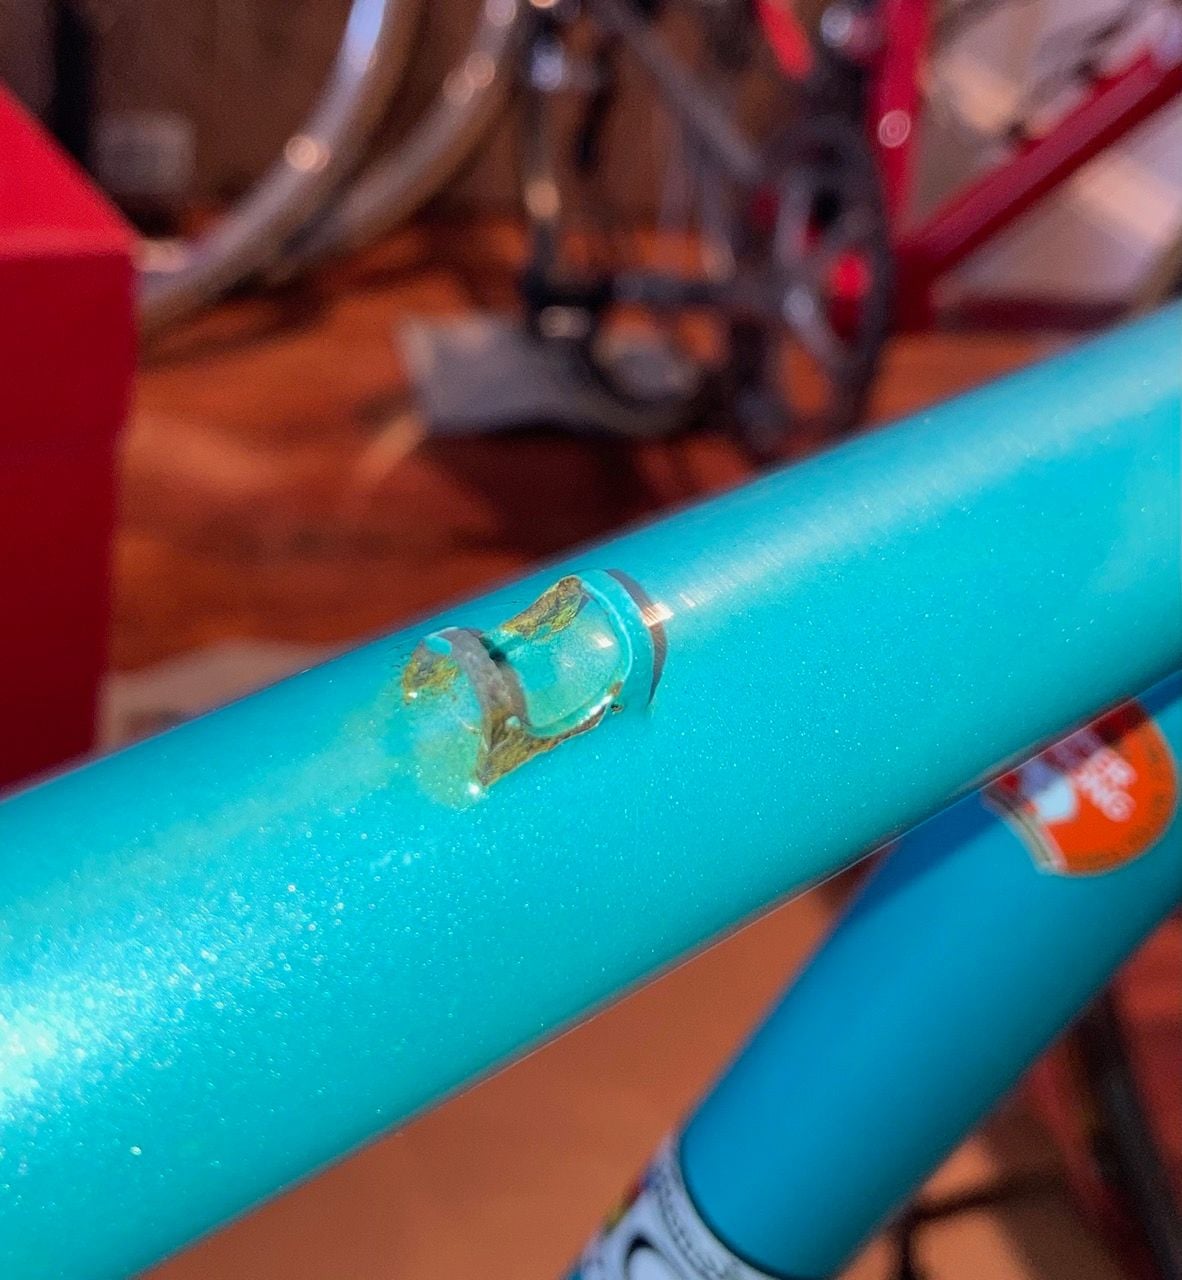
UPDATE: Rather than soak the entire frame, I tied strips of shop towels around cable guides, stuffed them into crevices, and then soak with evapo-rust using an eye dropper. Reapplying liquid every few hours. Now, I need a sealer, but wonder if I'll be able to paint it on (rustoleum or Por15) rather than spray--the affected areas being so small. Anyone have any experience brushing sealer on? Is there also a lacquer primer you recommend? (Preferably white.) Rustoleum has some primers but I don't think they neutralize traces of rust like the Rust Reformer, which coats everything in black.
Color matching those top tube cable guides is going to require some experimentation. My local auto body shops said they can't help me. So i purchased a few nail polishes I think are close but may have to mix. I thought automotive touch up would be best, but the 2002 Thunderbird Blue touch up was disappointing in person. Fingers crossed.


Color matching those top tube cable guides is going to require some experimentation. My local auto body shops said they can't help me. So i purchased a few nail polishes I think are close but may have to mix. I thought automotive touch up would be best, but the 2002 Thunderbird Blue touch up was disappointing in person. Fingers crossed.
02-15-21, 05:42 PM
#32
Senior Member

Join Date: Mar 2014
Location: City of Angels
Posts: 4,870
Bikes: A few too many
Mentioned: 42 Post(s)
Tagged: 1 Thread(s)
Quoted: 1364 Post(s)
Liked 2,180 Times
in
1,183 Posts
OP,
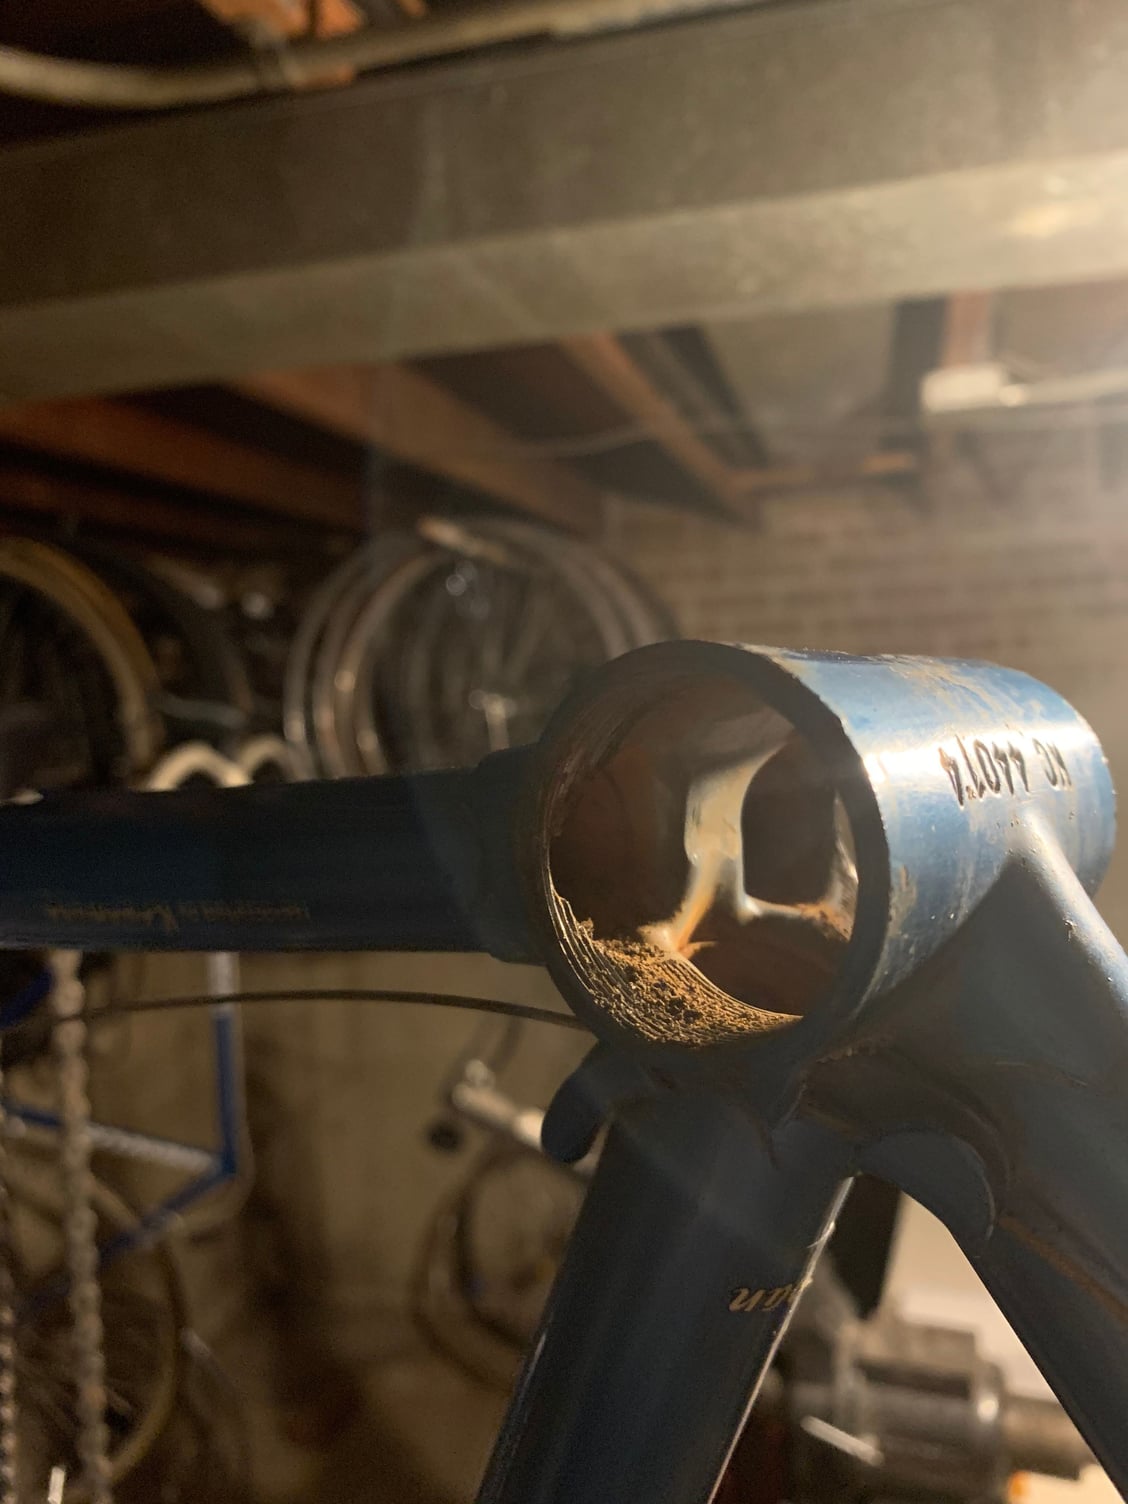
There appears to still be rust in the BB shell...if this were my frame I would use a dental pick to scrape the rust from those areas and use the clear POR-15 I mentioned in my earlier post. It has a very low viscosity, almost like water, and will get into all the crevices and stop the rust from reappearing (toothpick tech.).
The cable guides pose a different problem because they are in an area that is noticeable and paint matching with nail polish may not yield the results you are after. even with an airbrush, the metallic will be a tough one. Since the guides are small try using the POR-15 (almost dry) on a q-tip and tap it on, you will need to use a toothpick where the edge of the chip are....after that a "close" color match applied in a similar way.....staying "inside the chip. You might also try a toothpick that has diluted paint on it...again stay inside the chipped area. In my estimation, dry dabbing might be best on the guides because it will be difficult to mask/paint/match/blend.
Check that POR-15 is compatible with your existing paint and won't lift it, and "always" practice your technique on something you're not concerned about "before" doing the final..
Good Luck, Ben
__________________
"EVERY PERSON IS GUILTY OF ALL THE GOOD THEY DID NOT DO"
Voltaire
Voice recognition may sometimes create odd spelling and grammatical errors
"EVERY PERSON IS GUILTY OF ALL THE GOOD THEY DID NOT DO"
Voltaire
Voice recognition may sometimes create odd spelling and grammatical errors
Last edited by xiaoman1; 02-15-21 at 06:26 PM.
Likes For xiaoman1:
02-16-21, 01:24 PM
#33
Full Member
There's a good chance that rust penetrates further under the paint than what can be seen with the eye. I think I would be carefully picking away at the edges removing tiny bits of paint to see how far it goes.
In my opinion you haven't gone far enough with the rust removal. You need to get it back to the point where the rust colour is all gone.
In my opinion you haven't gone far enough with the rust removal. You need to get it back to the point where the rust colour is all gone.
02-16-21, 01:29 PM
#34
Senior Member

Join Date: Apr 2012
Location: Middle Earth (aka IA)
Posts: 20,434
Bikes: A bunch of old bikes and a few new ones
Mentioned: 178 Post(s)
Tagged: 0 Thread(s)
Quoted: 5888 Post(s)
Liked 3,471 Times
in
2,079 Posts
But it can be disappointing. It works well, at least in my experience, when new but degrades quickly (unlike the regular evaporust).
02-16-21, 07:47 PM
#35
PM me your cotters
Join Date: Jun 2015
Location: ATL
Posts: 3,241
Mentioned: 80 Post(s)
Tagged: 0 Thread(s)
Quoted: 1137 Post(s)
Liked 590 Times
in
422 Posts
If you want to properly fix this problem on the BB shell, you need to selectively soak that part of the frame. Period. You otherwise will not get the constant coverage required to eat the FeO away thoroughly.
You clearly still have rust visible, and if you paint over it, it's just going to continue rusting under the paint. You could try a rust conversion product, but I wouldn't personally trust it. The goal here is to correctly fix the issue, not kick the can, right?
Naval Jelly is the perfect product for that top tube cable guide. It'll get down to bare metal in less than a half hour, with 2 x 10min treatments. Then properly clean, use a self-etching primer per the instructions.
Oxalic acid bath of just the BB shell in a simple 8x10 tub with about 4" of sidewall will work lovely. It won't cost much at all. Neutralizing bath after. If you are in a hurry, blow dry the shell for 3-5 minutes to evaporate all water from the area, wait for the area to cool, then brush in self-etching primer after taping off adjacent areas.
I don't recommend products like Rust Bullet and POR. Stuff like that is intended for vehicle chassis - frames, crossmembers, etc. - I used it all the time back when I still did a lot of metalwork resto-modding old American cars. It's not practical to use in small areas, it gets onto everything, and will catalyze on your skin not much different from superglue. It will chip easily and is a living nightmare to clean up when you get it in places it wasn't supposed to go. Self-etching primer is great.
__________________
███████████████
███████████████
Likes For francophile:
02-17-21, 12:02 AM
#36
Senior Member
Join Date: Mar 2014
Location: City of Angels
Posts: 4,870
Bikes: A few too many
Mentioned: 42 Post(s)
Tagged: 1 Thread(s)
Quoted: 1364 Post(s)
Liked 2,180 Times
in
1,183 Posts
I have used POR on a lot of restoration projects, cars as well as bicycles and never had any issues. As has been mentioned if you are not careful it can be messy and why I did not recommend a brush and suggested that one do trial runs to get the feel of how it flows....q-tip won't work in the crease but a toothpick will. Each condition is different and getting a feel for materials as well as how to approach the problem is important otherwise going in with a limited experience can be problematic and cause disastrous results.
The OP will be using small amounts of any material so getting it everywhere should not be an issue....toothpicks would eliminate paint on one's hands and it getting into everything.... in those small areas that is what I would want to use when tackling the rust in those creases. Low viscosity paint would be ideal in this situation, the paint would flow easily....be sure to thin whatever you are using etc.
Practice practice and patience are the keys....Too often folks rush into repairs without a clear path forward.
In any event, OP, Good Luck.
JMHO, Best, Ben
I checked the web...here is a tutorial that the OP might find helpful. I find images better than words for situations like the OP is encountering. About 530 min. in again go slow.
__________________
"EVERY PERSON IS GUILTY OF ALL THE GOOD THEY DID NOT DO"
Voltaire
Voice recognition may sometimes create odd spelling and grammatical errors
"EVERY PERSON IS GUILTY OF ALL THE GOOD THEY DID NOT DO"
Voltaire
Voice recognition may sometimes create odd spelling and grammatical errors
Last edited by xiaoman1; 02-17-21 at 09:06 AM.
02-17-21, 07:59 AM
#37
Newbie
Thread Starter
Join Date: Aug 2014
Location: Washington, DC
Posts: 63
Bikes: 82 De Rosa Sammontana, 82 3Rensho Aero, 83 Bianchi Specialissima X3, 89 De Rosa Professional, 90s De Rosa Primato, 99 Colnago Mapei Master X-Light
Mentioned: 3 Post(s)
Tagged: 0 Thread(s)
Quoted: 19 Post(s)
Liked 29 Times
in
11 Posts
Thank you for the thorough responses! I really appreciate your time.
