


4130 Steel tube forming
 02-11-21, 10:26 AM
#1
Newbie
Thread Starter
Join Date: Feb 2021
Posts: 2
Mentioned: 0 Post(s)
Tagged: 0 Thread(s)
Quoted: 0 Post(s)
Likes: 0
Liked 1 Time
in
1 Post
4130 Steel tube forming
Hi everyone,
Could someone offer some advice as to how I would go about adding some form to the end of a 4130 steel tube for a frame build project I am currently working on.
The tube is 5/8" OD with a 0.35" wall. It is to be welded to a square profile so would be good to form it from circular to square at the end. Would also like to put a small bend in it (around 5deg, radius can be whatever).
I have considered getting a former tool 3D printed and then using a fly press but not sure whether 1) the printed part will be up to the force required and 2) a fly press will be able to provide enough force to form the tube.
Anyone with any experience of this that could offer some advice would be much appreciated.
I'll add some pictures once I've been a member for 10 days.
Cheers
Last edited by Azza46; 02-11-21 at 10:34 AM.
 02-11-21, 11:40 AM
#2


Randomhead
Join Date: Aug 2008
Location: Happy Valley, Pennsylvania
Posts: 24,394
Mentioned: 0 Post(s)
Tagged: 0 Thread(s)
Quoted: 4 Post(s)
Liked 3,694 Times
in
2,516 Posts
make an album in your gallery and then we can rescue the pictures for you.
Just from having reshaped tubes much less dramatically, I don't think a press will really do what you want. If it's too big to fit on the square tube, I would go with ovalizing. That you can do in a vise
Just from having reshaped tubes much less dramatically, I don't think a press will really do what you want. If it's too big to fit on the square tube, I would go with ovalizing. That you can do in a vise
02-11-21, 12:03 PM
#3
Senior Member
Join Date: Dec 2019
Posts: 955
Mentioned: 3 Post(s)
Tagged: 0 Thread(s)
Quoted: 321 Post(s)
Liked 263 Times
in
212 Posts
It's very hard to cold-bend tubes without them just kinking without the proper bending die the right size. You can heat them up, push one end into a block of wood drilled the right size, and bend it down by hand. I've done this on tubes to unbend a bend a bit and it worked OK but idk whether the heat cycle is doing the tube any favours, and I didn't end up using those tubes as they weren't symmetrical enough. This is the other thing about bending chainstays: you have to get them exactly the same. That's what I like about the design of this double-barrelled bender: https://cobraframebuilding.com/store/tube-bender (I don't have one but it looks cool). You often don't care exactly what the bend is so long as it's the same.
As for making a square on the end I guess you might have to do it in steps with a series of mandrels and dies. Don't know. If you just bash something square in there at the final size it's probably going to split the tube.
You could just push the end into a bit of square tube the right size and braze it up at both ends, filling in as much of the gaps as possible and leaving a good sized fillet on the long end. Then sand it into a nice smooth transition. A bit of 16 gauge 3/4" square tube would have pretty much exactly the right ID. It wouldn't need to be 4130 or anything fancy since it's thick enough and anyway the round tube is still there on the inside.
02-11-21, 12:20 PM
#4

Senior Member
Join Date: Feb 2012
Location: Rochester, NY
Posts: 18,071
Bikes: Stewart S&S coupled sport tourer, Stewart Sunday light, Stewart Commuting, Stewart Touring, Co Motion Tandem, Stewart 3-Spd, Stewart Track, Fuji Finest, Mongoose Tomac ATB, GT Bravado ATB, JCP Folder, Stewart 650B ATB
Mentioned: 0 Post(s)
Tagged: 0 Thread(s)
Quoted: 4199 Post(s)
Liked 3,851 Times
in
2,301 Posts
Why does the tube end have to be a square cross section? Why won't a fillet brazing of the round ended tube to the square form not be doable? Is there a aesthetic reason? Structural one? Does some not mentioned part have to interface with the tube in a way that the tube needs to be square as it contacts the form?
My first thought was to make a tapered square mandrel that, along with a vise, can be inserted and serve as the shaping tool. I'm unsure if I agree with guy153's tube cracking concerns but that is what fabricating something new is about, discovering what works and what doesn't. One could always anneal the tube if it was found on the practice (you will practice this first, won't you?) that the tube did crack. I do like his alternate method though. Andy
My first thought was to make a tapered square mandrel that, along with a vise, can be inserted and serve as the shaping tool. I'm unsure if I agree with guy153's tube cracking concerns but that is what fabricating something new is about, discovering what works and what doesn't. One could always anneal the tube if it was found on the practice (you will practice this first, won't you?) that the tube did crack. I do like his alternate method though. Andy
__________________
AndrewRStewart
AndrewRStewart
Likes For Andrew R Stewart:
02-11-21, 04:49 PM
#5
Randomhead
Join Date: Aug 2008
Location: Happy Valley, Pennsylvania
Posts: 24,394
Mentioned: 0 Post(s)
Tagged: 0 Thread(s)
Quoted: 4 Post(s)
Liked 3,694 Times
in
2,516 Posts
I had the same question as Andy, but I'm waiting for pictures to see if that helps my understanding
02-12-21, 05:58 AM
#6
Newbie
Thread Starter
Join Date: Feb 2021
Posts: 2
Mentioned: 0 Post(s)
Tagged: 0 Thread(s)
Quoted: 0 Post(s)
Likes: 0
Liked 1 Time
in
1 Post
Hi, thanks for the replies.
So yea it's pretty hard to explain with pics but I've added them to an album now. Still cant post them in this thread though unfortunately.
Originally I was just going to squish them, I might still end up doing this. The reason I am asking is I would like a cleaner solution that gives a better junction between the pivot plate in green and the upright in yellow.
In the second picture the tube on the right is straight and forms down to a square. Was thinking I could weld the triangular 'wedge' that is left between the pivot and the tube. The tube on the left has the bend. So it come up perpendicular with the mounting face, bends 5 deg and fires off toward the top fixing point.
Making a mandrel sounds like a good idea. I cant see the tube deforming around the mandrel using only a vice though. Or are you saying insert it then squish the tube around the mandrel?
Cheers
Likes For Azza46:
02-12-21, 06:58 AM
#7
Randomhead
Join Date: Aug 2008
Location: Happy Valley, Pennsylvania
Posts: 24,394
Mentioned: 0 Post(s)
Tagged: 0 Thread(s)
Quoted: 4 Post(s)
Liked 3,694 Times
in
2,516 Posts
Here are your pictures:


Likes For unterhausen:
02-12-21, 07:05 AM
#8
Randomhead
Join Date: Aug 2008
Location: Happy Valley, Pennsylvania
Posts: 24,394
Mentioned: 0 Post(s)
Tagged: 0 Thread(s)
Quoted: 4 Post(s)
Liked 3,694 Times
in
2,516 Posts
The only way you are going to get the tube square is with a hammer over a form. I imagine it will take some practice.
Other than machining a round interface into the piece that the tubes will be joined to, I think that the best way may be to use something like the paragon tube plugs for flat dropouts. The conical end goes into the tube https://www.paragonmachineworks.com/...pout-plug.html
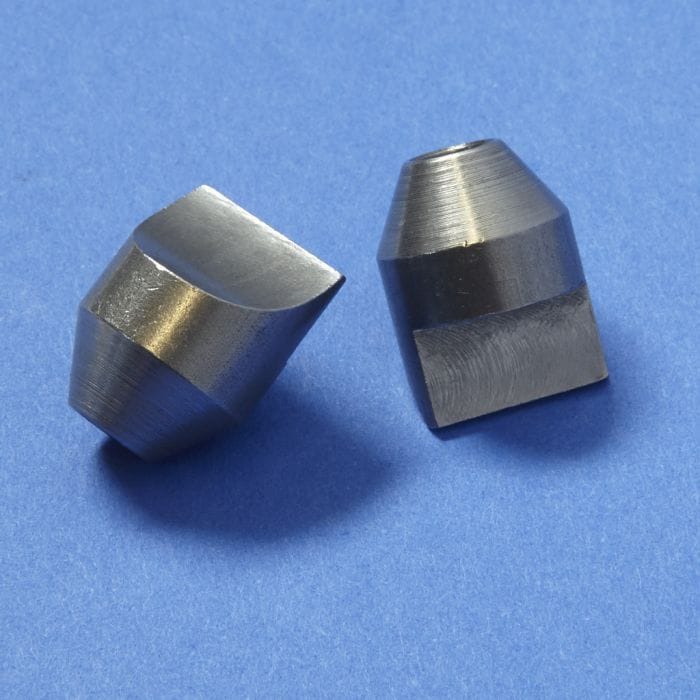
Other than machining a round interface into the piece that the tubes will be joined to, I think that the best way may be to use something like the paragon tube plugs for flat dropouts. The conical end goes into the tube https://www.paragonmachineworks.com/...pout-plug.html
02-12-21, 09:22 AM
#9
Senior Member
Join Date: Dec 2019
Posts: 955
Mentioned: 3 Post(s)
Tagged: 0 Thread(s)
Quoted: 321 Post(s)
Liked 263 Times
in
212 Posts
Yes I was going to say this is not much different to a dropout or a fork end. Those paragon dealies look nice but you can also just have a bit of tang on the green bit, insert it into the tube and fill the gaps with bronze. Cutting the round tubes at a bit of an angle. Is a good idea so you can get more bronze in there. Then you can try to sand it to a nice shape.
I've done this a few times with TIG silicon bronze and it works out pretty well.
I've done this a few times with TIG silicon bronze and it works out pretty well.
02-12-21, 10:09 AM
#10
Senior Member
Join Date: Feb 2012
Location: Rochester, NY
Posts: 18,071
Bikes: Stewart S&S coupled sport tourer, Stewart Sunday light, Stewart Commuting, Stewart Touring, Co Motion Tandem, Stewart 3-Spd, Stewart Track, Fuji Finest, Mongoose Tomac ATB, GT Bravado ATB, JCP Folder, Stewart 650B ATB
Mentioned: 0 Post(s)
Tagged: 0 Thread(s)
Quoted: 4199 Post(s)
Liked 3,851 Times
in
2,301 Posts
I agree with Eric and guy about alternatives. If one reason to have the square tube ends is for chainring clearance I might suggest extending the rocker's contact point "up" the tube, so the tube could remain round and the structure that passes by the chain ring can still be flat.
Not asked about but- The rocker's pinch bolt might be relocated to the 3 or 4 o'clock position to avoid the brazed/welded tube area. This change would free up the rocker's 9-12 o'clock section for an alternative tube contact. I find it easier to try to keep different aspects separate if I am still "prototyping". Andy
Not asked about but- The rocker's pinch bolt might be relocated to the 3 or 4 o'clock position to avoid the brazed/welded tube area. This change would free up the rocker's 9-12 o'clock section for an alternative tube contact. I find it easier to try to keep different aspects separate if I am still "prototyping". Andy
__________________
AndrewRStewart
AndrewRStewart
