


Strumey Archer FW 4 split indicator for a split personality
 08-03-19, 01:01 AM
#1
Senior Member
Thread Starter
Join Date: Oct 2016
Location: Cambridge UK
Posts: 852
Bikes: 1903 24 spd Sunbeam, 1927 Humber, 3 1930 Raleighs, 2 1940s Sunbeams, 2 1940s Raleighs, Rudge, 1950s Robin Hood, 1958 Claud Butler, 2 1973 Colnago Supers, Eddie Merckx, 2 1980 Holdsworth, EG Bates funny TT bike, another 6 or so 1990s bikes
Mentioned: 15 Post(s)
Tagged: 0 Thread(s)
Quoted: 331 Post(s)
Liked 332 Times
in
185 Posts
Strumey Archer FW 4 split indicator for a split personality
Finally got it together. When I first removed the unit the planet cage end holding the fourth gear pawls was completely choked with hardened grease and the pawl springs totally mangled. The 1945 manual says two teaspoons of oil after a rebuild and a teaspoon of oil once a year thereafter. I think someone kept putting too much grease on the bearing or started pumping in grease thru the oil filler cap to try and get 4th gear to work. Big time mistake.
Only lost two more springs getting the hub together (5 all told!). These two pawls are the same for the 3 speed and are relatively easy to fit.
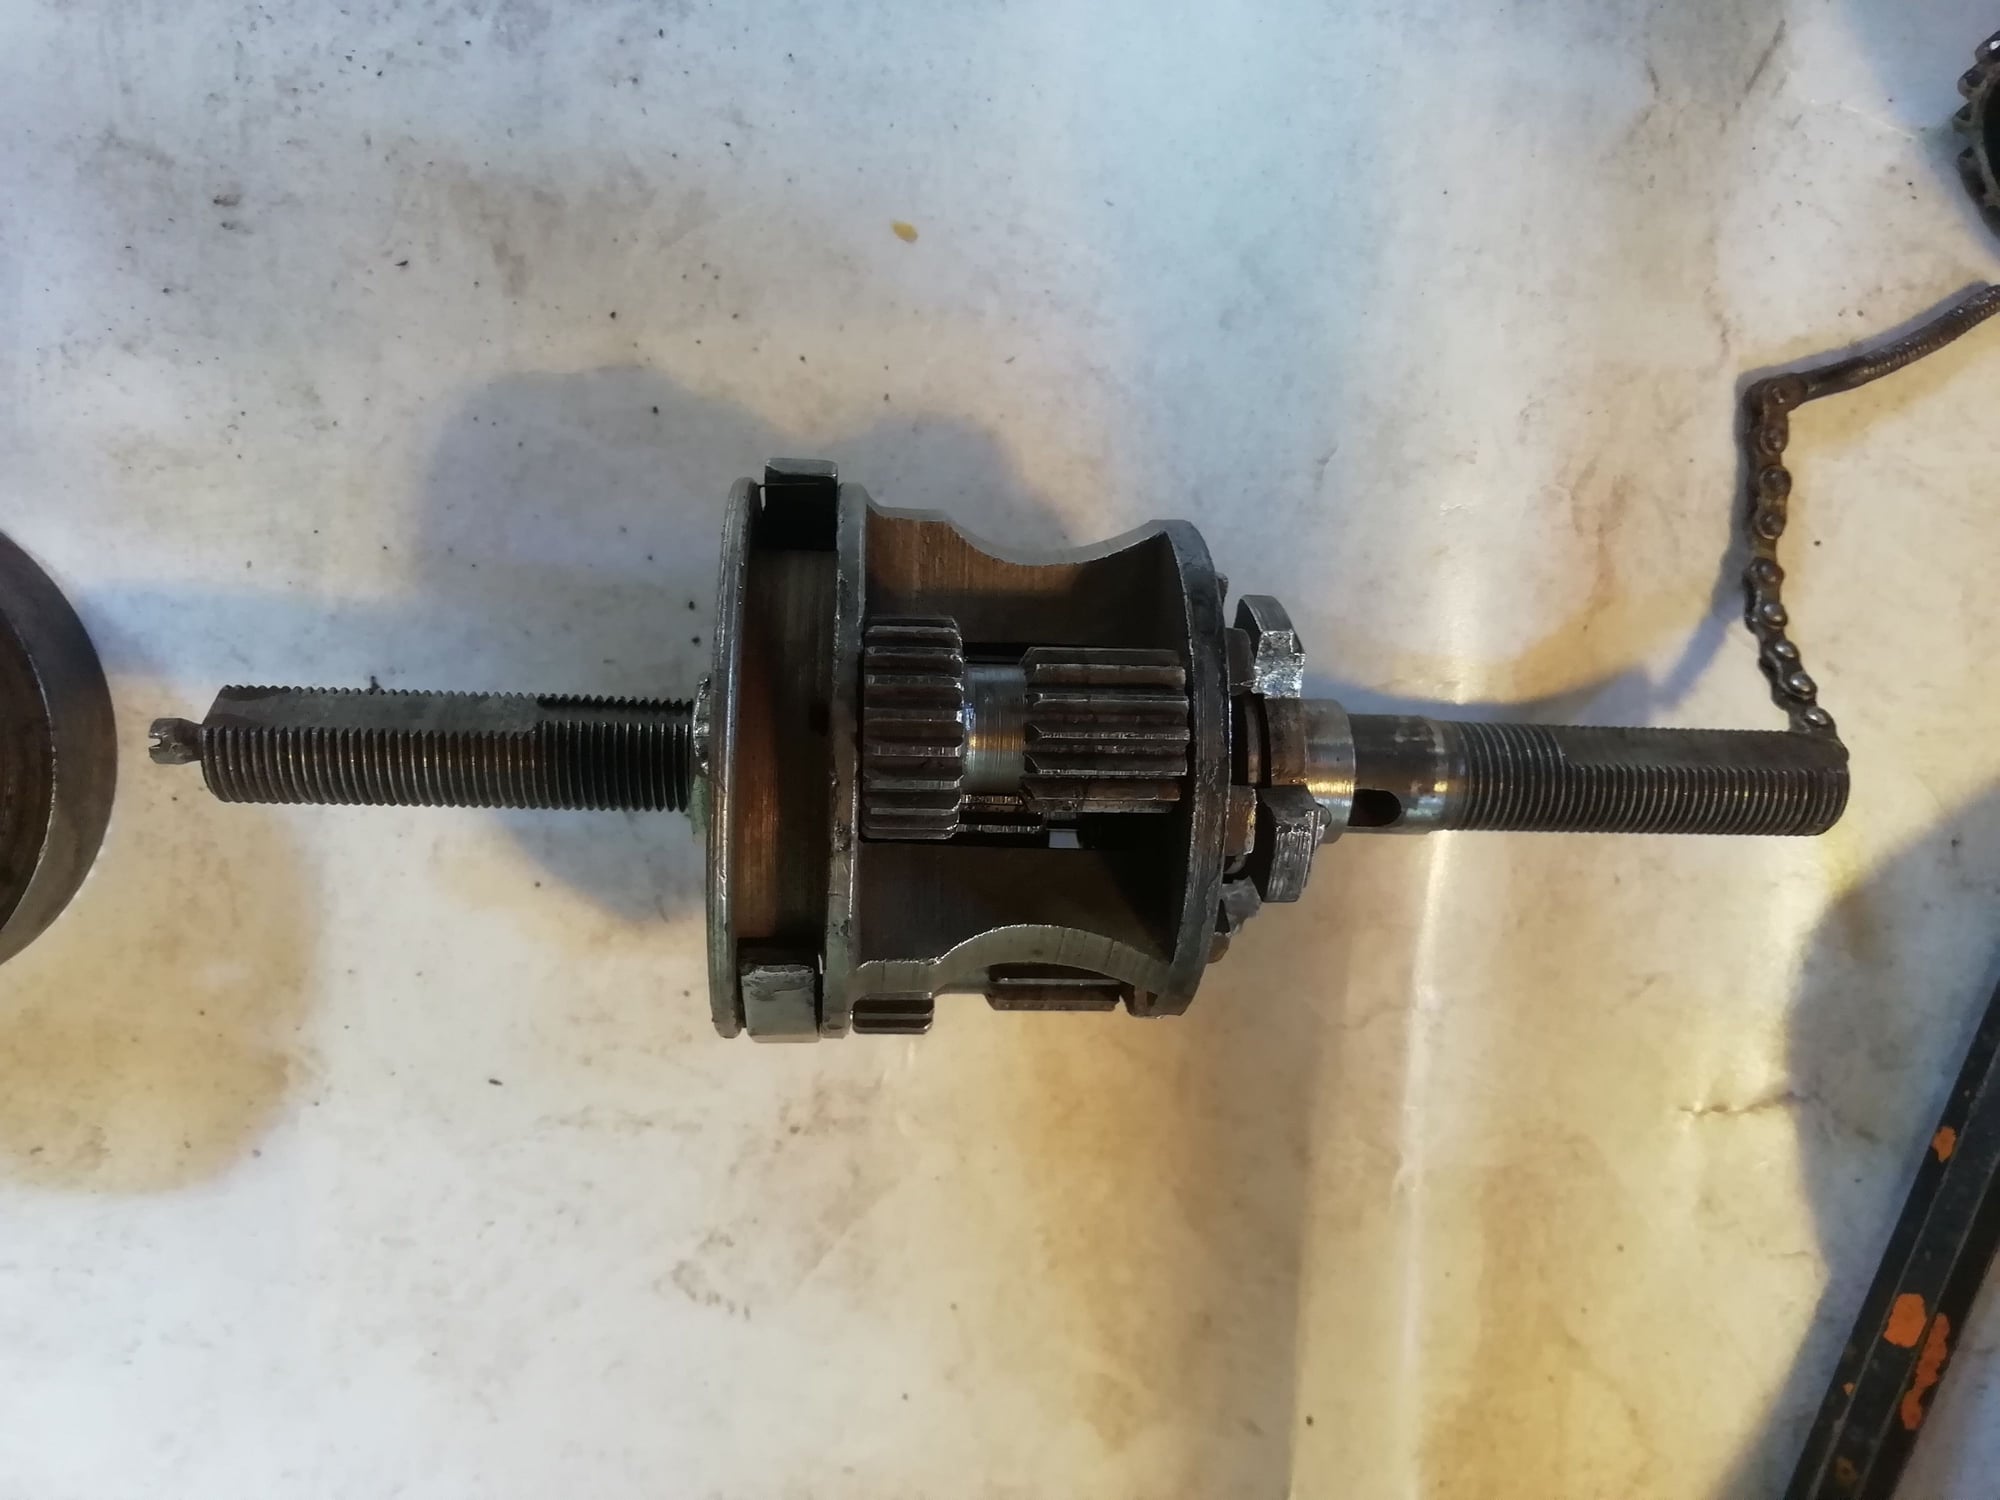
It is the other two giving the fourth gear that I struggled with - on the left of the planet cage in this foto. Here they are the wrong way round and I had to do it all again! Note the LHS axle end has the indicator showing fourth gear.
The split indicator rod was something I wasn't familair with. It had a expanding compensator spring between the two that you had to compress to screw them together form either end of the assembled hub.
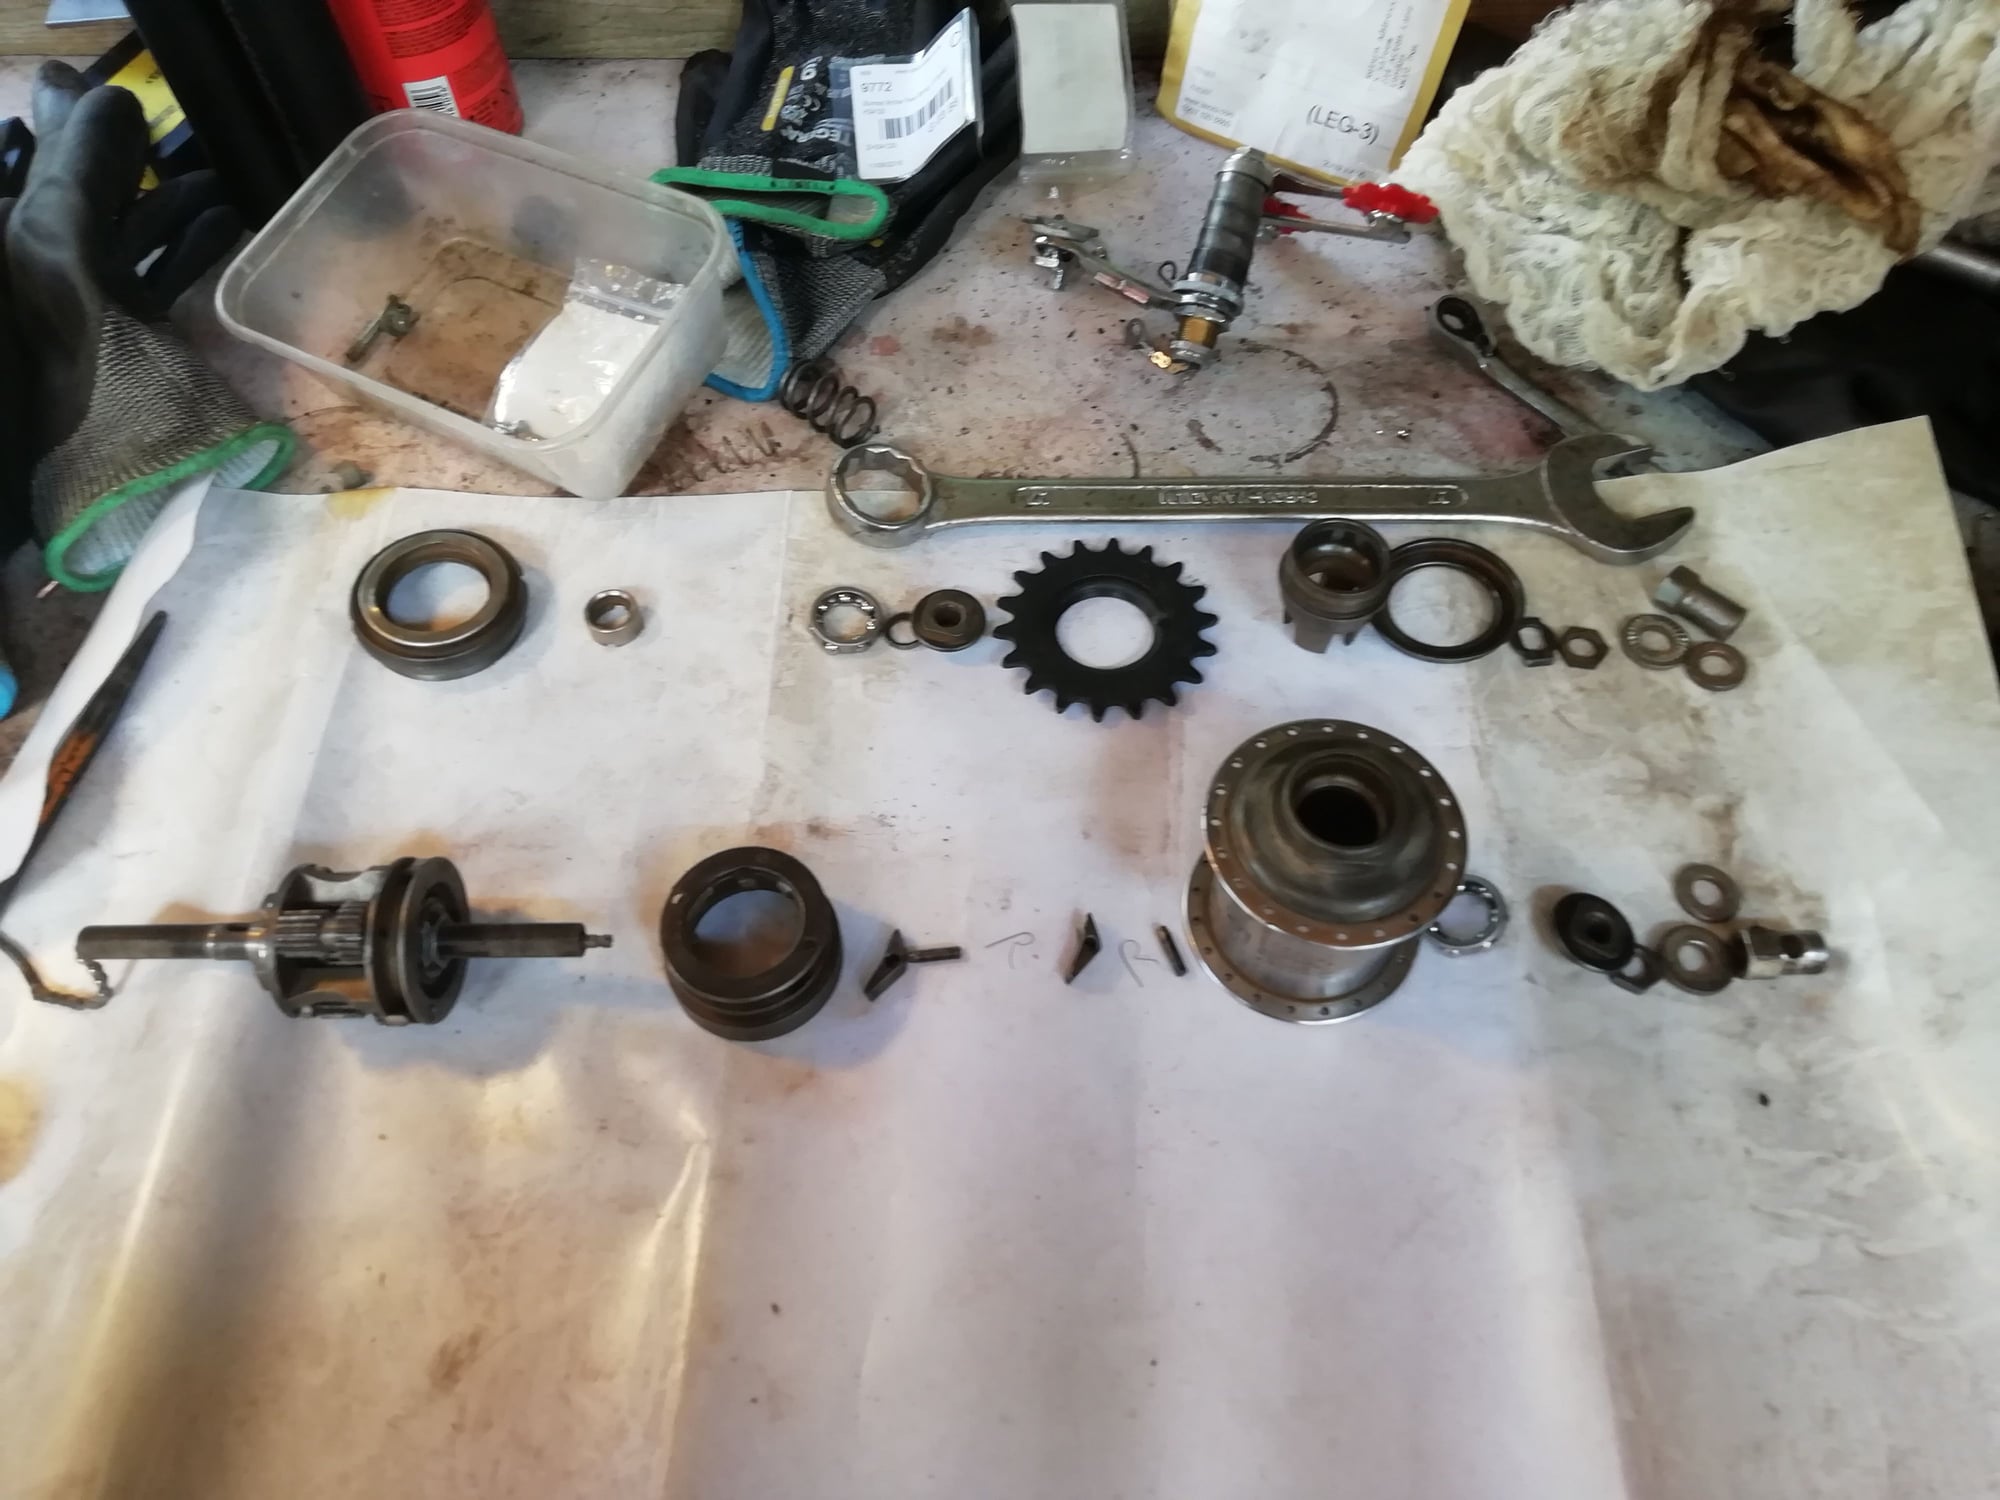
And so it was in the beginning. Interesting for me to learn something new - you fix the RHS (sprocket side) bearing cone first ( quarter turn back from finger tight) and then you do the non drive LHS. For some reason I found this counter-intuitive but there you go.
Only lost two more springs getting the hub together (5 all told!). These two pawls are the same for the 3 speed and are relatively easy to fit.
It is the other two giving the fourth gear that I struggled with - on the left of the planet cage in this foto. Here they are the wrong way round and I had to do it all again! Note the LHS axle end has the indicator showing fourth gear.
The split indicator rod was something I wasn't familair with. It had a expanding compensator spring between the two that you had to compress to screw them together form either end of the assembled hub.
And so it was in the beginning. Interesting for me to learn something new - you fix the RHS (sprocket side) bearing cone first ( quarter turn back from finger tight) and then you do the non drive LHS. For some reason I found this counter-intuitive but there you go.
Last edited by Johno59; 08-03-19 at 01:16 AM.
 08-04-19, 12:36 PM
#2
Senior Member
Thread Starter
Join Date: Oct 2016
Location: Cambridge UK
Posts: 852
Bikes: 1903 24 spd Sunbeam, 1927 Humber, 3 1930 Raleighs, 2 1940s Sunbeams, 2 1940s Raleighs, Rudge, 1950s Robin Hood, 1958 Claud Butler, 2 1973 Colnago Supers, Eddie Merckx, 2 1980 Holdsworth, EG Bates funny TT bike, another 6 or so 1990s bikes
Mentioned: 15 Post(s)
Tagged: 0 Thread(s)
Quoted: 331 Post(s)
Liked 332 Times
in
185 Posts
Finished article
Finally got it together. When I first removed the unit the planet cage end holding the fourth gear pawls was completely choked with hardened grease and the pawl springs totally mangled. The 1945 manual says two teaspoons of oil after a rebuild and a teaspoon of oil once a year thereafter. I think someone kept putting too much grease on the bearing or started pumping in grease thru the oil filler cap to try and get 4th gear to work. Big time mistake.
Only lost two more springs getting the hub together (5 all told!). These two pawls are the same for the 3 speed and are relatively easy to fit.
It is the other two giving the fourth gear that I struggled with - on the left of the planet cage in this foto. Here they are the wrong way round and I had to do it all again! Note the LHS axle end has the indicator showing fourth gear.
The split indicator rod was something I wasn't familair with. It had a expanding compensator spring between the two that you had to compress to screw them together form either end of the assembled hub.
And so it was in the beginning. Interesting for me to learn something new - you fix the RHS (sprocket side) bearing cone first ( quarter turn back from finger tight) and then you do the non drive LHS. For some reason I found this counter-intuitive but there you go.
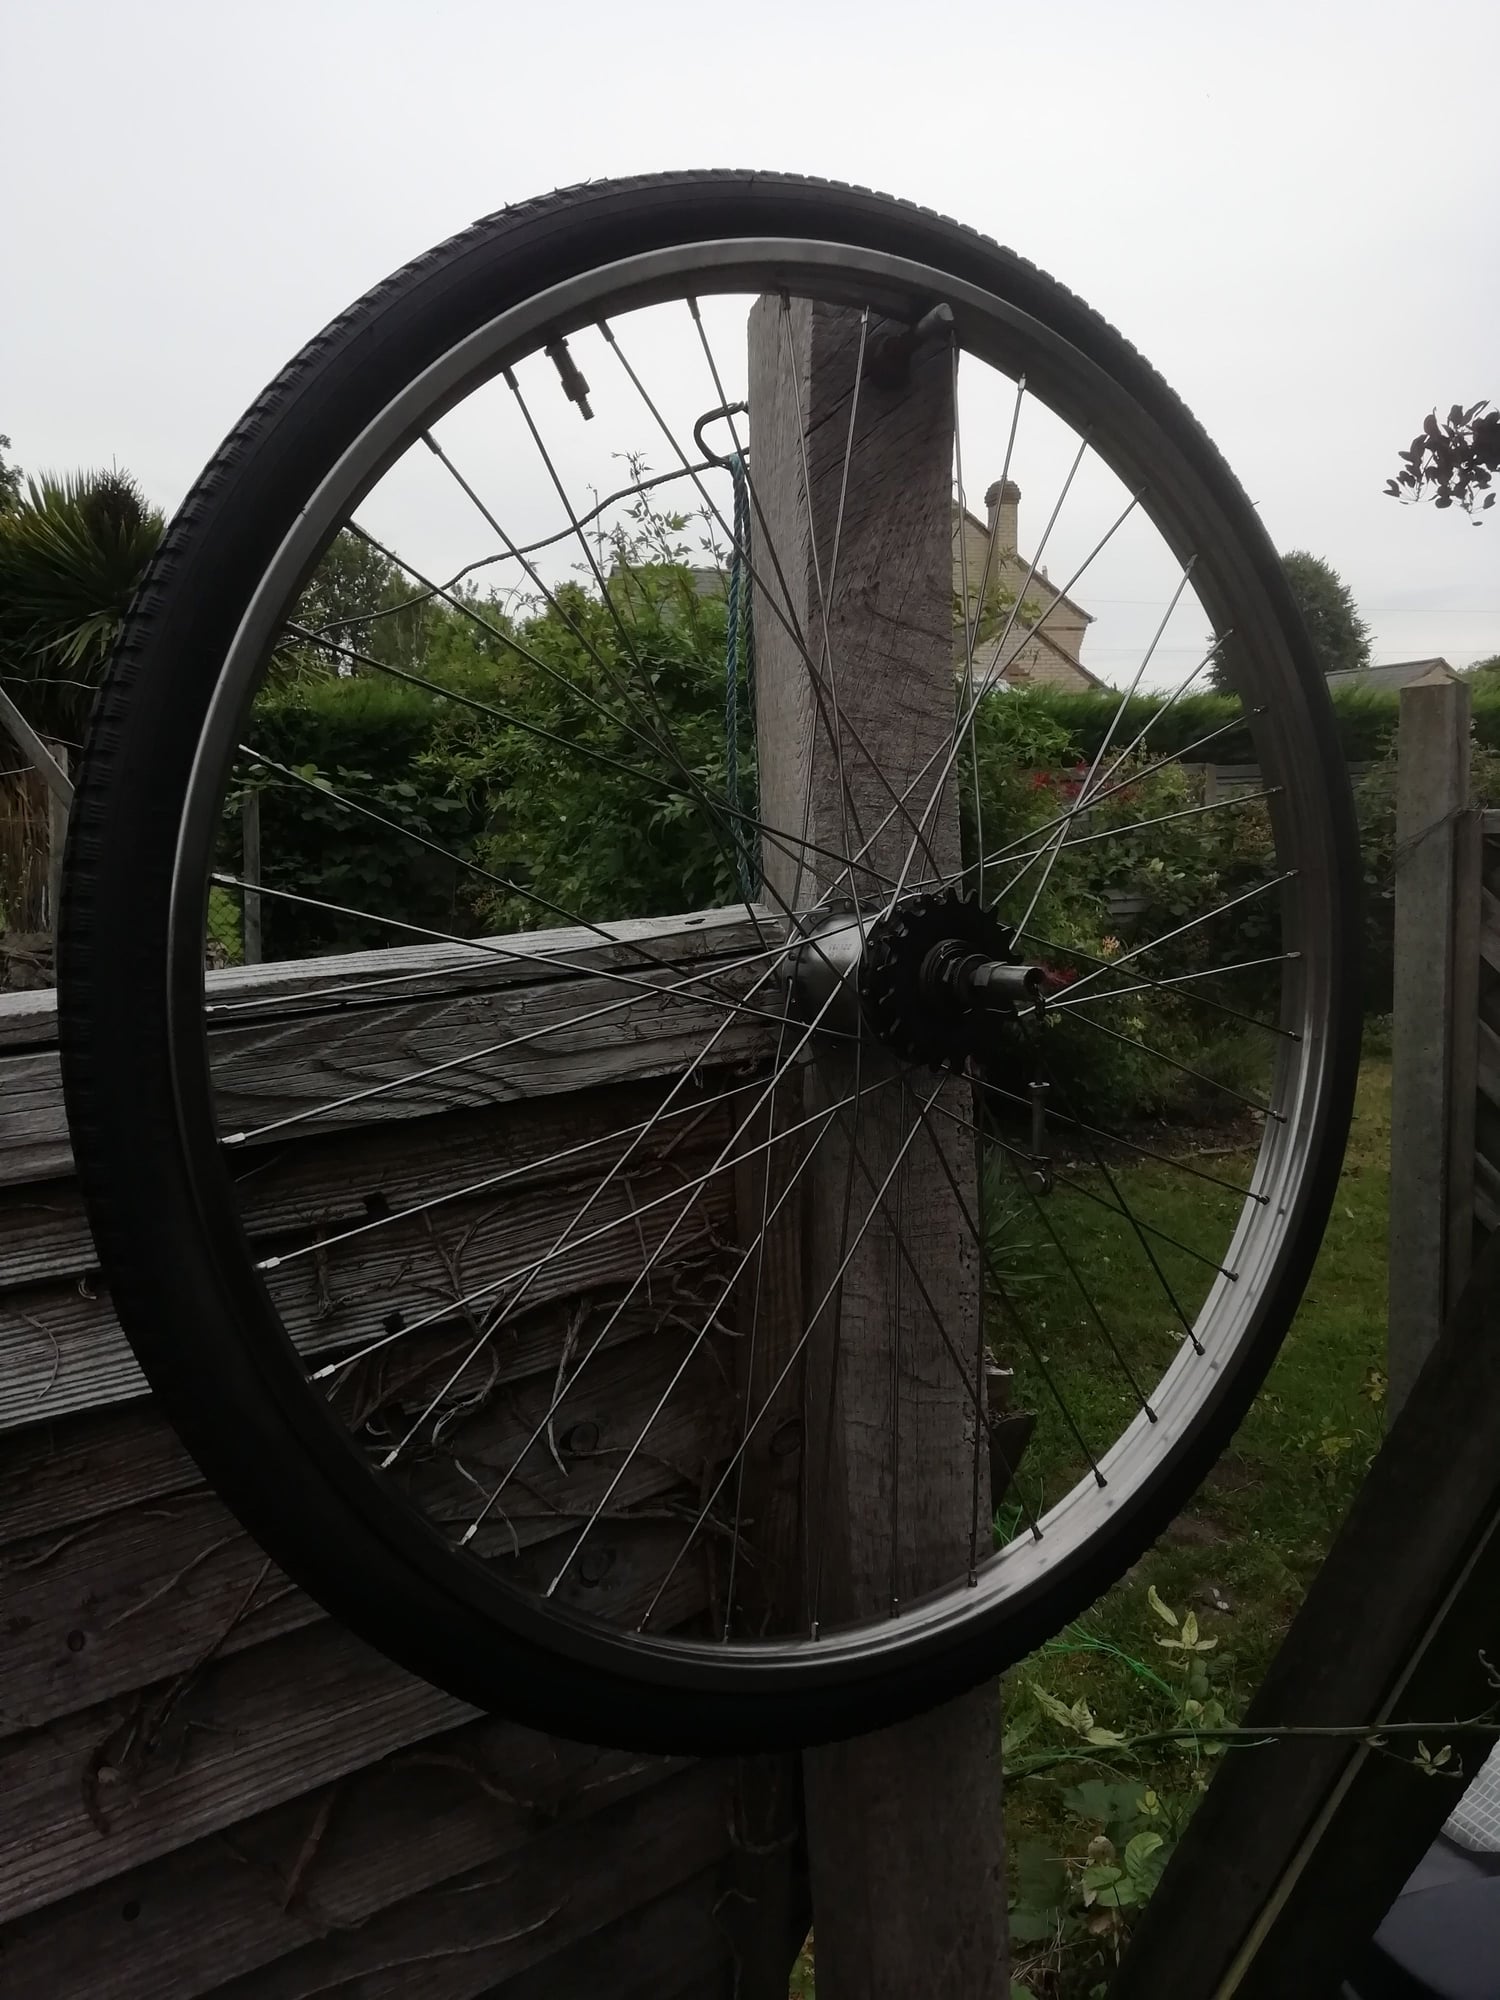
Some folks do it in an hour, I take at least a day.Strumey Archer 1945 FW4 hub, 40 Stainless steel spokes, 4 Cross pattern spoke laced under the third spoke and over the forth to give more strength. 1940 stainless Raleigh 26x1 3/8 rim.
Likes For Johno59:
08-04-19, 12:56 PM
#3

Phyllo-buster

Join Date: Jan 2010
Location: Nova Scotia
Posts: 8,847
Bikes: roadsters, club bikes, fixed and classic
Mentioned: 133 Post(s)
Tagged: 0 Thread(s)
Quoted: 2298 Post(s)
Liked 2,055 Times
in
1,255 Posts
Nice post.
Likes For clubman:
08-04-19, 03:54 PM
#4
www.theheadbadge.com

Join Date: Sep 2005
Location: Southern Florida
Posts: 28,513
Bikes: https://www.theheadbadge.com
Mentioned: 124 Post(s)
Tagged: 0 Thread(s)
Quoted: 2422 Post(s)
Liked 4,395 Times
in
2,092 Posts
You're giving me the determination I need to take my parts-built FW apart again in an effort to to make it work...again.
-Kurt
-Kurt
__________________


08-05-19, 12:38 AM
#5
Senior Member
Thread Starter
Join Date: Oct 2016
Location: Cambridge UK
Posts: 852
Bikes: 1903 24 spd Sunbeam, 1927 Humber, 3 1930 Raleighs, 2 1940s Sunbeams, 2 1940s Raleighs, Rudge, 1950s Robin Hood, 1958 Claud Butler, 2 1973 Colnago Supers, Eddie Merckx, 2 1980 Holdsworth, EG Bates funny TT bike, another 6 or so 1990s bikes
Mentioned: 15 Post(s)
Tagged: 0 Thread(s)
Quoted: 331 Post(s)
Liked 332 Times
in
185 Posts
Strumey Archer FW4 Manual
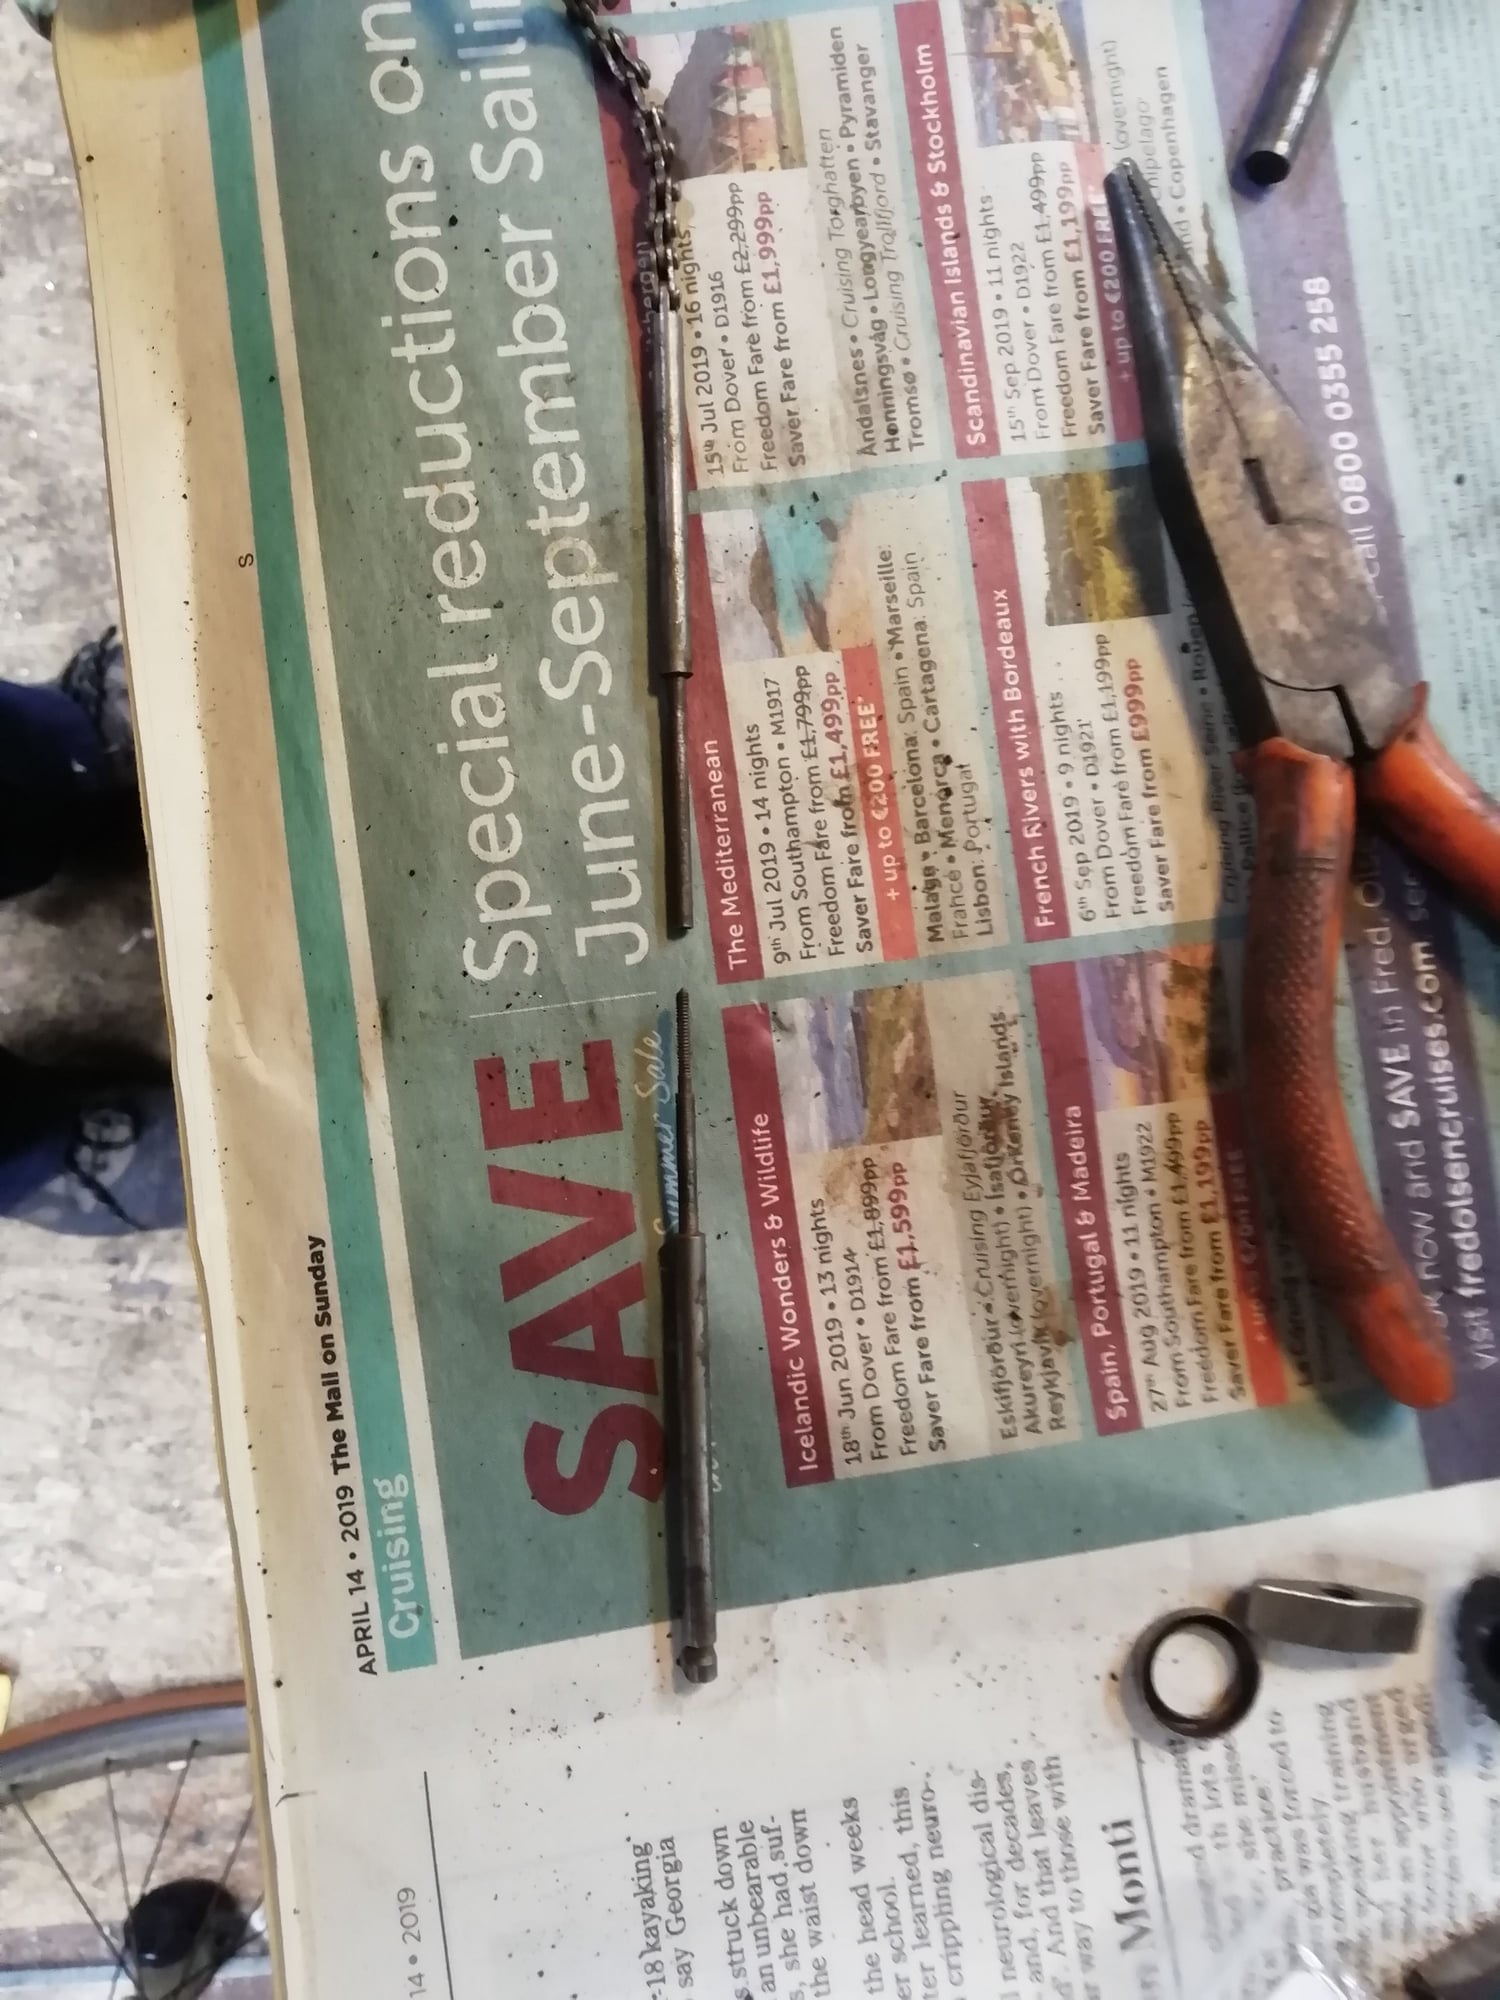
The Strumey Archer heritage site has the complete 1945 FW 4 manual on a PDF download. My pawl spring problem was solved by mounting the pawl, spring and pin into the planet cage with the right-angled catch on the outside of the offending pawl ie without tension. When just so, pull / push the right angled tab around the end of the pawl into its correct tensioning position. Crude to say the least, but I was on my 5th lost spring and desperate.
Last edited by Johno59; 08-05-19 at 01:13 AM.
08-05-19, 07:25 AM
#6
Senior Member

Join Date: Jan 2015
Posts: 3,240
Mentioned: 103 Post(s)
Tagged: 0 Thread(s)
Quoted: 1299 Post(s)
Likes: 0
Liked 103 Times
in
85 Posts
I've found this same condition in AW hubs I've serviced. I think it may just be dried up oil or maybe too heavy of an oil that gums up the pawls so they don't engage. A note about my experience with pawl springs. They are an "R" shape with a foot that bends either up or down. If the foot is bent up, (or is it down, I forget) it forces you to mount the spring under the pawl which is much harder to do than if it's on top where you can see it through the hole as you slide the pin in place. I found it easier than I thought to fashion pawl springs from a stainless steel .012 guitar string. Just needed needle nose pliers and wire cutters. An advantage is being able to bend the foot in the direction you need for on top of the pawl mounting.
__________________
Inflate Hard
Inflate Hard
Last edited by BigChief; 08-05-19 at 07:31 AM.
08-05-19, 11:21 AM
#7
Senior Member
Thread Starter
Join Date: Oct 2016
Location: Cambridge UK
Posts: 852
Bikes: 1903 24 spd Sunbeam, 1927 Humber, 3 1930 Raleighs, 2 1940s Sunbeams, 2 1940s Raleighs, Rudge, 1950s Robin Hood, 1958 Claud Butler, 2 1973 Colnago Supers, Eddie Merckx, 2 1980 Holdsworth, EG Bates funny TT bike, another 6 or so 1990s bikes
Mentioned: 15 Post(s)
Tagged: 0 Thread(s)
Quoted: 331 Post(s)
Liked 332 Times
in
185 Posts
I've found this same condition in AW hubs I've serviced. I think it may just be dried up oil or maybe too heavy of an oil that gums up the pawls so they don't engage. A note about my experience with pawl springs. They are an "R" shape with a foot that bends either up or down. If the foot is bent up, (or is it down, I forget) it forces you to mount the spring under the pawl which is much harder to do than if it's on top where you can see it through the hole as you slide the pin in place. I found it easier than I thought to fashion pawl springs from a stainless steel .012 guitar string. Just needed needle nose pliers and wire cutters. An advantage is being able to bend the foot in the direction you need for on top of the pawl mounting.
Tapping each spoke to match a certain pitch to indicate balance around the wheel and whether a customer wanted a B flat, E major or an F minot pitch matching the tension for the wheel to match their road, track, path-racing or touring requirements. I suppose a guitar inspired musical pitch for your sprung pawls striking the planet cage ring gear might be considered a bit OTT by normal people but normal folk don't repair 60 year old IGHs.
Last edited by Johno59; 08-05-19 at 11:47 AM.

