


Dealing with a small crack in a titanium head tube
 08-14-19, 12:13 PM
#1
Senior Member
Thread Starter
Dealing with a small crack in a titanium head tube
What's up, my two-wheelin homies,
I have an old Litespeed titanium frame with a small crack in the head tube -- it's faint, about 2 cm long, and ends well within the metal tubing on both sides (it doesn't touch a weld (edit: it might have terminated at or very close to the weld with the downtube) or go all the way to the end of the tube).
Litespeed is helpful and willing to replace the headtube with a 1 1/8" tube instead of the 1" tube it has now. That would be nice, and for the work I think their price is reasonable, but still out of my range at the moment.
The bike just serves for now as a flat route commuter. Someday, I'd like to get the headtube replaced by Litespeed. But for now, I'd just like to ride it, which brings me to the following plan:
Drill two small holes (I am thinking about 1/8") at each end of the crack.
Take 2 layers of really nice carbon fiber cloth I have from working at Trek and lay it up inside the head tube as a patch where the crack is. Clean, etch the titanium inside the head tube. Bond with Araldite 2015 (said to be what Serotta used to bond the Ottrott and other carbon/ti frames). Squeeze the layup and let it cure by inflating a compression bag inside the head tube.
I'll be able to keep an eye on the crack from outside the tube. If it grows worse, no huge deal -- I can stop riding it, and shelve it until I have time to pay for a headtube replacement.
I expect that there will be some who raise the alarm of a sudden head tube failure. Have at it, but what I'm really looking for is any expertise you all might have on drilling stop crack holes (diameter being a big question for me) and, if there is any value of taping the backside with carbon and epoxy, your thoughts about executing it.
Last edited by ljsense; 09-12-19 at 12:43 PM.
 08-14-19, 02:49 PM
#2
Senior Member

Join Date: Sep 2010
Location: Roswell, GA
Posts: 8,319
Bikes: '93 Trek 750, '92 Schwinn Crisscross, '93 Mongoose Alta
Mentioned: 30 Post(s)
Tagged: 0 Thread(s)
Quoted: 1438 Post(s)
Liked 1,092 Times
in
723 Posts
Stop drilling is used on cracks in aircraft so it is a tried-and-true method. I would suspect that 1/8" would be a good choice of size, just be sure that the end of the crack gets drilled out by the hole.
I think that patching the backside would not help much, since the strength of the adhesive would be much less than that of the metal. It would not weaken anything so shouldn't do any harm.
I think that patching the backside would not help much, since the strength of the adhesive would be much less than that of the metal. It would not weaken anything so shouldn't do any harm.
08-14-19, 02:53 PM
#3
Senior Member
Join Date: Aug 2005
Location: Pittsburgh, PA
Posts: 33,656
Bikes: '96 Litespeed Catalyst, '05 Litespeed Firenze, '06 Litespeed Tuscany, '20 Surly Midnight Special, All are 3x10. It is hilly around here!
Mentioned: 39 Post(s)
Tagged: 0 Thread(s)
Quoted: 2026 Post(s)
Likes: 0
Liked 1,095 Times
in
741 Posts
If you are the original owner of the frame and registered it with Litespeed when you purchased it or have the original bill of sale, Litespeed should repair it at no cost.
08-14-19, 03:10 PM
#4
Senior Member
Thread Starter
Yeah, the Litespeed people were very nice -- I made clear up front, though, that I'm not the original owner and didn't expect any warranty work. This is one of their very early bikes that I picked up for a few bucks that's had who knows how many prior owners.
I suspect that dsbrantjr is right, that epoxying a little carbon to the back won't do too much. But I'm curious to give it a try. I'll orient the first layer of carbon strands perpendicular to the crack and the second two perpendicular to each other, at 45 degrees off the first.
If I think of the cracked titanium as a tear in the middle of a sheet of paper, and the carbon as a piece of tape on the back, that gives me some hope.
But it's probably more like putting a wad of paper mache onto a cracked piece of wood.
08-14-19, 03:31 PM
#5
Senior Member
Join Date: Jun 2019
Posts: 580
Mentioned: 7 Post(s)
Tagged: 0 Thread(s)
Quoted: 254 Post(s)
Likes: 0
Liked 182 Times
in
141 Posts
You might also check with titanium frame builders like Bilenky and see what they�d charge for a repair. Might be cheaper than Litespeed. But in the meantime, the drilled hole should stop propagation. I don�t have an idea on best diameter.
08-14-19, 03:55 PM
#6
Senior Member

Join Date: Nov 2014
Location: Eugene, Oregon, USA
Posts: 27,547
Mentioned: 217 Post(s)
Tagged: 0 Thread(s)
Quoted: 18354 Post(s)
Liked 4,502 Times
in
3,346 Posts
Photos?
I presume the crack extends up to the headset. And, you won't have much room for your patch behind the headset.
Your overall thickness below the headset will be limited. 1/16"?
I would think you'd be better off overall to layer the patch on the outside of the frame. But, that will be noticeable, and could hamper future repair work on the frame.
If repairs are on the menu, it doesn't hurt to look at alternatives.
Ti Cycles in Portland does repairs, but I presume a number of titanium builders would also do the work.
08-14-19, 04:00 PM
#7
Senior Member
Join Date: Nov 2014
Location: Eugene, Oregon, USA
Posts: 27,547
Mentioned: 217 Post(s)
Tagged: 0 Thread(s)
Quoted: 18354 Post(s)
Liked 4,502 Times
in
3,346 Posts
1 1/8" would be more commonly supported for replacement forks.
1" means the old fork will work.
One can purchase 1 1/8" to 1" headset adapters to allow fitting the old fork and headset into the new headtube. Then allow future upgrades if one wishes.
1" means the old fork will work.
One can purchase 1 1/8" to 1" headset adapters to allow fitting the old fork and headset into the new headtube. Then allow future upgrades if one wishes.
08-14-19, 08:17 PM
#9

Senior Member
Join Date: May 2019
Location: Bloomington, IN
Posts: 2,940
Bikes: Paramount, Faggin, Ochsner, Ciocc, Basso
Mentioned: 115 Post(s)
Tagged: 0 Thread(s)
Quoted: 1301 Post(s)
Liked 1,903 Times
in
1,137 Posts
ljsense,
Stop drill will help from a further spread of the crack. Use the smallest drill bit that will cover the crack. But a good weld will fix it after the stop drill. 2cm is a good sized crack but not enough to be dangerous. I work with Ti regularly and the weld process is difficult but not overly priced, so go for the weld. Ti doesn't work like steel and is moved by a lot of pushing the Ti around with a trizac belt. It shouldn't be too pricey for the weld when you find someone who can do it. Smiles, MH
Stop drill will help from a further spread of the crack. Use the smallest drill bit that will cover the crack. But a good weld will fix it after the stop drill. 2cm is a good sized crack but not enough to be dangerous. I work with Ti regularly and the weld process is difficult but not overly priced, so go for the weld. Ti doesn't work like steel and is moved by a lot of pushing the Ti around with a trizac belt. It shouldn't be too pricey for the weld when you find someone who can do it. Smiles, MH
08-15-19, 09:06 AM
#10
Generally bewildered

Join Date: Aug 2015
Location: Eastern PA, USA
Posts: 3,037
Bikes: 2014 Trek Domane 6.9, 1999 LeMond Zurich, 1978 Schwinn Superior
Mentioned: 20 Post(s)
Tagged: 0 Thread(s)
Quoted: 1152 Post(s)
Liked 341 Times
in
251 Posts
Agree with Mad Honk, a crack less than an inch long, that is remote from other welds, joints, and edges, should not be too difficult to weld. Should be unobtrusive as well, but if you are persnickety about such things you could have the welder grind/sand down the weld a bit. But since you probably are only going to weld on the outside, I'd just leave the weld bead alone. Not hurting anything. Would look kind of cool, actually.
Make sure that your friends at LiteSpeed will still replace the head tube after you've welded it, if that's your goal eventually. In fact, you might ask if THEY would give you a price on welding the head tube. I sense that they're probably giving you a deal because a crack like this is defective materials I think. Worth checking - a factory weld should have some semblance of a warranty as well.
Make sure that your friends at LiteSpeed will still replace the head tube after you've welded it, if that's your goal eventually. In fact, you might ask if THEY would give you a price on welding the head tube. I sense that they're probably giving you a deal because a crack like this is defective materials I think. Worth checking - a factory weld should have some semblance of a warranty as well.
08-15-19, 06:28 PM
#13
Senior Member
Join Date: Nov 2014
Location: Eugene, Oregon, USA
Posts: 27,547
Mentioned: 217 Post(s)
Tagged: 0 Thread(s)
Quoted: 18354 Post(s)
Liked 4,502 Times
in
3,346 Posts
1" headtube, of course, is larger than 1"
And 1 1/8" is also larger than 1 1/8"
08-15-19, 07:09 PM
#14
Senior Member
Join Date: Jun 2002
Location: Montreal, Quebec
Posts: 5,921
Mentioned: 16 Post(s)
Tagged: 0 Thread(s)
Quoted: 1815 Post(s)
Liked 1,693 Times
in
974 Posts
Where is the crack? Forgive me if that has been covered and I didn't notice. If it is on the front of the headtube, I would not get back on that bike. On the back I would be less nervous
09-12-19, 12:17 PM
#15
Senior Member
Thread Starter
Sorry for the long delay, and thanks for the comments -- I'd been busy, but found time today to go after it and get some photos while I tried my strategy.
First off, let me tell you, as much as there is such a thing -- and there really isn't -- I'm a "professional bike mechanic." So let that sink in a bit the next time you see some bike listed on eBay that says it was mechanic owned.
Anyway, here was my method:
1. try to locate the ends of the hairline crack
2. drill stop-crack holes and hopefully hit the ends
3. use araldite 2015 epoxy and carbon fiber to create a sleeve around the inner circumference of lower part of the head tube, covering the crack area.
4. inflate an innertube inside the headtube to compact the cabon fiber/epoxy resin
5. maybe do a little carbon fiber on the outside.
It's curing right now, so I am unsure of the results. I'll post more pictures.
My thoughts so far: I cut an inner tube, tied the ends, and threw sealant in there for my reverse vacuum bag. I pumped it up to 25 psi, well above atmospheric pressure. I tried to wrap the outside of it with saran wrap so it would release, but that interfered with its ability to expand, so I lightly coated it with vaseline. I hope that works. It looks clever to my eyes. We'll see.
Araldite 2015 is maybe the most toxic stuff I've ever been around. The warning label basically says prepare to die. I used gloves and a respirator, but I could actually feel six different parts of my body trying to burst out into cancer.
Drilling through the titanium was pretty easy. I used a hand drill, an ordinary cheapo drill bit, and a little chain lube as the cutting oil. The head tube on this old Litespeed is quite thin -- thinner than all the other tubes, which is maybe why it developed a crack. This was a very early frame for them, and they probably did the math, realized that they could win a few grams in the weight weenie race, and use a thinner tube on such a short part of the frame. I'd have done the same thing, I bet. I used a larger drill bit than I first considered, because I didn't want to miss the crack's end. The crack was hard to see once the paint was removed. I had to sand it down with 2000 grit to faintly see it -- anything rougher and it would disappear in the abrasion marks.
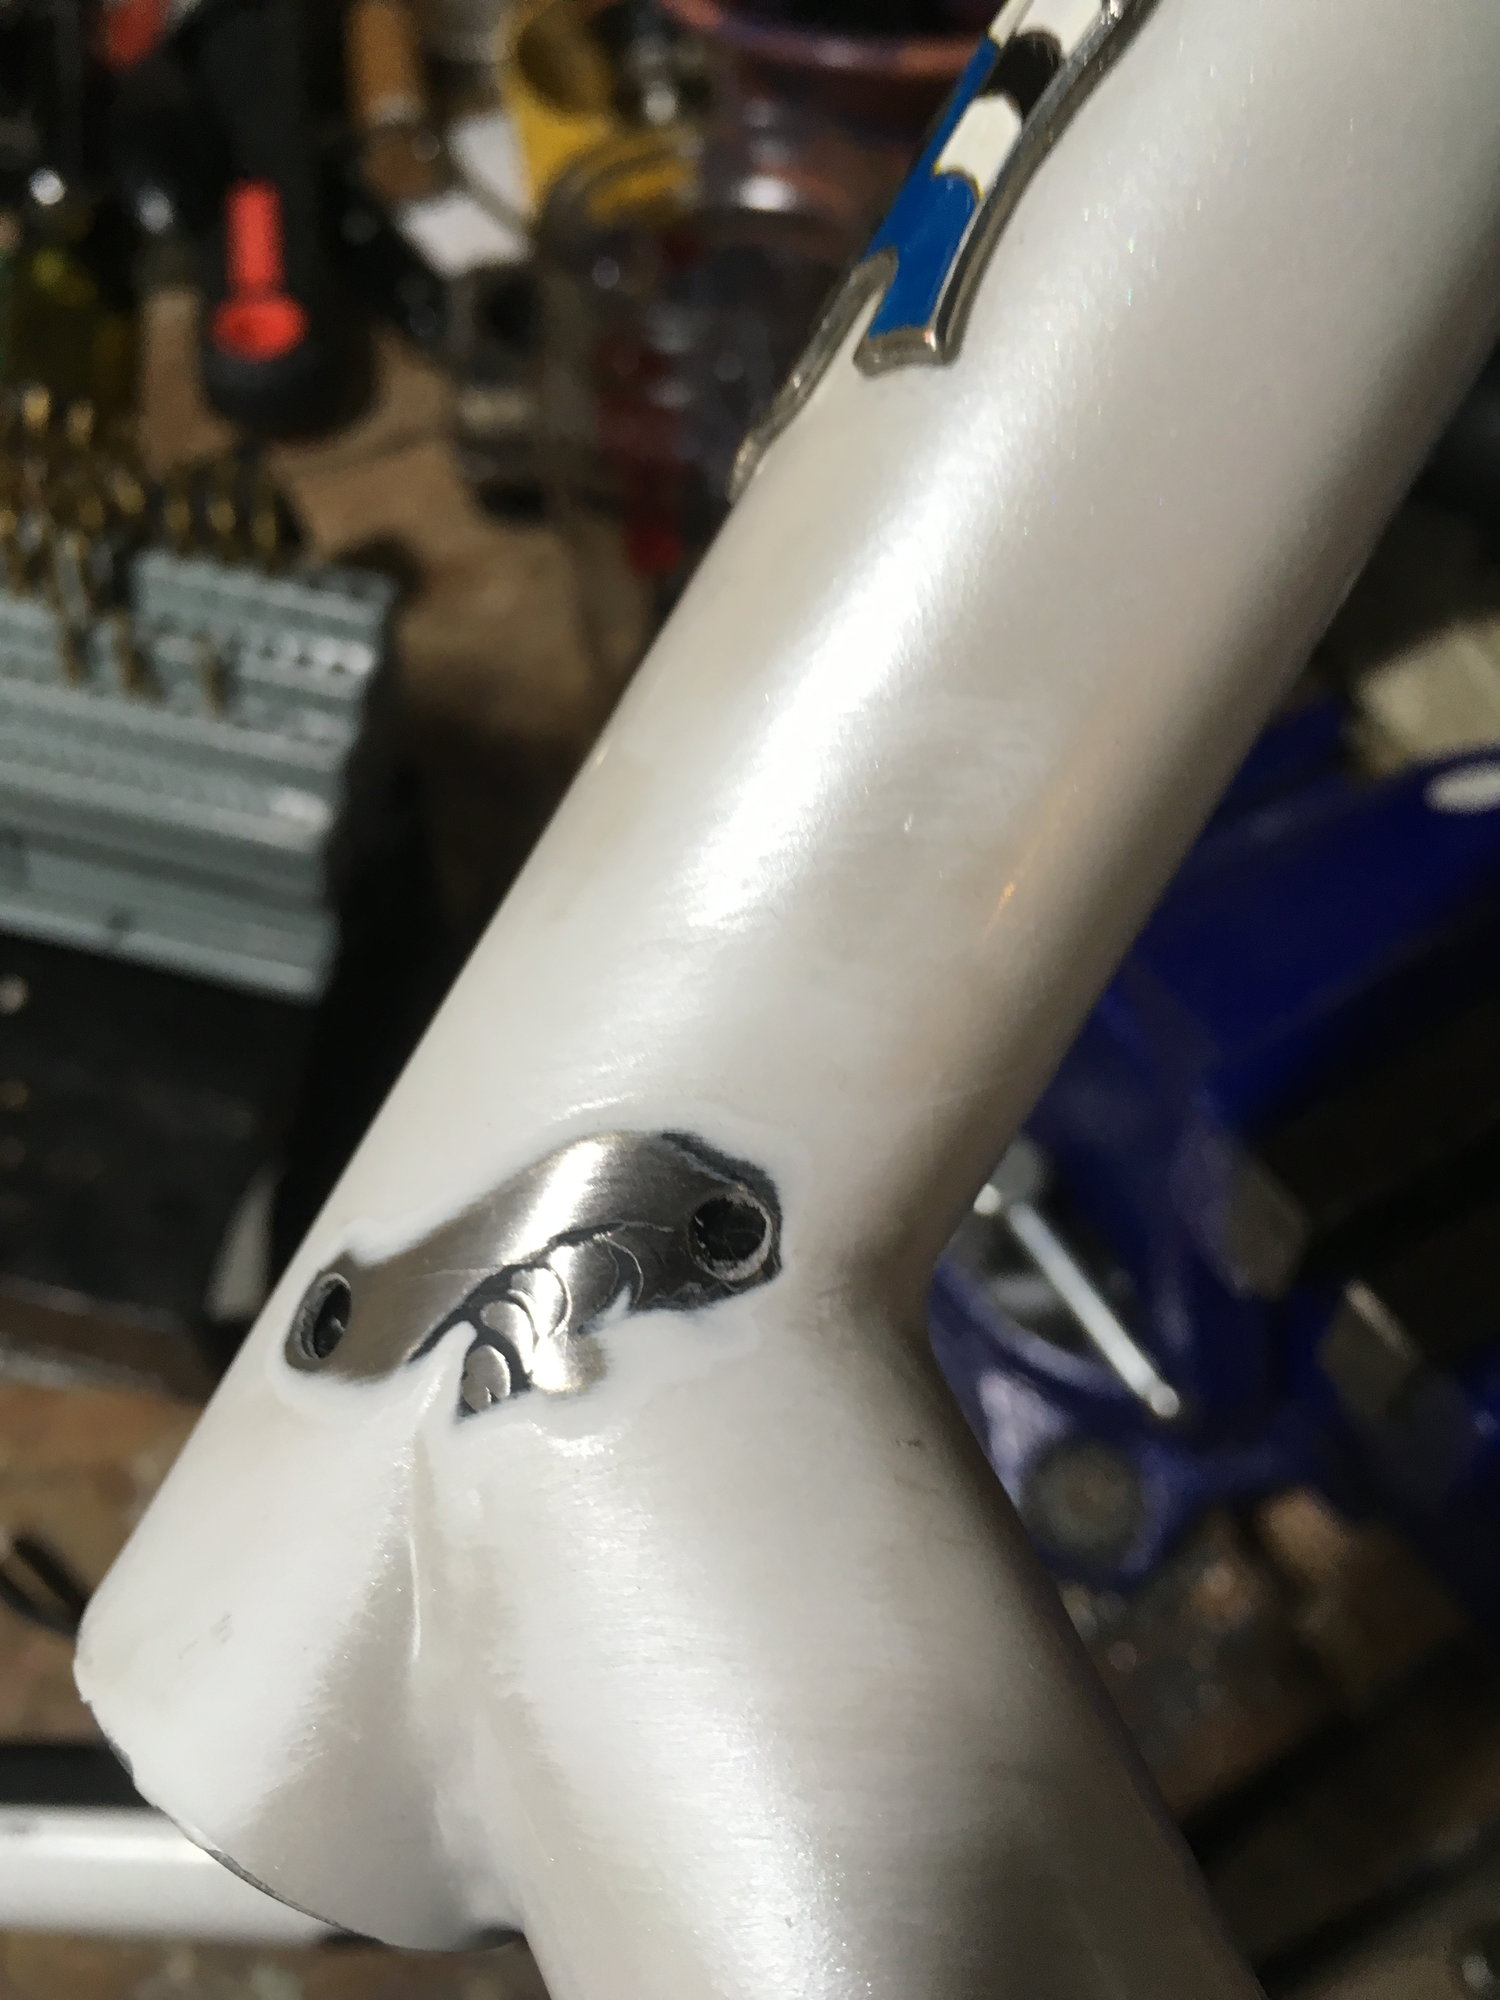
the crack (not visible -- the line that sort of shows up is a sanding scratch) after being drilled.
First off, let me tell you, as much as there is such a thing -- and there really isn't -- I'm a "professional bike mechanic." So let that sink in a bit the next time you see some bike listed on eBay that says it was mechanic owned.
Anyway, here was my method:
1. try to locate the ends of the hairline crack
2. drill stop-crack holes and hopefully hit the ends
3. use araldite 2015 epoxy and carbon fiber to create a sleeve around the inner circumference of lower part of the head tube, covering the crack area.
4. inflate an innertube inside the headtube to compact the cabon fiber/epoxy resin
5. maybe do a little carbon fiber on the outside.
It's curing right now, so I am unsure of the results. I'll post more pictures.
My thoughts so far: I cut an inner tube, tied the ends, and threw sealant in there for my reverse vacuum bag. I pumped it up to 25 psi, well above atmospheric pressure. I tried to wrap the outside of it with saran wrap so it would release, but that interfered with its ability to expand, so I lightly coated it with vaseline. I hope that works. It looks clever to my eyes. We'll see.
Araldite 2015 is maybe the most toxic stuff I've ever been around. The warning label basically says prepare to die. I used gloves and a respirator, but I could actually feel six different parts of my body trying to burst out into cancer.
Drilling through the titanium was pretty easy. I used a hand drill, an ordinary cheapo drill bit, and a little chain lube as the cutting oil. The head tube on this old Litespeed is quite thin -- thinner than all the other tubes, which is maybe why it developed a crack. This was a very early frame for them, and they probably did the math, realized that they could win a few grams in the weight weenie race, and use a thinner tube on such a short part of the frame. I'd have done the same thing, I bet. I used a larger drill bit than I first considered, because I didn't want to miss the crack's end. The crack was hard to see once the paint was removed. I had to sand it down with 2000 grit to faintly see it -- anything rougher and it would disappear in the abrasion marks.
the crack (not visible -- the line that sort of shows up is a sanding scratch) after being drilled.
09-12-19, 12:22 PM
#16
Senior Member
Thread Starter

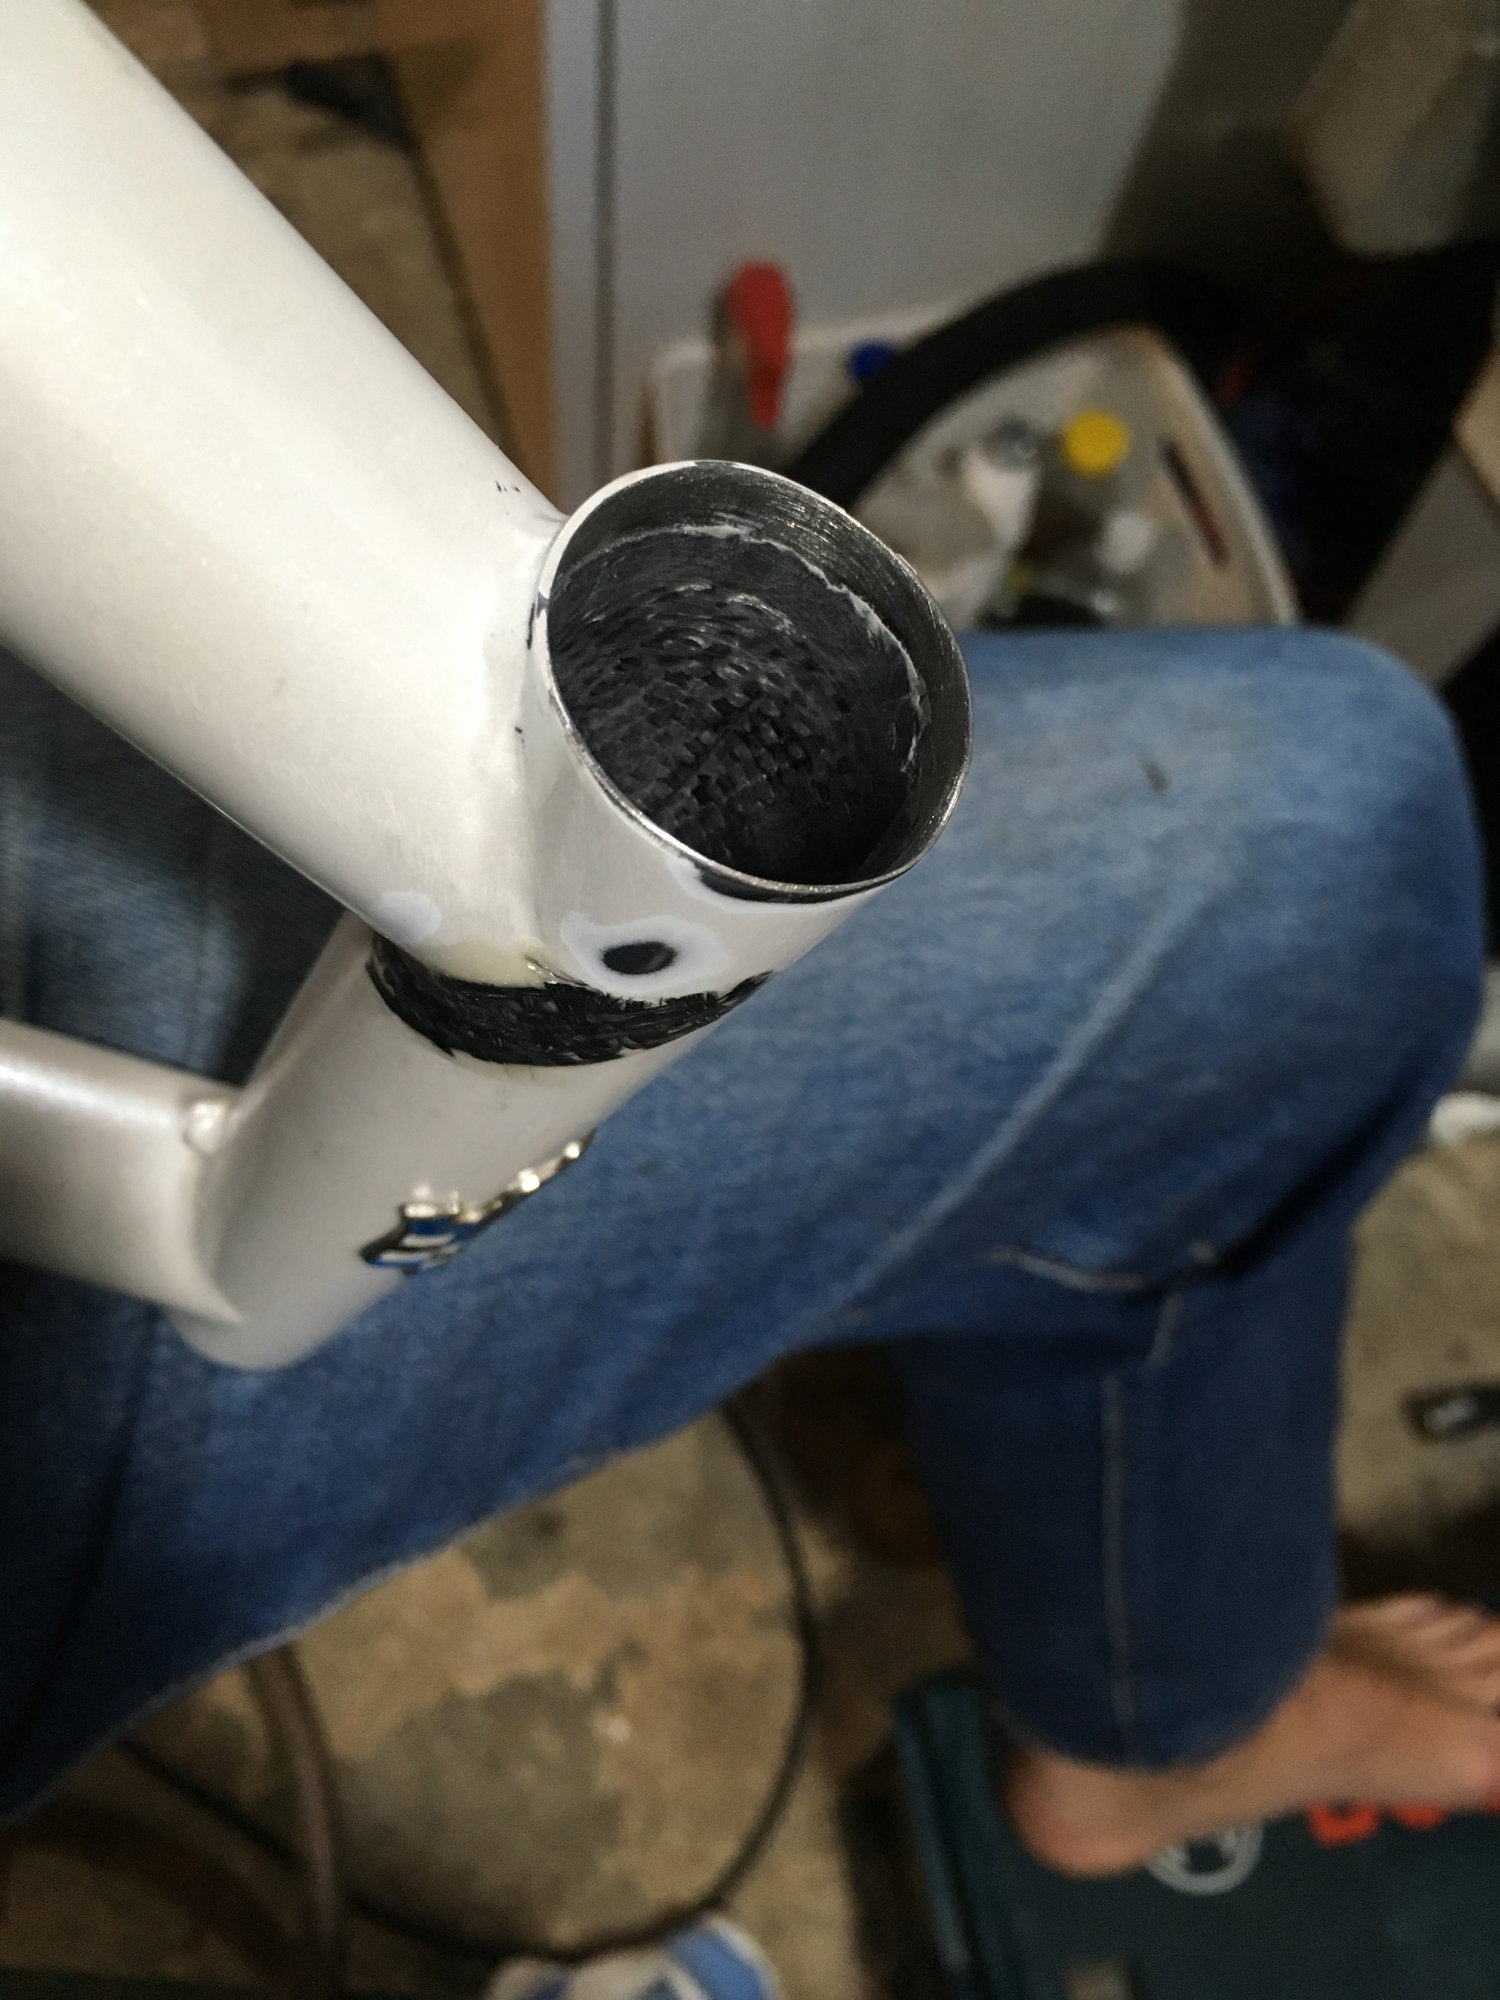
The carbon fiber went around about 3 times. This is a dry fit; I saturated it with the expoxy, rolled it up, then stuck it in the top tube. There's still plenty of clearance for the steerer tube.
09-12-19, 12:25 PM
#17
Senior Member
Thread Starter
The Araldite epoxy is pretty heavy and thick. I had to work it into the weave. I sanded the inside of the top tube with 600 grit paper, then wiped it down with acetone.
09-12-19, 12:26 PM
#18
Senior Member
Thread Starter
Here is the set up with the inner tube pushing the carbon fiber layup against the inner wall of the head tube.

09-12-19, 12:33 PM
#19
Senior Member
Thread Starter
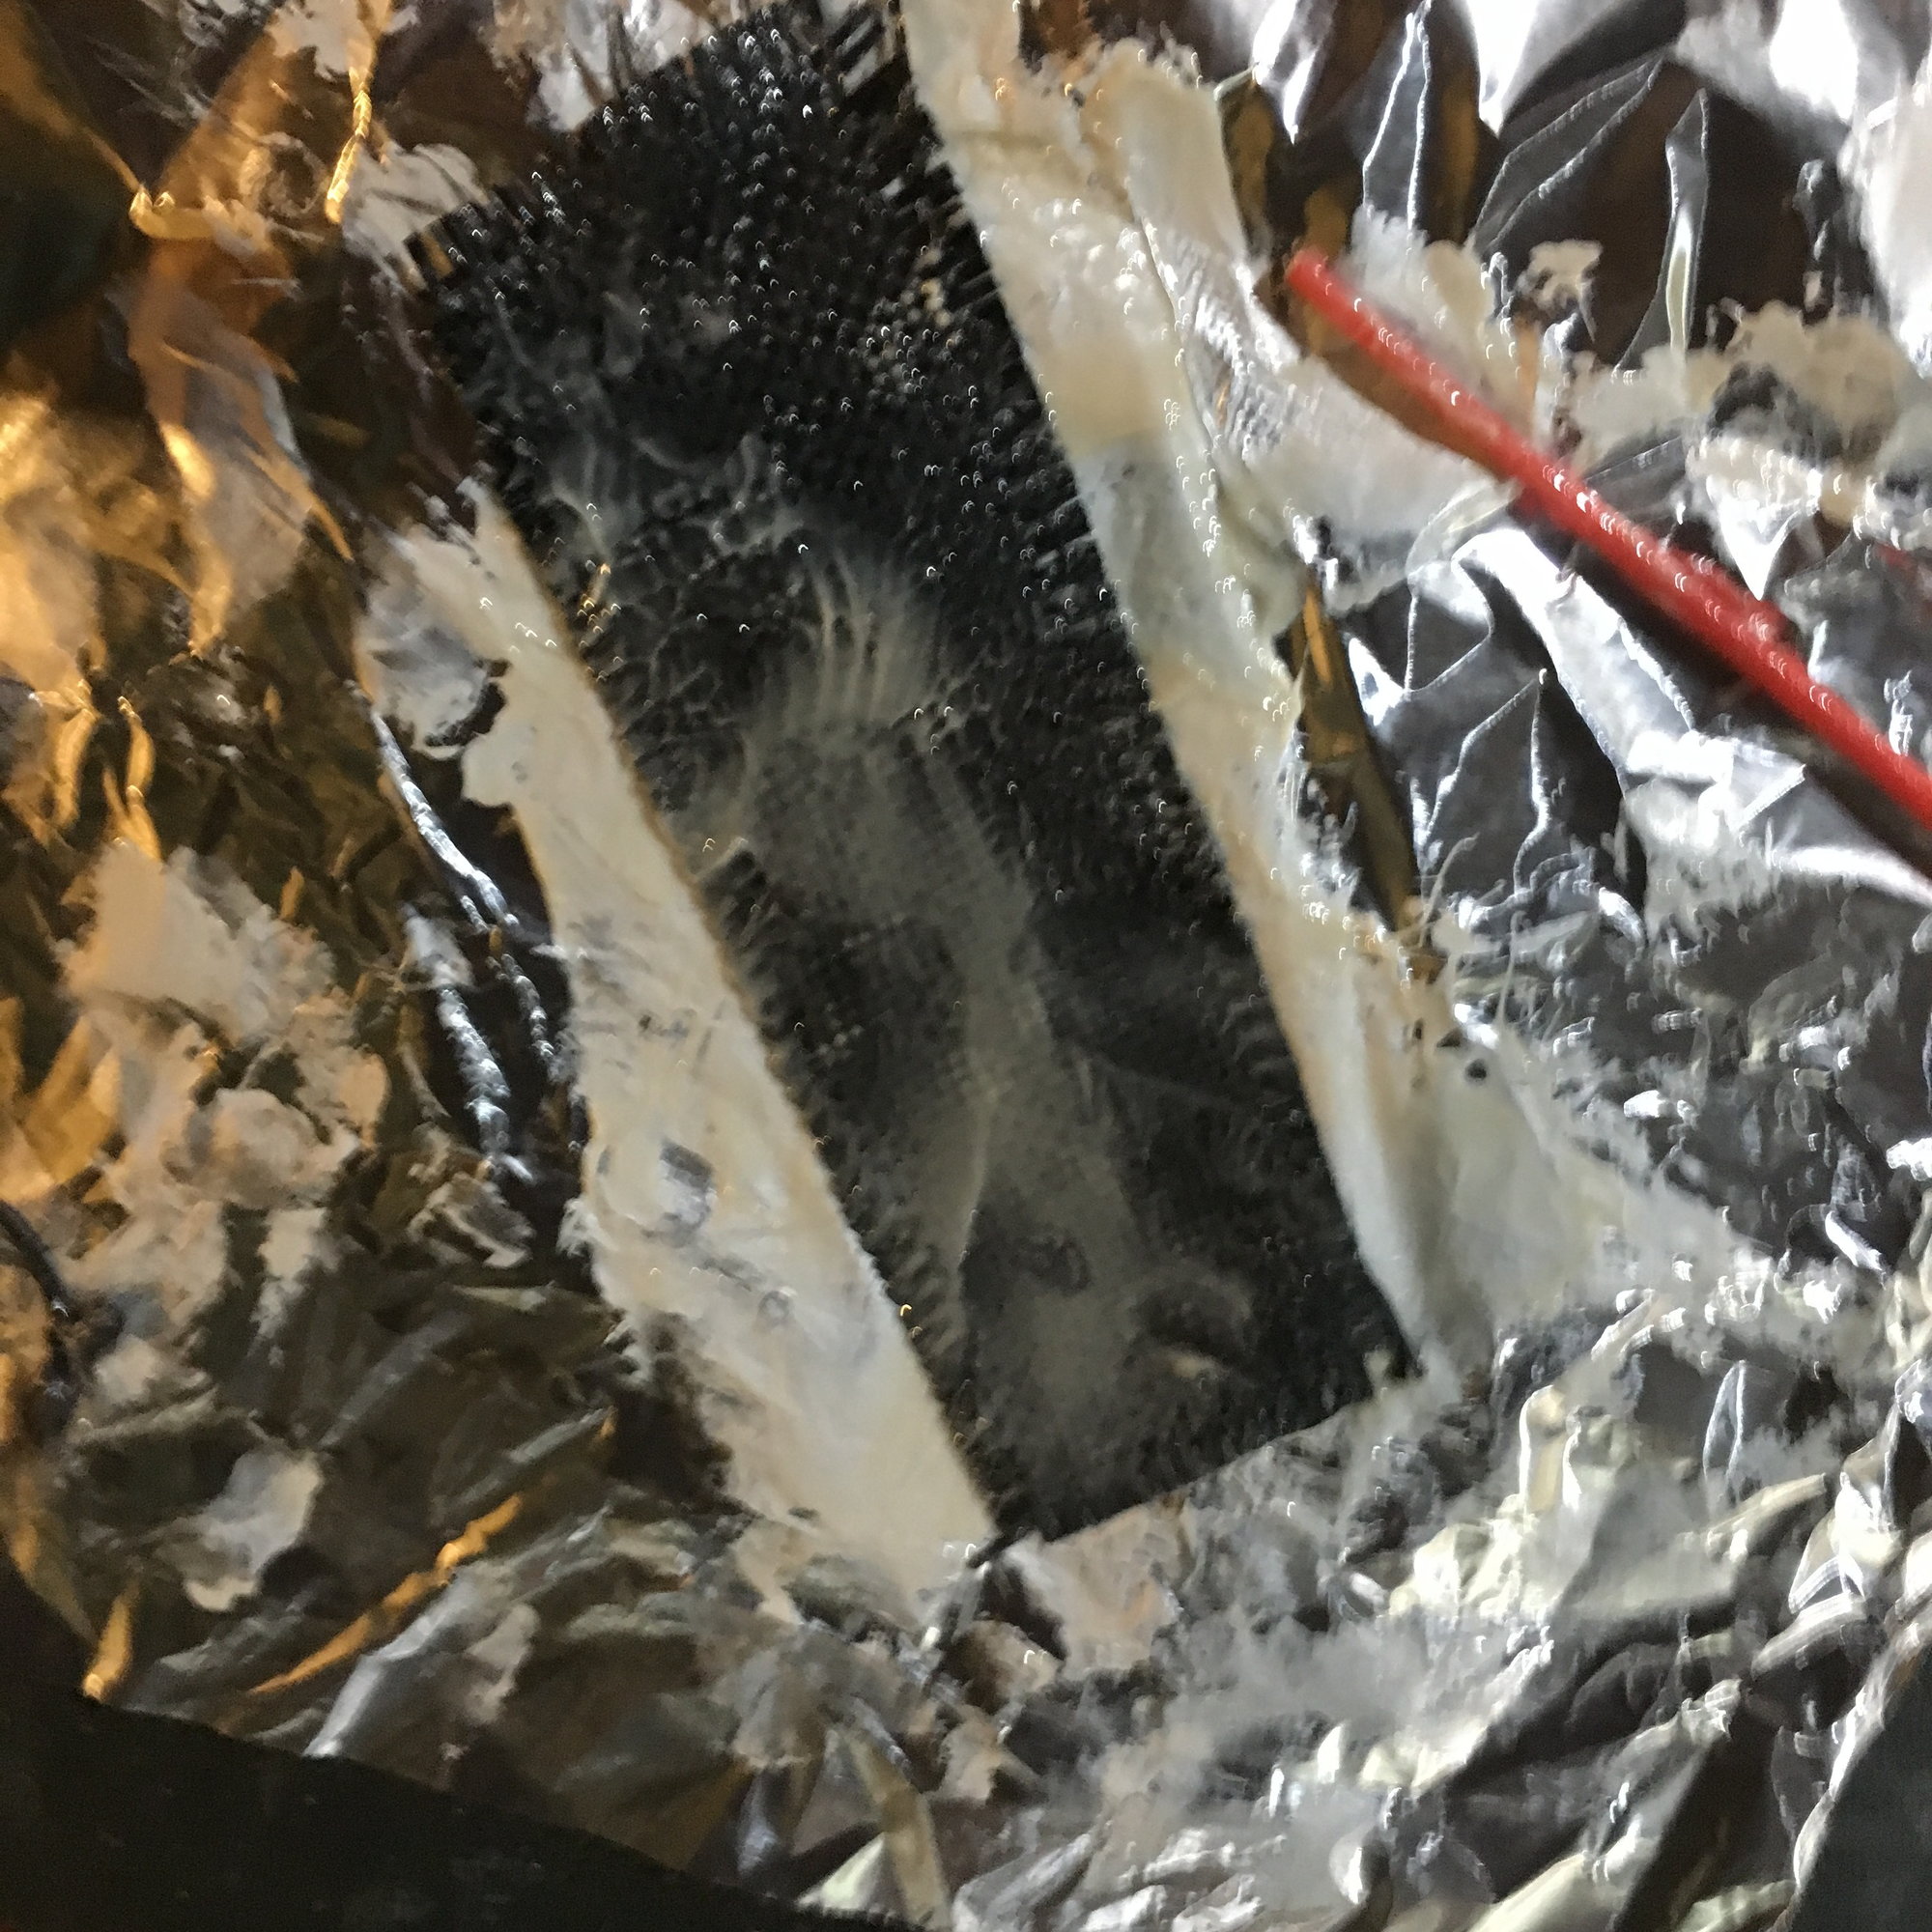
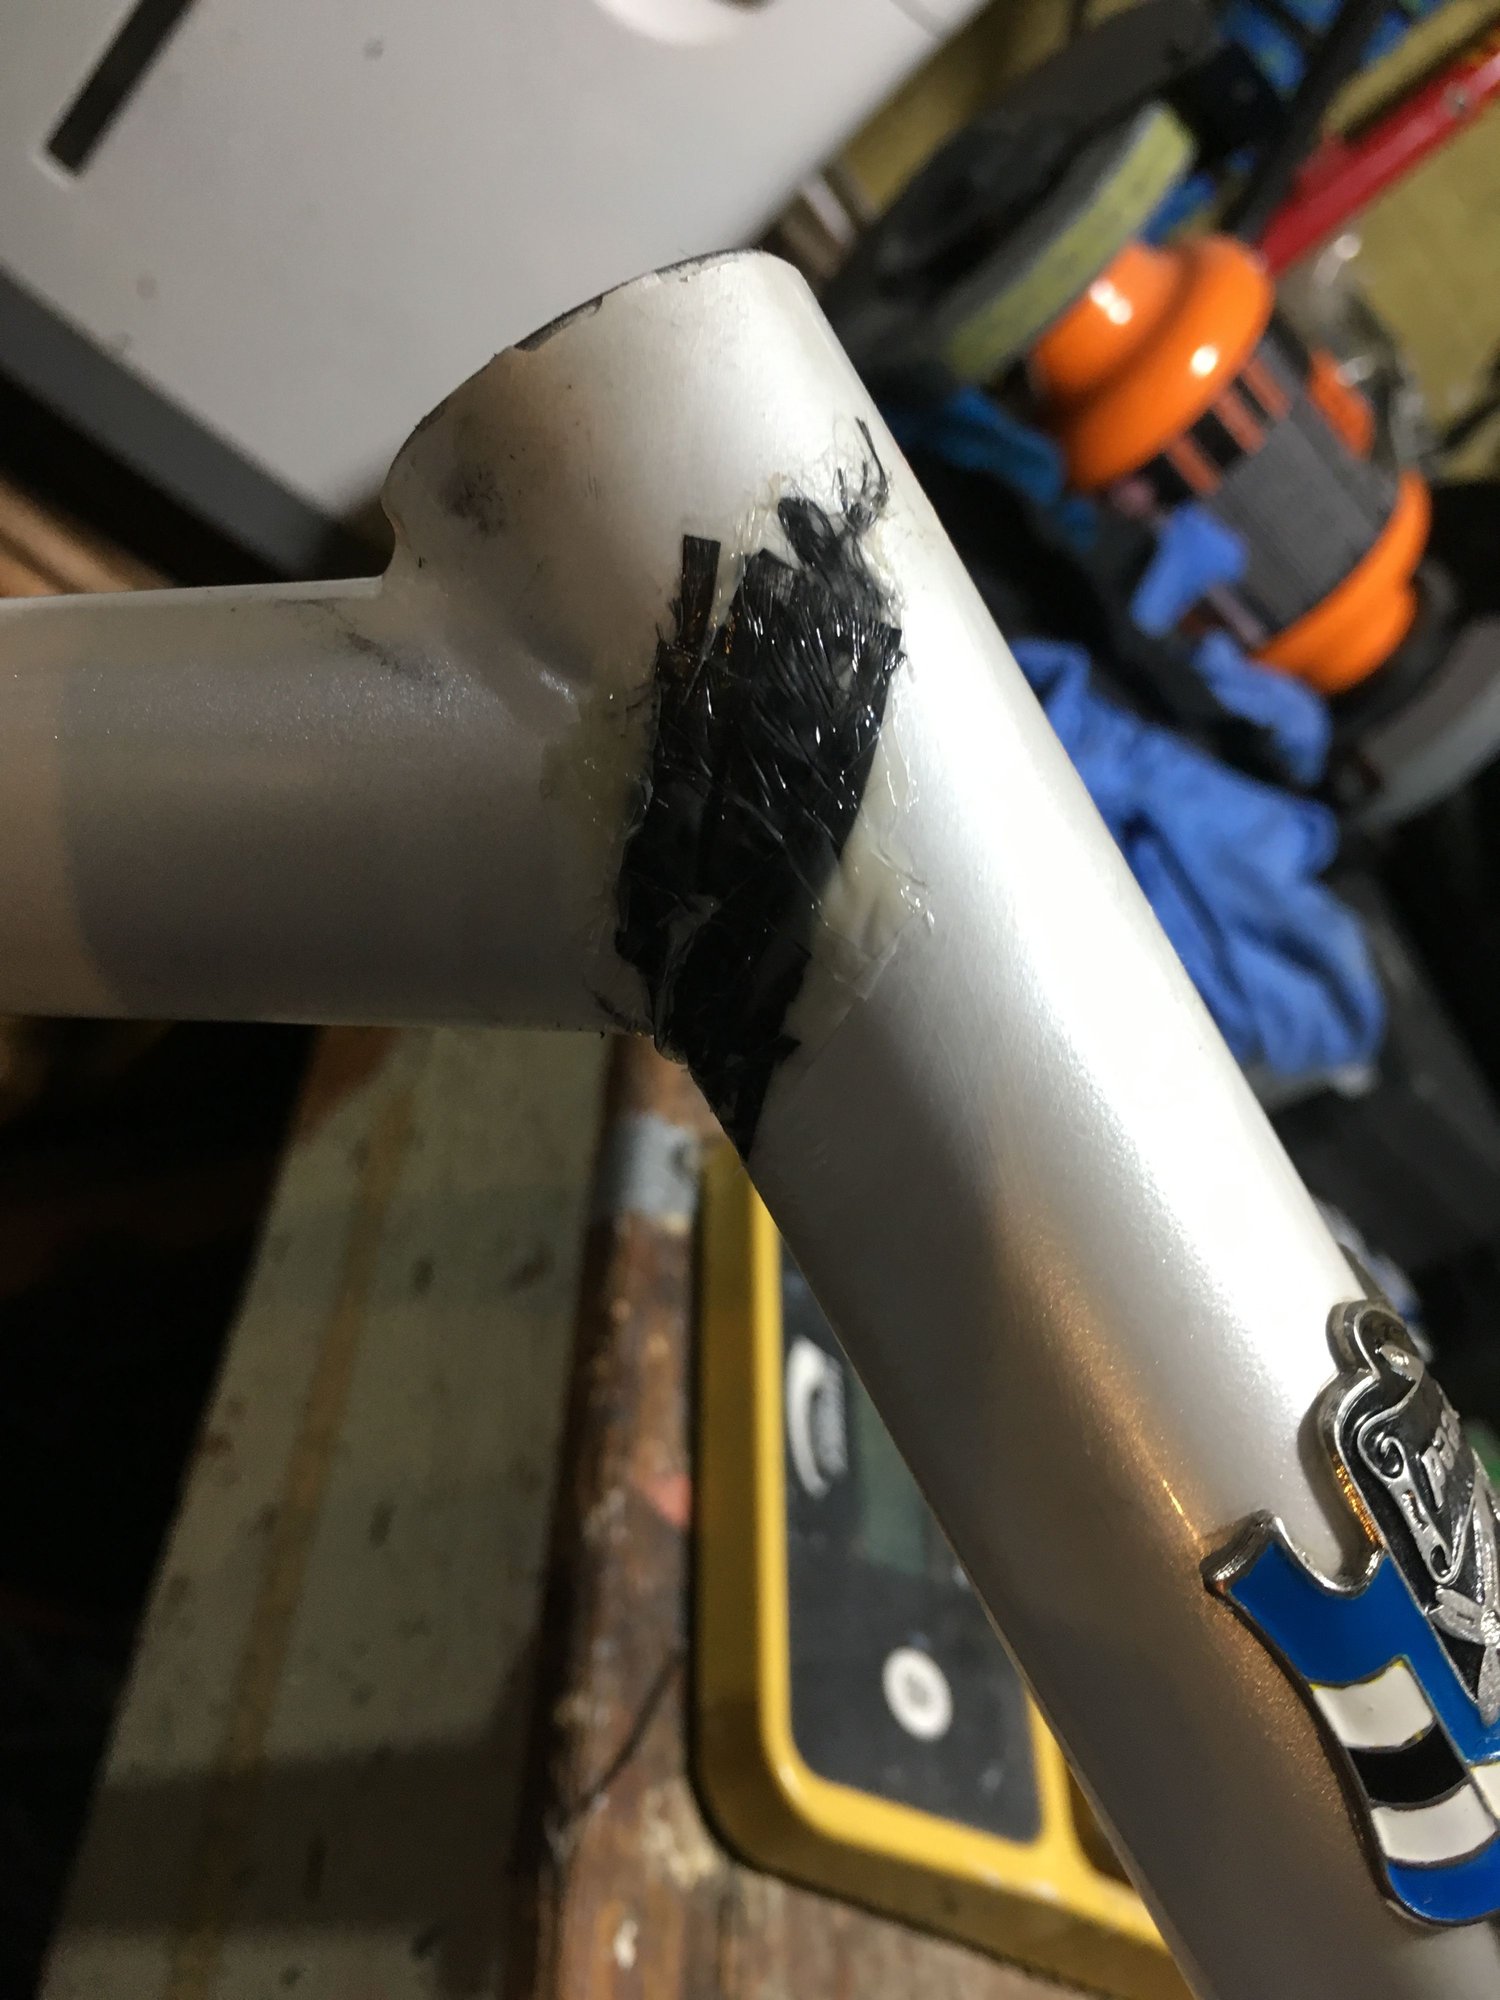
I'm sorry about some of the bad image quality -- I thought that the fumes were coming straight through the mask and rapidly killing me.
I ended up putting a small patch of carbon fiber on the outside too to fill the drill holes and make plain that a crazy repair had been done. We'll see how it turns out -- I can always sand it off. It just covered the bare area of metal, which was quite small on the outside.
It's supposed to cure now for 20+ hours.
Araldite 2015 is supposedly what Serotta used to bond their carbon/ti frames.
If this is a disaster, it can be corrected to save the rest of a classic frame -- just cut off the head tube and have a new 1 1/8" welded on. But that's the expensive solution I can't afford right now.
This cost me $10 for the glue on eBay. I've got lots of carbon fiber cloth on hand. It didn't take long. Mostly sanding the inside, and making sure the gluing surfaces were clean. Probably 45 minutes to an hour.
09-12-19, 12:40 PM
#20
Senior Member
Thread Starter
Oh, one last note -- I agree with everyone that having someone run a weld would have been a nice solution, but I was unable to find anyone local to do it. I think any service where I'd ship the frame would have cost more than $200 in labor and transport fees, so that spurred me to give this a go.
09-12-19, 04:49 PM
#21
Expired Member

Join Date: Jun 2007
Location: TN
Posts: 11,507
Mentioned: 37 Post(s)
Tagged: 0 Thread(s)
Quoted: 3657 Post(s)
Liked 5,394 Times
in
2,739 Posts
Cool idea to use the tube!
09-13-19, 08:31 AM
#22
Senior Member
Thread Starter
Thanks! I was really happy with the way the inside turned out, at least cosmetically. We'll see if the engineering holds up. I pumped up the tube last night again last night after it had been curing a few hours. I think I went to about 25 or 27 psi. Later in the night the tube blew, but by then it had been curing for probably 8 hours or so.
I used a punctured tube I had on hand. It was years old, probably an ultralight 700x25c. The skinniness of it made it easy to thread into the top tube before inflating it, but if I did it again, I'd use a beefier tube.
The carbon inside is smooth, well filled and all around looks like something that came out of a factory. Some of the epoxy forced out of the weave coated the bottom of the headtube where the headset cup inserts, so I had to sand that away.
On the outside, it was pretty messy. I used electrical tape as my compaction force, which leaves a lot to be desired. Sort of very-not-optimum-compaction-high-void (VNOCHV instead of OCLV). So that had some epoxy ridges and stuff that needed to be sanded clean.
Here are some photos:

This was before sanding. It's hard to get a good picture inside the tube, but the carbon really looked like it belonged there.
Here's the messy outside before sanding

Headset cups pressed in, ready to be built
The epoxy said that full strength happens after 20 hours of curing at 50 F; since it was considerably warmer, I think it's already there
I used a punctured tube I had on hand. It was years old, probably an ultralight 700x25c. The skinniness of it made it easy to thread into the top tube before inflating it, but if I did it again, I'd use a beefier tube.
The carbon inside is smooth, well filled and all around looks like something that came out of a factory. Some of the epoxy forced out of the weave coated the bottom of the headtube where the headset cup inserts, so I had to sand that away.
On the outside, it was pretty messy. I used electrical tape as my compaction force, which leaves a lot to be desired. Sort of very-not-optimum-compaction-high-void (VNOCHV instead of OCLV). So that had some epoxy ridges and stuff that needed to be sanded clean.
Here are some photos:
This was before sanding. It's hard to get a good picture inside the tube, but the carbon really looked like it belonged there.
Here's the messy outside before sanding
Headset cups pressed in, ready to be built
The epoxy said that full strength happens after 20 hours of curing at 50 F; since it was considerably warmer, I think it's already there
 09-13-19, 09:17 AM
#24
Se�or Member

Join Date: Feb 2013
Posts: 5,066
Mentioned: 5 Post(s)
Tagged: 0 Thread(s)
Quoted: 649 Post(s)
Liked 292 Times
in
215 Posts
Nice attempt, and I wish you the best of luck, but I have a feeling that your repair is not going to last too many miles. My fear is that there was some stress inside that tube that was pulling the material apart, and that stress will still be there, but now you can't give the Ti and credit for withstanding the force - it's all up to your repair. The holes you drilled may stop or ****** the crack from propagating, but the forces pulling the material apart still exist.
Also, you said it was not near a weld but it is obviously right on top of a weld.
Also, you said it was not near a weld but it is obviously right on top of a weld.
09-13-19, 09:50 AM
#25
Senior Member
Thread Starter
Nice attempt, and I wish you the best of luck, but I have a feeling that your repair is not going to last too many miles. My fear is that there was some stress inside that tube that was pulling the material apart, and that stress will still be there, but now you can't give the Ti and credit for withstanding the force - it's all up to your repair. The holes you drilled may stop or ****** the crack from propagating, but the forces pulling the material apart still exist.
Also, you said it was not near a weld but it is obviously right on top of a weld.
Also, you said it was not near a weld but it is obviously right on top of a weld.
One idea I take from your post -- that there are internal stresses lurking in the frame like it's a Popsicle stick bomb -- seems a little suspect to me. I think a piece of metal is generally just resting in equilibrium. The forces that would break it are external, and some combination over the years cracked a very thin tube wall near the weld where it may have been more brittle due to how it cooled or escaped some of the Argon during manufacturing or something. As evidence for my way of thinking, I don't know of any frames spontaneously cracking, and when metal is cut, it doesn't uncoil or spring into some new shape. I know that there is some surface tension created in forging that lends additional strength, but this isn't a forged piece.
The carbon I put inside is about the same thickness as the headtube itself. My hope is that it's well bonded to the titanium and that this hybrid tube can absorb whatever forces I pound into it by riding on a smooth, flat bike path at 16 miles an hour or so.
There are a couple failures that seem possible to me. First, the bond between the carbon and titanium might not be what I hope it is. If the titanium tube flexes a lot more easily than the carbon insert, and flexes even more where it's cracked and I've drilled out material, it could de-laminate there. Or the head tube itself may just be at the end of its fatigue life in a lot of areas. Maybe it had a crack because someone drove the fork into their garage. Maybe it's had 80,000 hard miles pounded into it, and it's about to crack near the top tube or something. It's easy to summon fears about the way failure can arrive.
But who needs to borrow trouble? I enjoyed this project, already learned from it, and now I'll get to see how my work fares in the world. The carbon patch on the outside is pretty useless to the structure, but maybe it will act as a canary in the coal mine to show if indeed a Popsicle stick bomb is about to blow.
One other thing I meant to include somewhere is the observation that this frame has two much larger holes drilled into it by the manufacturer to allow the brake cable to pass in and out of the top tube. These are just drill holes -- no guide or metal on the internal side -- done at an oblique angle to get an oval.