


Atom cassette and hub
 03-01-21, 11:51 PM
#1
Junior Member
Thread Starter
Join Date: Jul 2014
Posts: 20
Mentioned: 0 Post(s)
Tagged: 0 Thread(s)
Quoted: 4 Post(s)
Liked 0 Times
in
0 Posts
Atom cassette and hub
Hello,
I have a 70s North American Mercier road bike. One of the spokes broke on the rear wheel and apparently I need to remove the cassette and hub to repair.
I was able to get the ring off that was keeping the cassette in place.

I could not figure out how to disassemble the rest of the hub.
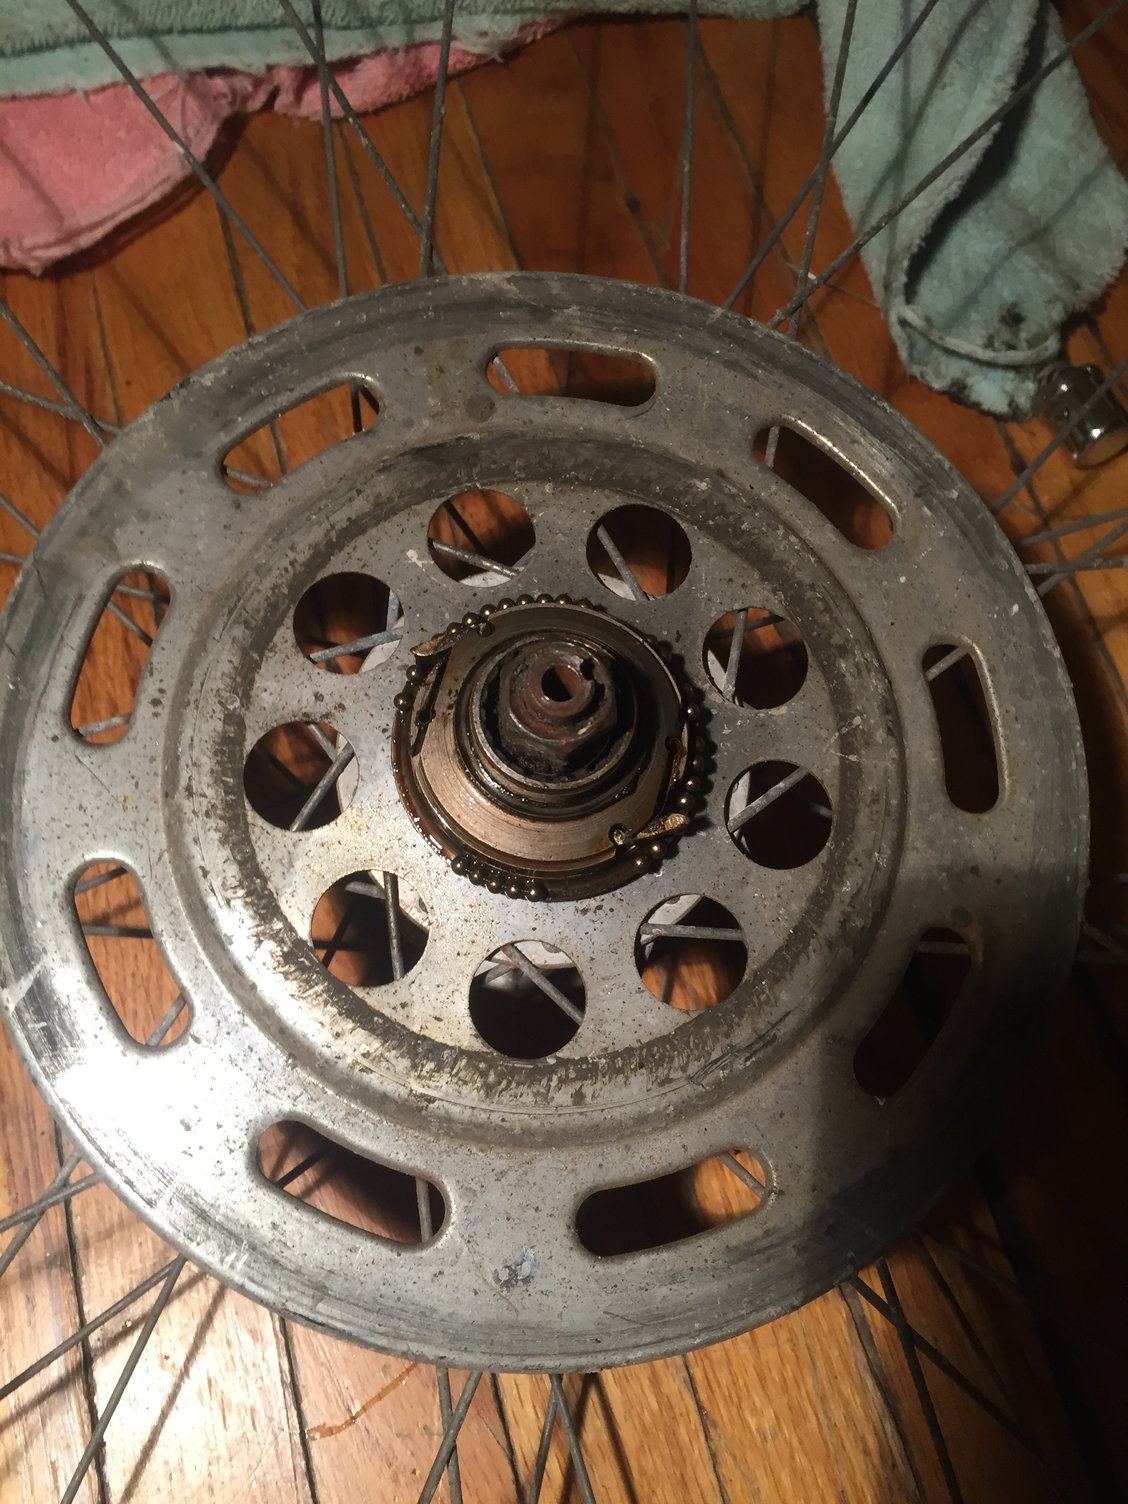
What is worse is that the tiny ball bearings are impossible to keep in place while getting the cassette back on. Note the "flanges" that stick out from the hub. Even with the bearings taken off I am not able to figure out how the hell to keep these flanges pushed in so that the cassette will fit back on.
Any ideas either on how to finish getting the hub off, or to at least put it back together would be greatly appreciated.
Thank you!
I have a 70s North American Mercier road bike. One of the spokes broke on the rear wheel and apparently I need to remove the cassette and hub to repair.
I was able to get the ring off that was keeping the cassette in place.
I could not figure out how to disassemble the rest of the hub.
What is worse is that the tiny ball bearings are impossible to keep in place while getting the cassette back on. Note the "flanges" that stick out from the hub. Even with the bearings taken off I am not able to figure out how the hell to keep these flanges pushed in so that the cassette will fit back on.
Any ideas either on how to finish getting the hub off, or to at least put it back together would be greatly appreciated.
Thank you!
 03-02-21, 12:11 AM
#2

Senior Member
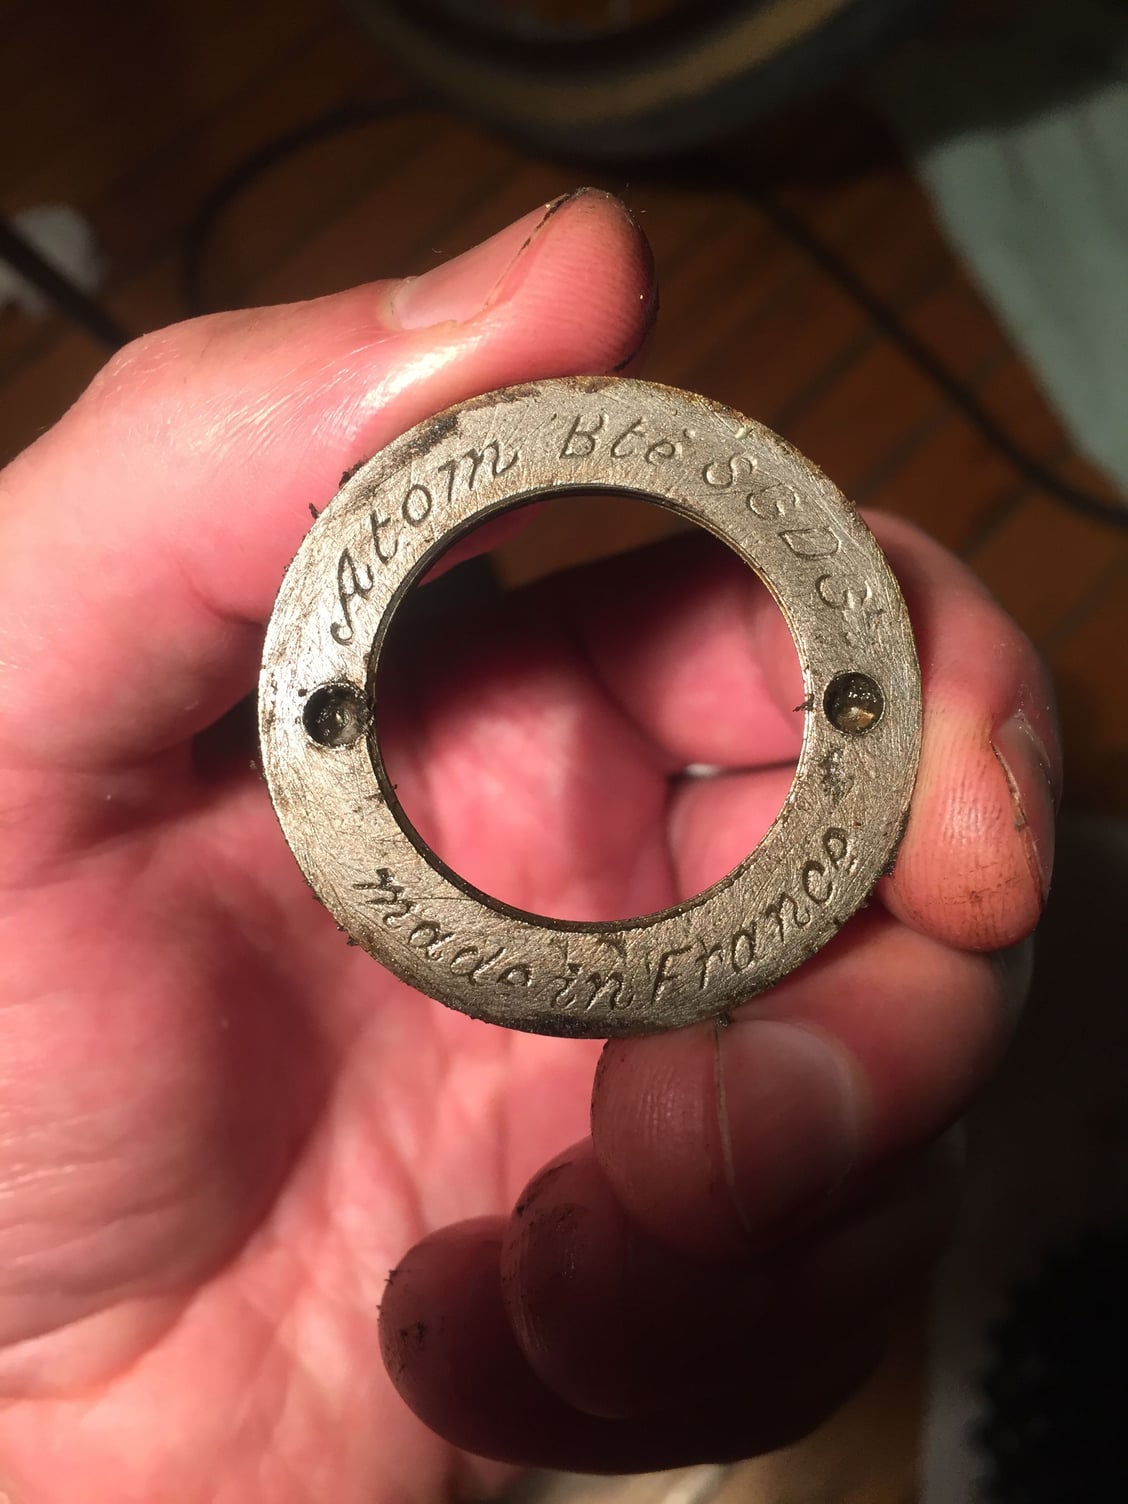
What you are looking at is not a cassette, but a freewheel. The freewheel assembly is screwed onto the hub and is removed, oddly enough, with a freewheel removal tool. I'm not 100% positive, but about as sure it is that the moon is not made of green cheese, the tool you need to remove the remainder of the freewheel from the hub is a Park FR4. Once you get the freewheel off the hub, you can try to put it back together or you can just replace it. The problem you have to face, then, is whether it is French thread or British thread. Probably British, but it pays to check. Depending on the hub, it should not be hard to tell as the hub, which is probably a Normandy or Atom or similar French hub, will have an identifying groove if it is not French thread. You are not the first person to try to take apart a cassette only to have someone point out that it's a freewheel. Been there.
Here's what a Park FR4 looks like:

Here's what a Park FR4 looks like:
03-02-21, 12:22 AM
#3
Junior Member
Thread Starter
Join Date: Jul 2014
Posts: 20
Mentioned: 0 Post(s)
Tagged: 0 Thread(s)
Quoted: 4 Post(s)
Liked 0 Times
in
0 Posts
Once you get the freewheel off the hub, you can try to put it back together or you can just replace it. The problem you have to face, then, is whether it is French thread or British thread. Probably British, but it pays to check. Depending on the hub, it should not be hard to tell as the hub, which is probably a Normandy or Atom or similar French hub, will have an identifying groove if it is not French thread. You are not the first person to try to take apart a cassette only to have someone point out that it's a freewheel. Been there.
So just to makes sure I understand correctly. I did not need to remove the ring from the freewheel and enter into ball bearing hell? If I had the tool I simply could have removed it all as one piece?
Thank you.
03-02-21, 12:59 AM
#4
Full Member
So just to makes sure I understand correctly. I did not need to remove the ring from the freewheel and enter into ball bearing hell? If I had the tool I simply could have removed it all as one piece?
Thank you.
03-02-21, 01:18 AM
#5
Full Member
More precisely, taking apart the freewheel was the last thing you wanted to do -- it is definitely not for the faint of heart and quite unneccesary here. But you know what they say: Good judgment comes from experience; experience comes from bad judgment. So now you have good judgment.
03-02-21, 01:23 AM
#6
Senior Member

Join Date: Sep 2020
Location: Eastern Poland
Posts: 744
Bikes: Romet Jubilat x 4, Wigry x 1, Turing x 1
Mentioned: 3 Post(s)
Tagged: 0 Thread(s)
Quoted: 194 Post(s)
Liked 204 Times
in
151 Posts
Thank you kindly for the informative reply. You're right that the hub is a Normandy.
So just to makes sure I understand correctly. I did not need to remove the ring from the freewheel and enter into ball bearing hell? If I had the tool I simply could have removed it all as one piece?
Thank you.
So just to makes sure I understand correctly. I did not need to remove the ring from the freewheel and enter into ball bearing hell? If I had the tool I simply could have removed it all as one piece?
Thank you.
Give the freewheel the good clean so many others lack and desperately need, reassemble lovingly and only then put the freewheel back on the wheel. Before you put the freewheel back on, put the axle and spacers back on and fit the freewheel with the removal tool fitted - so that the freewheel is indeed square to the threads on the hub.
03-02-21, 01:36 AM
#7
Senior Member
Thank you kindly for the informative reply. You're right that the hub is a Normandy.
So just to makes sure I understand correctly. I did not need to remove the ring from the freewheel and enter into ball bearing hell? If I had the tool I simply could have removed it all as one piece?
Thank you.
So just to makes sure I understand correctly. I did not need to remove the ring from the freewheel and enter into ball bearing hell? If I had the tool I simply could have removed it all as one piece?
Thank you.
There are a bunch of different freewheel removal tools for different freewheel styles, but from even my limited experience, the old Regina and Atom and some Maillard freewheels use the thin wall FR4 style remover.
If you know anybody that messes with old bikes, you might know someone who has one of these tools. Or, any bike shop that works on vintage bikes should have one and removing the butt of the freewheel should only take about ten seconds, the first five of which will be spent looking for the tool.
Sometimes, the freewheel can be pretty tight as pedaling torque will tend to tighten it. Also, if it was installed dry, it might have some corrosion holding it on. There are many videos on youtube describing how to remove real tight freewheels without busting your knuckles using a 12" adjustable wrench, or something.
As for re-assembling your existing freewheel, in my experience, the only way to get a freewheel apart and back together is to plan, plan, plan and then plan some more. If you know what you are going to encounter when you take it apart and are very careful with your balls, it can be done successfully and many forum members do it regularly. Not me as I'm not sufficiently patient nor dextrous.
Likes For desconhecido:
03-02-21, 07:50 AM
#8
WGB
Join Date: Jul 2017
Location: Niagara Region
Posts: 2,917
Bikes: Panasonic PT-4500
Mentioned: 46 Post(s)
Tagged: 0 Thread(s)
Quoted: 1800 Post(s)
Liked 2,334 Times
in
1,378 Posts
This is not the worst situation to be in. If you're seriously bored, take a spare hub and screw on a freewheel nice tight and then try and get it back off. Or alternatively, take an old wheel, cut off the spoke with wire cutters and the try to remove the freewheel.
Seriously, you should be able to remove that freewheel body (called a freehub) from the wheel hub quite easily. First, collect the bearings and remove the two little flanges and the springs that hold them. If you do want to try to rebuild it, you can't lose those. Bearings are cheap and easy to find and at this point you won't want to reuse the old ones. Add a penetrant of some kind so that it seeps in between the freewheel hub and the wheel hub. let sit for a day.
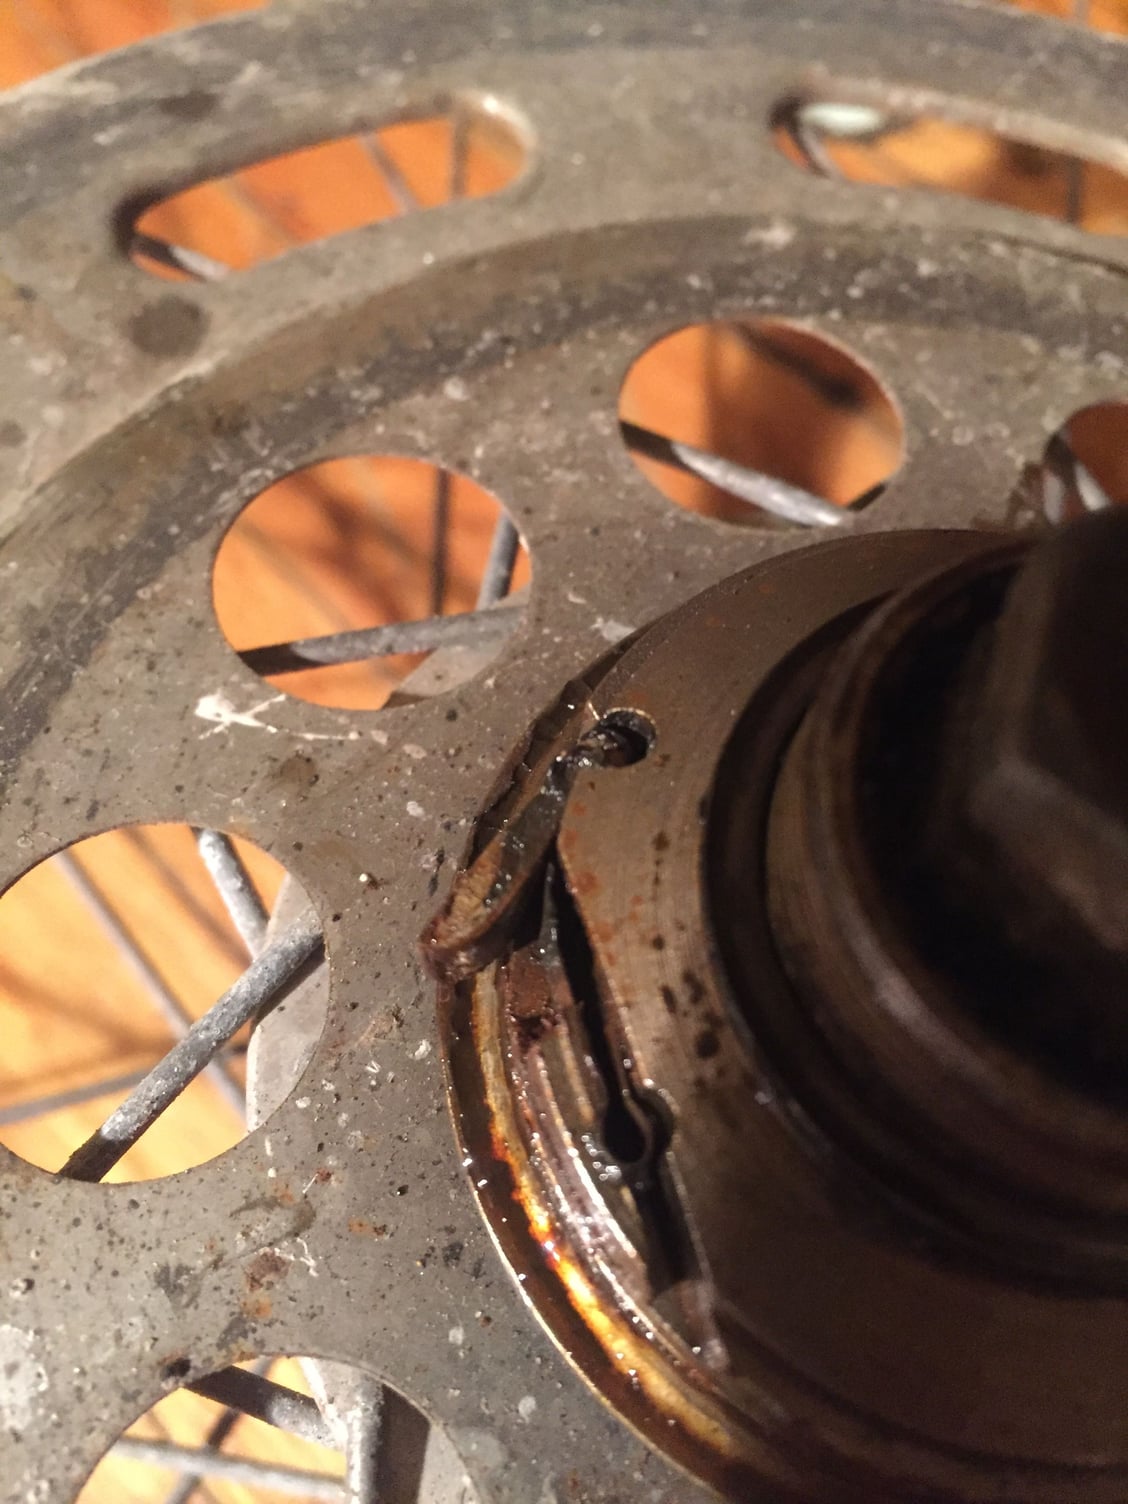
Now, take an adjustable wrench (not a chewed up on as you need a good contact between flats) and mount it to the flat edges of the freewheel hub (roughly at 9-10 o'clock and 2-3 o'clock in your 3rd photo). It should unscrew.
Should say that Atom freewheels are quite cheap and often sold here.
Depending on where you reside you will often see them locally on Craigslist or Kijiji or Facebook.
Here is a recent example.
Note that seller a) says he's cleaned and lubed it and b) includes shipping in shipping to CONUS.
https://www.bikeforums.net/classic-v...reewheels.html
Seriously, you should be able to remove that freewheel body (called a freehub) from the wheel hub quite easily. First, collect the bearings and remove the two little flanges and the springs that hold them. If you do want to try to rebuild it, you can't lose those. Bearings are cheap and easy to find and at this point you won't want to reuse the old ones. Add a penetrant of some kind so that it seeps in between the freewheel hub and the wheel hub. let sit for a day.
Now, take an adjustable wrench (not a chewed up on as you need a good contact between flats) and mount it to the flat edges of the freewheel hub (roughly at 9-10 o'clock and 2-3 o'clock in your 3rd photo). It should unscrew.
Should say that Atom freewheels are quite cheap and often sold here.
Depending on where you reside you will often see them locally on Craigslist or Kijiji or Facebook.
Here is a recent example.
Note that seller a) says he's cleaned and lubed it and b) includes shipping in shipping to CONUS.
https://www.bikeforums.net/classic-v...reewheels.html
Last edited by WGB; 03-02-21 at 07:57 AM.
03-02-21, 07:58 AM
#9
WGB
Join Date: Jul 2017
Location: Niagara Region
Posts: 2,917
Bikes: Panasonic PT-4500
Mentioned: 46 Post(s)
Tagged: 0 Thread(s)
Quoted: 1800 Post(s)
Liked 2,334 Times
in
1,378 Posts
This is not the worst situation to be in. If you're seriously bored, take a spare hub and screw on a freewheel nice tight and then try and get it back off. Or alternatively, take an old wheel, cut off the spoke with wire cutters and the try to remove the freewheel.
Seriously, you should be able to remove that freewheel body (called a freehub) from the wheel hub quite easily. First, collect the bearings and remove the two little flanges and the springs that hold them. If you do want to try to rebuild it, you can't lose those. Bearings are cheap and easy to find and at this point you won't want to reuse the old ones. Add a penetrant of some kind so that it seeps in between the freewheel hub and the wheel hub. let sit for a day.
Now, take an adjustable wrench (not a chewed up on as you need a good contact between flats) and mount it to the flat edges of the freewheel hub (roughly at 9-10 o'clock and 2-3 o'clock in your 3rd photo). It should unscrew.
You can replace that Atom cheaply. one is for sale here on the sales forum. They appear regularly on FB, eBay, Kijiji and Craigslist
Last edited by WGB; 03-02-21 at 08:04 AM.
03-02-21, 08:01 AM
#10
WGB
Join Date: Jul 2017
Location: Niagara Region
Posts: 2,917
Bikes: Panasonic PT-4500
Mentioned: 46 Post(s)
Tagged: 0 Thread(s)
Quoted: 1800 Post(s)
Liked 2,334 Times
in
1,378 Posts
Sorry - duplicate
03-02-21, 08:04 AM
#11
SE Wis
Join Date: Apr 2005
Location: Milwaukee, WI
Posts: 10,509
Bikes: '68 Raleigh Sprite, '02 Raleigh C500, '84 Raleigh Gran Prix, '91 Trek 400, 2013 Novara Randonee, 1990 Trek 970
Mentioned: 40 Post(s)
Tagged: 0 Thread(s)
Quoted: 2746 Post(s)
Liked 3,390 Times
in
2,053 Posts
03-02-21, 07:36 PM
#12
Junior Member
Thread Starter
Join Date: Jul 2014
Posts: 20
Mentioned: 0 Post(s)
Tagged: 0 Thread(s)
Quoted: 4 Post(s)
Liked 0 Times
in
0 Posts
Many thanks to all who replied. I will attempt to remove the freewheel hub and reconstruct it. If there's success -- or interesting failure -- I will report back.
03-02-21, 09:24 PM
#13
Senior Member
Once you get the freehub off the wheel you can collect all the loose ball bearings and give everything a good cleaning with kerosene. Air dry, and use a small amount of light grease to hold the bearings in place while you assemble the two "halves". No easy, but not impossible. Once complete you'll have the freewheel back as good as new and ready for many more miles.
I have an old Atom Compac myself, a straight block "corncob" 5-speed. Just for a spare.
I have an old Atom Compac myself, a straight block "corncob" 5-speed. Just for a spare.
03-05-21, 11:22 AM
#14
Senior Member
The OP has stumbled into an area that most (at least many) DIY bike mechanics tend to avoid either after making that very mistake themselves or reading of the misadventures of others. I’ve actually taken the plunge (AFTER reading about the issues involved) and successfully completely disassembled and reassembled a similar freewheel. As mentioned, it’s not a project for the faint of heart and is probably best suited for a person born under the sign of Virgo that has, at least, a certain degree of OCD (obsessive/compulsive disorder). I pretty much consider myself to be in that category!
While not terribly difficult, it’s tedious time consuming work which is why experience bike mechanics find it simpler to just replace the freewheel!
It may be too late for the OP but I found it very helpful to work over a light colored towel in order to keep the bearings and other small parts from getting lost. IIRC (and the OP’s pics seem to confirm) the bearings are smaller for the inner most race than for the outer most race. Keep them separated and count them to know how many should go back into their respective races. I can’t remember if the palls are pushed out by a flat or coiled spring but it’s important to not lose them as they integral to the “freewheeling” function.
Once everything is cleaned up and ready for reassembly, I found it easiest to apply the bearing lube to the races then stick the bearings into the lube with a tweezers. To hold the palls in against the springs, wrap a length of strong but thin thread around them. Once the cog set is placed over the base, the thread is pulled free allowing the palls to be pushed out by the springs to engage the ratcheted surface of the cog component. Reinstall the retaining ring and you’re done!
Make sure that the palls are functioning properly by holding the base (threaded part) and try to rotate the cogs. The cogs should turn freely in a counter (anti) clockwise direction but not in a clockwise direction. If so, reassembly was correct. If not, take it apart and reassemble as described above OR just get a new freewheel
Last edited by sovende; 03-05-21 at 03:02 PM.
Likes For sovende:
03-07-21, 11:15 AM
#15
Junior Member
Thread Starter
Join Date: Jul 2014
Posts: 20
Mentioned: 0 Post(s)
Tagged: 0 Thread(s)
Quoted: 4 Post(s)
Liked 0 Times
in
0 Posts
There were a few frustrating moments when inserting the freewheel hub back into the rest of the freewheel. You have to tie the palls down and then pull the string (or I used an elastic) once you get it in. The first time I did this successfully, then tried to place the freewheel ride side up on the ground to install the top bearings, and in doing so the hub came out enough to allow one of the palls to open up and I had to do it again.
The second time I did it successfully, having installed the top bearings, I then realized that I had left out two spacers. This meant I had to remove the hub section, put on the spacers, retie it, insert it again, and then put the bearings in again. These are the moments when your meditative training come in handy; hands are greasy and it's easy to start throwing things against the wall, or rushing in a way that could get you further into the muck.
With the above guide though, I felt as though I knew exactly how to proceed and it really wasn't that bad. No more frustrating than working on an older french road bike usually is.
The added bonus is that this has forced me to give the whole bike some much needed TLC. We shouldn't forget to show some love to the bike(s) that give us so much!
Thanks again everyone.
