


Old School Frame Project for Rat Trap Pass Tire
 02-22-19, 01:40 AM
#51

Senior Member
I have an Astro Penumatics knock off of a Sata MiniJet HVLP unit and an Astro condensate trap / particulate filter. I don't know the model number but if my gun is any indication then Astro makes nice equipment. Garden variety consumer air compressor. Mine is maybe 20 gal receiver, don't remember the compressor delivery specs. I spray in the carport or yard depending on the weather.
Although I've used automotive urethanes I'm growing tired of the expense of solidifying activators. My last few frames were shot with Rustoleum "Stops Rust" alkyd oil. It's a small fraction of the urethane cost and it's pretty good. A good painter can make it look fantastic. Certainly not as tough but then, it's a bicycle. If I were to do it over again from scratch I'd standardize on either the Rusto or perhaps a single stage urethane from one manufacturer in only one color. I've got half a dozen colors from two manufacturers which means that my five or six different activators for all that stuff go bad before I've used even a quarter of any can. That would keep the urethane costs halfway reasonable (though still a LOT more than the Rusto).
Although I've used automotive urethanes I'm growing tired of the expense of solidifying activators. My last few frames were shot with Rustoleum "Stops Rust" alkyd oil. It's a small fraction of the urethane cost and it's pretty good. A good painter can make it look fantastic. Certainly not as tough but then, it's a bicycle. If I were to do it over again from scratch I'd standardize on either the Rusto or perhaps a single stage urethane from one manufacturer in only one color. I've got half a dozen colors from two manufacturers which means that my five or six different activators for all that stuff go bad before I've used even a quarter of any can. That would keep the urethane costs halfway reasonable (though still a LOT more than the Rusto).
 02-22-19, 07:53 AM
#52
Senior Member
Thread Starter
Join Date: May 2013
Posts: 80
Mentioned: 4 Post(s)
Tagged: 0 Thread(s)
Quoted: 21 Post(s)
Likes: 0
Liked 16 Times
in
8 Posts
Some folks use airbrushes to paint frames. I've never tried one but the vast majority of what comes out of my gun doesn't go on the tubes. Suzy Jackson (Little Fish Bicycles) used airbrushes to paint her frames. She got fine results and used little paint, and you can run one with a much smaller compressor. Might be worth checking around.
Last edited by Jmclay; 02-22-19 at 07:56 AM.
02-22-19, 01:58 PM
#53
Senior Member
I remember reading that when she built her first bike! To be honest, she's so handy and knowledgeable it's kinda scary D:
03-05-19, 06:43 AM
#54
Senior Member
Thread Starter
Join Date: May 2013
Posts: 80
Mentioned: 4 Post(s)
Tagged: 0 Thread(s)
Quoted: 21 Post(s)
Likes: 0
Liked 16 Times
in
8 Posts
You know how when you get on a bike that really rings your bell you just know it immediately? Well, this one does. The Baby Shoe Pass bike is fantastic too but my gut reaction, after about 30 miles of mixed surface riding, mostly finely crushed limestone, sand and about 30% asphalt, is that this Rat Trap Pass bike will become my favorite. The BSP bike works very well on these surfaces but this is even more capable off-road and it feels more competent while cornering on every surface. Pavement cracks and gnarly asphalt joints disappear even further than with the BSP bike. It's substantially better across sand. If it gives up any speed it's not obvious to me; it feels like it doesn't.
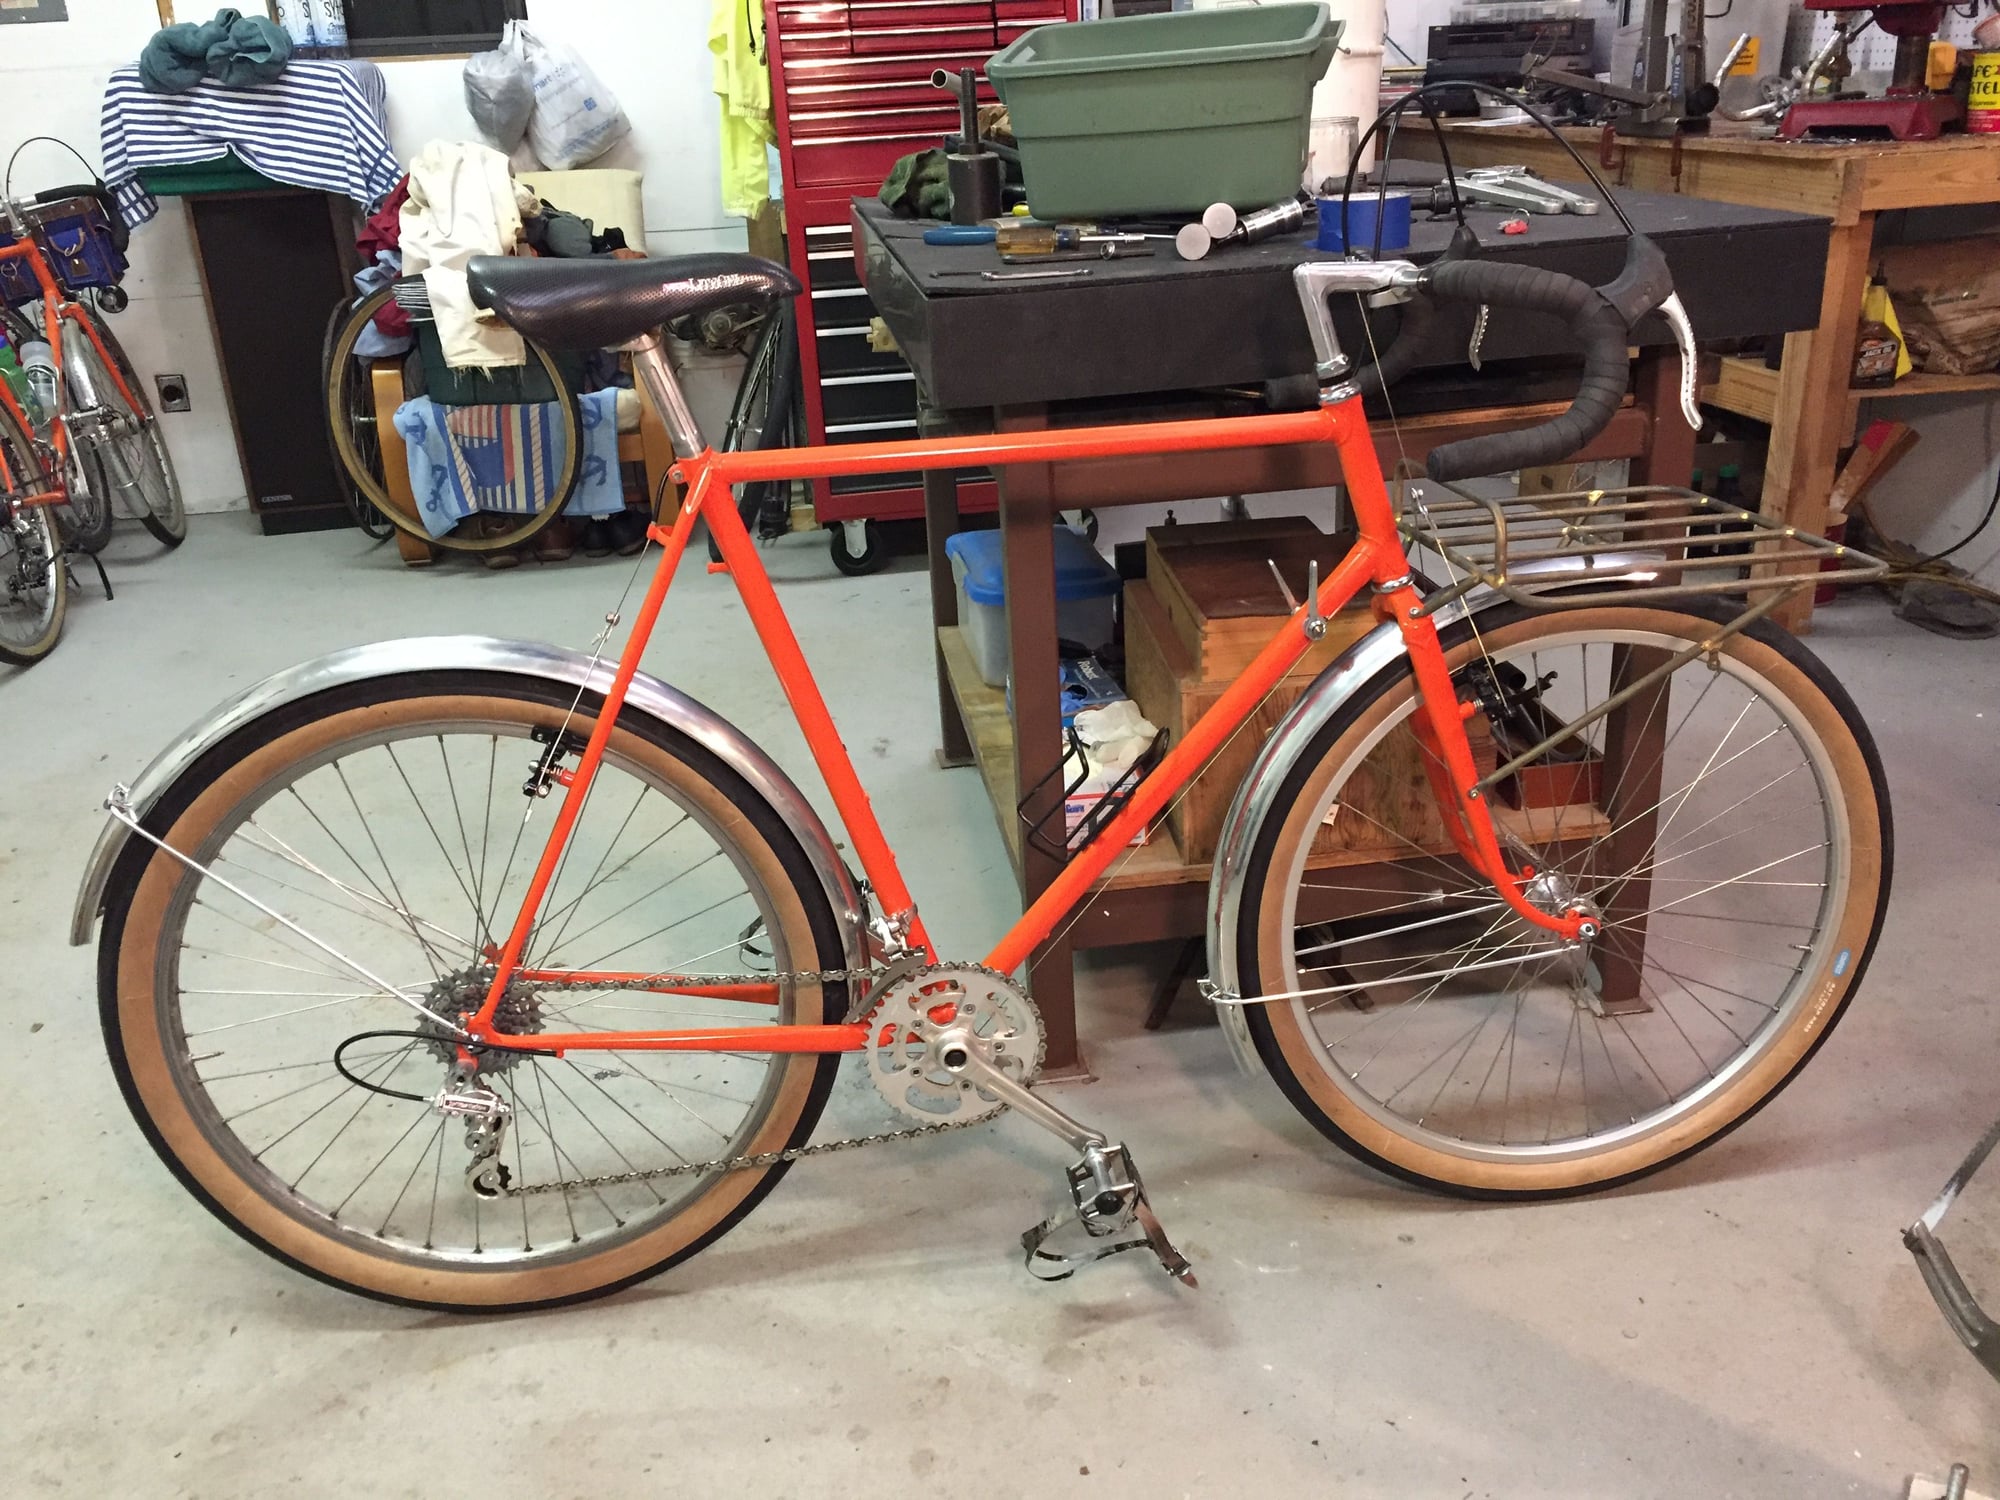
The heavily worked chainstay sockets and stays provide perfect clearance for the 60mm fenders. That was really quite a bit of work and I couldn't be more pleased with how it turned out. Photos of how I got there start here: https://www.flickr.com/photos/216244...7671170583438/
Cranks: Stronglight 99 drive side, Stronglight 49d on the off-side until I find a mate to the '99.Gearing: 42/30 rings with some 28s in reserve. A 2X6 (13-28) which will become a 2x7 (13-32) shortly, and both via a Suntour Winner freewheel.
Q-factor: 145mm. I could get it to 140 with a BB change and a minor dent for the small chainring but it's not worth the trouble.
Changers: Old Dura Ace front, Cyclone GT rear, Campy levers.
Hubs: Campy Chorus front, old Super Record rear. DB spokes @ 2mm/1.8mm.Rims: Mavic 517 rear and a new Sun CR18 front, 36 holes.
Saddle: Will become a B17 but for now is something from my parts bin.
Headset: Tange Levin with pretty heavy grease.
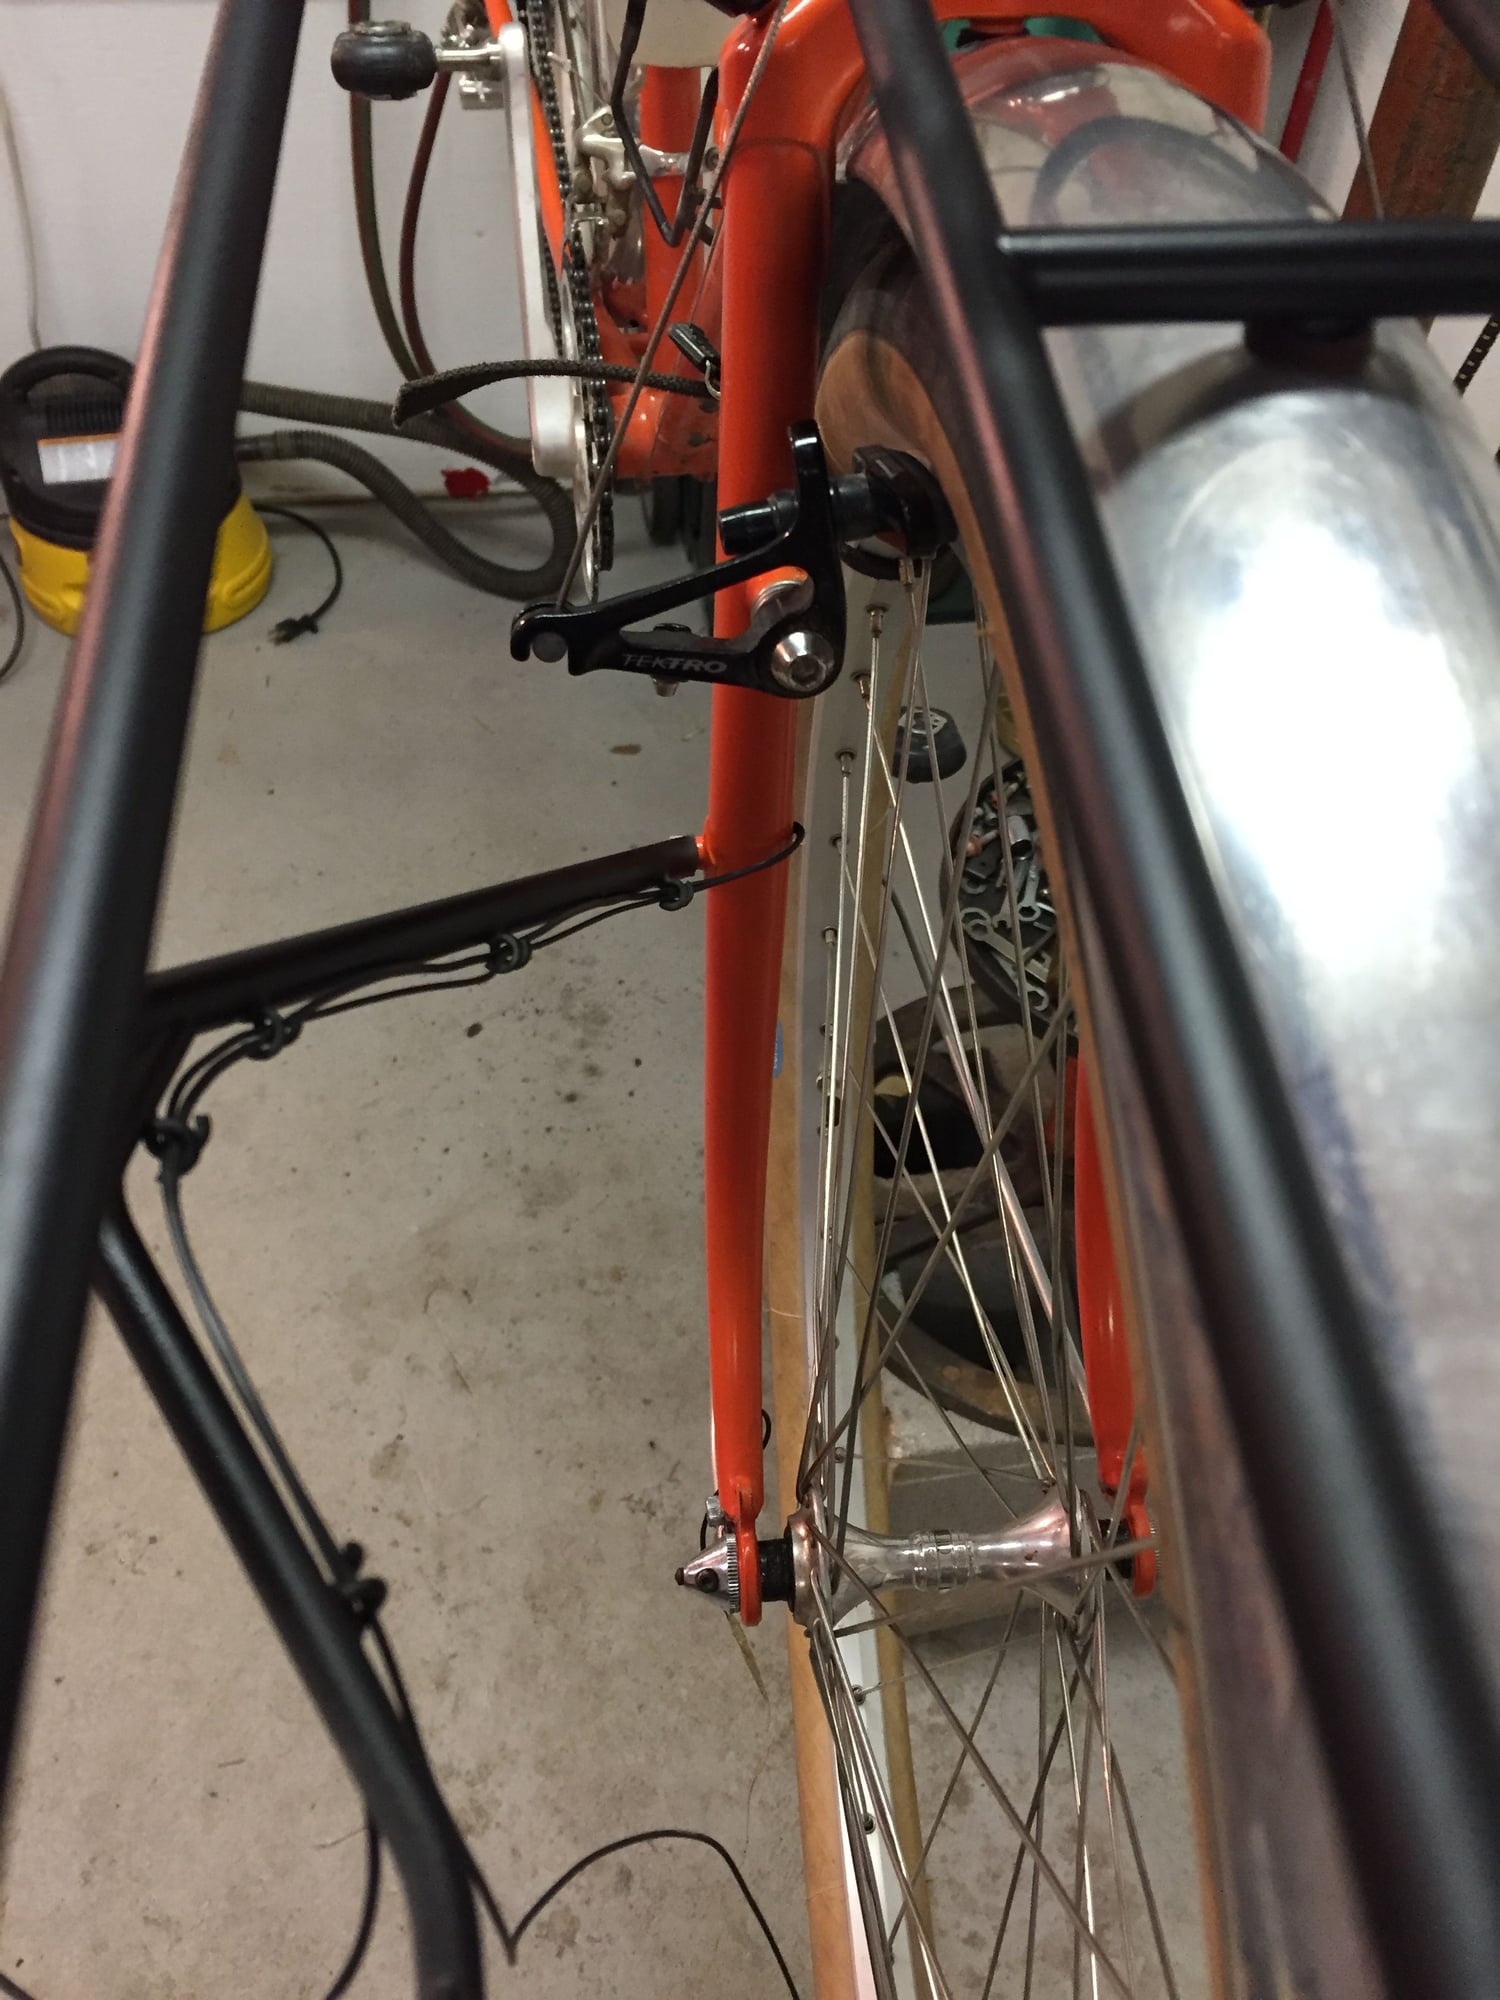
Brakes: Old Campy SR levers x Tektro cantilevers. With nothing special pads they are extremely strong even with only two fingers.
Lighting: None for now but the electrical slip ring essentials (the brush capsule receptacle in the head tube/down tube junction), concealed wiring details and tail light mounting boss are present.
I need to remove the headlight mounting tab from the rack (12" x 15") and make a better one, then get the whole thing chromed. I'll probably configure the rear fender for rinko; all the other rinko necessities are there. And I'll substitute Berthoud fender stays for those awful drawbolt things; they eat up about 10mm of toe/fender clearance that I would like to regain.
It's quite fantastic and I am stoked.
The heavily worked chainstay sockets and stays provide perfect clearance for the 60mm fenders. That was really quite a bit of work and I couldn't be more pleased with how it turned out. Photos of how I got there start here: https://www.flickr.com/photos/216244...7671170583438/
Cranks: Stronglight 99 drive side, Stronglight 49d on the off-side until I find a mate to the '99.Gearing: 42/30 rings with some 28s in reserve. A 2X6 (13-28) which will become a 2x7 (13-32) shortly, and both via a Suntour Winner freewheel.
Q-factor: 145mm. I could get it to 140 with a BB change and a minor dent for the small chainring but it's not worth the trouble.
Changers: Old Dura Ace front, Cyclone GT rear, Campy levers.
Hubs: Campy Chorus front, old Super Record rear. DB spokes @ 2mm/1.8mm.Rims: Mavic 517 rear and a new Sun CR18 front, 36 holes.
Saddle: Will become a B17 but for now is something from my parts bin.
Headset: Tange Levin with pretty heavy grease.
Brakes: Old Campy SR levers x Tektro cantilevers. With nothing special pads they are extremely strong even with only two fingers.
Lighting: None for now but the electrical slip ring essentials (the brush capsule receptacle in the head tube/down tube junction), concealed wiring details and tail light mounting boss are present.
I need to remove the headlight mounting tab from the rack (12" x 15") and make a better one, then get the whole thing chromed. I'll probably configure the rear fender for rinko; all the other rinko necessities are there. And I'll substitute Berthoud fender stays for those awful drawbolt things; they eat up about 10mm of toe/fender clearance that I would like to regain.
It's quite fantastic and I am stoked.
Last edited by Jmclay; 03-05-19 at 08:52 AM.
Likes For Jmclay:
03-05-19, 07:42 AM
#55

Se�or Member

Join Date: Oct 2004
Location: Hardy, VA
Posts: 17,922
Bikes: Mostly English - predominantly Raleighs
Mentioned: 70 Post(s)
Tagged: 0 Thread(s)
Quoted: 1491 Post(s)
Liked 1,090 Times
in
638 Posts
You know how when you get on a bike that really rings your bell you just know it immediately? Well, this one does. The Baby Shoe Pass bike is fantastic too but my gut reaction, after about 30 miles of mixed surface riding, mostly finely crushed limestone, sand and about 30% asphalt, is that this Rat Trap Pass bike will become my favorite. The BSP bike works very well on these surfaces but this is even more capable off-road and it feels more competent while cornering on every surface. Pavement cracks and gnarly asphalt joints disappear even further than with the BSP bike. It's substantially better across sand. If it gives up any speed it's not obvious to me; it feels like it doesn't.
The heavily worked chainstay sockets and stays provide perfect clearance for the 60mm fenders. That was really quite a bit of work and I couldn't be more pleased with how it turned out. Photos of how I got there start here: https://www.flickr.com/photos/216244...7671170583438/
Cranks: Stronglight 99 drive side, Stronglight 49d on the off-side until I find a mate to the '99.Gearing: 42/30 rings with some 28s in reserve.. A 2X6 (13-28) which will become a 2x7 (13-32) shortly, and both via a Suntour Winner freewheel.
Q-factor: 145mm. I could get it to 140 with a BB change and a minor dent for the small chainstay but it's not worth the trouble.
Changers: Old Dura Ace front, Cyclone GT rear, Campy levers.
Hubs: Campy Chorus front, old Super Record rear. DB spokes @ 2mm/1.8mm.Rims: Mavic 517 rear and a new Sun CR18 front, 36 holes.
Saddle: Will become a B17 but for now is something from my parts bin.
Headset: Tange Levin with pretty heavy grease.
Brakes: Old Campy SR levers x Tektro cantilevers. With nothing special pads they are extremely strong even with only two fingers.
Lighting: None for now but the electrical slip ring essentials (the brush capsule receptacle in the head tube/down tube junction), concealed wiring details and tail light mounting boss are present.
I need to remove the headlight mounting tab from the rack (12" x 15") and make a better one, then get the whole thing chromed. I'll probably configure the rear fender for rinko; all the other rinko necessities are there. And I'll substitute Berthoud fender stays for those awful drawbolt things; they eat up about 10mm of toe/fender clearance that I would like to regain.
It's quite fantastic and I am stoked.

__________________
In search of what to search for.
In search of what to search for.
03-05-19, 01:26 PM
#56
Bike Butcher of Portland

Join Date: Jul 2014
Location: Portland, OR
Posts: 11,630
Bikes: It's complicated.
Mentioned: 1299 Post(s)
Tagged: 0 Thread(s)
Quoted: 4677 Post(s)
Liked 5,790 Times
in
2,279 Posts
You'll love those RTP on steep gravel descents, and on heavy, loose gravel. At lower pressures they float right on top of the loose stuff, and give you a lot of confidence on turns at speed.
__________________
If someone tells you that you have enough bicycles and you don't need any more, stop talking to them. You don't need that kind of negativity in your life.
If someone tells you that you have enough bicycles and you don't need any more, stop talking to them. You don't need that kind of negativity in your life.
03-05-19, 03:13 PM
#57
Senior Member
Thread Starter
Join Date: May 2013
Posts: 80
Mentioned: 4 Post(s)
Tagged: 0 Thread(s)
Quoted: 21 Post(s)
Likes: 0
Liked 16 Times
in
8 Posts
Just the little bit of riding I've done has made that clear. And the same is true on asphalt. There are some pretty decent downhill bends in a neighbourhood that's part of the route I took, including rough pavement transitions in some of them, and the bike/tires were seriously confidence inspiring and predictable. I don't intend to often "drag the footpegs" as I did in my younger motorcycle racing days but it's pretty neat to see what this sort of bicycle can do....and to occasionally tiptoe near that realm.
03-05-19, 07:40 PM
#58
Member
I just mounted a set of the Rat trap pass with tan sidewalls in 26 x 2.3 on an old mountain bike I have, man, do they ever look ridiculous. Hopefully once the bike is on the road it is worth it.
04-29-19, 11:01 PM
#59
Senior Member
Thread Starter
Join Date: May 2013
Posts: 80
Mentioned: 4 Post(s)
Tagged: 0 Thread(s)
Quoted: 21 Post(s)
Likes: 0
Liked 16 Times
in
8 Posts
I like this bike so much that I've decided to configure it for Rinko instead of my 650b x 42 (BSP tire). The slip-ring assembly has been installed, the front struts for the porteur rack have been reconfigured for bolted connections top and bottom (so they can be removed for travel and avoid damage), the light mounting arm and wire guides are complete, and the rear fender is being configured for rinko. It's slow work. Photos are in this vicinity of the RTP project Flickr album: https://www.flickr.com/photos/216244...in/dateposted/

 05-13-19, 12:15 PM
#61
Senior Member
Thread Starter
Join Date: May 2013
Posts: 80
Mentioned: 4 Post(s)
Tagged: 0 Thread(s)
Quoted: 21 Post(s)
Likes: 0
Liked 16 Times
in
8 Posts
This morning I finished pulling the lighting wires. The power supply wire from the dynamo to the headlight and the wire from the headlight to the taillight location, via the slip-ring/brass brush assembly, are in place. The wires run externally to the rack strut because the rack is removable for rinko/packing. As a result the struts have to be detachable from the fork and rack (flat pack), and the wires have to be removable from the strut and stay with the fork; Eric Nichols introduced me to the little spirals that facilitate this type of routing � thank you Eric! Clever little things. So now everything is in place and ready for connection when I decide to transplant them from my BSP bike...or get a second set

Slip ring to which I later added the thin, offset solder tab. Offsetting the solder joint from the main body of the slip-ring by a few mm more than the length of the lower headset cup spigot is necessary for installation/removal.

Pull strings were installed via vacuum suction and carefully feeding while spinning the string between thumb and forefinger. I used epoxy to connect the string to the wire from the slip-ring; tape was adequate for the wire from the dynamo.
.
Rough wiring in place.
Slip ring to which I later added the thin, offset solder tab. Offsetting the solder joint from the main body of the slip-ring by a few mm more than the length of the lower headset cup spigot is necessary for installation/removal.
Pull strings were installed via vacuum suction and carefully feeding while spinning the string between thumb and forefinger. I used epoxy to connect the string to the wire from the slip-ring; tape was adequate for the wire from the dynamo.
.
Rough wiring in place.
10-04-19, 02:02 PM
#62
Senior Member
Thread Starter
Join Date: May 2013
Posts: 80
Mentioned: 4 Post(s)
Tagged: 0 Thread(s)
Quoted: 21 Post(s)
Likes: 0
Liked 16 Times
in
8 Posts
Repainted after the Rustoleum paint failed and allowed sweat to start rusting the top tube. Back to automotive urethane; no more Rustoleum, ever.
No lights or generator for the time being but all of the supporting accoutrements are there, including the slip ring.
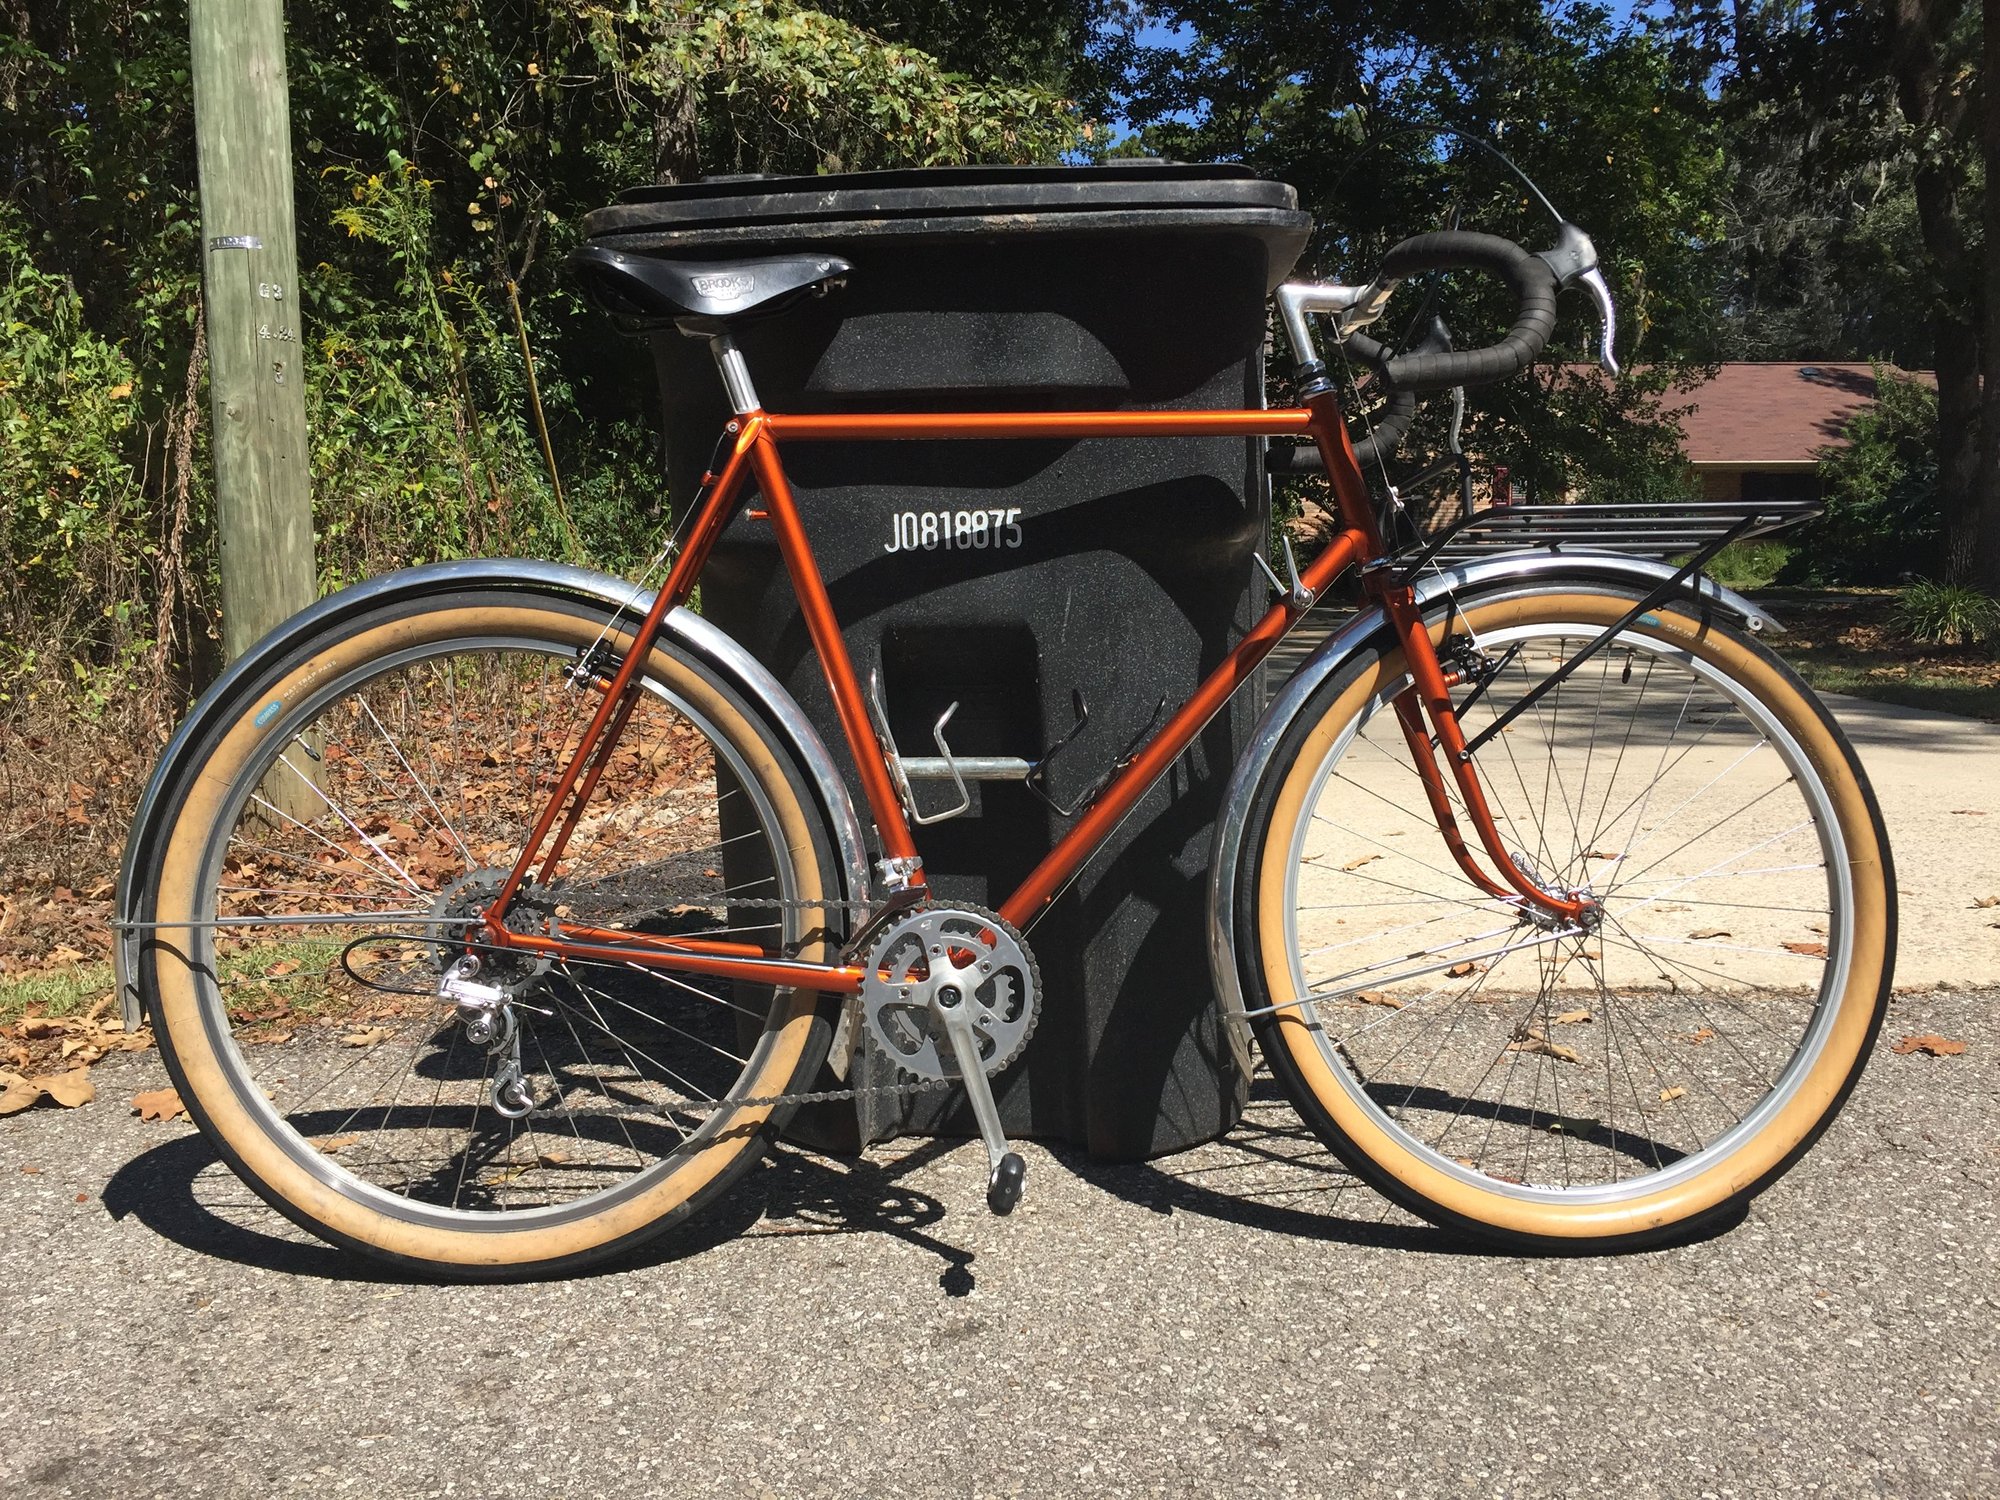
No lights or generator for the time being but all of the supporting accoutrements are there, including the slip ring.
Last edited by Jmclay; 10-04-19 at 02:33 PM.
10-04-19, 02:10 PM
#63
Senior Member
Join Date: Oct 2010
Posts: 8,515
Mentioned: 69 Post(s)
Tagged: 0 Thread(s)
Quoted: 3241 Post(s)
Liked 2,512 Times
in
1,510 Posts
10-04-19, 03:28 PM
#65
Senior Member

Join Date: Sep 2005
Location: Oakland, CA
Posts: 3,265
Bikes: '82 Univega Competizione, '72 Motobecane Grand Record, '83 Mercian KOM Touring, '85 Univega Alpina Uno, '76 Eisentraut Limited
Mentioned: 57 Post(s)
Tagged: 0 Thread(s)
Quoted: 1088 Post(s)
Liked 1,205 Times
in
701 Posts
Love the new color. Careful where you park it -- folks will think it's their save from the dump! 
10-05-19, 07:20 AM
#66
Senior Member
Thread Starter
Join Date: May 2013
Posts: 80
Mentioned: 4 Post(s)
Tagged: 0 Thread(s)
Quoted: 21 Post(s)
Likes: 0
Liked 16 Times
in
8 Posts
Thanks, all! I couldn't be happier with the painting results....or the bike. I've probably said it before but if I could have only one bicycle it would be this one; and I have a geometrically identical bike built for the outstanding Baby Shoe Pass tire. The BSP is a stellar tire and bicycle, but this RTP one is simply better. In every way from my perspective.
You can see them, here: https://www.flickr.com/photos/21624415@N04/albums
You can see them, here: https://www.flickr.com/photos/21624415@N04/albums
10-05-19, 07:55 AM
#67
Edumacator
Join Date: Jan 2018
Location: Goose Creek, SC
Posts: 6,777
Bikes: '87 Crestdale, '87 Basso Gap, '92 Rossin Performance EL-OS, 1990 VanTuyl, 1980s Losa, 1985 Trek 670, 1982 AD SLE, 1987 PX10, etc...
Mentioned: 59 Post(s)
Tagged: 0 Thread(s)
Quoted: 2434 Post(s)
Liked 3,108 Times
in
1,957 Posts
This entire thread is so impressive. Fascinating how talented you guys are.

