


Restoring A 1971 Marinoni
 11-08-20, 05:07 PM
#1
Cobalto
Thread Starter

Join Date: Jun 2012
Location: San Francisco, California
Posts: 42
Bikes: Colnago, Marinoni, Columbine, Schwinn Paramount, Raleigh International, Raleigh Professional, 1893 Crescent Juno, 1896 Crescent No.1, 1899 Crescent No.18, 1896 Columbia 40, 1902 Pierce Special, 1903 Pierce Special, 1905 Pierce Special Racer,
Mentioned: 1 Post(s)
Tagged: 0 Thread(s)
Quoted: 14 Post(s)
Liked 14 Times
in
8 Posts
Restoring A 1971 Marinoni
I’m restoring a 1971 Marinoni bicycle and would like to replace the rear brake bridge, at a slightly lower position. When new, it had a MaFac center-pull and I would like to use Campagnolo Nuovo Record brakes, so the original bridge must be replaced and a new one positioned lower.
Is there anyone that can supply me with a new bridge, with a Colnago style bridge, so I can use a recessed nut?
Thanks!
Giovanni
Is there anyone that can supply me with a new bridge, with a Colnago style bridge, so I can use a recessed nut?
Thanks!
Giovanni
 11-08-20, 06:09 PM
#2

blahblahblah chrome moly

Join Date: Apr 2009
Location: Seattle
Posts: 1,987
Mentioned: 92 Post(s)
Tagged: 0 Thread(s)
Quoted: 1173 Post(s)
Liked 2,569 Times
in
1,073 Posts
I’m restoring a 1971 Marinoni bicycle and would like to replace the rear brake bridge, at a slightly lower position. When new, it had a MaFac center-pull and I would like to use Campagnolo Nuovo Record brakes, so the original bridge must be replaced and a new one positioned lower.
Is there anyone that can supply me with a new bridge, with a Colnago style bridge, so I can use a recessed nut?
Thanks!
Giovanni
Is there anyone that can supply me with a new bridge, with a Colnago style bridge, so I can use a recessed nut?
Thanks!
Giovanni
Also, do you know about the drop bolt for the Campy brake, allowing it to reach 6 mm lower? There are other tricks too, to get even more drop, but the Campy drop bolt is the officially-approved way, done on a lot of nice bikes BITD. Less damaging to the frame, though replacing the bridge can usually be done plenty safely enough. It'd be a shame to repaint it just to get the bridge lower, but that's moot if you're repainting it anyway for other reasons.
Mark B in Seattle
Likes For bulgie:
11-08-20, 07:05 PM
#3


Randomhead
Join Date: Aug 2008
Location: Happy Valley, Pennsylvania
Posts: 24,396
Mentioned: 0 Post(s)
Tagged: 0 Thread(s)
Quoted: 4 Post(s)
Liked 3,696 Times
in
2,517 Posts
I agree with Mark, a drop bolt is a great idea.
I was thinking maybe a "Colnago style bridge" was the biconical ones, but then I googled for the term and it looks a lot like the ones that Paragon makes
https://www.paragonmachineworks.com/...ke-bridge.html

I was thinking maybe a "Colnago style bridge" was the biconical ones, but then I googled for the term and it looks a lot like the ones that Paragon makes
https://www.paragonmachineworks.com/...ke-bridge.html
Likes For unterhausen:
11-10-20, 03:47 PM
#4
Old fart

Join Date: Nov 2004
Location: Appleton WI
Posts: 24,784
Bikes: Several, mostly not name brands.
Mentioned: 153 Post(s)
Tagged: 0 Thread(s)
Quoted: 3587 Post(s)
Liked 3,400 Times
in
1,934 Posts
I agree, a drop bolt is the easiest way to address this, if you can find one or fabricate one.
Otherwise, I have some Gipiemme brake bridges that might be suitable:
Otherwise, I have some Gipiemme brake bridges that might be suitable:
11-10-20, 07:22 PM
#5
Cobalto
Thread Starter
Join Date: Jun 2012
Location: San Francisco, California
Posts: 42
Bikes: Colnago, Marinoni, Columbine, Schwinn Paramount, Raleigh International, Raleigh Professional, 1893 Crescent Juno, 1896 Crescent No.1, 1899 Crescent No.18, 1896 Columbia 40, 1902 Pierce Special, 1903 Pierce Special, 1905 Pierce Special Racer,
Mentioned: 1 Post(s)
Tagged: 0 Thread(s)
Quoted: 14 Post(s)
Liked 14 Times
in
8 Posts
Marinoni Brake Bridge
Silver Solder is more fluid than Braze and works by being drawn into the joint by a capillary action. ... Silver Solder is used with a Flux, which chemically cleans the metal and keeps it clean during the Silver Soldering process. Silver Solder is also know as Silver Brazing.
Kind regards,
Giovanni
Last edited by GiovanniLiCalsi; 11-11-20 at 04:53 AM.
11-11-20, 02:40 AM
#6
blahblahblah chrome moly
Join Date: Apr 2009
Location: Seattle
Posts: 1,987
Mentioned: 92 Post(s)
Tagged: 0 Thread(s)
Quoted: 1173 Post(s)
Liked 2,569 Times
in
1,073 Posts
Most silver brazing alloys are a bit on the "runny" side for a brake bridge, but they can work if you're careful, with good fit-up, prep, cleanliness, the right flux and flame etc. The higher silver content fillers, 56% for example, tend to be the runnier ones, not good for fillet-building, so I would choose a bit lower silver content, say 45%.
Some bridges come with reinforcing plates that have a little spigot that goes up inside the bridge, like an inside lug, very much increasing the "wetted area" for the silver to grab onto. While that is not strictly necessary, I think with silver it's a good idea. It can help with the safety margin, in case your fit-up, prep, flux or brazing skill are anything less than optimal.
Mark B in Seattle
Likes For bulgie:
11-11-20, 05:53 AM
#7
Cobalto
Thread Starter
Join Date: Jun 2012
Location: San Francisco, California
Posts: 42
Bikes: Colnago, Marinoni, Columbine, Schwinn Paramount, Raleigh International, Raleigh Professional, 1893 Crescent Juno, 1896 Crescent No.1, 1899 Crescent No.18, 1896 Columbia 40, 1902 Pierce Special, 1903 Pierce Special, 1905 Pierce Special Racer,
Mentioned: 1 Post(s)
Tagged: 0 Thread(s)
Quoted: 14 Post(s)
Liked 14 Times
in
8 Posts
OK, as long as you know that soldering is not strong enough. Even silver-bearing solders are not strong enough for a brake bridge. You need to silver braze a bridge. But a lot of bikies call that silver soldering — it's sort of a traditional jargon in the bike world that's technically inaccurate, but it's fine as long as you actually braze it!
Most silver brazing alloys are a bit on the "runny" side for a brake bridge, but they can work if you're careful, with good fit-up, prep, cleanliness, the right flux and flame etc. The higher silver content fillers, 56% for example, tend to be the runnier ones, not good for fillet-building, so I would choose a bit lower silver content, say 45%.
Some bridges come with reinforcing plates that have a little spigot that goes up inside the bridge, like an inside lug, very much increasing the "wetted area" for the silver to grab onto. While that is not strictly necessary, I think with silver it's a good idea. It can help with the safety margin, in case your fit-up, prep, flux or brazing skill are anything less than optimal.
Mark B in Seattle
Last edited by GiovanniLiCalsi; 11-11-20 at 05:58 AM.
Likes For GiovanniLiCalsi:
11-11-20, 08:24 AM
#8
Randomhead
Join Date: Aug 2008
Location: Happy Valley, Pennsylvania
Posts: 24,396
Mentioned: 0 Post(s)
Tagged: 0 Thread(s)
Quoted: 4 Post(s)
Liked 3,696 Times
in
2,517 Posts
I also think silver is somewhat questionable for this application. There are high-build silver fillers, and they are plenty strong. Fillet pro is an example. These fillers are somewhat tricky to use properly. But it's much better to use brass for a bridge that has to withstand braking forces.
11-11-20, 09:04 AM
#9
Cobalto
Thread Starter
Join Date: Jun 2012
Location: San Francisco, California
Posts: 42
Bikes: Colnago, Marinoni, Columbine, Schwinn Paramount, Raleigh International, Raleigh Professional, 1893 Crescent Juno, 1896 Crescent No.1, 1899 Crescent No.18, 1896 Columbia 40, 1902 Pierce Special, 1903 Pierce Special, 1905 Pierce Special Racer,
Mentioned: 1 Post(s)
Tagged: 0 Thread(s)
Quoted: 14 Post(s)
Liked 14 Times
in
8 Posts
That video shows brazing a lug, so it doesn't seem to contradict bulgie at all.
I also think silver is somewhat questionable for this application. There are high-build silver fillers, and they are plenty strong. Fillet pro is an example. These fillers are somewhat tricky to use properly. But it's much better to use brass for a bridge that has to withstand braking forces.
I also think silver is somewhat questionable for this application. There are high-build silver fillers, and they are plenty strong. Fillet pro is an example. These fillers are somewhat tricky to use properly. But it's much better to use brass for a bridge that has to withstand braking forces.
https://www.cycledesignusa.com/silver/fillet-pro
I have used lots of slfos. What do you think?
https://blog.lucasmilhaupt.com/en-us...r-and-plumbing
Last edited by GiovanniLiCalsi; 11-11-20 at 09:07 AM.
11-11-20, 09:14 AM
#10
Senior Member
Join Date: Feb 2012
Location: Rochester, NY
Posts: 18,073
Bikes: Stewart S&S coupled sport tourer, Stewart Sunday light, Stewart Commuting, Stewart Touring, Co Motion Tandem, Stewart 3-Spd, Stewart Track, Fuji Finest, Mongoose Tomac ATB, GT Bravado ATB, JCP Folder, Stewart 650B ATB
Mentioned: 0 Post(s)
Tagged: 0 Thread(s)
Quoted: 4201 Post(s)
Liked 3,857 Times
in
2,305 Posts
There's very little advantage to use silver braze for a brake (or BB) bridge, compared to using bronze/brass. But if you know how to swing a silver hammer then use it. If you know how to swing a bronze hammer then use that. I suggest bronze. Andy
__________________
AndrewRStewart
AndrewRStewart
11-11-20, 10:59 AM
#11
Cobalto
Thread Starter
Join Date: Jun 2012
Location: San Francisco, California
Posts: 42
Bikes: Colnago, Marinoni, Columbine, Schwinn Paramount, Raleigh International, Raleigh Professional, 1893 Crescent Juno, 1896 Crescent No.1, 1899 Crescent No.18, 1896 Columbia 40, 1902 Pierce Special, 1903 Pierce Special, 1905 Pierce Special Racer,
Mentioned: 1 Post(s)
Tagged: 0 Thread(s)
Quoted: 14 Post(s)
Liked 14 Times
in
8 Posts
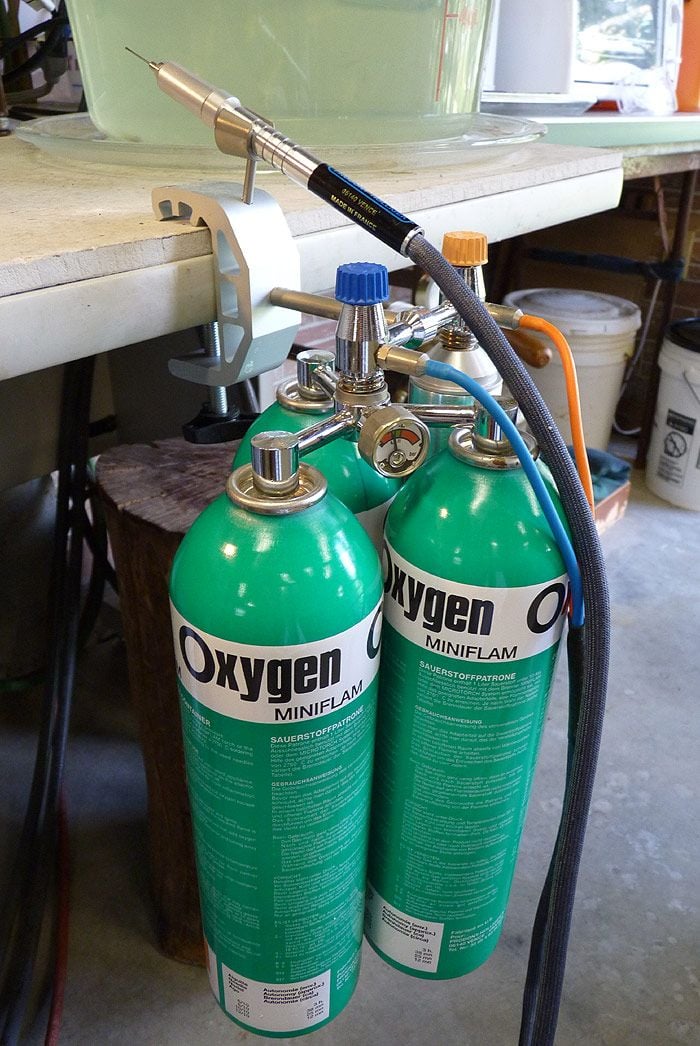
Aircraft chrome moly frame builders use this torch and also jewelers. I’m into both.
 11-11-20, 01:13 PM
#12
blahblahblah chrome moly
Join Date: Apr 2009
Location: Seattle
Posts: 1,987
Mentioned: 92 Post(s)
Tagged: 0 Thread(s)
Quoted: 1173 Post(s)
Liked 2,569 Times
in
1,073 Posts
I just tried an older Meco Midget for the first time the other day. It came (well-used) with a gas fluxer I bought used a few years ago, but I never got around to hooking it up and sparking it until the other day -- I think I really like it. It's almost comically small. I got the longer tube from the handle to the tip, puts your hand a bit farther from the flame, good for the bigger tips like rosebuds.
I also got the propane tips from Paige Tools, recommended. They have multiple orifices arranged in a circle around the main one, which is supposed to keep the flame from blowing out. I haven't used them much yet, but so far so good, flame completely stable.
I also recommend the ultralight hoses from TinManTech. The hose is so light and flexible you hardly notice it's there, more dexterity and less fatigue on your torch arm. Not very durable though, so make sure you never walk on it or drop blobs of molten metal on it. I have heavy duty hose from regulator to gas saver, and ultralight from the gas saver to the torch, with the UL hose suspended so it doesn't even touch the ground.
I just noticed Smith makes different gas savers for acetylene versus propane. Mine's the acetylene model, got it used many moons ago (it was actually Mario Confente's originally) so I never realized how expensive they are — I'm seeing almost $200 new (ouch). So I won't be buying a second one for propane! Anyway mine works OK for propane, it's just a bit harder to get the pilot light lit. The flame blows itself out unless I set it really low, but once I get it burning it works %100 throughout the day, good enough for me. Super convenient if you frequently set the torch down between bouts of brazing, because the valves stay adjusted. Just pick it up, light it off the pilot flame, and your flame is already adjusted however you left it when you hung it up..
Mark B in Seattle
11-11-20, 01:47 PM
#13
blahblahblah chrome moly
Join Date: Apr 2009
Location: Seattle
Posts: 1,987
Mentioned: 92 Post(s)
Tagged: 0 Thread(s)
Quoted: 1173 Post(s)
Liked 2,569 Times
in
1,073 Posts
I just noticed Smith makes different gas savers for acetylene versus propane. Mine's the acetylene model,
Mark B
Likes For bulgie:
11-11-20, 03:09 PM
#14
Cobalto
Thread Starter
Join Date: Jun 2012
Location: San Francisco, California
Posts: 42
Bikes: Colnago, Marinoni, Columbine, Schwinn Paramount, Raleigh International, Raleigh Professional, 1893 Crescent Juno, 1896 Crescent No.1, 1899 Crescent No.18, 1896 Columbia 40, 1902 Pierce Special, 1903 Pierce Special, 1905 Pierce Special Racer,
Mentioned: 1 Post(s)
Tagged: 0 Thread(s)
Quoted: 14 Post(s)
Liked 14 Times
in
8 Posts
Torch Setups
I'm also a fan of fillet pro. As @unterhausen mentioned, a little tricky to use, but done right it makes nice silver fillets, especially useful on stainless. The silver flux from Cycle Design is also top notch.
I just tried an older Meco Midget for the first time the other day. It came (well-used) with a gas fluxer I bought used a few years ago, but I never got around to hooking it up and sparking it until the other day -- I think I really like it. It's almost comically small. I got the longer tube from the handle to the tip, puts your hand a bit farther from the flame, good for the bigger tips like rosebuds.
I also got the propane tips from Paige Tools, recommended. They have multiple orifices arranged in a circle around the main one, which is supposed to keep the flame from blowing out. I haven't used them much yet, but so far so good, flame completely stable.
I also recommend the ultralight hoses from TinManTech. The hose is so light and flexible you hardly notice it's there, more dexterity and less fatigue on your torch arm. Not very durable though, so make sure you never walk on it or drop blobs of molten metal on it. I have heavy duty hose from regulator to gas saver, and ultralight from the gas saver to the torch, with the UL hose suspended so it doesn't even touch the ground.
I just noticed Smith makes different gas savers for acetylene versus propane. Mine's the acetylene model, got it used many moons ago (it was actually Mario Confente's originally) so I never realized how expensive they are — I'm seeing almost $200 new (ouch). So I won't be buying a second one for propane! Anyway mine works OK for propane, it's just a bit harder to get the pilot light lit. The flame blows itself out unless I set it really low, but once I get it burning it works %100 throughout the day, good enough for me. Super convenient if you frequently set the torch down between bouts of brazing, because the valves stay adjusted. Just pick it up, light it off the pilot flame, and your flame is already adjusted however you left it when you hung it up..
Mark B in Seattle
Thanks for sharing your knowledge and experience!
Hope I get an opportunity to meet you.
I’m learning so much, on this thread!
Regards,
Giovanni
11-11-20, 10:20 PM
#15
Cobalto
Thread Starter
Join Date: Jun 2012
Location: San Francisco, California
Posts: 42
Bikes: Colnago, Marinoni, Columbine, Schwinn Paramount, Raleigh International, Raleigh Professional, 1893 Crescent Juno, 1896 Crescent No.1, 1899 Crescent No.18, 1896 Columbia 40, 1902 Pierce Special, 1903 Pierce Special, 1905 Pierce Special Racer,
Mentioned: 1 Post(s)
Tagged: 0 Thread(s)
Quoted: 14 Post(s)
Liked 14 Times
in
8 Posts
Fillet Pro
With Fillet Pro you can join stainless steel to chrome-moly and vice versa.
https://youtu.be/w8rvcJ-6YYg
- For fillet brazing at below 1200F.
- Ideal for use with Martensitic SS (953) and XCR, Cycle Design SS Dropouts and G.P. Wilson 17/4. Paragon and other SS tips and parts.
- Beyond any brass in finish strength at silver temps.
- Excellent for tips and fork crowns or loose fits.
- Capable of joining without support with 100% joint integrity.
- Fillet Pro is being used Worldwide for SS and Steel fillet frames by Top Builders.
- Joining with Fillet Pro results in distortion free construction.
https://youtu.be/w8rvcJ-6YYg
Last edited by GiovanniLiCalsi; 11-11-20 at 10:48 PM. Reason: Add Video
11-12-20, 01:09 AM
#16
framebuilder
I have a number of smaller "aircraft" style of torch handles for frame building class students to try including the Meco Midget. While the Midget is okay I'm not a fan because it takes more hand action (well mostly wrist action) to flick away the flame from the work. I can roll the round handled ones with my fingers. It is also the least likely torch handle for students to like after trying them all out. However those that like it really love it. Here are a couple of tips for improving the use of the Midget. John Clay suggested to me to turn the elbow so it is parallel to the torch body instead of being at a right angle. I found it easier to flick the flame (meaning less hand motion) when the elbow is at that location. My second suggestion is to increase the body length by putting flashback arrestors on the body. The Meco is pretty small and the addition of the arrestors (instead of the smaller check valves which otherwise should go there) made it easier for me to handle and keep my fingers away from the control knobs.
It should be noted that the best place for flashback arrestors is on the regulators in case the flame cuts a hose so the resulting flame can't reach the tanks. This should be obvious if one thinks about it but arrestors are made specifically to either attach to the regulars or torch handle, One made to attach to the handle can not be used on the regulator or vise versa.
I'll second Mark's suggestion of using TM Technologies light hoses. The less experienced one is, the more important light hoses are in helping with good torch control. No student has ever wanted to go back to standard rubber hoses after trying out light hoses. They make a difference.
Likes For Doug Fattic:
11-12-20, 03:01 AM
#17
Cobalto
Thread Starter
Join Date: Jun 2012
Location: San Francisco, California
Posts: 42
Bikes: Colnago, Marinoni, Columbine, Schwinn Paramount, Raleigh International, Raleigh Professional, 1893 Crescent Juno, 1896 Crescent No.1, 1899 Crescent No.18, 1896 Columbia 40, 1902 Pierce Special, 1903 Pierce Special, 1905 Pierce Special Racer,
Mentioned: 1 Post(s)
Tagged: 0 Thread(s)
Quoted: 14 Post(s)
Liked 14 Times
in
8 Posts
Hoses
I have a number of smaller "aircraft" style of torch handles for frame building class students to try including the Meco Midget. While the Midget is okay I'm not a fan because it takes more hand action (well mostly wrist action) to flick away the flame from the work. I can roll the round handled ones with my fingers. It is also the least likely torch handle for students to like after trying them all out. However those that like it really love it. Here are a couple of tips for improving the use of the Midget. John Clay suggested to me to turn the elbow so it is parallel to the torch body instead of being at a right angle. I found it easier to flick the flame (meaning less hand motion) when the elbow is at that location. My second suggestion is to increase the body length by putting flashback arrestors on the body. The Meco is pretty small and the addition of the arrestors (instead of the smaller check valves which otherwise should go there) made it easier for me to handle and keep my fingers away from the control knobs.
It should be noted that the best place for flashback arrestors is on the regulators in case the flame cuts a hose so the resulting flame can't reach the tanks. This should be obvious if one thinks about it but arrestors are made specifically to either attach to the regulars or torch handle, One made to attach to the handle can not be used on the regulator or vise versa.
I'll second Mark's suggestion of using TM Technologies light hoses. The less experienced one is, the more important light hoses are in helping with good torch control. No student has ever wanted to go back to standard rubber hoses after trying out light hoses. They make a difference.
It should be noted that the best place for flashback arrestors is on the regulators in case the flame cuts a hose so the resulting flame can't reach the tanks. This should be obvious if one thinks about it but arrestors are made specifically to either attach to the regulars or torch handle, One made to attach to the handle can not be used on the regulator or vise versa.
I'll second Mark's suggestion of using TM Technologies light hoses. The less experienced one is, the more important light hoses are in helping with good torch control. No student has ever wanted to go back to standard rubber hoses after trying out light hoses. They make a difference.


Last edited by GiovanniLiCalsi; 11-12-20 at 03:13 AM. Reason: Add common
