


Needed The Fun - But Needed A Bigger Bike
 11-27-23, 11:56 AM
#1
Newbie
Thread Starter
Needed The Fun - But Needed A Bigger Bike
I'm mostly a 1x7 city bike rider, but when I found out about the larger 29" BMX bikes I knew I was going to be out some cash. Picked up a Framed Twenty9er and for an older guy who has never owned a BMX bike, it was an amazing experience. I'm a large fellow, so riding a smaller model was not going to work but this bike is a great fit. It's currently upside down getting fitted with a new larger front sprocket and I'll also be custom fitting a rear derailleur so I can install a 3 sprocket freewheel, but I need to find the right short cage model so it's a trim fit. Having a blast on this bike!

Likes For MarkInMilwaukee:

 11-27-23, 07:44 PM
#3
Newbie
Thread Starter
Thanks! I had no idea I'd enjoy it so much and Milwaukee is rich with bicycle access. Won't be long before I get 10 posts done and I'll certainly upload pics. Another thing I like about this is the ease of working on it because it's pretty straightforward. I did have to do some research to understand the BB on this one, though. If the bearing cups are tightened like a road bike, the spindle stops flat so that explains why they use a lock ring on the non-drive side. Hopefully there'll be a few more mild days so I can get some more riding in before the proper Wisconsin winter makes its appearance.
Likes For MarkInMilwaukee:
11-30-23, 12:12 PM
#4
Newbie
Thread Starter
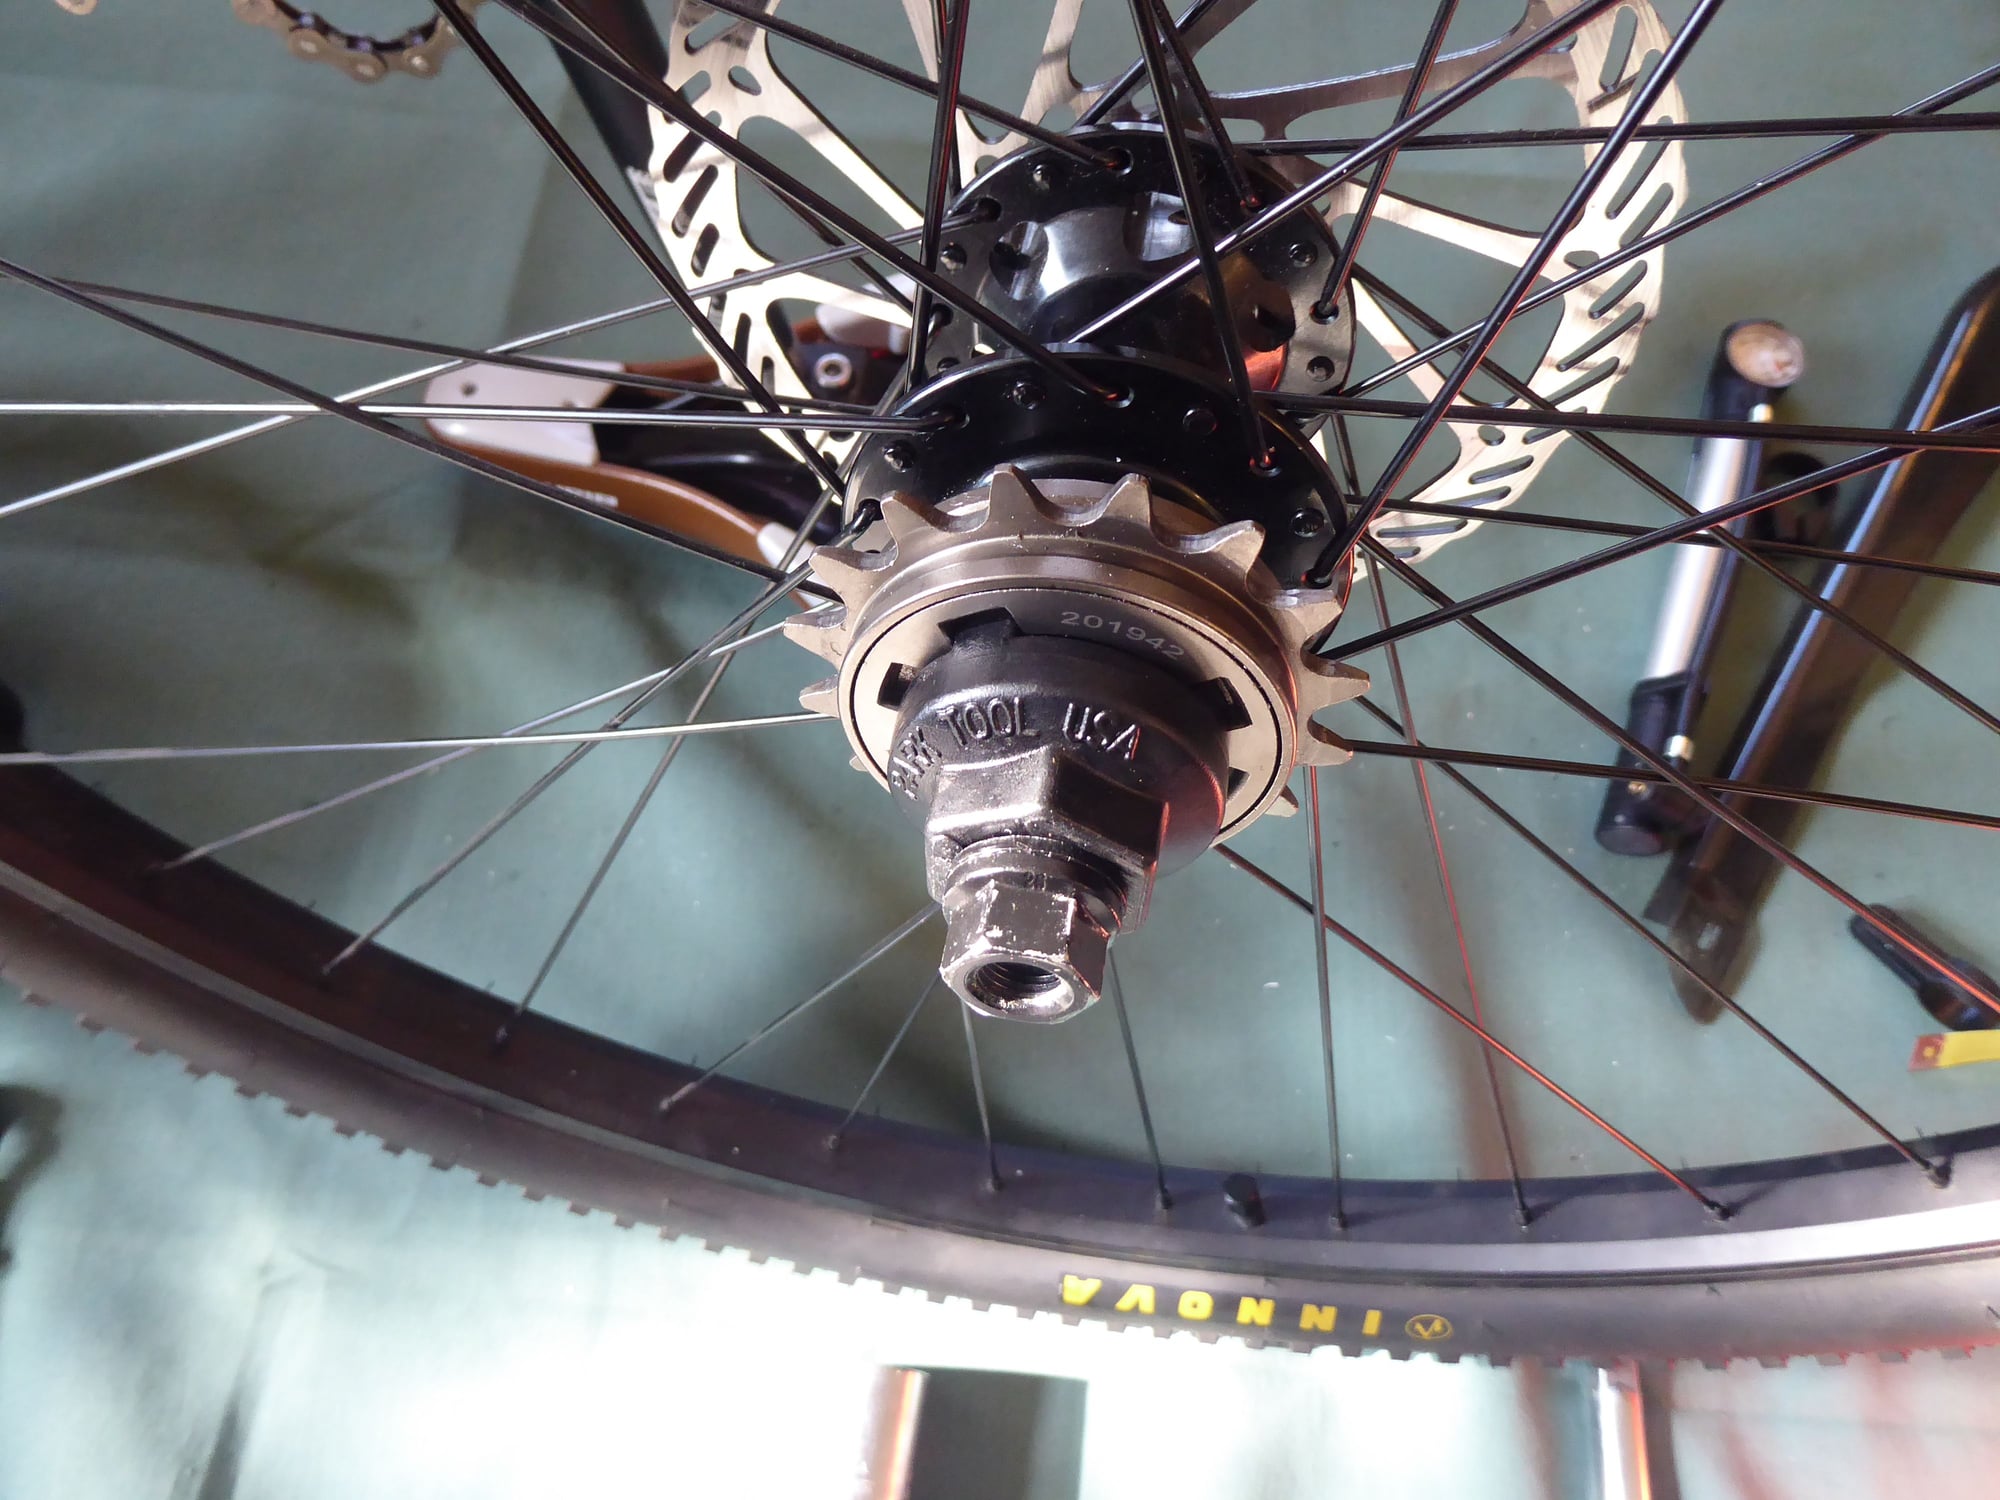
Wow, that was a difficult freewheel to remove. When I finally removed it sure enough, dry as a bone on the threads. Believe I'll put some anti-seize on the new one. One thing I really like about the Park FR-6 is that it's pretty wide and there was room to install the axle nut over the tool to keep in it place while putting pressure on with a 1" socket. Otherwise, it was like trying to wrestle a greased pig. It took a considerable amount of torque to remove, including leaning up against the wall, pressing the tire down into the carpet and using my foot to rotate the 1/2" drive ratchet. I'm guessing it was about 100 ft/lb to coax it off. So here's the tool with the axle nut keeping it in place which made the job much easier. I guess I should add the axle nut should only be used to just break the freewheel loose, then remove the axle nut to continue the process:
And because no living room or kitchen should be left without a project underway, LOL...
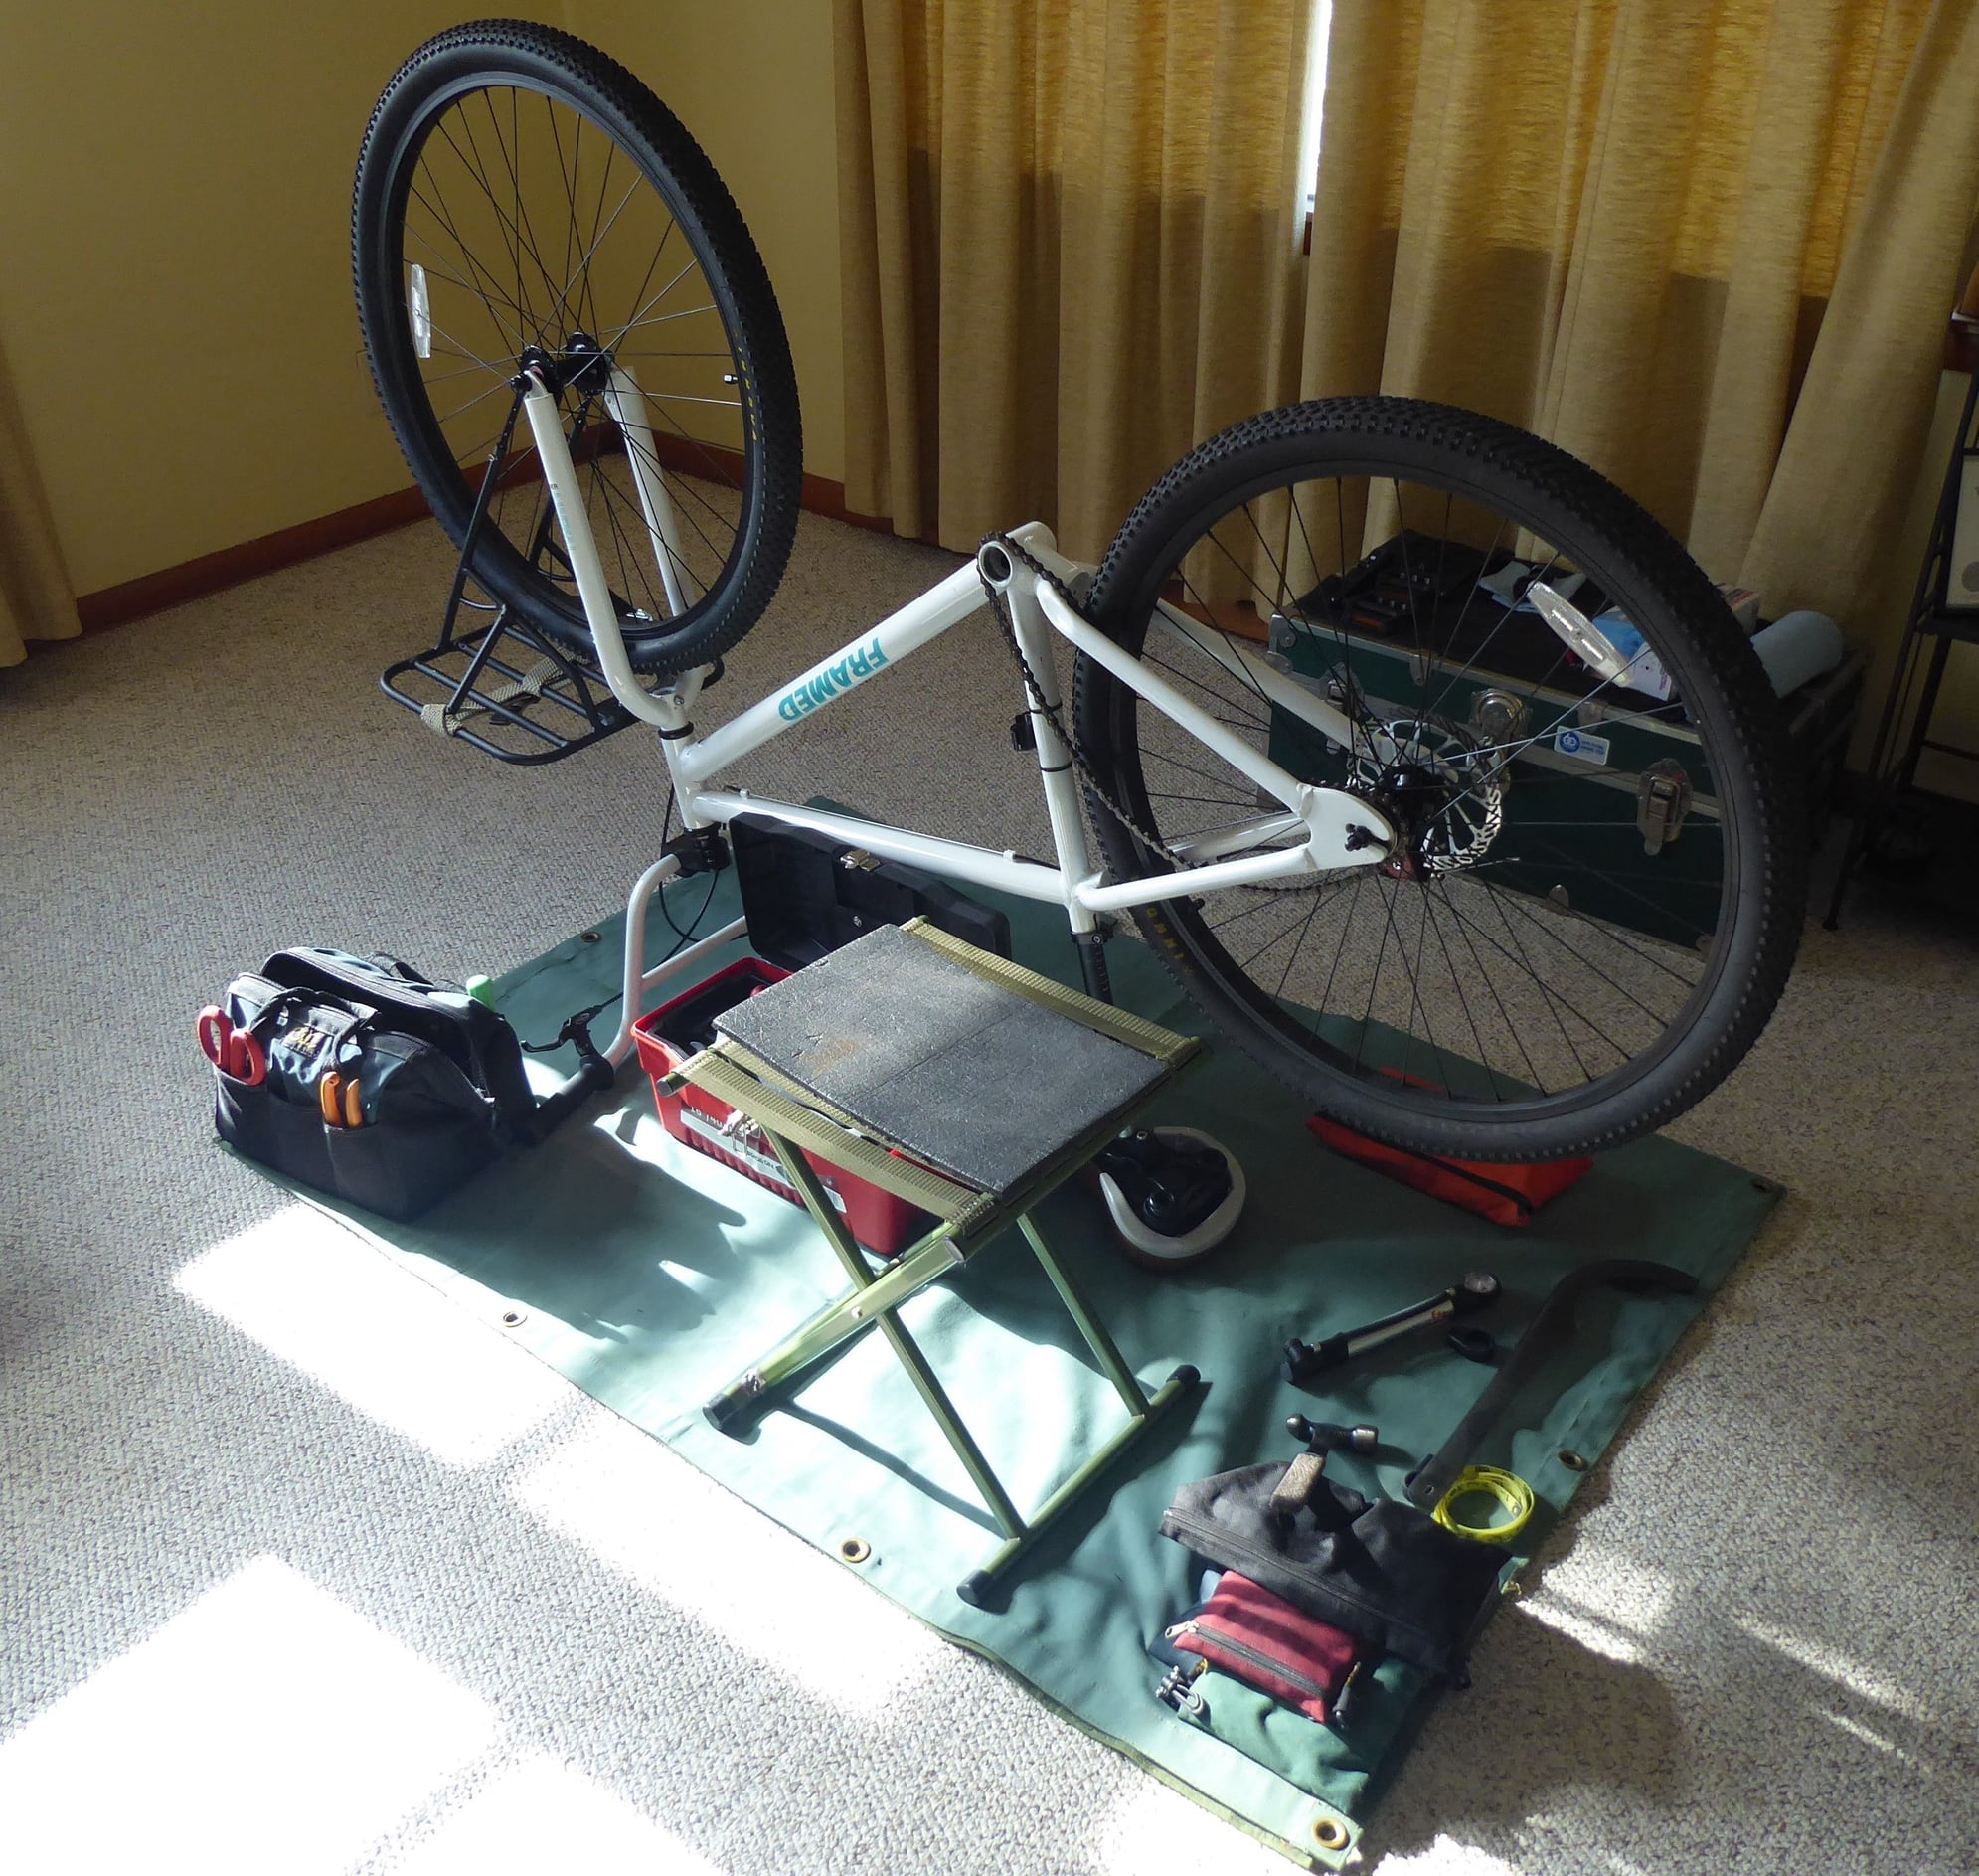
I also went to work on the Avid manual disc brake, because it was always squawking. Turns out it needed some spacing to move the entire assembly inboard. Now I can finally adjust the caliper and get better braking... but this is my first disc brake experience and I have to say that this one is pretty weak. It came without a front brake so I installed an old school C brake on the front. It's definitely light-duty but it greatly shortened braking distances.
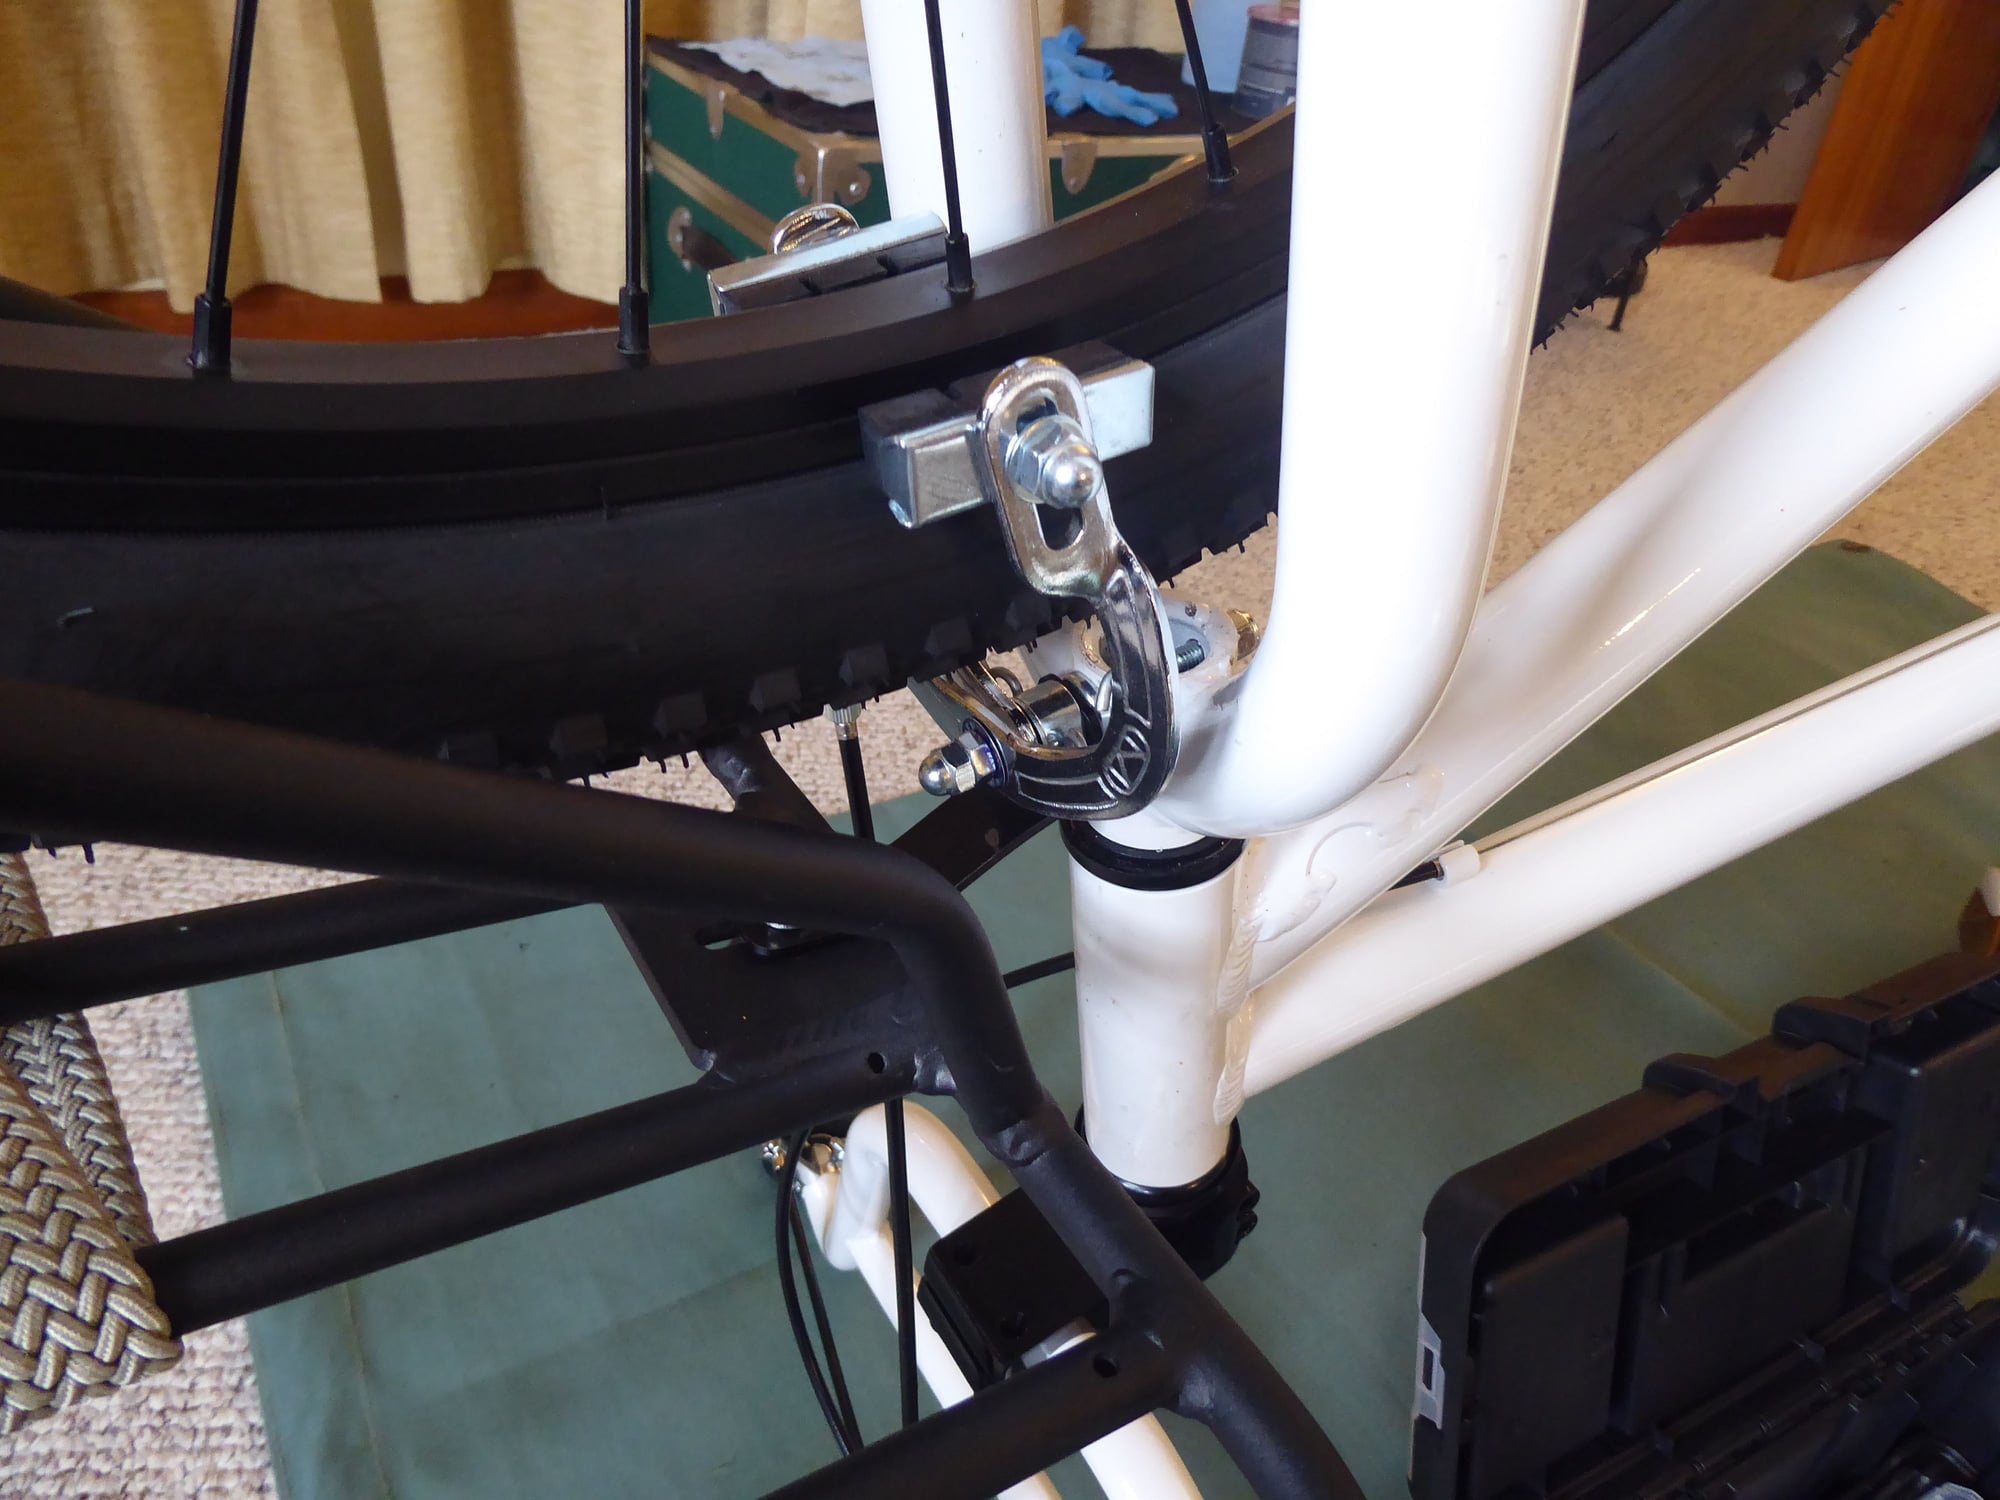
This is my first time encountering rims with a groove in the middle, so it might not be legit to use a friction brake on them. I'm sure others with more experience could let me know. The 3-speed freewheel and rear short cage derailleur will be showing up soon and I'll share a few pictures as I get that installed.
And because no living room or kitchen should be left without a project underway, LOL...
I also went to work on the Avid manual disc brake, because it was always squawking. Turns out it needed some spacing to move the entire assembly inboard. Now I can finally adjust the caliper and get better braking... but this is my first disc brake experience and I have to say that this one is pretty weak. It came without a front brake so I installed an old school C brake on the front. It's definitely light-duty but it greatly shortened braking distances.
This is my first time encountering rims with a groove in the middle, so it might not be legit to use a friction brake on them. I'm sure others with more experience could let me know. The 3-speed freewheel and rear short cage derailleur will be showing up soon and I'll share a few pictures as I get that installed.
Likes For MarkInMilwaukee:
